Export Control
EAR Export Classification: Not subject to the EAR per 15 C.F.R. Chapter 1, Part 734.3(b)(3), except for the following Service Bulletins which are currently published as EAR Export Classification 9E991: SBE70-0992, SBE72-0483, SBE72-0580, SBE72-0588, SBE72-0640, SBE73-0209, SBE80-0024 and SBE80-0025.Copyright
© IAE International Aero Engines AG (2001, 2014 - 2021) The information contained in this document is the property of © IAE International Aero Engines AG and may not be copied or used for any purpose other than that for which it is supplied without the express written authority of © IAE International Aero Engines AG. (This does not preclude use by engine and aircraft operators for normal instructional, maintenance or overhaul purposes.).Applicability
All
Common Information
TASK 70-33-02-220-502 Chrome Plate Inspection
General
This TASK gives the procedure to do inspection of chromium plate.
Do this TASK after you apply chrome plate and after you grind chromium plate.
Preliminary Requirements
Pre-Conditions
NONESupport Equipment
NONEConsumables, Materials and Expendables
NONESpares
NONESafety Requirements
NONEProcedure
Before grinding the chromium plate examine with unaided eye. The chromium plate must be smooth, fine grained, adherent and visibly free from blisters, pits, nodules, porosity, excessive edge build up and indications of burning or arcing. Slight discoloration resulting from baking or superficial staining from rinsing must not be cause for rejection.
After grinding of chromium plating, no pitting or voids are permitted.
NOTE
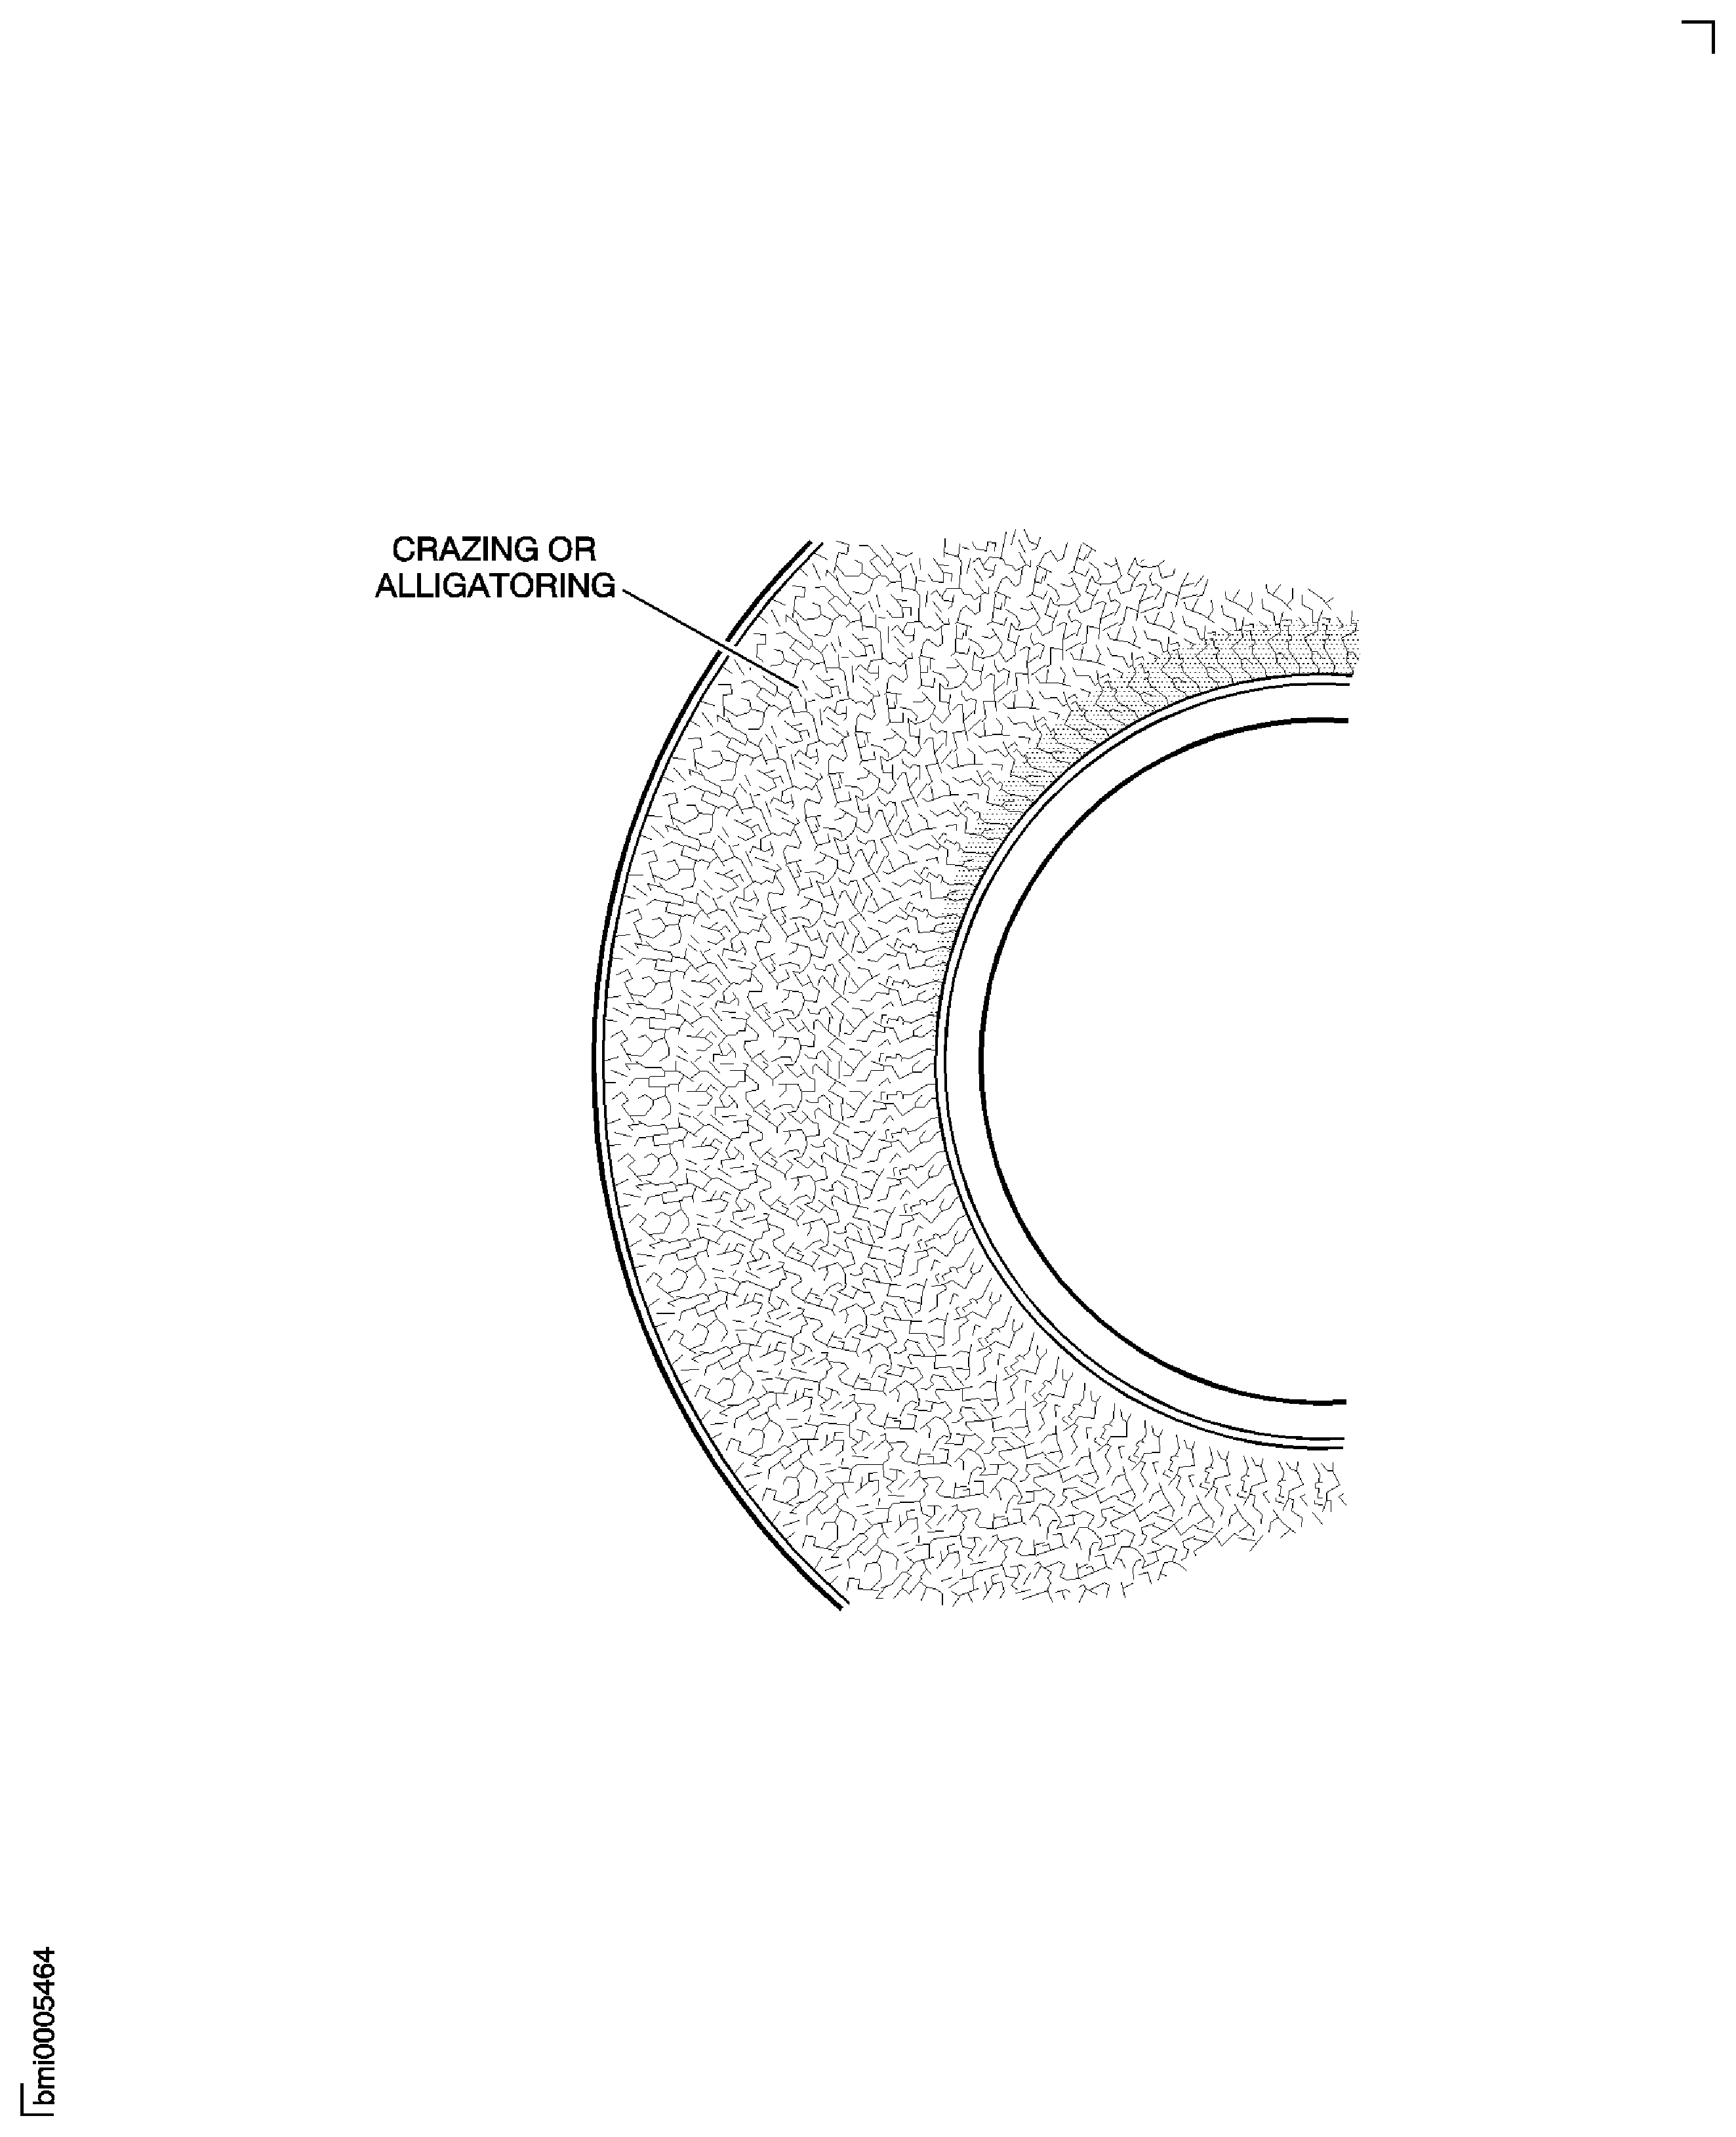
Conditions such as pit, blister, burned spot and void indicate a process problem that must be addressed.A lace-like network of minute cracks, commonly known as "crazing" or "alligatoring", as shown in Figure is normal for chromium plate and is acceptable. This lace-like pattern is typical of chromium plate on flat surfaces, but it can also occur on the Inner Diameter or Outer Diameter of large curved surfaces.
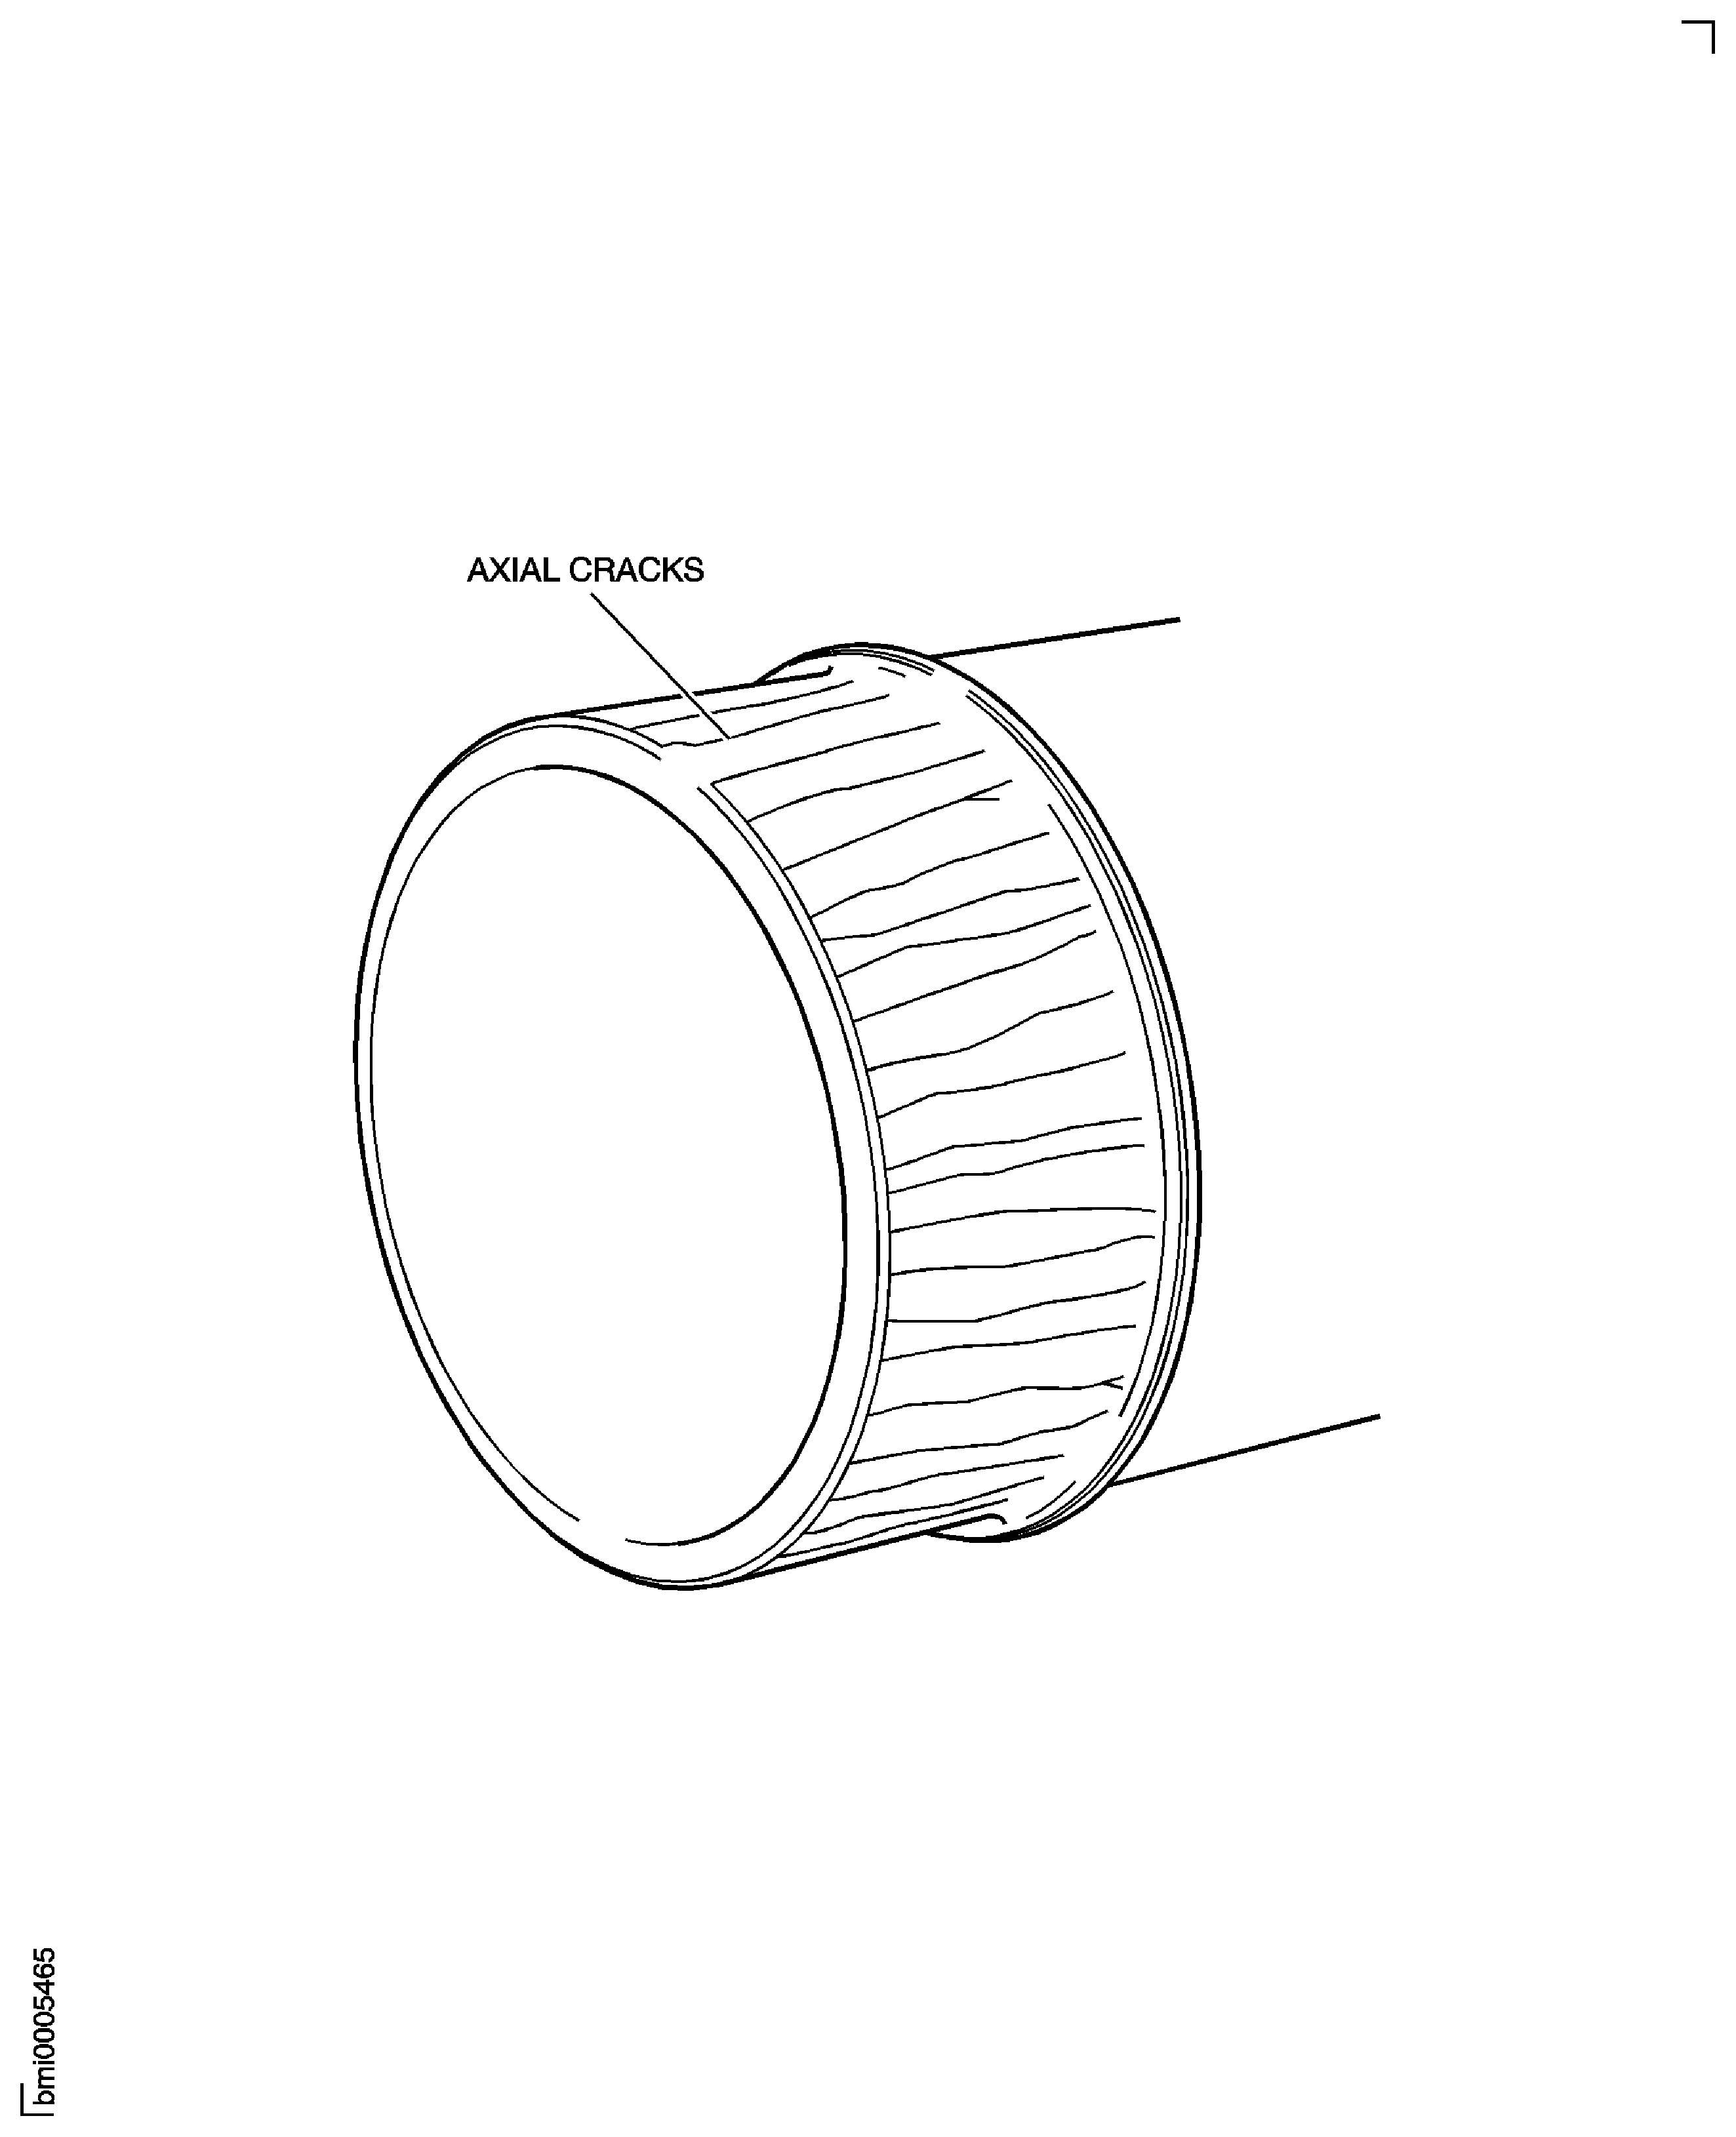
On curved surfaces, straight line circumferential cracks of any size are not permitted. Minute straight line axial cracks similar to those illustrated in Figure are typical of chromium plate on Inner Diameter or Outer Diameter curved surfaces and are permitted. Straight line cracks occurring elsewhere are not permitted.
NOTE
The definition of a crack in this procedure is a fracture in the chromium plate. Minute cracks are those that require magnification or special lighting effects, such as oblique lighting, to be discernible. Magnification and such special lighting would be required to observe the typical minute cracking shown in Figure.Where Outer Diameter plating encompasses fewer than two circumferential grooves per inch of part length, chipping at the edge of the chromium plate is permitted if the chipped area extends not more than 0.0469 in. (1.19 mm) back from an edge, and the edge shows no chipping on 75 percent of the groove circumference.
NOTE
The definition of a chipped area is an area in which plate is missing because it was removed mechanically.Where Outer Diameter plating encompasses two or more circumferential grooves per inch of part length, chipping on Outer Diameter lands is permitted within limits as per given in the below table if no chipped land is adjacent to another chipped land, and chipped areas on the same land or on two alternate lands do not occur on the same axial line.
Outer Diameter Land Width in Inch (mm)
Acceptable Edge Chipping (Maximum) in Inch (mm)
Acceptable Circumferential Chipping (Maximum) in Inch (mm)
Thru 0.070 (1.78)
0.0156 (0.39)
0.070 (1.78) thru 0.080 (2.03)
0.0312 (0.79)
25 percent of circumference. Number of chipped areas not important
Greater than 0.080 (2.03)
50 percent of actual land width up to 0.0469 (1.19)
Outer Diameter plating on Piston-like parts with circumferential grooves
Chipped areas on an edge of a chromium plated face are permitted if each chip extends radially not more than 0.0469 in. (1.19 mm) from either edge. The number of chipped areas is not important if at least 75 percent of the plate boundary shows no edge chipping.
NOTE
This limit does not apply to chromium plated faces mating with carbon seals.
SUBTASK 70-33-02-200-001 Inspection Procedure
Figure: Chromium Plate "Crazing" or "Alligatoring"
Chromium Plate "Crazing" or "Alligatoring"

Figure: Minute Straight Line Axial Cracks in Chromium Plate
Minute Straight Line Axial Cracks in Chromium Plate

