DMC:V2500-A0-72-42-3301-02A-649A-CIssue No:002.00Issue Date:2021-02-01
Export Control
EAR Export Classification: Not subject to the EAR per 15 C.F.R. Chapter 1, Part 734.3(b)(3), except for the following Service Bulletins which are currently published as EAR Export Classification 9E991: SBE70-0992, SBE72-0483, SBE72-0580, SBE72-0588, SBE72-0640, SBE73-0209, SBE80-0024 and SBE80-0025.Copyright
© IAE International Aero Engines AG (2001, 2014 - 2021) The information contained in this document is the property of © IAE International Aero Engines AG and may not be copied or used for any purpose other than that for which it is supplied without the express written authority of © IAE International Aero Engines AG. (This does not preclude use by engine and aircraft operators for normal instructional, maintenance or overhaul purposes.).Applicability
All
Common Information
TASK 72-42-33-300-019 No. 4 Bearing Front Seal Support - Blend Repair Cracks, Repair-019 (VRS3666)
General
Price and availability - none
The practices and processes referred to in the procedure by the TASK numbers are in the SPM.
Preliminary Requirements
Pre-Conditions
| Action/Condition | Data Module/Technical Publication |
|---|---|
| Make sure that all the cleaning and inspection procedures are done before this repair. |
Support Equipment
NONEConsumables, Materials and Expendables
NONESpares
NONESafety Requirements
NONEProcedure
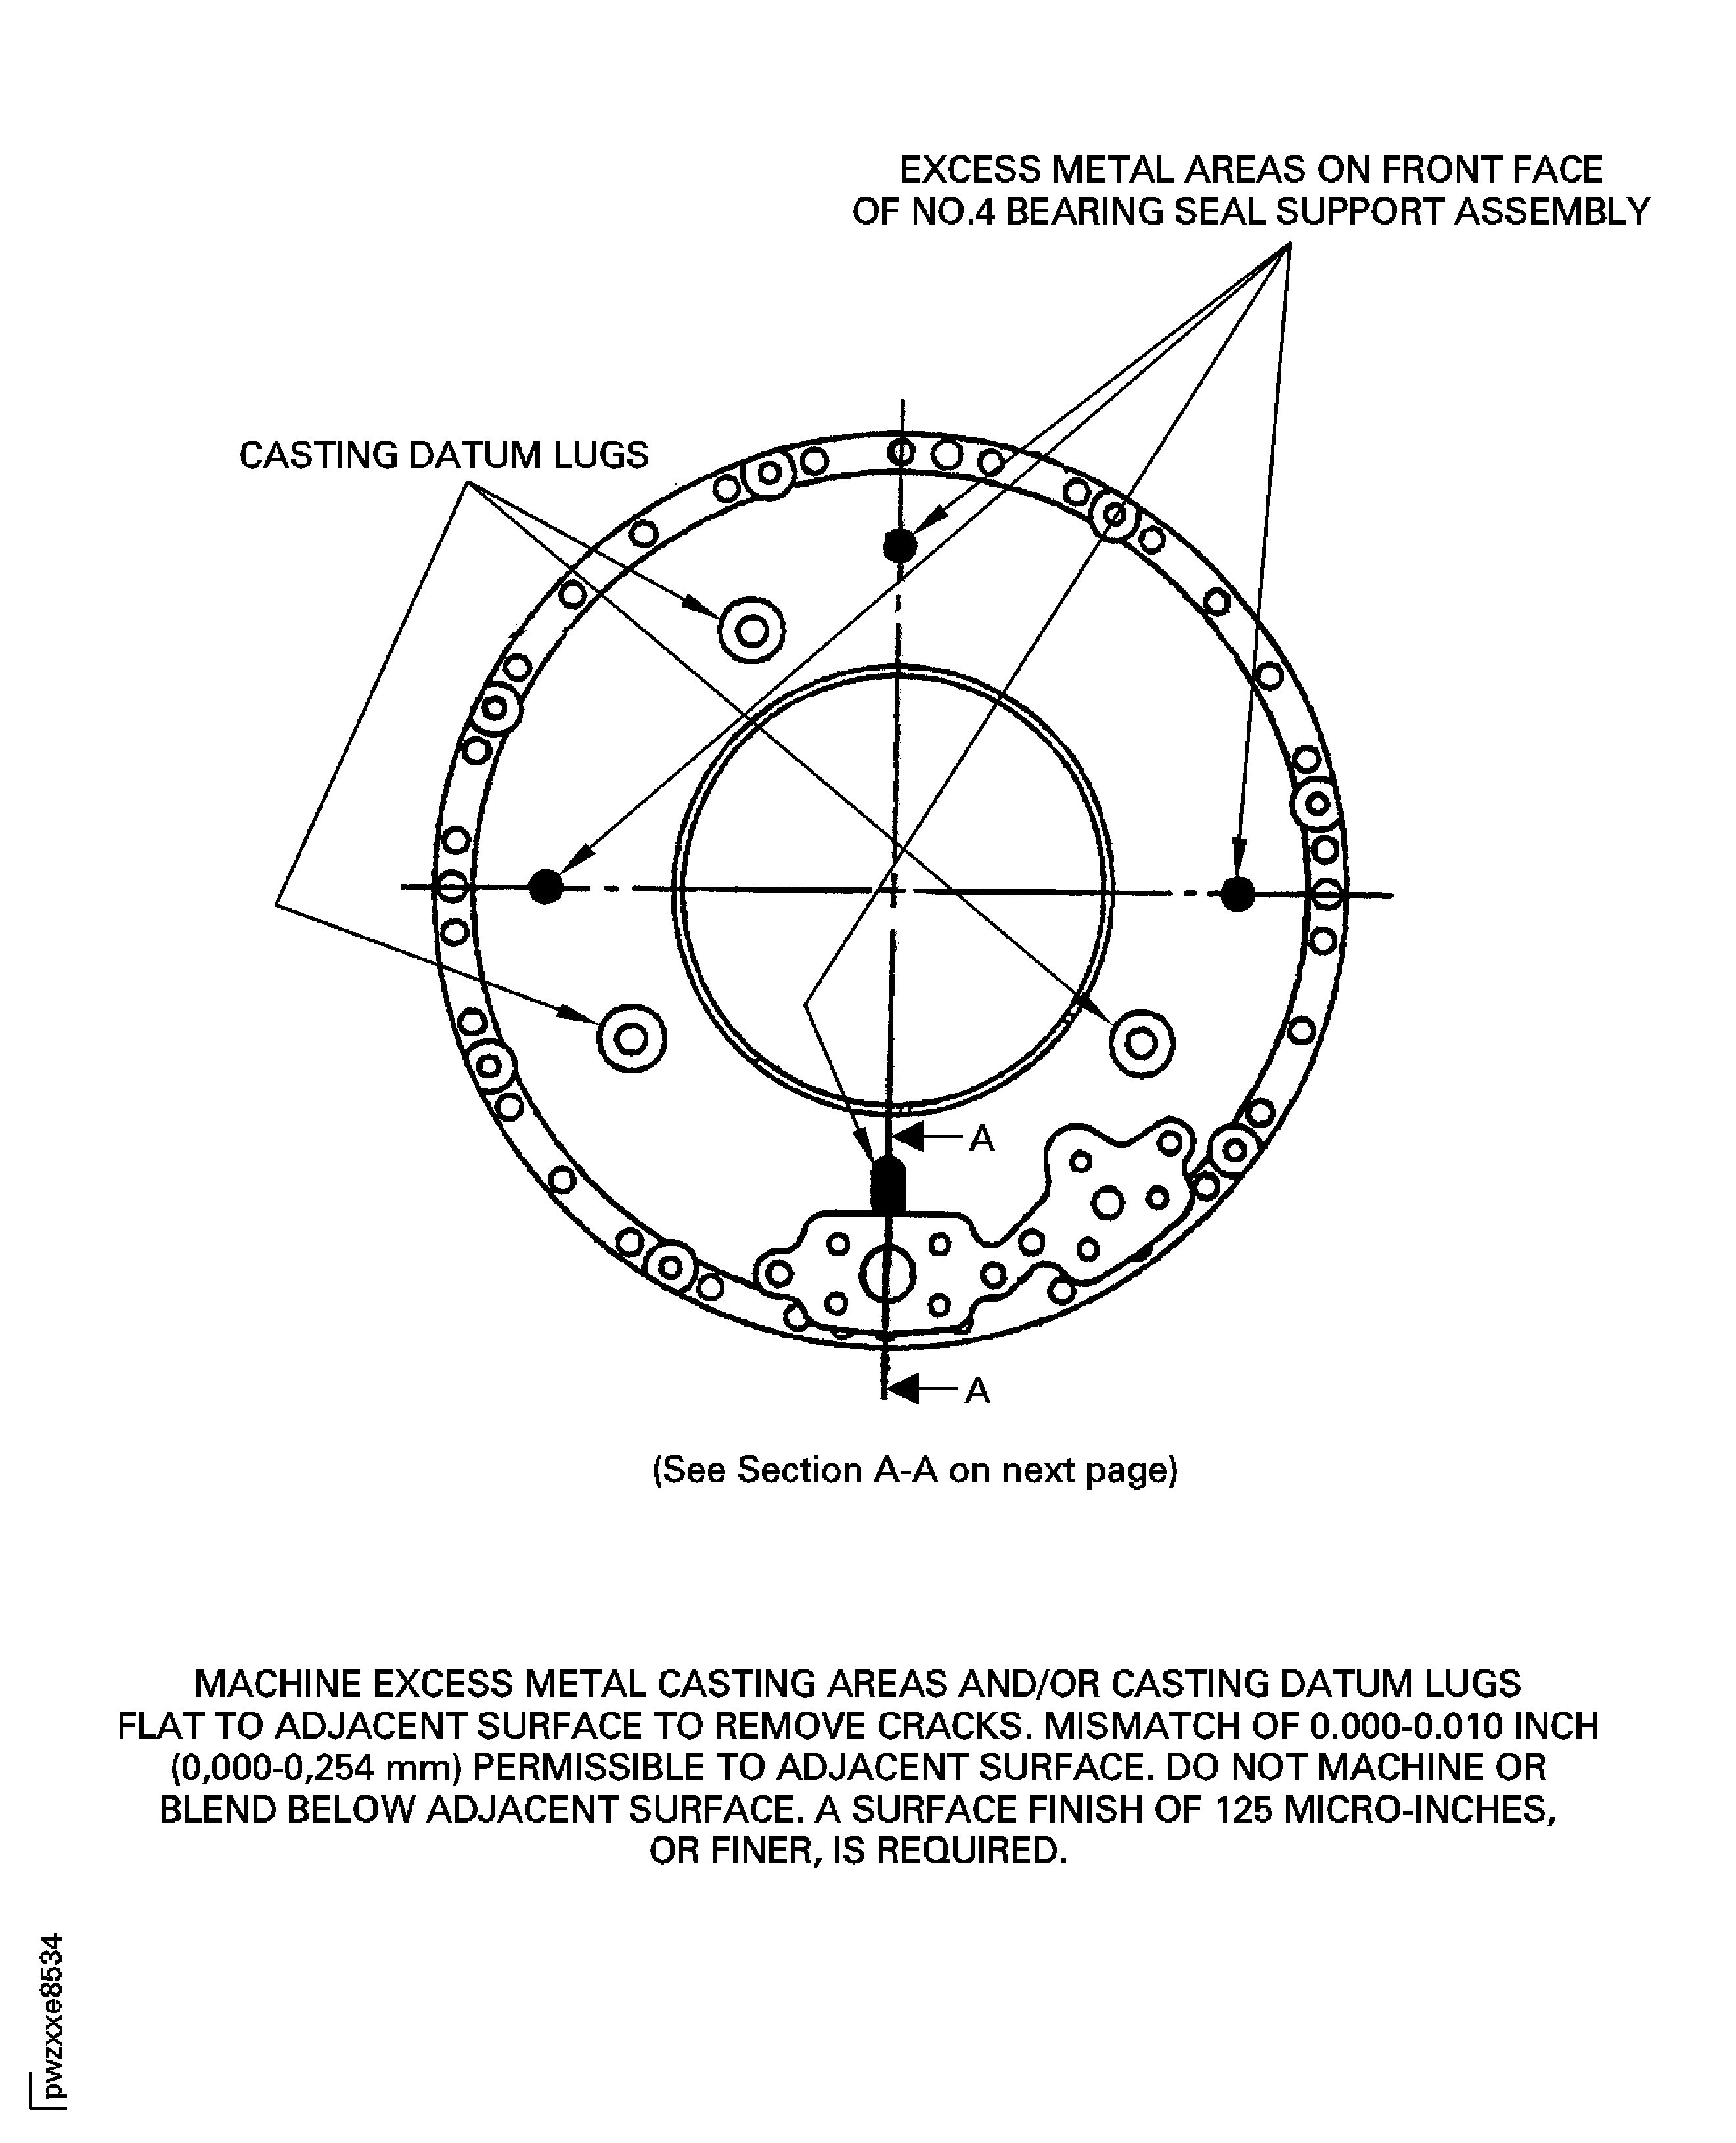
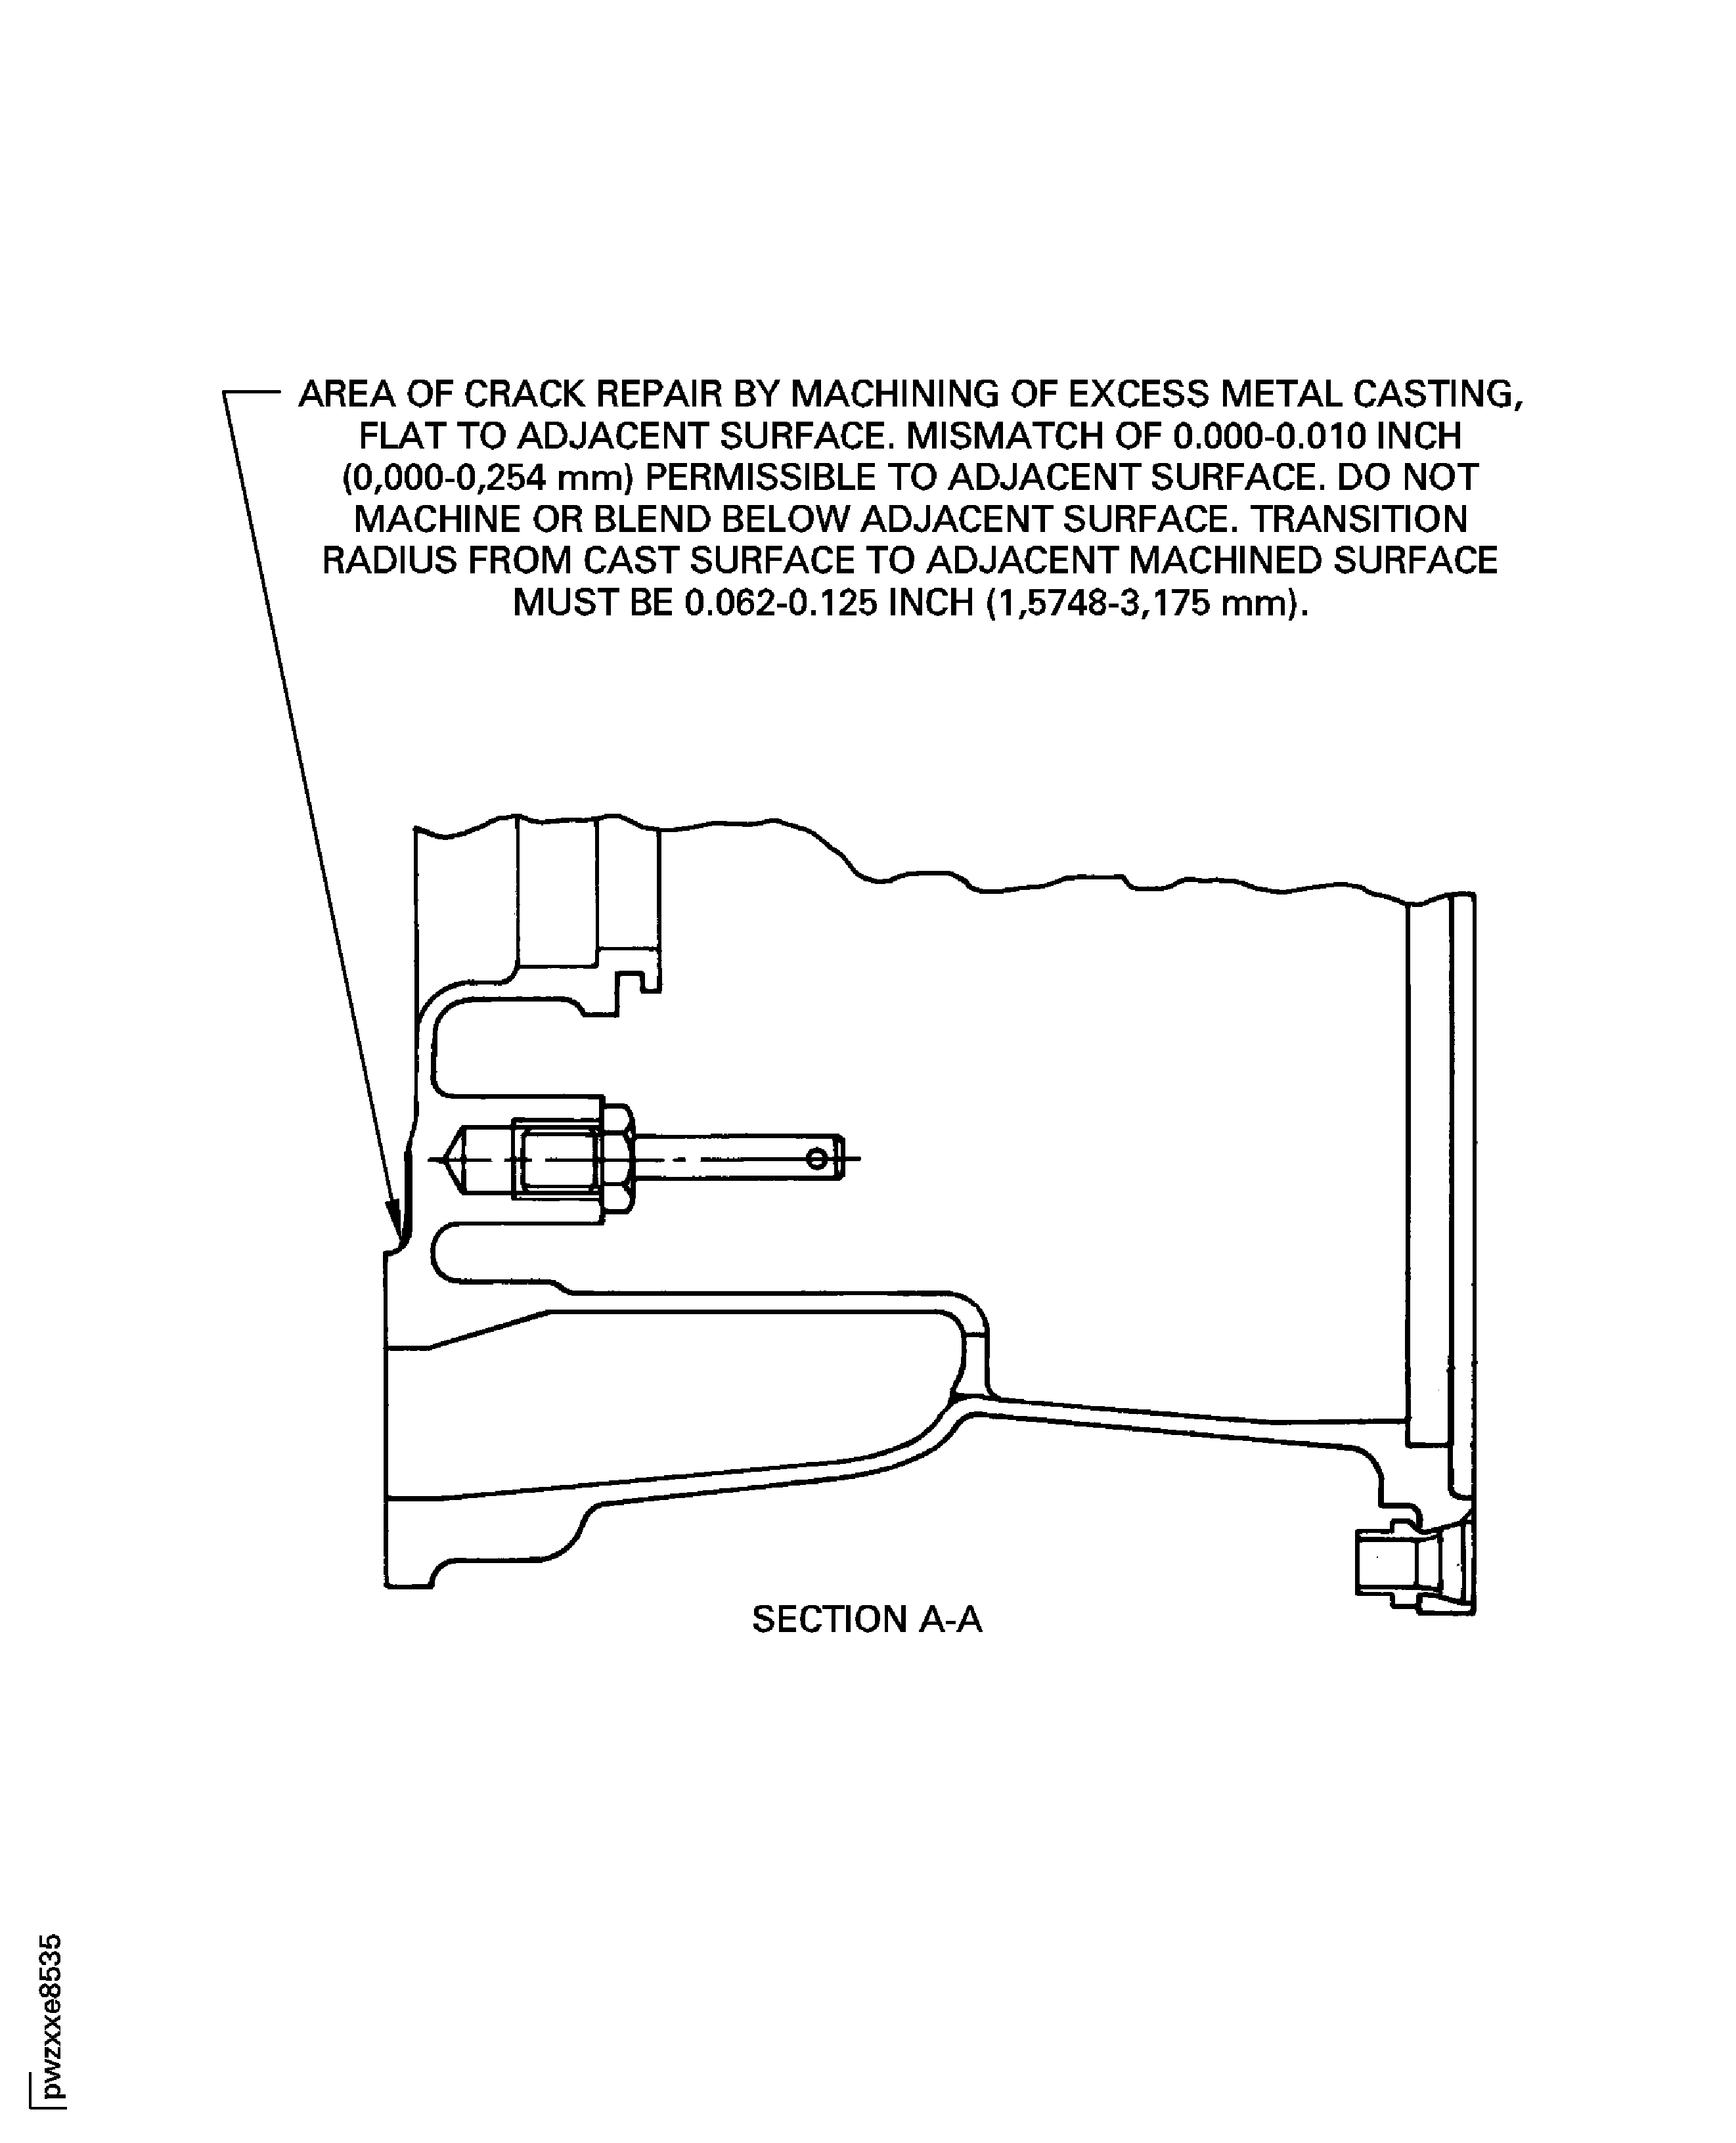
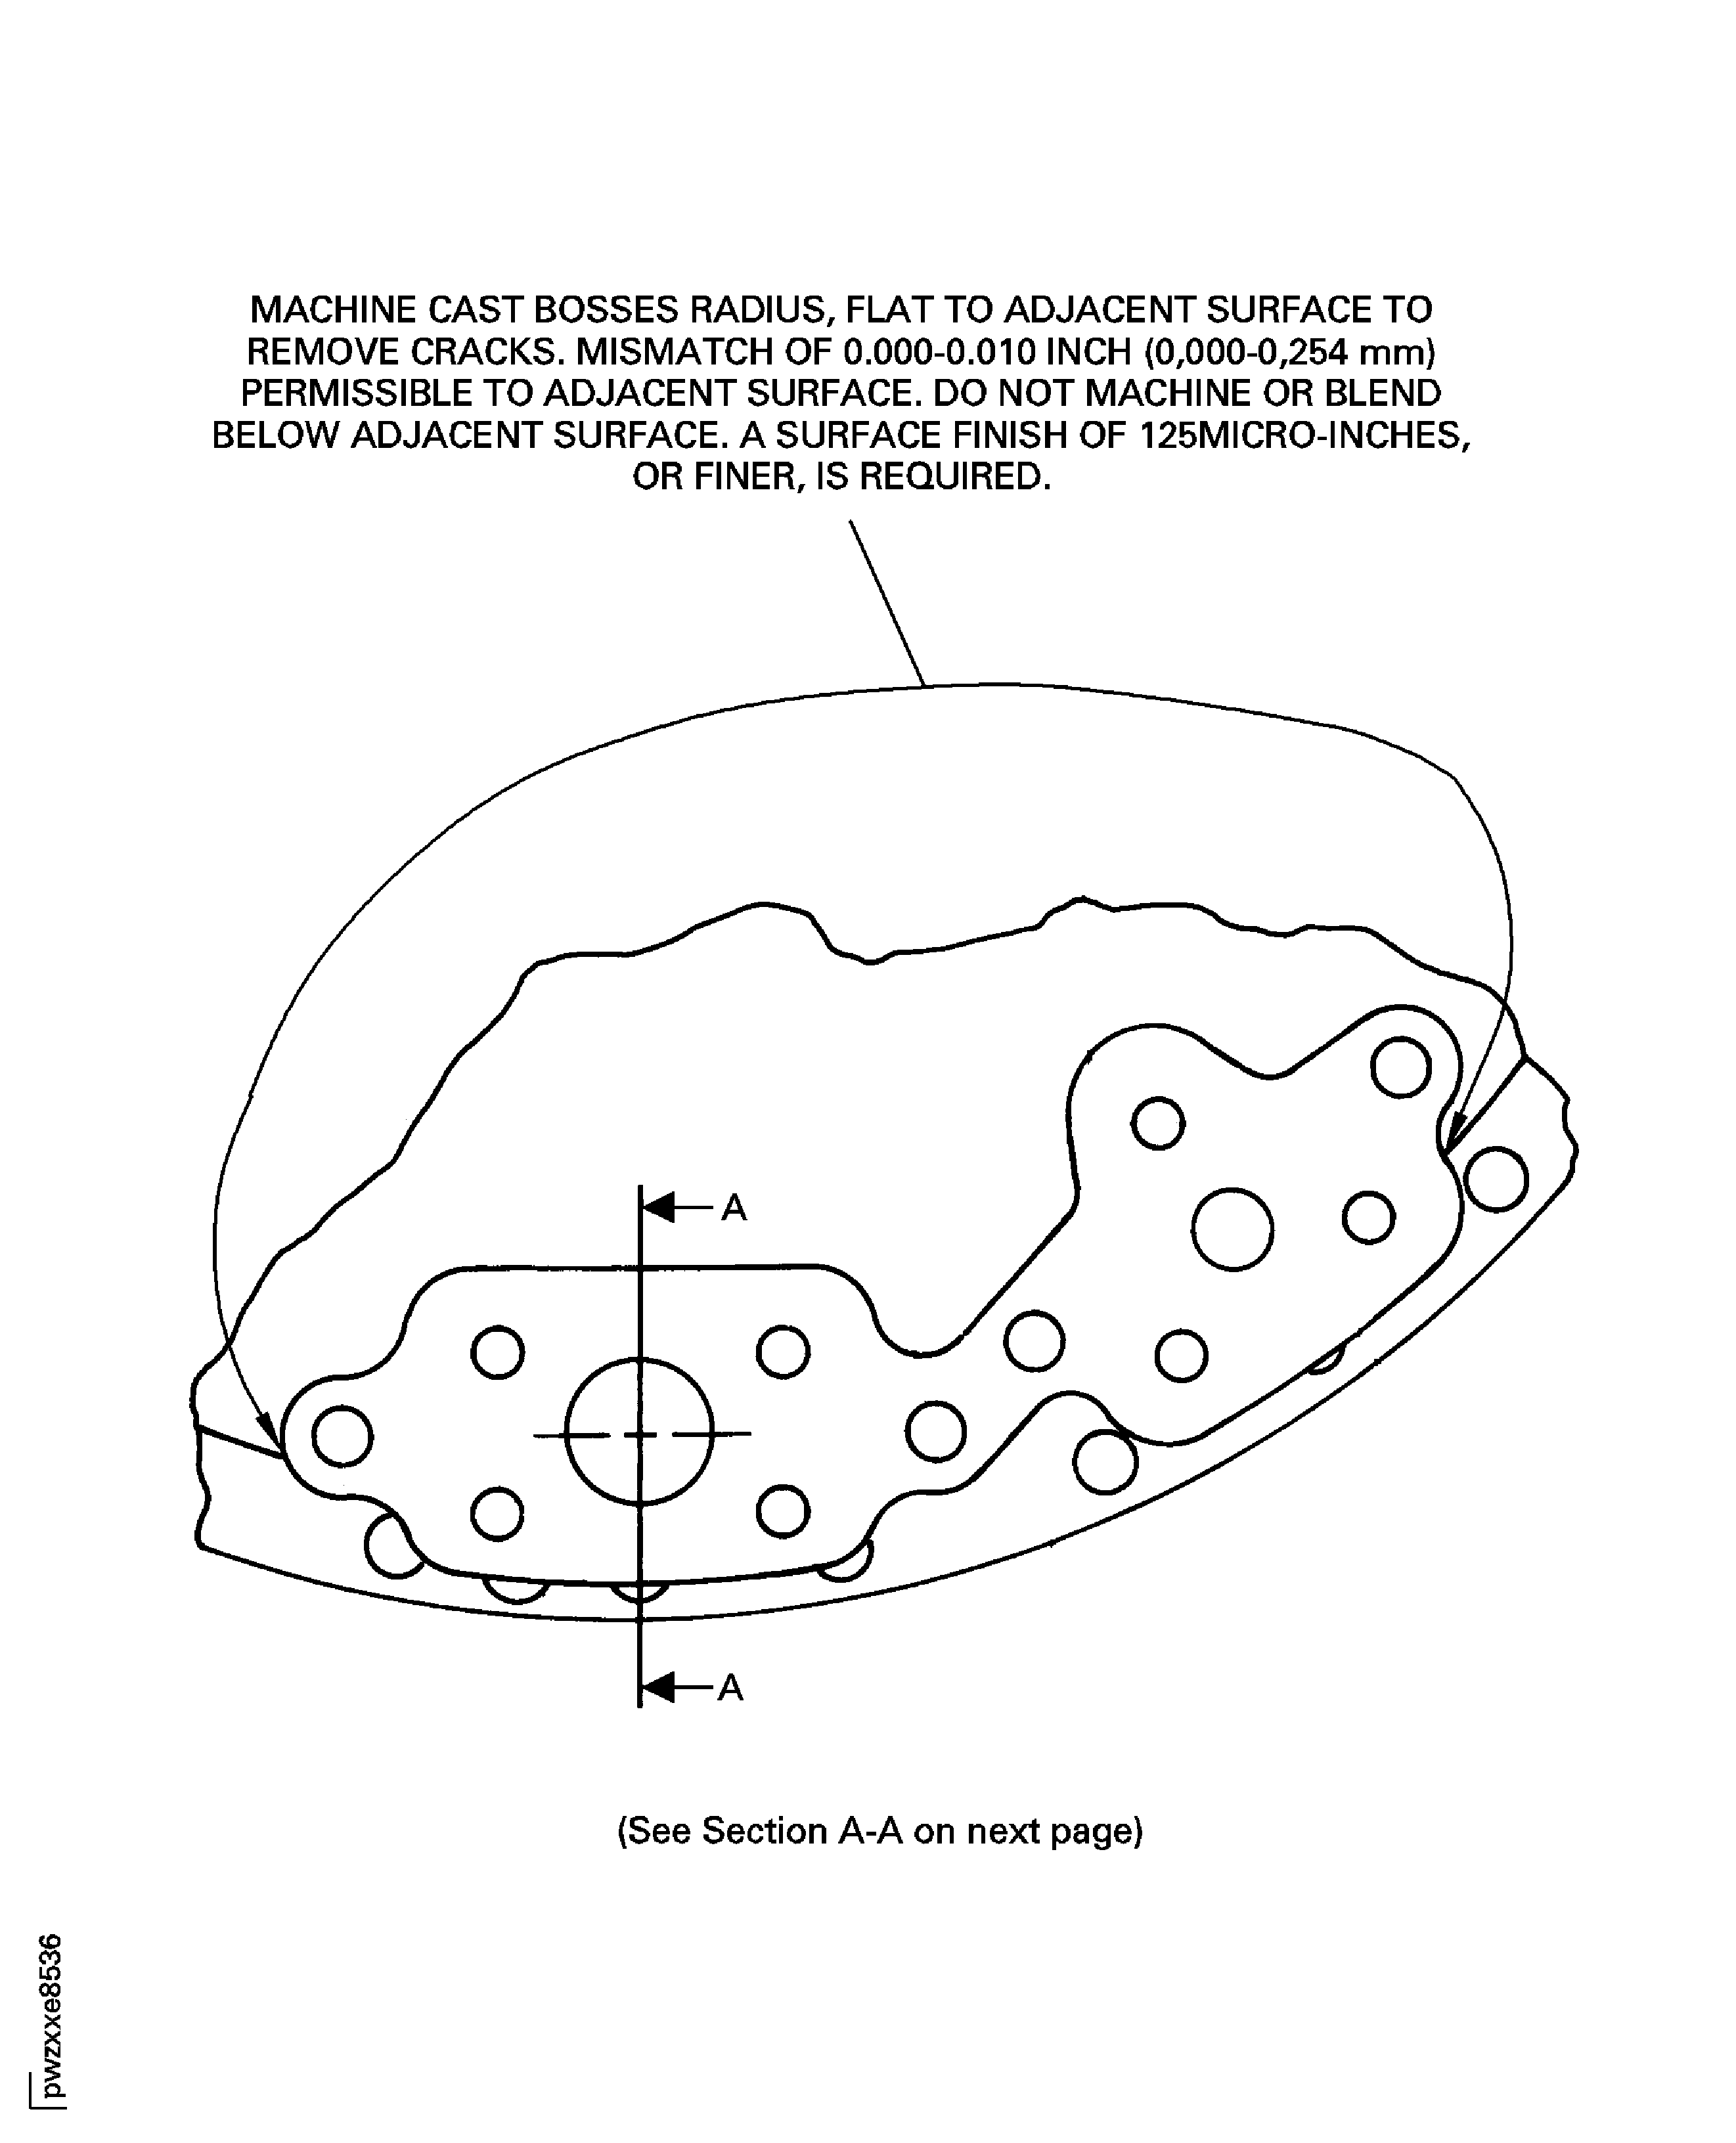
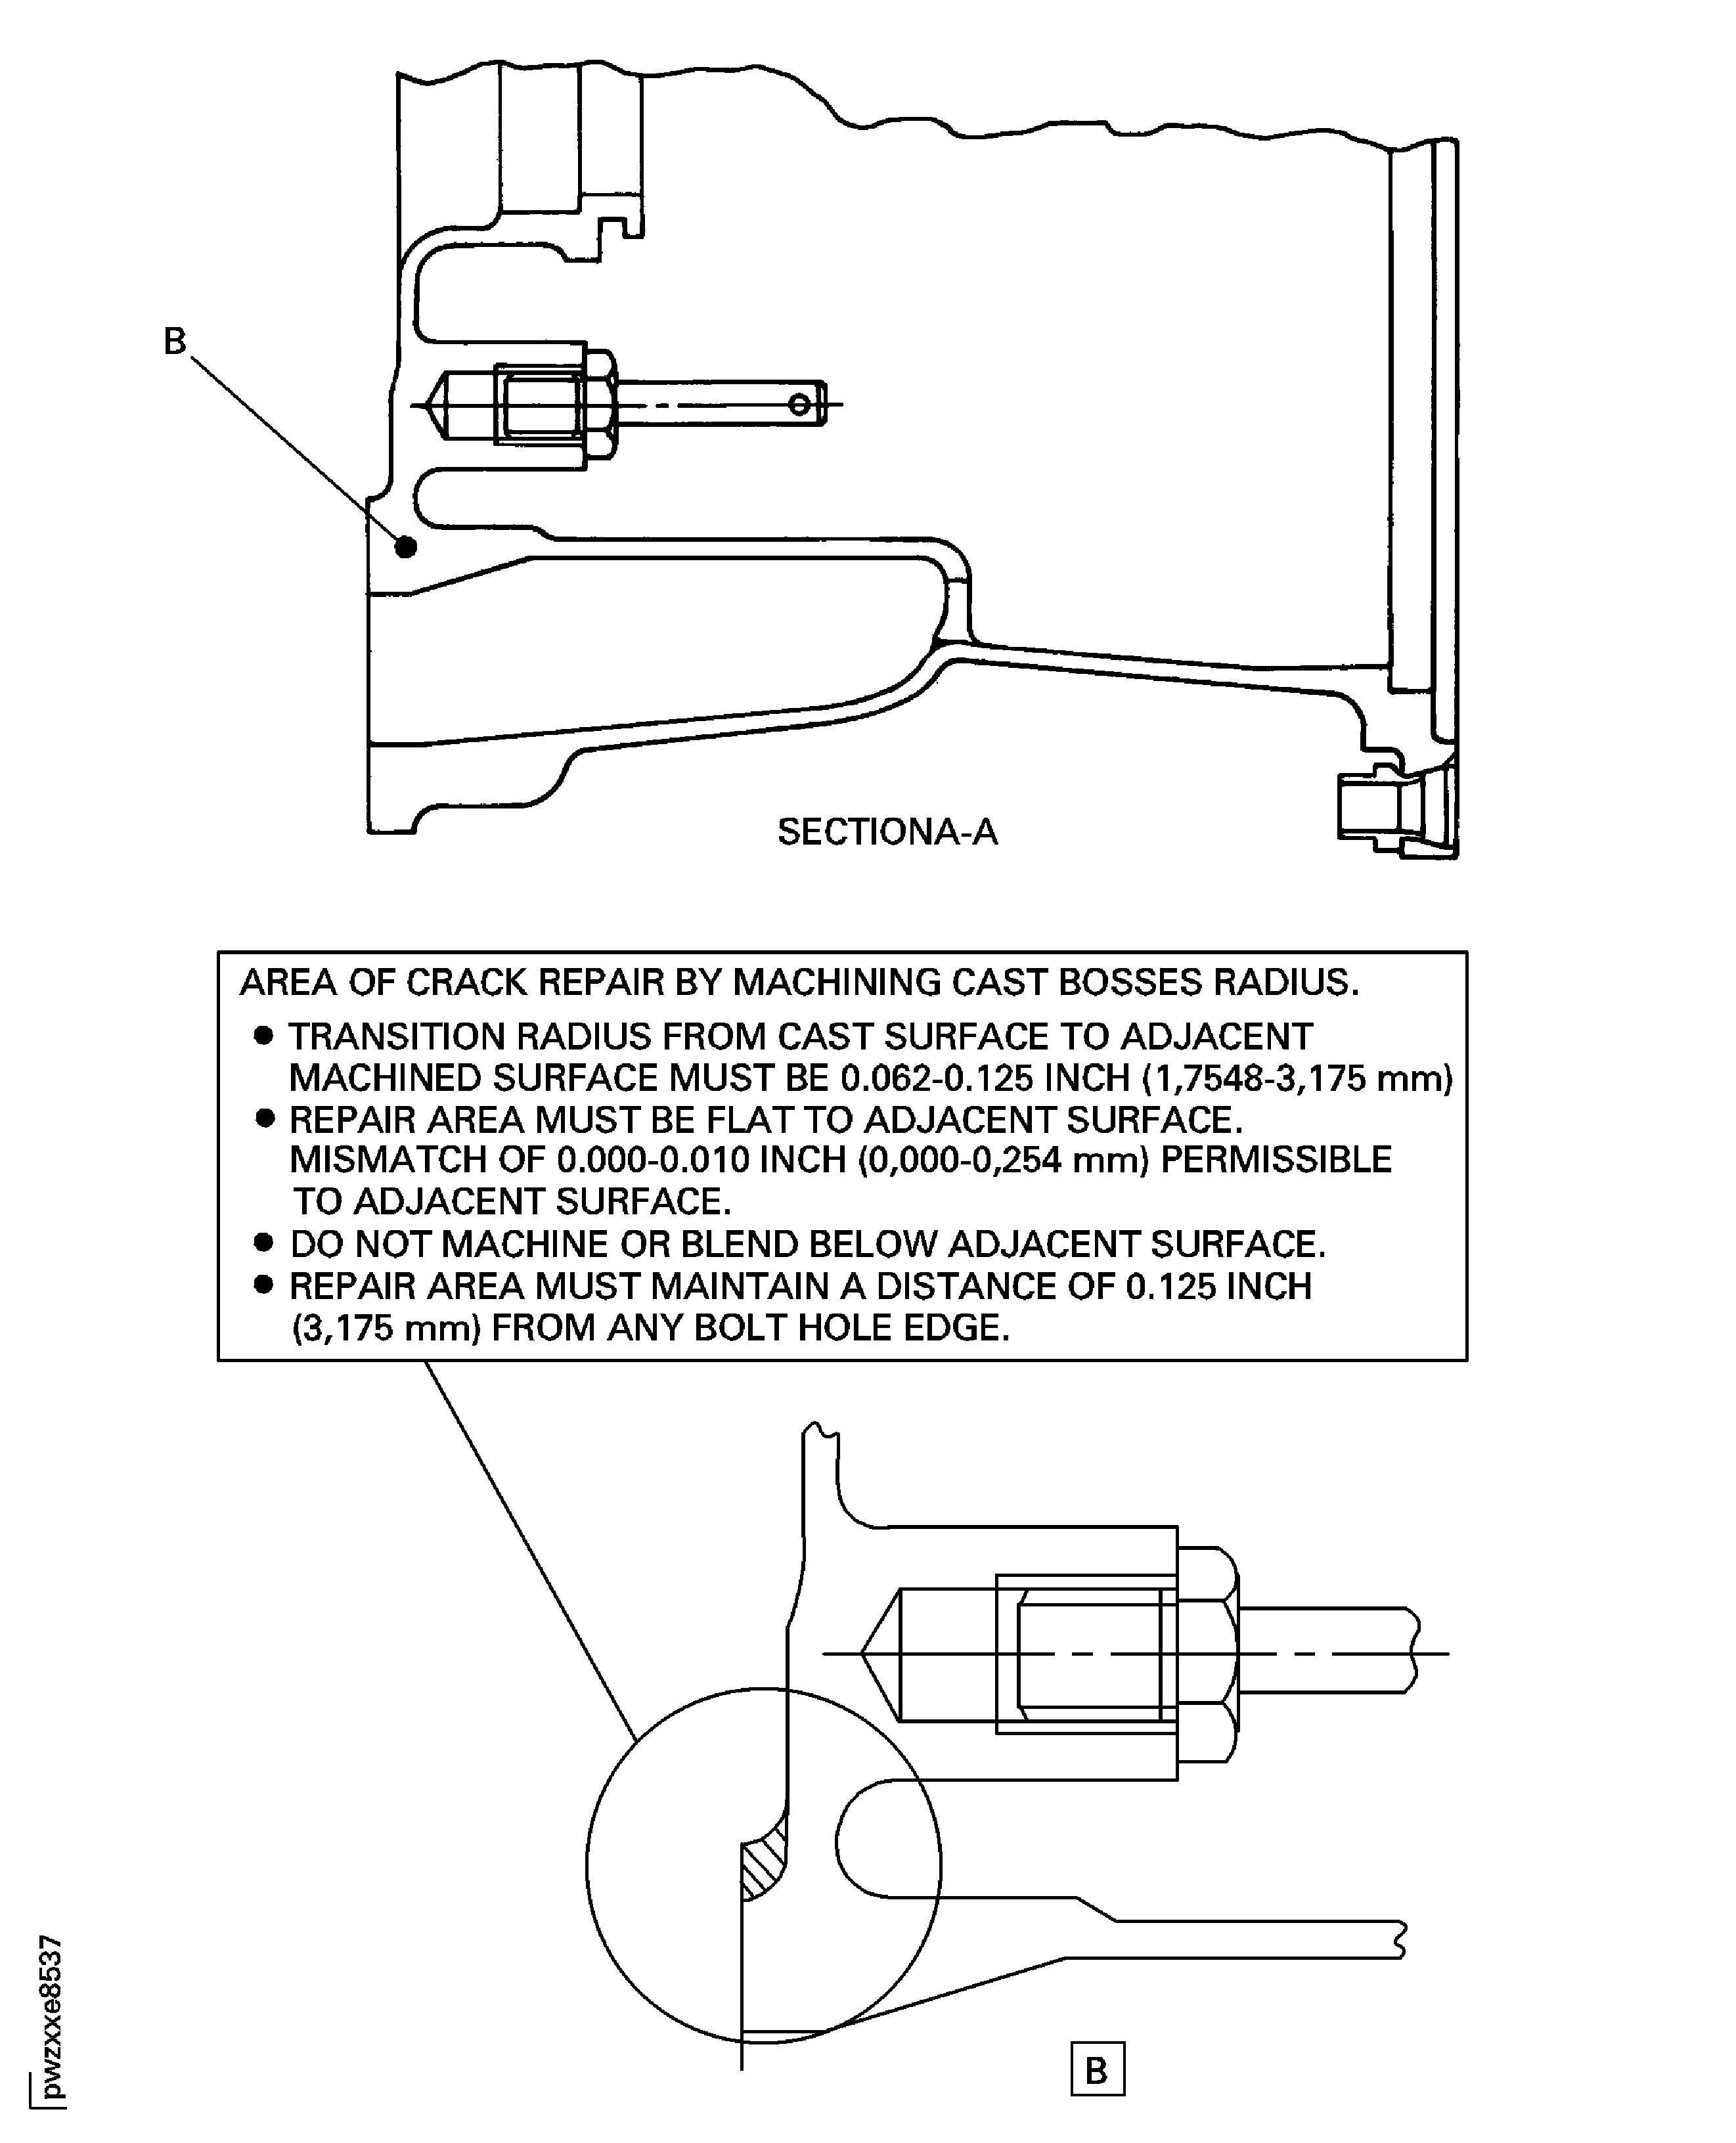
Refer to Figure, Figure, Figure, Figure and the SPM TASK 70-35-03-300-501.
Blend to remove sharp edges or burrs. Break all sharp edges 0.003 to 0.015 in. (0.0762 to 0.381 mm).
SUBTASK 72-42-33-320-069 Blend the Repaired Area

CAUTION
DO NOT BLEND ON MACHINED SURFACE. MAY CAUSE SMEARING OF MATERIAL WHICH COULD AFFECT FPI RESULTS.Refer to Figure, Figure, Figure, Figure and the SPM TASK 70-23-01-230-501 (Dip or Spray).
Do a fluorescent penetrant inspection of the No. 4 bearing seal assembly after crack repair.
SUBTASK 72-42-33-220-099 Examine the Repaired Area
Figure: Repair Details and Dimensions
Sheet 1

Figure: Repair Details and Dimensions
Sheet 2

Figure: Repair Details and Dimensions
Sheet 3

Figure: Repair Details and Dimensions
Sheet 4

