DMC:V2500-A0-72-43-2001-00A-649A-CIssue No:002.00Issue Date:2021-08-01
Export Control
EAR Export Classification: Not subject to the EAR per 15 C.F.R. Chapter 1, Part 734.3(b)(3), except for the following Service Bulletins which are currently published as EAR Export Classification 9E991: SBE70-0992, SBE72-0483, SBE72-0580, SBE72-0588, SBE72-0640, SBE73-0209, SBE80-0024 and SBE80-0025.Copyright
© IAE International Aero Engines AG (2001, 2014 - 2021) The information contained in this document is the property of © IAE International Aero Engines AG and may not be copied or used for any purpose other than that for which it is supplied without the express written authority of © IAE International Aero Engines AG. (This does not preclude use by engine and aircraft operators for normal instructional, maintenance or overhaul purposes.).Applicability
All
Common Information
TASK 72-43-20-300-015 No. 4 Bearing Seal Ring Holder - Blend Repair, Repair-015 (VRS3667)
General
Price and availability - none
The practices and processes referred to in the procedure by the TASK number are in the SPM.
Preliminary Requirements
Pre-Conditions
NONESupport Equipment
NONEConsumables, Materials and Expendables
NONESpares
NONESafety Requirements
NONEProcedure
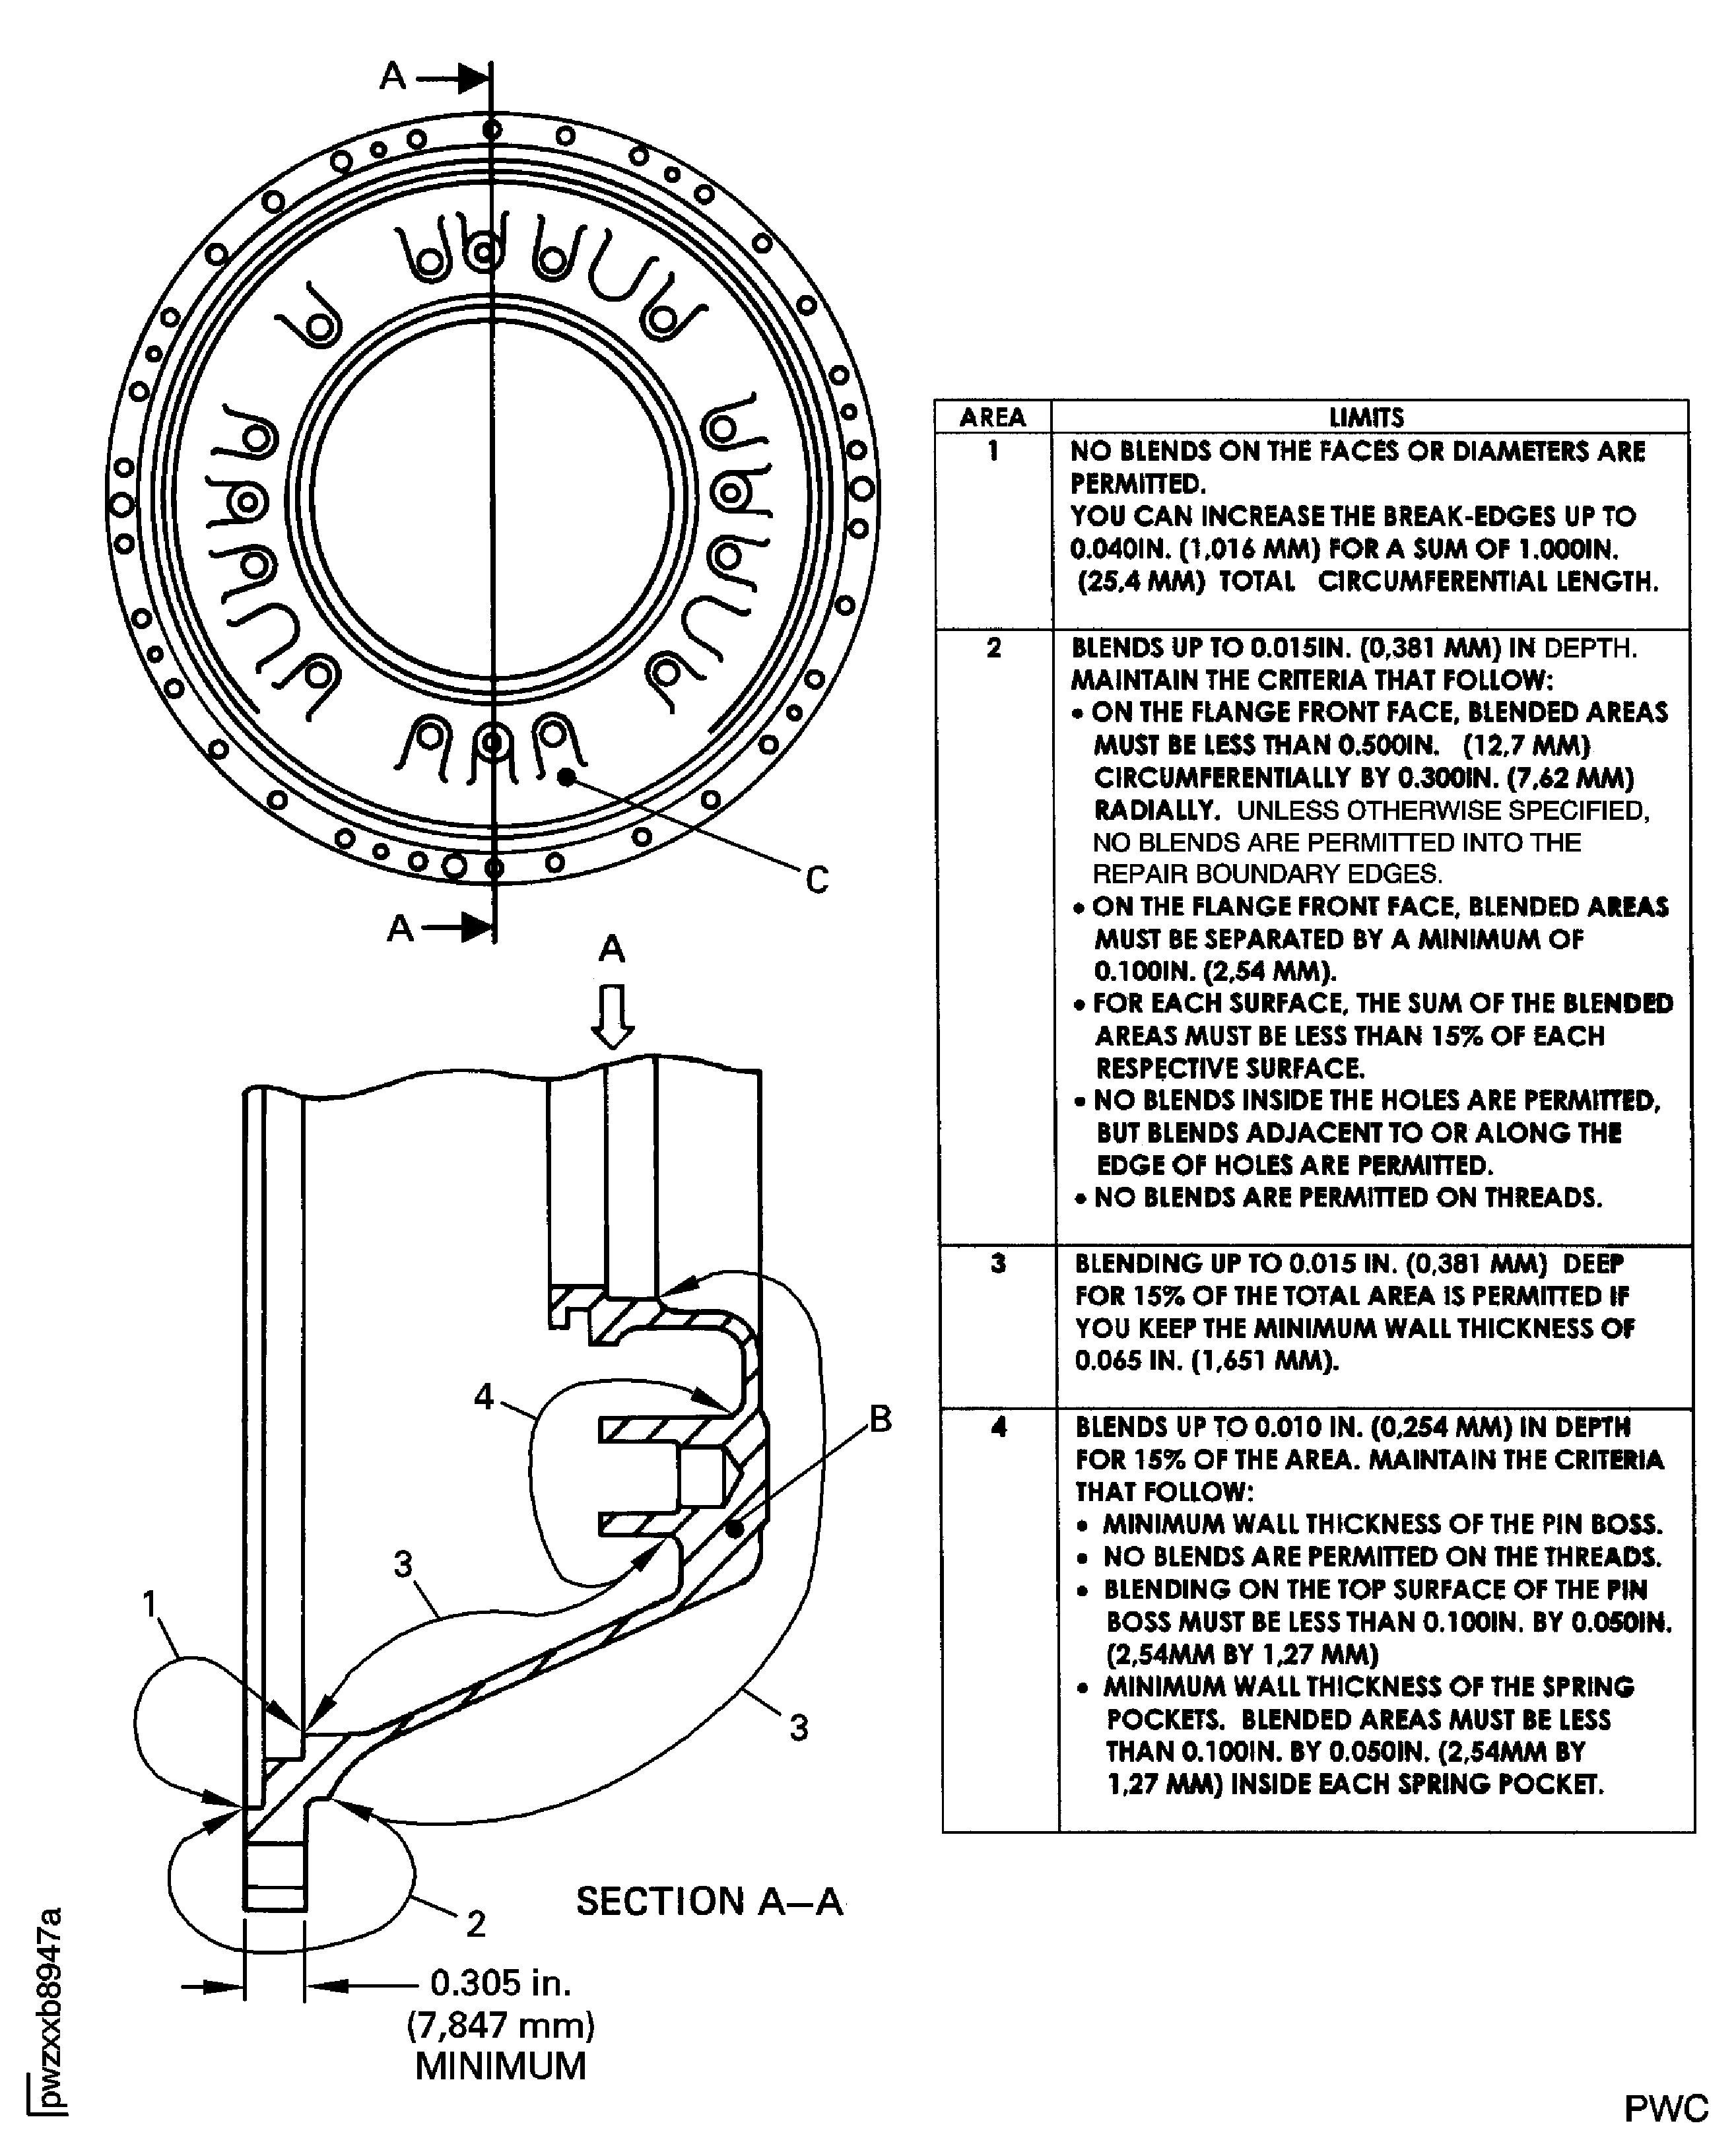
Figure: Repair Details and Dimensions
Repair Details and Dimensions

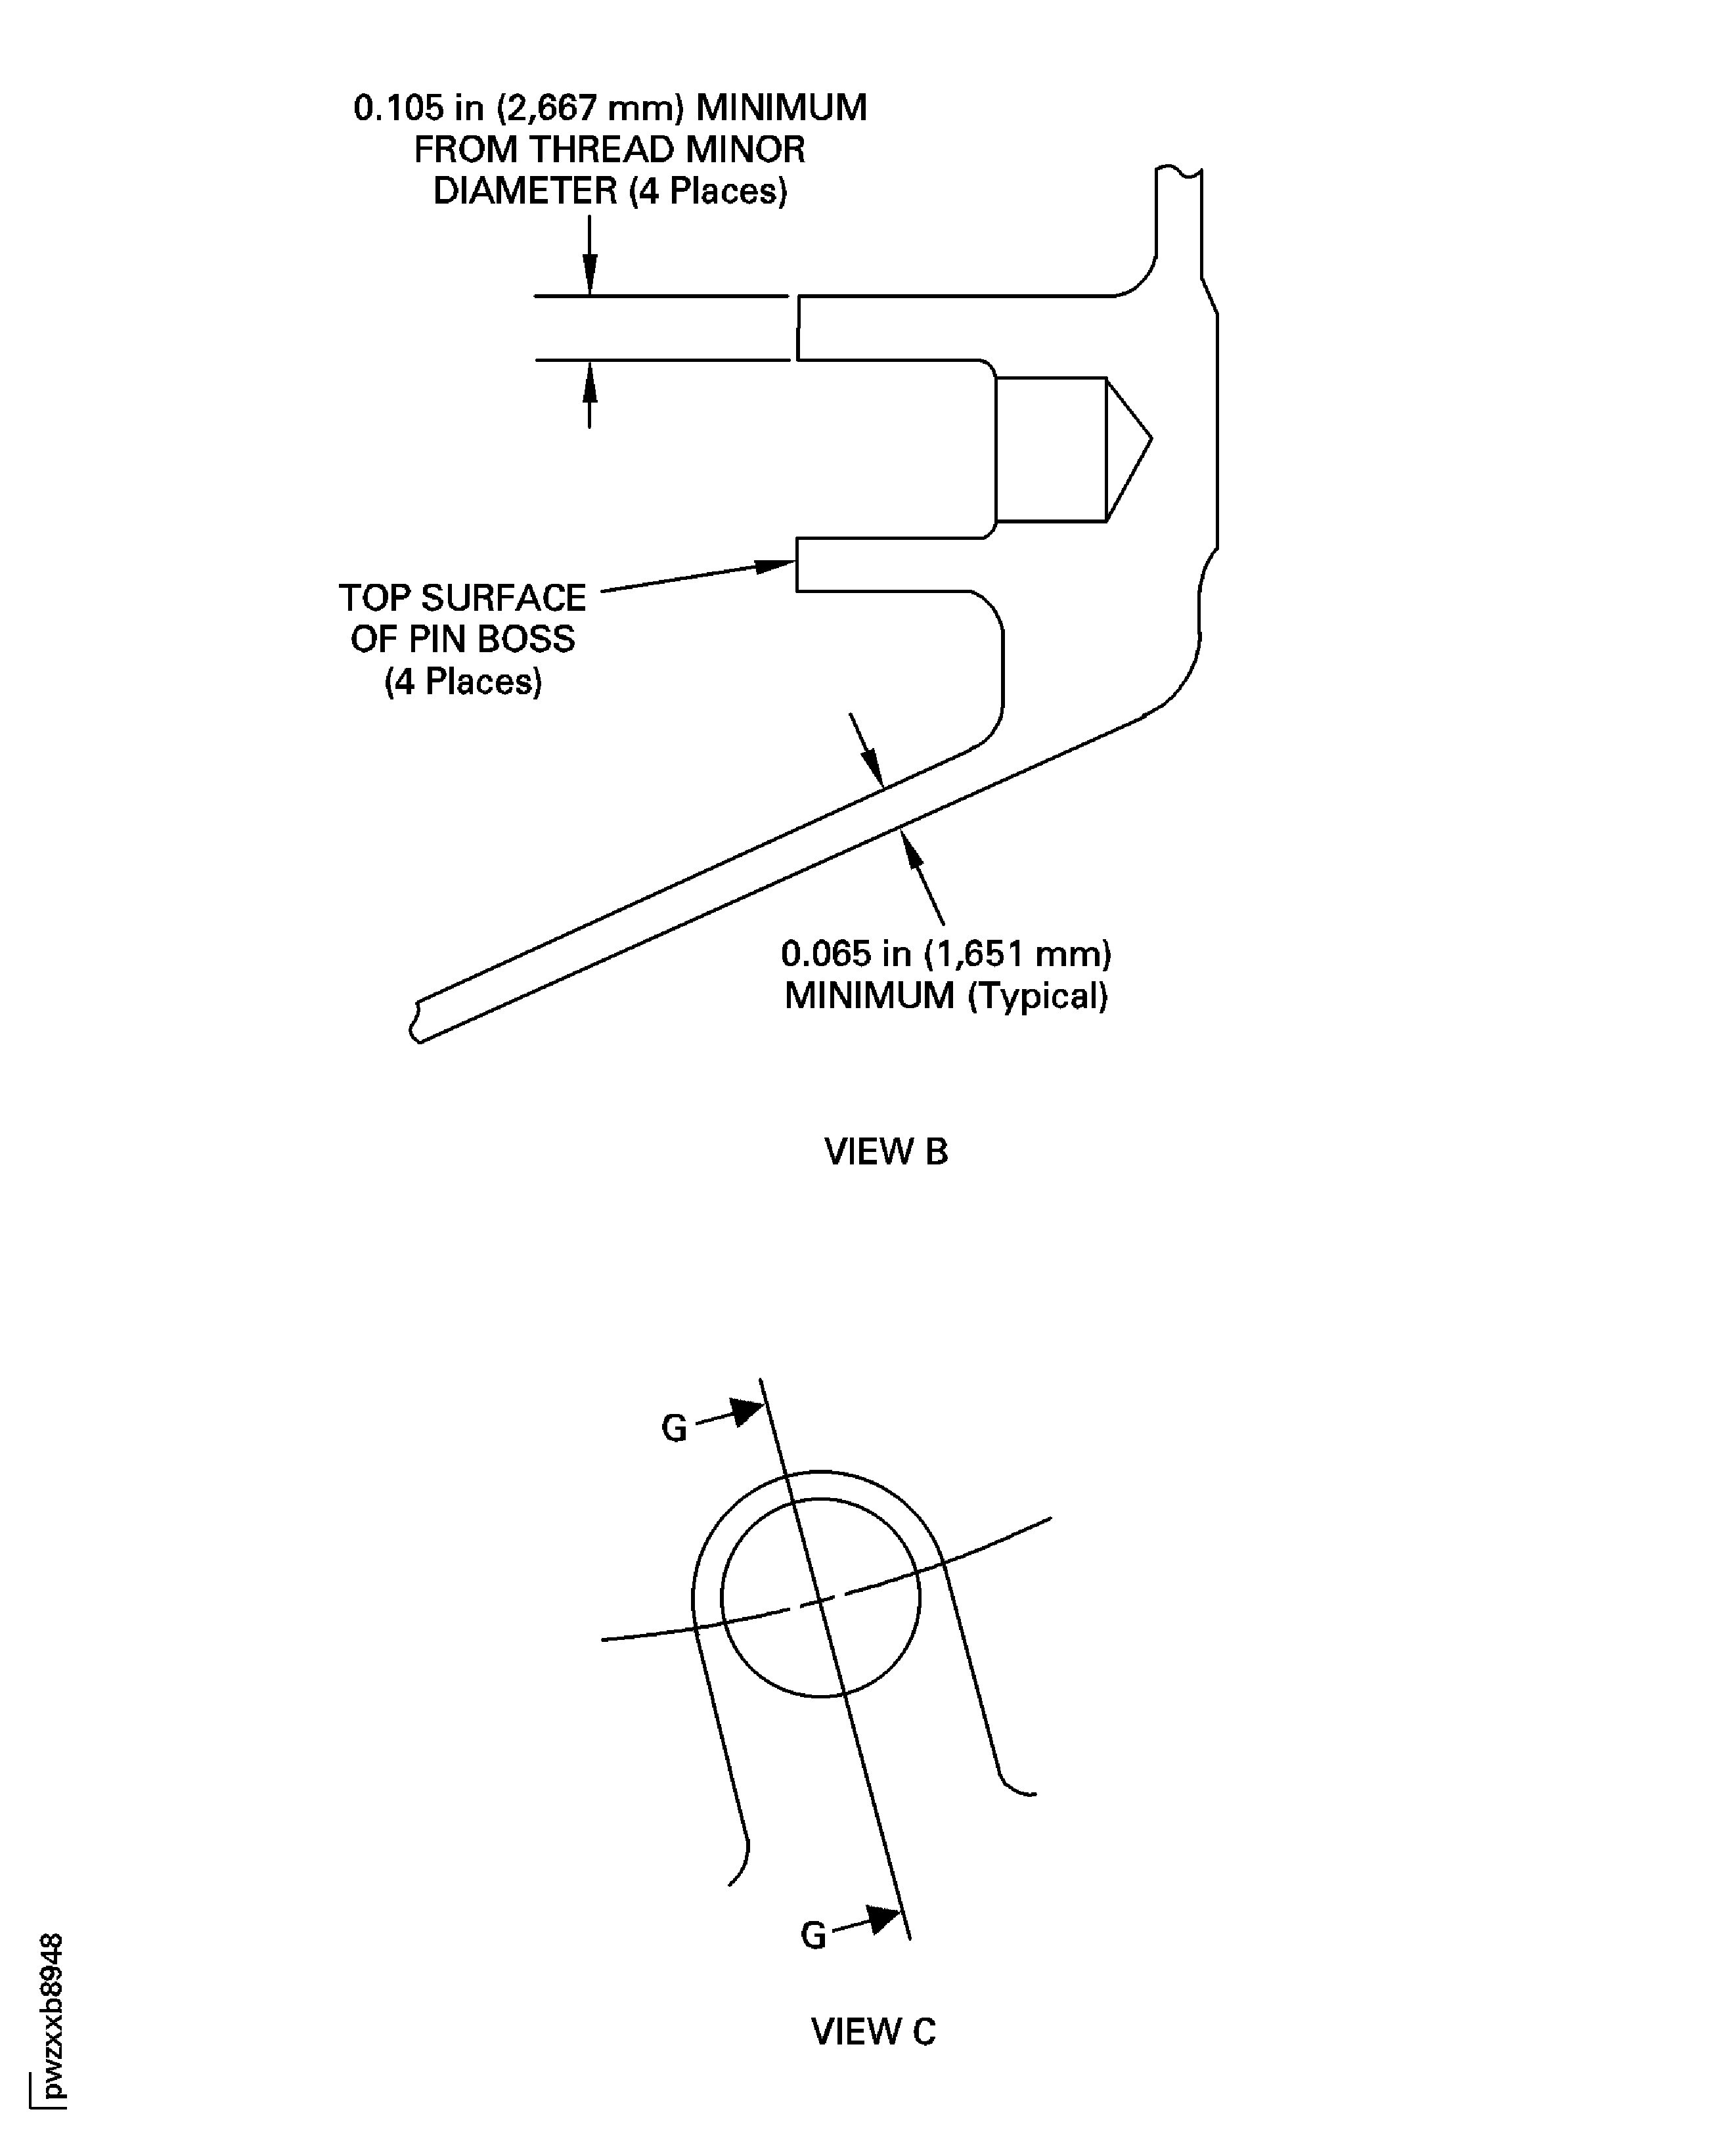
Repair Details and Dimensions

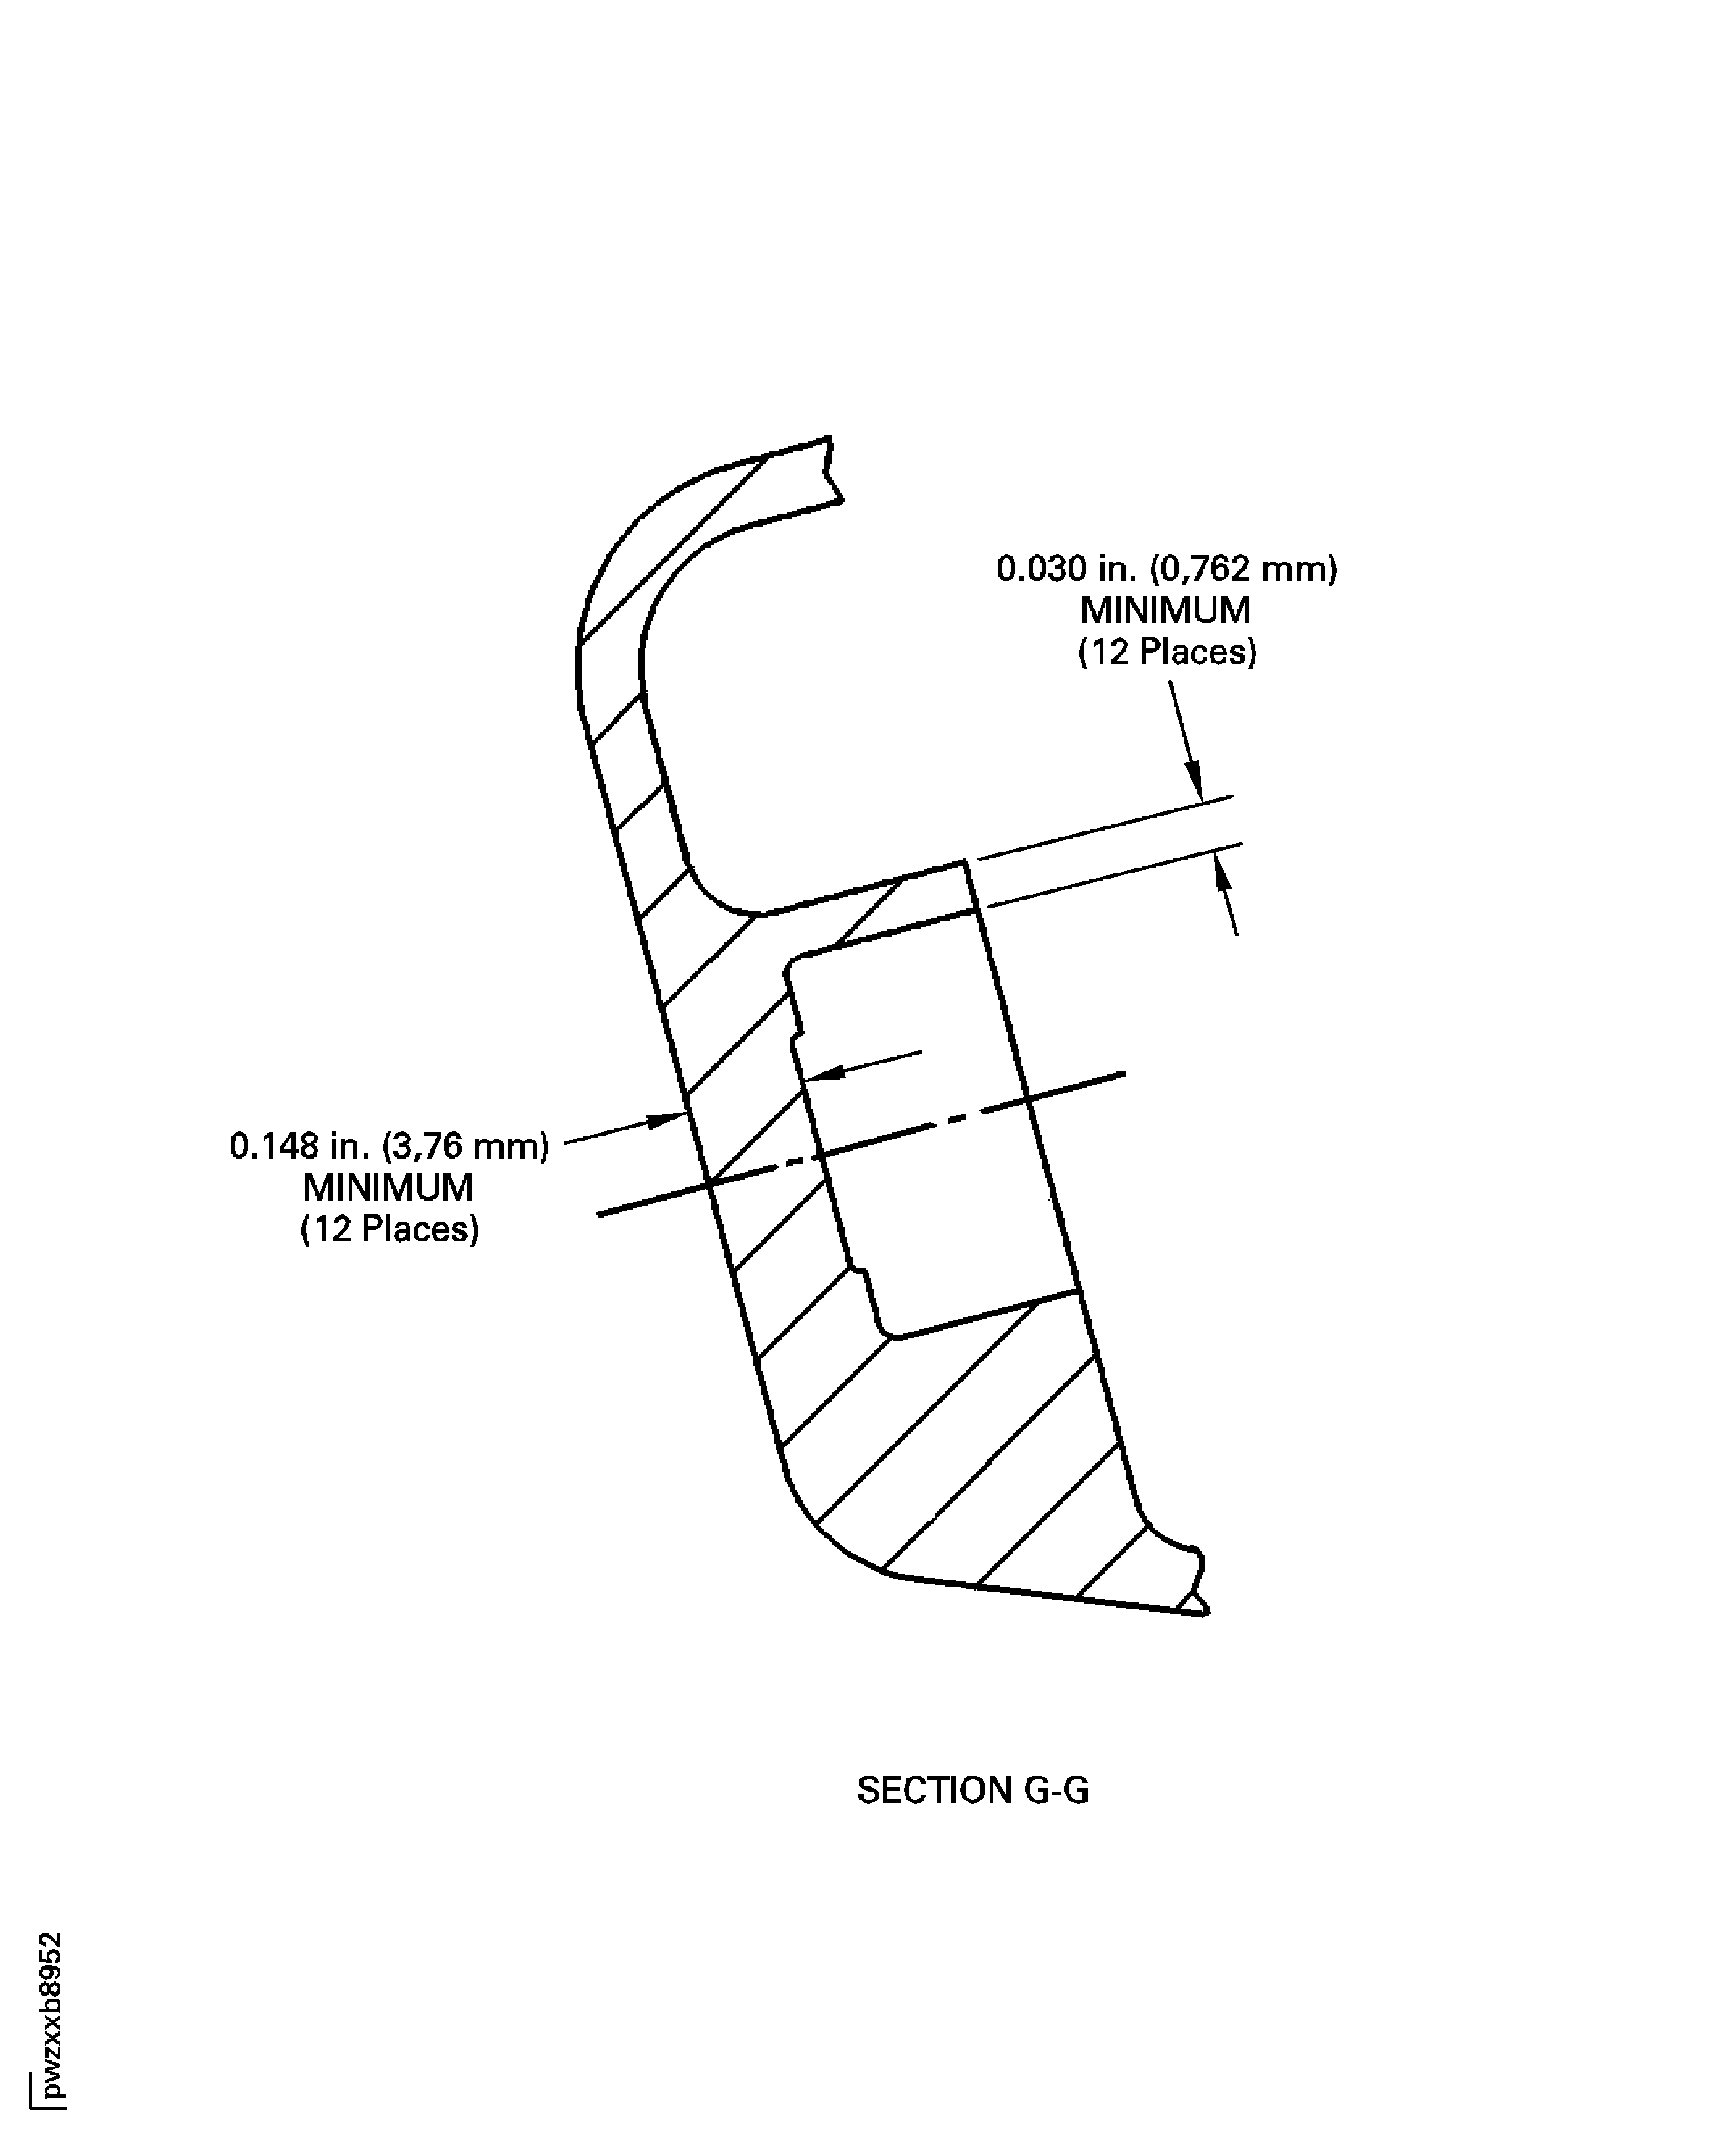
Repair Details and Dimensions

