Export Control
EAR Export Classification: Not subject to the EAR per 15 C.F.R. Chapter 1, Part 734.3(b)(3), except for the following Service Bulletins which are currently published as EAR Export Classification 9E991: SBE70-0992, SBE72-0483, SBE72-0580, SBE72-0588, SBE72-0640, SBE73-0209, SBE80-0024 and SBE80-0025.Copyright
© IAE International Aero Engines AG (2001, 2014 - 2021) The information contained in this document is the property of © IAE International Aero Engines AG and may not be copied or used for any purpose other than that for which it is supplied without the express written authority of © IAE International Aero Engines AG. (This does not preclude use by engine and aircraft operators for normal instructional, maintenance or overhaul purposes.).Applicability
All
Common Information
TASK 72-50-22-300-024 LPT Stage 3 Vane - Blend Repair, Repair-024 (VRS4066)
General
Price and availability - none
The practices and processes referred to in the procedure by the TASK numbers are in the SPM.
NOTE
NOTE
Preliminary Requirements
Pre-Conditions
NONESupport Equipment
| Name | Manufacturer | Part Number / Identification | Quantity | Remark |
|---|---|---|---|---|
| Action swivel vise | LOCAL | Action swivel vise | ||
| Radius gage set | LOCAL | Radius gage set | ||
| Illuminated comparator magnifier | LOCAL | Illuminated comparator magnifier | ||
| Dial caliper | LOCAL | Dial caliper | ||
| External dial caliper | LOCAL | External dial caliper | 0 - 0.787in. (0 - 20.0 mm) |
Consumables, Materials and Expendables
NONESpares
NONESafety Requirements
NONEProcedure
Refer to SUBTASK 72-50-22-350-055 before you do the blend repairs.
Do not blend repair dents, but blend repair dents on leading and trailing edge.
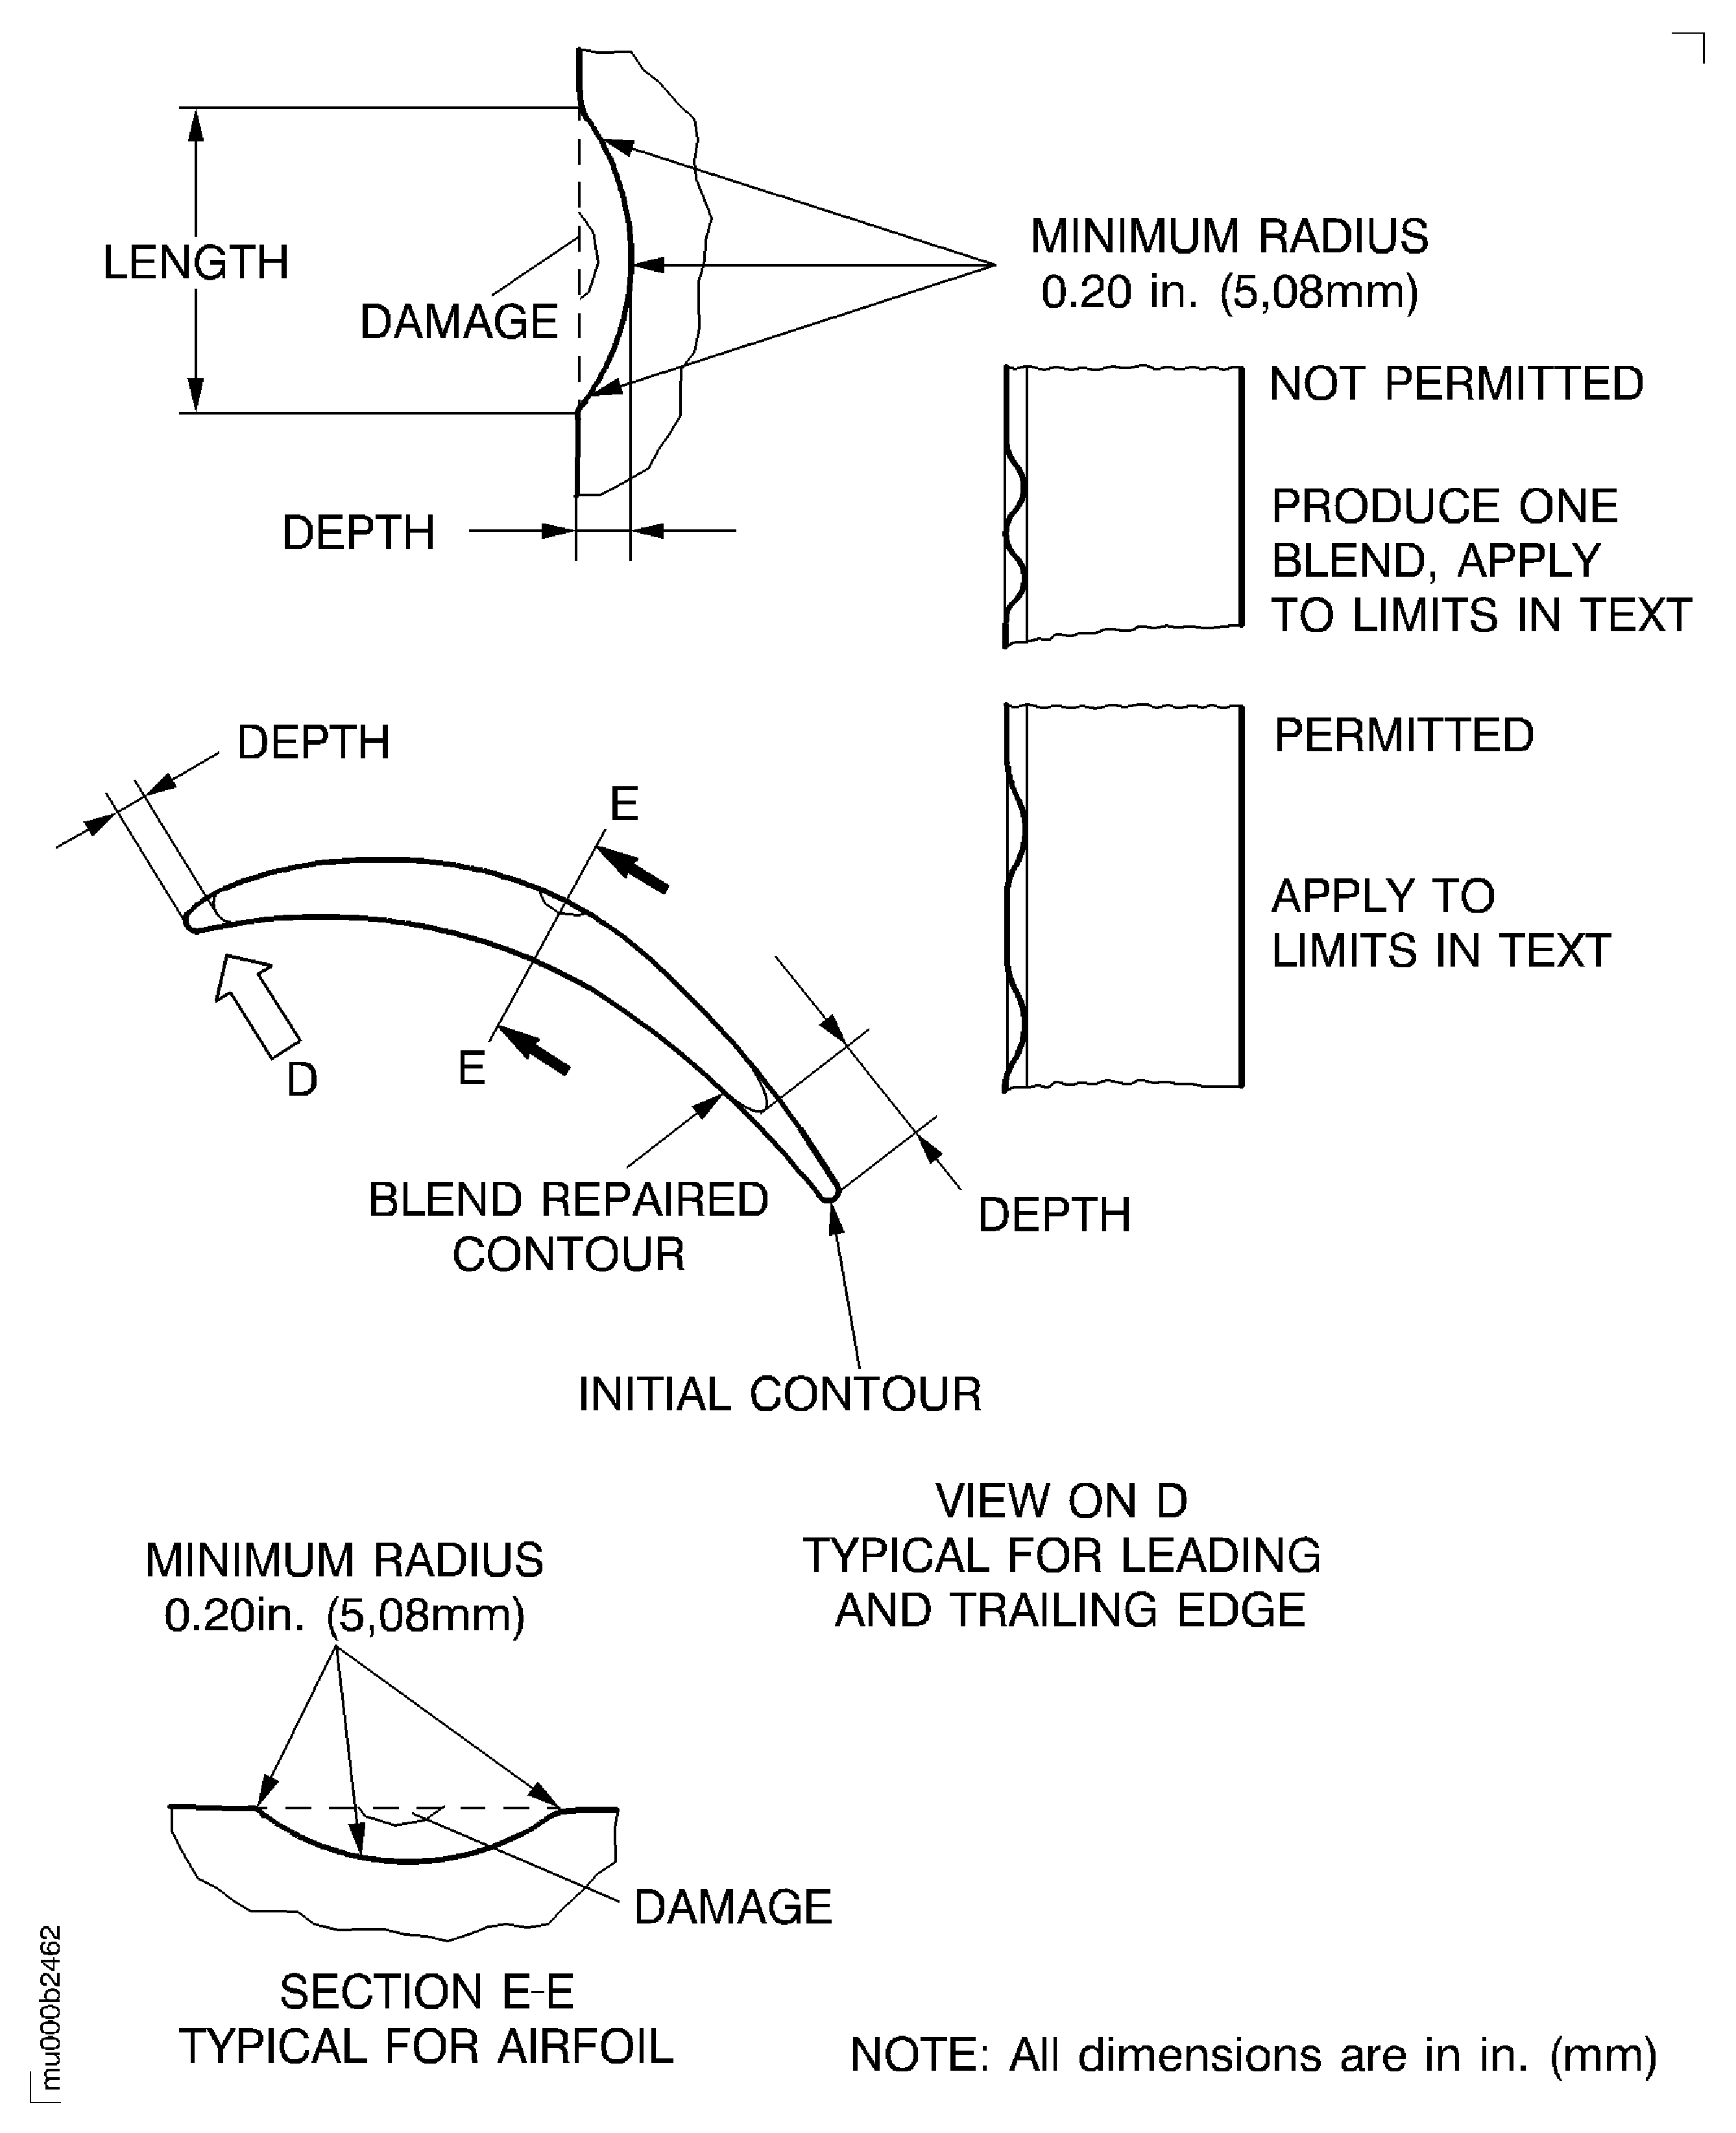
The blend ratio, length to depth, must be a minimum of 5:1, refer to Figure.
Keep the material removal to the minimum necessary to remove damage.
The surface texture of all repaired surfaces must have the same or better quality to that of the adjacent not damaged area.
Nicks within acceptable limits do not require blend repair. If there, remove raised material only.
Repeated blending in one place is acceptable to the specified maximum depth, measured from the initial unblended surface.
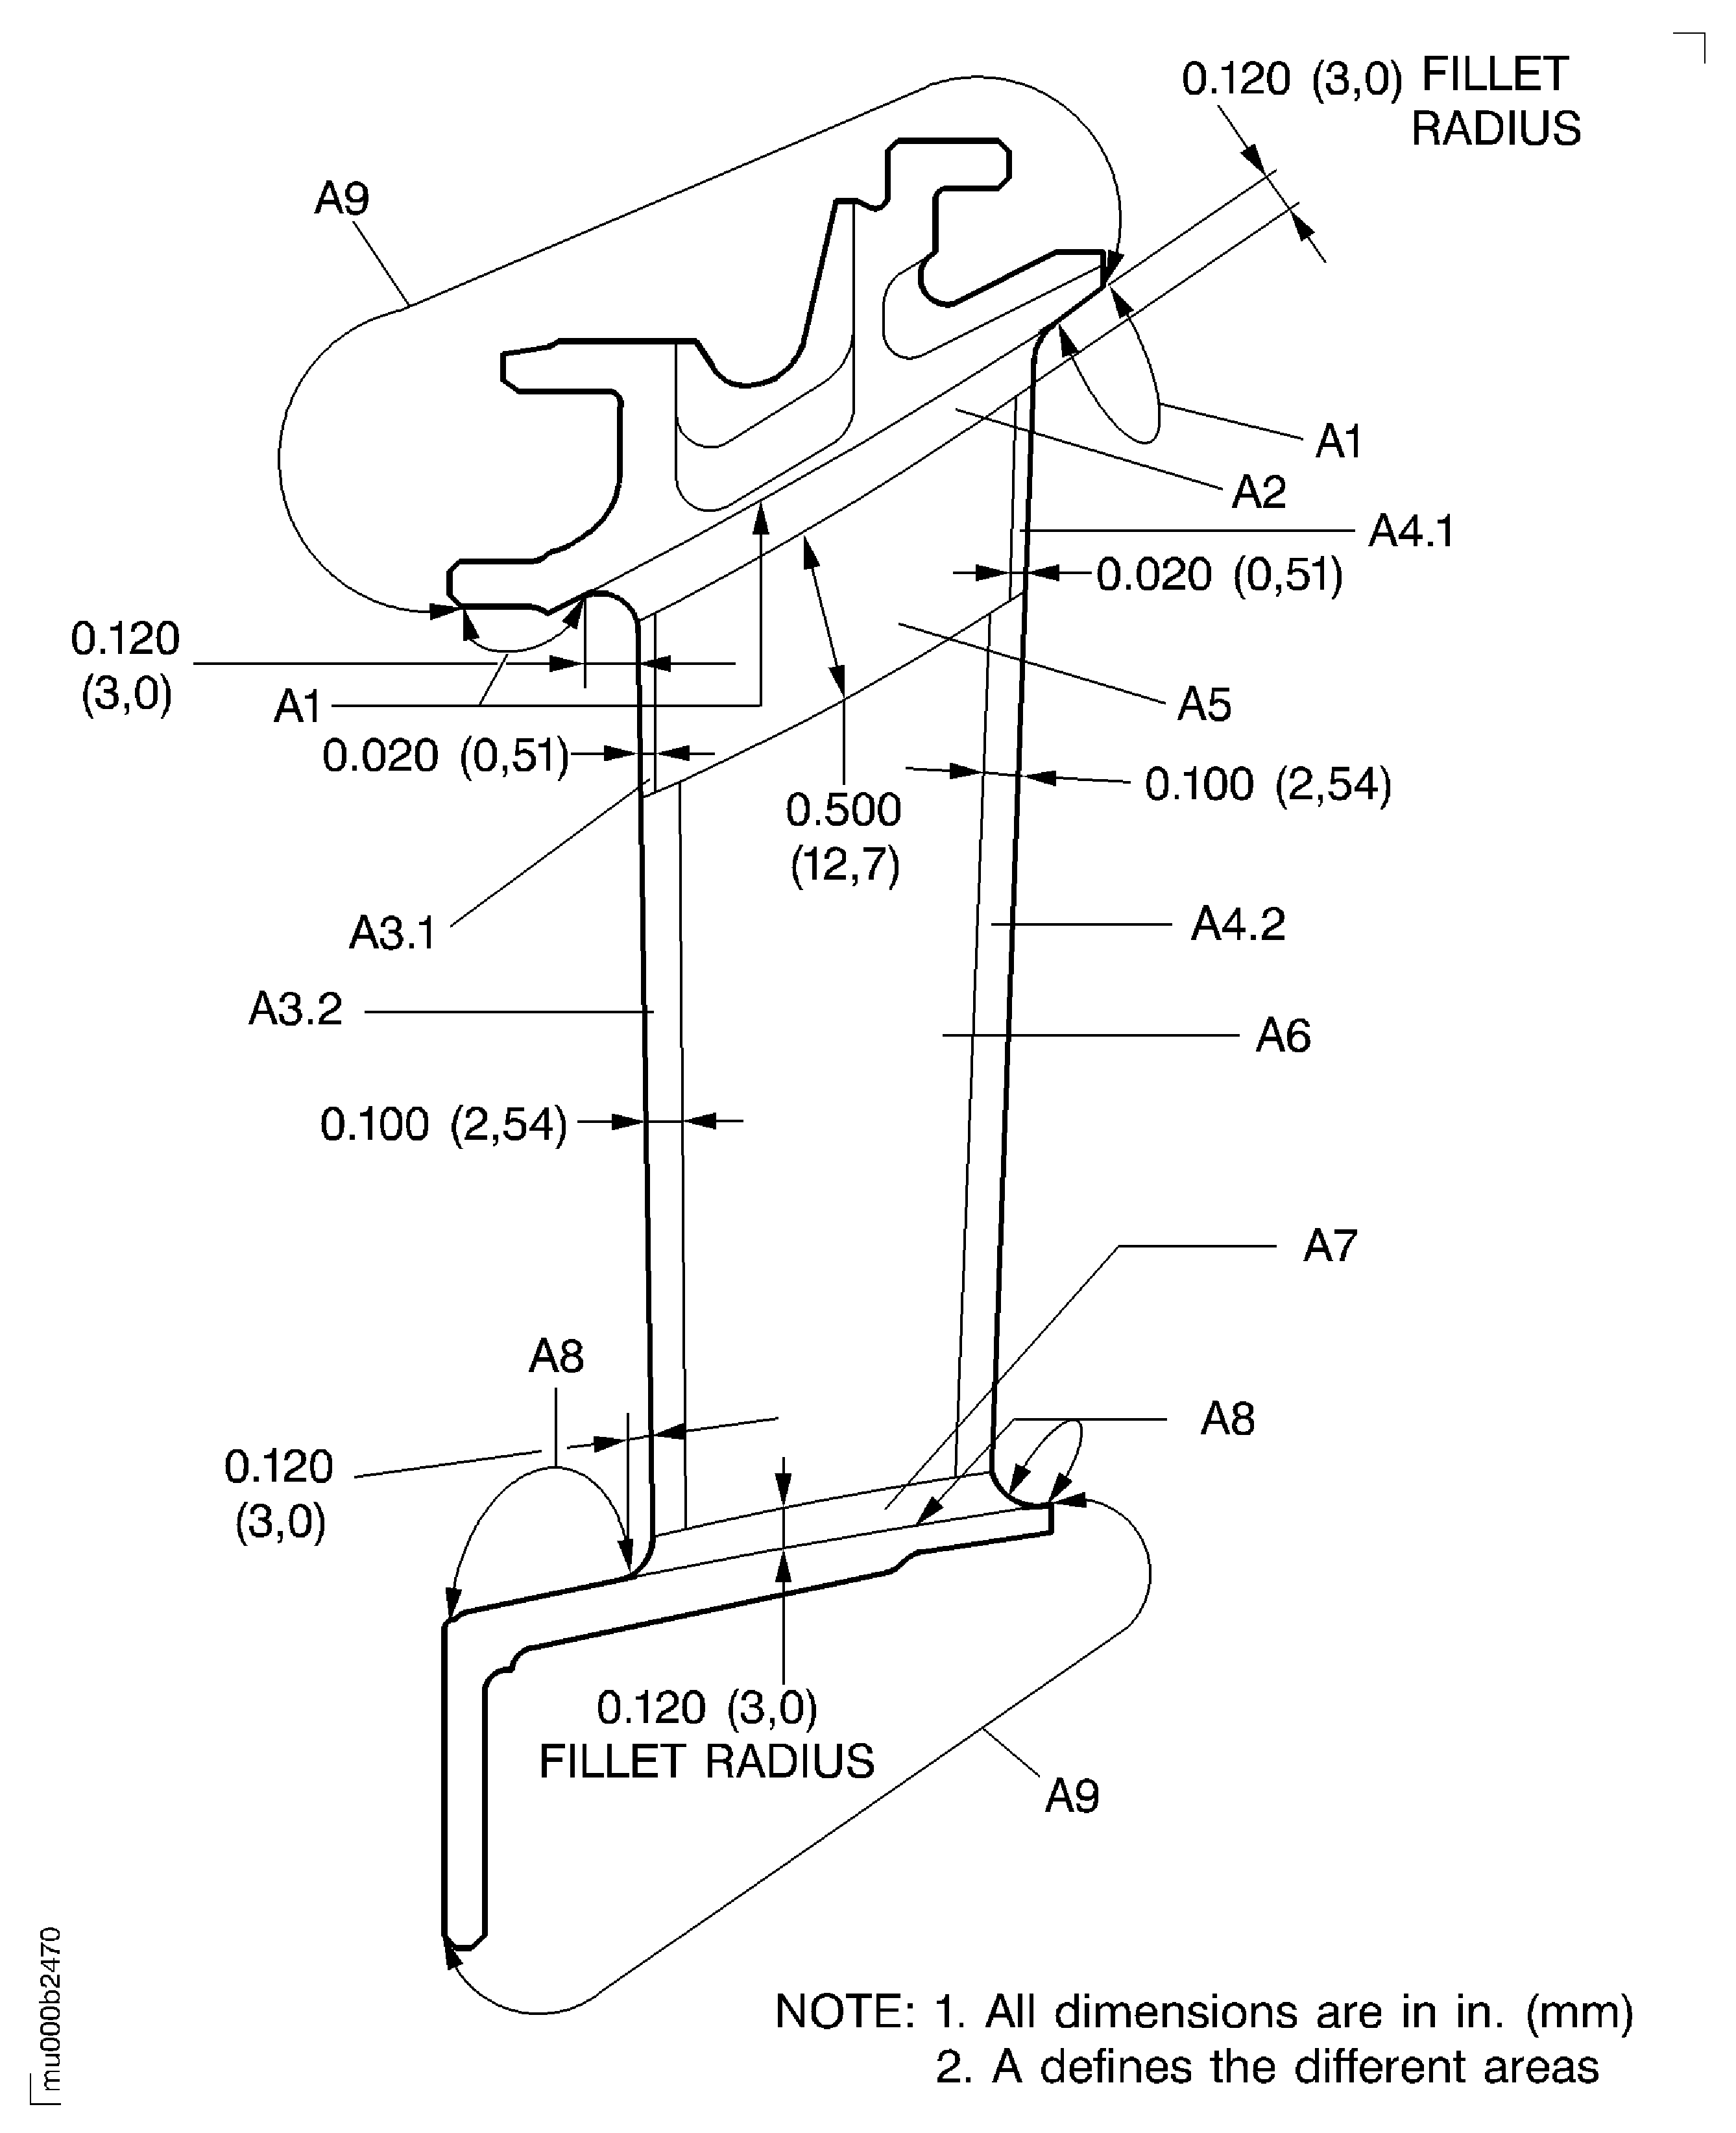
Area definition is identical with area definition at visual inspection.
Refer to: Figure
SUBTASK 72-50-22-350-056 Blend Repair the Stage 3 Turbine Vane
NOTE
Measure the dimensions of the blended areas with dial caliper and external dial caliper.
The limits are given in Step.
Use radius gage set to examine the radius at each blend repaired area.
Refer to Figure.
Use the dial caliper to identify the extension of leading and trailing edge areas.
Refer to Figure.
Examine the blend repaired areas dimensionally.
SUBTASK 72-50-22-220-101 Examine the Blend Repaired Area Visually and Dimensionally
Refer to Repair, VRS4067 TASK 72-50-22-300-025 (REPAIR-025) or Repair, VRS4069 TASK 72-50-22-300-027 (REPAIR-027).
Replace the coating of the stage 3 turbine vane.
SUBTASK 72-50-22-380-055 Replace the Coating of the Stage 3 Turbine Vane
Figure: Blend repair the stag 3 turbine vanes
Blend repair the stag 3 turbine vanes

Figure: Blend repair the stag 3 turbine vanes
Blend repair the stag 3 turbine vanes

