DMC:V2500-A0-72-50-3106-01A-649A-CIssue No:001.00Issue Date:2013-11-01
Export Control
EAR Export Classification: Not subject to the EAR per 15 C.F.R. Chapter 1, Part 734.3(b)(3), except for the following Service Bulletins which are currently published as EAR Export Classification 9E991: SBE70-0992, SBE72-0483, SBE72-0580, SBE72-0588, SBE72-0640, SBE73-0209, SBE80-0024 and SBE80-0025.Copyright
© IAE International Aero Engines AG (2001, 2014 - 2021) The information contained in this document is the property of © IAE International Aero Engines AG and may not be copied or used for any purpose other than that for which it is supplied without the express written authority of © IAE International Aero Engines AG. (This does not preclude use by engine and aircraft operators for normal instructional, maintenance or overhaul purposes.).Applicability
All
Common Information
TASK 72-50-31-840-001 LPT Stage 6 Disk - Blend To Remove The Correlation Marking, Rework-001 - SBE 72-0067
General
Price and availability - none
The practices and processes referred to in the procedure by the TASK number are in the SPM.
NOTE
For equipment and materials necessary to do this rework, refer to the SPM TASK 70-23-05-230-501.
Equivalent equipment may be used.
Preliminary Requirements
Pre-Conditions
NONESupport Equipment
NONEConsumables, Materials and Expendables
NONESpares
NONESafety Requirements
NONEProcedure
The correlation marking can be located on the front or rear side of the disk.
If the correlation marking touches the bolt holes, contact.
SUBTASK 72-50-31-350-076 General Instruction for Identification of the Correlation Marking
NOTE
IAE INTERNATIONAL AERO ENGINES
AG
400 Main Street,
East Hartford, CT 06108
USA
ATTN: Head of Technical Services
Keep material removal to the minimum to remove correlation.
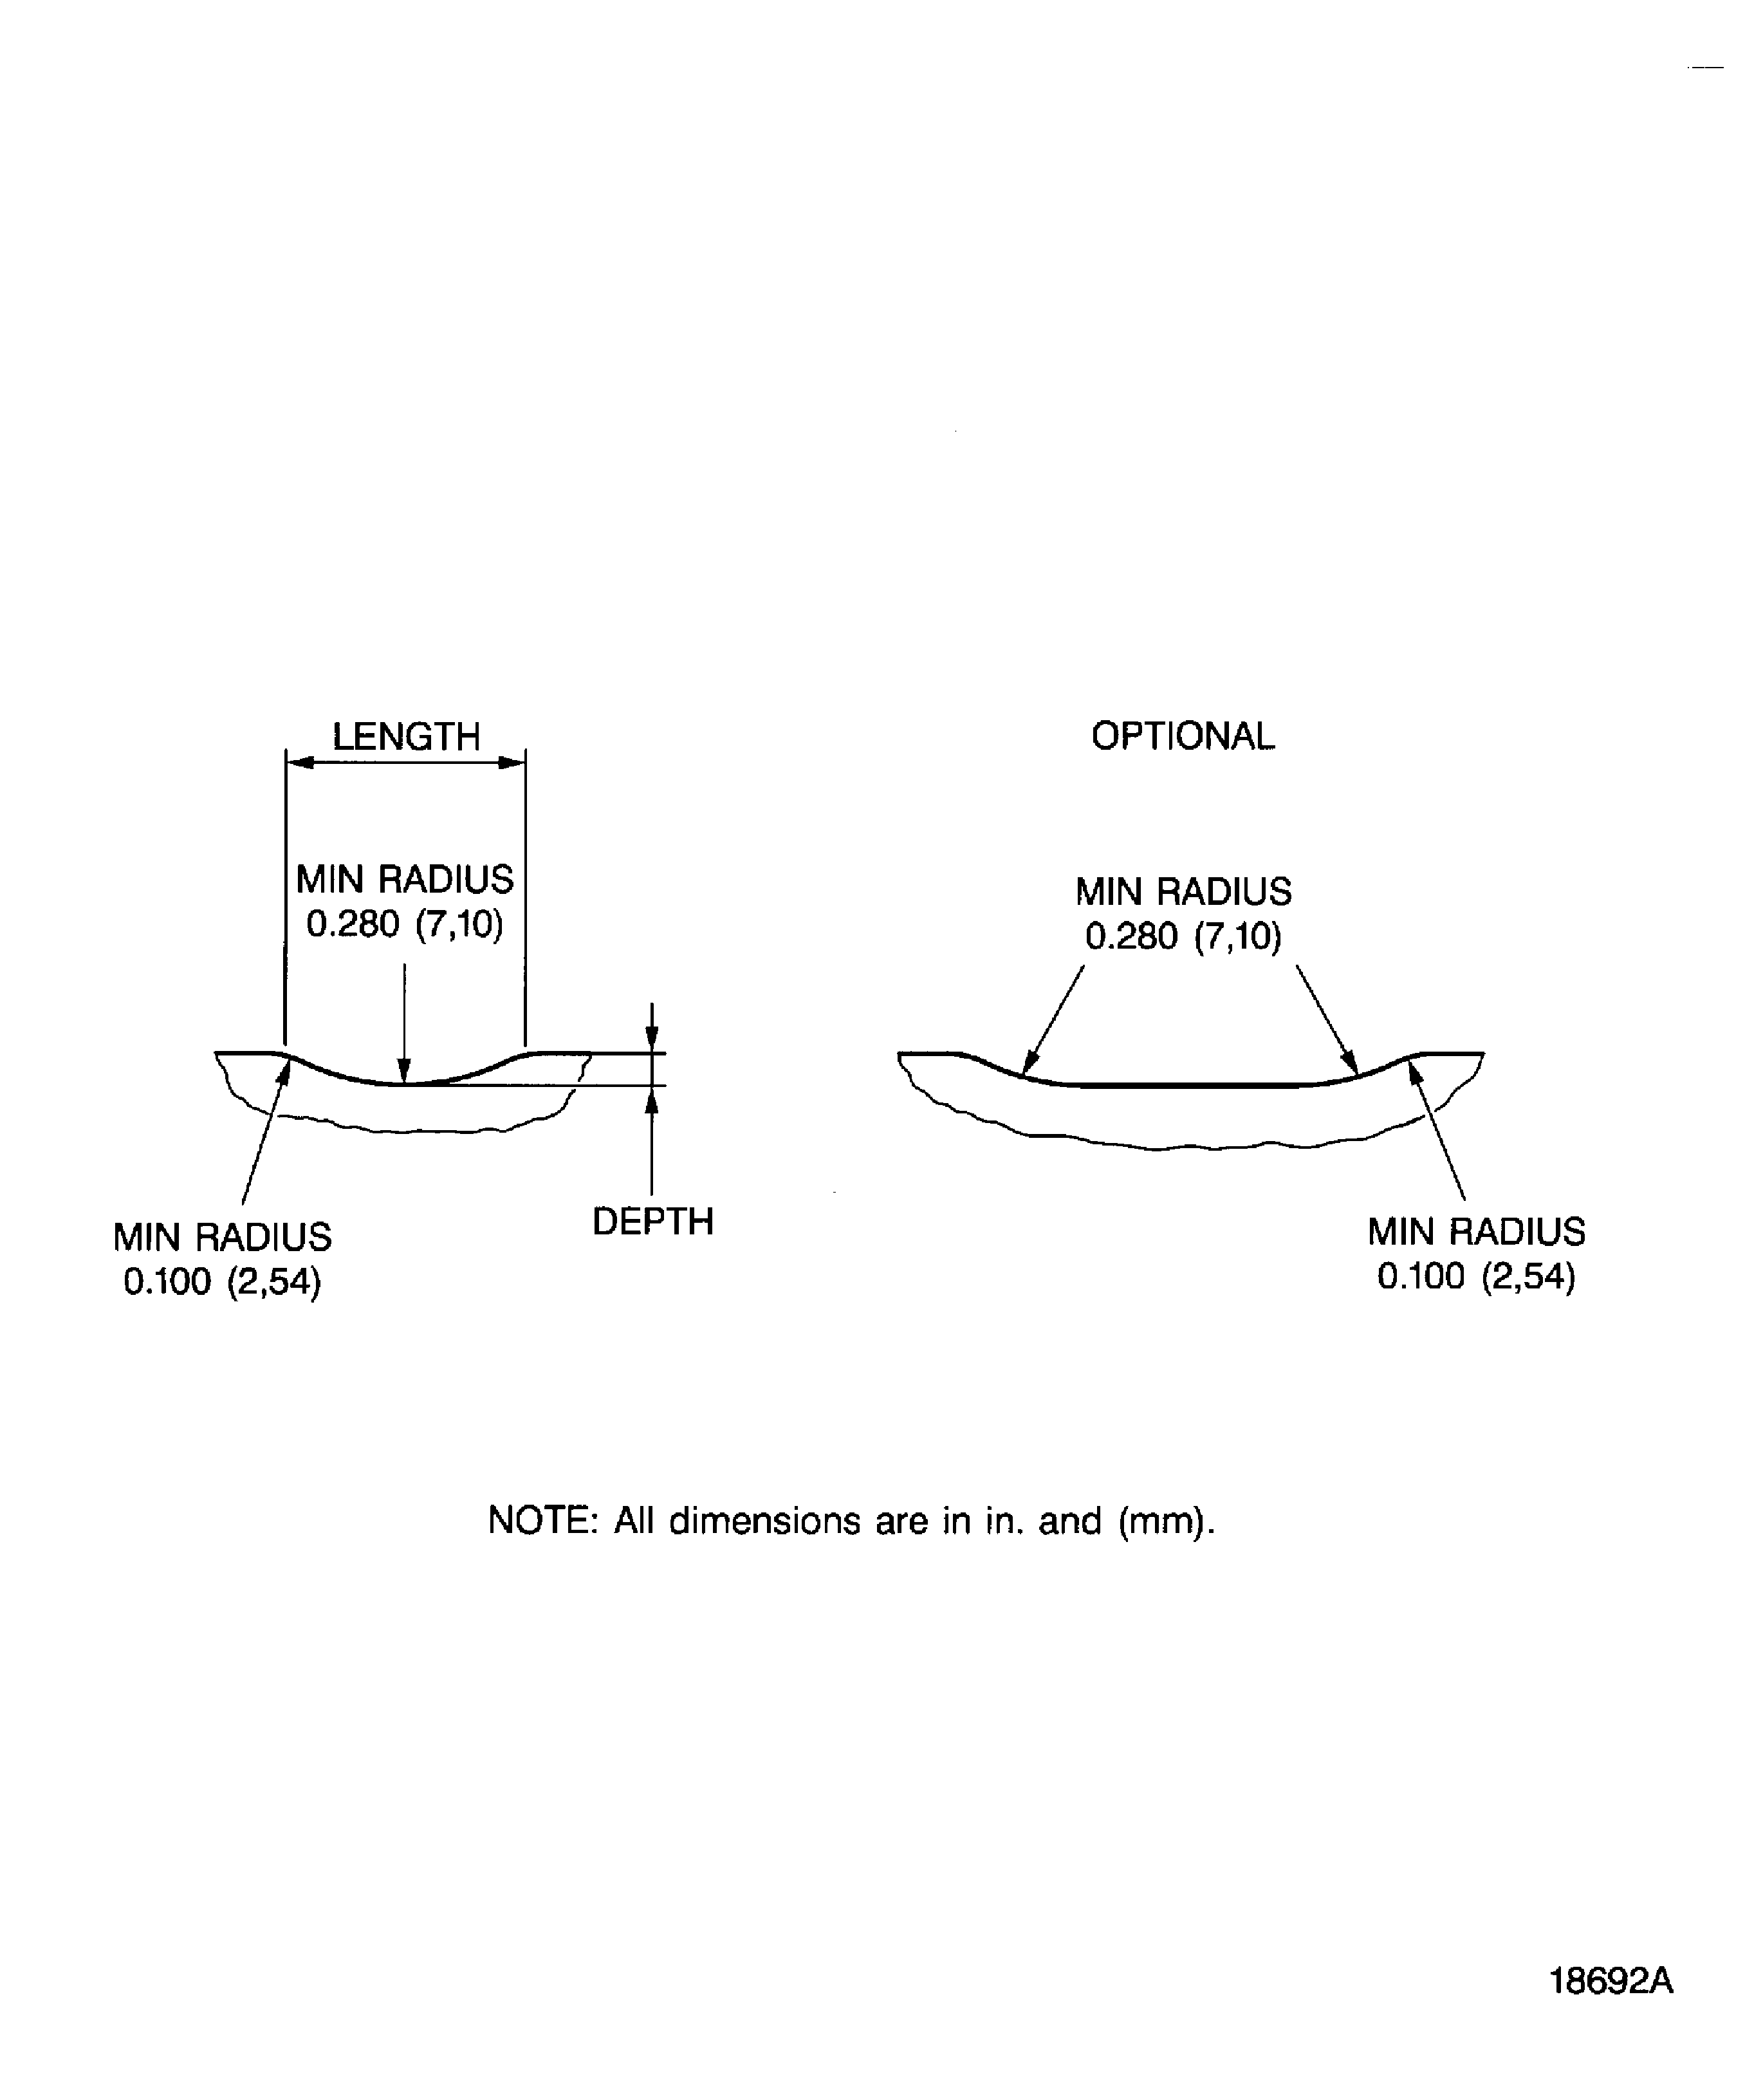
For blending the length to depth blend ratio is 5:1 minimum, refer to Figure.
Blend repair in circumferential direction only.
Maximum permitted depth of blend repair is 0.006 in. (0.152 mm), Figure.
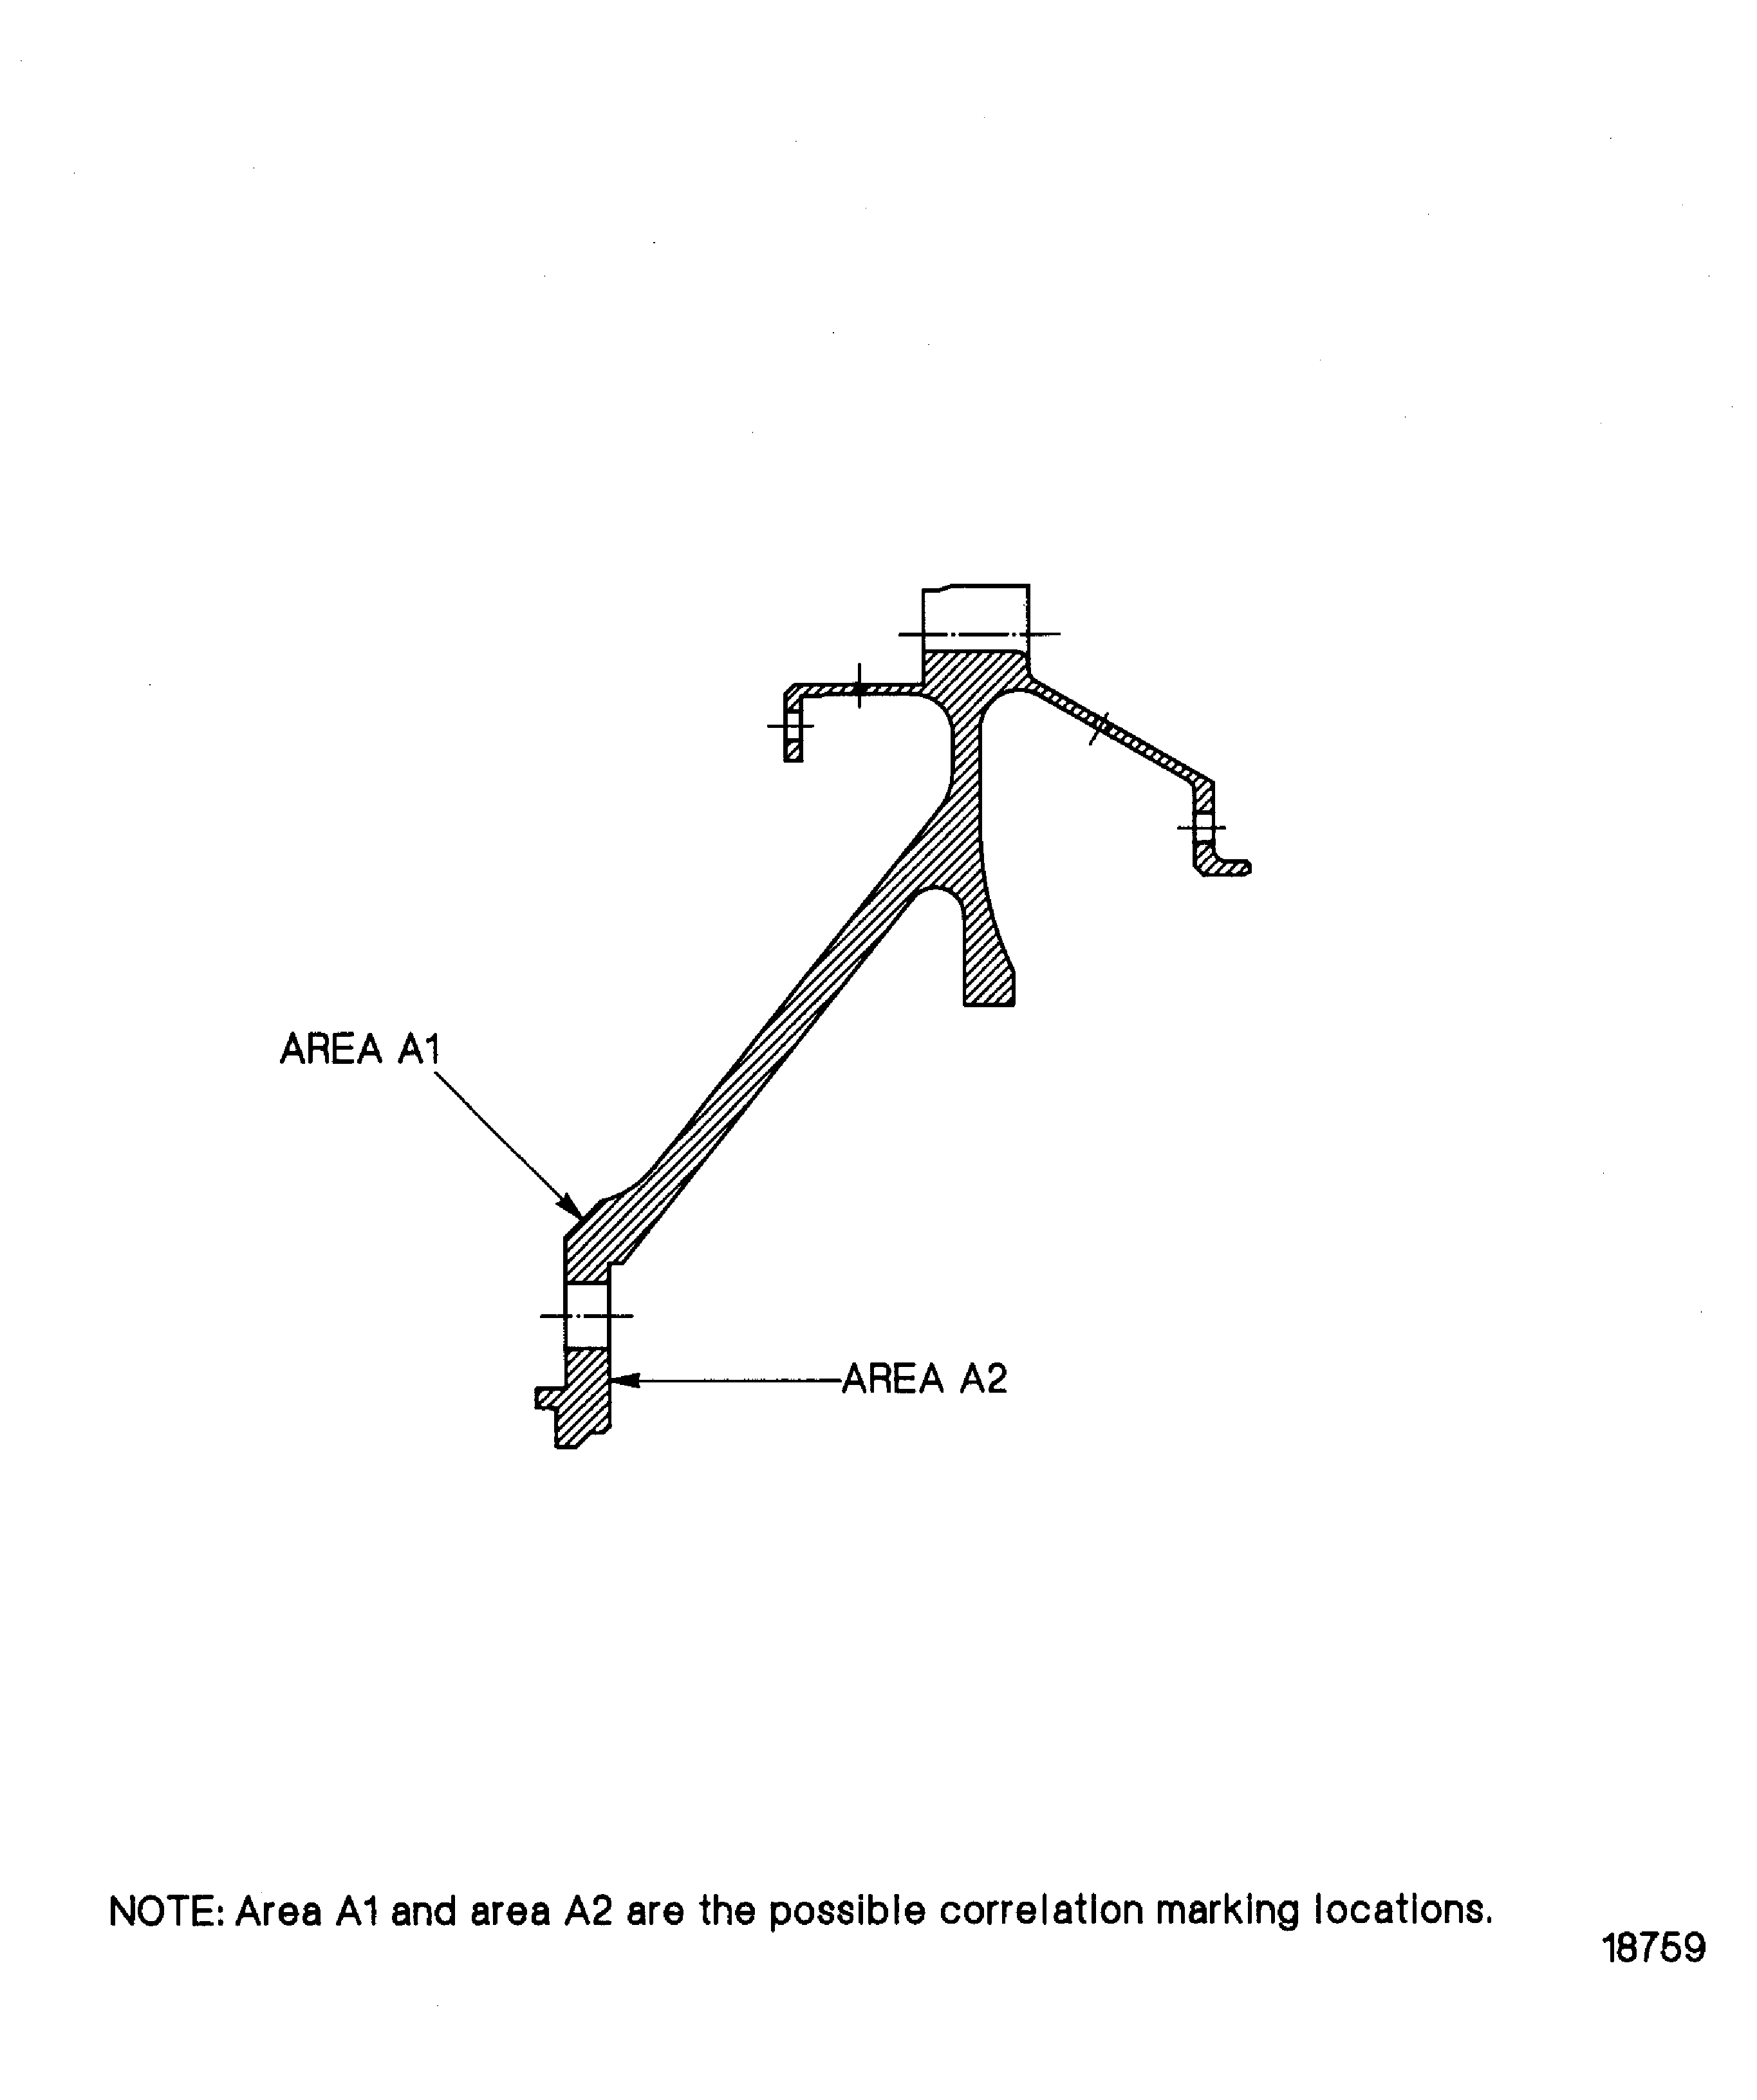
Blend repair in area A1 or A2 to remove the correlation marking.
SUBTASK 72-50-31-350-078 Remove the Correlation Marking
NOTE
Refer to SUBTASK 72-50-31-350-076 and SUBTASK 72-50-31-350-077 before you do the blend repair.Refer to: Figure
SUBTASK 72-50-31-380-051 Polish the Blended Area A1 or A2
Refer to: Figure
SUBTASK 72-50-31-230-061 Do the Post Repair Inspection for Cracks
Figure: Stage 6 turbine disk, position of correlation marking
Stage 6 turbine disk, position of correlation marking

Figure: Blending length to depth ratio
Blending length to depth ratio

