Export Control
EAR Export Classification: Not subject to the EAR per 15 C.F.R. Chapter 1, Part 734.3(b)(3), except for the following Service Bulletins which are currently published as EAR Export Classification 9E991: SBE70-0992, SBE72-0483, SBE72-0580, SBE72-0588, SBE72-0640, SBE73-0209, SBE80-0024 and SBE80-0025.Copyright
© IAE International Aero Engines AG (2001, 2014 - 2021) The information contained in this document is the property of © IAE International Aero Engines AG and may not be copied or used for any purpose other than that for which it is supplied without the express written authority of © IAE International Aero Engines AG. (This does not preclude use by engine and aircraft operators for normal instructional, maintenance or overhaul purposes.).Applicability
All
Common Information
TASK 72-50-52-300-007 No. 5 Bearing Retaining Plate - Chromium Plate The Slots, Repair-007 (VRS3128)
Material of component
RR | ||
|---|---|---|
DESCRIPTION | SYMBOL | MATERIAL |
No. 5 bearing retaining plate | - | Corrosion and heat resistant |
steel |
General
Price and availability - refer to IAE
The practices and processes referred to in the procedure by the TASK numbers are in the SPM.
NOTE
Preliminary Requirements
Pre-Conditions
NONESupport Equipment
| Name | Manufacturer | Part Number / Identification | Quantity | Remark |
|---|---|---|---|---|
| Workshop inspection equipment | LOCAL | Workshop inspection equipment | ||
| Grinding machine | LOCAL | Grinding machine | ||
| Furnace | LOCAL | Furnace |
Consumables, Materials and Expendables
| Name | Manufacturer | Part Number / Identification | Quantity | Remark |
|---|---|---|---|---|
| CoMat 02-067 STRIPPABLE COATING | 71410 | CoMat 02-067 |
Spares
NONESafety Requirements
NONEProcedure
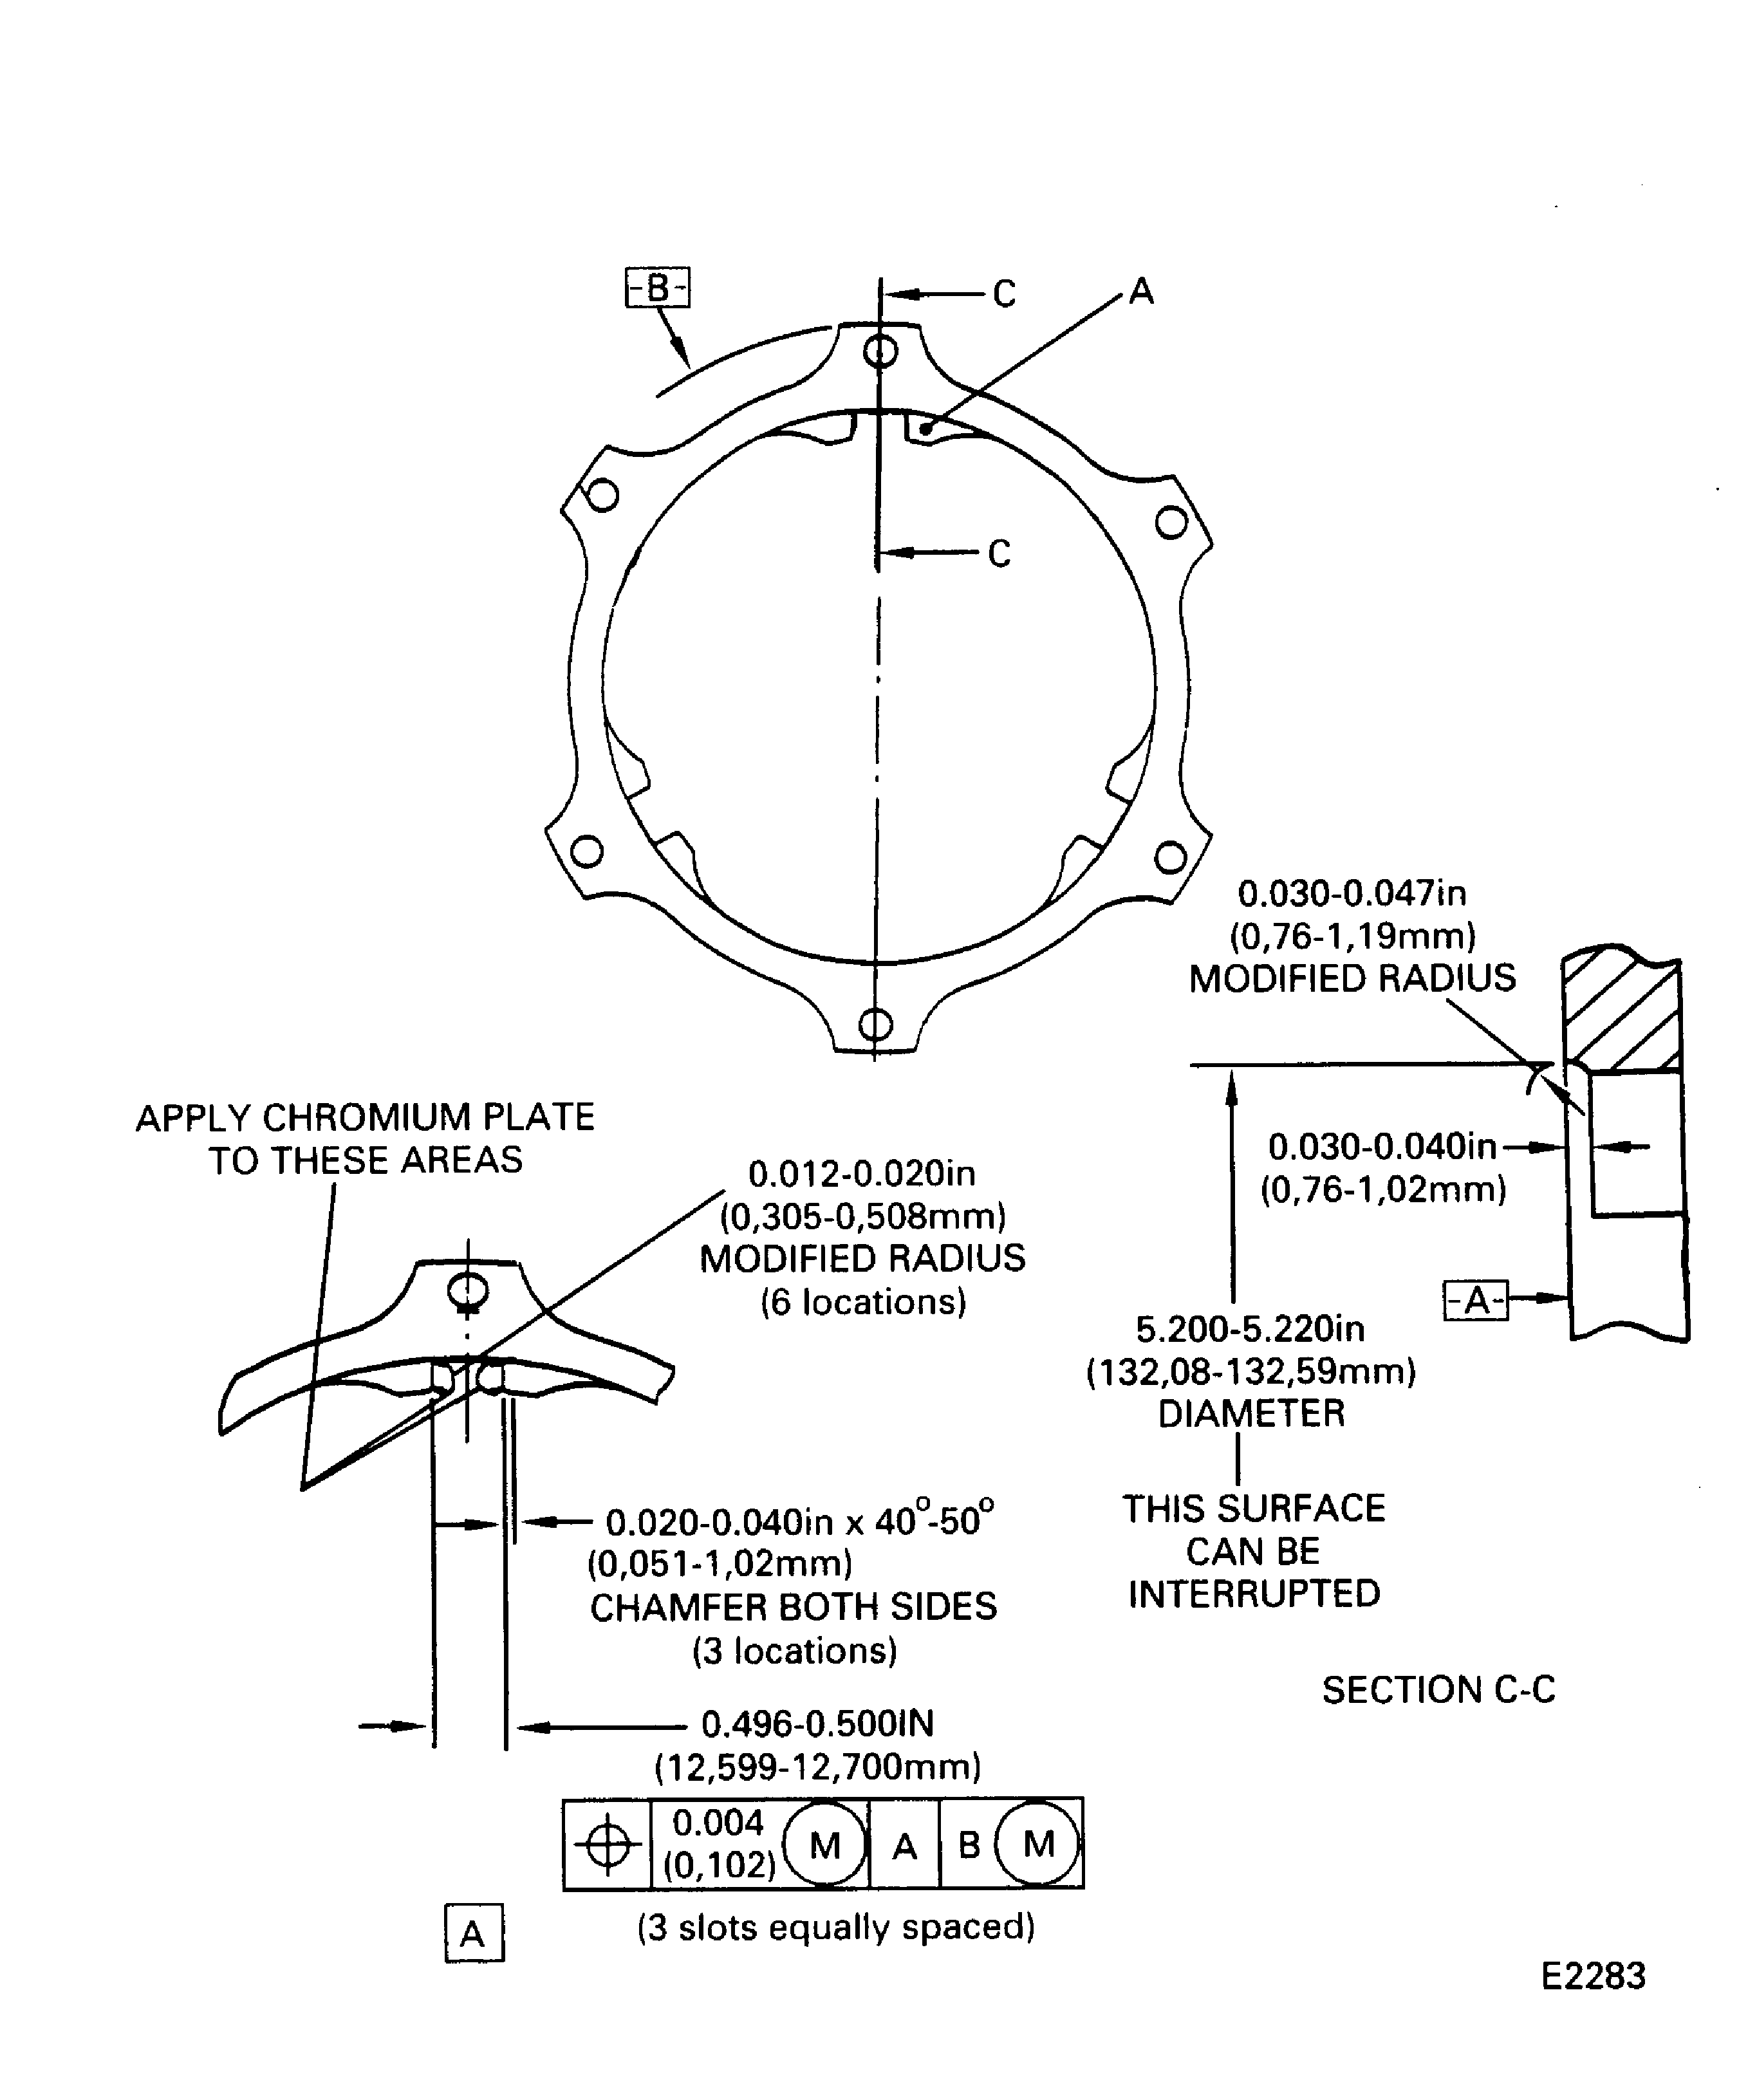
Refer to Figure.
Keep the removal of material to the minimum necessary to remove the damage and to permit sufficient plating thickness.
Plating thickness must be 0.003 to 0.006in. (0.077 to 0.152 mm) after finish machining. If the surface was plated before, you can strip the plating. Refer to the SPM TASK 70-33-02-330-501.
Machine the slots(s) in the retaining plate. Make a record of the width of the slot(s).
SUBTASK 72-50-52-320-055 Machine the Slot(s) in the No. 5 Bearing Retaining Plate
Refer to the SPM TASK 70-23-01-230-501. No cracks are permitted.
Fluorescent penetrant inspect retaining plate.
SUBTASK 72-50-52-230-053 Examine the No. 5 Bearing Retaining Plate
Use CoMat 02-067 STRIPPABLE COATING. Refer to the SPM TASK 70-38-24-300-503.
Apply a mask to the areas of the retaining plate that are not to be plated.
SUBTASK 72-50-52-380-051 Apply a Mask to the No. 5 Bearing Retaining Plate
Refer to Figure and the SPM TASK 70-33-02-330-501. Apply chromium plate to a sufficient thickness to permit finish machining. Plating outside the repair area is permitted but must be removed.
Chromium plate the slot(s) in the retaining plate.
SUBTASK 72-50-52-330-053 Chromium Plate the Slot(s) in the No. 5 Bearing Retaining Plate
Refer to Figure. Machine the slot(s) to 0.496 to 0.500in. (12.599 to 12.700 mm).
Machine the slot(s) in the retaining plate after chromium plate.
SUBTASK 72-50-52-320-056 Machine the Slot(s) in the No. 5 Bearing Retaining Plate after Chromium Plate
Refer to Figure and TASK 72-50-52-200-000 (INSPECTION/CHECK-000). Do a visual inspection of the plated area for cracks and the bond of the plate. Measure the width of the slot(s) and compare the measurement to the measurement in step 4. Step. The thickness of the plate after finish machining must be 0.003 to 0.006in. (0.077 to 0.152 mm).
Examine the retaining plate after chromium plate.
SUBTASK 72-50-52-220-069 Examine the Repair
Figure: Chromium plate the slot(s) in the No. 5 bearing retaining plate
Chromium plate the slot(s) in the No. 5 bearing retaining plate

