DMC:V2500-A0-72-50-5301-01A-664A-CIssue No:001.00Issue Date:2013-11-01
Export Control
EAR Export Classification: Not subject to the EAR per 15 C.F.R. Chapter 1, Part 734.3(b)(3), except for the following Service Bulletins which are currently published as EAR Export Classification 9E991: SBE70-0992, SBE72-0483, SBE72-0580, SBE72-0588, SBE72-0640, SBE73-0209, SBE80-0024 and SBE80-0025.Copyright
© IAE International Aero Engines AG (2001, 2014 - 2021) The information contained in this document is the property of © IAE International Aero Engines AG and may not be copied or used for any purpose other than that for which it is supplied without the express written authority of © IAE International Aero Engines AG. (This does not preclude use by engine and aircraft operators for normal instructional, maintenance or overhaul purposes.).Applicability
All
Common Information
TASK 72-50-53-300-082 Turbine Exhaust Case (TEC) - Repair The Oil Jet Mating Diameter With A Bushing, Repair-082 (VRS3744)
Effectivity
FIG/ITEM PART NO. | |
|---|---|
21-300 | 2A1209-01 |
21-300 | 2A2620-01 |
21-300 | 2A3111-01 |
21-300 | 2A3183-01 |
21-300 | 2A3455-01 |
21-300 | 2A3183-101 |
21-300 | 2A4258-01 |
21-300 | 2A4263-01 |
General
Price and availability - refer to IAE
The practices and processes referred to in the procedure by the TASK numbers are in the SPM.
Preliminary Requirements
Pre-Conditions
NONESupport Equipment
NONEConsumables, Materials and Expendables
NONESpares
NONESafety Requirements
NONEProcedure
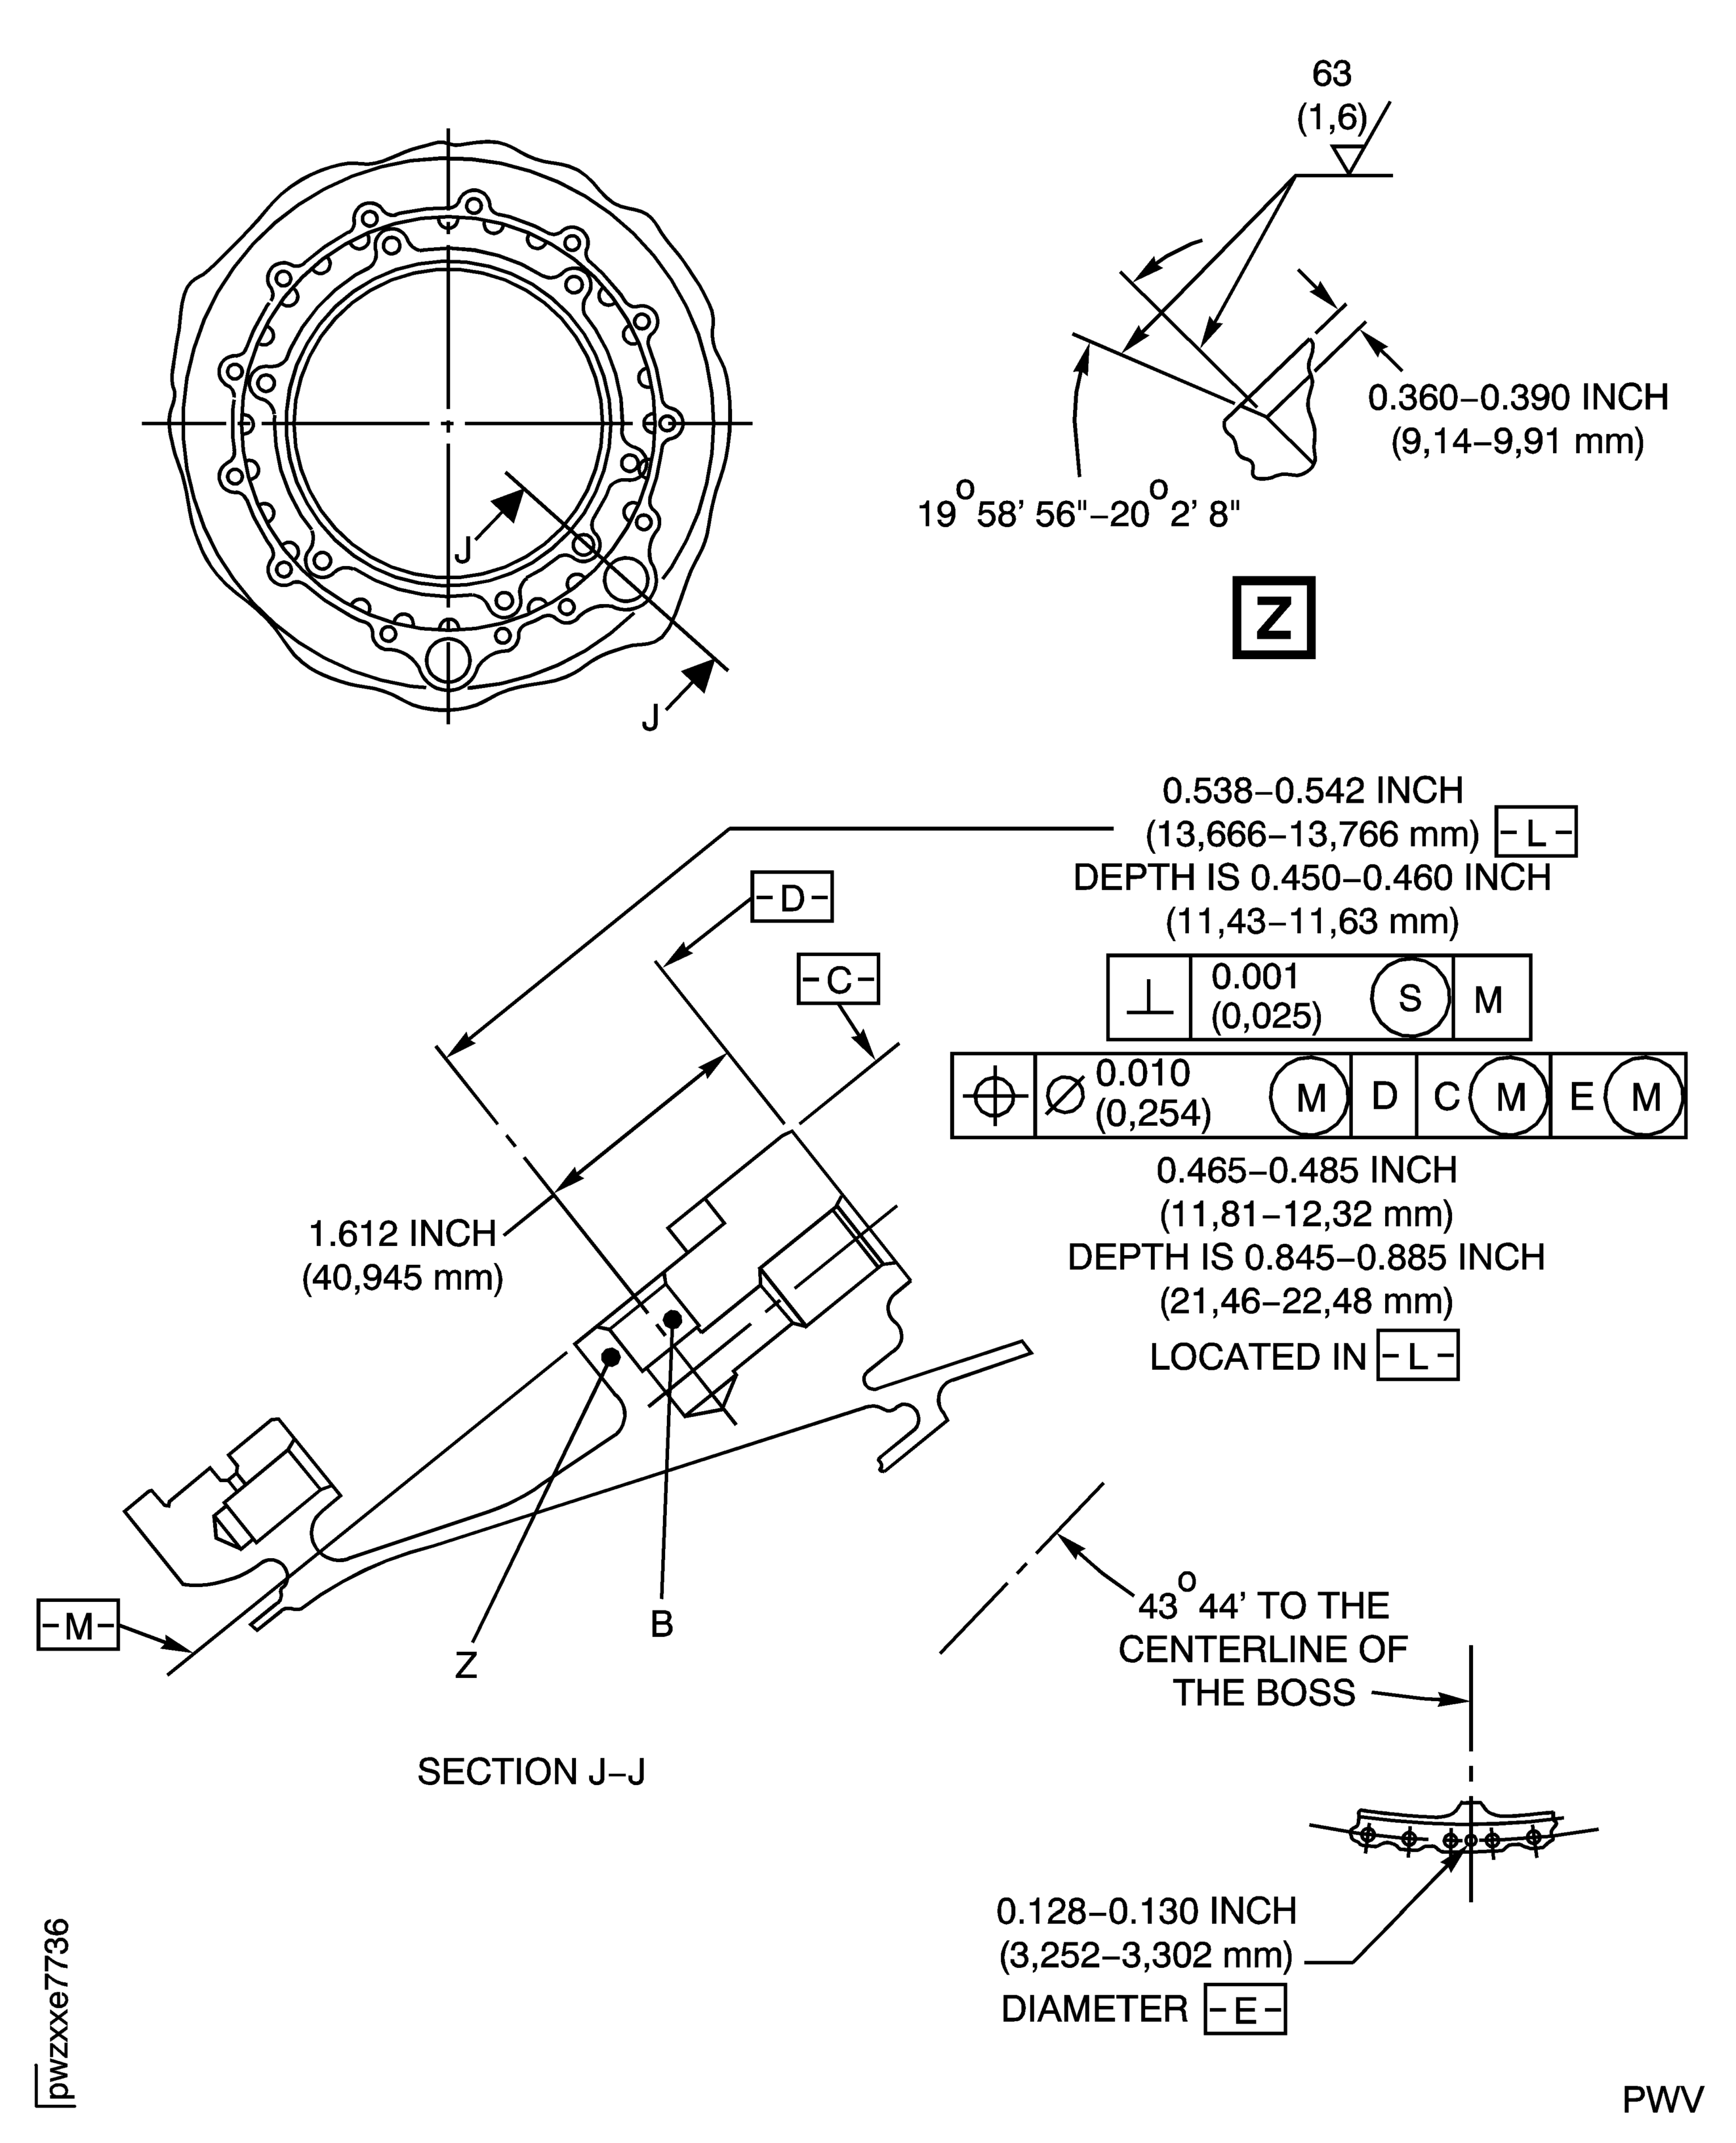
Refer to Figure.
SUBTASK 72-50-53-320-160 Machine the Oil Jet Mating Diameter
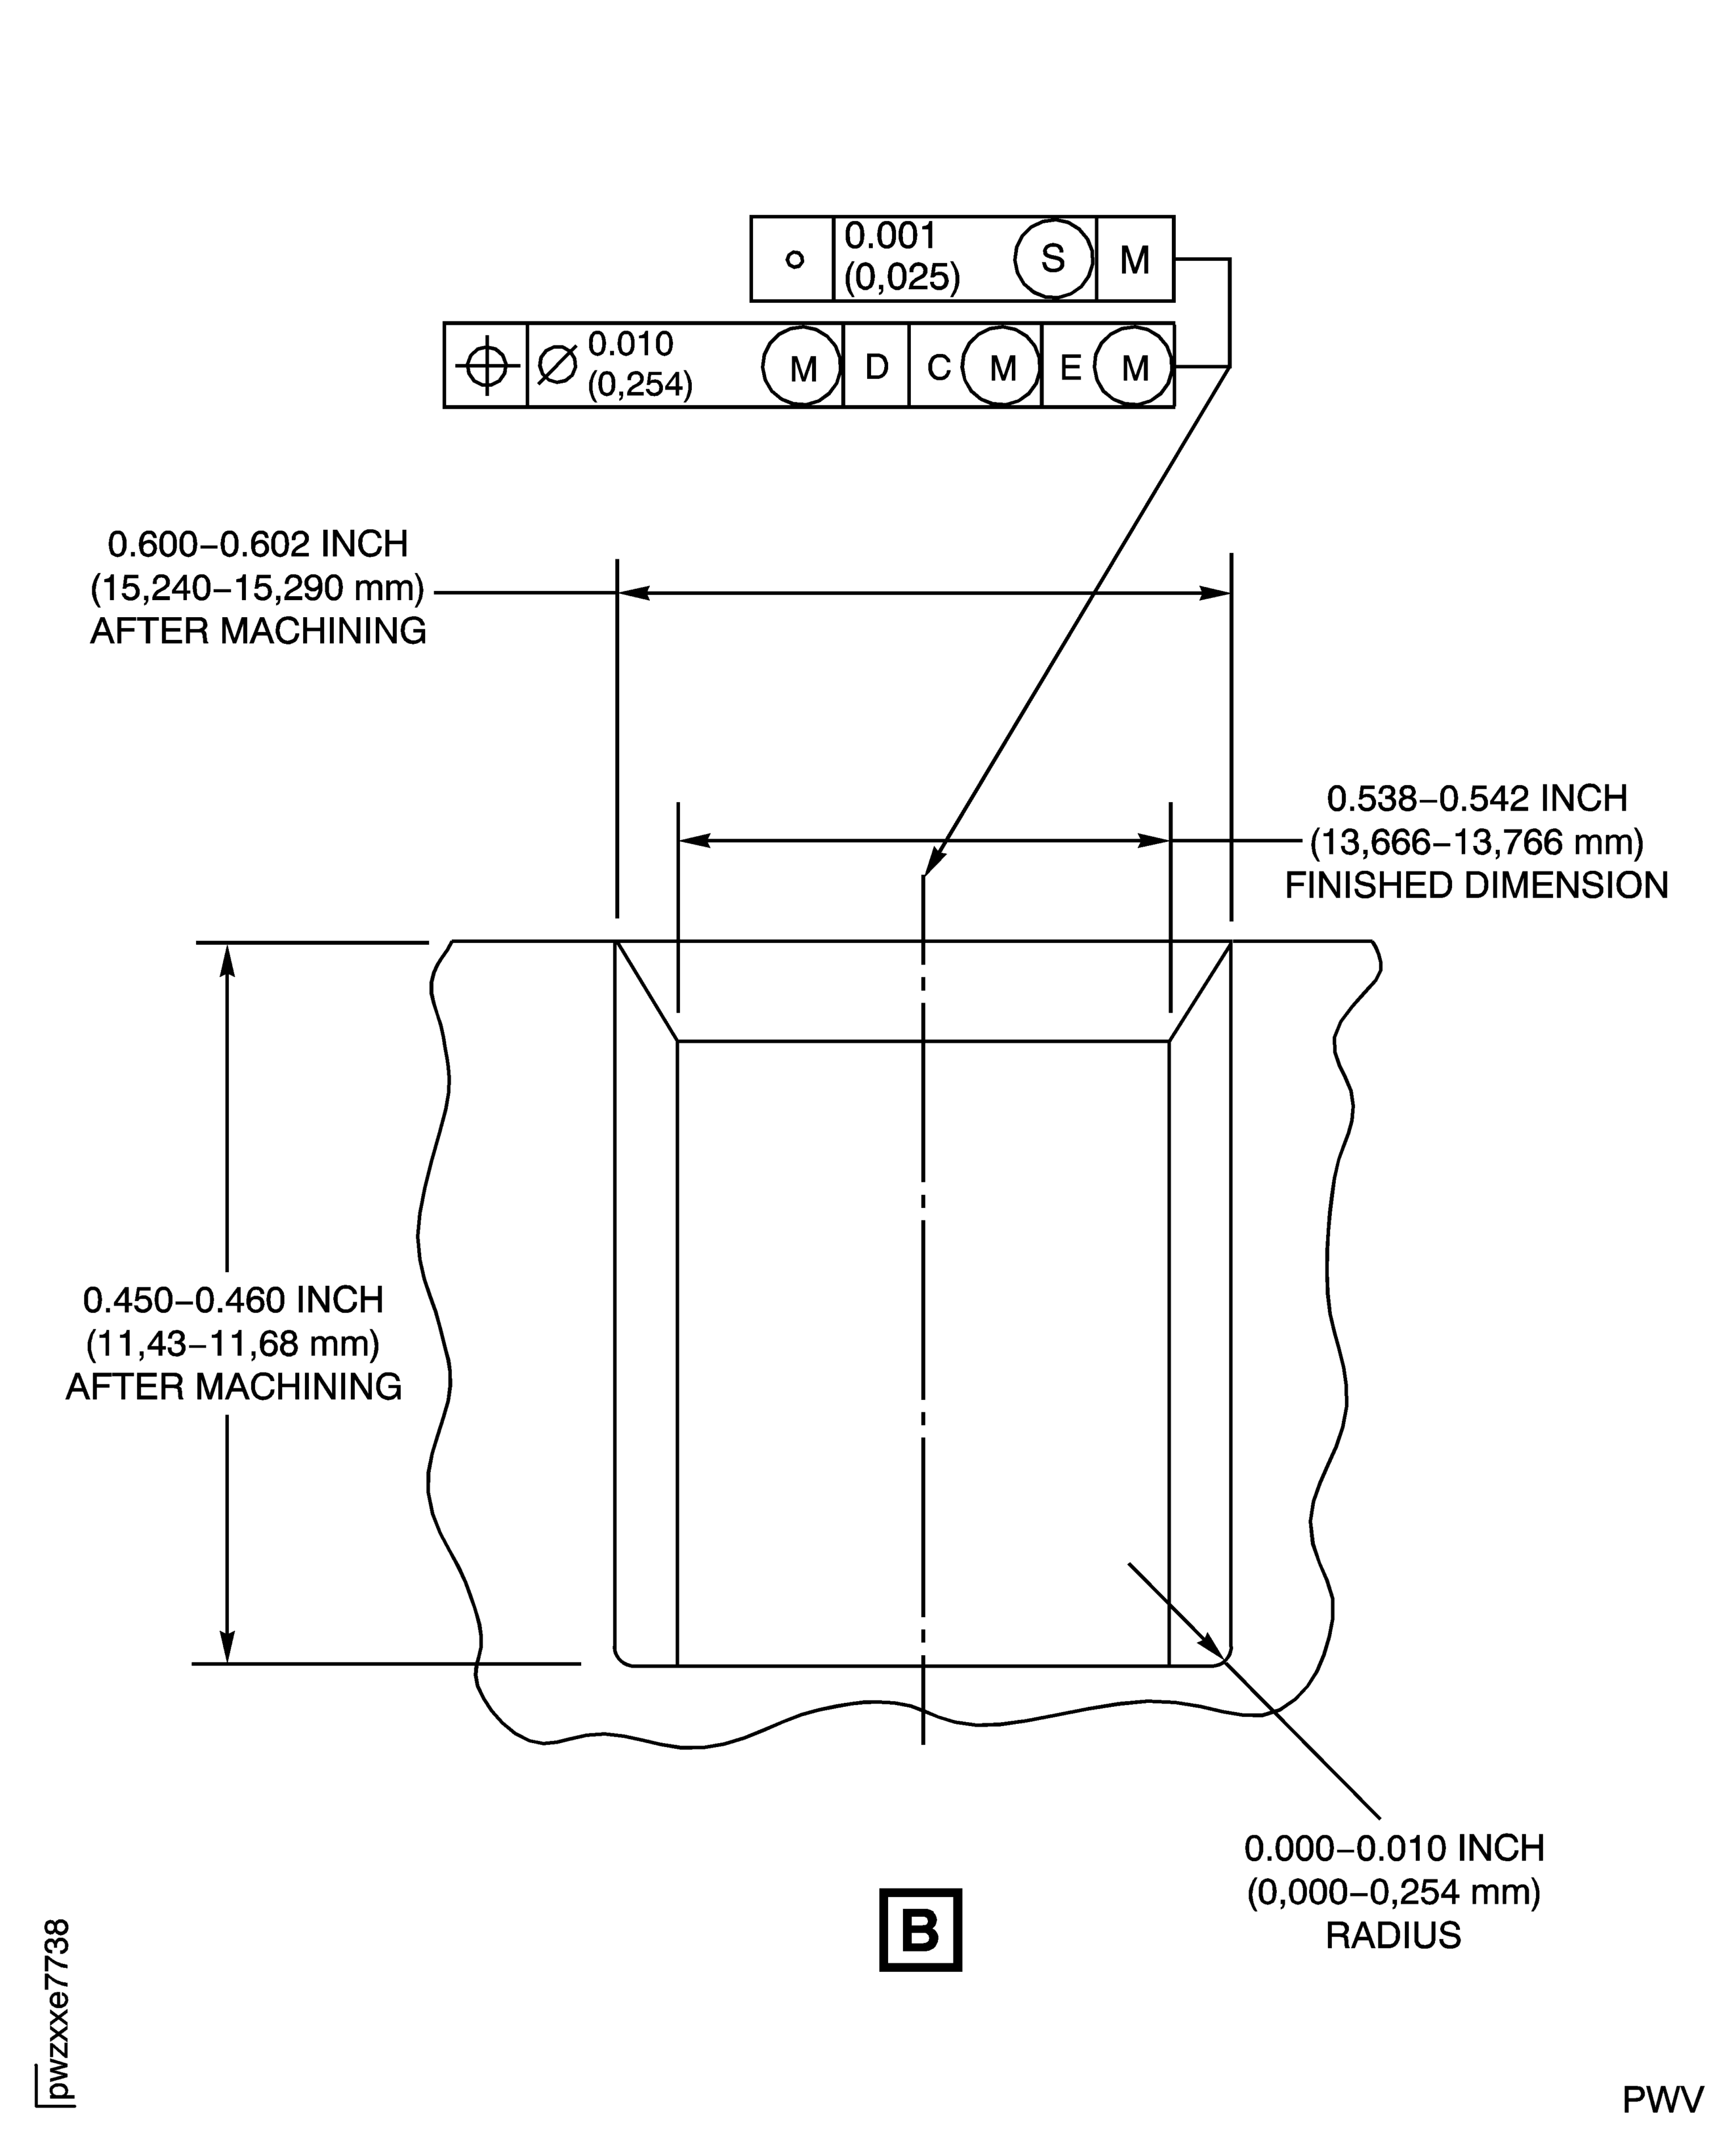
Refer to Figure.
SUBTASK 72-50-53-320-161 Make the Bushing Locally for the Oil Jet Mating Diameter
Make the bushing cool at a rate equal to or faster than qir cool.
Refer to the SPM TASK 70-37-28-370-501.
Austenize the bushing.
SUBTASK 72-50-53-370-094 Heat Treat the Bushing
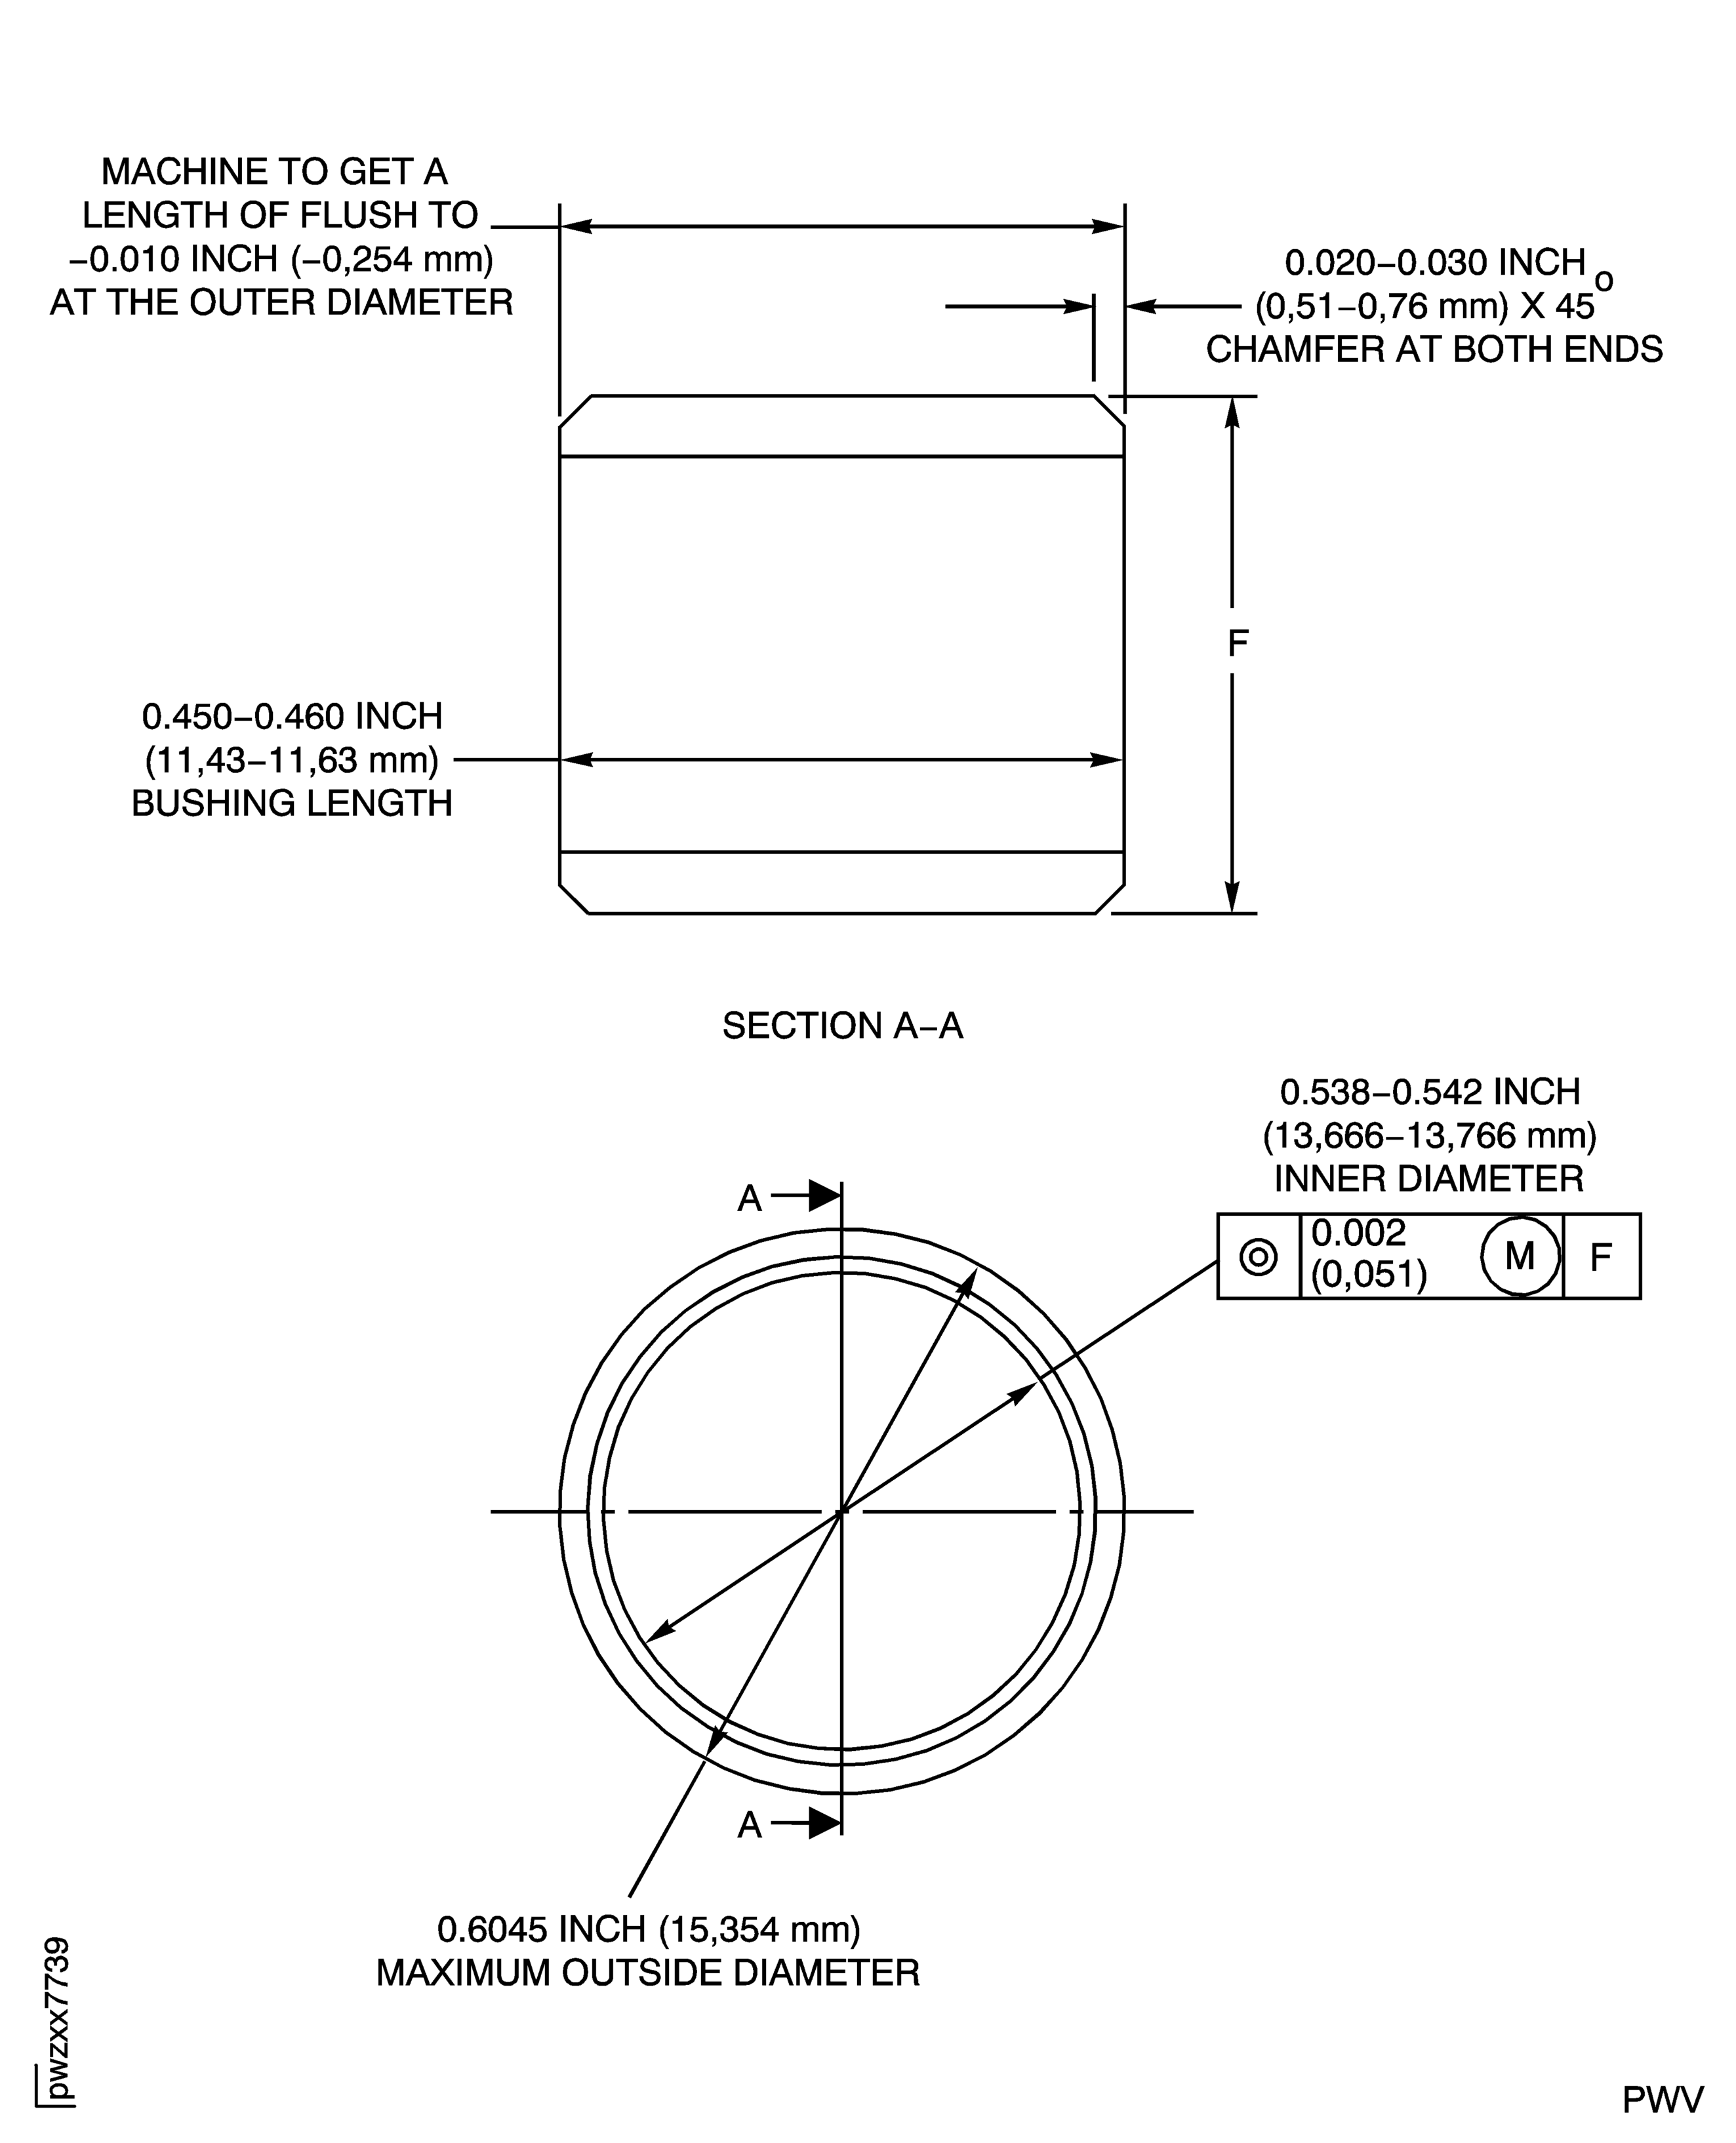
Refer to Figure.
SUBTASK 72-50-53-370-095 Machine the Outside Diameter of the Bushing
Refer to TASK 72-50-53-200-000 (INSPECTION/CHECK-000).
Examine the case after repair.
SUBTASK 72-50-53-220-248 Examine the Turbine Exhaust Case
Figure: Repair Details and Dimensions
Repair Details and Dimensions

Figure: Repair Details and Dimensions
Repair Details and Dimensions

Figure: Repair Details and Dimensions
Repair Details and Dimensions

