Export Control
EAR Export Classification: Not subject to the EAR per 15 C.F.R. Chapter 1, Part 734.3(b)(3), except for the following Service Bulletins which are currently published as EAR Export Classification 9E991: SBE70-0992, SBE72-0483, SBE72-0580, SBE72-0588, SBE72-0640, SBE73-0209, SBE80-0024 and SBE80-0025.Copyright
© IAE International Aero Engines AG (2001, 2014 - 2021) The information contained in this document is the property of © IAE International Aero Engines AG and may not be copied or used for any purpose other than that for which it is supplied without the express written authority of © IAE International Aero Engines AG. (This does not preclude use by engine and aircraft operators for normal instructional, maintenance or overhaul purposes.).Applicability
All
Common Information
TASK 72-50-53-300-045 Turbine Exhaust Case (TEC) - Blend Repair, Repair-045 (VRS3008)
Effectivity
FIG/ITEM PART NO. | |
|---|---|
21-300 | 2A1209-01 |
21-300 | 2A2620-01 |
21-300 | 2A3111-01 |
21-300 | 2A3183-01 |
21-300 | 2A3455-01 |
21-300 | 2A3183-101 |
21-300 | 2A4258-01 |
21-300 | 2A4263-01 |
Material of component
PART IDENT | SYMBOL | MATERIAL |
|---|---|---|
Turbine exhaust case assembly | - | Corrosion and heat resistant steel |
General
Price and availability - refer to IAE
The practices and processes referred to in this procedure by TASK numbers are in the SPM.
NOTE
Preliminary Requirements
Pre-Conditions
NONESupport Equipment
NONEConsumables, Materials and Expendables
| Name | Manufacturer | Part Number / Identification | Quantity | Remark |
|---|---|---|---|---|
| CoMat 06-064 FLUORESCENT PENETRANT (WATER WASHABLE MEDIUM SENSITIVITY) | LOCAL | CoMat 06-064 |
Spares
NONESafety Requirements
NONEProcedure
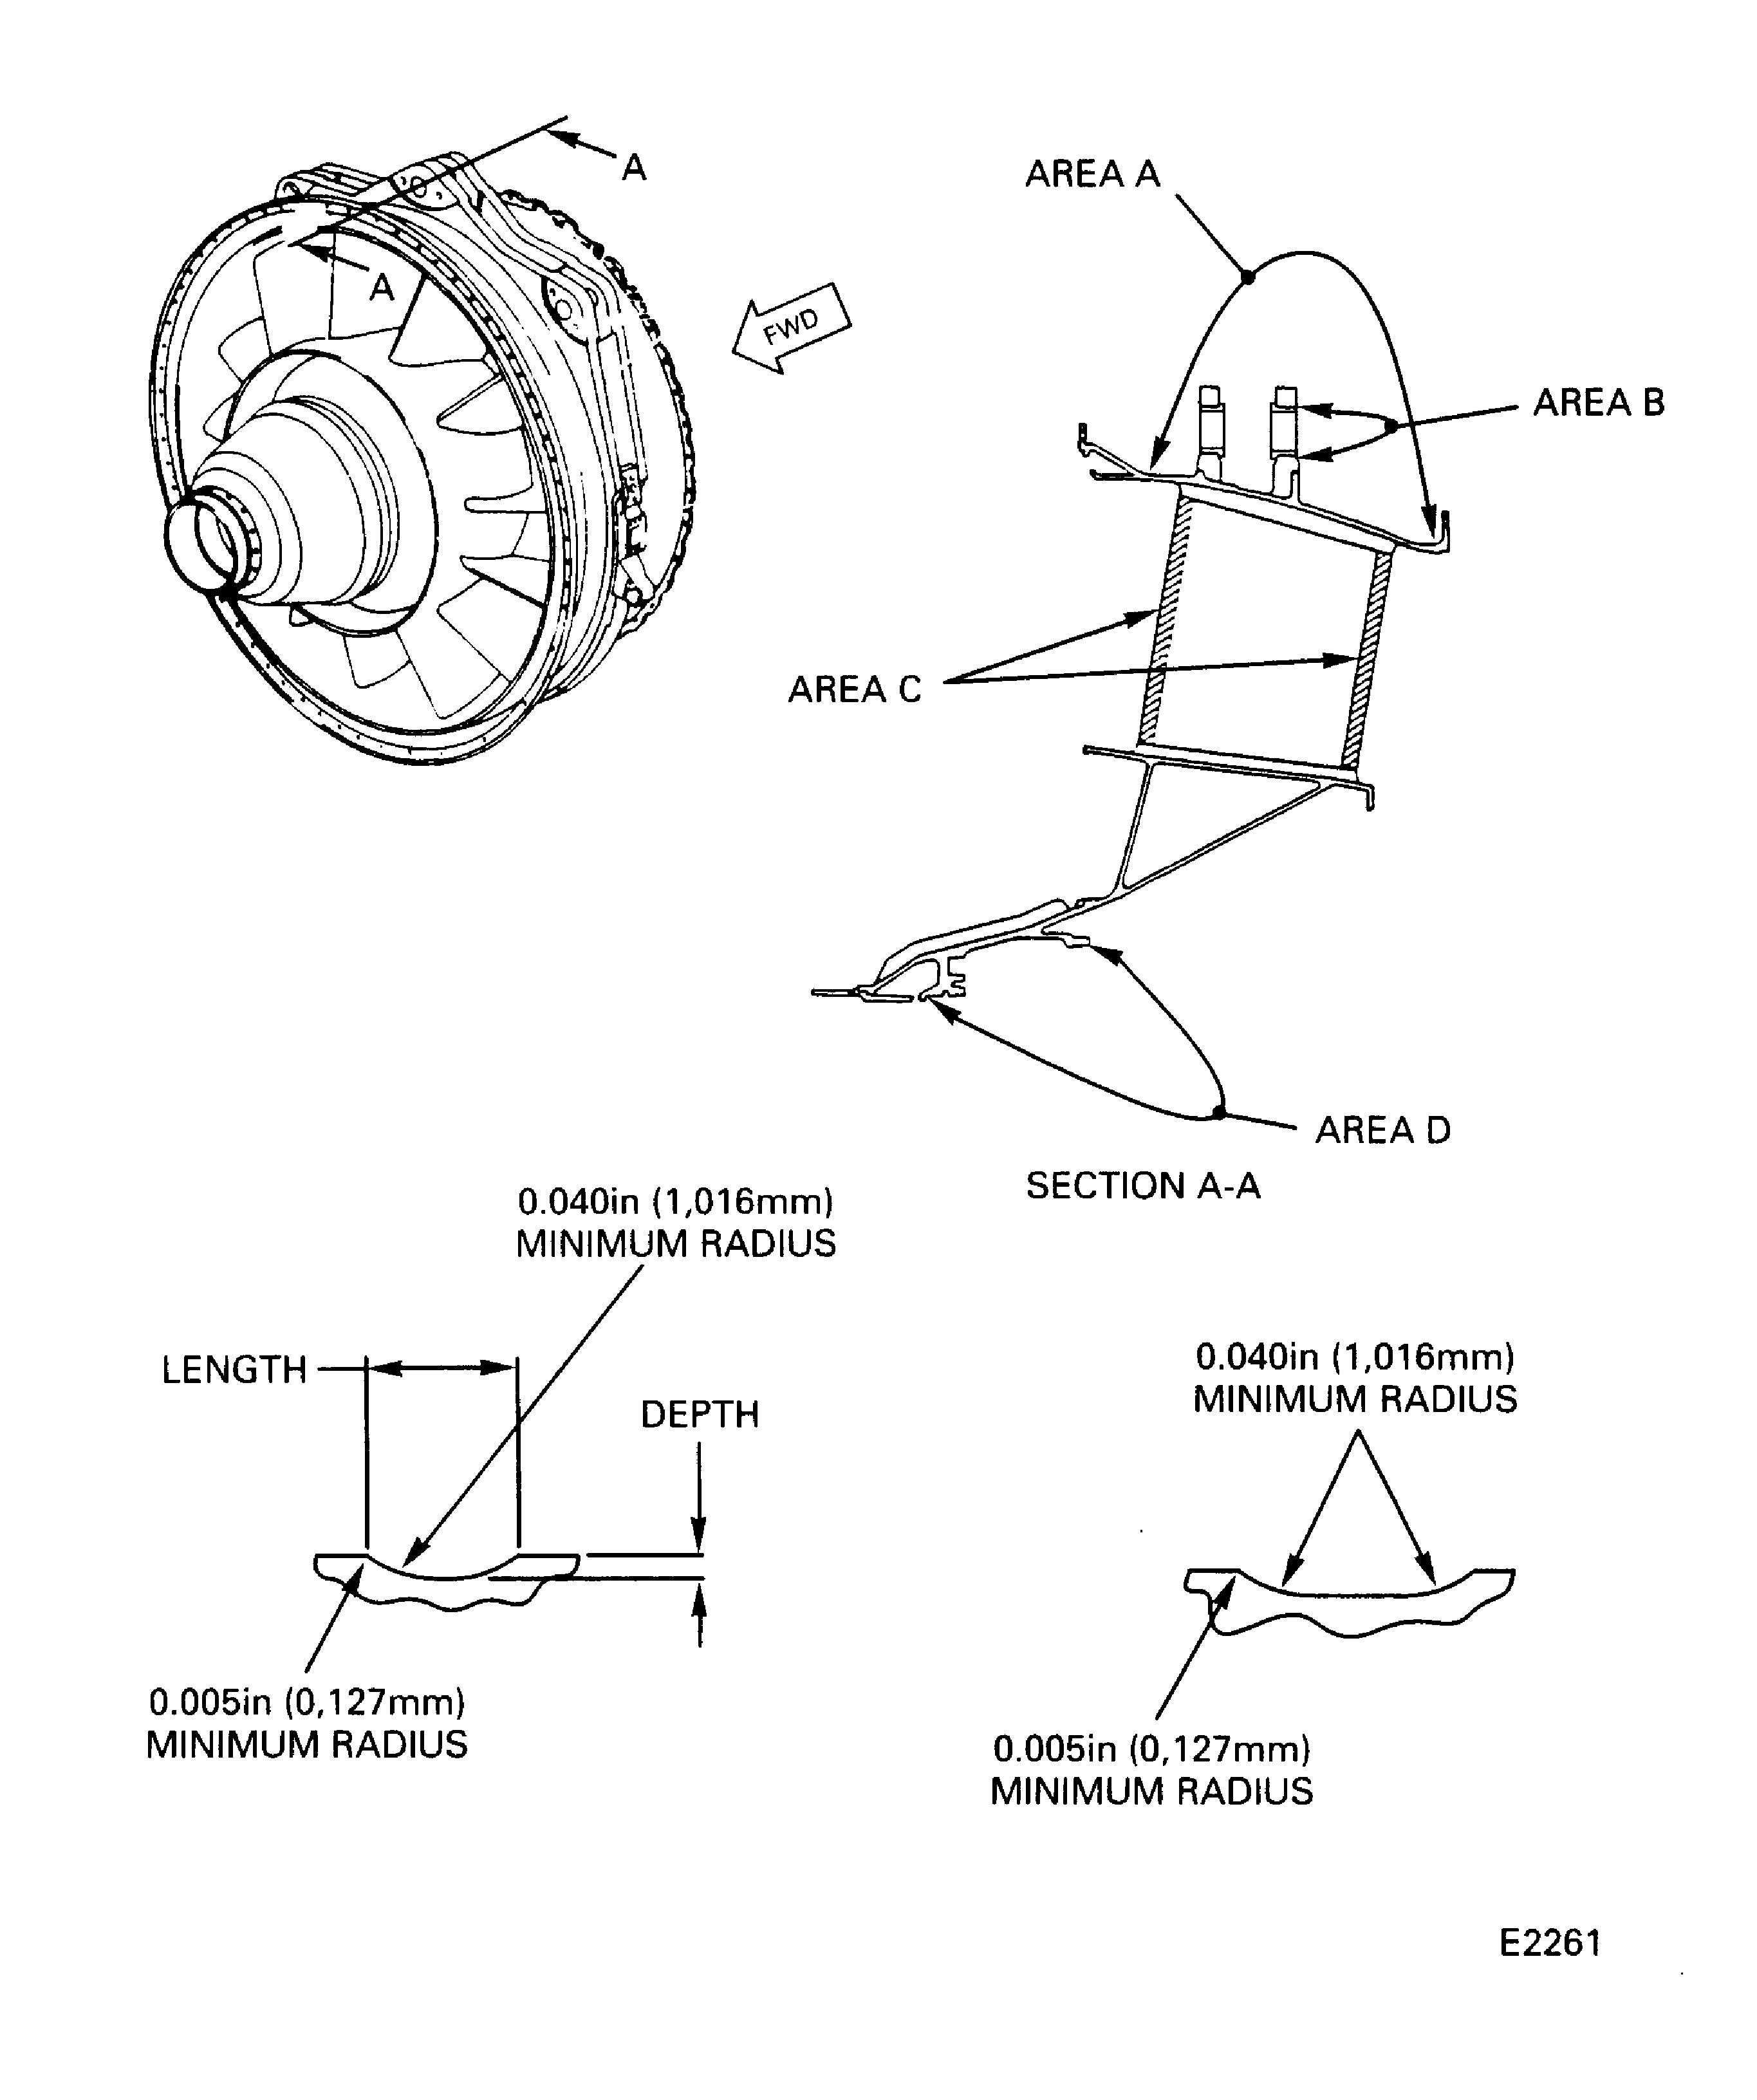
Refer to Figure.
Blend using the SPM TASK 70-35-21-350-501.
Blend in a circumferential direction.
Do not blend along the axis when you blend a cylindrically-shaped part.
The length to depth ratio of a blend must be a minimum of 10 to 1.
The minimum distance between blends must be 0.500 in. (12.70 mm).
When two or more damaged areas are near each other, blend the areas together.
Put the surface texture back to that of the adjacent areas without damage.
General.
Blend the damaged surfaces on the turbine exhaust case. Refer to Figure.
Maximum blend depth is 0.0150 in. (0.381 mm).
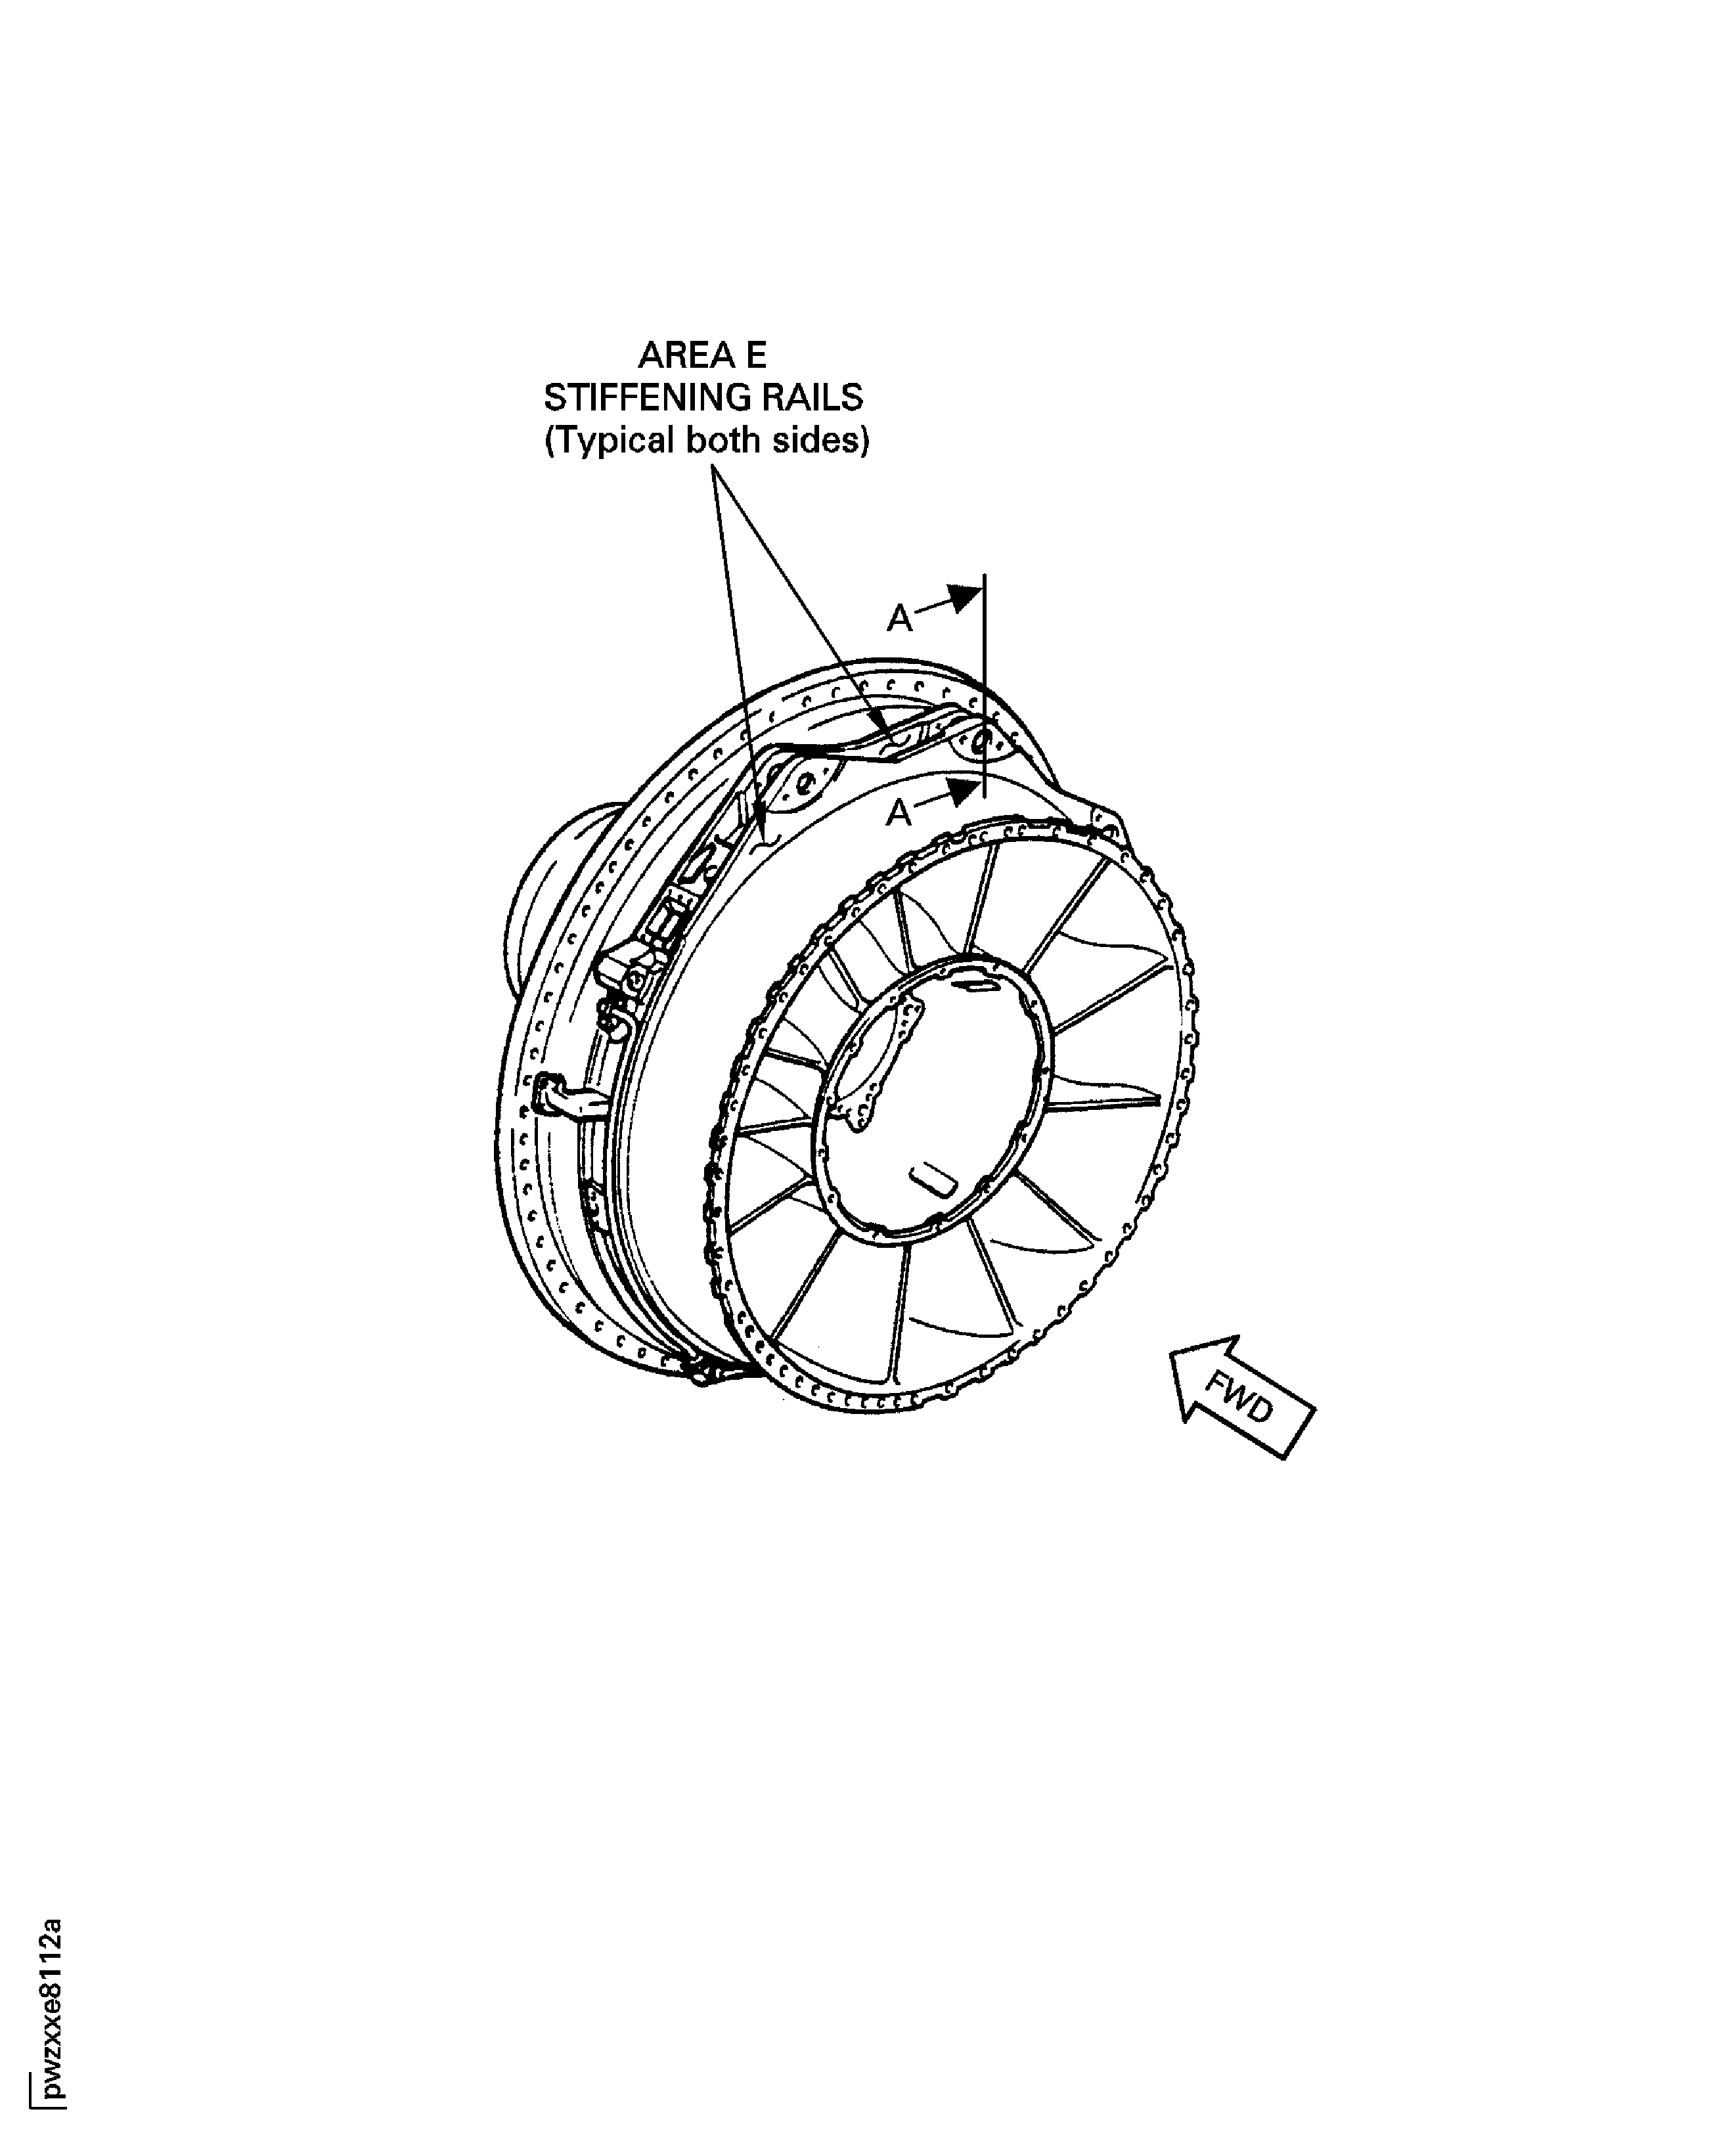
Bulging damage on the forward and aft sides of the rails can be blended as necessary. Blend the bulges to be flush with rail areas that do not have damage. Remove a minimum amount of parent material.
Local minimum rail thickness must not be less than 0.150 in. (3.81 mm) after blend repair.
Blend the damage in Area E, both stiffening rails.
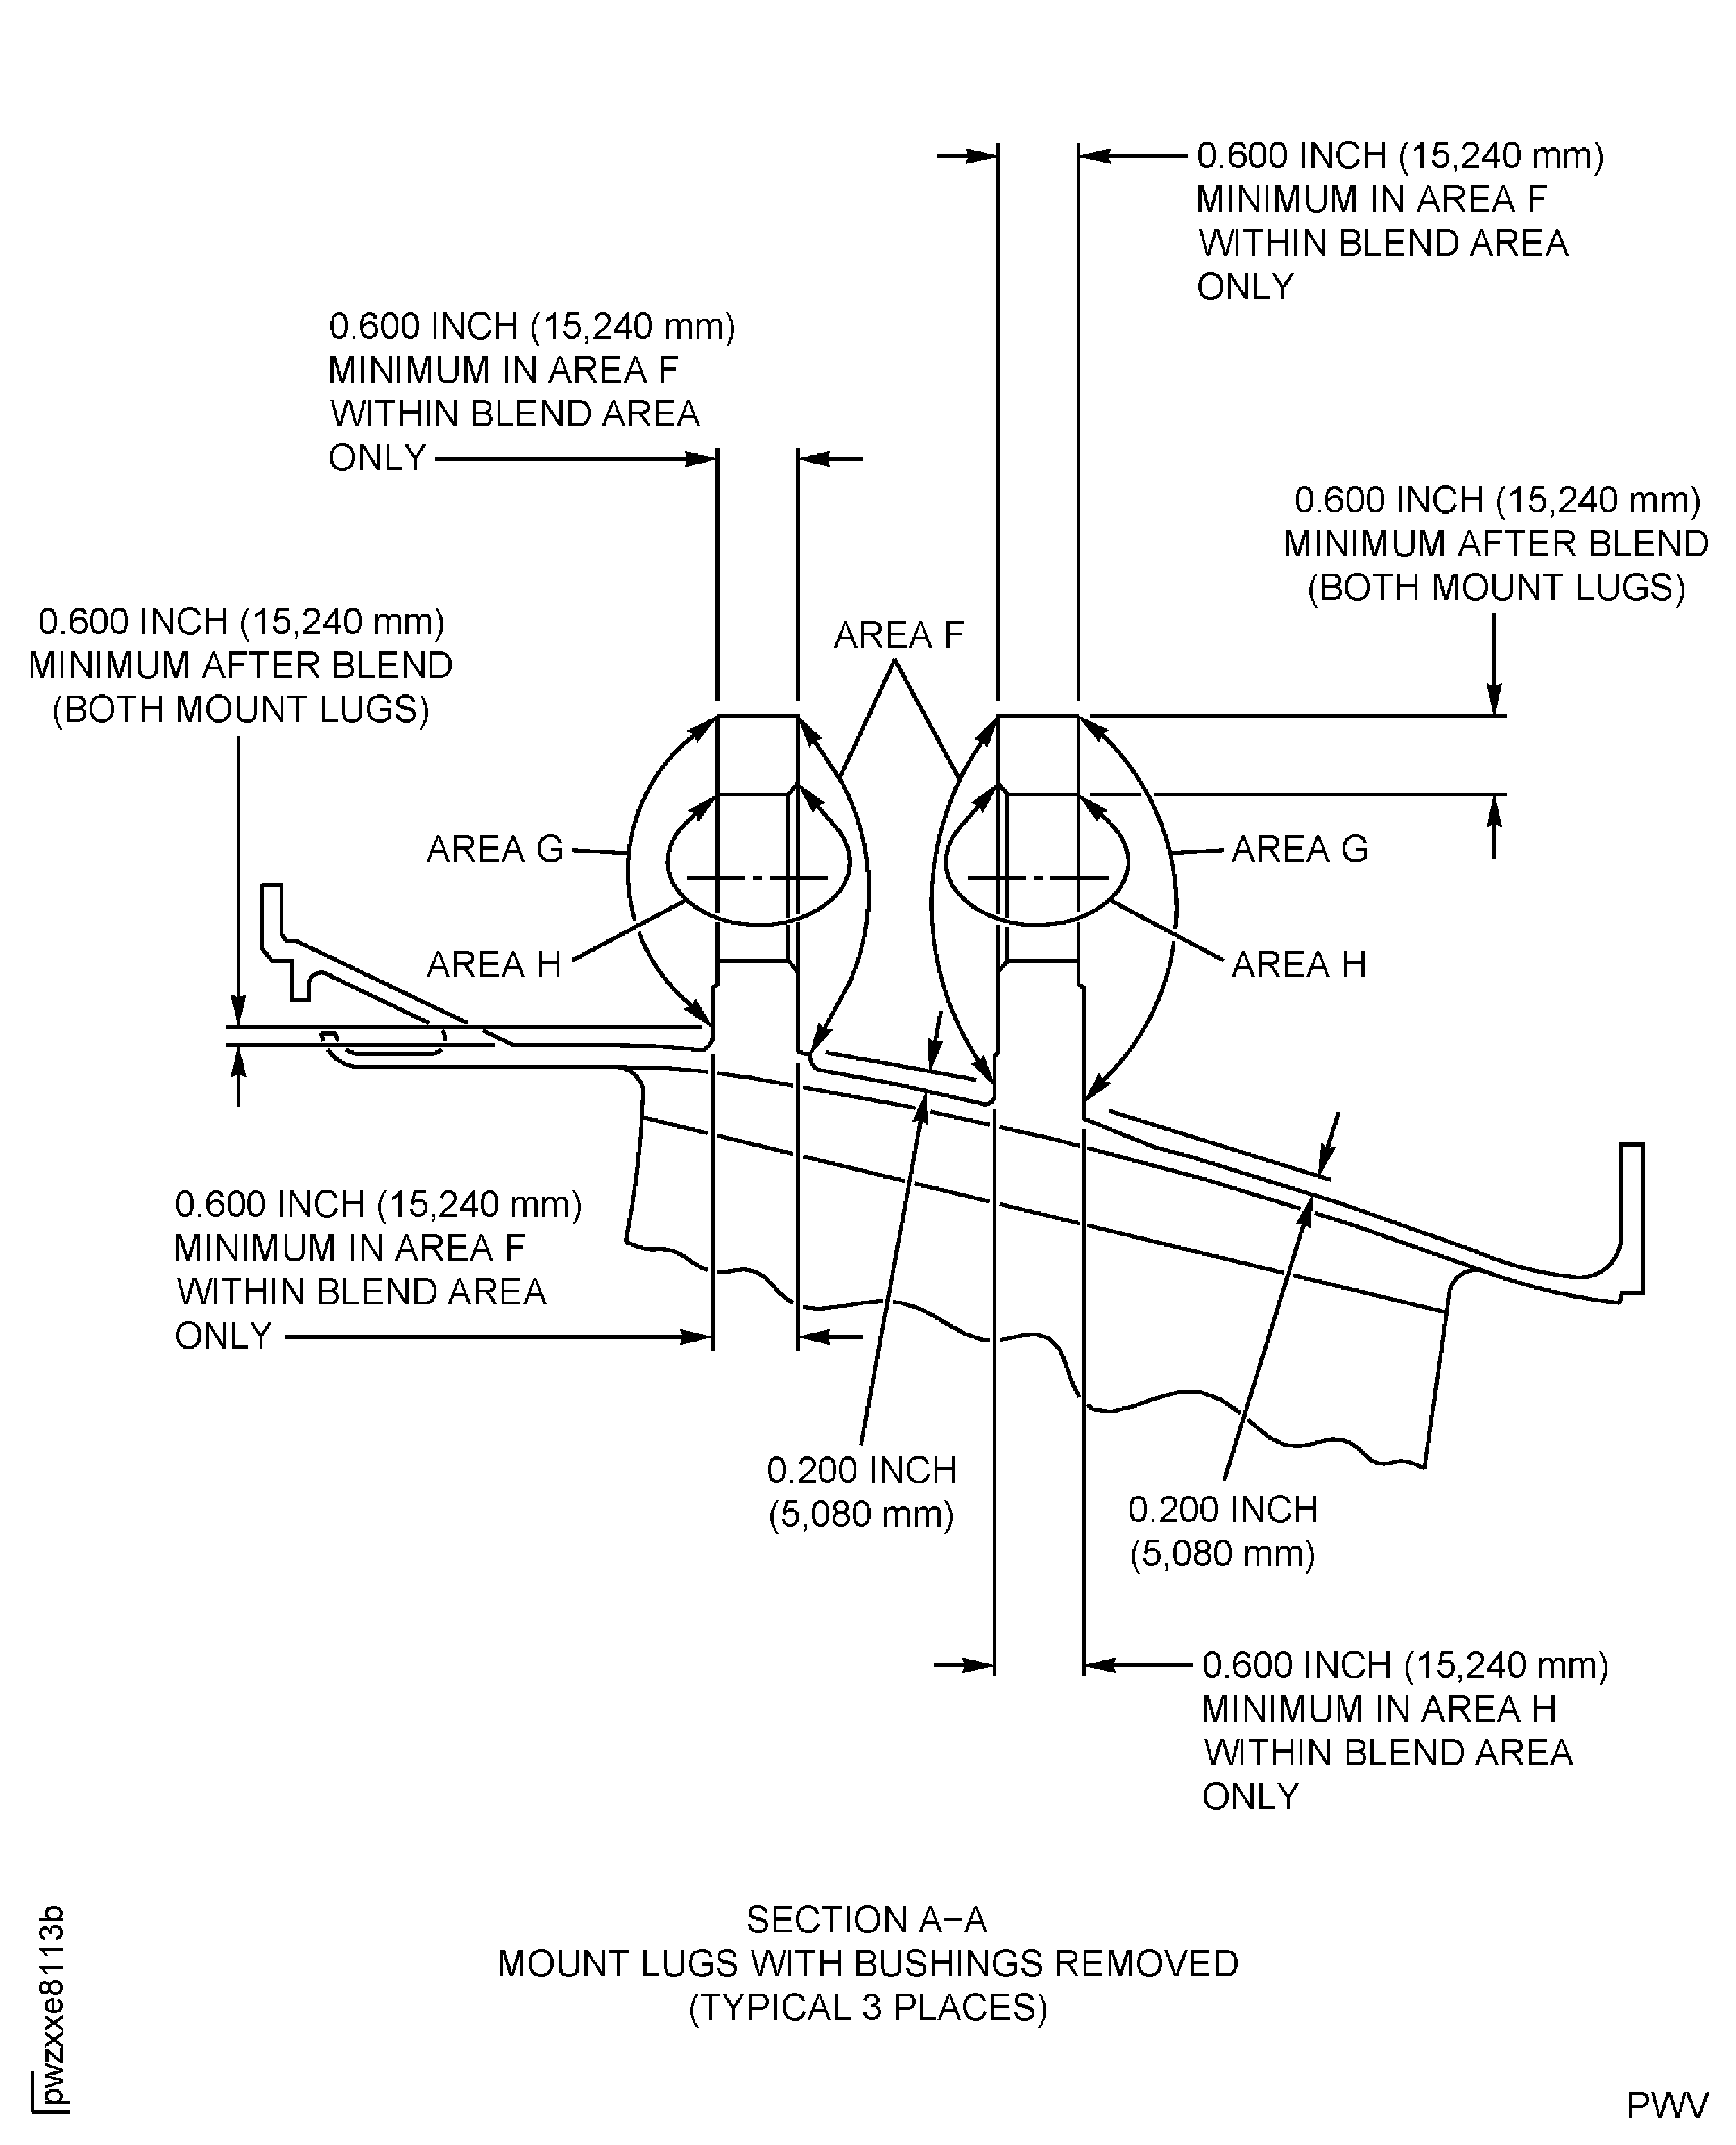
Blend the damaged surfaces on the stiffening rails and the mount lugs. Refer to Figure.
SUBTASK 72-50-53-350-085 Blend the Damaged Surfaces on the Turbine Exhaust Case
Refer to the SPM TASK 70-23-05-230-501. Use CoMat 06-064 FLUORESCENT PENETRANT (WATER WASHABLE MEDIUM SENSITIVITY).
No cracks are permitted.
Do a fluorescent penetrant inspection after blend repair.
SUBTASK 72-50-53-230-080 Examine the Repair
Figure: Repair Details and Dimensions
Repair Details and Dimensions

Figure: Repair Details and Dimensions
Sheet 1

Figure: Repair Details and Dimensions
Sheet 2

