Export Control
EAR Export Classification: Not subject to the EAR per 15 C.F.R. Chapter 1, Part 734.3(b)(3), except for the following Service Bulletins which are currently published as EAR Export Classification 9E991: SBE70-0992, SBE72-0483, SBE72-0580, SBE72-0588, SBE72-0640, SBE73-0209, SBE80-0024 and SBE80-0025.Copyright
© IAE International Aero Engines AG (2001, 2014 - 2021) The information contained in this document is the property of © IAE International Aero Engines AG and may not be copied or used for any purpose other than that for which it is supplied without the express written authority of © IAE International Aero Engines AG. (This does not preclude use by engine and aircraft operators for normal instructional, maintenance or overhaul purposes.).Applicability
All
Common Information
TASK 72-60-21-300-002 Main Gearbox Casing - Blend Repair, Repair-002 (VRS5253)
Effectivity
FIG/ITEM | PART NO. |
|---|---|
02-050 | 4B0053 |
02-050 | 4B0054 |
02-050 | 4B0055 |
02-050 | 4B0057 |
02-050 | 4B0400 |
02-050 | 4B0402 |
02-050 | 4B0423 |
Material of component
DESCRIPTION | RR SYMBOL | MATERIAL |
|---|---|---|
Accessory gearbox casing | A357/T61 (AMS4219) | Aluminum alloy |
General
The practices and processes referred to in the procedure by the TASK numbers are in SPM.
NOTE
Preliminary Requirements
Pre-Conditions
NONESupport Equipment
NONEConsumables, Materials and Expendables
| Name | Manufacturer | Part Number / Identification | Quantity | Remark |
|---|---|---|---|---|
| CoMat 02-140 TRIANGULAR INDIA STONE, FINE GRIT | LOCAL | CoMat 02-140 |
Spares
NONESafety Requirements
NONEProcedure
The remaining wall thickness after blend is completed is a minimum of 0.118 in. (3 mm).
The blend area with thickness less than 0.157 in. (4 mm) is not more than 1.55 sq.in. (10 sq.cm.).
The blend area has a gradually change in thickness.
Adjacent blends are separated by a minimum of 0.394 in. (10 mm).
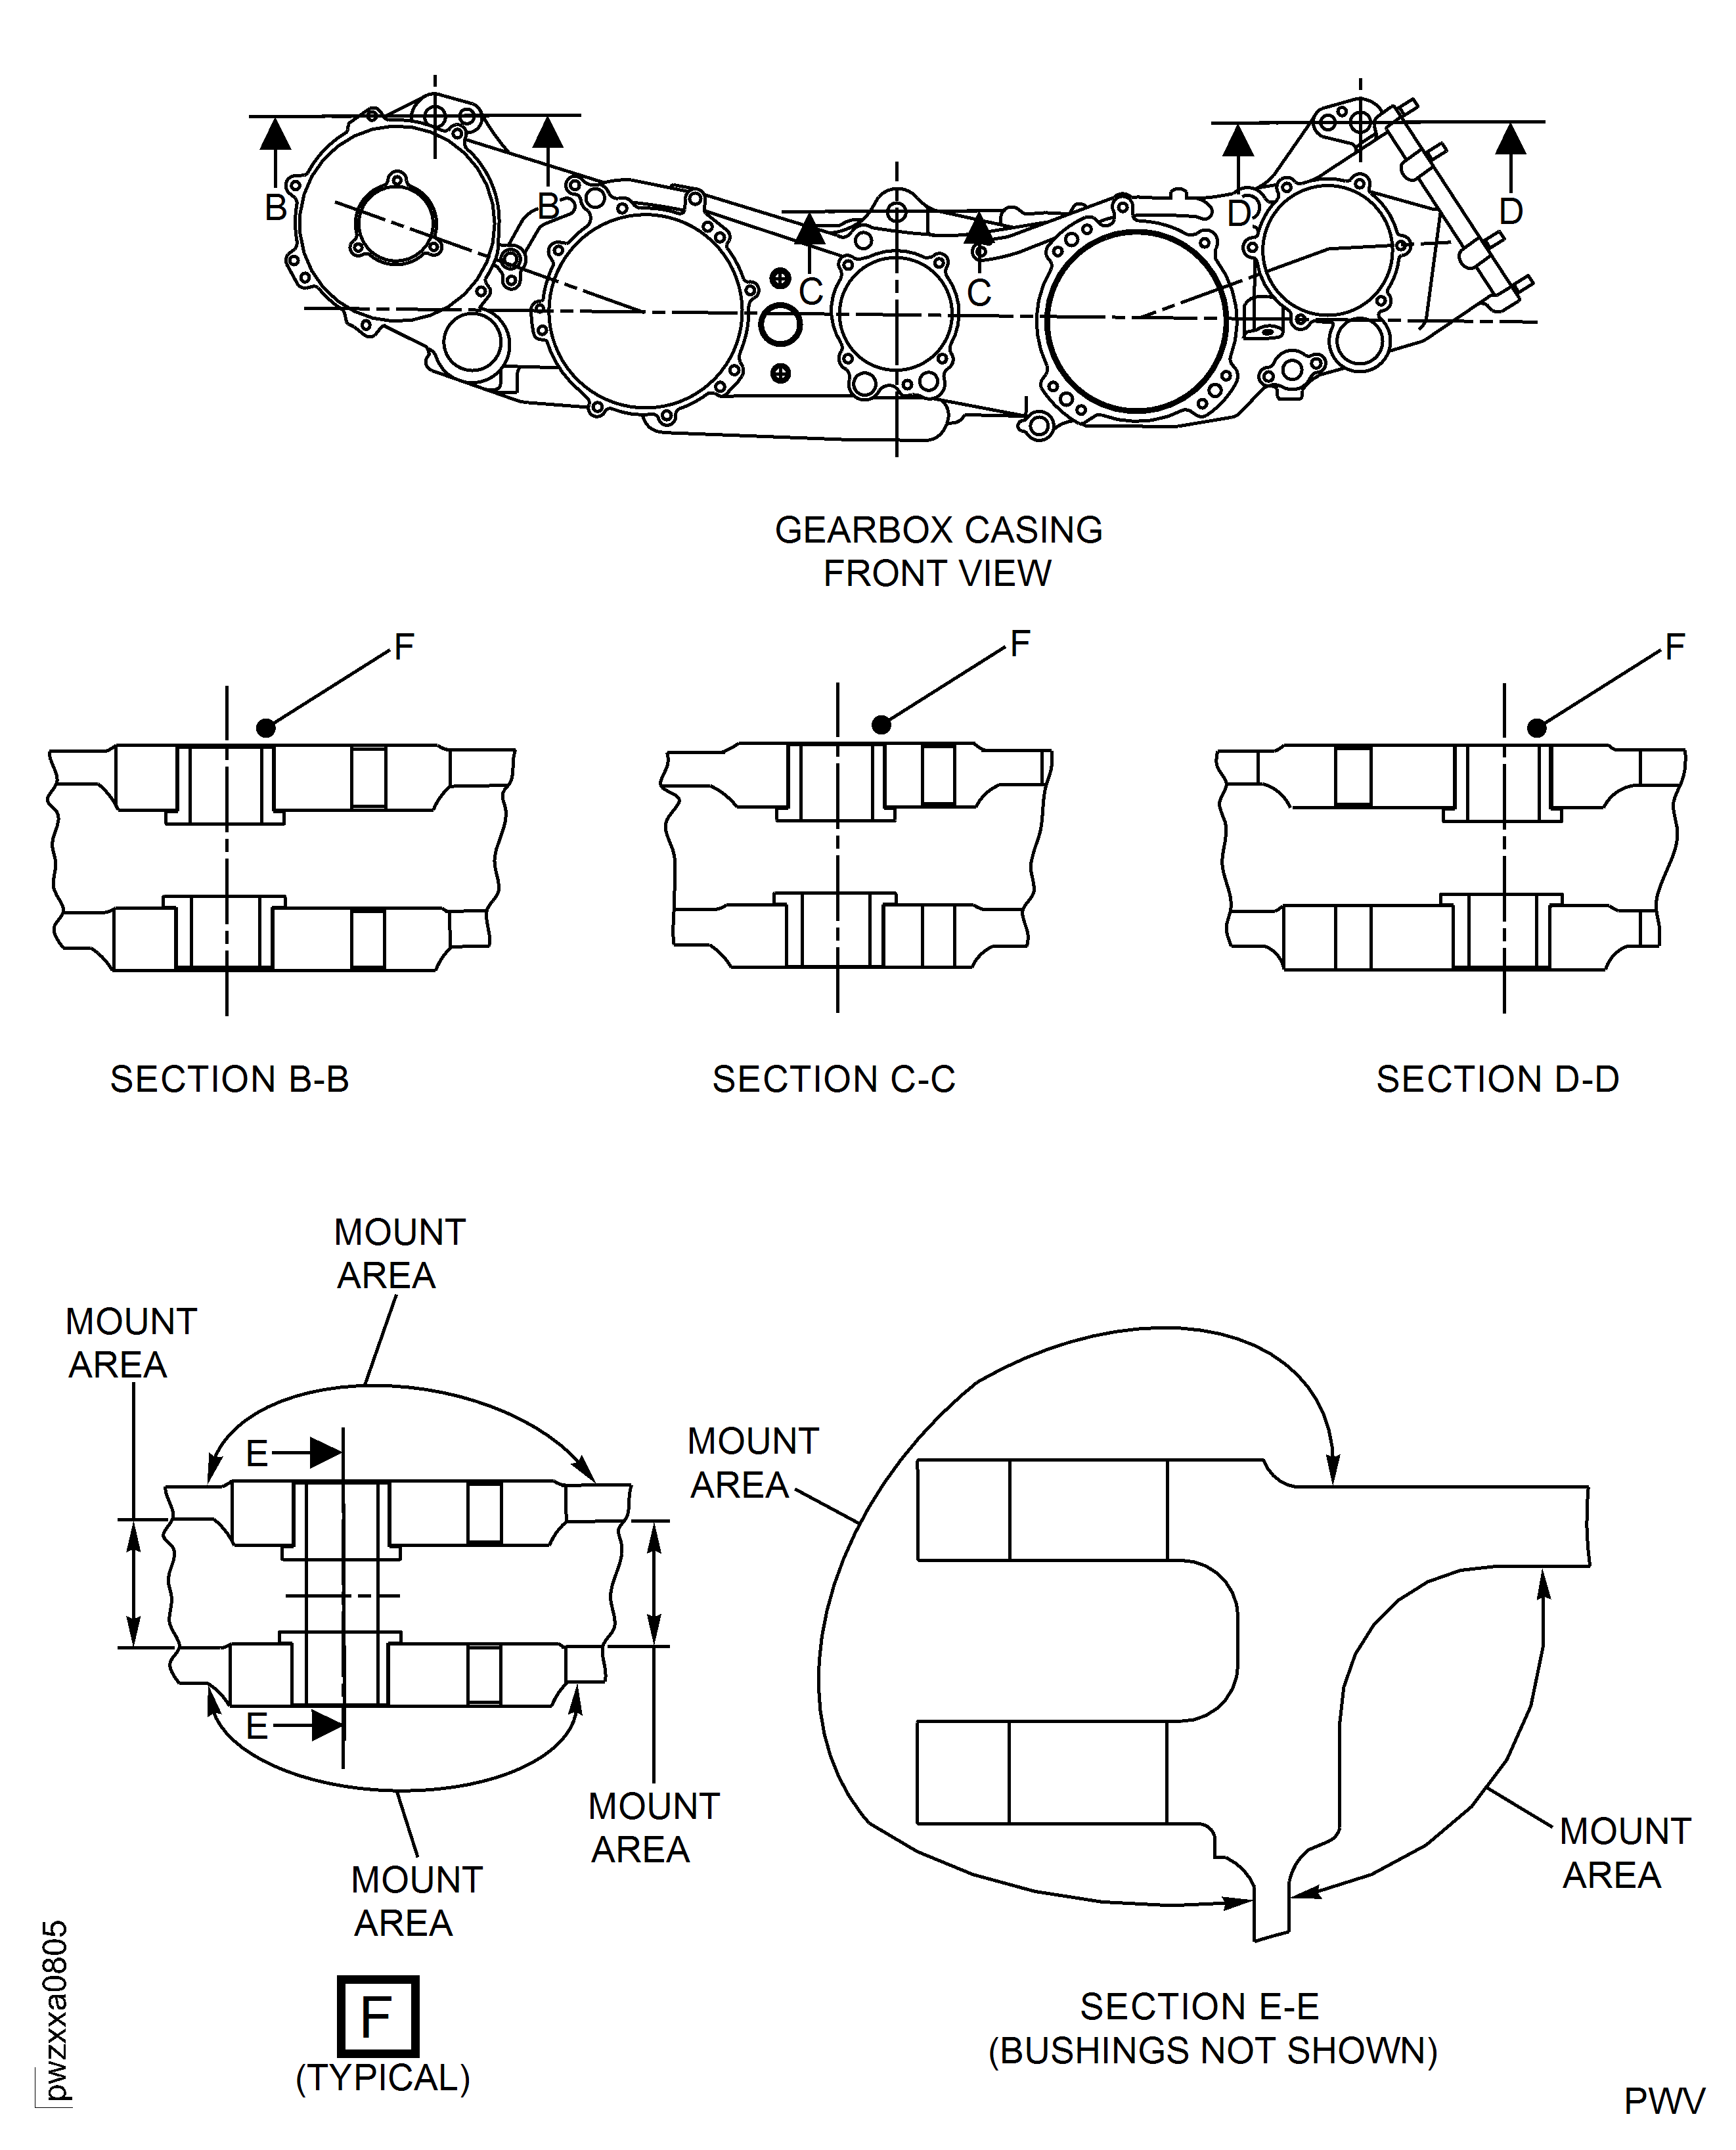
The blend area is not in a mount area.
A blend depth of more than 0.037 in. (0.94 mm) is permitted, if you obey all the conditions that follow:
Refer to the SPM TASK 70-35-03-300-501.
Hand polish and blend. The maximum depth of the blending is 0.037 in. (0.94 mm).
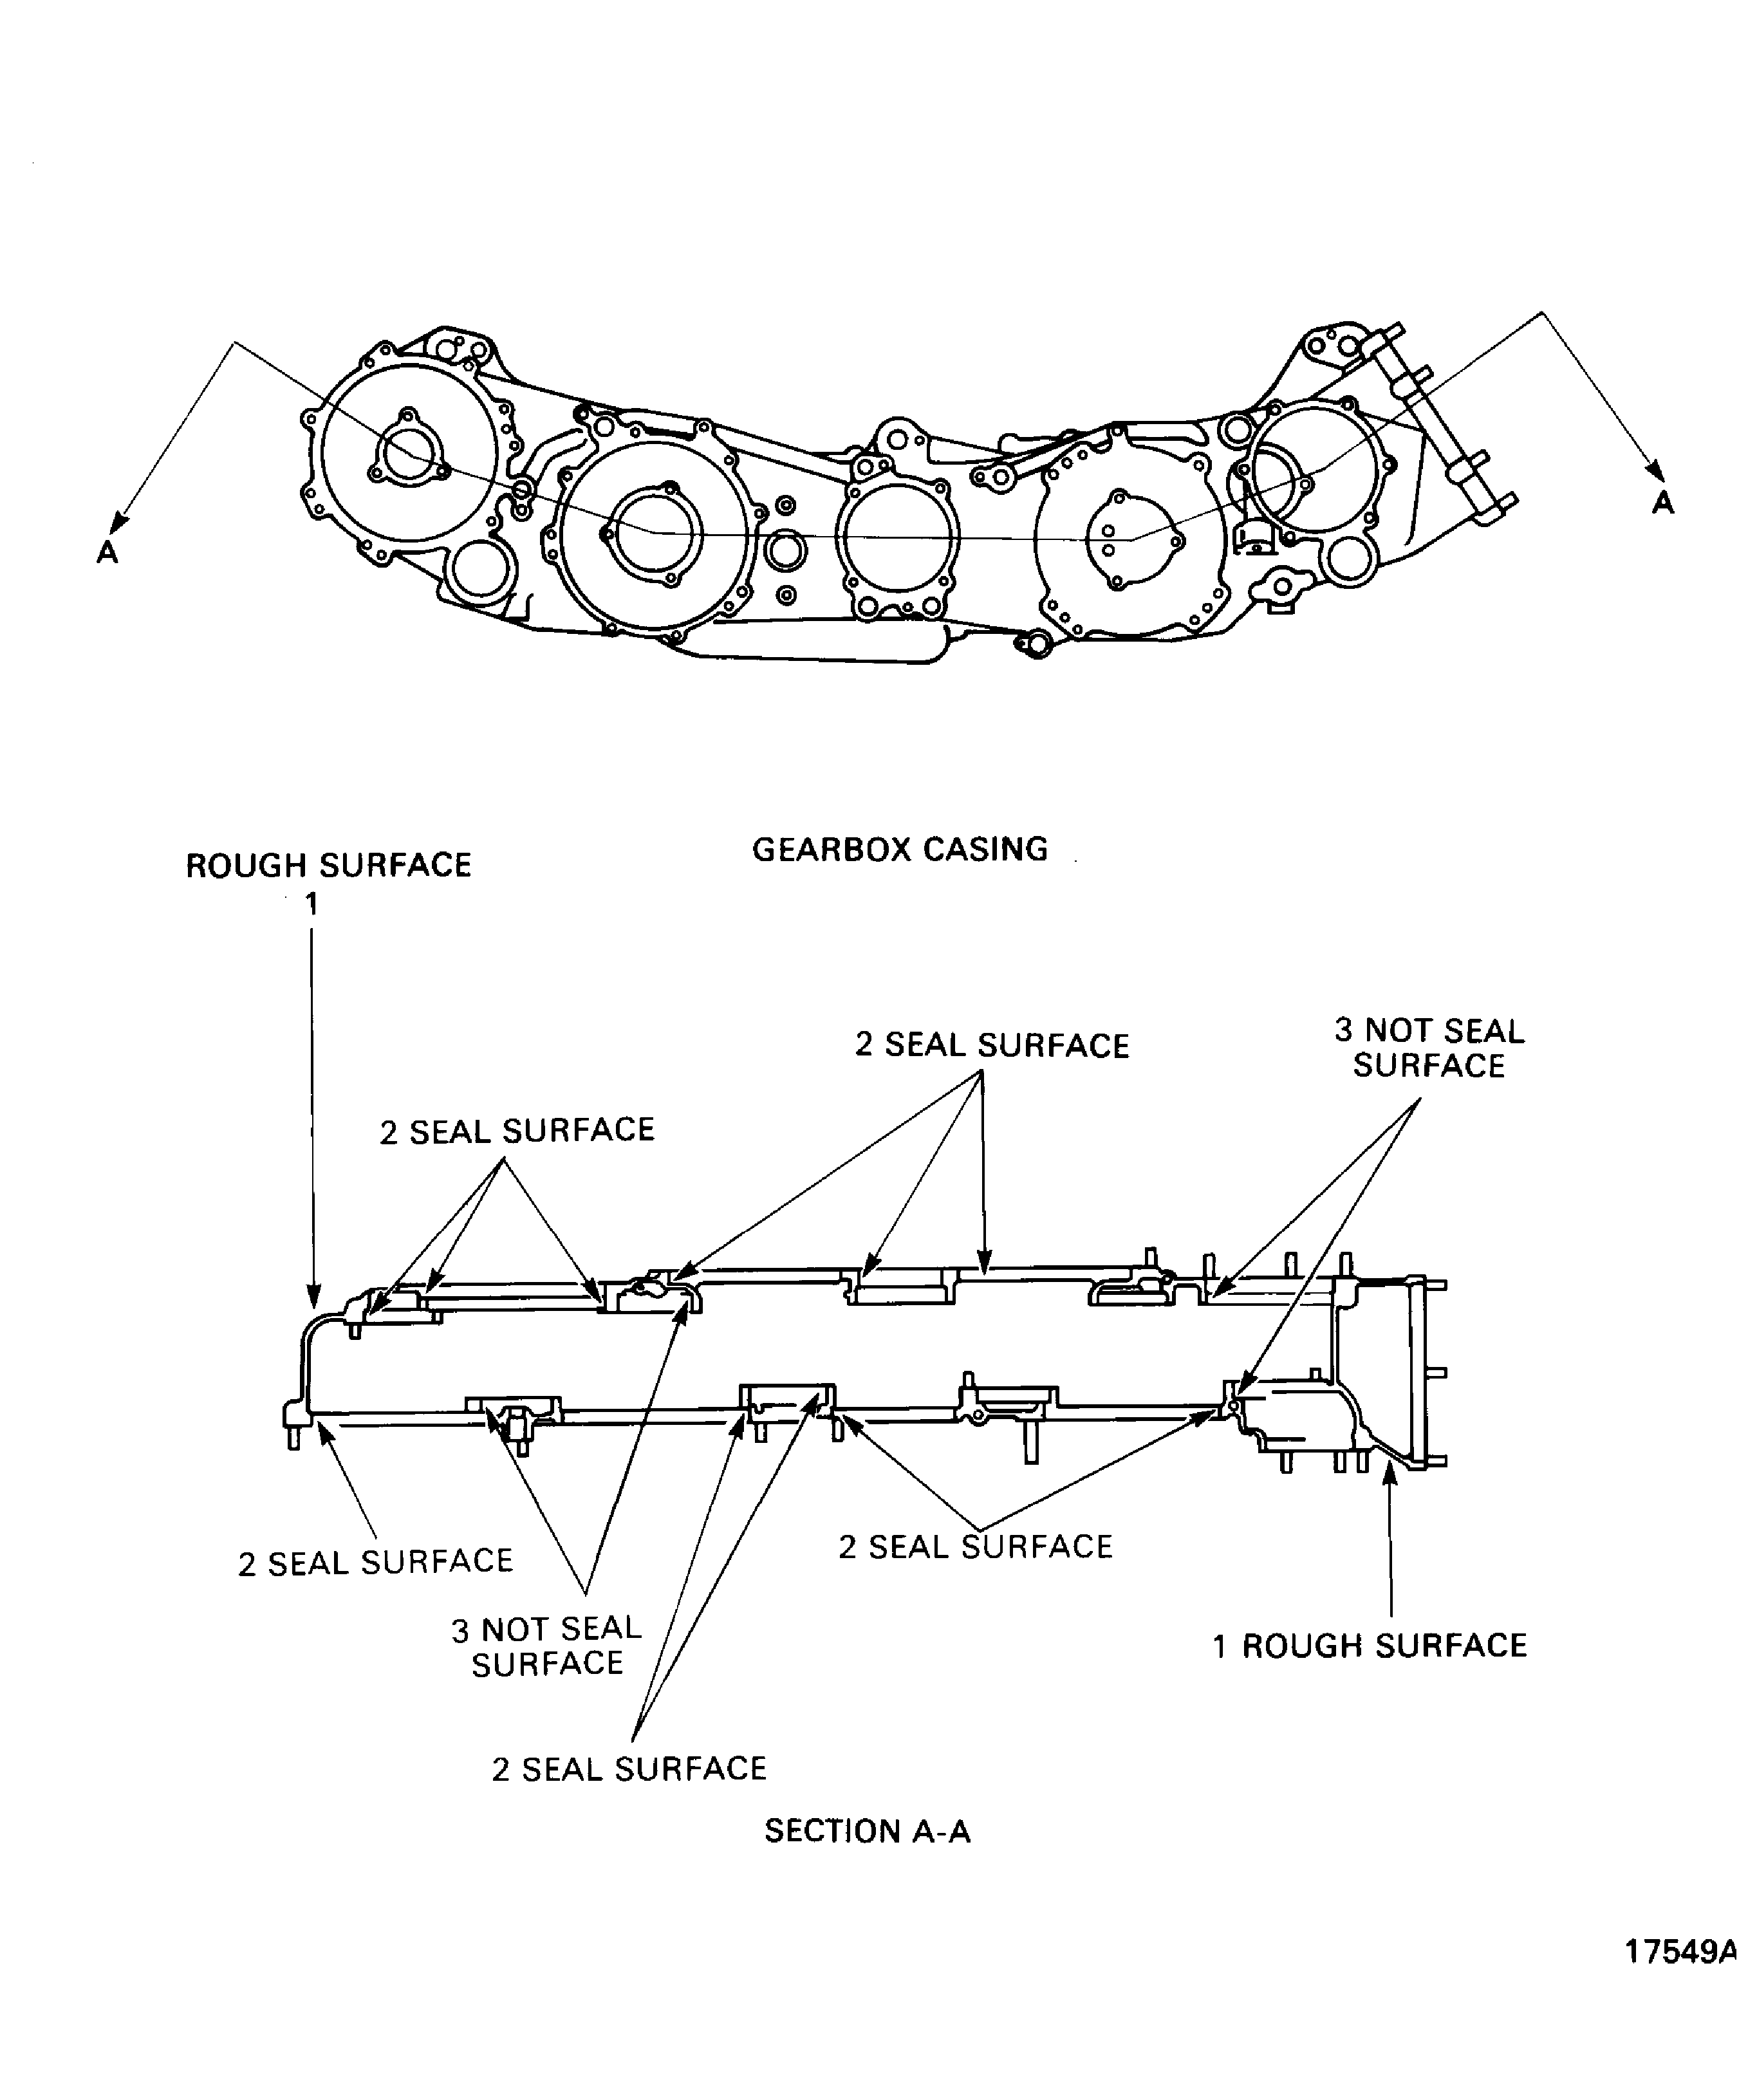
SUBTASK 72-60-21-350-051 Repair the Rough Surfaces - Location 1
Refer to Figure.
Refer to the SPM TASK 70-35-03-300-501.
Hand polish and blend. The maximum depth of the blending is 0.005 in. (0.13 mm).
Seal surfaces - location 2.
Refer to the SPM TASK 70-35-03-300-501.
Hand polish and blend. The maximum depth of the blending is 0.01 in. (0.25 mm).
Not seal surfaces - location 3.
SUBTASK 72-60-21-350-052 Repair the Machined Surfaces
Refer to Repair, VRS5254 TASK 72-60-21-300-003 (REPAIR-003).
SUBTASK 72-60-21-350-065 Repair the Surface Protection
Refer to Figure.
Refer to SPM TASK 70-35-03-300-501.
Hand polish and blend to remove high material and sharp corners. The maximum depth of the blending is 0.063 in. (1.60 mm).
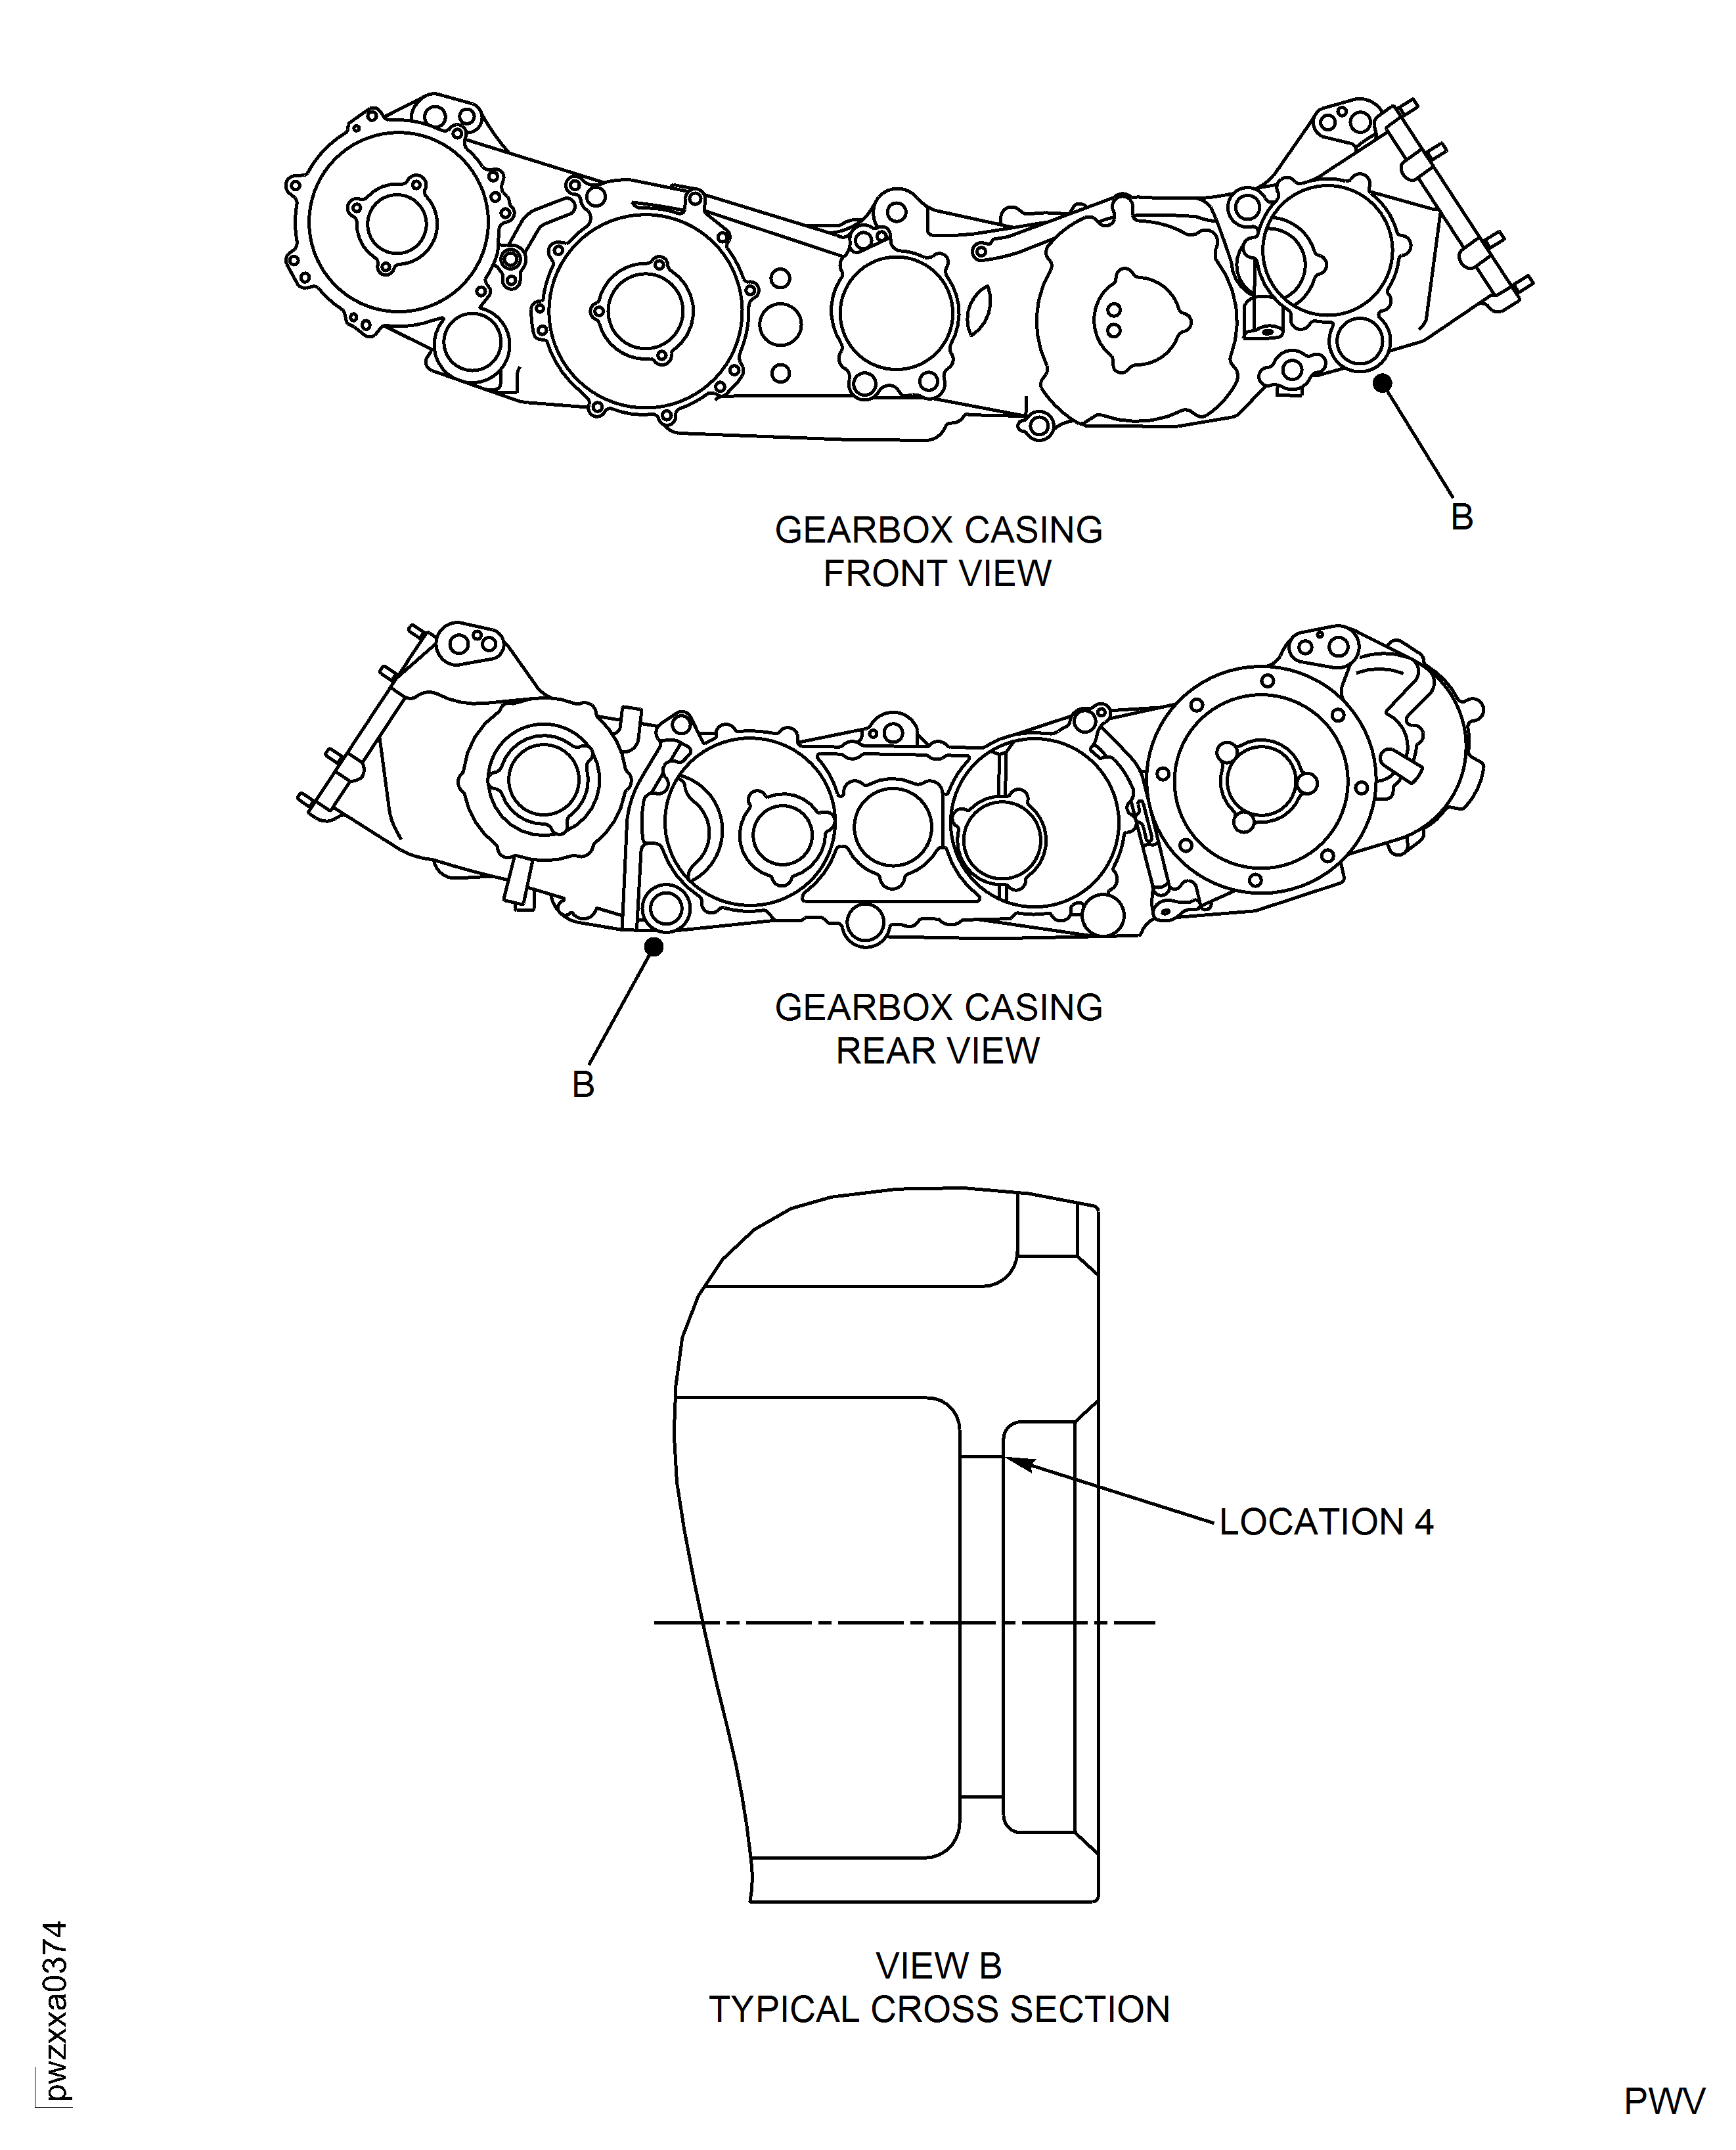
Strainer Locations - Location 4.
SUBTASK 72-60-21-350-209 Repair Damage at Strainer Locations
Figure: Repair Details And Dimensions
Repair Details And Dimensions

Figure: Repair Details And Dimensions
Repair Details And Dimensions

Figure: Repair Details And Dimensions
Repair Details And Dimensions

