Export Control
EAR Export Classification: Not subject to the EAR per 15 C.F.R. Chapter 1, Part 734.3(b)(3), except for the following Service Bulletins which are currently published as EAR Export Classification 9E991: SBE70-0992, SBE72-0483, SBE72-0580, SBE72-0588, SBE72-0640, SBE73-0209, SBE80-0024 and SBE80-0025.Copyright
© IAE International Aero Engines AG (2001, 2014 - 2021) The information contained in this document is the property of © IAE International Aero Engines AG and may not be copied or used for any purpose other than that for which it is supplied without the express written authority of © IAE International Aero Engines AG. (This does not preclude use by engine and aircraft operators for normal instructional, maintenance or overhaul purposes.).Applicability
All
Common Information
TASK 72-60-27-300-001 Starter Idler Gear - Blend Repair, Repair-001 (VRS5156)
General
NOTE
Preliminary Requirements
Pre-Conditions
NONESupport Equipment
NONEConsumables, Materials and Expendables
| Name | Manufacturer | Part Number / Identification | Quantity | Remark |
|---|---|---|---|---|
| CoMat 02-140 TRIANGULAR INDIA STONE, FINE GRIT | LOCAL | CoMat 02-140 |
Spares
NONESafety Requirements
NONEProcedure
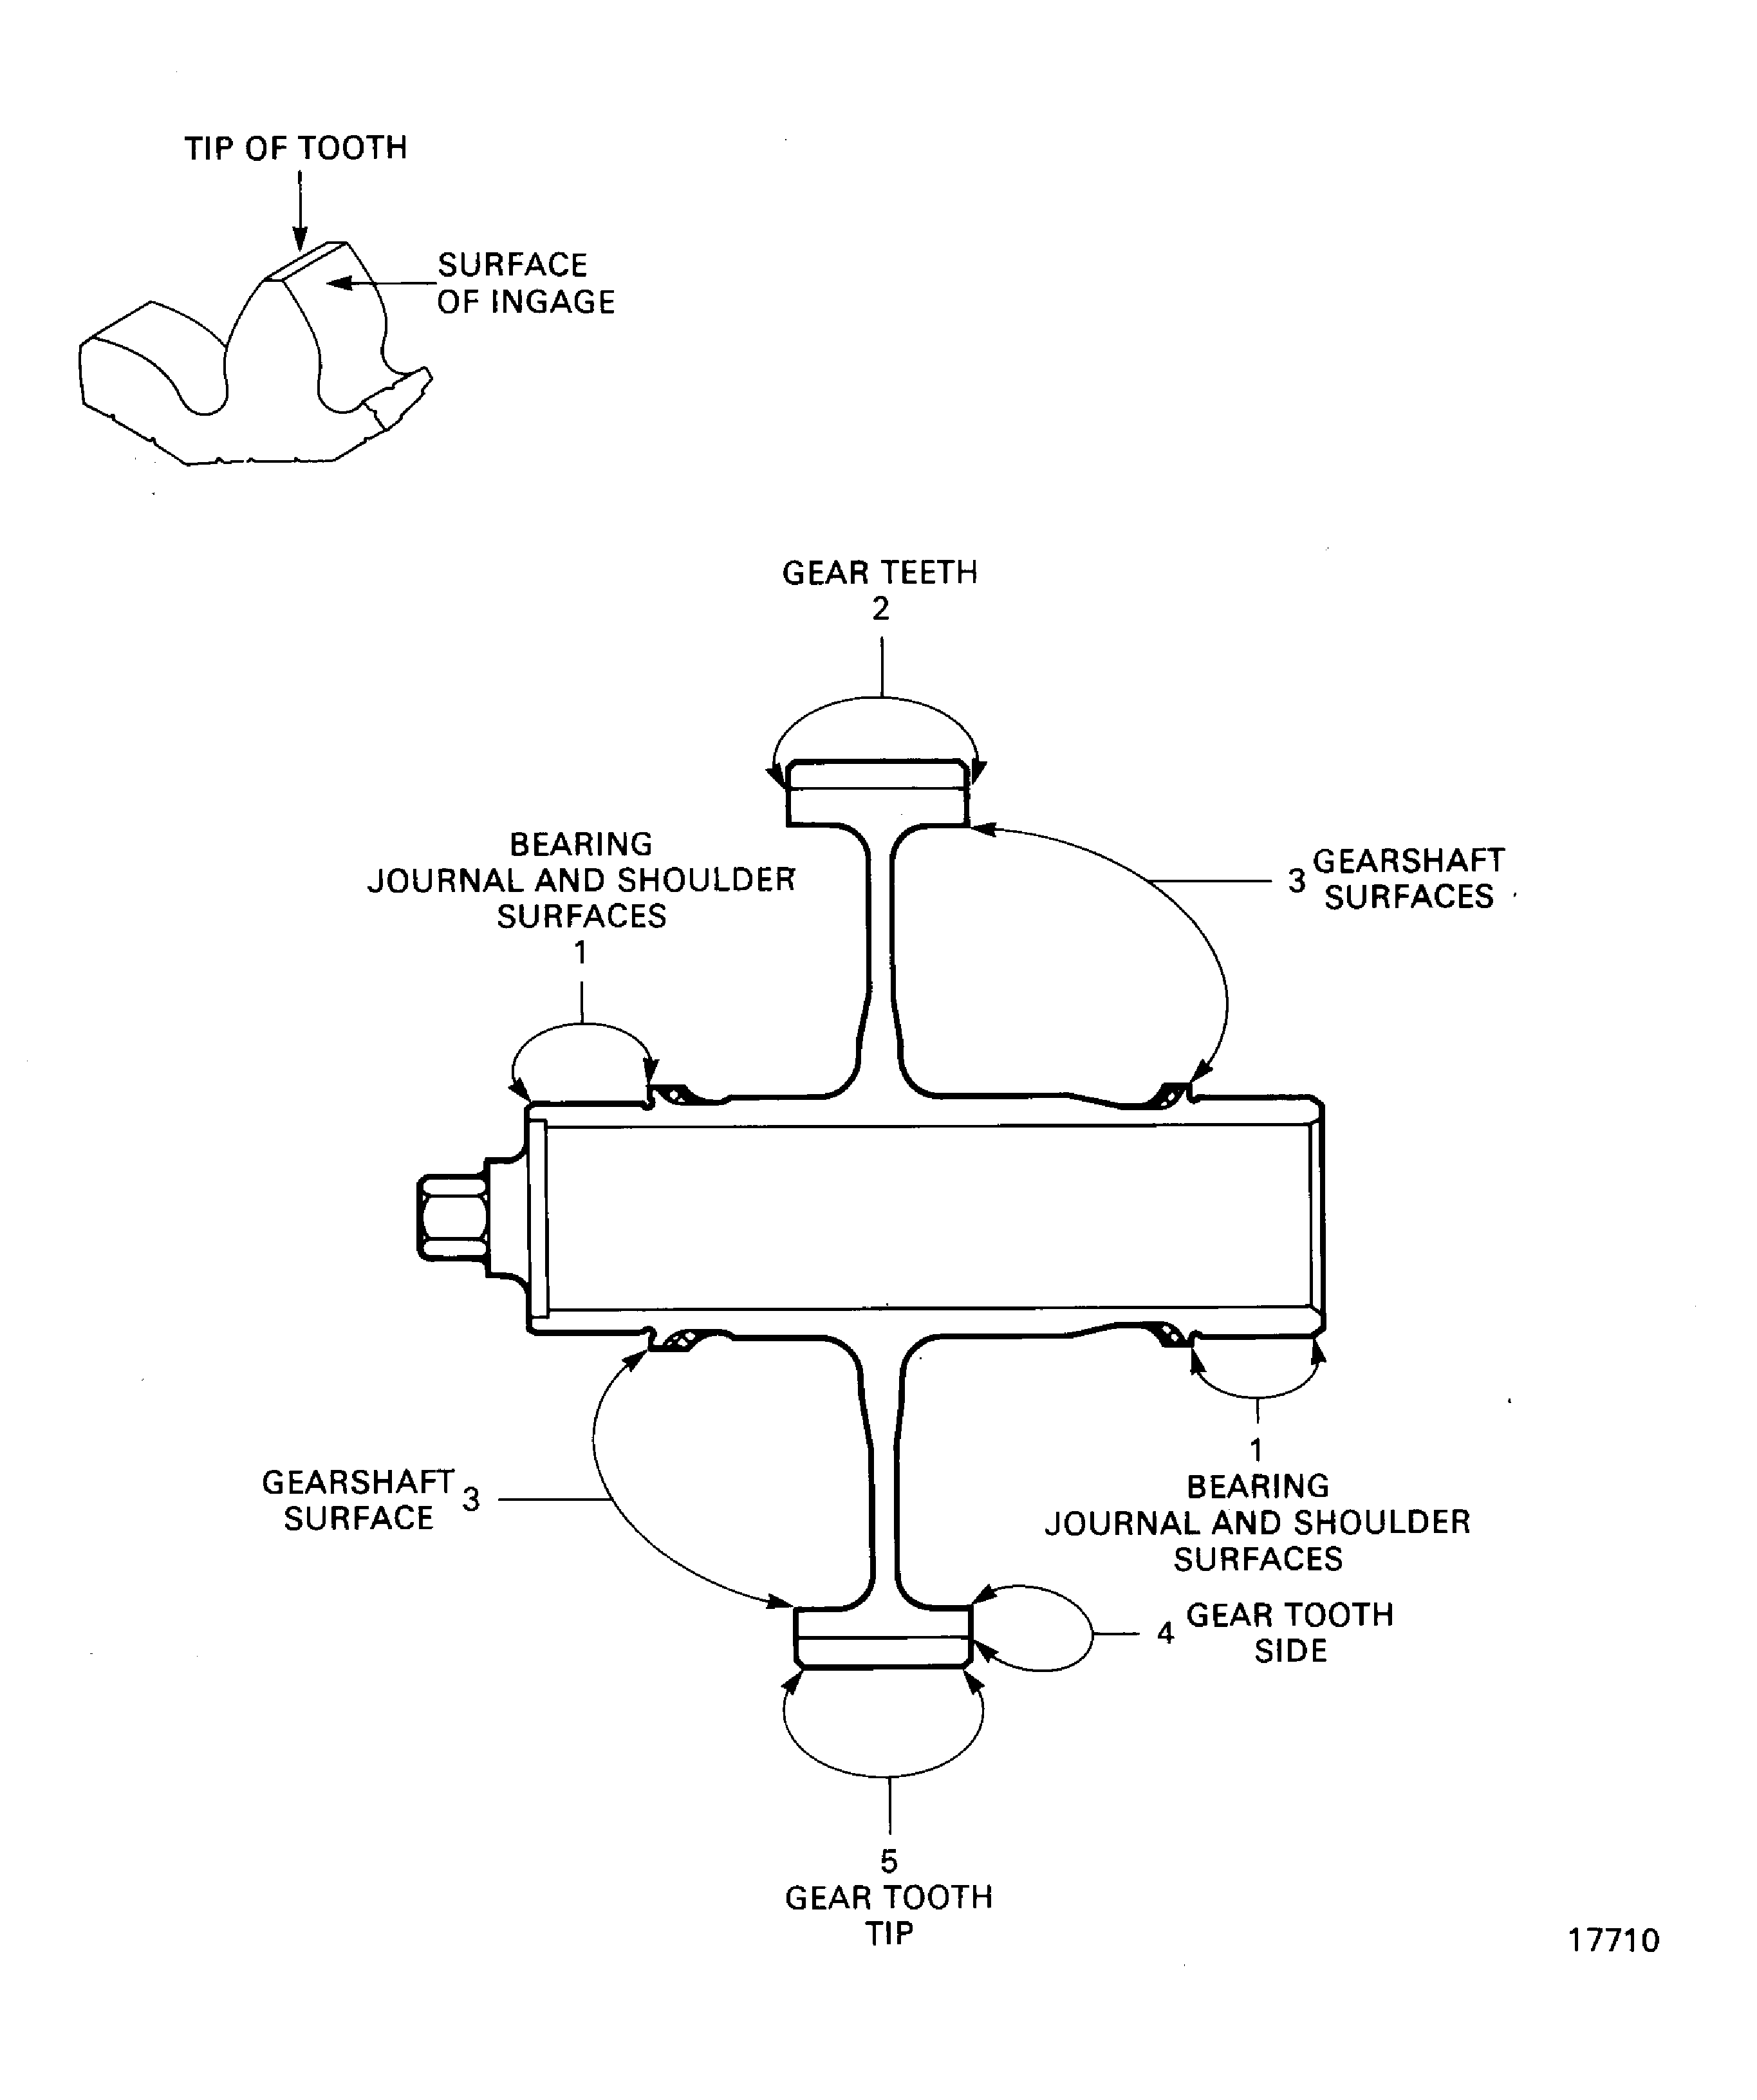
Refer to Figure.
Refer to the TASK 70-35-03-300-501.
The maximum permitted depth of the blending is 0.010 in. (0.25 mm).
Blend the bearing journal and shoulder surfaces at location 1.
Refer to the TASK 70-35-03-300-501.
The maximum permitted depth of the blending on the gear is 0.0014 in. (0.035 mm).
The maximum permitted damaged area of each tooth is 10 percent of the surface of in gage.
It is not necessary to polish the repaired surfaces.
Blend the surfaces of ingage of the gear teeth at location 2.
Refer to the TASK 70-35-03-300-501 .
The maximum permitted depth of the blending is 0.008 in. (0.20 mm).
Blend the gearshaft surfaces at location 3.
Refer to the TASK 70-35-03-300-501 .
The maximum number of nicks permitted is 3 per tooth, 0.04 in. (1.02 mm) long, not extended more than 0.02 in. (0.51 mm) onto the surface of ingage.
The maximum permitted depth of blended nicks is 0.01 in. (0.25 mm).
The minimum distance between the nicks must be equal to or more than the longest nick.
Blend the gear tooth tip and tooth side at locations 5 and 4.
SUBTASK 72-60-27-350-051 Blend Repair the Idler Gear (01-140) Surfaces
Figure: Repair details and dimensions
Repair details and dimensions

