Export Control
EAR Export Classification: Not subject to the EAR per 15 C.F.R. Chapter 1, Part 734.3(b)(3), except for the following Service Bulletins which are currently published as EAR Export Classification 9E991: SBE70-0992, SBE72-0483, SBE72-0580, SBE72-0588, SBE72-0640, SBE73-0209, SBE80-0024 and SBE80-0025.Copyright
© IAE International Aero Engines AG (2001, 2014 - 2021) The information contained in this document is the property of © IAE International Aero Engines AG and may not be copied or used for any purpose other than that for which it is supplied without the express written authority of © IAE International Aero Engines AG. (This does not preclude use by engine and aircraft operators for normal instructional, maintenance or overhaul purposes.).Applicability
All
Common Information
TASK 73-22-51-300-003 P4.9 Air Sensor Tubes and Manifolds - Blend Repair the Right Tube, Repair-003 (VRS3276)
General
Price and availability - none.
The practices and processes referred to in the procedure by the TASK numbers are in the SPM.
Preliminary Requirements
Pre-Conditions
NONESupport Equipment
| Name | Manufacturer | Part Number / Identification | Quantity | Remark |
|---|---|---|---|---|
| File (fine) | LOCAL | File (fine) | ||
| Workshop Inspection Equipment | LOCAL | Workshop Inspection Equipment |
Consumables, Materials and Expendables
NONESpares
NONESafety Requirements
NONEProcedure
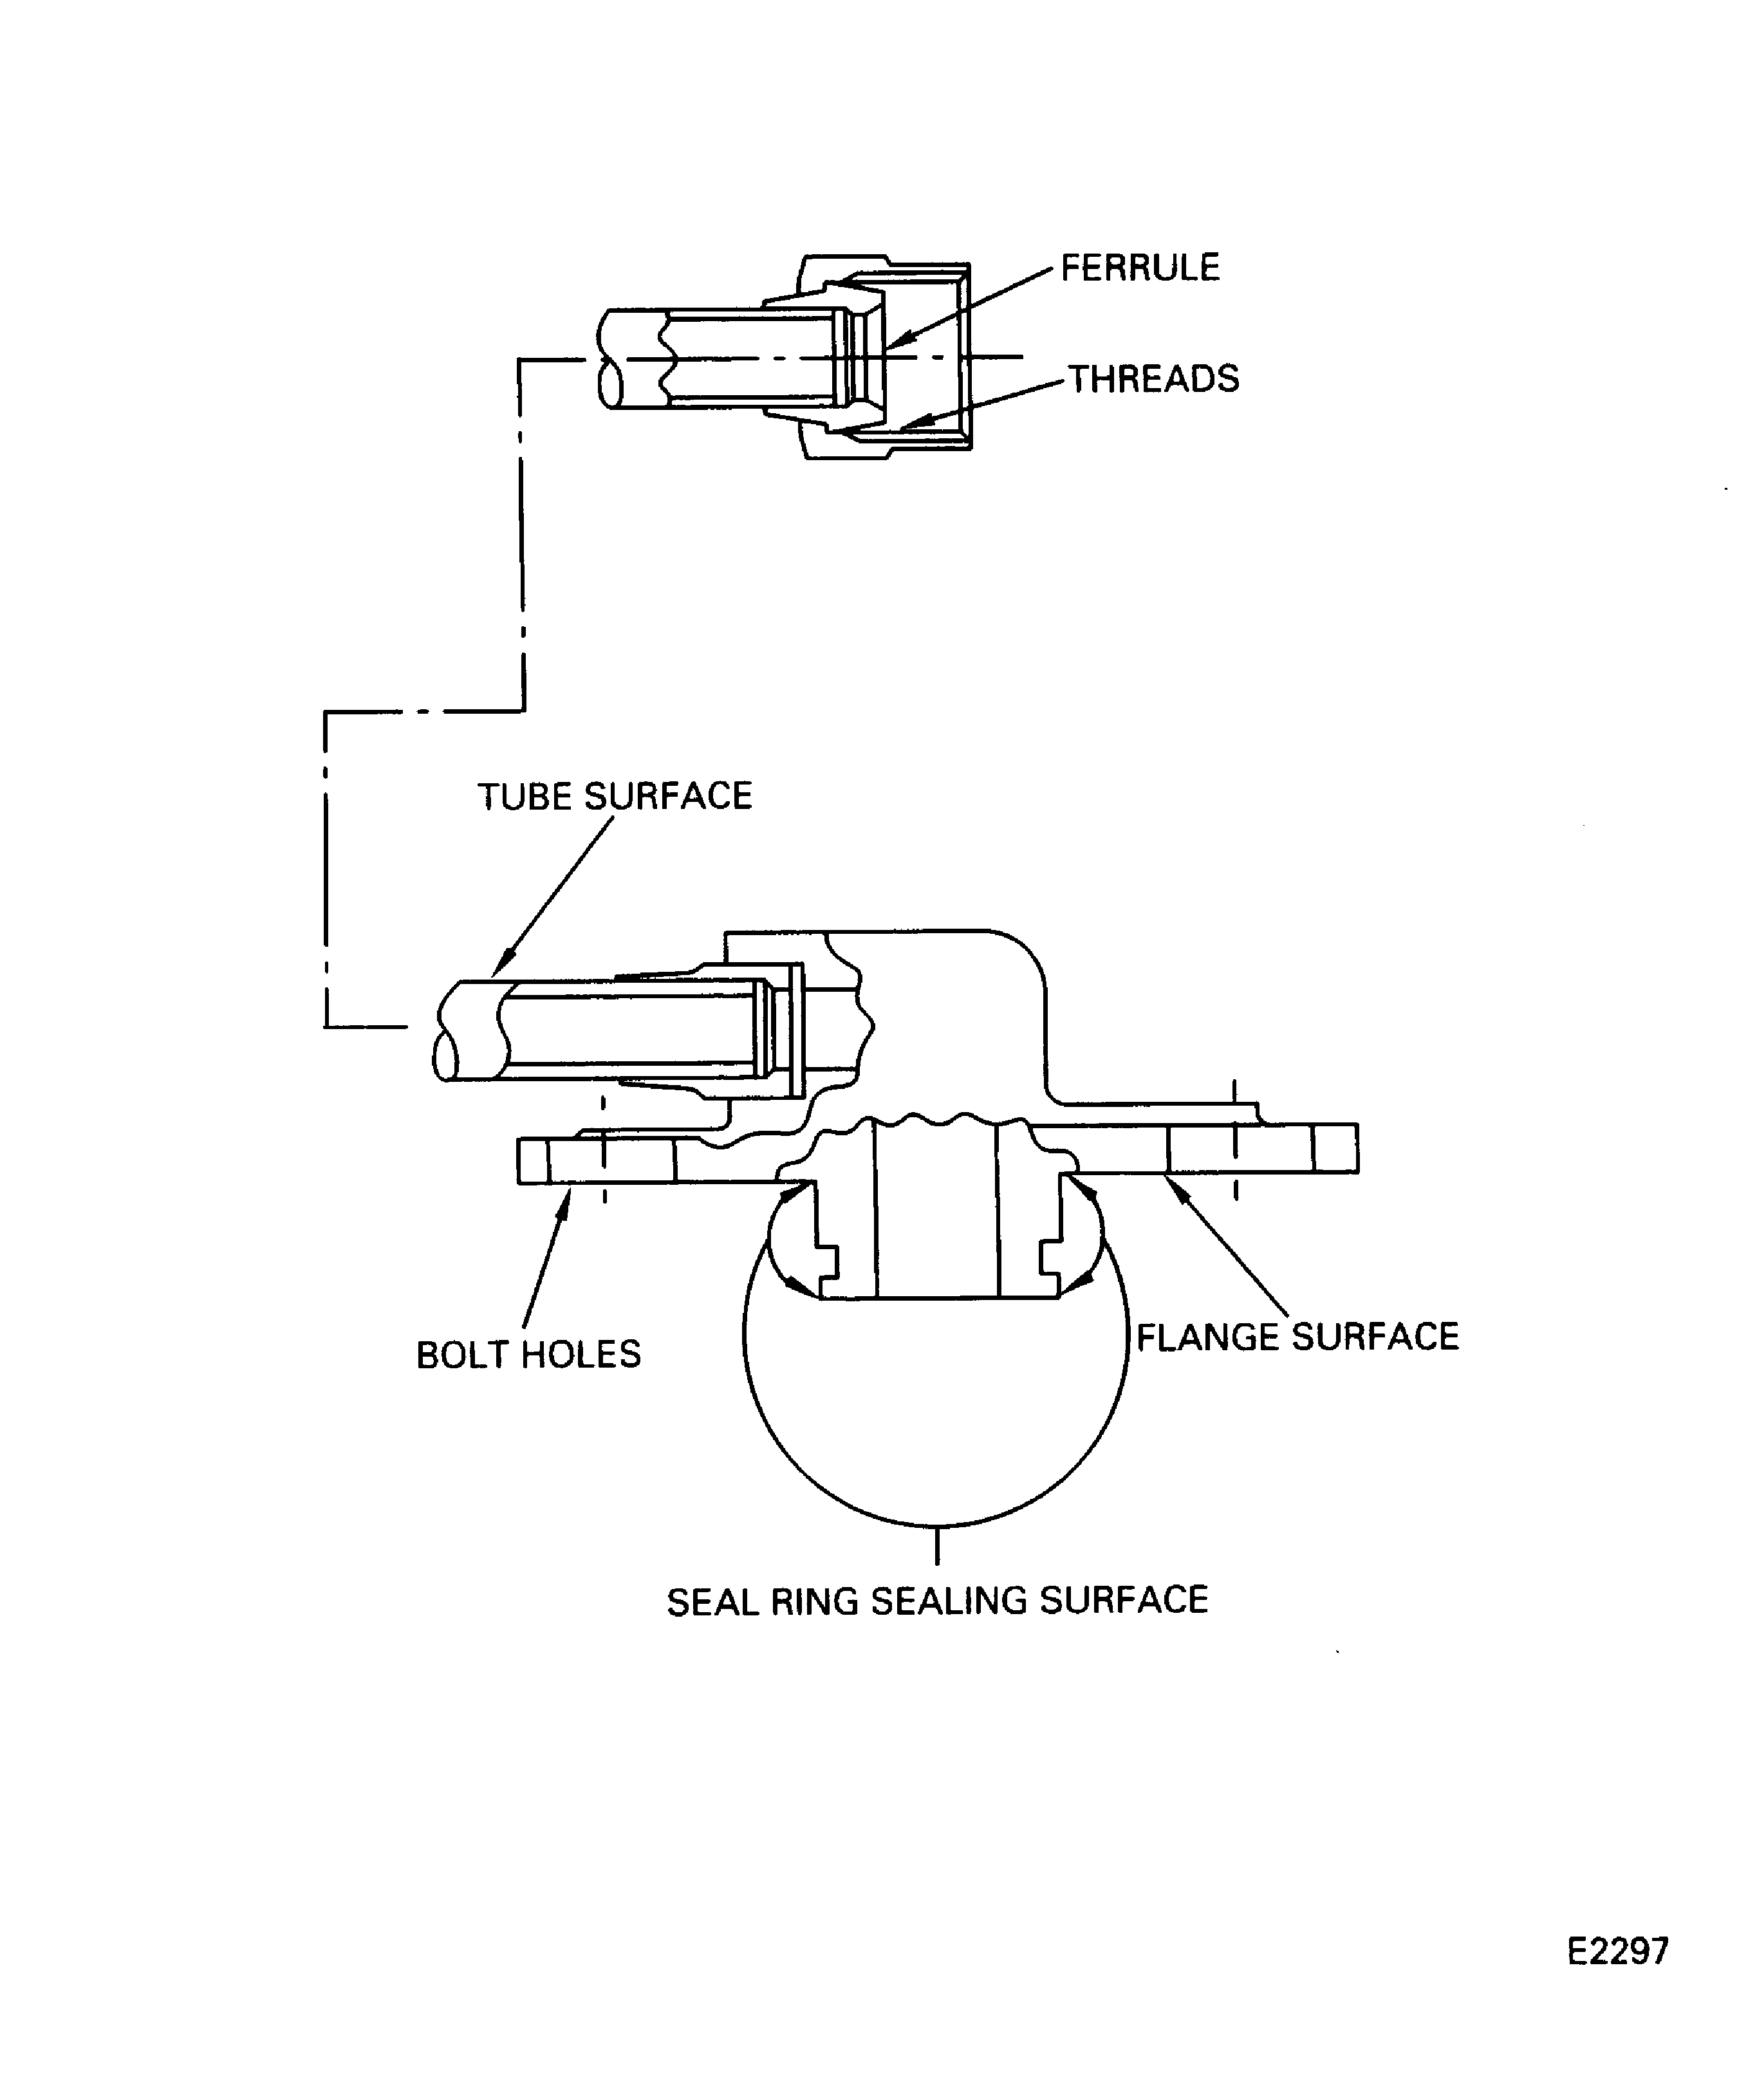
Refer to Figure.
Refer to SPM TASK 70-35-21-350-501.
The maximum blend depth is 0.008 in. (0.20 mm) in a straight length of the tube and 0.006 in. (0.15 mm) in a bend.
The surface finish of the repaired area must be the same as the adjacent area.
Blend nicks, scoring, galling and chafing on the tube surface.
Refer to SPM TASK 70-35-21-350-501.
Blend the bolt holes to remove burrs.
Refer to SPM TASK 70-35-21-350-501.
Blend damage to a maximum of 0.010 in. (0.25 mm) in depth.
Blend damage on the flange surface.
Refer to SPM TASK 70-35-21-350-501.
Hand polish high metal.
Do not blend in the groove.
Blend seal ring sealing surfaces.
Refer to SPM TASK 70-35-21-350-501.
Blend damage to a maximum of 0.005 in. (0.13 mm) in depth.
Blend damage on the ferrule.
Refer to SPM TASK 70-35-21-350-501.
Use a File (fine) or a honing stone.
Blend burrs and pick-up on the threads of the nut.
SUBTASK 73-22-51-350-057 Blend Damage on the Right Pressure Control Tube
Fluorescent penetrant inspect the tube for cracks.
Refer to SPM TASK 70-23-05-230-501.
No cracks are permitted.
SUBTASK 73-22-51-230-057 Examine the Repair
Figure: Right Pressure Control Tube Blend Repair
Right Pressure Control Tube Blend Repair

