DMC:V2500-A0-75-24-4700-00A-270A-CIssue No:001.00Issue Date:2013-11-01
Export Control
EAR Export Classification: Not subject to the EAR per 15 C.F.R. Chapter 1, Part 734.3(b)(3), except for the following Service Bulletins which are currently published as EAR Export Classification 9E991: SBE70-0992, SBE72-0483, SBE72-0580, SBE72-0588, SBE72-0640, SBE73-0209, SBE80-0024 and SBE80-0025.Copyright
© IAE International Aero Engines AG (2001, 2014 - 2021) The information contained in this document is the property of © IAE International Aero Engines AG and may not be copied or used for any purpose other than that for which it is supplied without the express written authority of © IAE International Aero Engines AG. (This does not preclude use by engine and aircraft operators for normal instructional, maintenance or overhaul purposes.).Applicability
All
Common Information
TASK 75-24-47-300-003 HPT/LPT Active Clearance Control (ACC) Ducts - Related Parts - Reshape The Heat Shield, Repair-003 (VRS1509)
Material of Component
DESCRIPTION | RR SYMBOL | MATERIAL |
Heat shield (Sheet plate) | 18Cr-10.5Ni-0.4Ti Steel | |
Heat shield (Foil) | 18Cr-10.5Ni.0.4Ti Steel |
General
Price and availability - none
The practices and processes referred to in the procedure by the TASK numbers are in the SPM.
For the method to clean the parts, refer to Cleaning-000 TASK 75-24-47-100-400.
Refer to the SPM TASK 70-23-05-230-501.
Preliminary Requirements
Pre-Conditions
NONESupport Equipment
| Name | Manufacturer | Part Number / Identification | Quantity | Remark |
|---|---|---|---|---|
| Fluorescent Penetrant Inspection Equipment | LOCAL | Fluorescent penetrant inspection equipment |
Consumables, Materials and Expendables
NONESpares
NONESafety Requirements
NONEProcedure
Use of small hammer permissible.
Lightly hit all around the concave side of any dent to smooth out.
SUBTASK 75-24-47-350-054 Reshape the Sheet Plate
Residual creases within 0.02 in. (0.508 mm) contour tolerance are permitted.
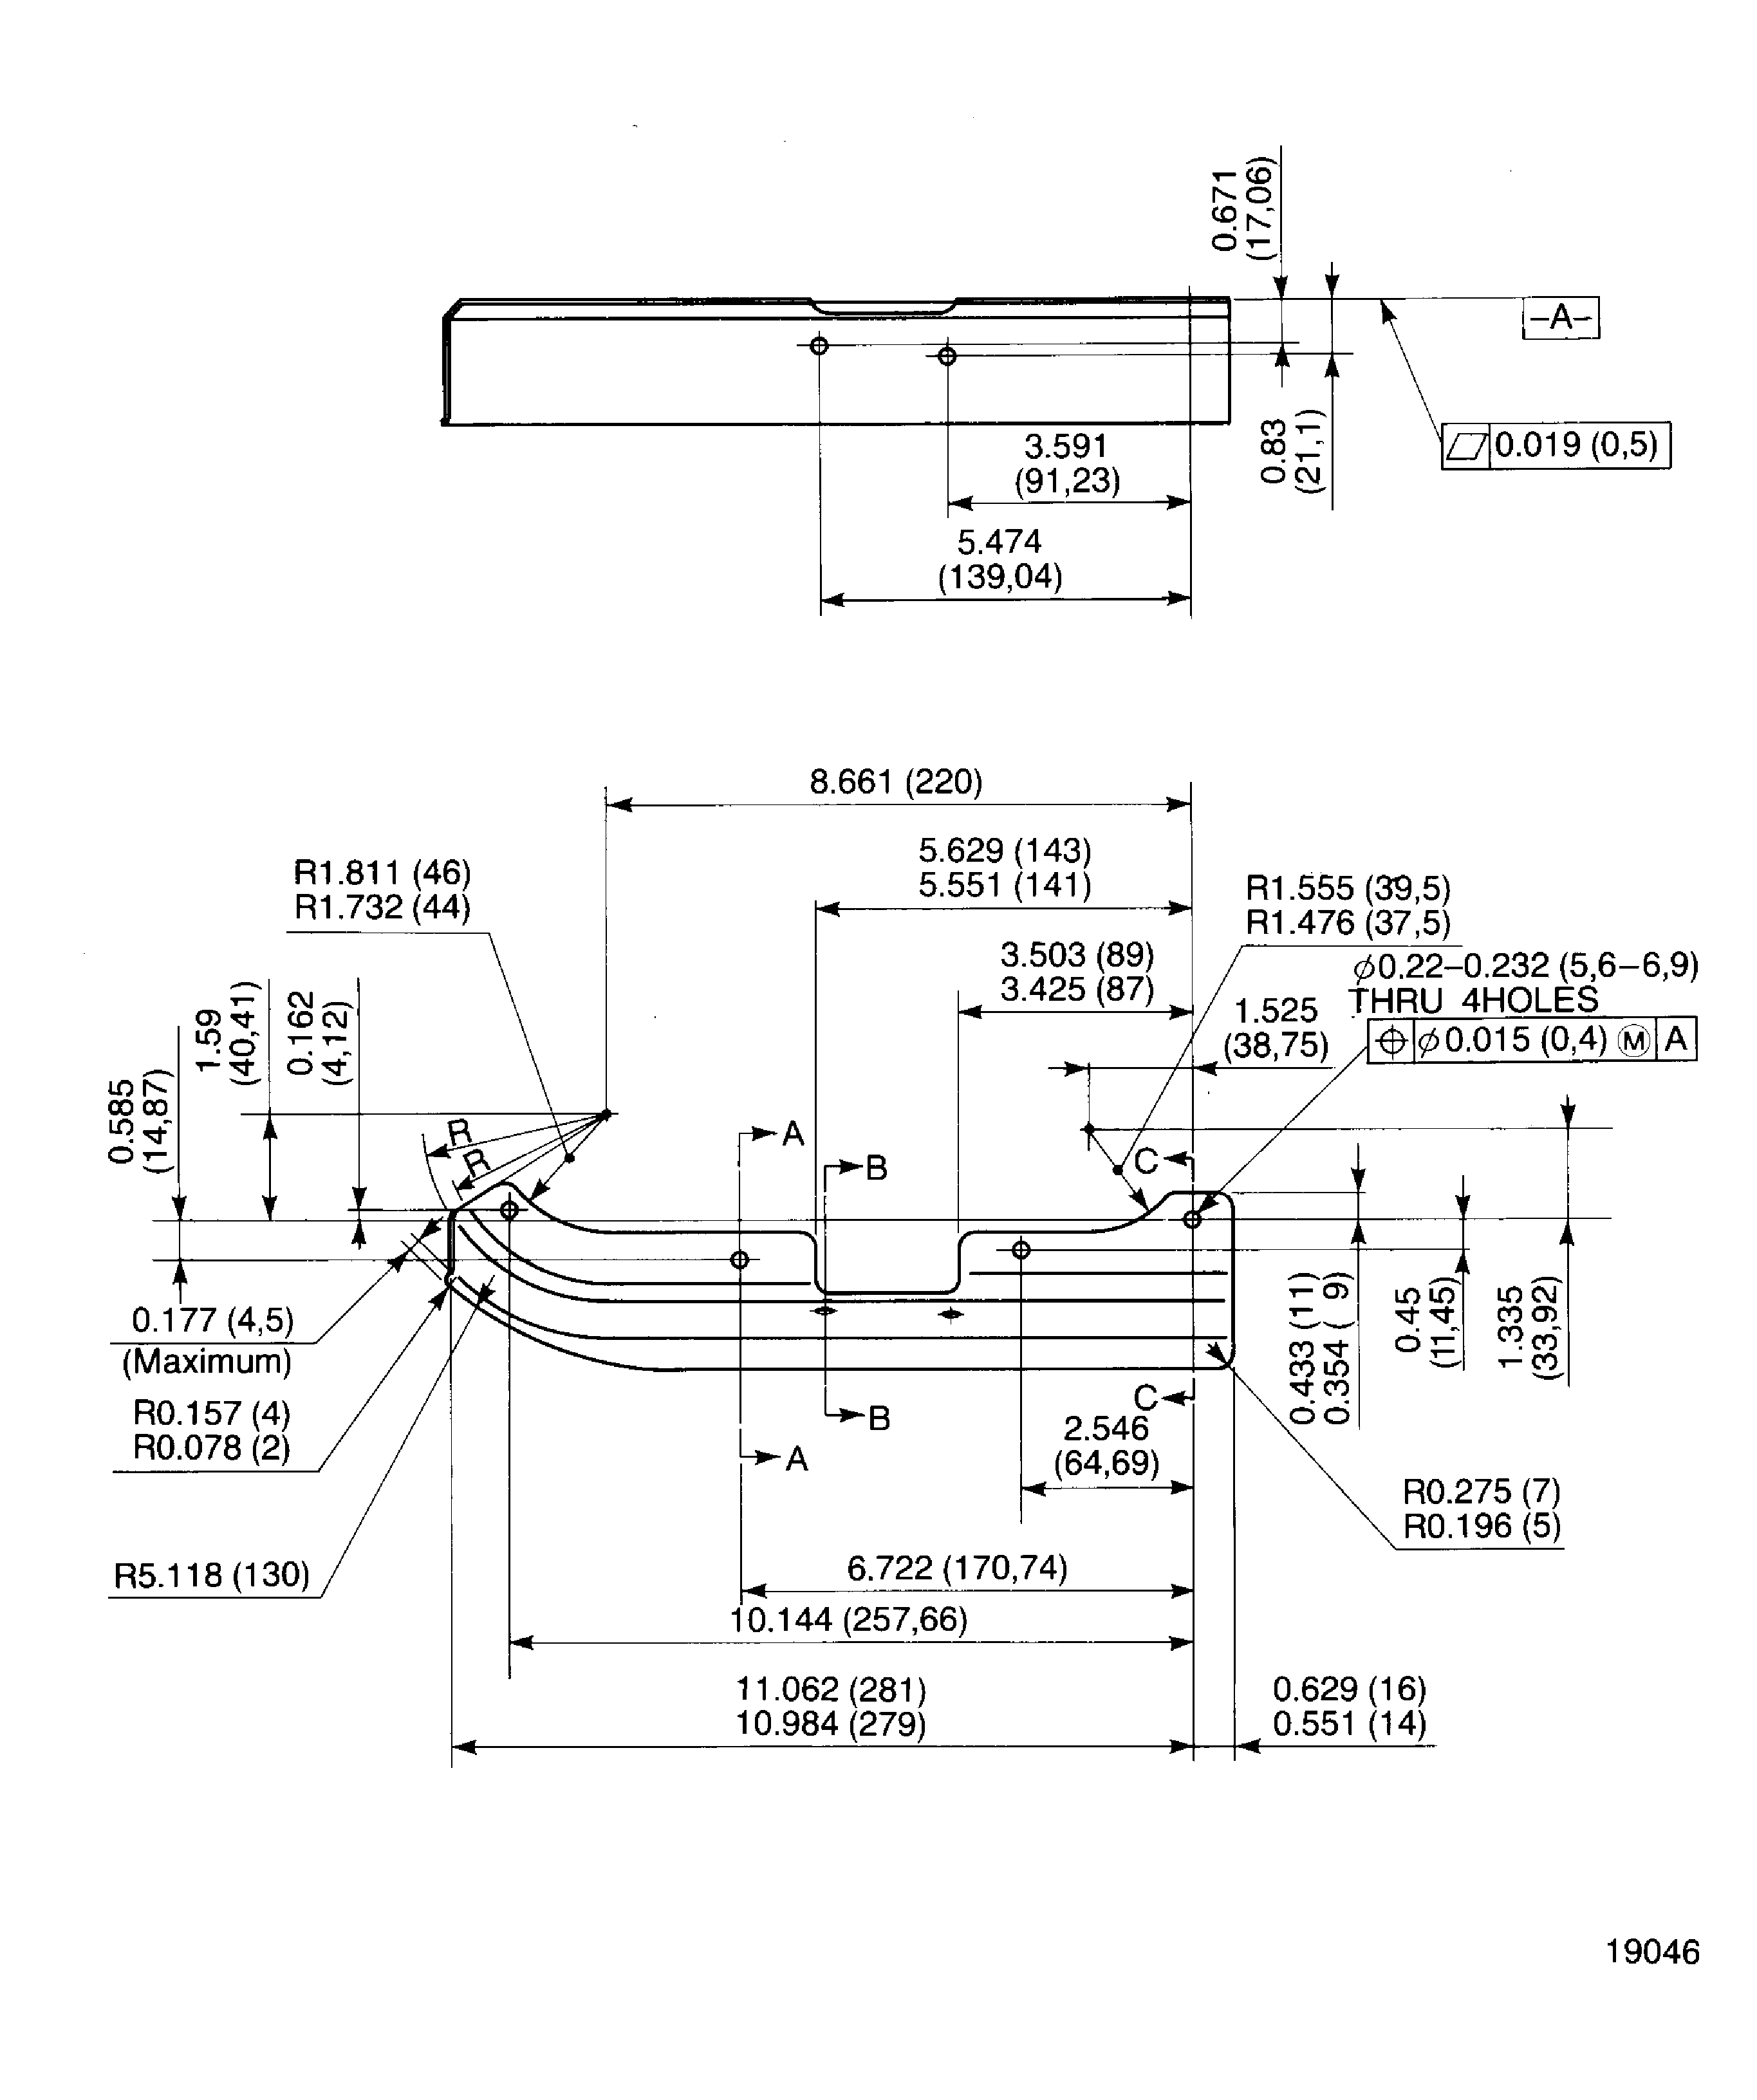
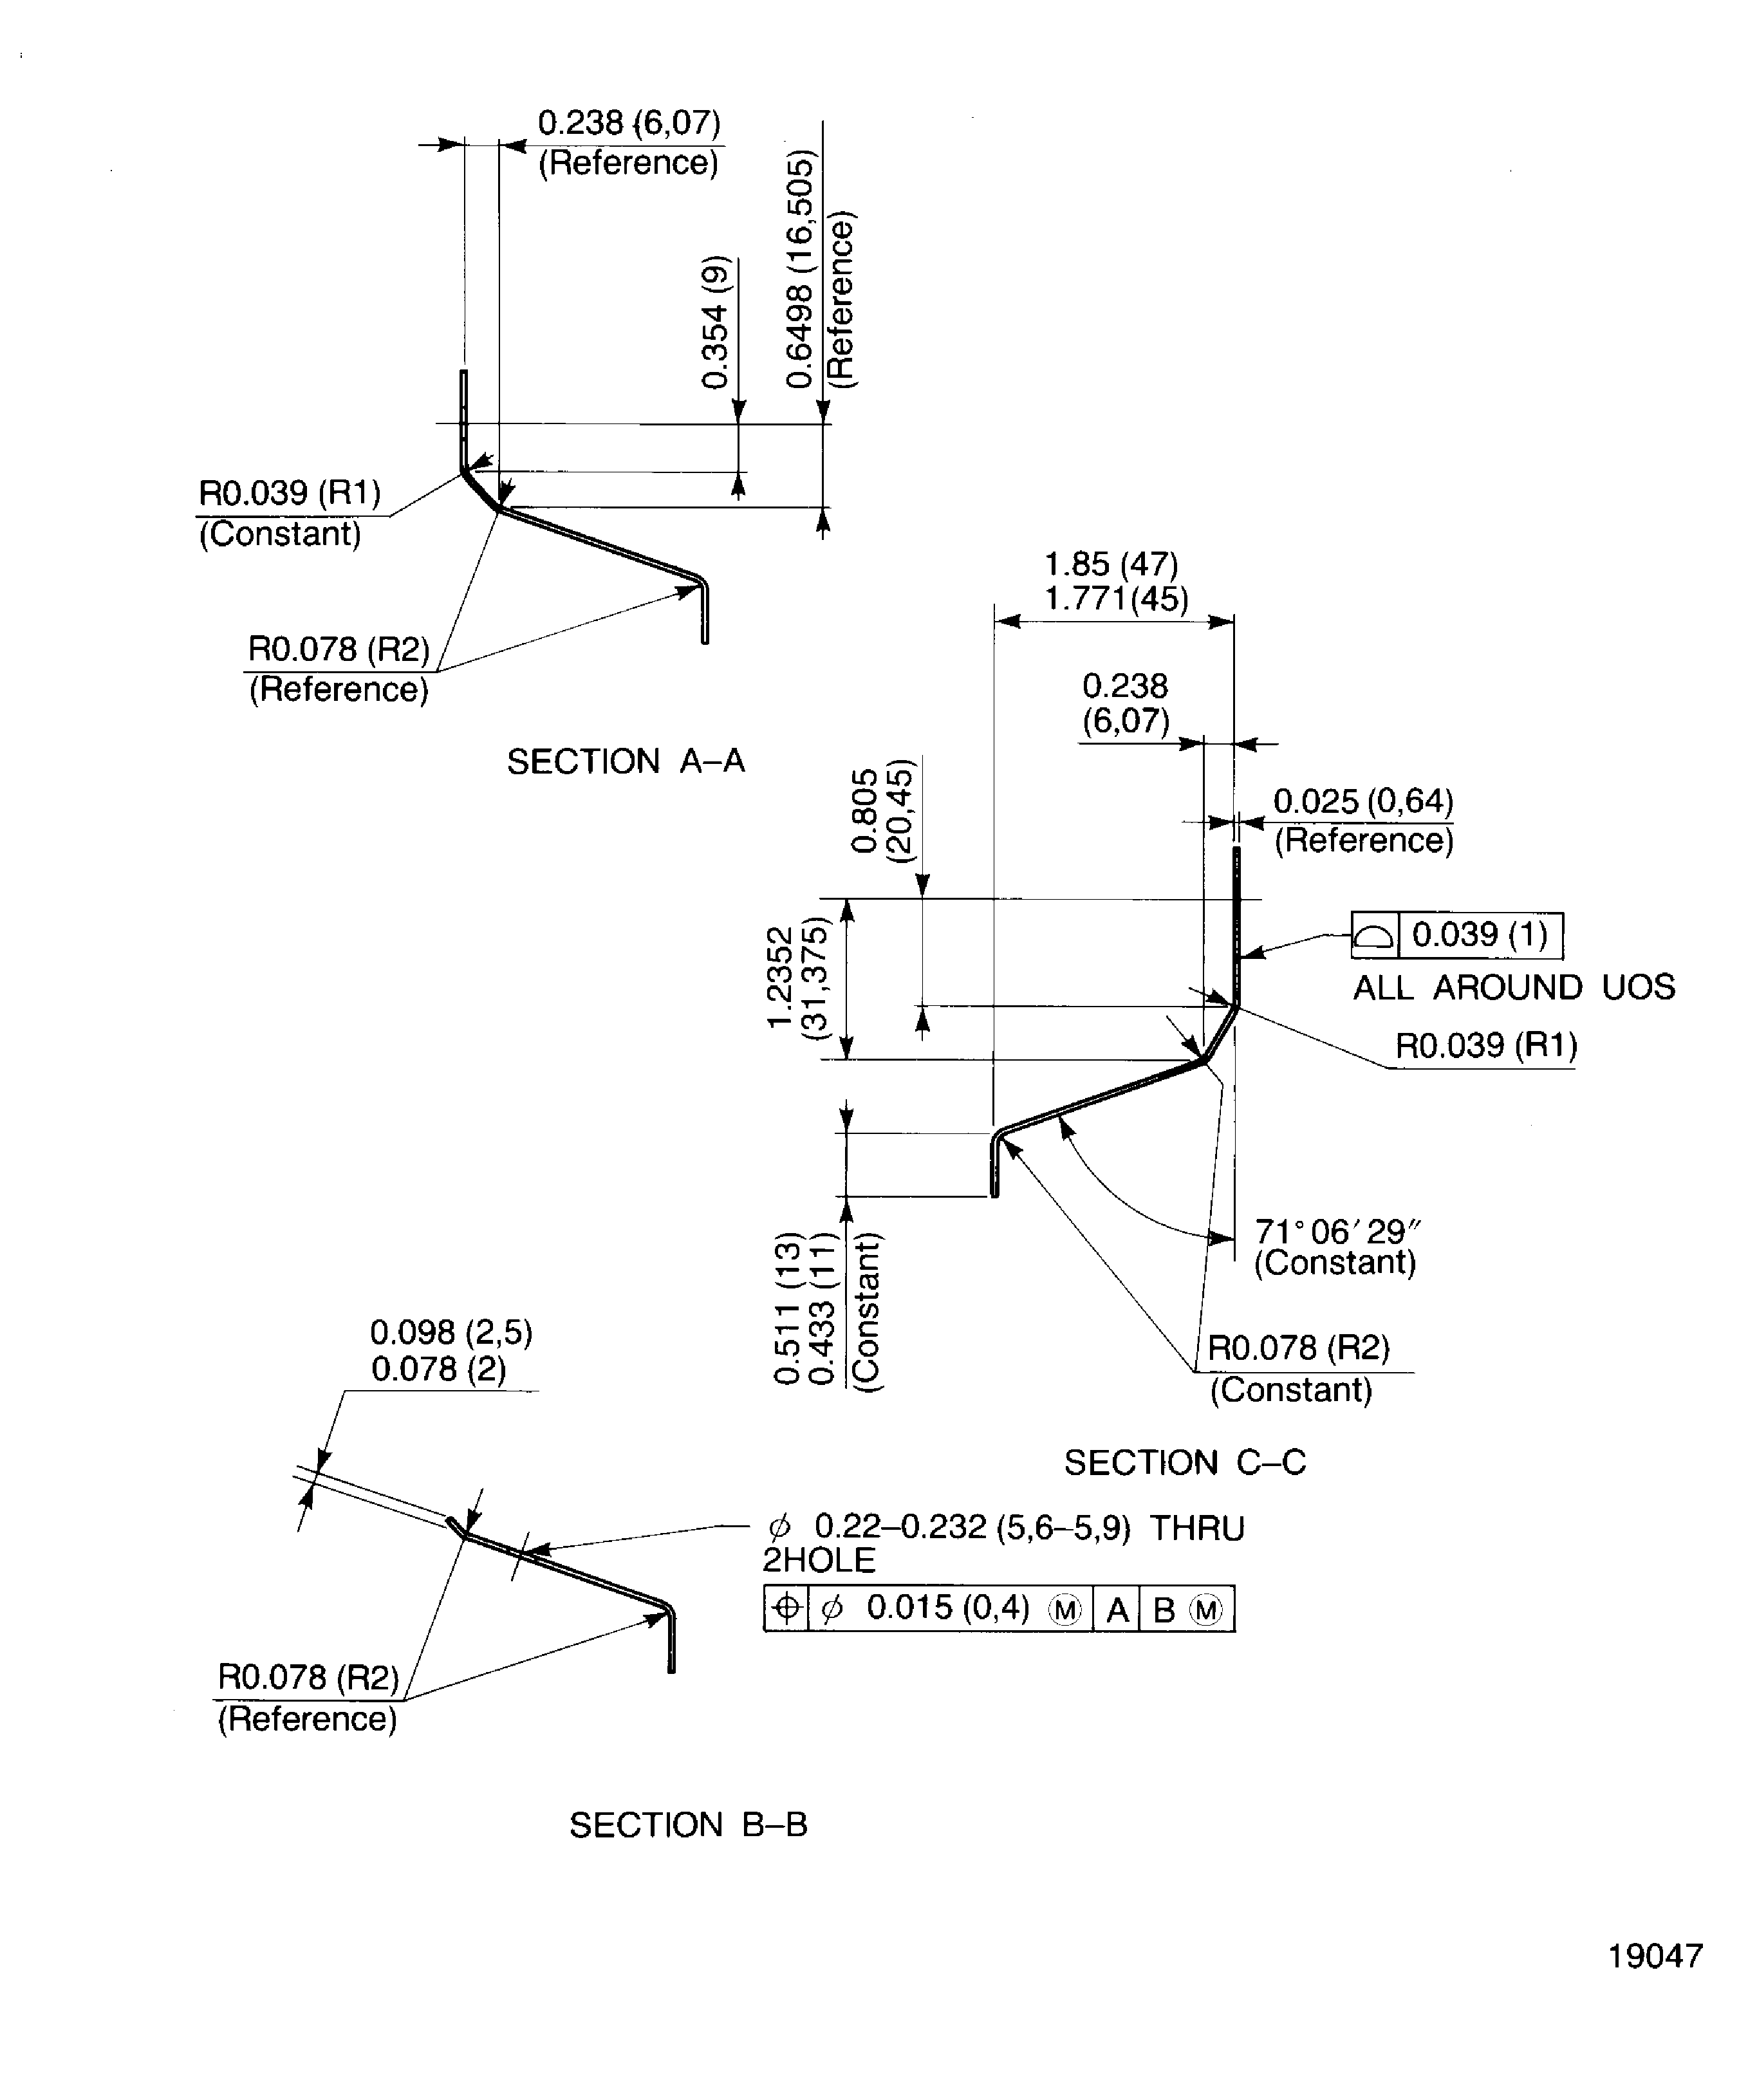
Dimensionally check the heat shield for wear and/or distortion.
Refer to the SPM TASK 70-23-05-230-501.
No cracks are permitted.
Do the test for cracks.
SUBTASK 75-24-47-220-066 Examine the Heat Shield (01-190)
Figure: Dimension of the Heat Shield
Dimension of the Heat Shield

Dimension of the Heat Shield

