Export Control
EAR Export Classification: Not subject to the EAR per 15 C.F.R. Chapter 1, Part 734.3(b)(3), except for the following Service Bulletins which are currently published as EAR Export Classification 9E991: SBE70-0992, SBE72-0483, SBE72-0580, SBE72-0588, SBE72-0640, SBE73-0209, SBE80-0024 and SBE80-0025.Copyright
© IAE International Aero Engines AG (2001, 2014 - 2021) The information contained in this document is the property of © IAE International Aero Engines AG and may not be copied or used for any purpose other than that for which it is supplied without the express written authority of © IAE International Aero Engines AG. (This does not preclude use by engine and aircraft operators for normal instructional, maintenance or overhaul purposes.).Applicability
All
Common Information
TASK 75-24-48-300-009 HPT ACC Air Manifold - Re-shape the Manifold - Repair-009 (VRS1531)
Material of component
DESCRIPTION | RR SYMBOL | MATERIAL |
Turbine cooling manifold assembly | Fe-18Cr-10Ni | |
Turbine cooling manifold assembly (part) | 47.5Ni-22Cr-1.5Co-9.0Mo-0.6W 18.5Fe |
General
Price and availability - none.
The practices and processes referred to in the procedure by the TASK numbers are in the SPM.
For the method to clean the parts, refer to Cleaning-000 TASK 75-24-48-100-100.
NOTE
Preliminary Requirements
Pre-Conditions
NONESupport Equipment
| Name | Manufacturer | Part Number / Identification | Quantity | Remark |
|---|---|---|---|---|
| Fluorescent Penetrant Inspection Equipment | LOCAL | Fluorescent Penetrant Inspection Equipment |
Consumables, Materials and Expendables
NONESpares
NONESafety Requirements
NONEProcedure
Use of small hammer permissible.
Lightly hit all around the concave side of any dent or deformed surface to smooth out.
SUBTASK 75-24-48-350-082 Re-Shape the Turbine Cooling Manifold Assembly
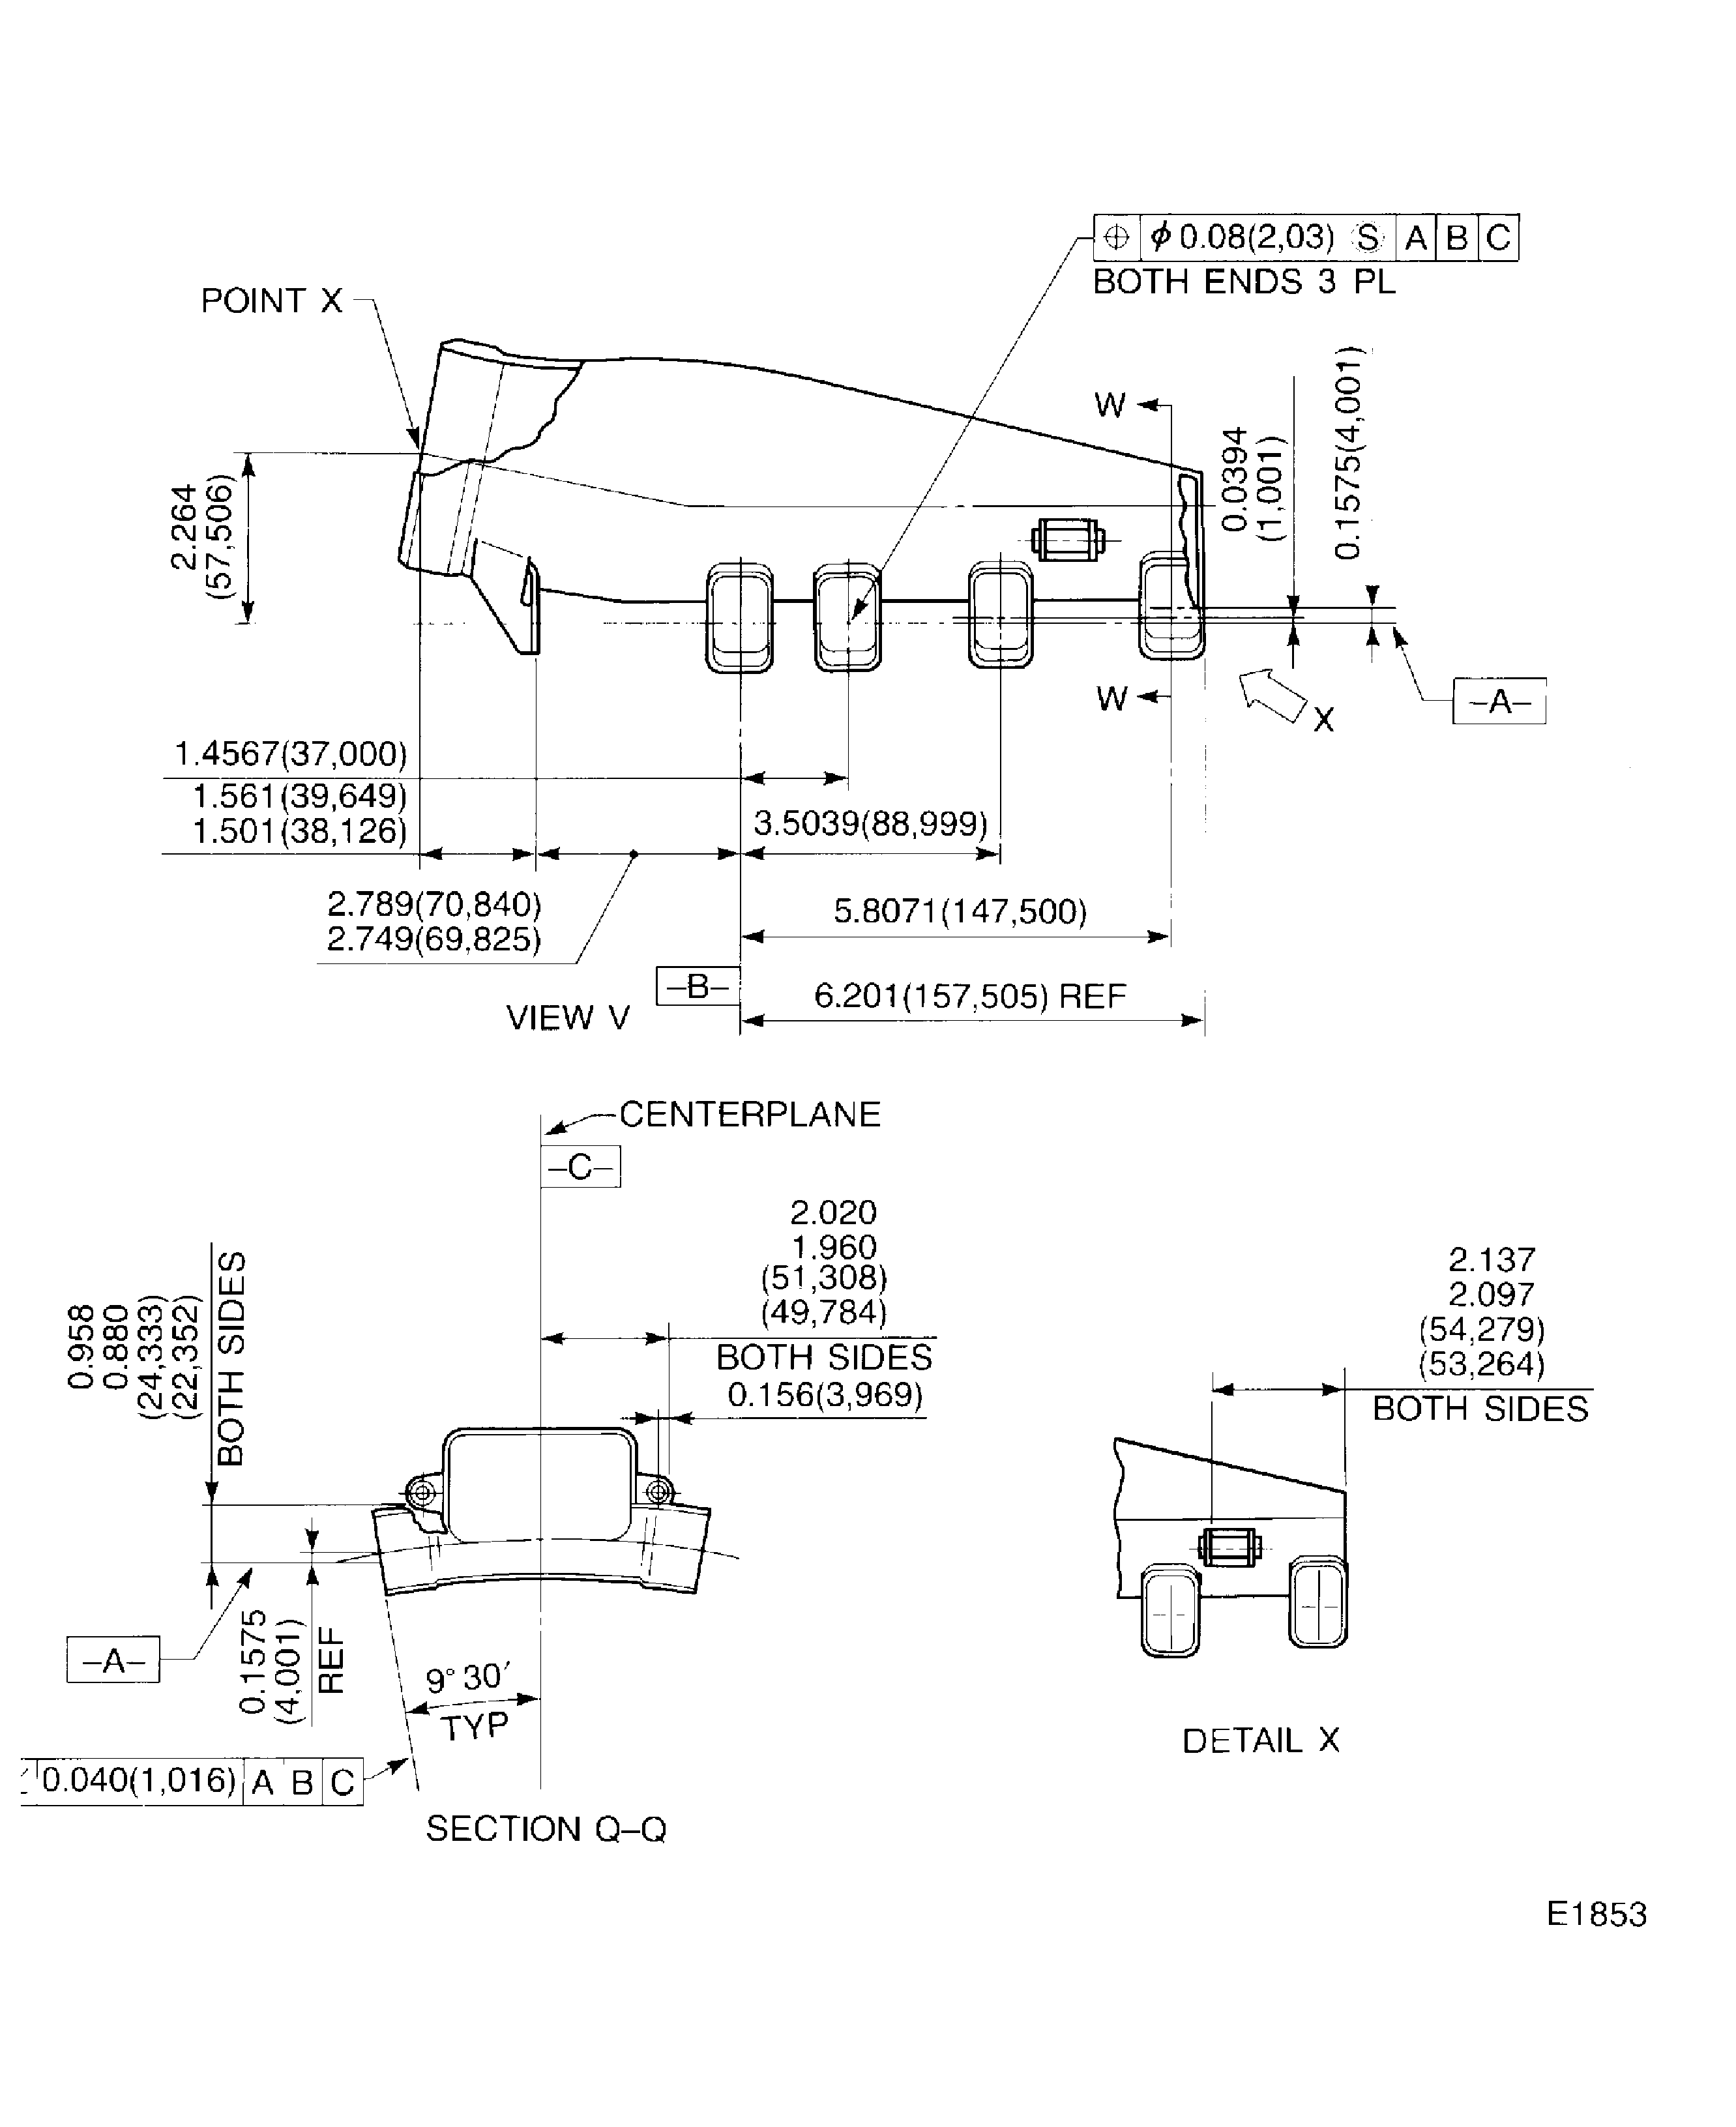
Refer to Figure.
Refer to Figure.
Residual creases within 0.19 in. (0.50 mm) contour tolerance in constrained are permitted.
Dimensionally check the tube at location 1 for distortion.
Refer to Figure.
Outer diameter should be within 3.079 in. (78.206 mm).
Dimensionally check the joint at location 2.
Dimension should be within the limit specified in Figure.
Dimensionally check the welded bracket at location 3.
Refer to Figure.
Dimensionally check the pin and support at location 4.
Refer to SPM TASK 70-23-05-230-501.
No cracks are permitted.
Do the test for cracks.
SUBTASK 75-24-48-220-071 Examine the Turbine Cooling Manifold Assembly (02-500)
Figure: Re-shape the Turbine Cooling Manifold Assembly
Re-shape the Turbine Cooling Manifold Assembly
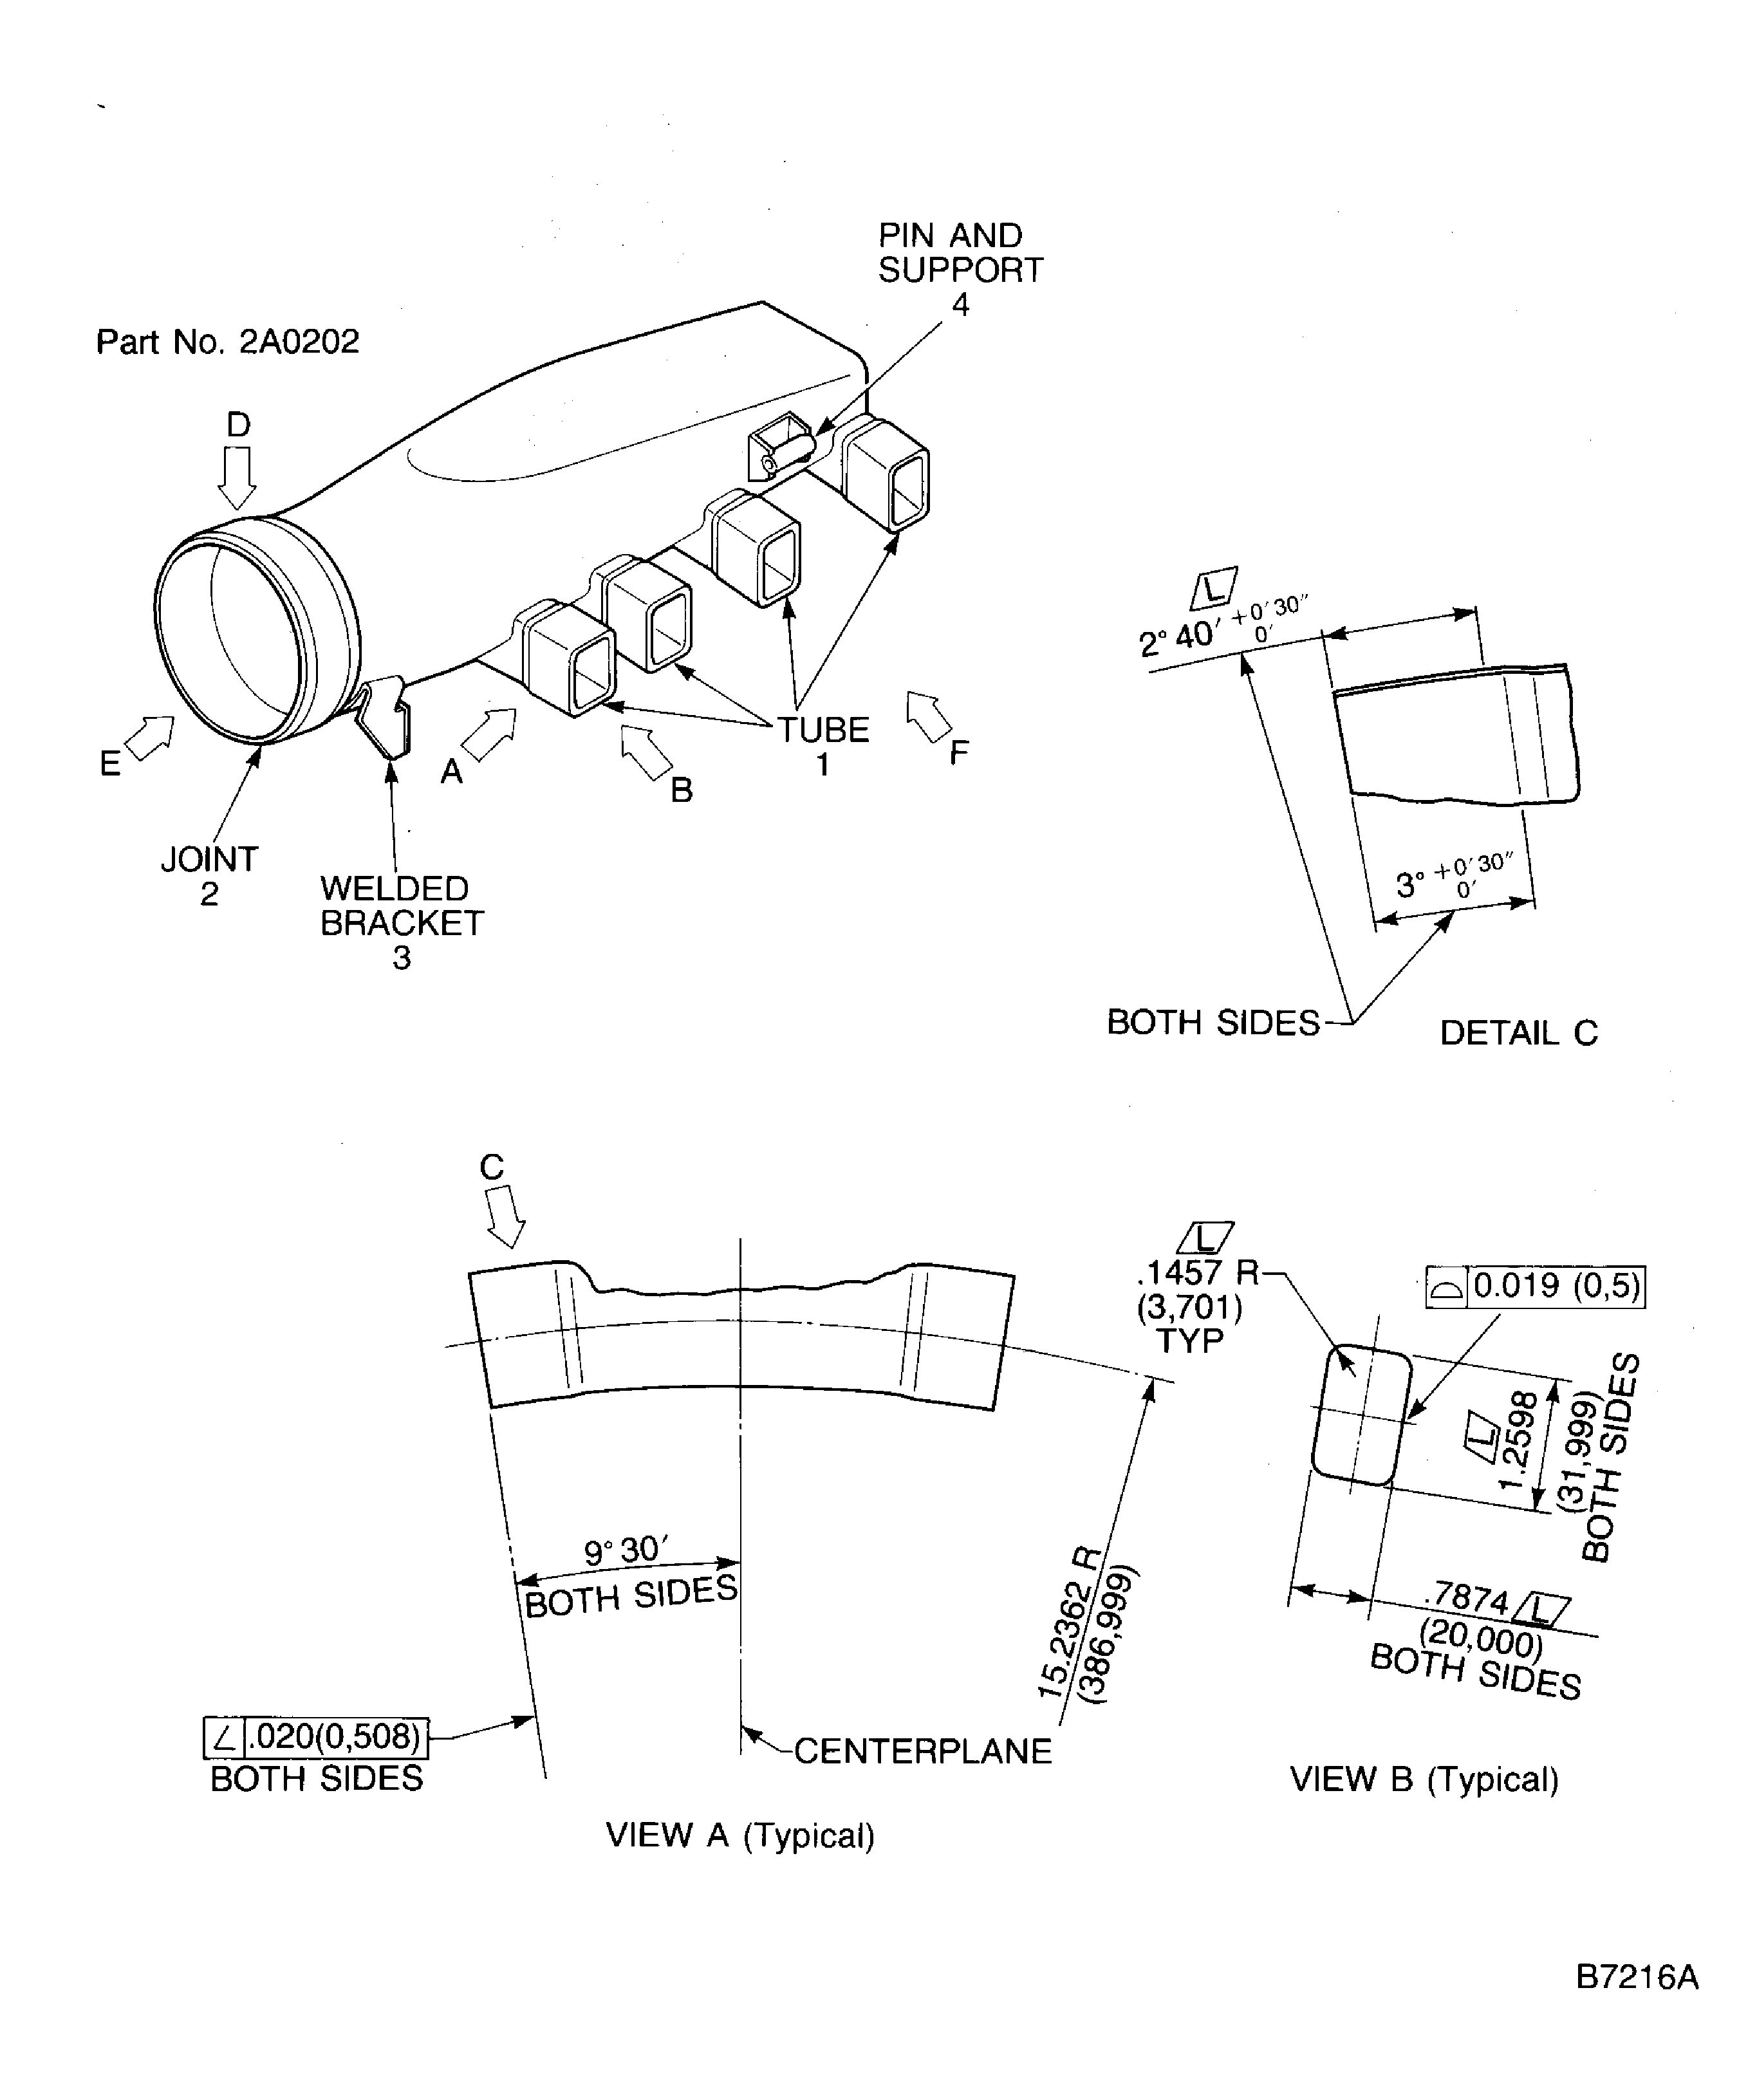
Re-shape the Turbine Cooling Manifold Assembly
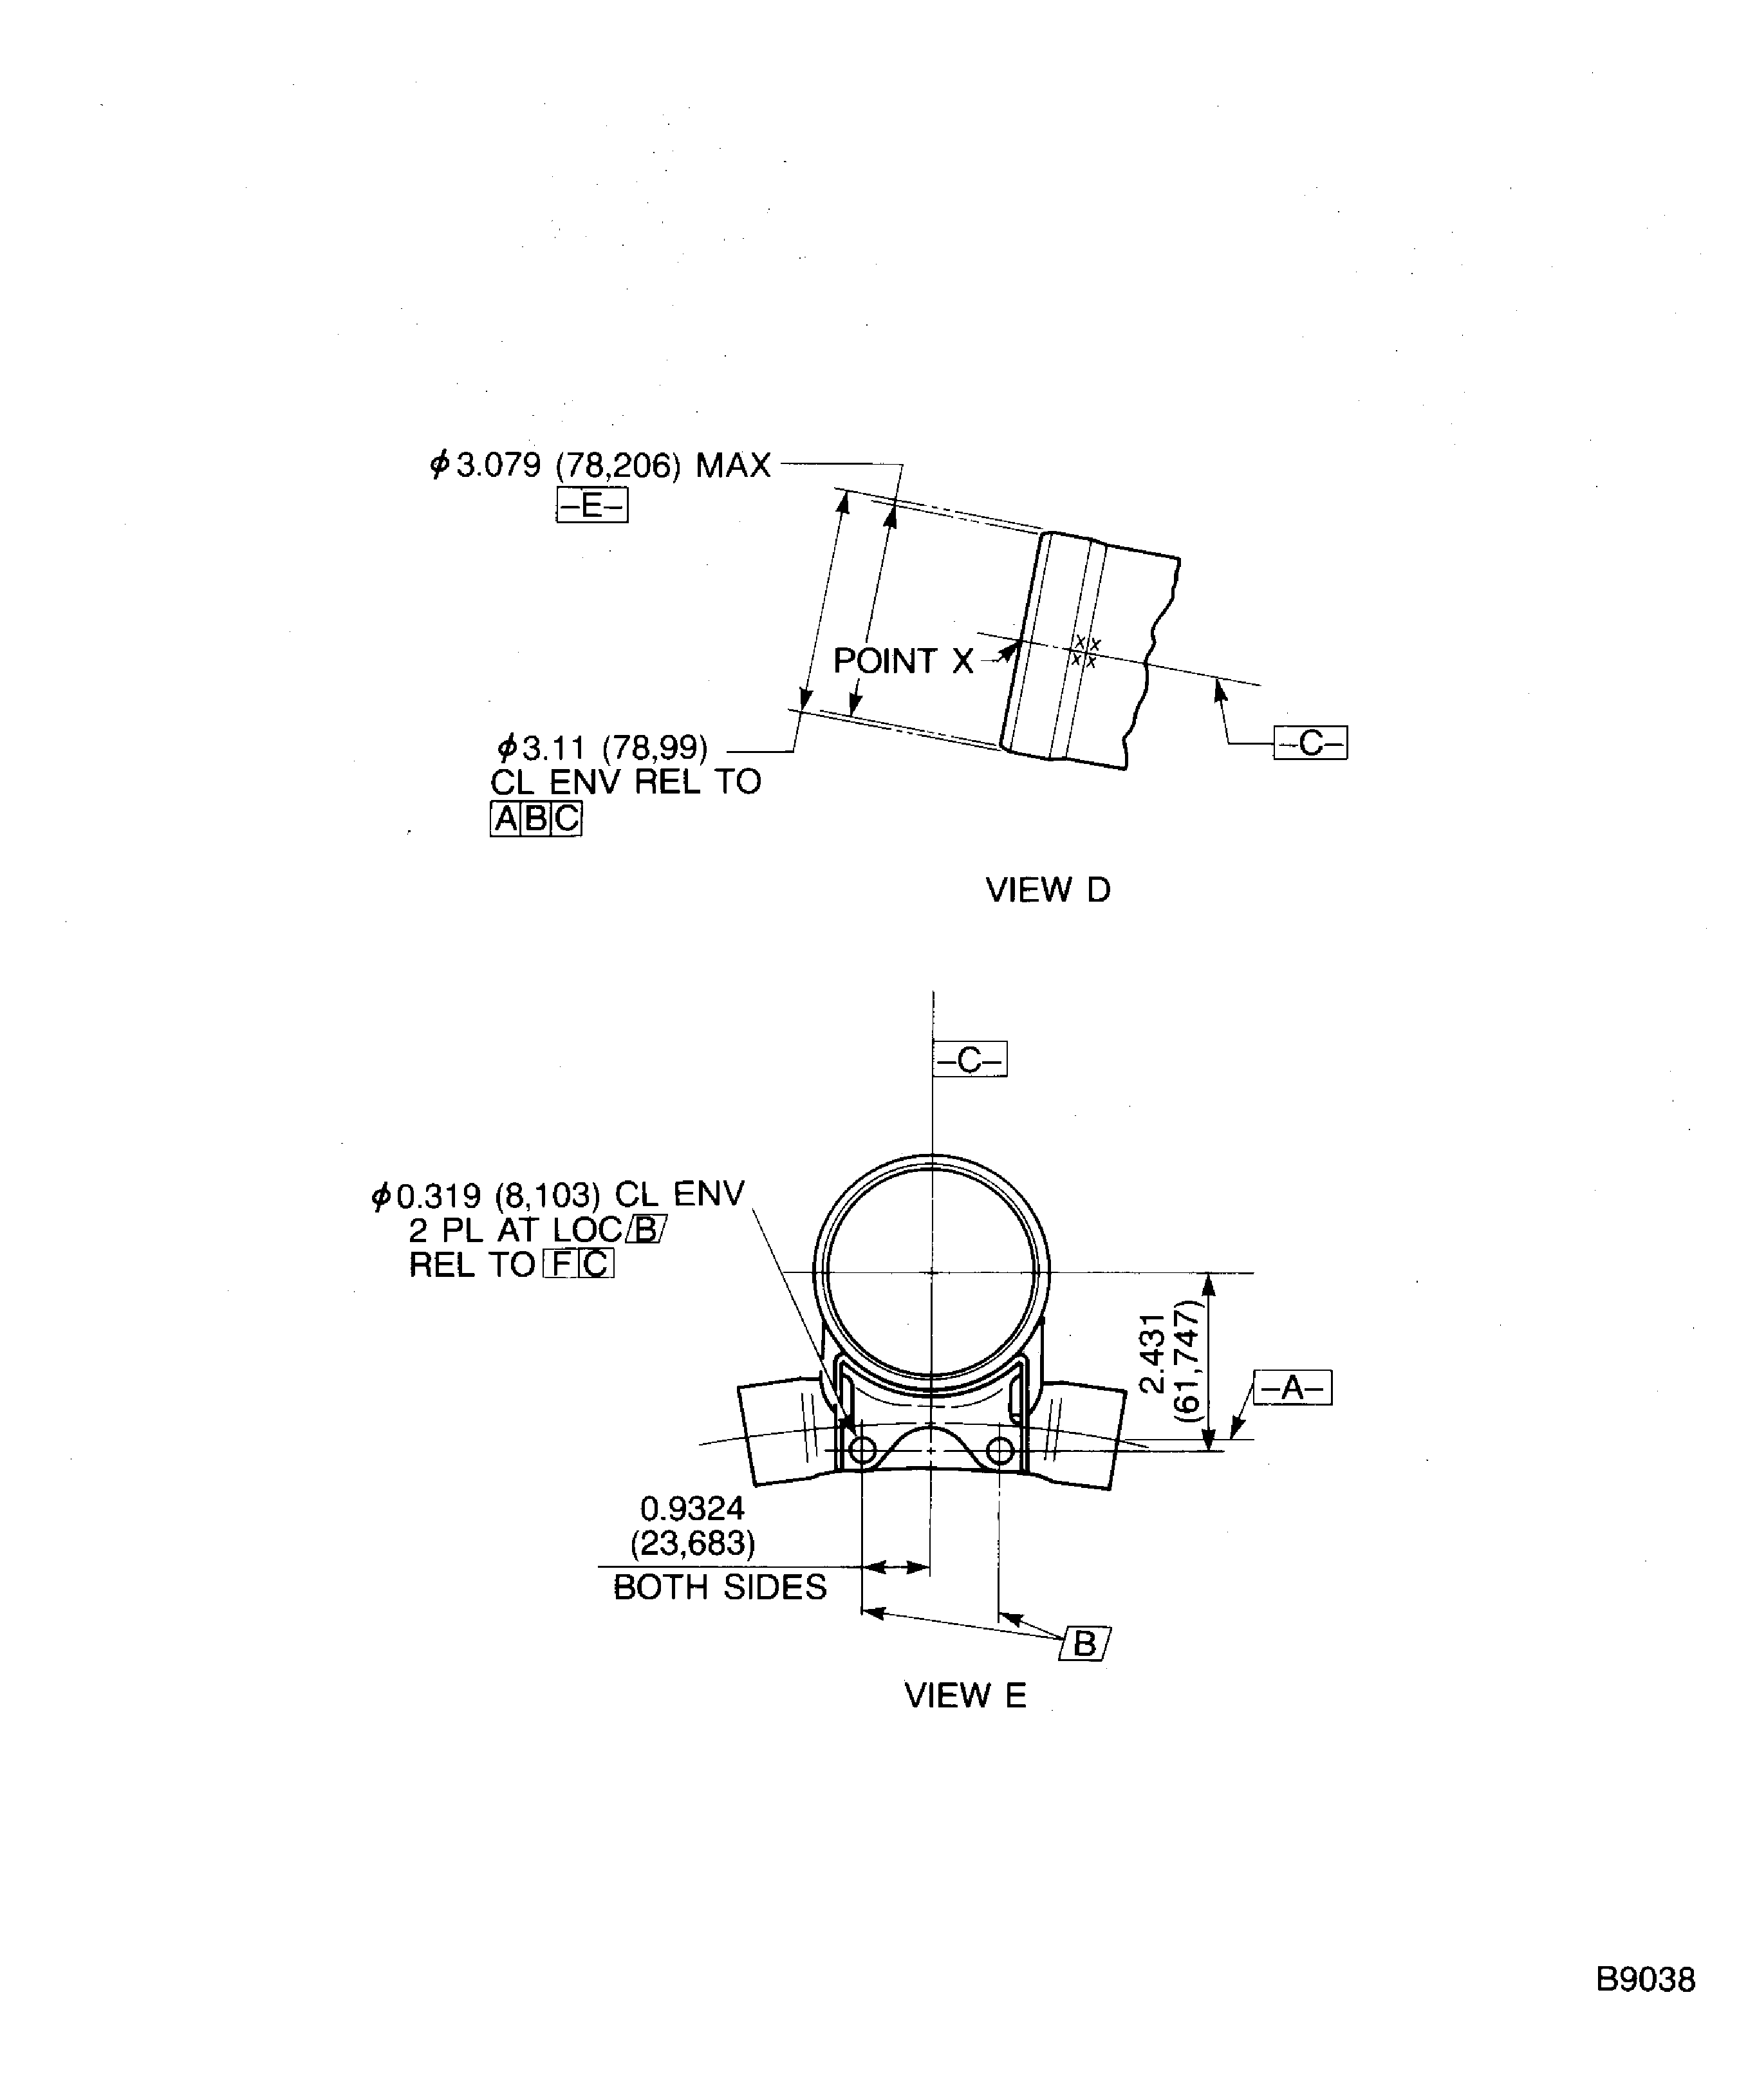
Re-shape the Turbine Cooling Manifold Assembly
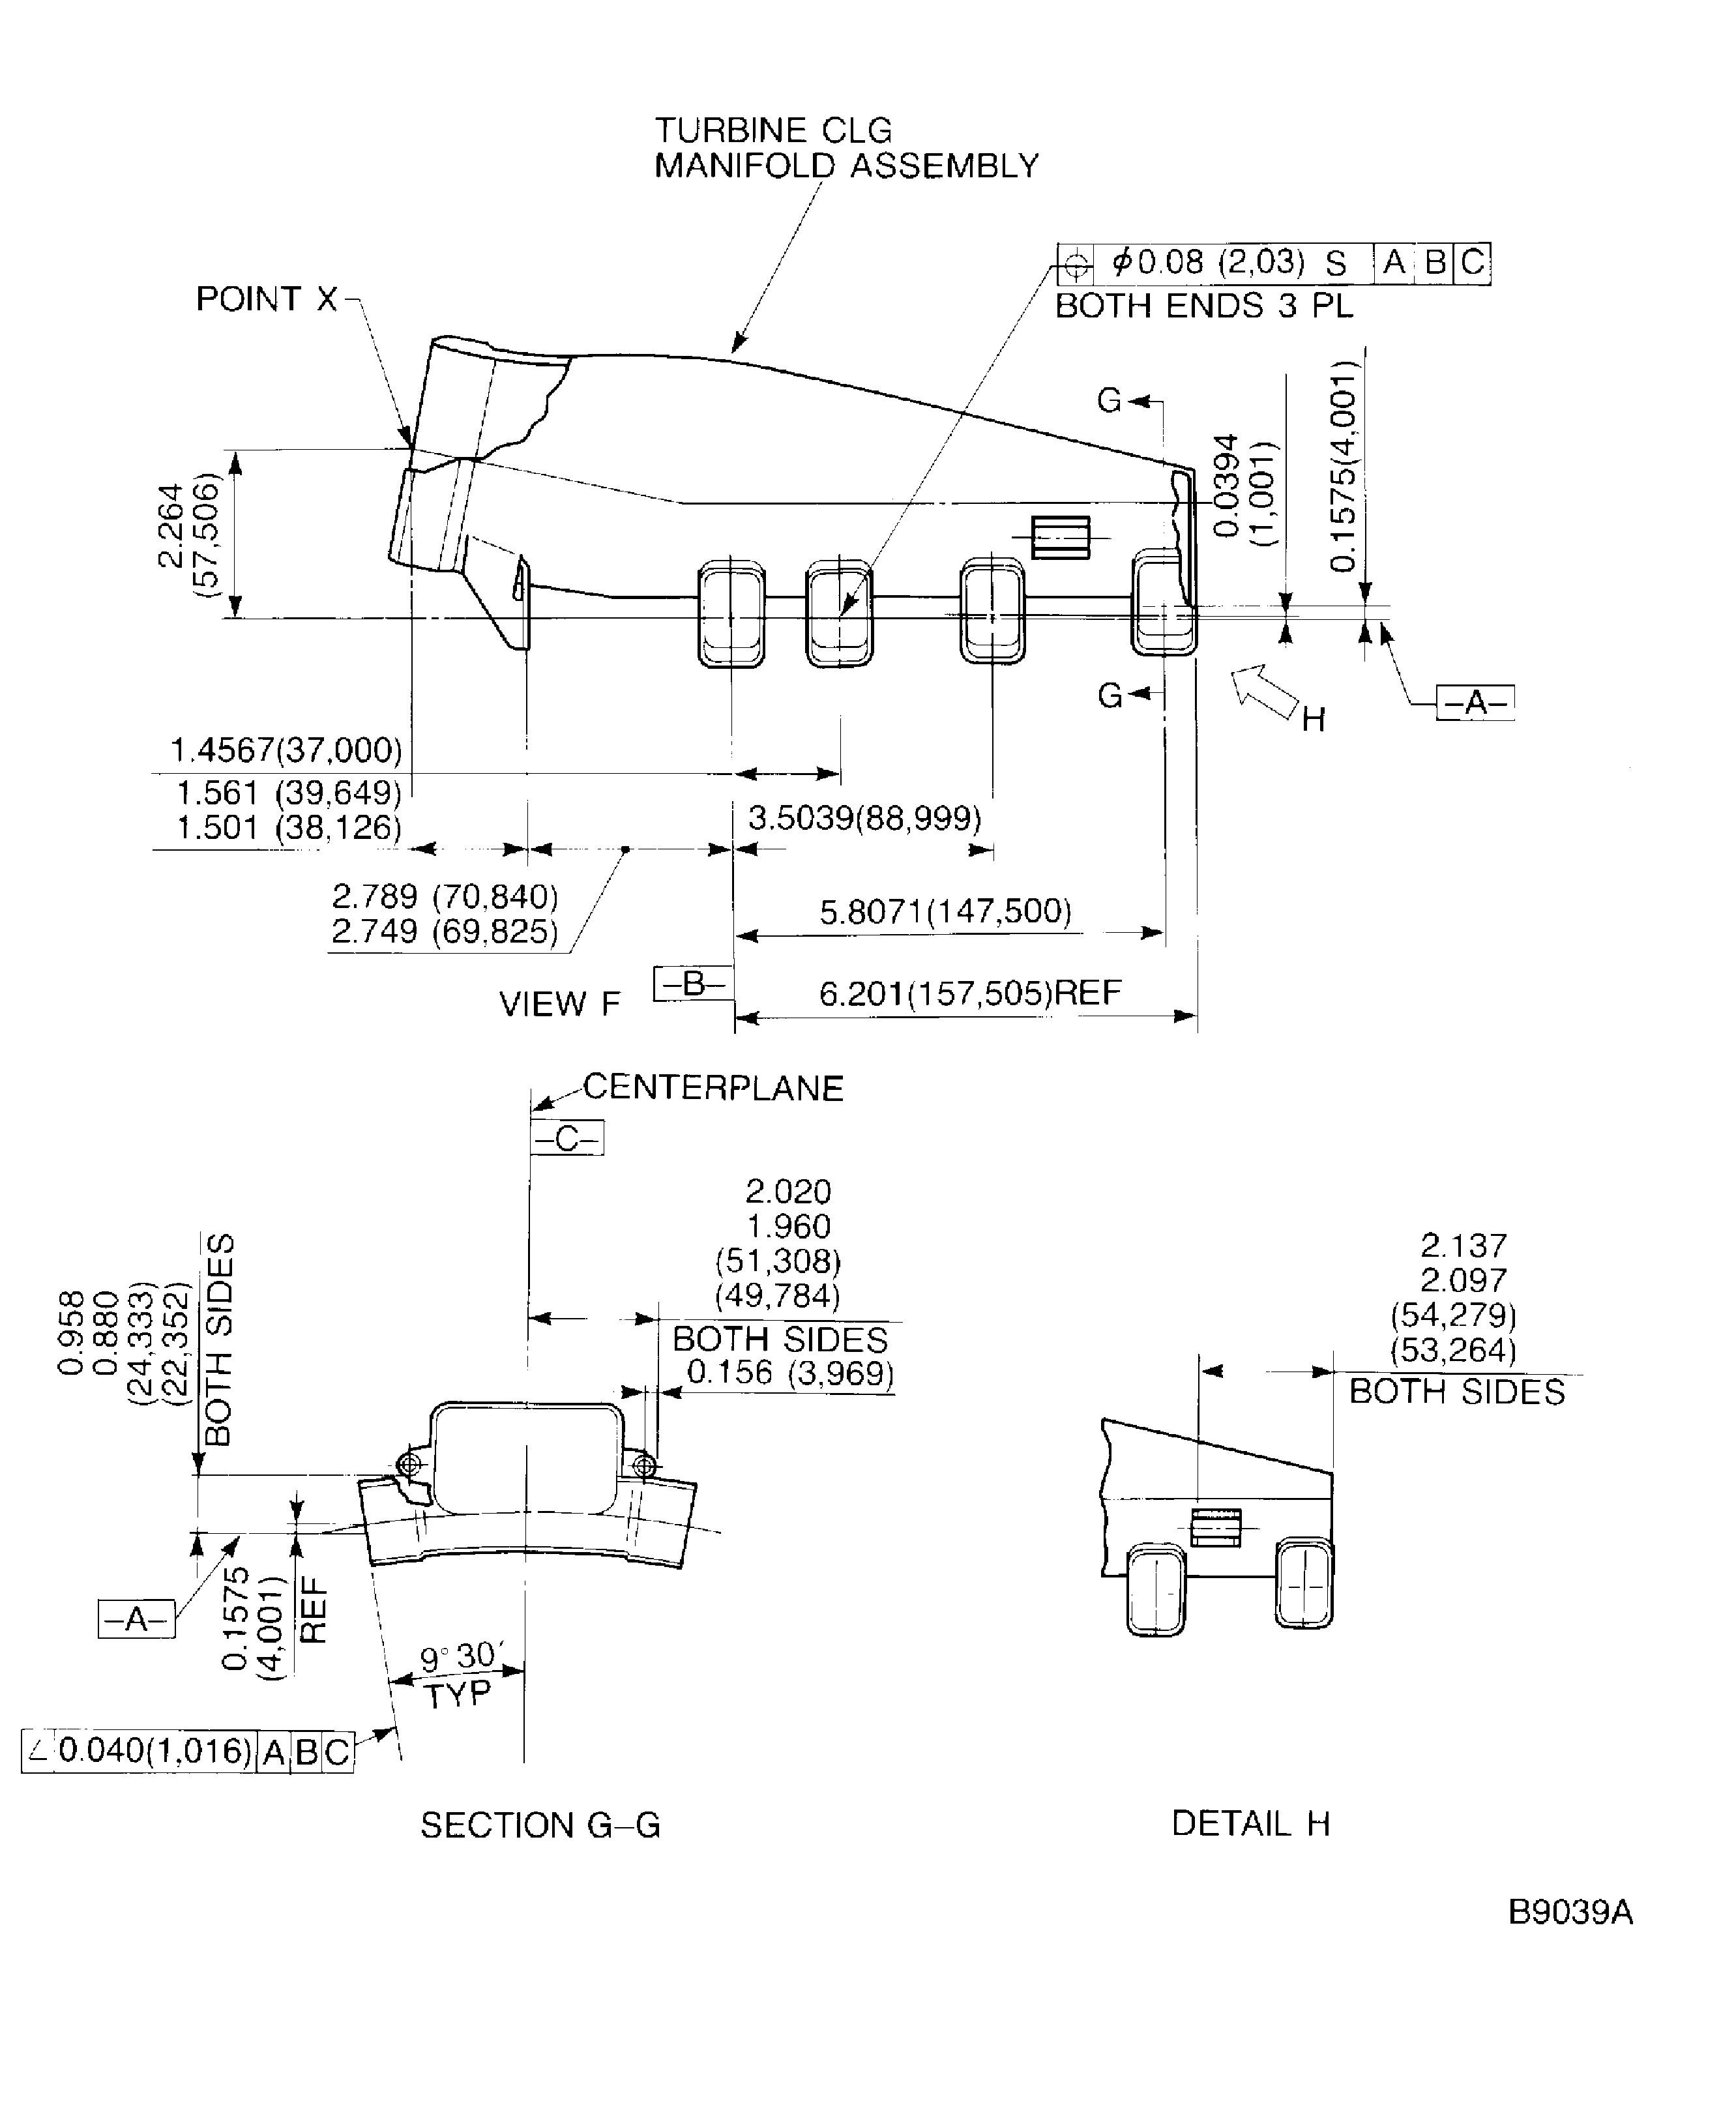
Re-shape the Turbine Cooling Manifold Assembly
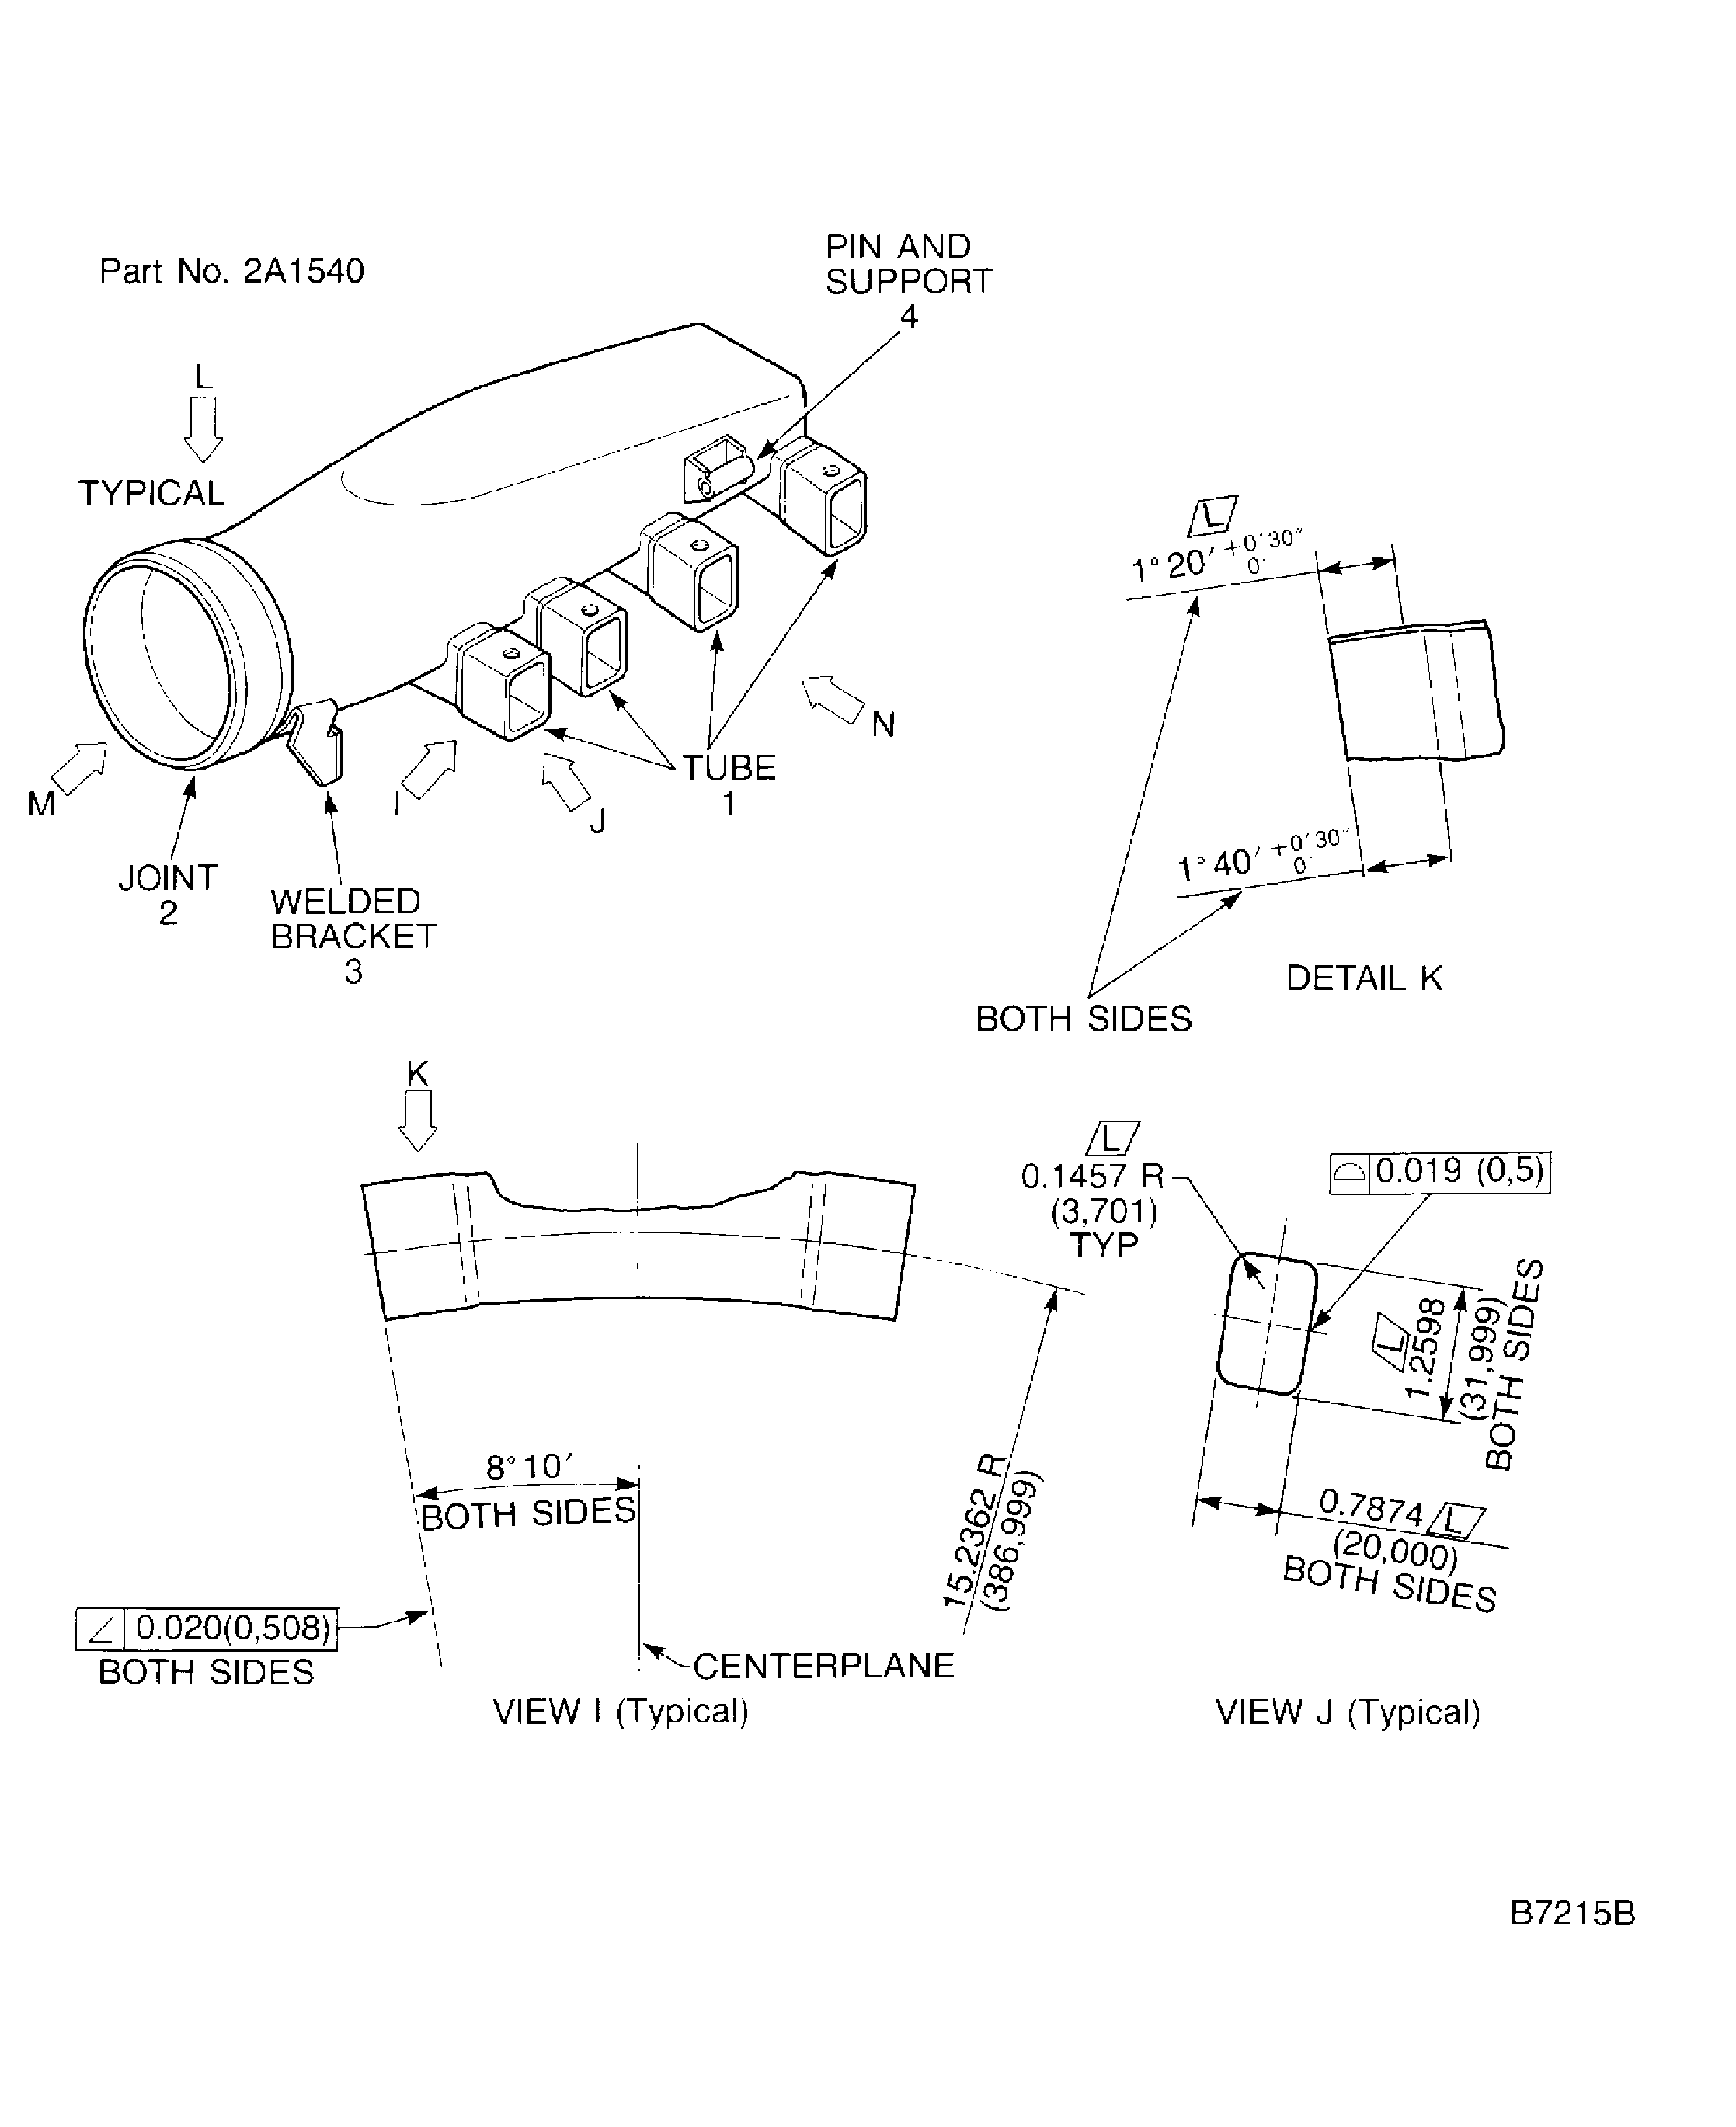
Re-shape the Turbine Cooling Manifold Assembly
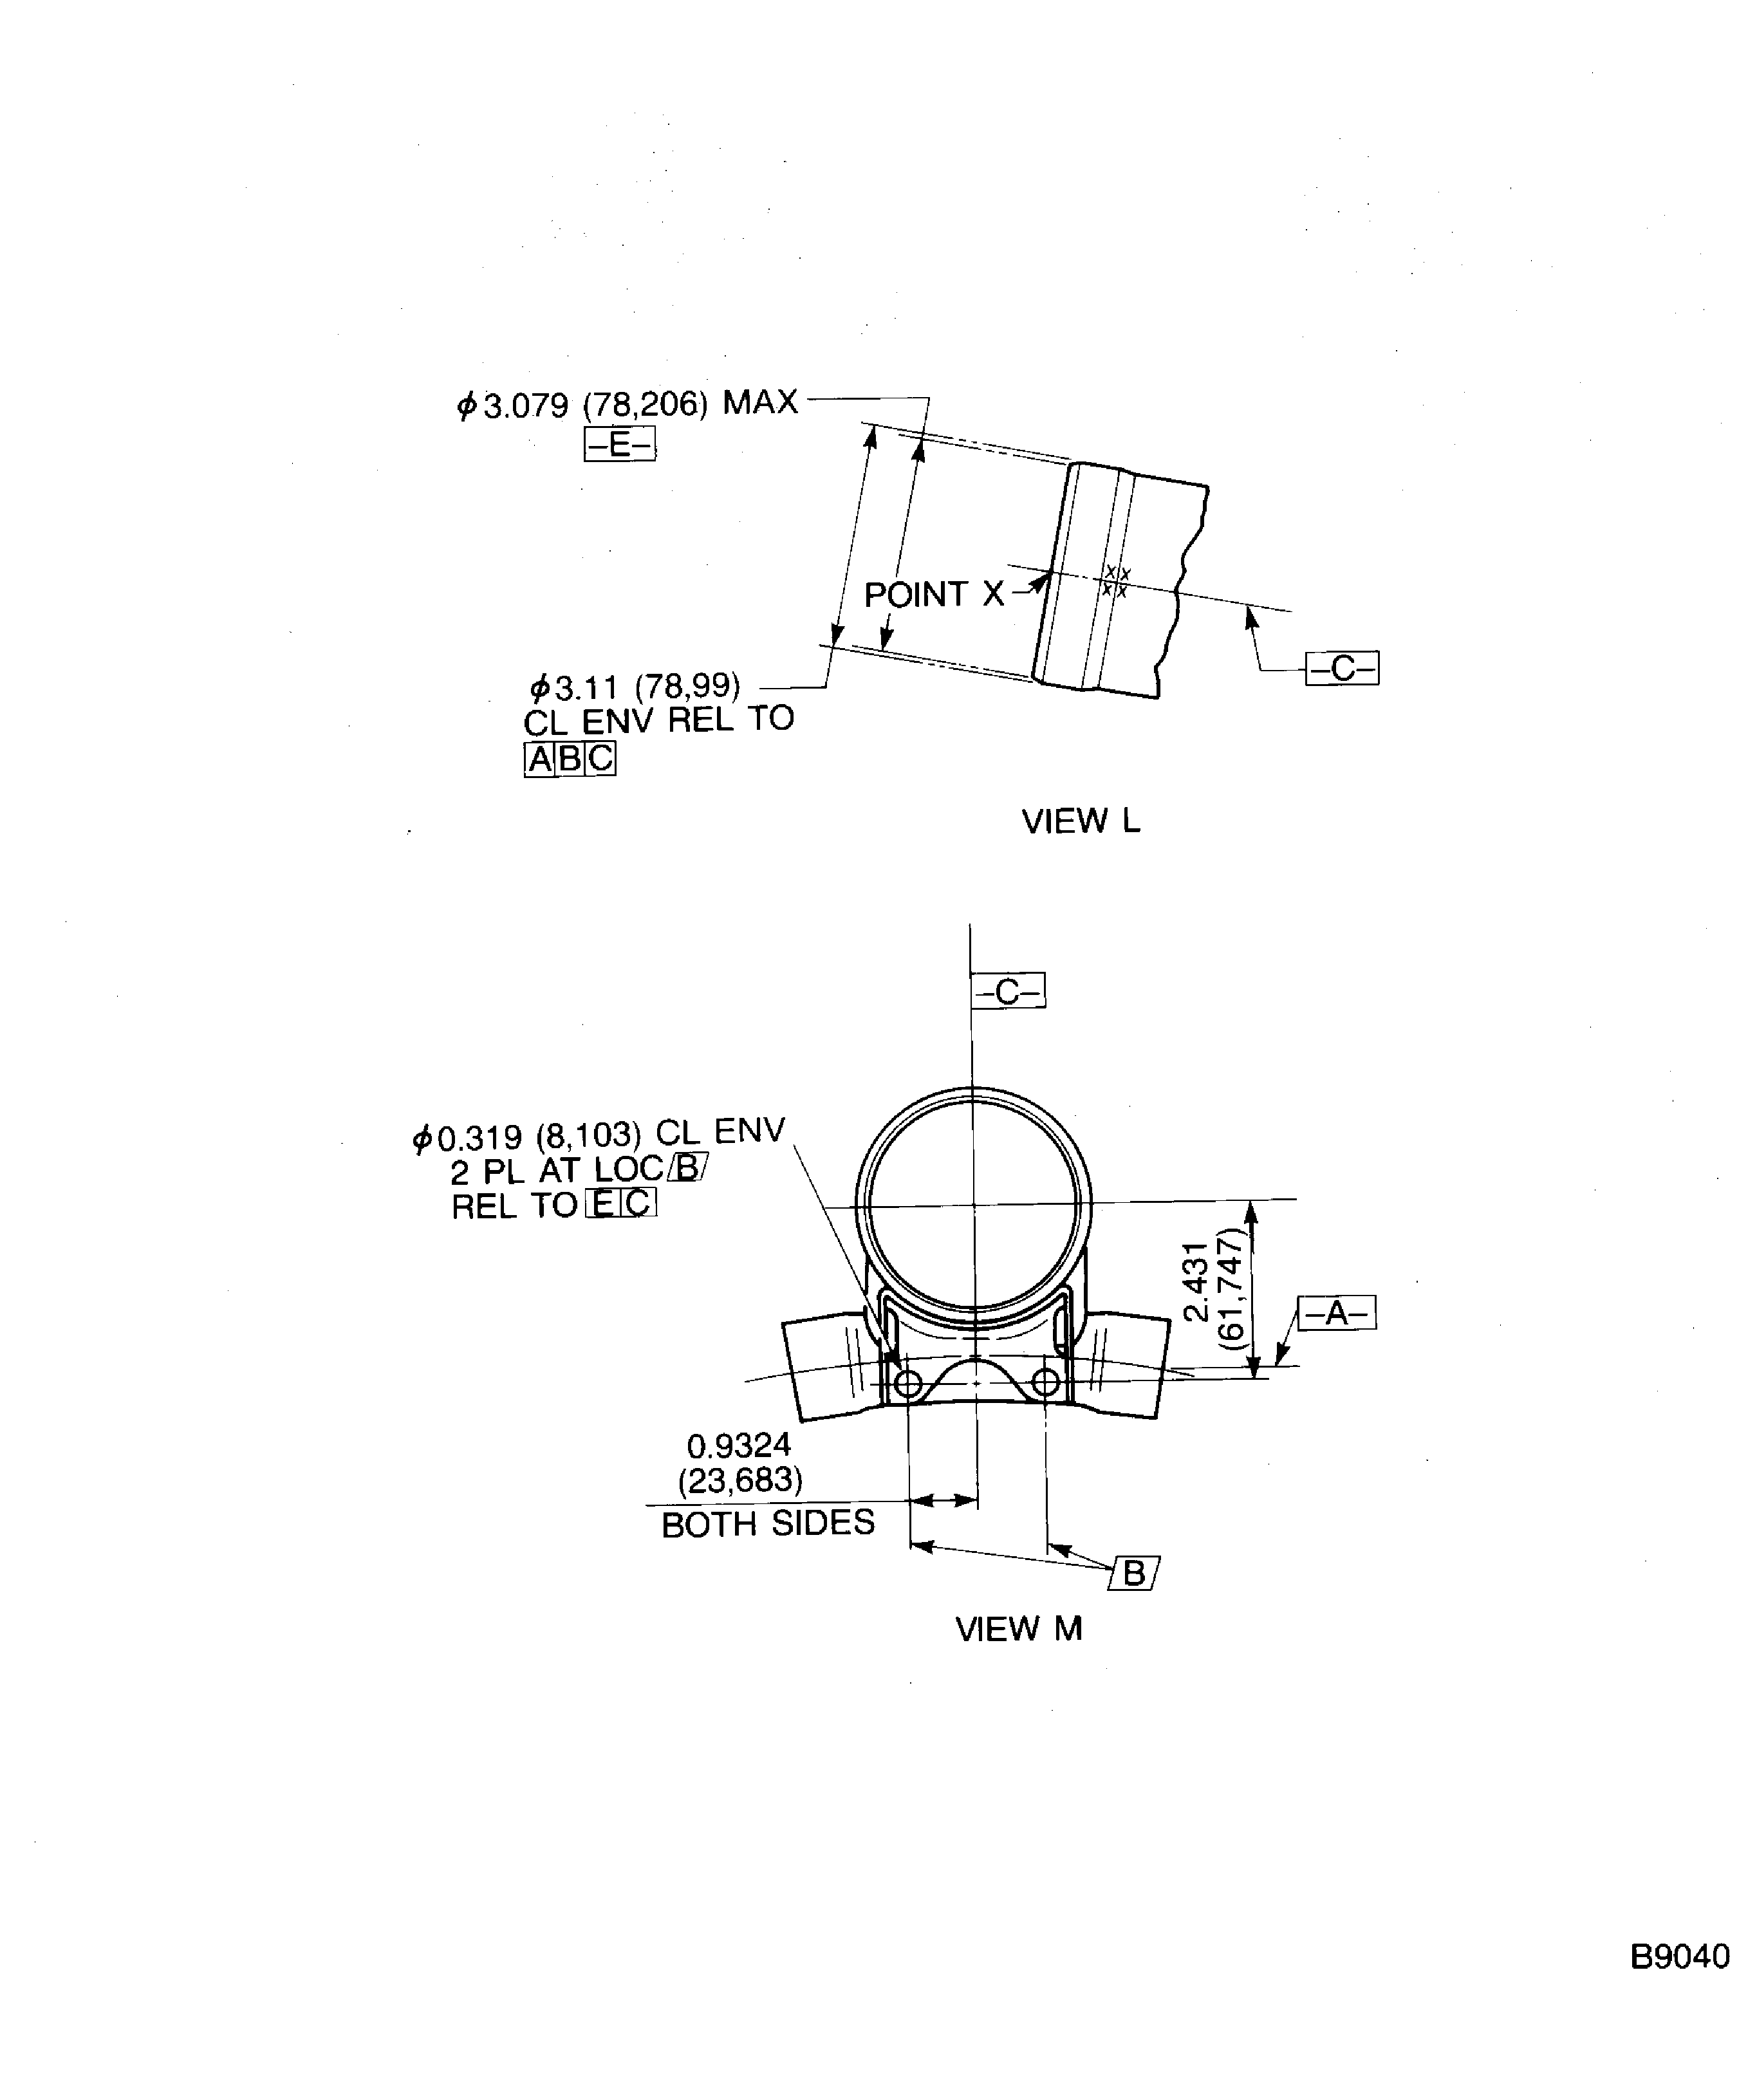
Re-shape the Turbine Cooling Manifold Assembly
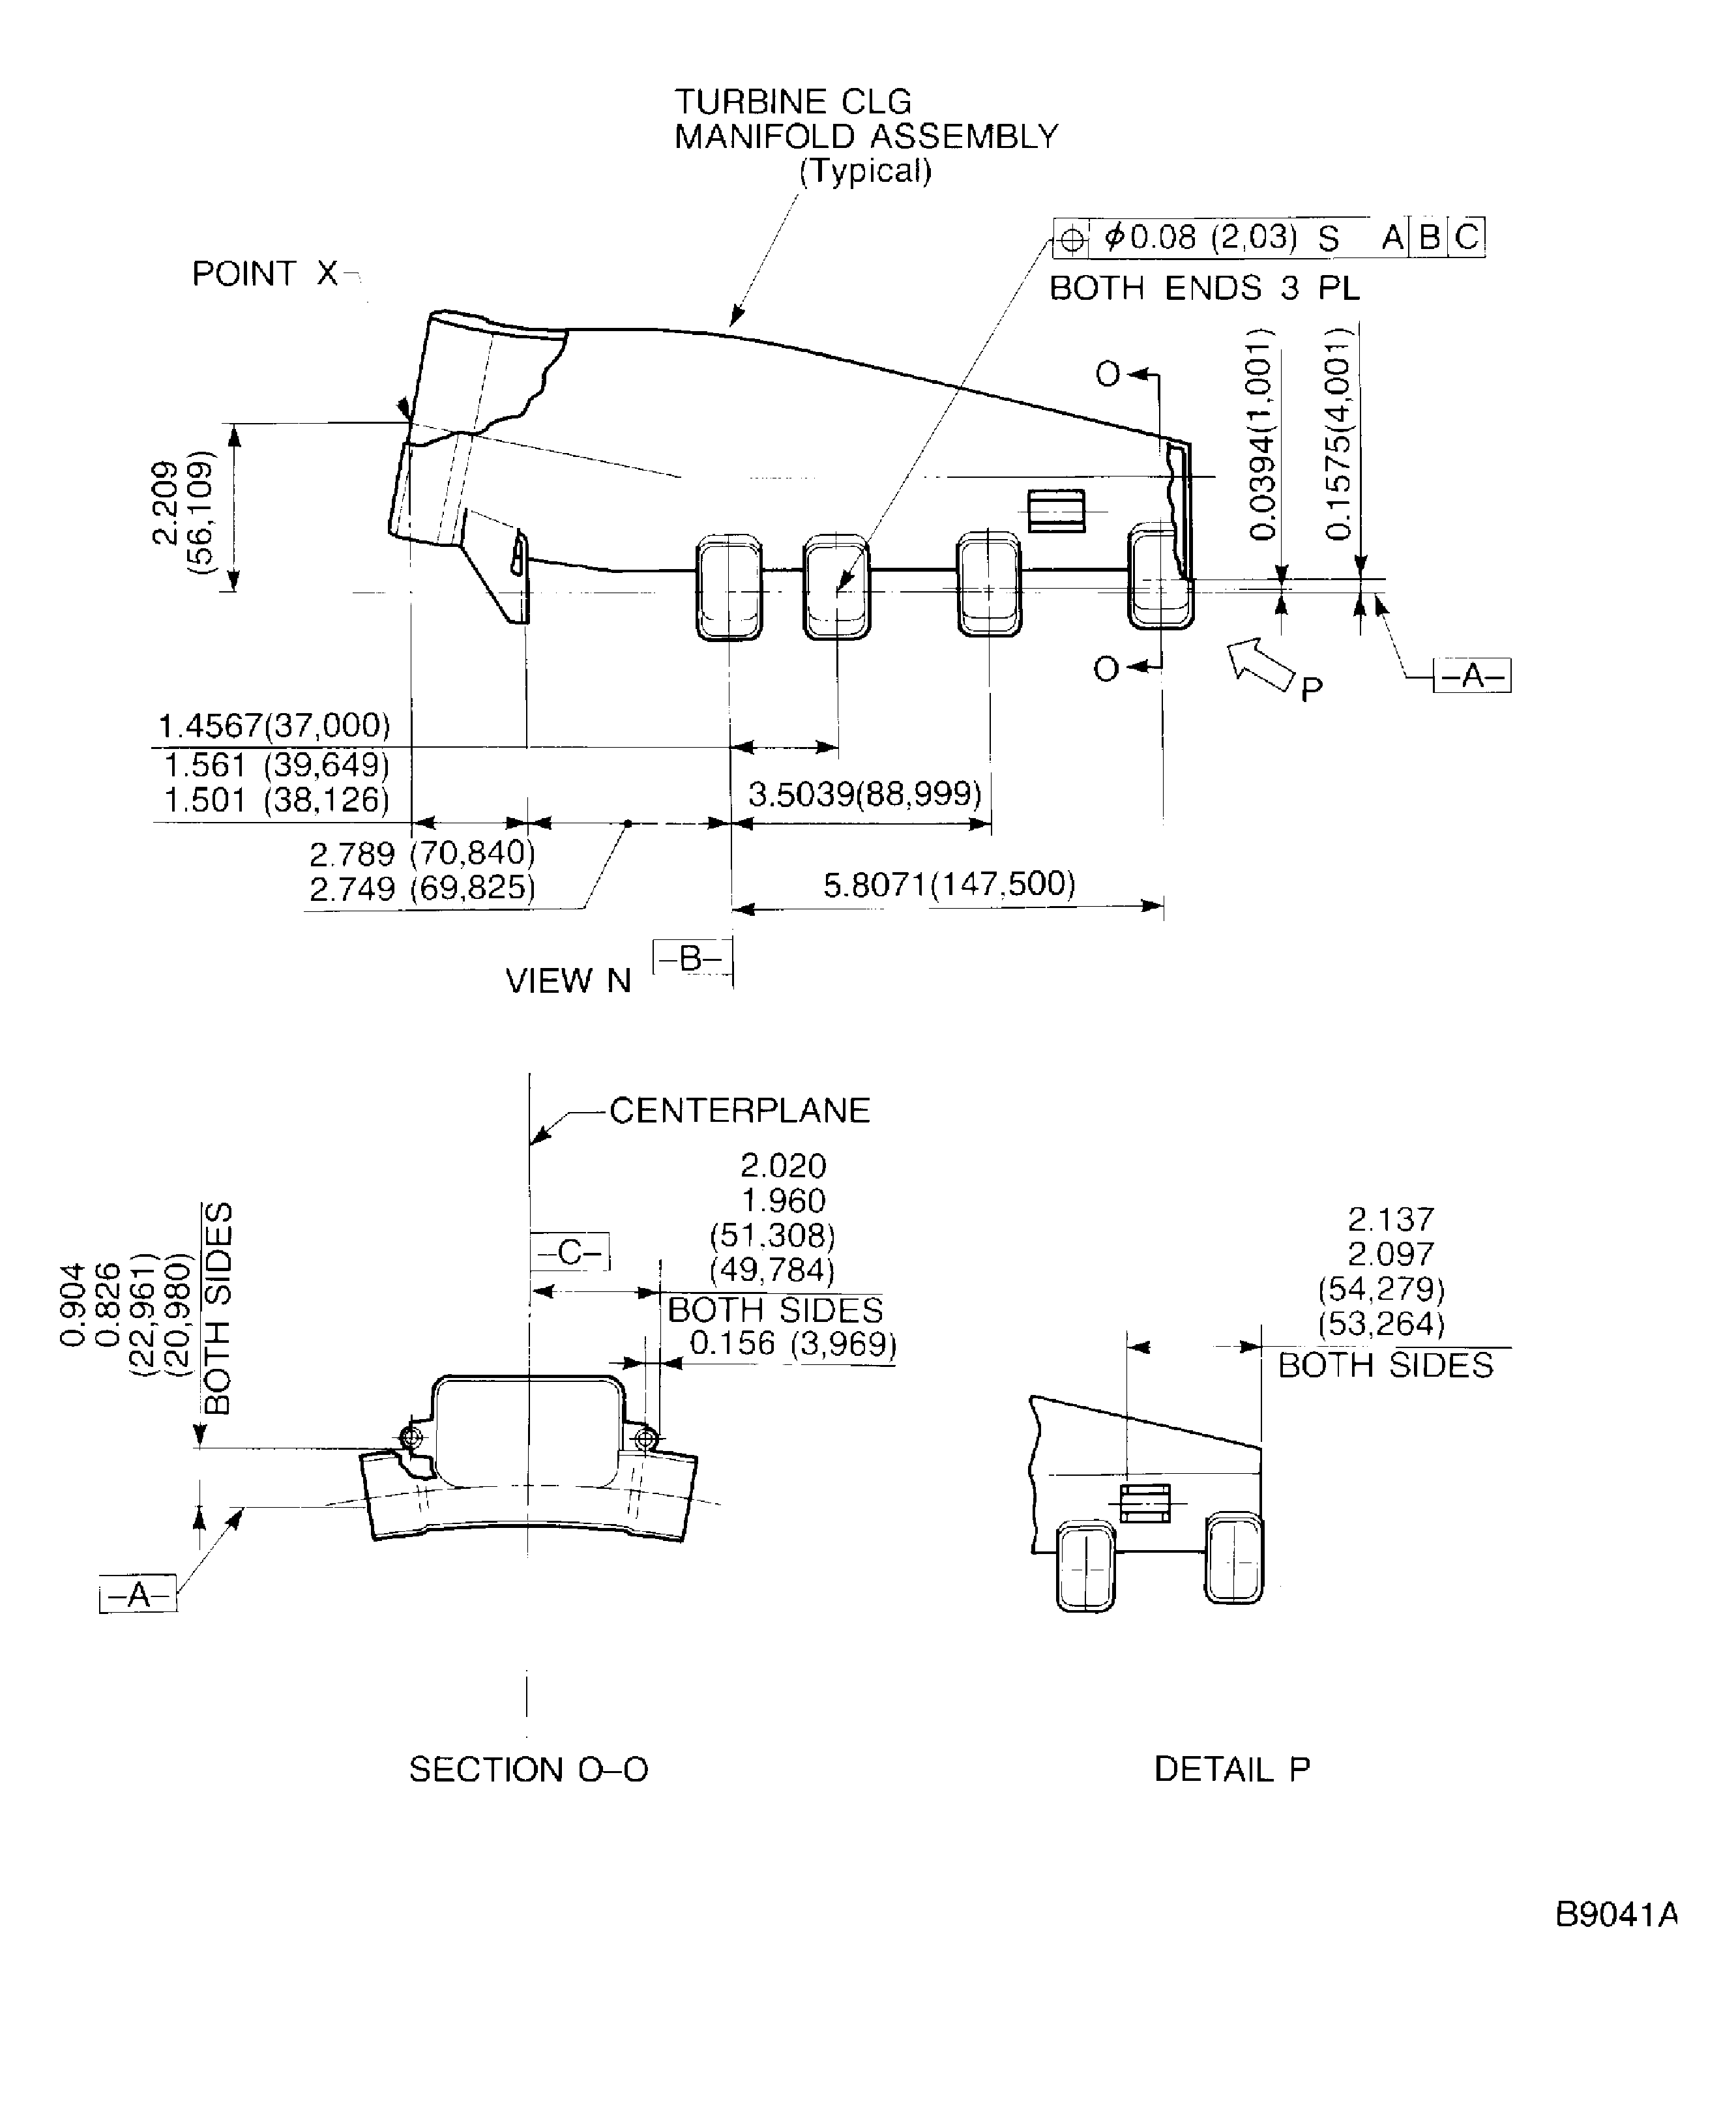
Re-shape the Turbine Cooling Manifold Assembly
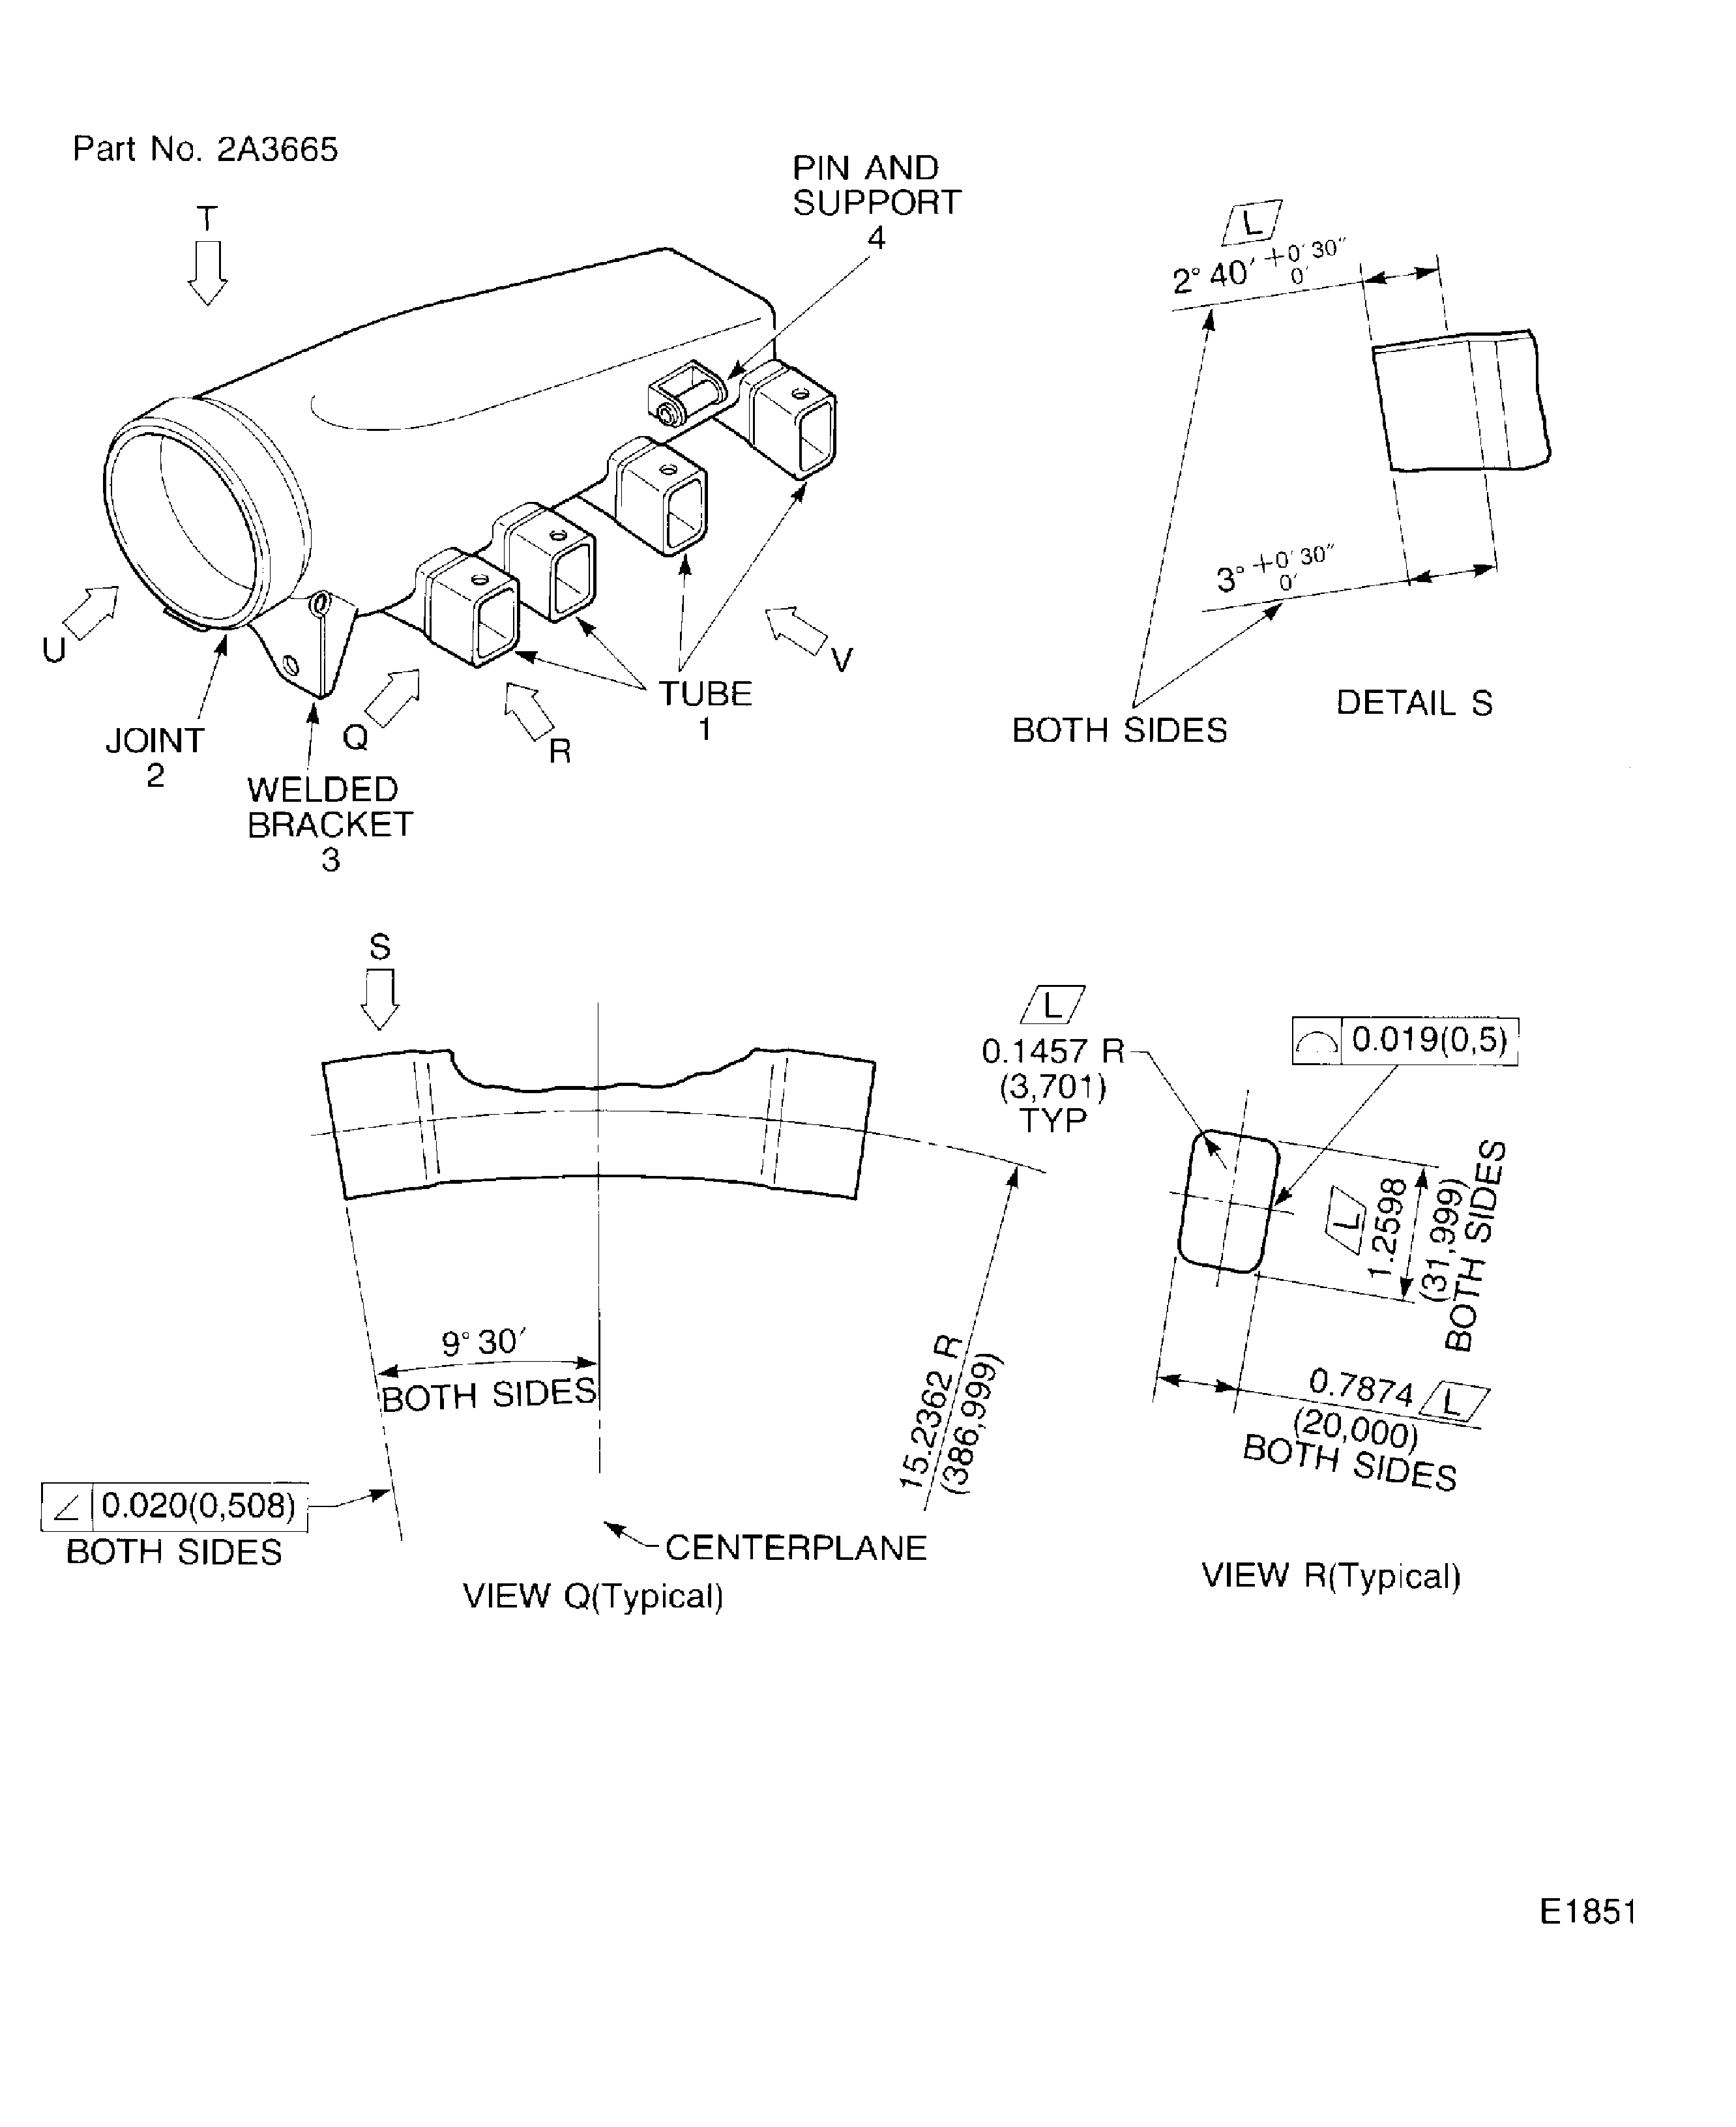
Re-shape the Turbine Cooling Manifold Assembly
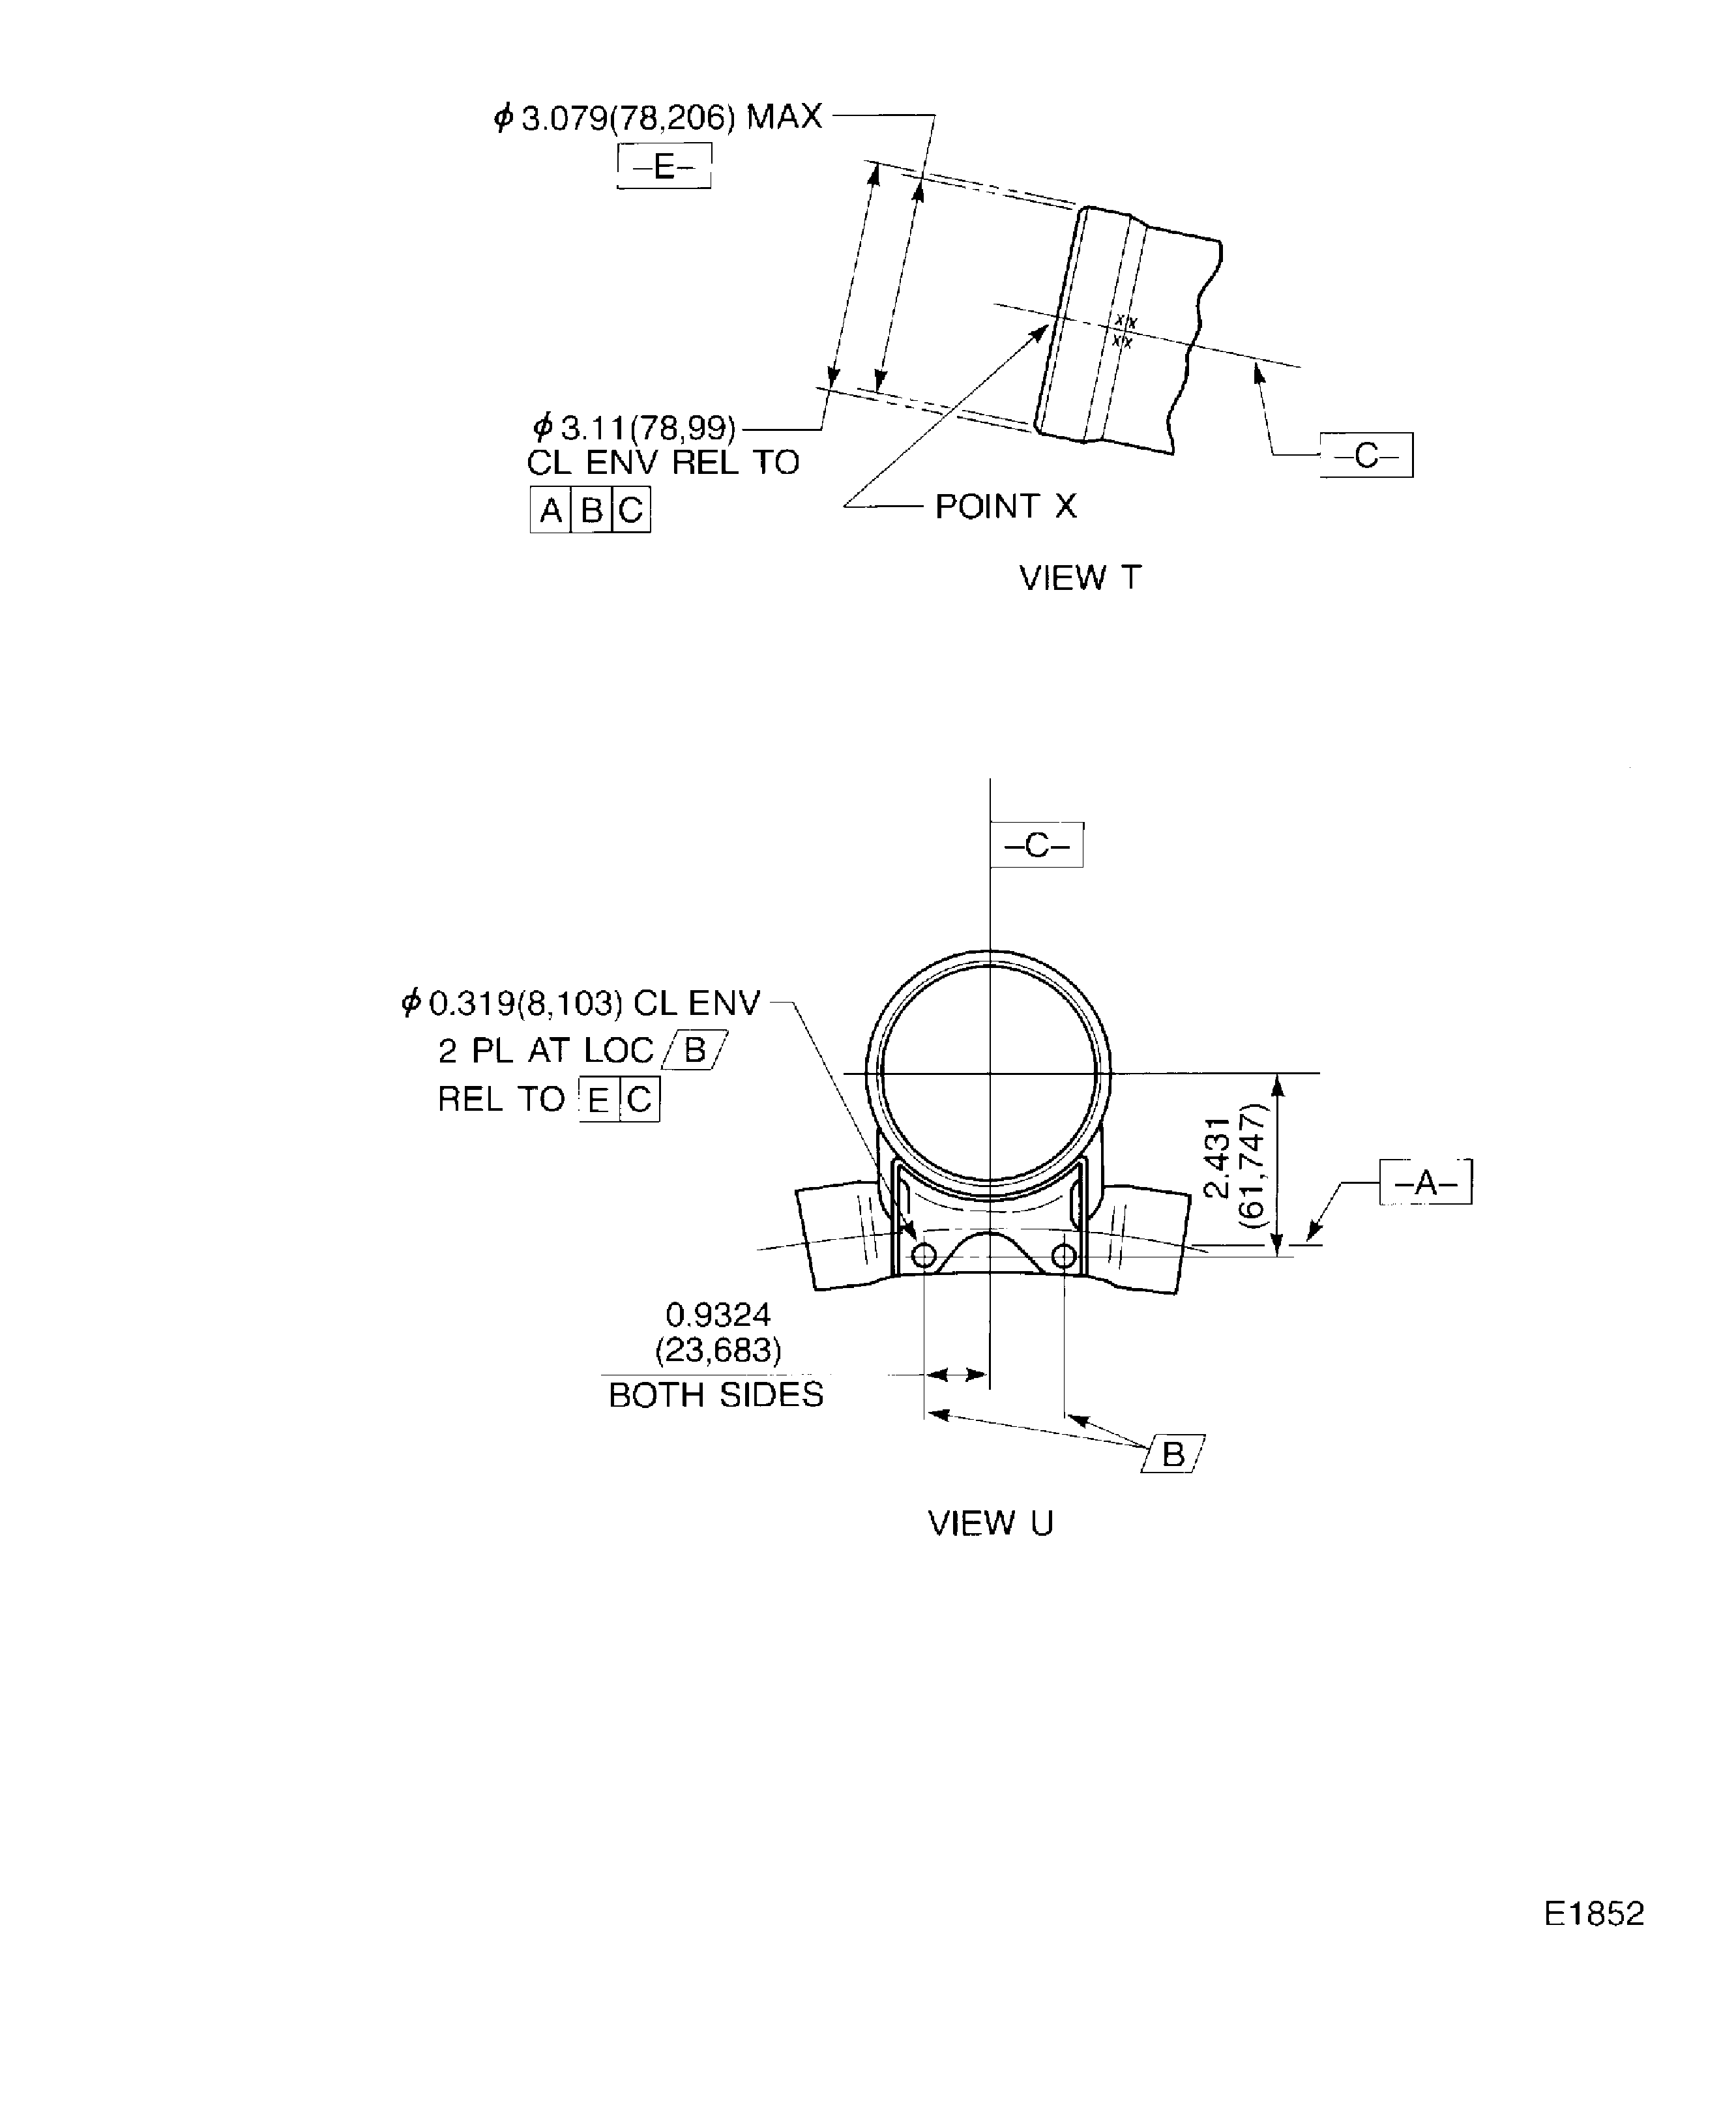
Re-shape the Turbine Cooling Manifold Assembly
