Export Control
EAR Export Classification: Not subject to the EAR per 15 C.F.R. Chapter 1, Part 734.3(b)(3), except for the following Service Bulletins which are currently published as EAR Export Classification 9E991: SBE70-0992, SBE72-0483, SBE72-0580, SBE72-0588, SBE72-0640, SBE73-0209, SBE80-0024 and SBE80-0025.Copyright
© IAE International Aero Engines AG (2001, 2014 - 2021) The information contained in this document is the property of © IAE International Aero Engines AG and may not be copied or used for any purpose other than that for which it is supplied without the express written authority of © IAE International Aero Engines AG. (This does not preclude use by engine and aircraft operators for normal instructional, maintenance or overhaul purposes.).Applicability
All
Common Information
TASK 75-24-48-300-011 HPT ACC Air Tubes - Re-Shape the Tubes, Repair-011 (VRS1528)
Effectivity
FIG/ITEM | PART NO. |
02-200 | 2A0220 |
02-200 | 2A1545 |
02-210 | 2A0225 |
02-210 | 2A1549 |
02-220 | 2A0229 |
02-220 | 2A1553 |
02-230 | 2A0233 |
02-230 | 2A1557 |
02-400 | 2A0223 |
02-400 | 2A1547 |
02-410 | 2A0227 |
02-410 | 2A1551 |
02-420 | 2A0231 |
02-420 | 2A1555 |
02-430 | 2A0235 |
02-430 | 2A1559 |
General
Price and availability - none.
The practices and processes referred to in the procedure by the TASK numbers are in the SPM.
For the method to clean the parts, refer to Cleaning-000 TASK 75-24-48-100-100.
NOTE
Preliminary Requirements
Pre-Conditions
NONESupport Equipment
| Name | Manufacturer | Part Number / Identification | Quantity | Remark |
|---|---|---|---|---|
| Fluorescent Penetrant Inspection Equipment | LOCAL | Fluorescent Penetrant Inspection Equipment |
Consumables, Materials and Expendables
NONESpares
NONESafety Requirements
NONEProcedure
Use small hammer permissible.
Lightly hit all around the convex side of any dent or deformed surface to smooth out.
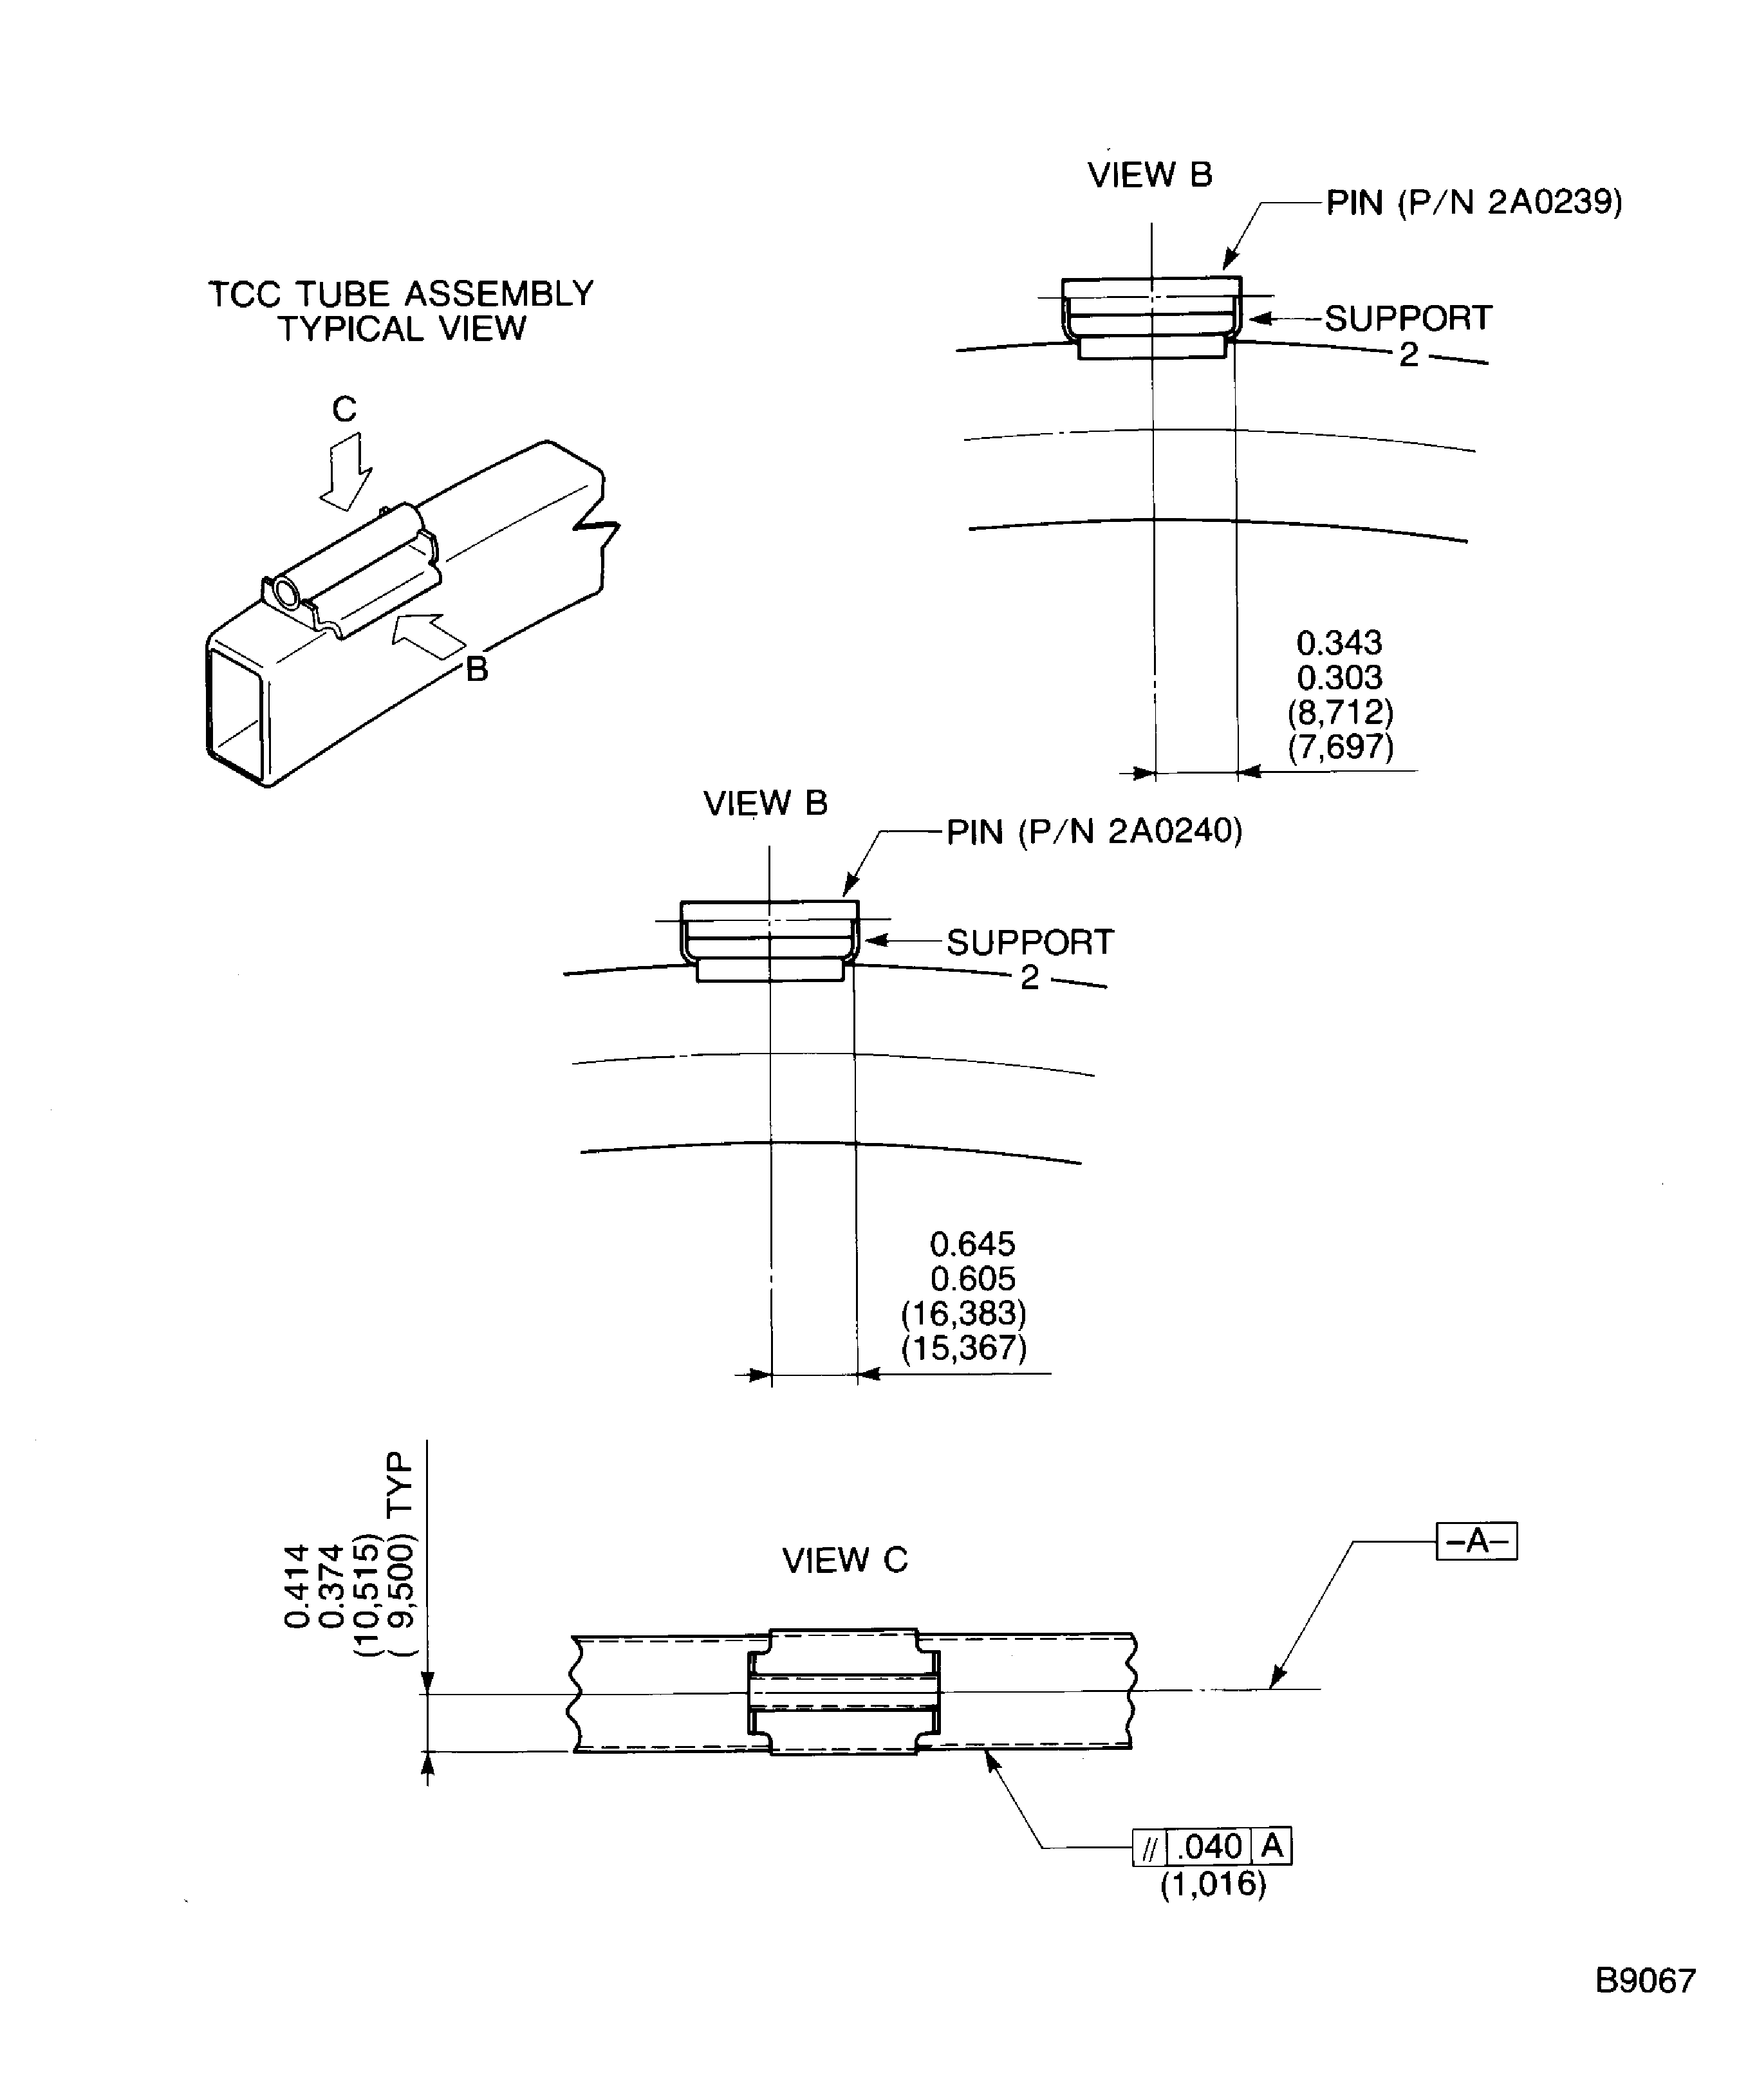
SUBTASK 75-24-48-350-083 Re-Shape the Tube End and/or the Support of TCC Tube Assemblies
Refer to Figure.
Refer to Figure.
Residual creases within 0.02 in. (0.50 mm) contour tolerance are permitted.
Dimensionally check the tube end at location 1 for distortion.
Refer to Figure.
Residual creases within 0.02 in. (0.50 mm) contour tolerance are permitted.
Dimensionally check the support at location 2 for distortion.
Refer to SPM TASK 70-23-05-230-501.
No cracks are permitted.
Do the test for cracks
SUBTASK 75-24-48-220-073 Examine the TCC Tube Assemblies
Figure: Re-shape the Tube End of TCC Tube Assemblies
Re-shape the Tube End of TCC Tube Assemblies

Re-shape the Tube End of TCC Tube Assemblies

