Export Control
EAR Export Classification: Not subject to the EAR per 15 C.F.R. Chapter 1, Part 734.3(b)(3), except for the following Service Bulletins which are currently published as EAR Export Classification 9E991: SBE70-0992, SBE72-0483, SBE72-0580, SBE72-0588, SBE72-0640, SBE73-0209, SBE80-0024 and SBE80-0025.Copyright
© IAE International Aero Engines AG (2001, 2014 - 2021) The information contained in this document is the property of © IAE International Aero Engines AG and may not be copied or used for any purpose other than that for which it is supplied without the express written authority of © IAE International Aero Engines AG. (This does not preclude use by engine and aircraft operators for normal instructional, maintenance or overhaul purposes.).Applicability
All
Common Information
TASK 75-24-49-300-063 LPT ACC Connector Air Tube - Blend Repair, Repair-063 (VRS4600)
General
Price and availability - none
The practices and processes referred to in the procedure by the TASK numbers are in the SPM.
Make sure that the necessary cleaning and inspection procedures are done before this repair.
NOTE
Preliminary Requirements
Pre-Conditions
NONESupport Equipment
NONEConsumables, Materials and Expendables
NONESpares
NONESafety Requirements
NONEProcedure
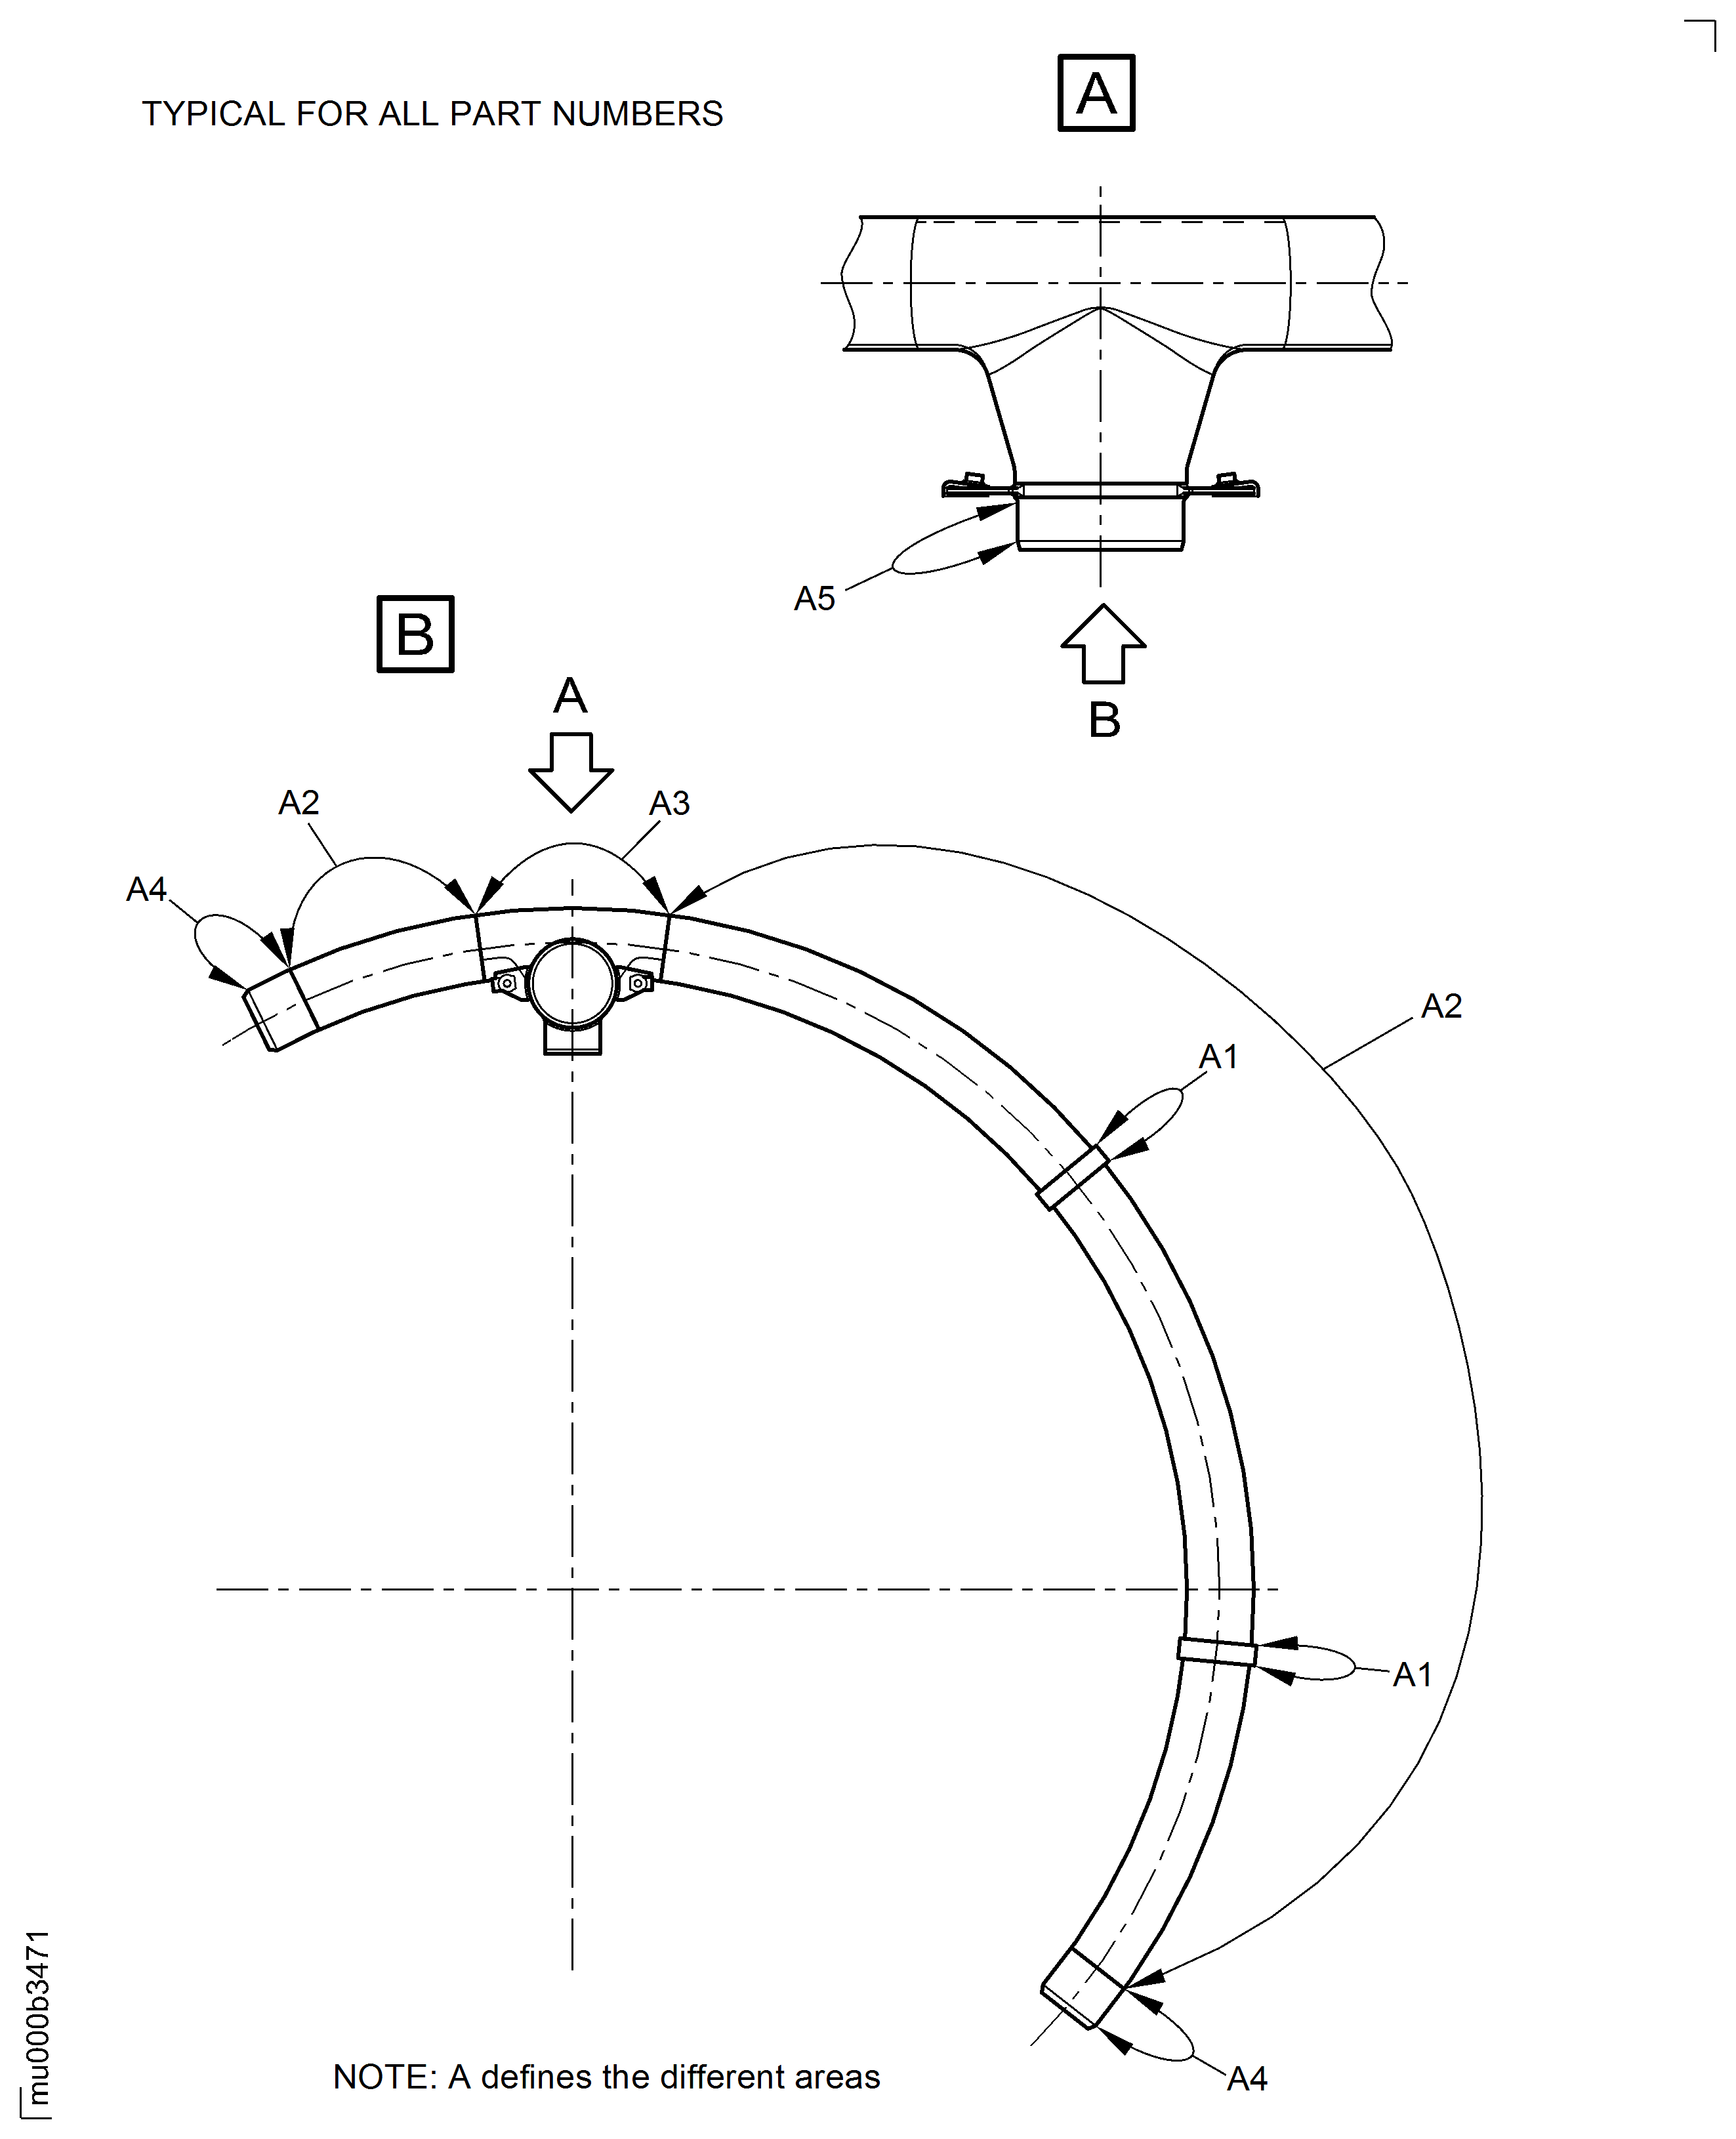
Refer to Figure.
NOTE
Refer to SPM TASK 70-35-03-300-501 for blending surface damage.
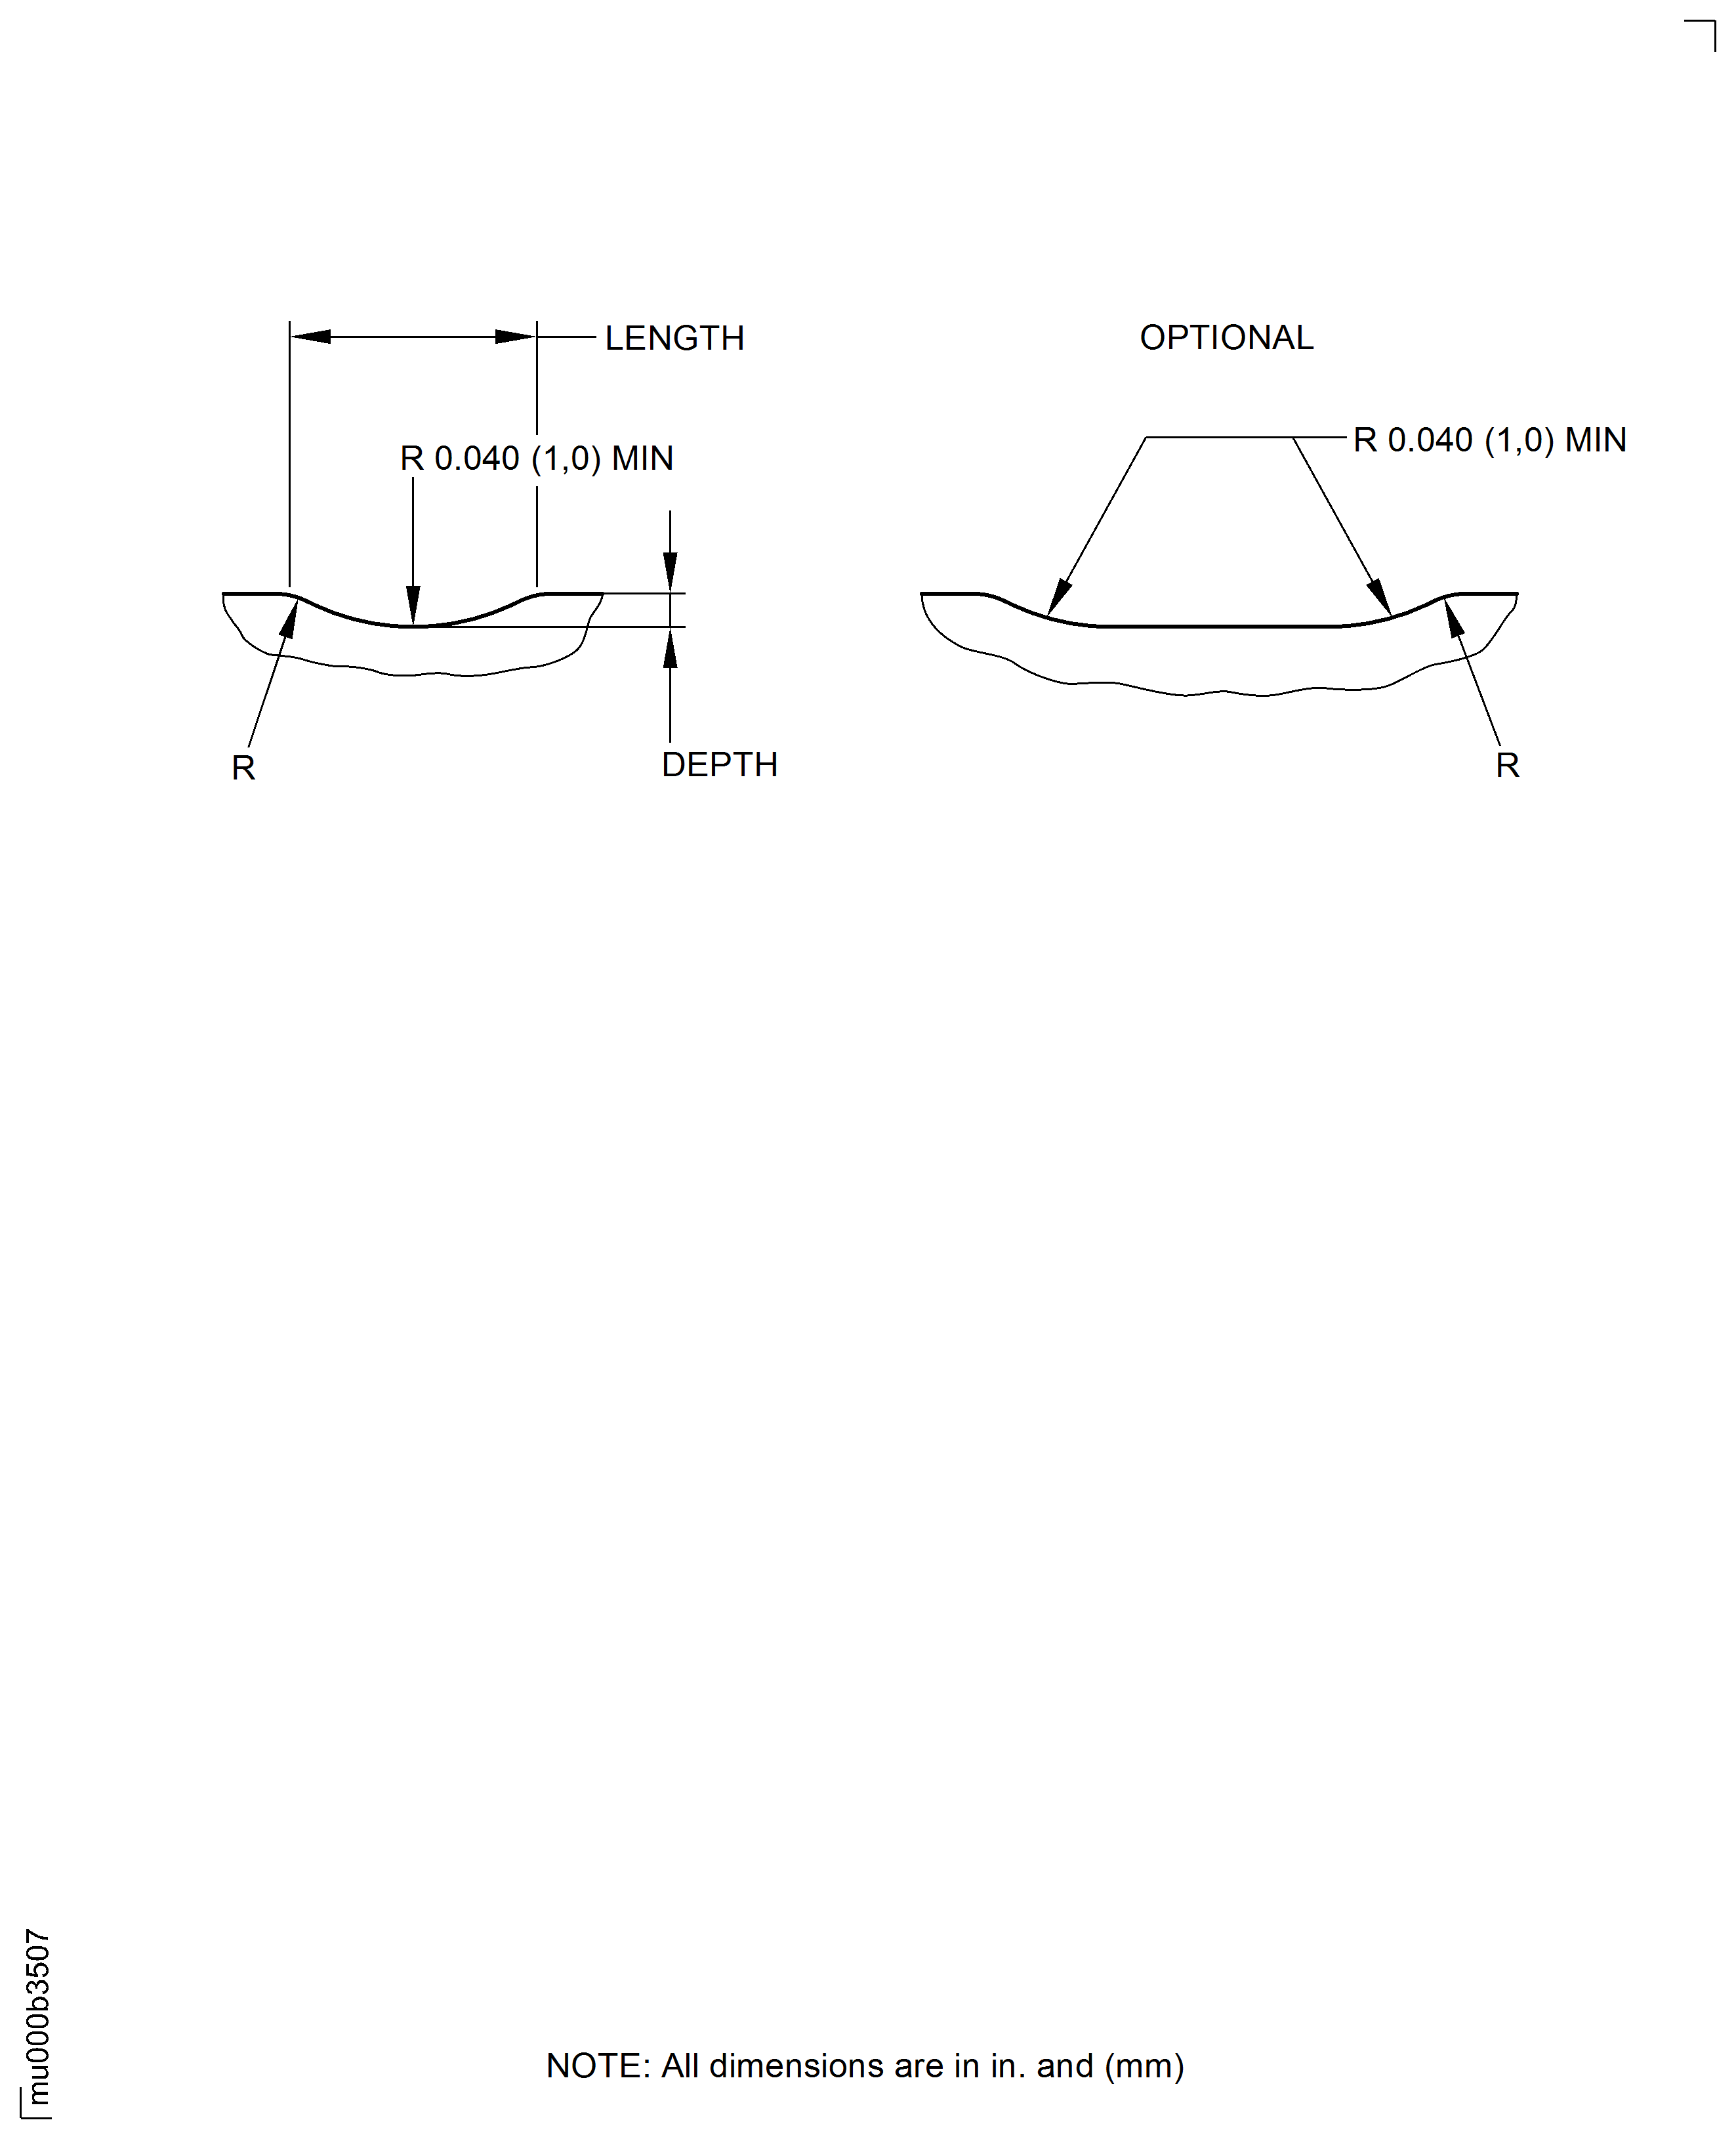
For local blending use a length to depth ratio of 10:1 minimum. Refer to Figure.
Minimum wall thickness after blending must not be less than 0.038 in. (0.97 mm).
Blend repair in area A1
Minimum wall thickness after blending must not be less than 0.018 in. (0.47 mm).
Blend repair in area A2
Minimum wall thickness after blending must not be less than 0.032 in. (0.80 mm).
Blend repair in area A3
Minimum wall thickness after blending must not be less than 0.053 in. (1.35 mm).
Blend repair in area A4
Minimum wall thickness after blending must not be less than 0.064 in. (1.62 mm).
Blend repair in area A5
SUBTASK 75-24-49-350-003 Blend Repair the Connector Tube
Refer to Figure.
The blended surface must be as smooth as the initial surface.
Edges and corners are not permitted.
Examine the surface of the blended areas visually.
The blend ratio must be in the limits.
Examine the blended areas dimensionally.
SUBTASK 75-24-49-220-004 Do the Post Repair Inspection
Figure: Repair Details and Dimensions
Repair Details and Dimensions

Figure: Repair Details and Dimensions
Repair Details and Dimensions

