Export Control
EAR Export Classification: Not subject to the EAR per 15 C.F.R. Chapter 1, Part 734.3(b)(3), except for the following Service Bulletins which are currently published as EAR Export Classification 9E991: SBE70-0992, SBE72-0483, SBE72-0580, SBE72-0588, SBE72-0640, SBE73-0209, SBE80-0024 and SBE80-0025.Copyright
© IAE International Aero Engines AG (2001, 2014 - 2021) The information contained in this document is the property of © IAE International Aero Engines AG and may not be copied or used for any purpose other than that for which it is supplied without the express written authority of © IAE International Aero Engines AG. (This does not preclude use by engine and aircraft operators for normal instructional, maintenance or overhaul purposes.).Applicability
All
Common Information
TASK 79-22-48-300-001 Gearbox Scavenge Oil Tubes - Blend Repair Surface Damage, Repair-001 (VRS5327)
Effectivity
FIG/ITEM | PART NO. |
|---|---|
01-110 | 4B0215 |
01-110 | 4B0306 |
01-110 | 4B0323 |
02-110 | 4B0216 |
02-110 | 4B0307 |
02-110 | 4B0414 |
03-100 | 4B0309 |
03-100 | 4B7162 |
03-100 | 4B7248 |
05-500 | 4B0308 |
05-500 | 4B0324 |
05-500 | 4B2262 |
05-500 | 4B7128 |
05-500 | 4B7252 |
General
Price and availability - none.
The practices and processes referred to in the procedure by the TASK numbers are in the SPM.
NOTE
Preliminary Requirements
Pre-Conditions
NONESupport Equipment
| Name | Manufacturer | Part Number / Identification | Quantity | Remark |
|---|---|---|---|---|
| Workshop inspection equipment | LOCAL | Workshop inspection equipment | ||
| Fluorescent Penetrant Inspection Equipment | LOCAL | Fluorescent penetrant inspection equipment |
Consumables, Materials and Expendables
| Name | Manufacturer | Part Number / Identification | Quantity | Remark |
|---|---|---|---|---|
| CoMat 05-021 WATERPROOF SILICON CARBIDE | 1E1X8 | CoMat 05-021 |
Spares
NONESafety Requirements
NONEProcedure
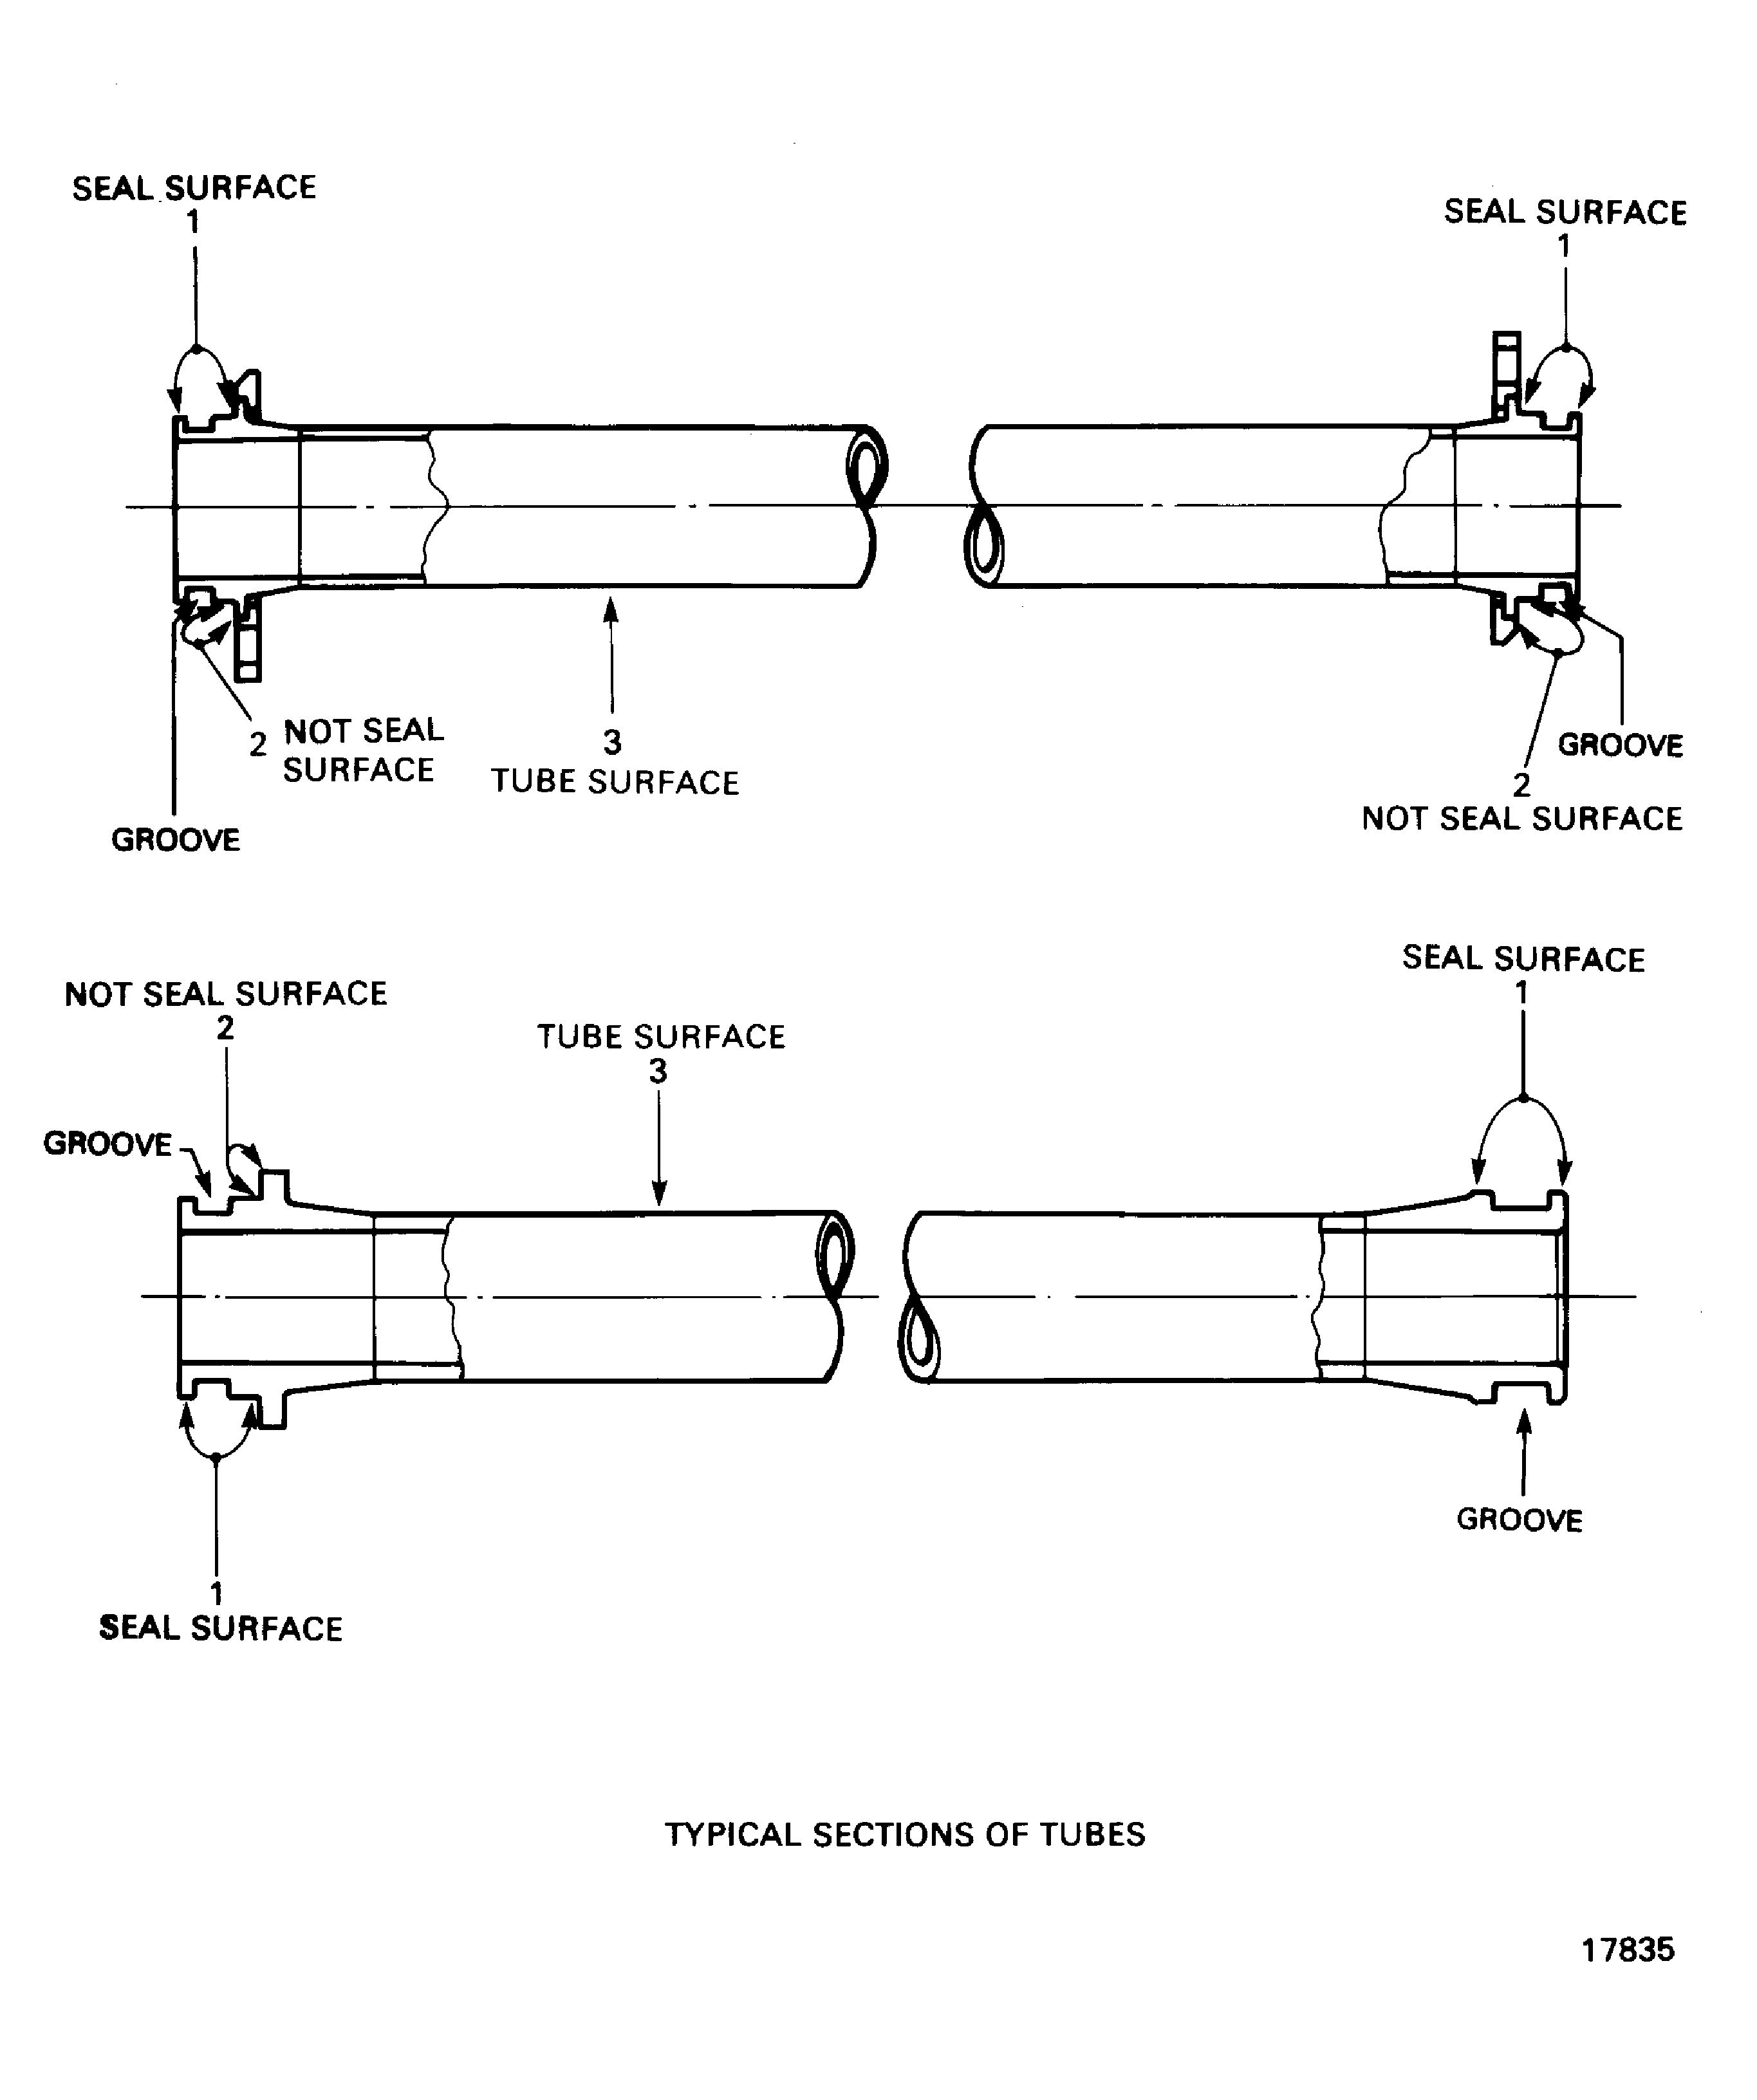
Refer to Figure.
Refer to TASK 70-35-03-300-501.
Remove high metal only.
Do not blend on groove.
Hand polish high metal.
Seal surfaces at Location 1.
Refer to TASK 70-35-03-300-501.
The maximum blend depth is 0.010 in. (0.25 mm).
Hand polish and blend.
Not seal surface at location 2.
SUBTASK 79-22-48-350-051 Remove the Nicks, Scores and Dents from the Tube Assembly End Fitting
Refer to Figure.
Refer to TASK 70-35-03-300-501.
The maximum blend depth is 0.010 in. (0.25 mm).
Surface finish of the repaired area must be the same as the adjacent area.
Remove the nicks, scores and galls.
SUBTASK 79-22-48-350-052 Remove the Nicks, Scores and Galls from the Tube Assembly Surfaces at Location 3
Refer to TASK 70-23-05-230-501.
Make sure there are no cracks.
Do a crack test on the repaired area.
SUBTASK 79-22-48-230-053 Examine the Tube Assembly for Cracks
Refer to TASK 70-38-02-300-503.
Apply the surface protection.
SUBTASK 79-22-48-330-124 Apply the Surface Protection
Figure: Locations on the Tube Assembly
Locations on the Tube Assembly

