Export Control
EAR Export Classification: Not subject to the EAR per 15 C.F.R. Chapter 1, Part 734.3(b)(3), except for the following Service Bulletins which are currently published as EAR Export Classification 9E991: SBE70-0992, SBE72-0483, SBE72-0580, SBE72-0588, SBE72-0640, SBE73-0209, SBE80-0024 and SBE80-0025.Copyright
© IAE International Aero Engines AG (2001, 2014 - 2021) The information contained in this document is the property of © IAE International Aero Engines AG and may not be copied or used for any purpose other than that for which it is supplied without the express written authority of © IAE International Aero Engines AG. (This does not preclude use by engine and aircraft operators for normal instructional, maintenance or overhaul purposes.).Applicability
All
Common Information
TASK 72-32-71-300-022 LPC Bleed Valve Support Ring - Repair The Worn Stud Pin Holes By Bush, Repair-022 (VRS1358)
General
Price and availability - none
The practices and processes referred to in the procedure by TASK/SUBTASK numbers are in the SPM.
NOTE
Preliminary Requirements
Pre-Conditions
NONESupport Equipment
| Name | Manufacturer | Part Number / Identification | Quantity | Remark |
|---|---|---|---|---|
| Standard workshop equipment | LOCAL | Standard workshop equipment | ||
| Horizontal boring mill | LOCAL | Horizontal boring mill | ||
| Rotary table | LOCAL | Rotary table | ||
| Penetrant Crack Test Equipment | LOCAL | Penetrant crack test equipment | ||
| Bore gage | LOCAL | Bore gage | ||
| Depth gage micrometer | LOCAL | Depth gage micrometer | ||
| Oven | LOCAL | Oven | ||
| Vibrating marking pencil | LOCAL | Vibrating marking pencil | ||
| Dial set indicator | LOCAL | Dial set indicator | ||
| Heat protection gloves | LOCAL | Heat protection gloves | ||
| IAE 3J12747 Assembly fixture | 0AM53 | IAE 3J12747 | 1 |
Consumables, Materials and Expendables
NONESafety Requirements
NONEProcedure
Use Rotary table and Horizontal boring mill.
Set a rotary table on to the horizontal boring machine.
Use IAE 3J12747 Assembly fixture 1 off.
Put the assembly fixture on to the boring machine.
Use Dial set indicator.
Make sure the datum B and D are set to locate correctly.
Set the assembly fixture by plane B, diameter D and surface E.
SUBTASK 72-32-71-320-051 Machine the Worn Stud Pin Hole(s) on the Support Ring Assembly
Refer to the SPM TASK 70-23-02-230-501.
Do a penetrant crack test on the machined hole(s).
SUBTASK 72-32-71-230-079 Examine the Machined Stud Pin Hole(s) of the Support Ring for Cracks
Refer to the SPM TASK 70-38-02-300-503, SUBTASK 70-38-02-300-002.
Apply the chromate conversion coating to the machined stud pin hole(s).
SUBTASK 72-32-71-330-054 Apply the Chromate Conversion Coating to the Support Ring
Use an Oven.
Heat the support ring at 230 to 302 deg F (110 to 150 deg C) for one hour.
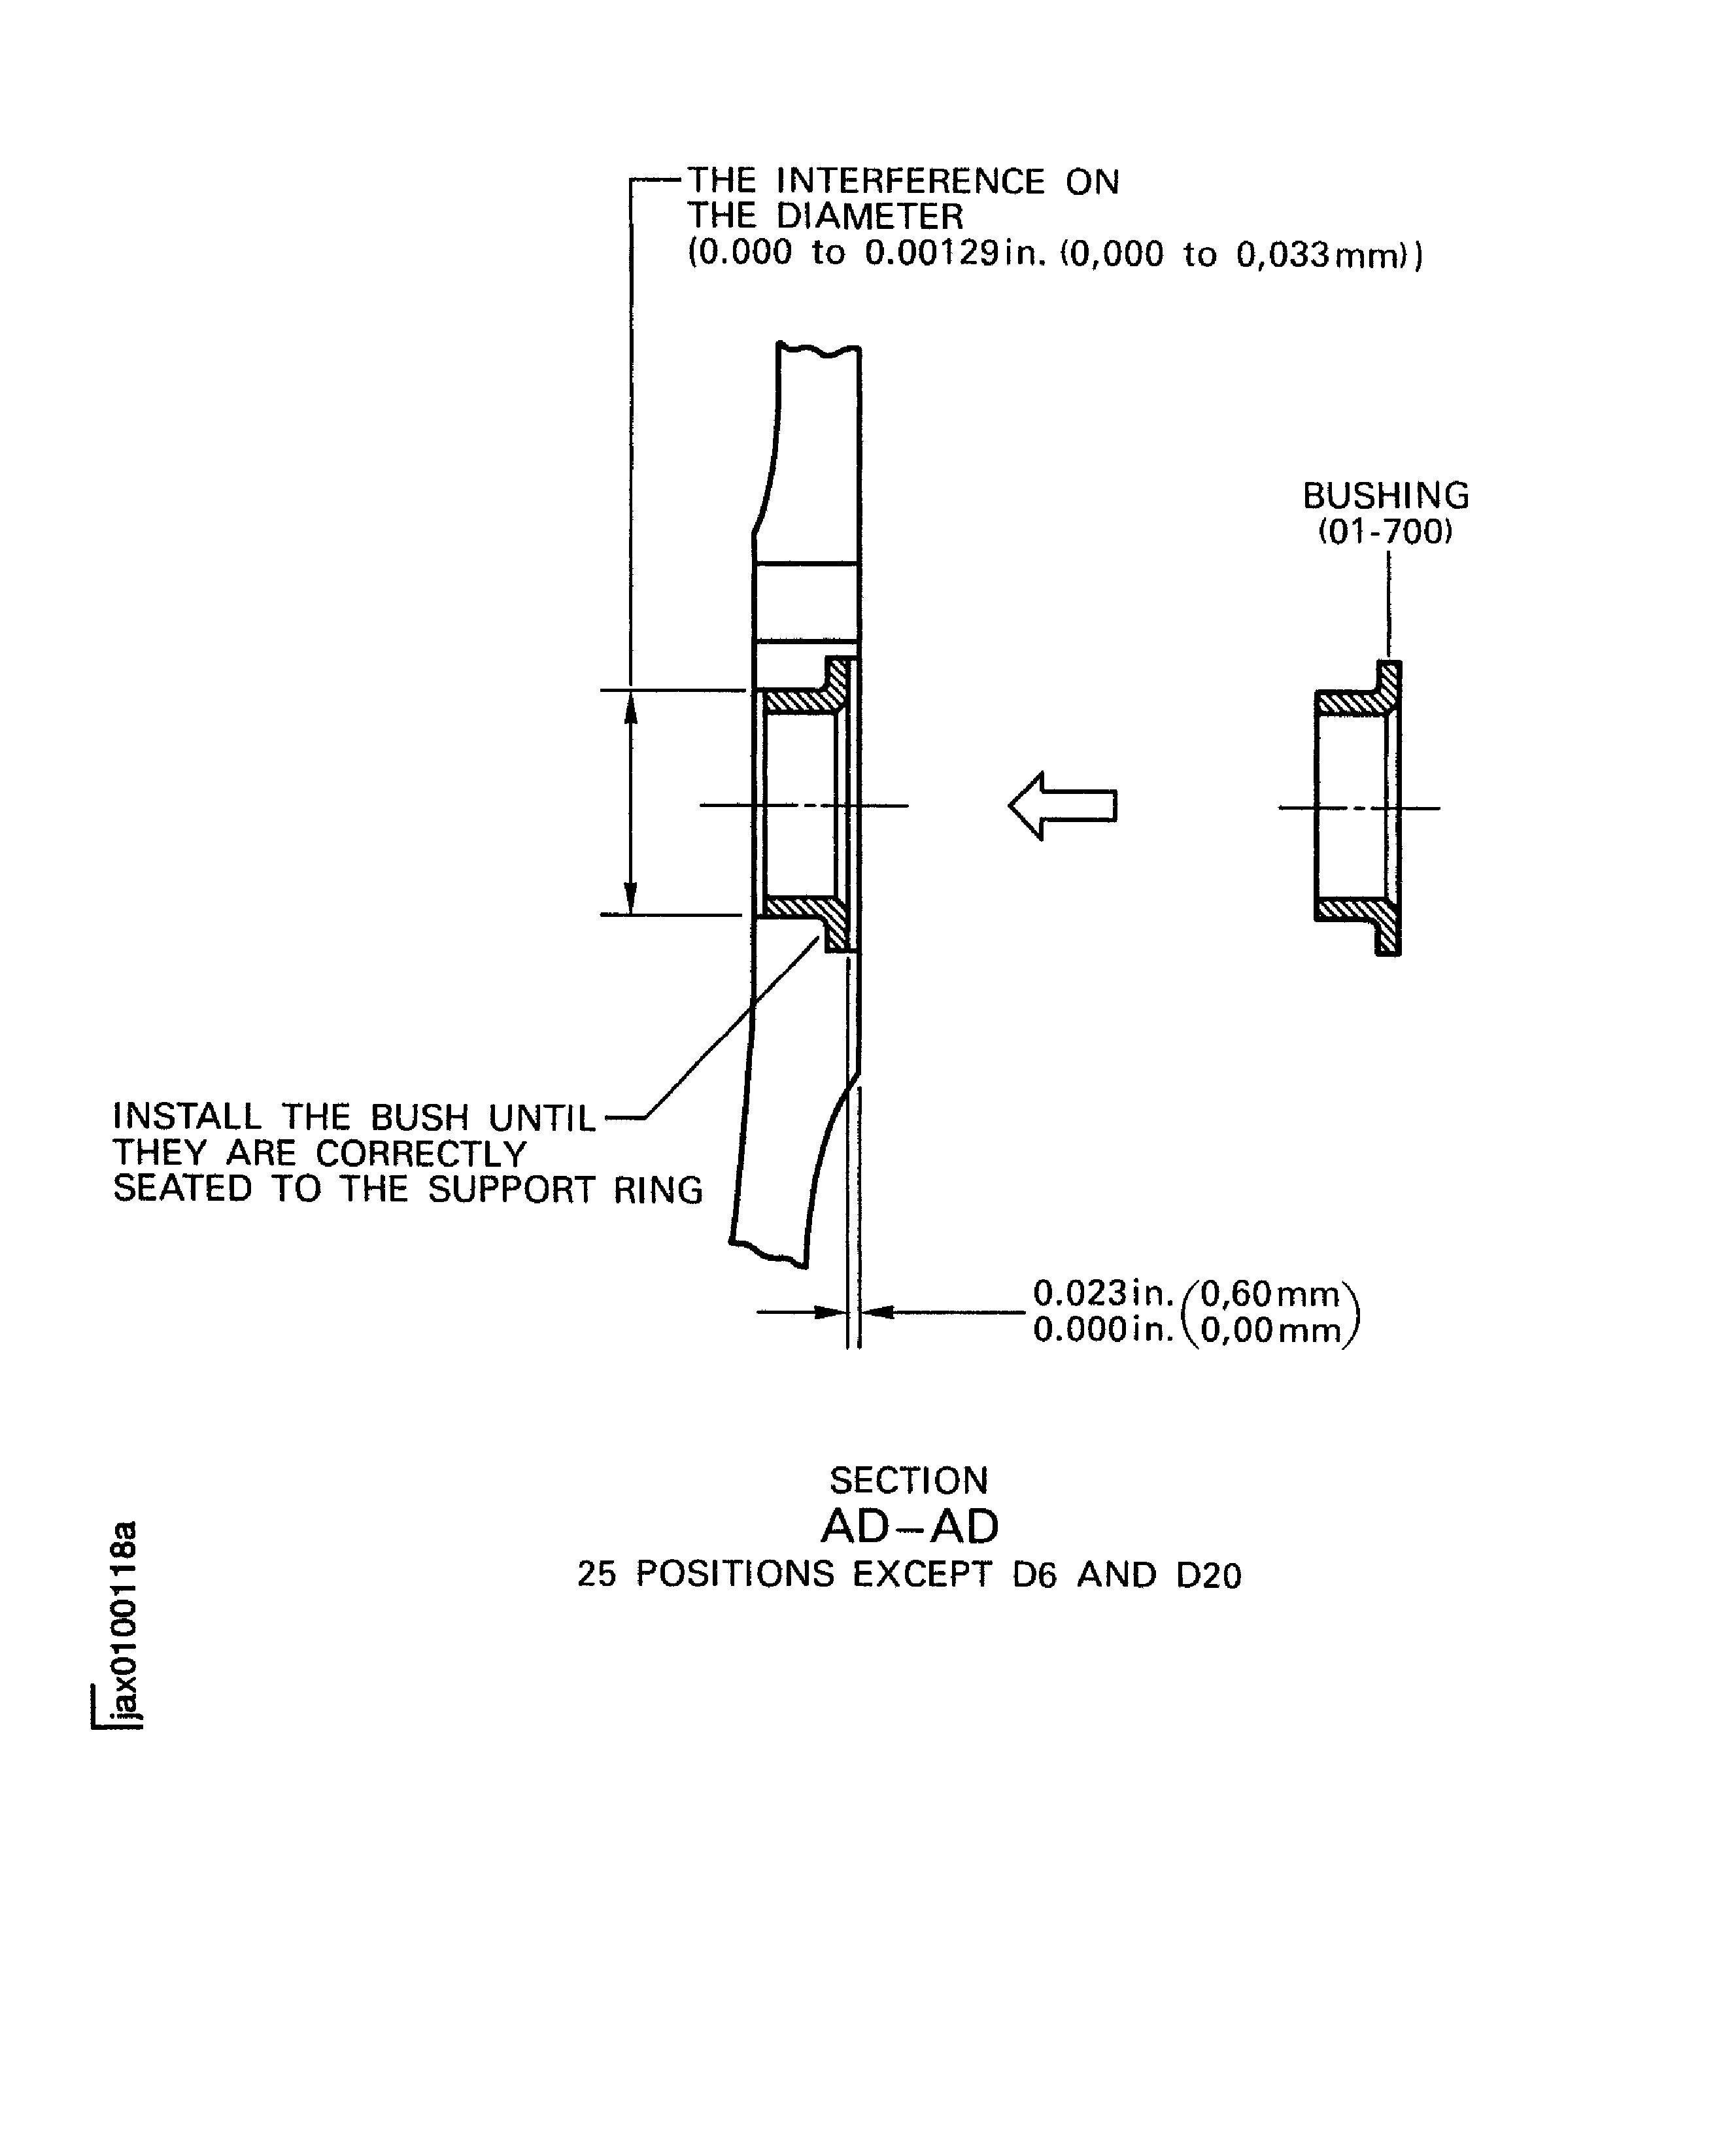
SUBTASK 72-32-71-350-076 Install Bush(es) (01-690 and/or 01-700) to the Support Ring
Refer to the SPM TASK 70-38-02-300-503.
Apply the chromate conversion coating to the marked letter.
SUBTASK 72-32-71-350-077 Identify the Repair
Figure: Repair Details and Dimensions
Repair Details and Dimensions
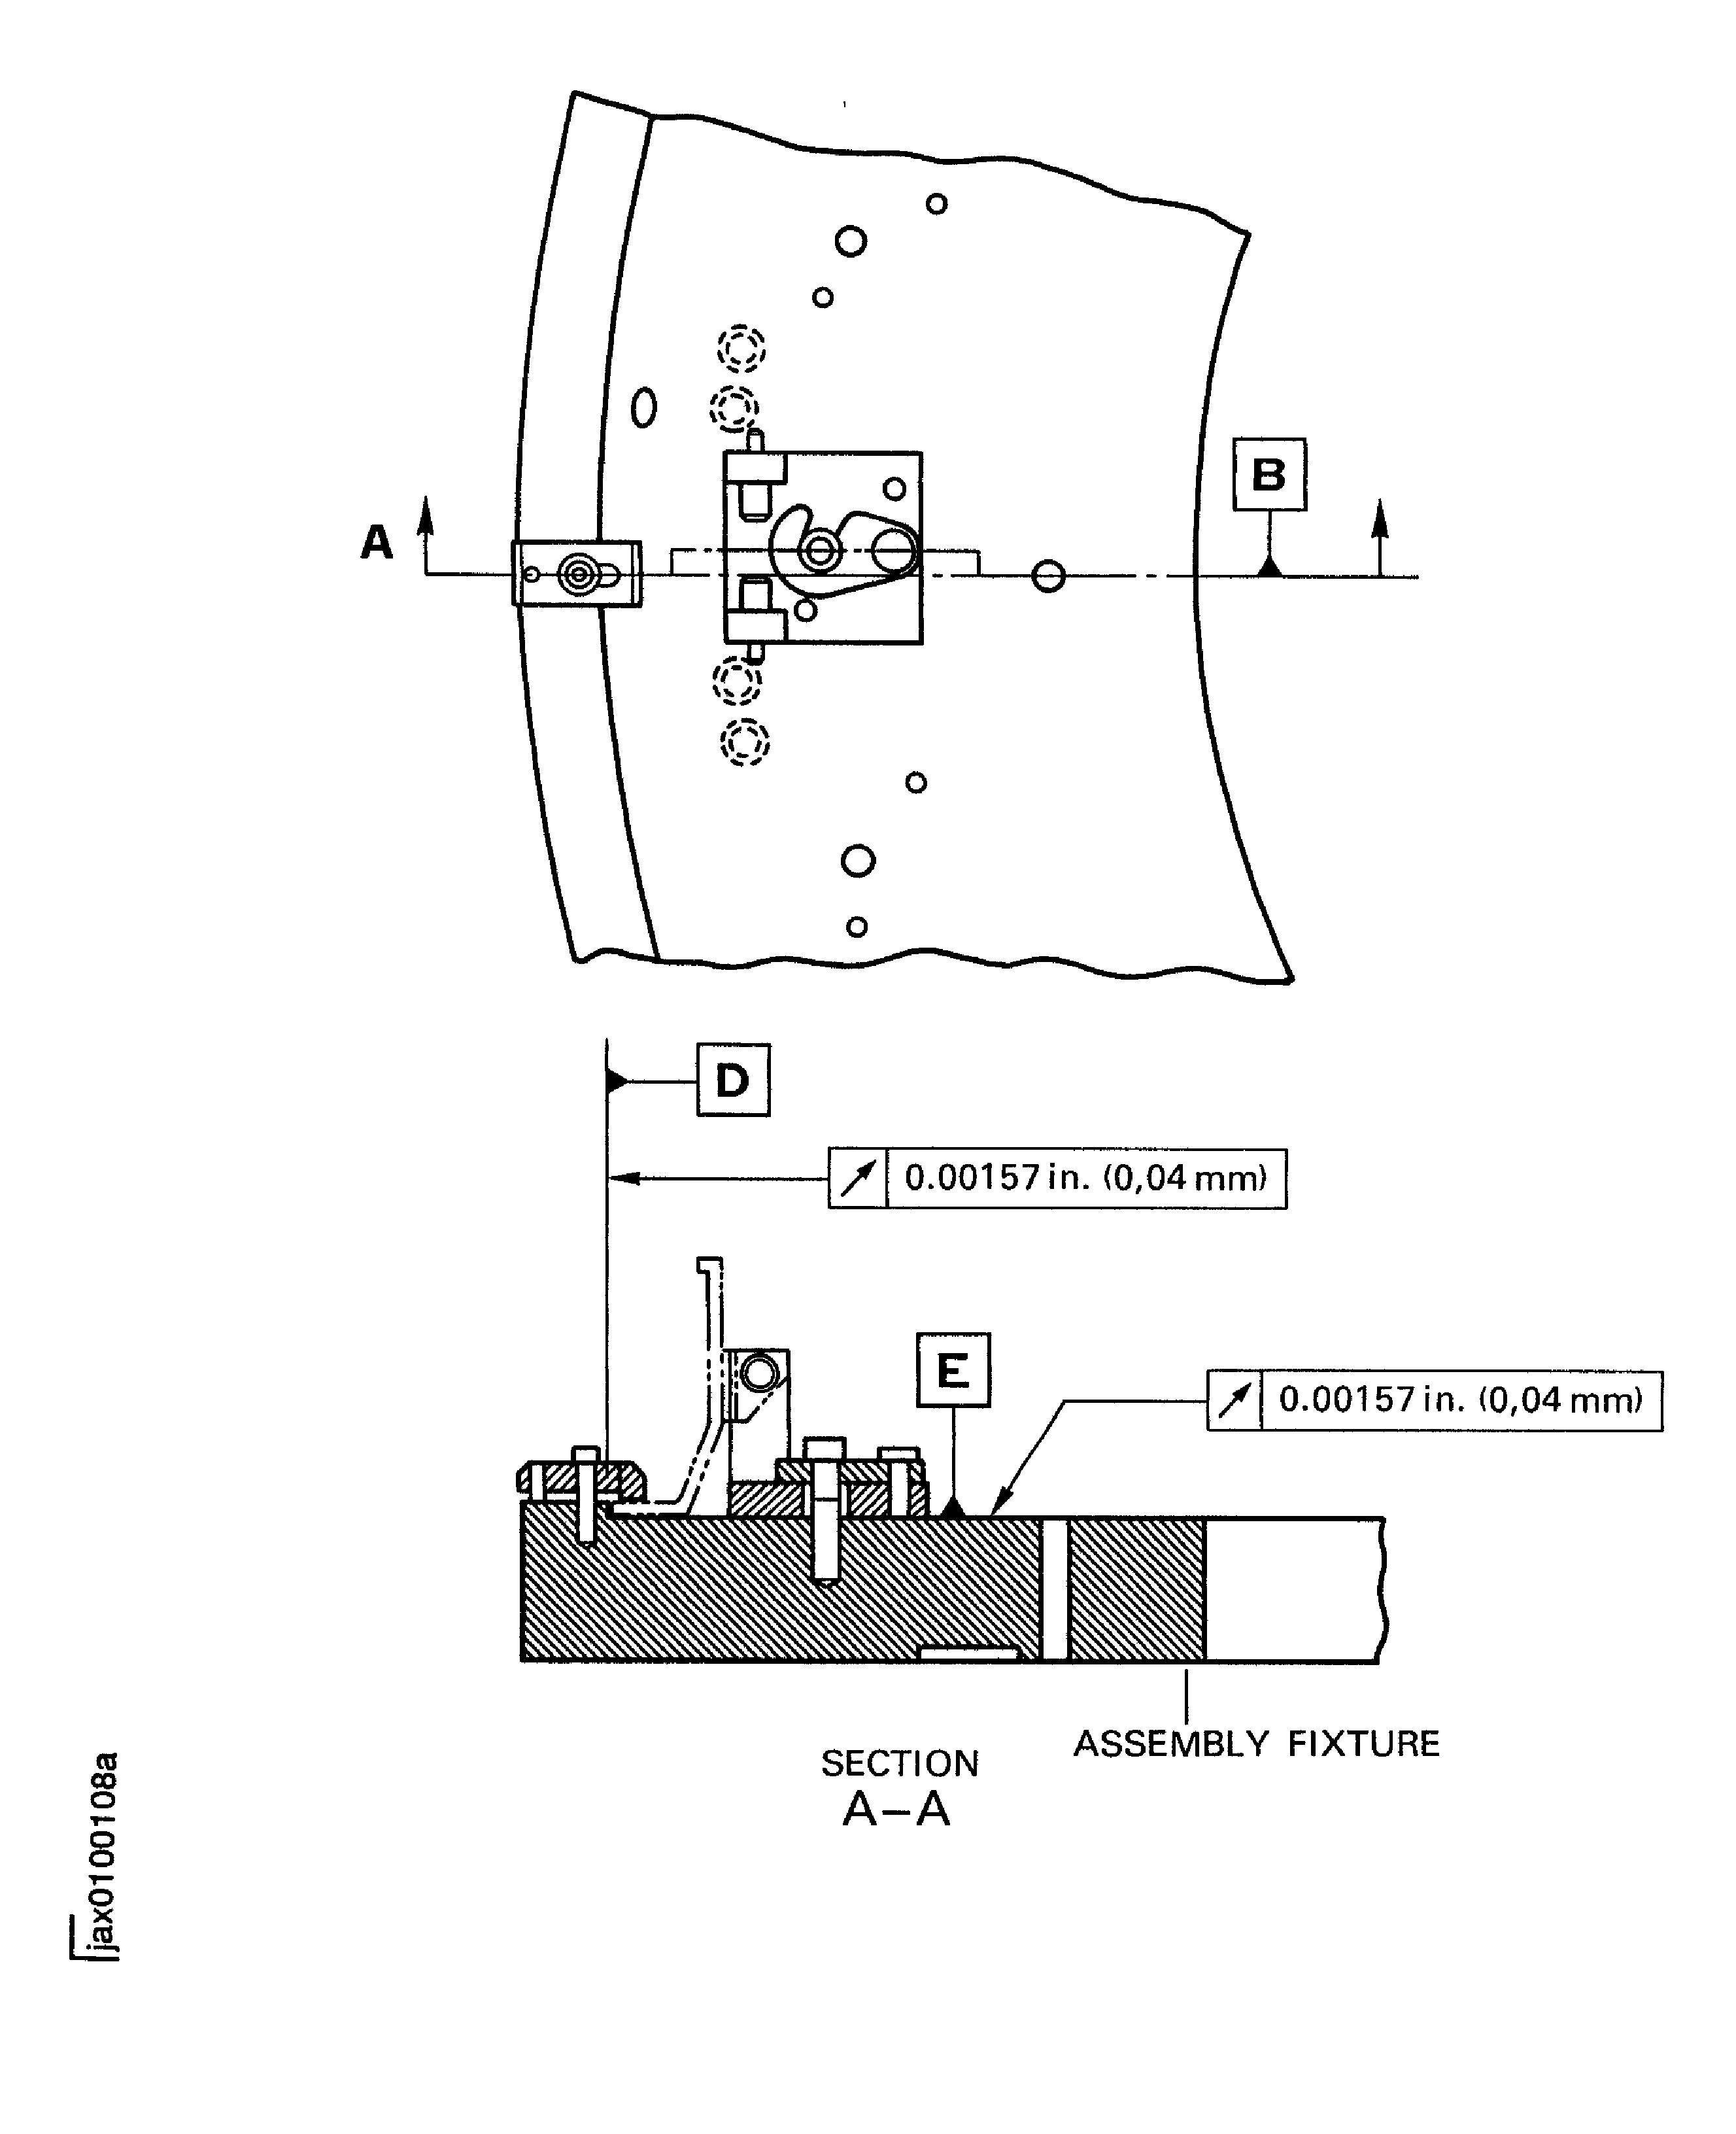
Figure: Repair Details and Dimensions
Repair Details and Dimensions
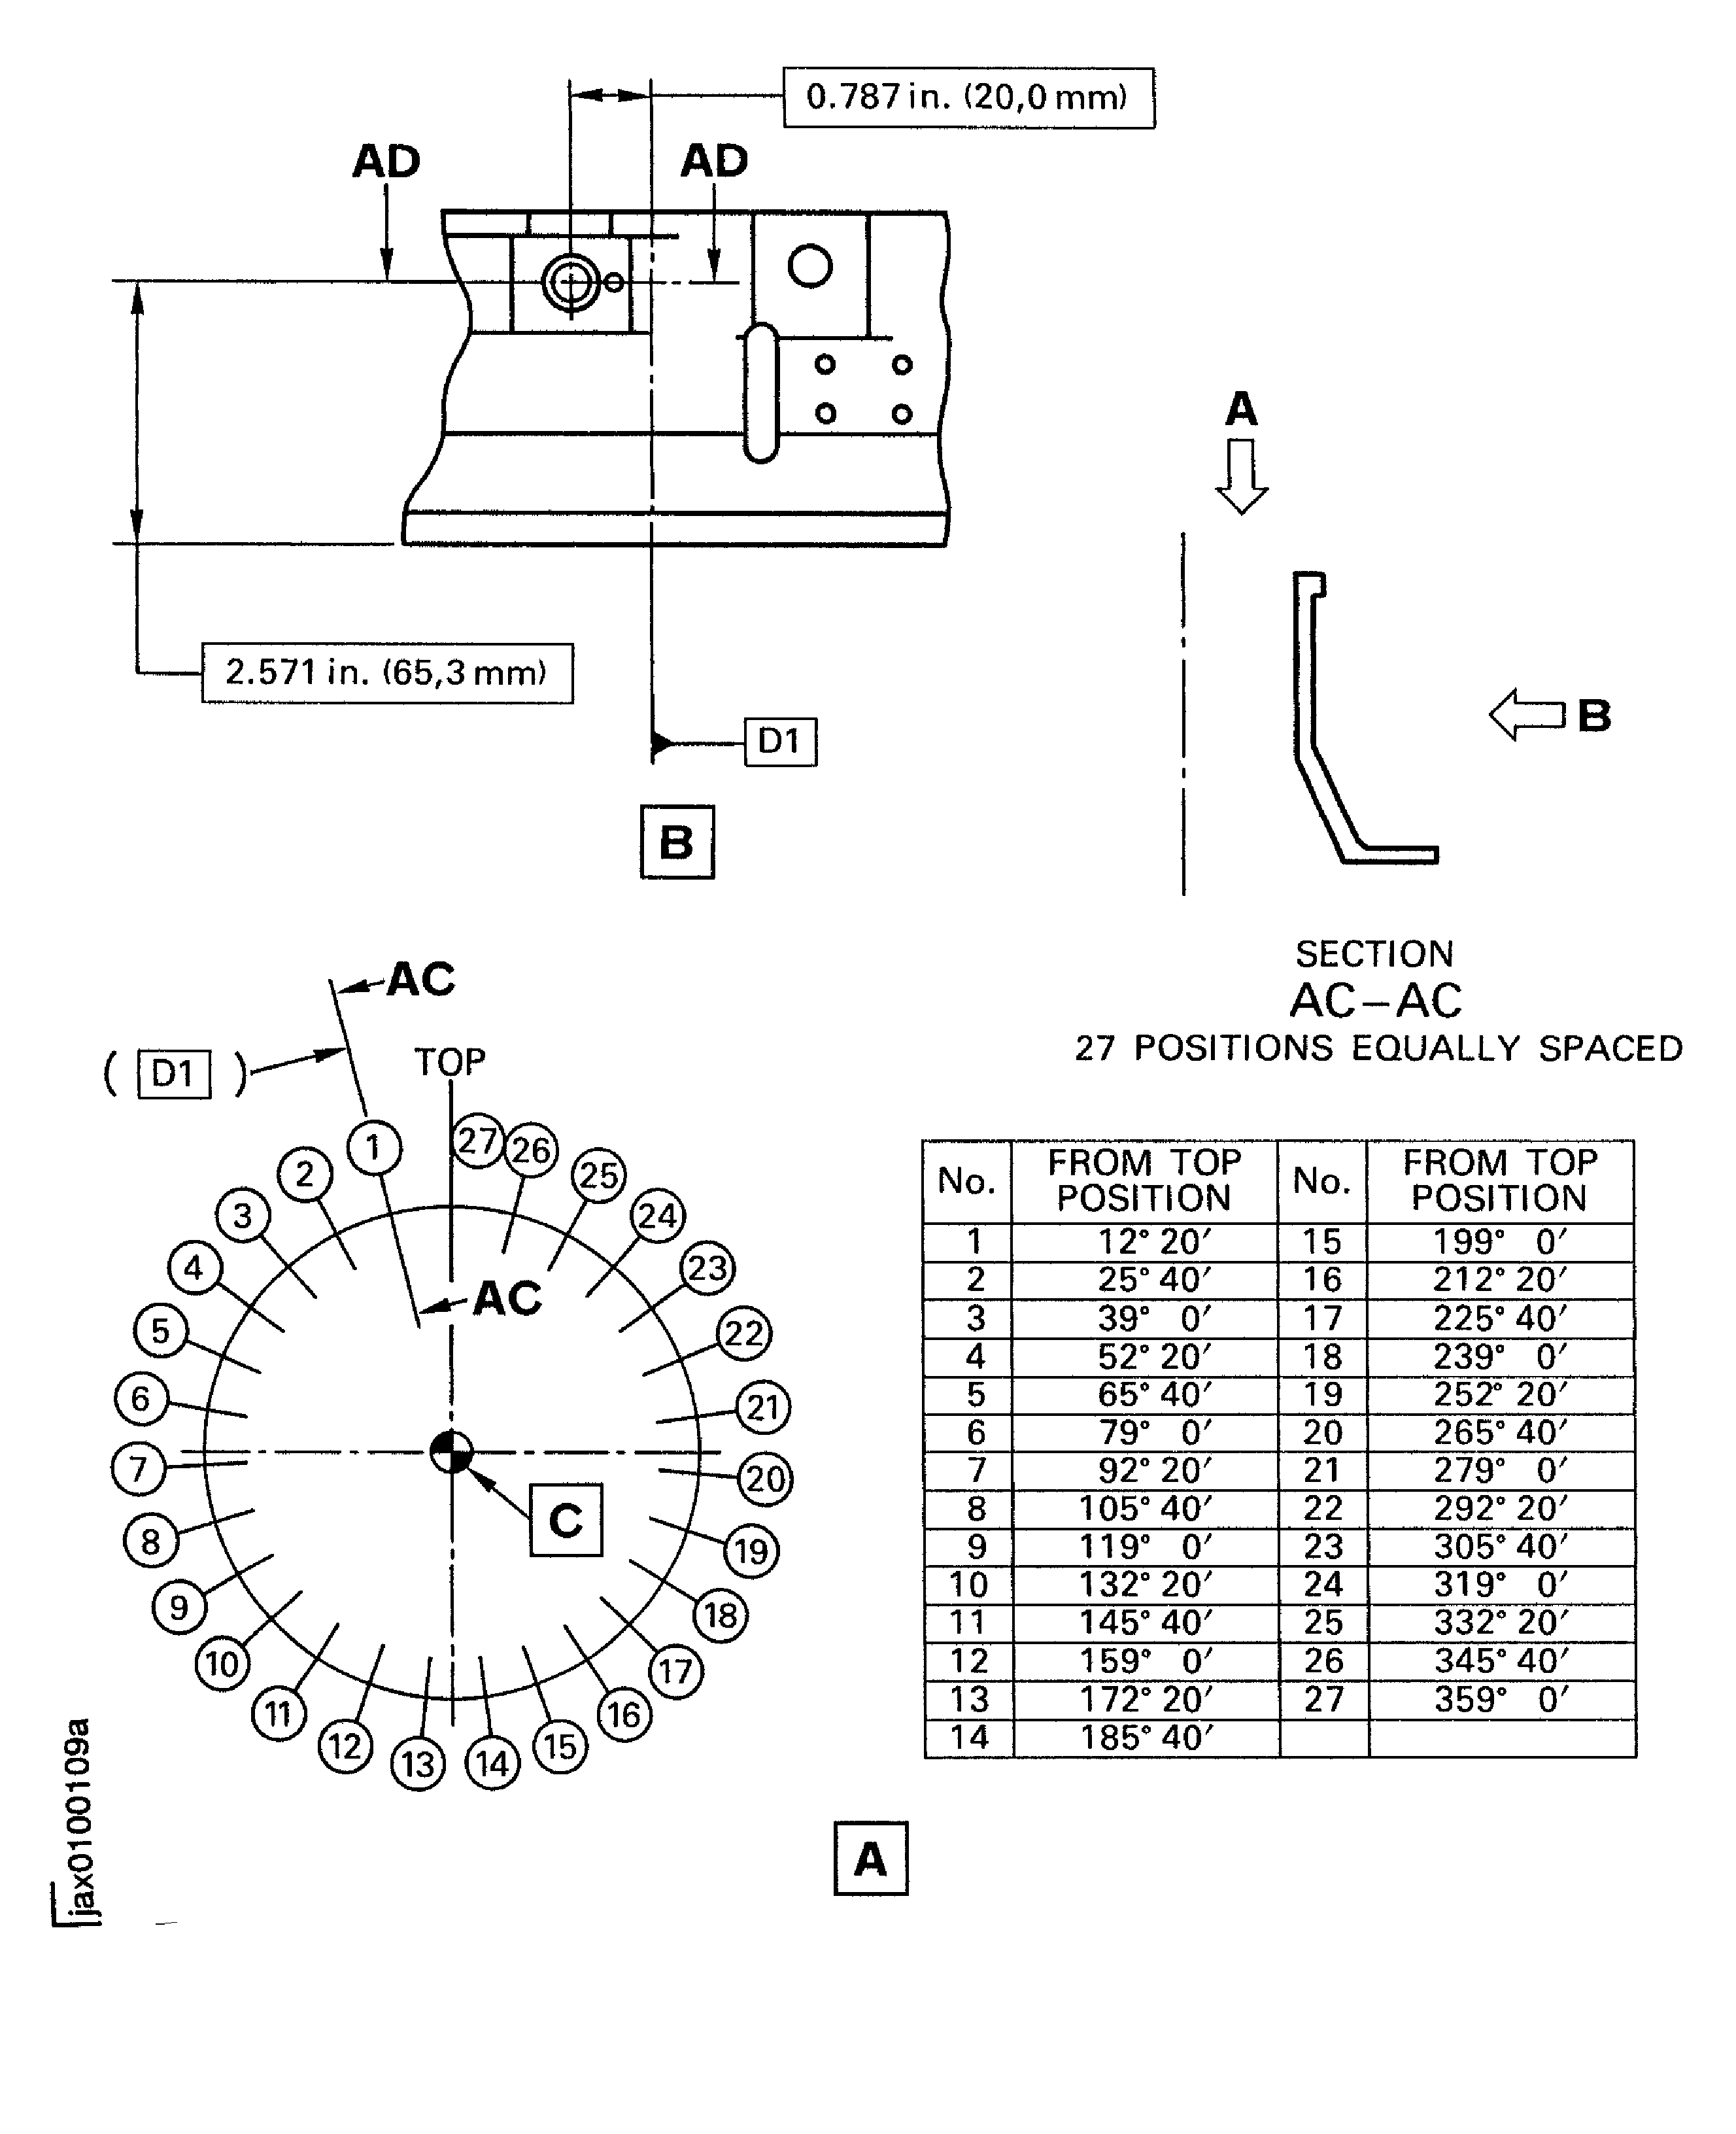
Figure: Repair Details and Dimensions
Repair Details and Dimensions
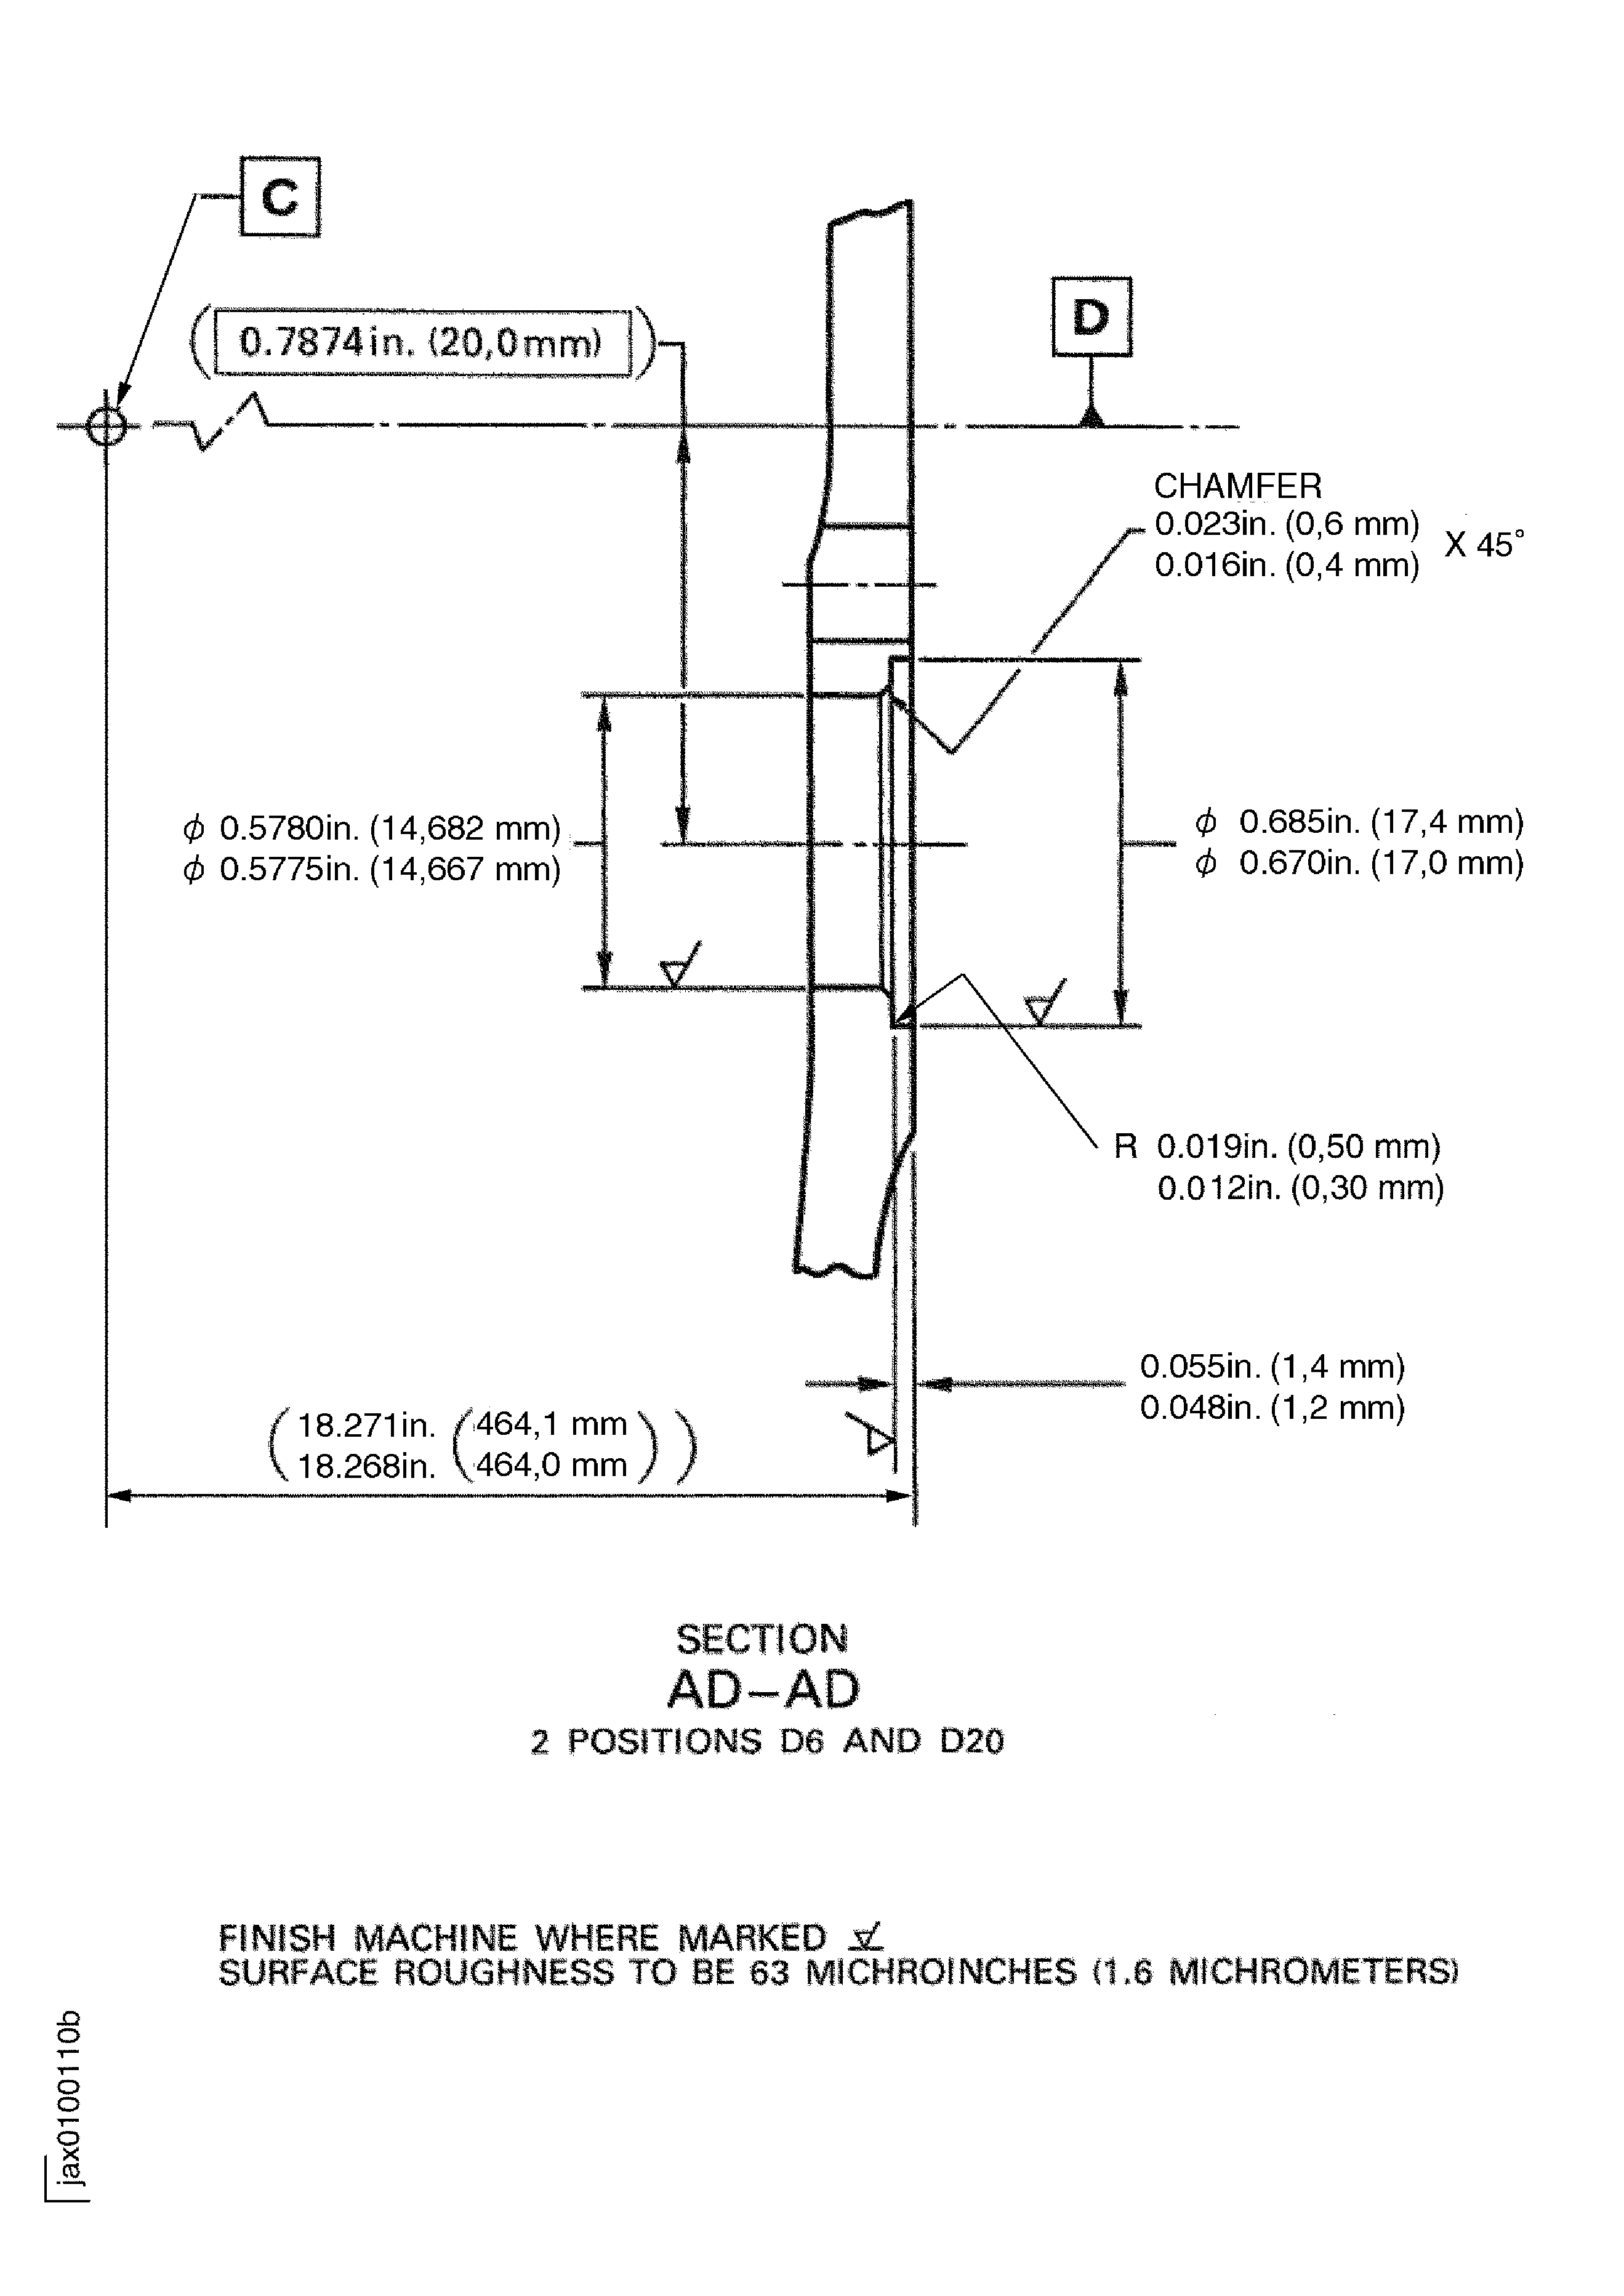
Figure: Repair Details and Dimensions
Repair Details and Dimensions
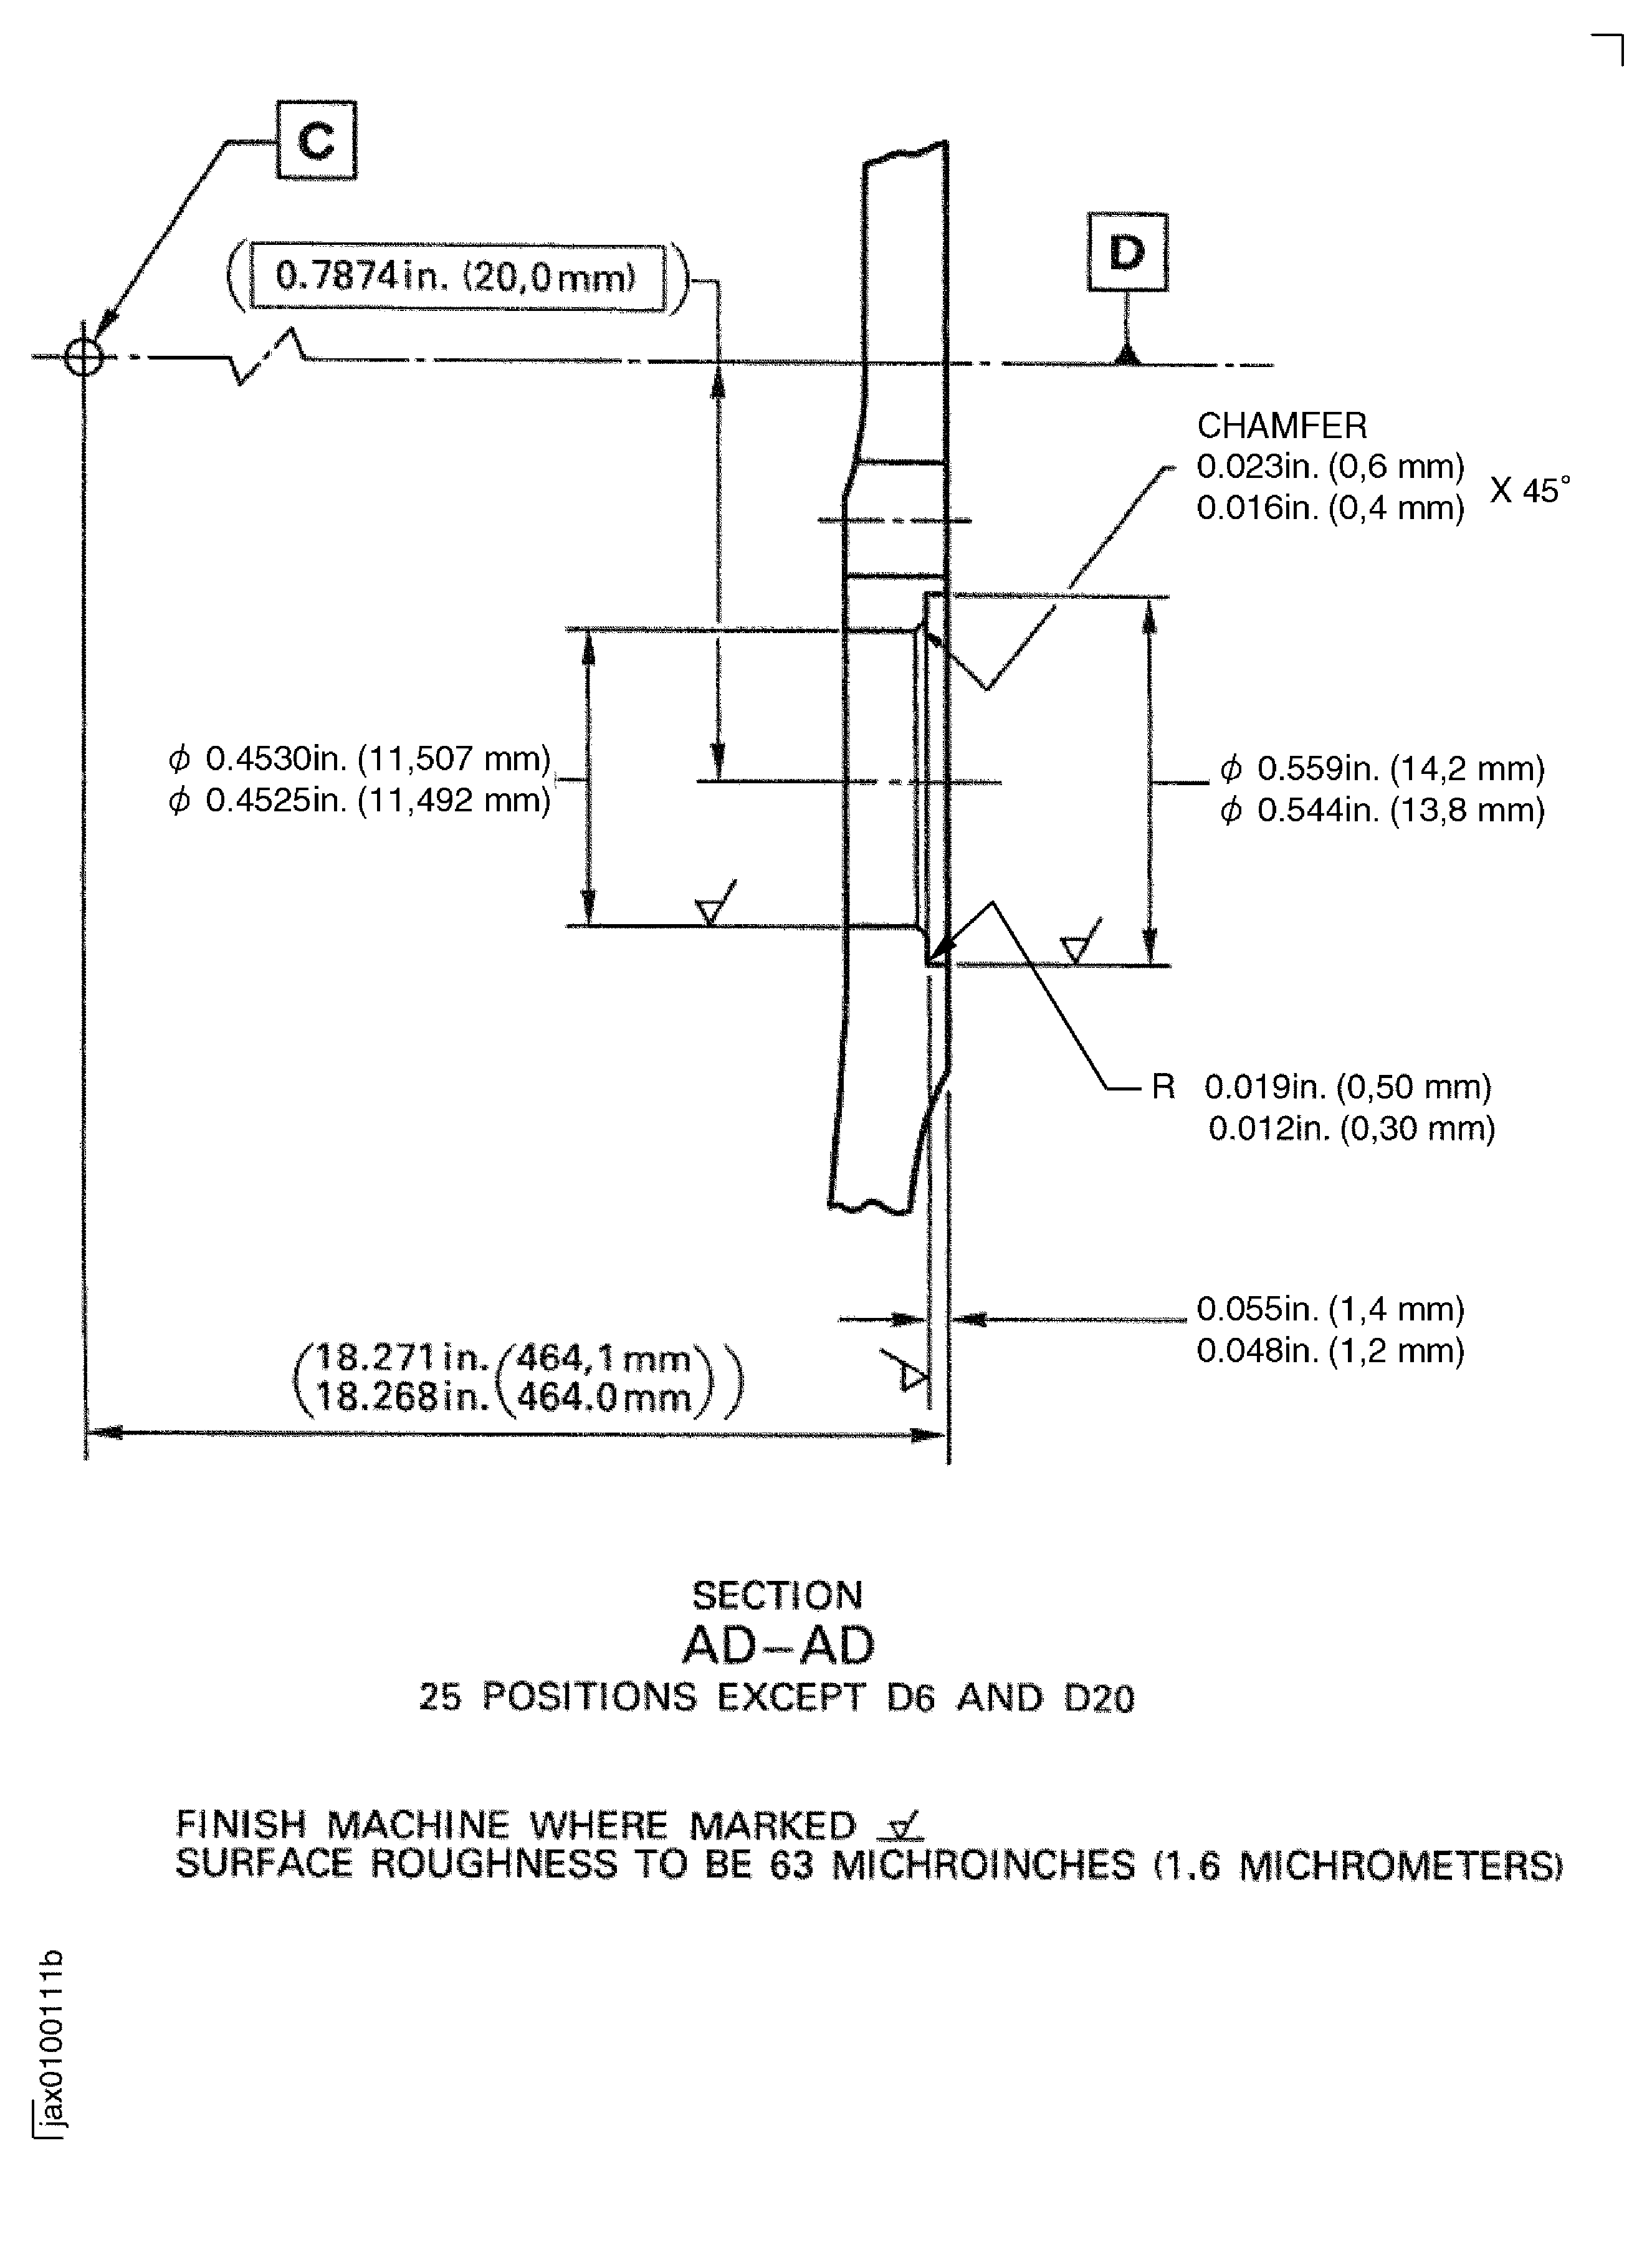
Figure: Repair Details and Dimensions
Repair Details and Dimensions
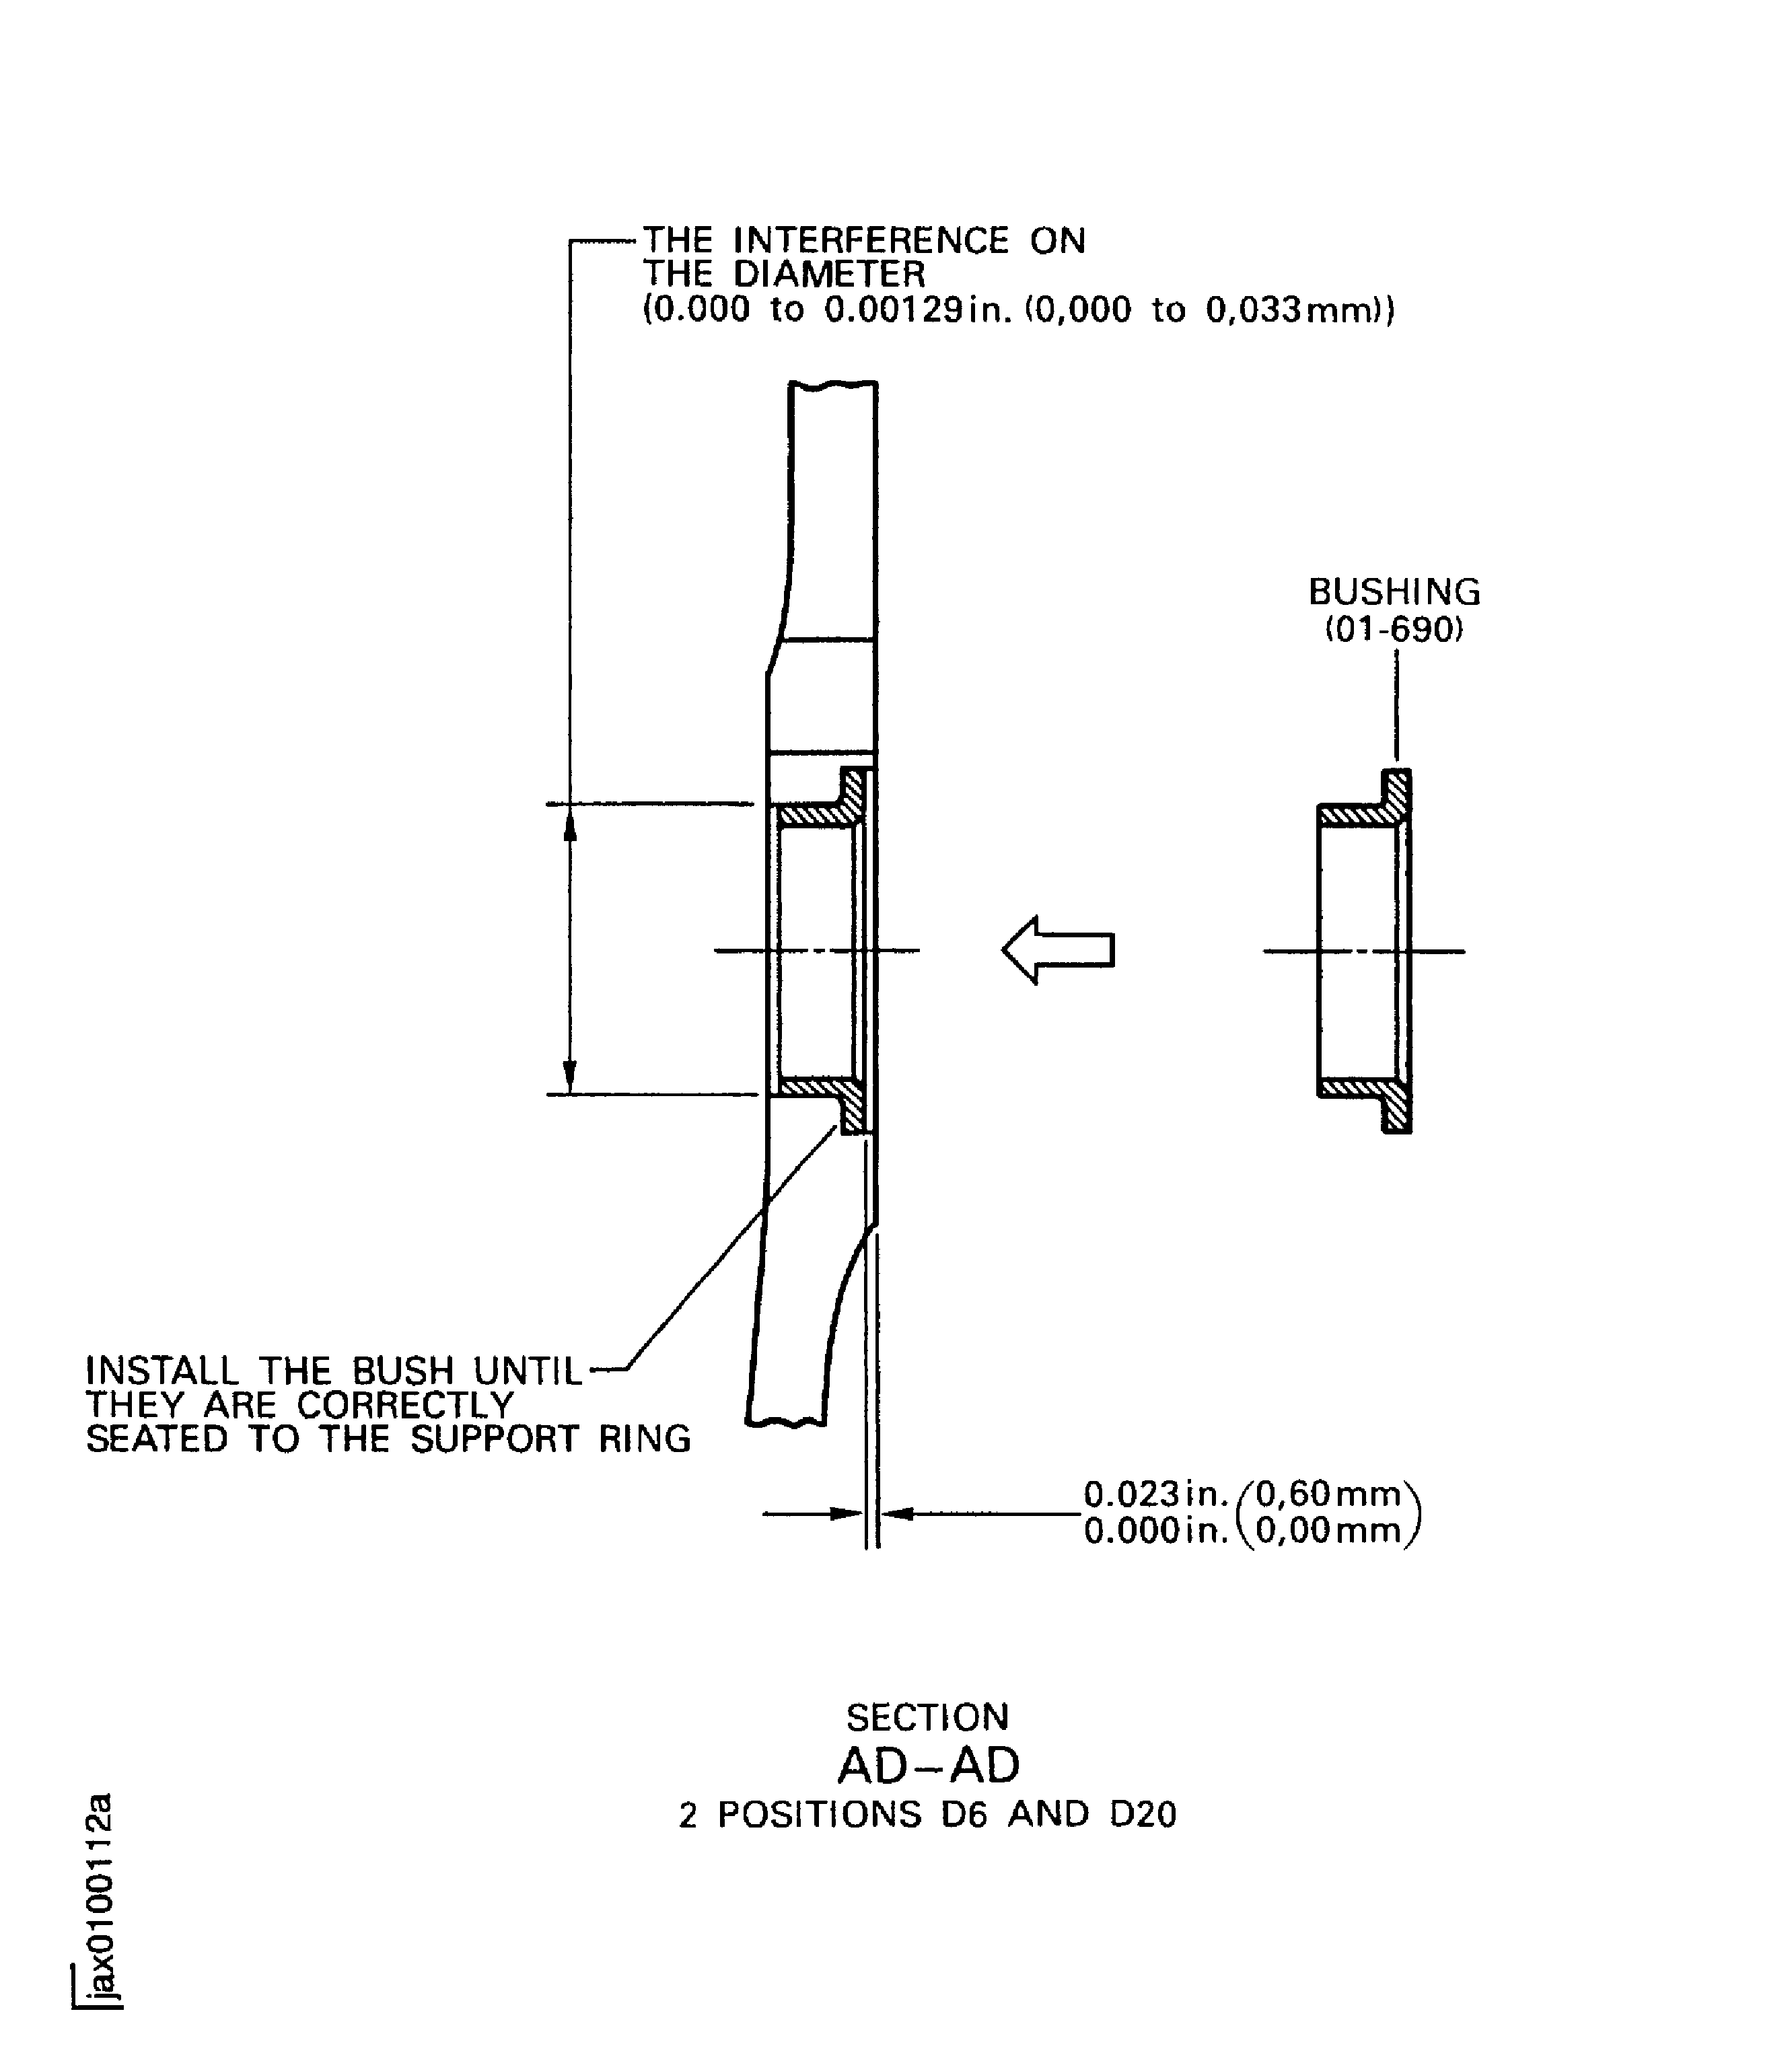
Figure: Repair Details and Dimensions
Repair Details and Dimensions
