DMC:V2500-A0-72-38-1101-00A-310A-CIssue No:001.00Issue Date:2013-11-01
Export Control
EAR Export Classification: Not subject to the EAR per 15 C.F.R. Chapter 1, Part 734.3(b)(3), except for the following Service Bulletins which are currently published as EAR Export Classification 9E991: SBE70-0992, SBE72-0483, SBE72-0580, SBE72-0588, SBE72-0640, SBE73-0209, SBE80-0024 and SBE80-0025.Copyright
© IAE International Aero Engines AG (2001, 2014 - 2021) The information contained in this document is the property of © IAE International Aero Engines AG and may not be copied or used for any purpose other than that for which it is supplied without the express written authority of © IAE International Aero Engines AG. (This does not preclude use by engine and aircraft operators for normal instructional, maintenance or overhaul purposes.).Applicability
All
Common Information
TASK 72-38-11-220-001 Inlet Cone Assembly - Visually Examine The Inlet Cone Rear Face At Interface A, Inspection-001
General
The word 'reject' after an interface inspection statement requires that further detailed inspection or repair as applicable, of the affected area be accomplished using data in the applicable ATA section of the part in question. Contact IAE for FAA approved data if the referenced TASK is not in the manual.
Refer to TASK 72-00-00-220-001 (INSPECTION-001) (Examine the modular/non-modular interfaces), before you do this TASK.
The policy that is necessary for inspection is given in the SPM TASK 70-20-01-200-501.
Preliminary Requirements
Pre-Conditions
NONESupport Equipment
NONEConsumables, Materials and Expendables
NONESpares
NONESafety Requirements
NONEProcedure
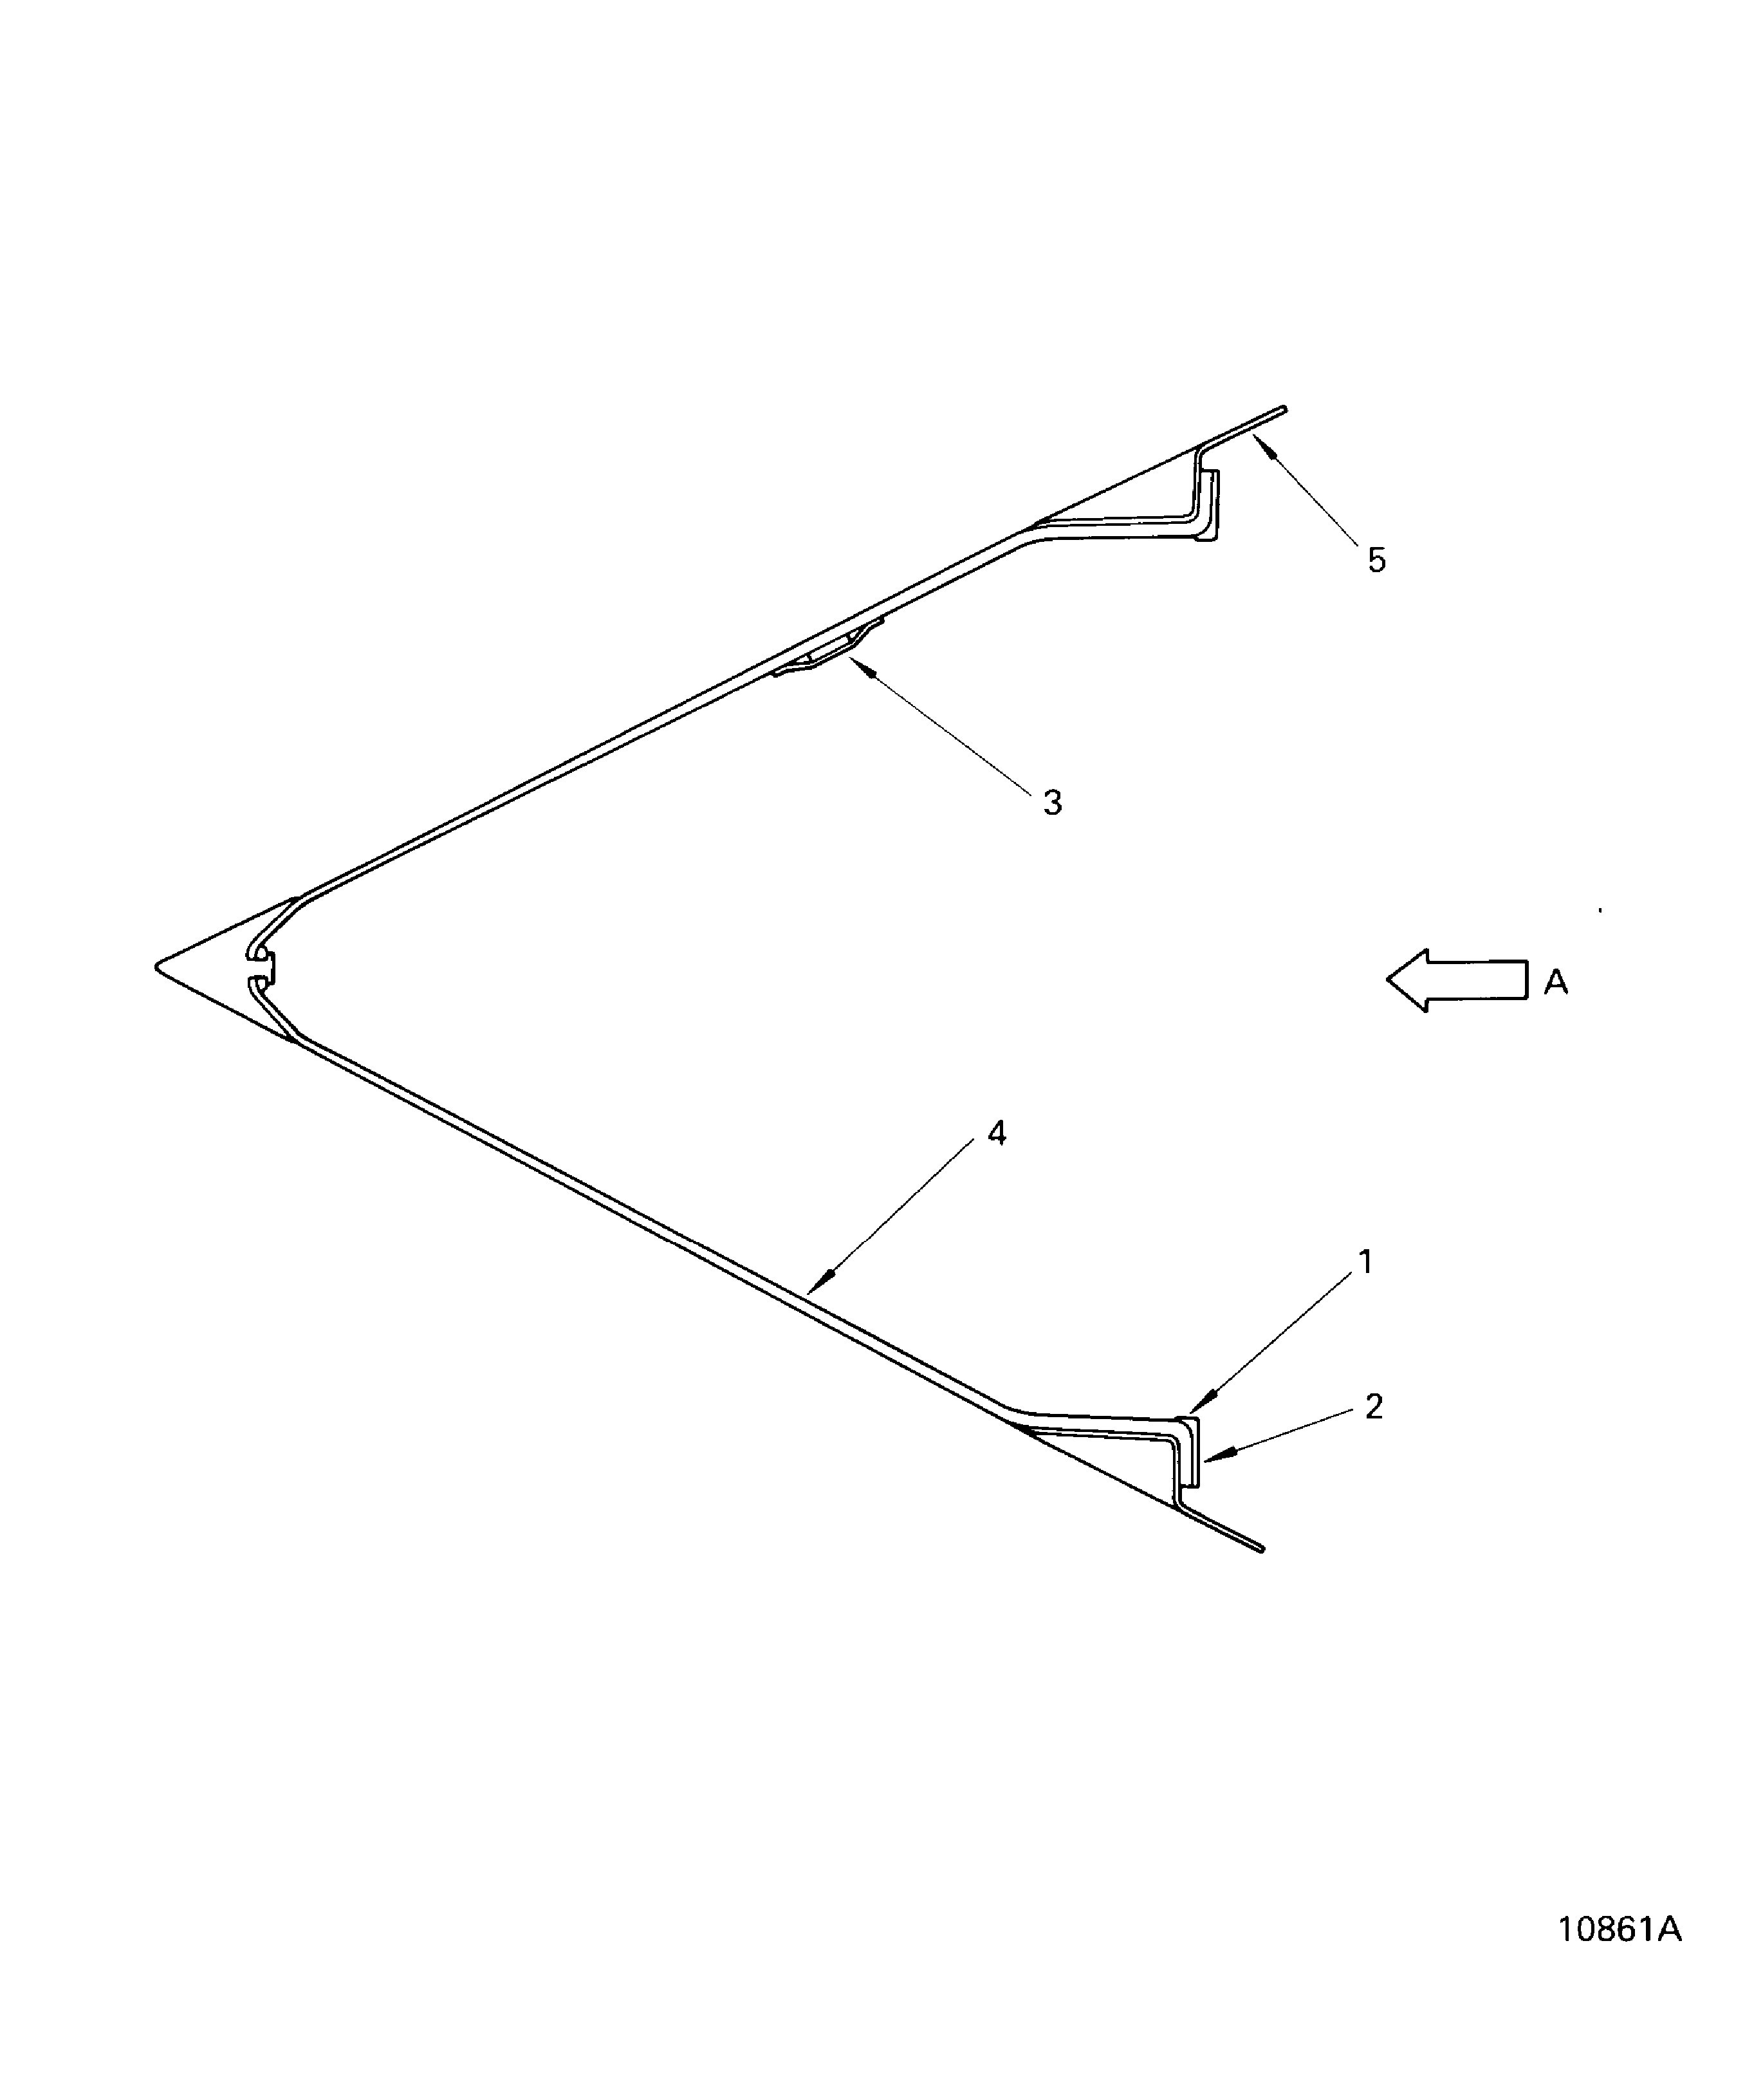
Refer to Figure.
SUBTASK 72-38-11-220-051 Visually Examine the Snap Diameter of the Inlet Cone at Location 1
Refer to Figure.
SUBTASK 72-38-11-220-052 Visually Examine the Flange Face of the Inlet Cone at Location 2
Refer to Figure.
SUBTASK 72-38-11-220-053 Visually Examine the Balance Weights of the Inlet Cone at Location 3
Refer to Figure.
SUBTASK 72-38-11-220-054 Visually Examine the Inner Surface of the Inlet Cone at Location 4
Refer to Figure.
SUBTASK 72-38-11-220-055 Visually examine the Fairing at Location 5
Figure: Locations at interface A
Locations at interface A

