Export Control
EAR Export Classification: Not subject to the EAR per 15 C.F.R. Chapter 1, Part 734.3(b)(3), except for the following Service Bulletins which are currently published as EAR Export Classification 9E991: SBE70-0992, SBE72-0483, SBE72-0580, SBE72-0588, SBE72-0640, SBE73-0209, SBE80-0024 and SBE80-0025.Copyright
© IAE International Aero Engines AG (2001, 2014 - 2021) The information contained in this document is the property of © IAE International Aero Engines AG and may not be copied or used for any purpose other than that for which it is supplied without the express written authority of © IAE International Aero Engines AG. (This does not preclude use by engine and aircraft operators for normal instructional, maintenance or overhaul purposes.).Applicability
All
Common Information
TASK 72-42-31-300-016 No. 4 Bearing Support - Nickel Plate The Rear Flange, Repair-016 (VRS3298)
General
Price and availability - Refer to IAE
The practices and processes referred to the the procedure by the TASK numbers are in the SPM.
NOTE
Preliminary Requirements
Pre-Conditions
NONESupport Equipment
| Name | Manufacturer | Part Number / Identification | Quantity | Remark |
|---|---|---|---|---|
| Workshop inspection equipment | LOCAL | Workshop inspection equipment | ||
| Grinding machine | LOCAL | Grinding machine | ||
| Magnifying glass, 4X | LOCAL | Magnifying glass, 4X | or greater |
Consumables, Materials and Expendables
| Name | Manufacturer | Part Number / Identification | Quantity | Remark |
|---|---|---|---|---|
| CoMat 02-067 STRIPPABLE COATING | 71410 | CoMat 02-067 |
Spares
NONESafety Requirements
NONEProcedure
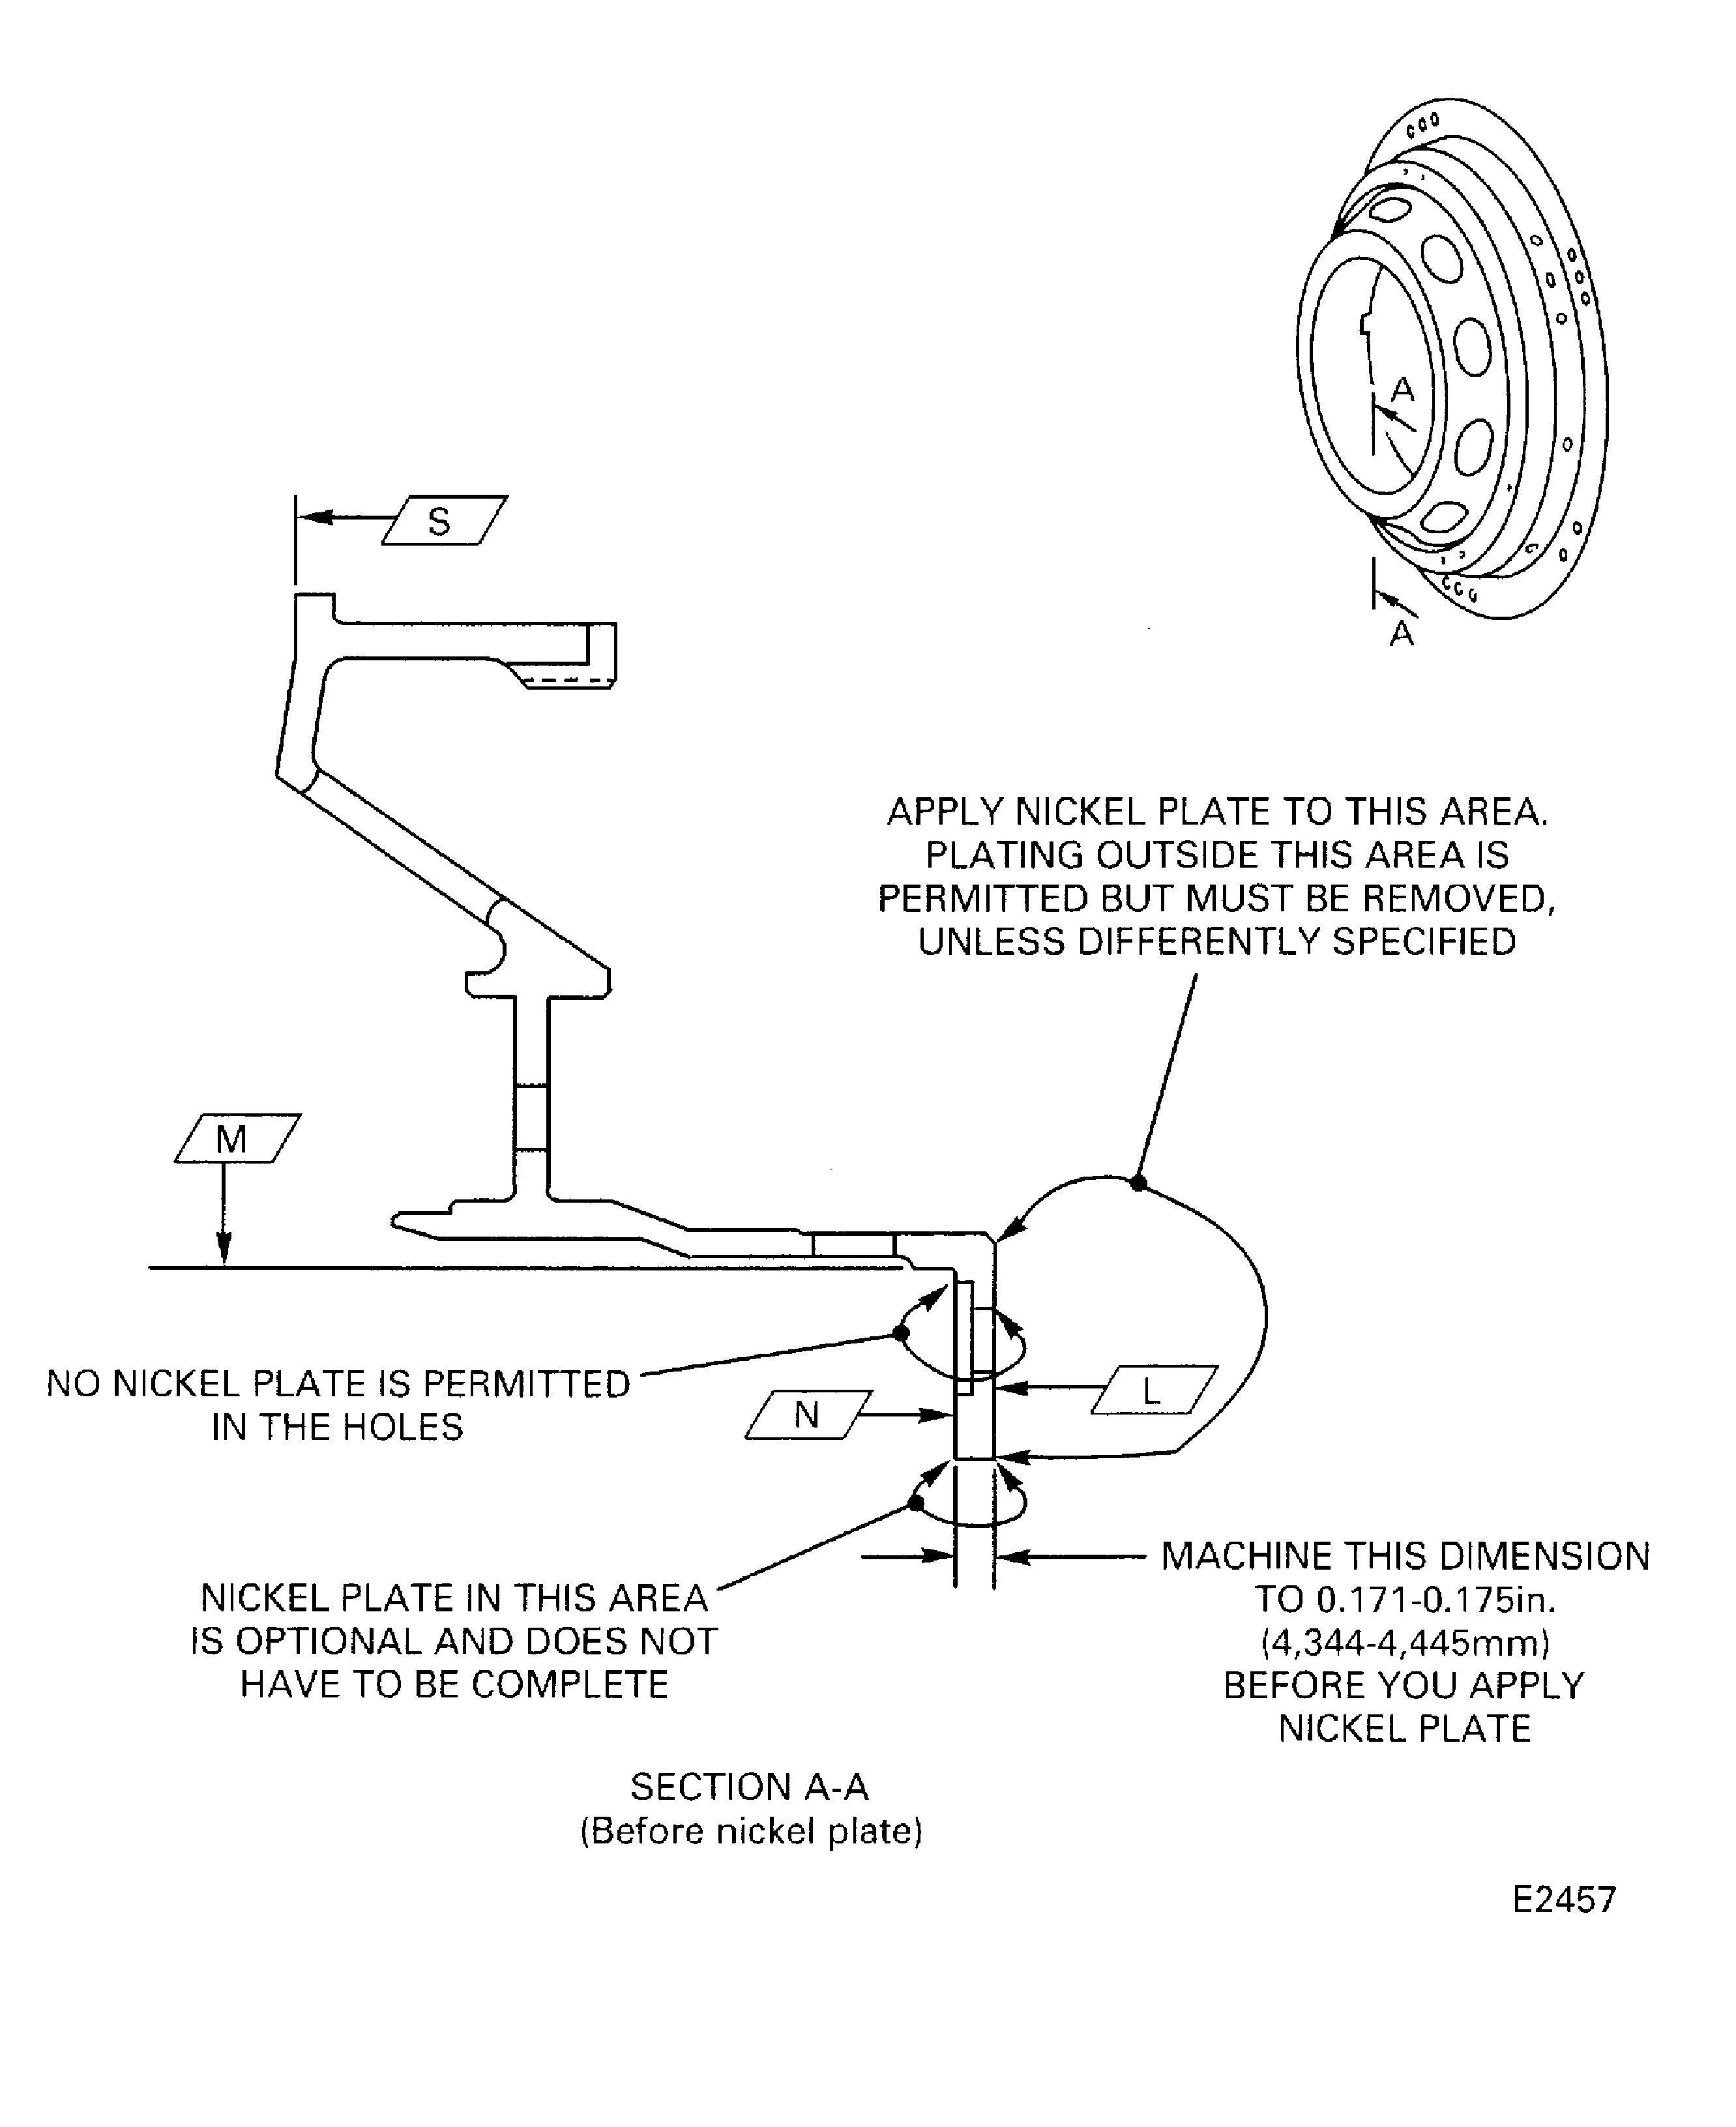
Refer to Figure. Hold to the maximum value.
The part must be in a held condition.
All dimensions apply when Surface N is flat by 0.001in. (0.025 mm) and Diameter M maintains a clearance envelope of 13.350in. (339.09 mm) in a free or held condition.
Hold the support only on Surfaces N, L and S and Diameter M.
If the flange surface was plated before, you can strip it.
Refer to the SPM TASK 70-33-06-300-503.
Machine the flange surface of the support.
SUBTASK 72-42-31-320-073 Machine the Rear Flange Surface of the No. 4 Bearing Support before Nickel Plate
Refer to Figure and the SPM TASK 70-33-06-300-503.
Apply nickel plate to a sufficient thickness to permit finish machining.
Plating outside the repair area is permitted but must be removed.
Nickel plate the flange surface of the support.
SUBTASK 72-42-31-330-062 Nickel Plate the Rear Flange of the No. 4 Bearing Support
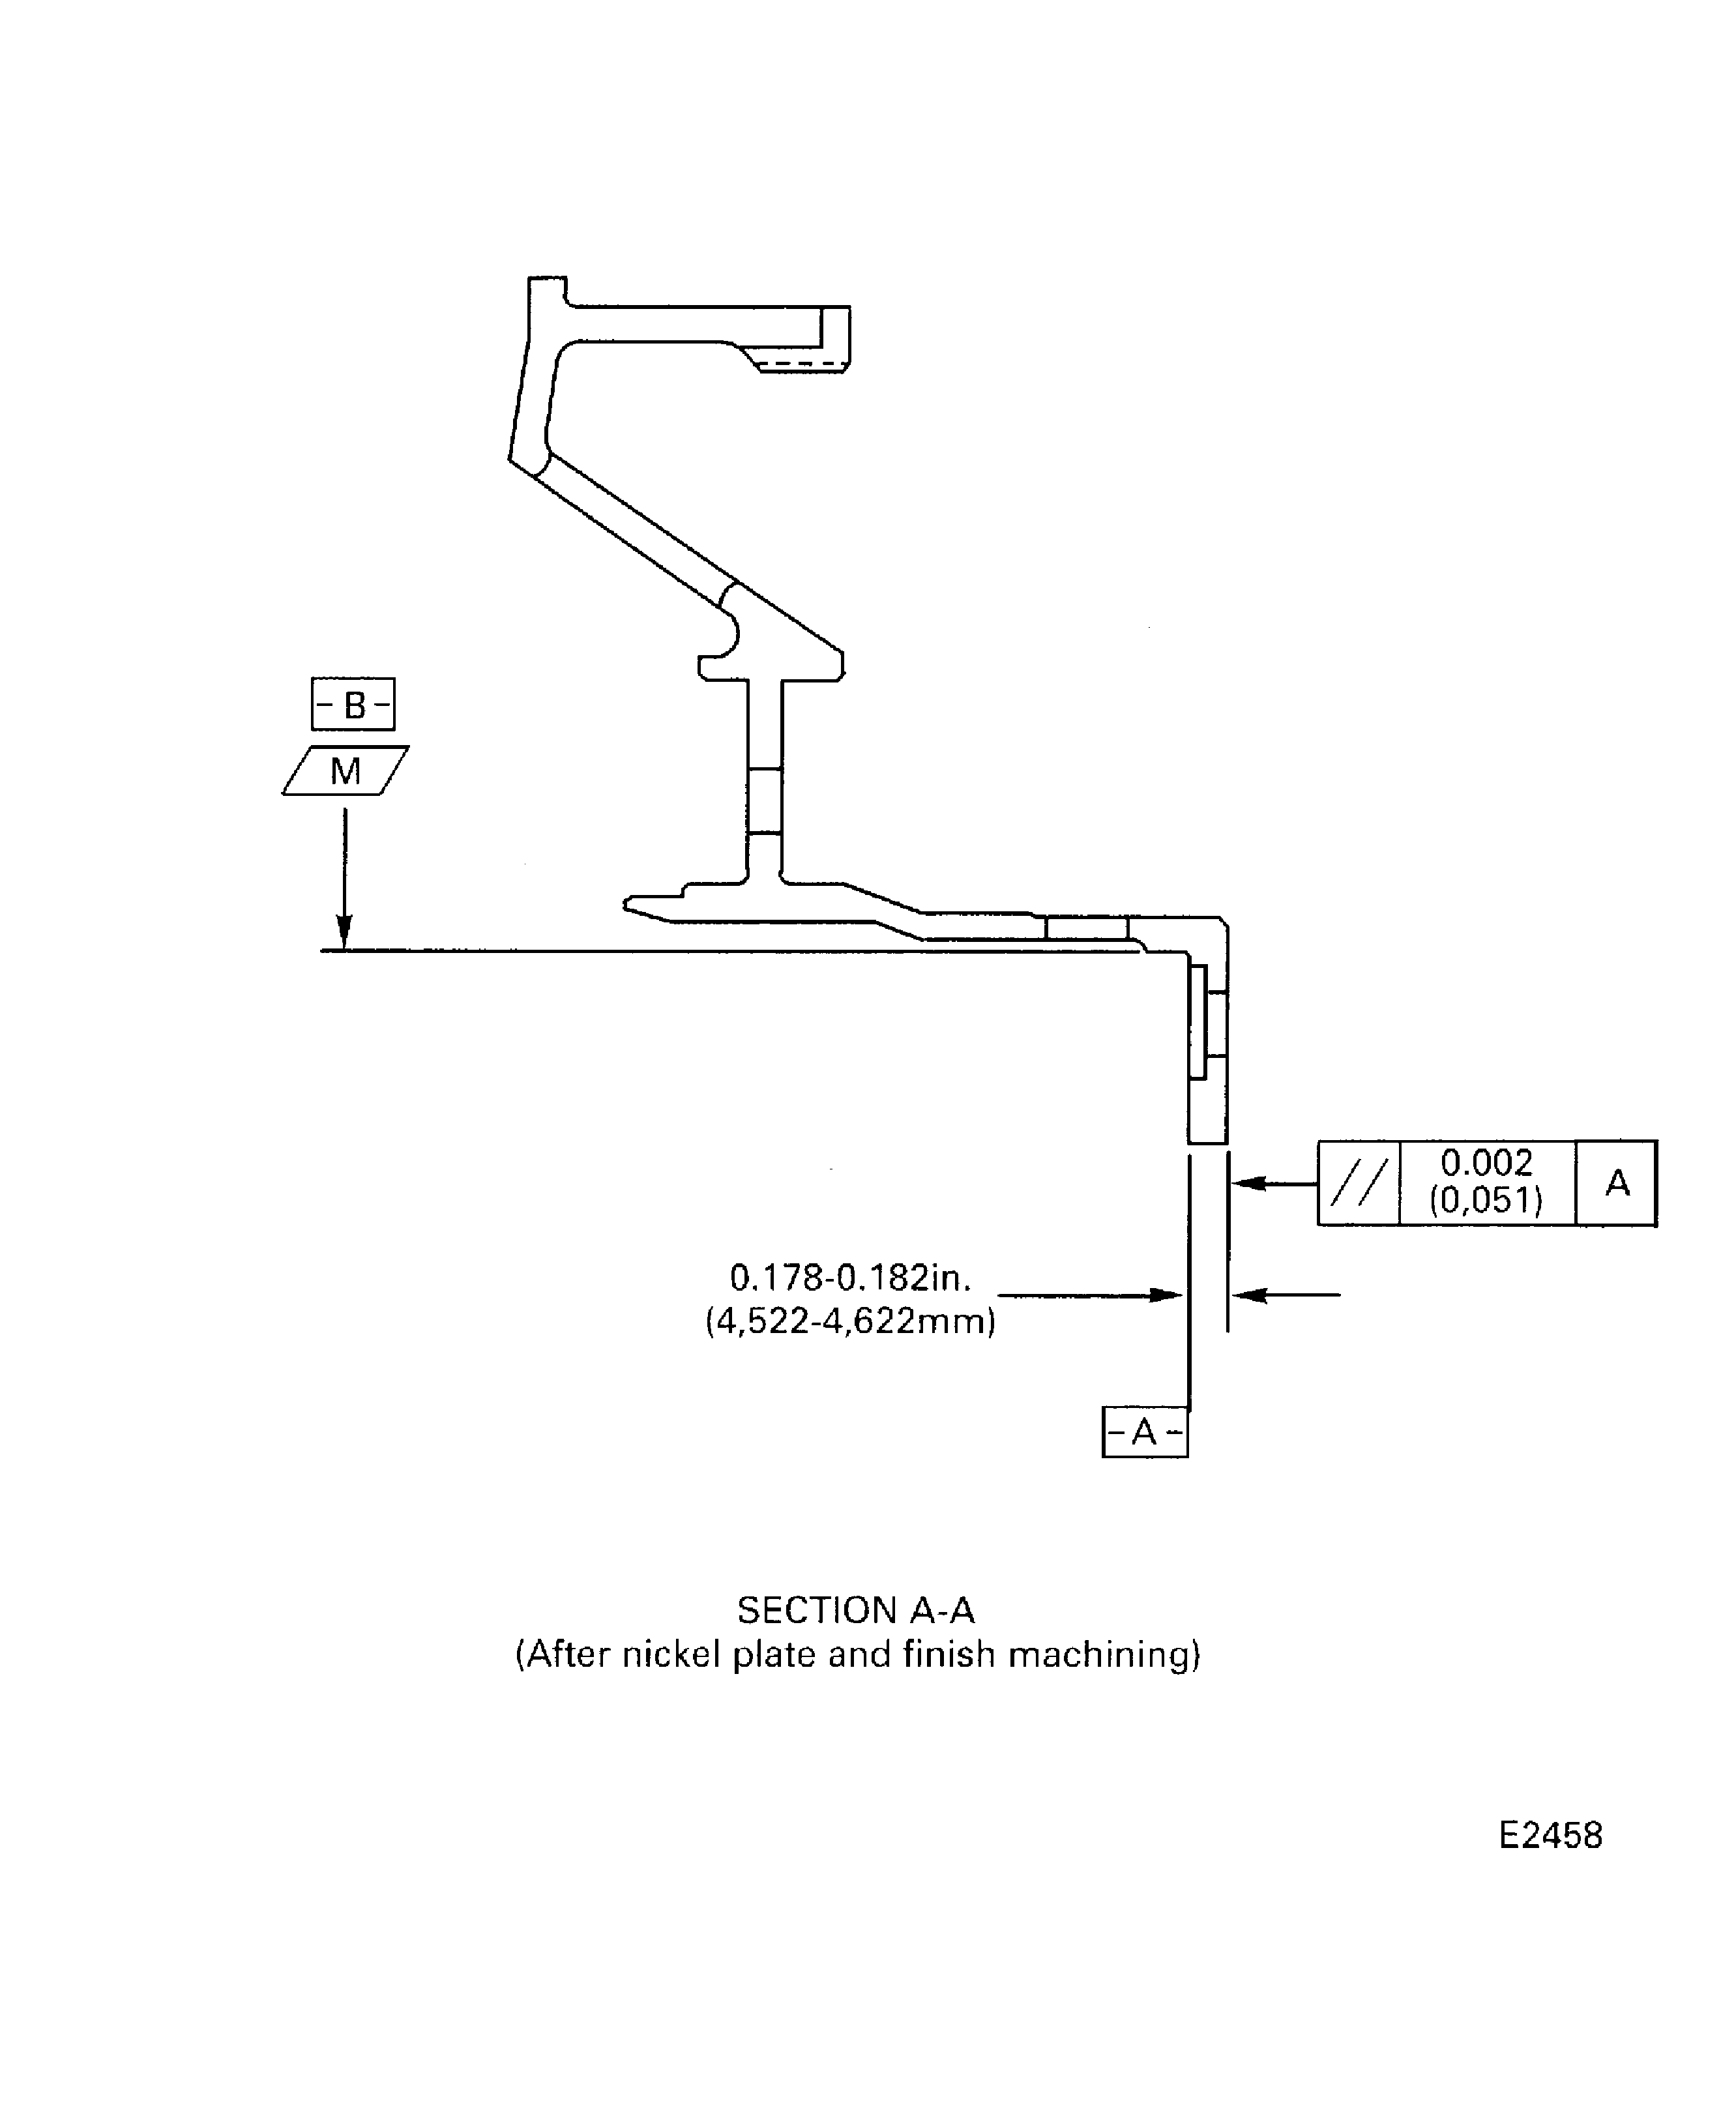
Refer to Figure. The minimum plating thickness is 0.002in. (0.051 mm) after machining.
The part must be in a held condition.
All dimensions apply when Surface N is flat by 0.001in. (0.025 mm) and Diameter M maintains a clearance envelope of 13.350in. (339.09 mm) in a free or held condition.
Hold the support only on Surfaces N, L and S and Diameter M.
Machine the flange surface of the support after nickel plate.
SUBTASK 72-42-31-320-074 Machine the Rear Flange of the No. 4 Bearing Support after Nickel Plate
Refer to Figure and TASK 72-42-31-200-000 (INSPECTION-000).
Use a Magnifying glass, 4X to do a visual inspection of the plated area to examine the cracks and adhesion.
Examine the support after nickel plate and finish machining.
SUBTASK 72-42-31-220-074 Examine the Repair
Make a permanent mark by the procedure given in the SPM TASK 70-09-00-400-501.
Use the vibration peen method.
Remove high metal caused by marking the number.
Mark VRS3298 on the repaired No. 4 bearing support adjacent to the part number.
SUBTASK 72-42-31-350-069 Identify the Repair
Figure: Nickel plate the rear flange of the No. 4 bearing support
Sheet 1

Figure: Nickel plate the rear flange of the No. 4 bearing support
Sheet 2

