Export Control
EAR Export Classification: Not subject to the EAR per 15 C.F.R. Chapter 1, Part 734.3(b)(3), except for the following Service Bulletins which are currently published as EAR Export Classification 9E991: SBE70-0992, SBE72-0483, SBE72-0580, SBE72-0588, SBE72-0640, SBE73-0209, SBE80-0024 and SBE80-0025.Copyright
© IAE International Aero Engines AG (2001, 2014 - 2021) The information contained in this document is the property of © IAE International Aero Engines AG and may not be copied or used for any purpose other than that for which it is supplied without the express written authority of © IAE International Aero Engines AG. (This does not preclude use by engine and aircraft operators for normal instructional, maintenance or overhaul purposes.).Applicability
All
Common Information
TASK 72-44-10-300-003 HPT Stage 1 Support Assembly - Blend Repair The Stage 1 HPT Support - Repair-003 (VRS3273)
Effectivity
FIG/ITEM | PART NO. |
|---|---|
01-010 | 2A1292 |
01-010 | 2A1358 |
01-010 | 2A1664 |
01-010 | 2A2703 |
01-010 | 2A3360 |
01-010 | 2A4027 |
01-010 | 2A3367 |
01-010 | 2A3896 |
01-010 | 2A4085 |
General
Price and availability - refer to IAE
The practices and processes referred to in the procedure by the TASK numbers are in the SPM.
NOTE
Preliminary Requirements
Pre-Conditions
NONESupport Equipment
| Name | Manufacturer | Part Number / Identification | Quantity | Remark |
|---|---|---|---|---|
| Hand stone | LOCAL | Hand stone |
Consumables, Materials and Expendables
NONESpares
NONESafety Requirements
NONEProcedure
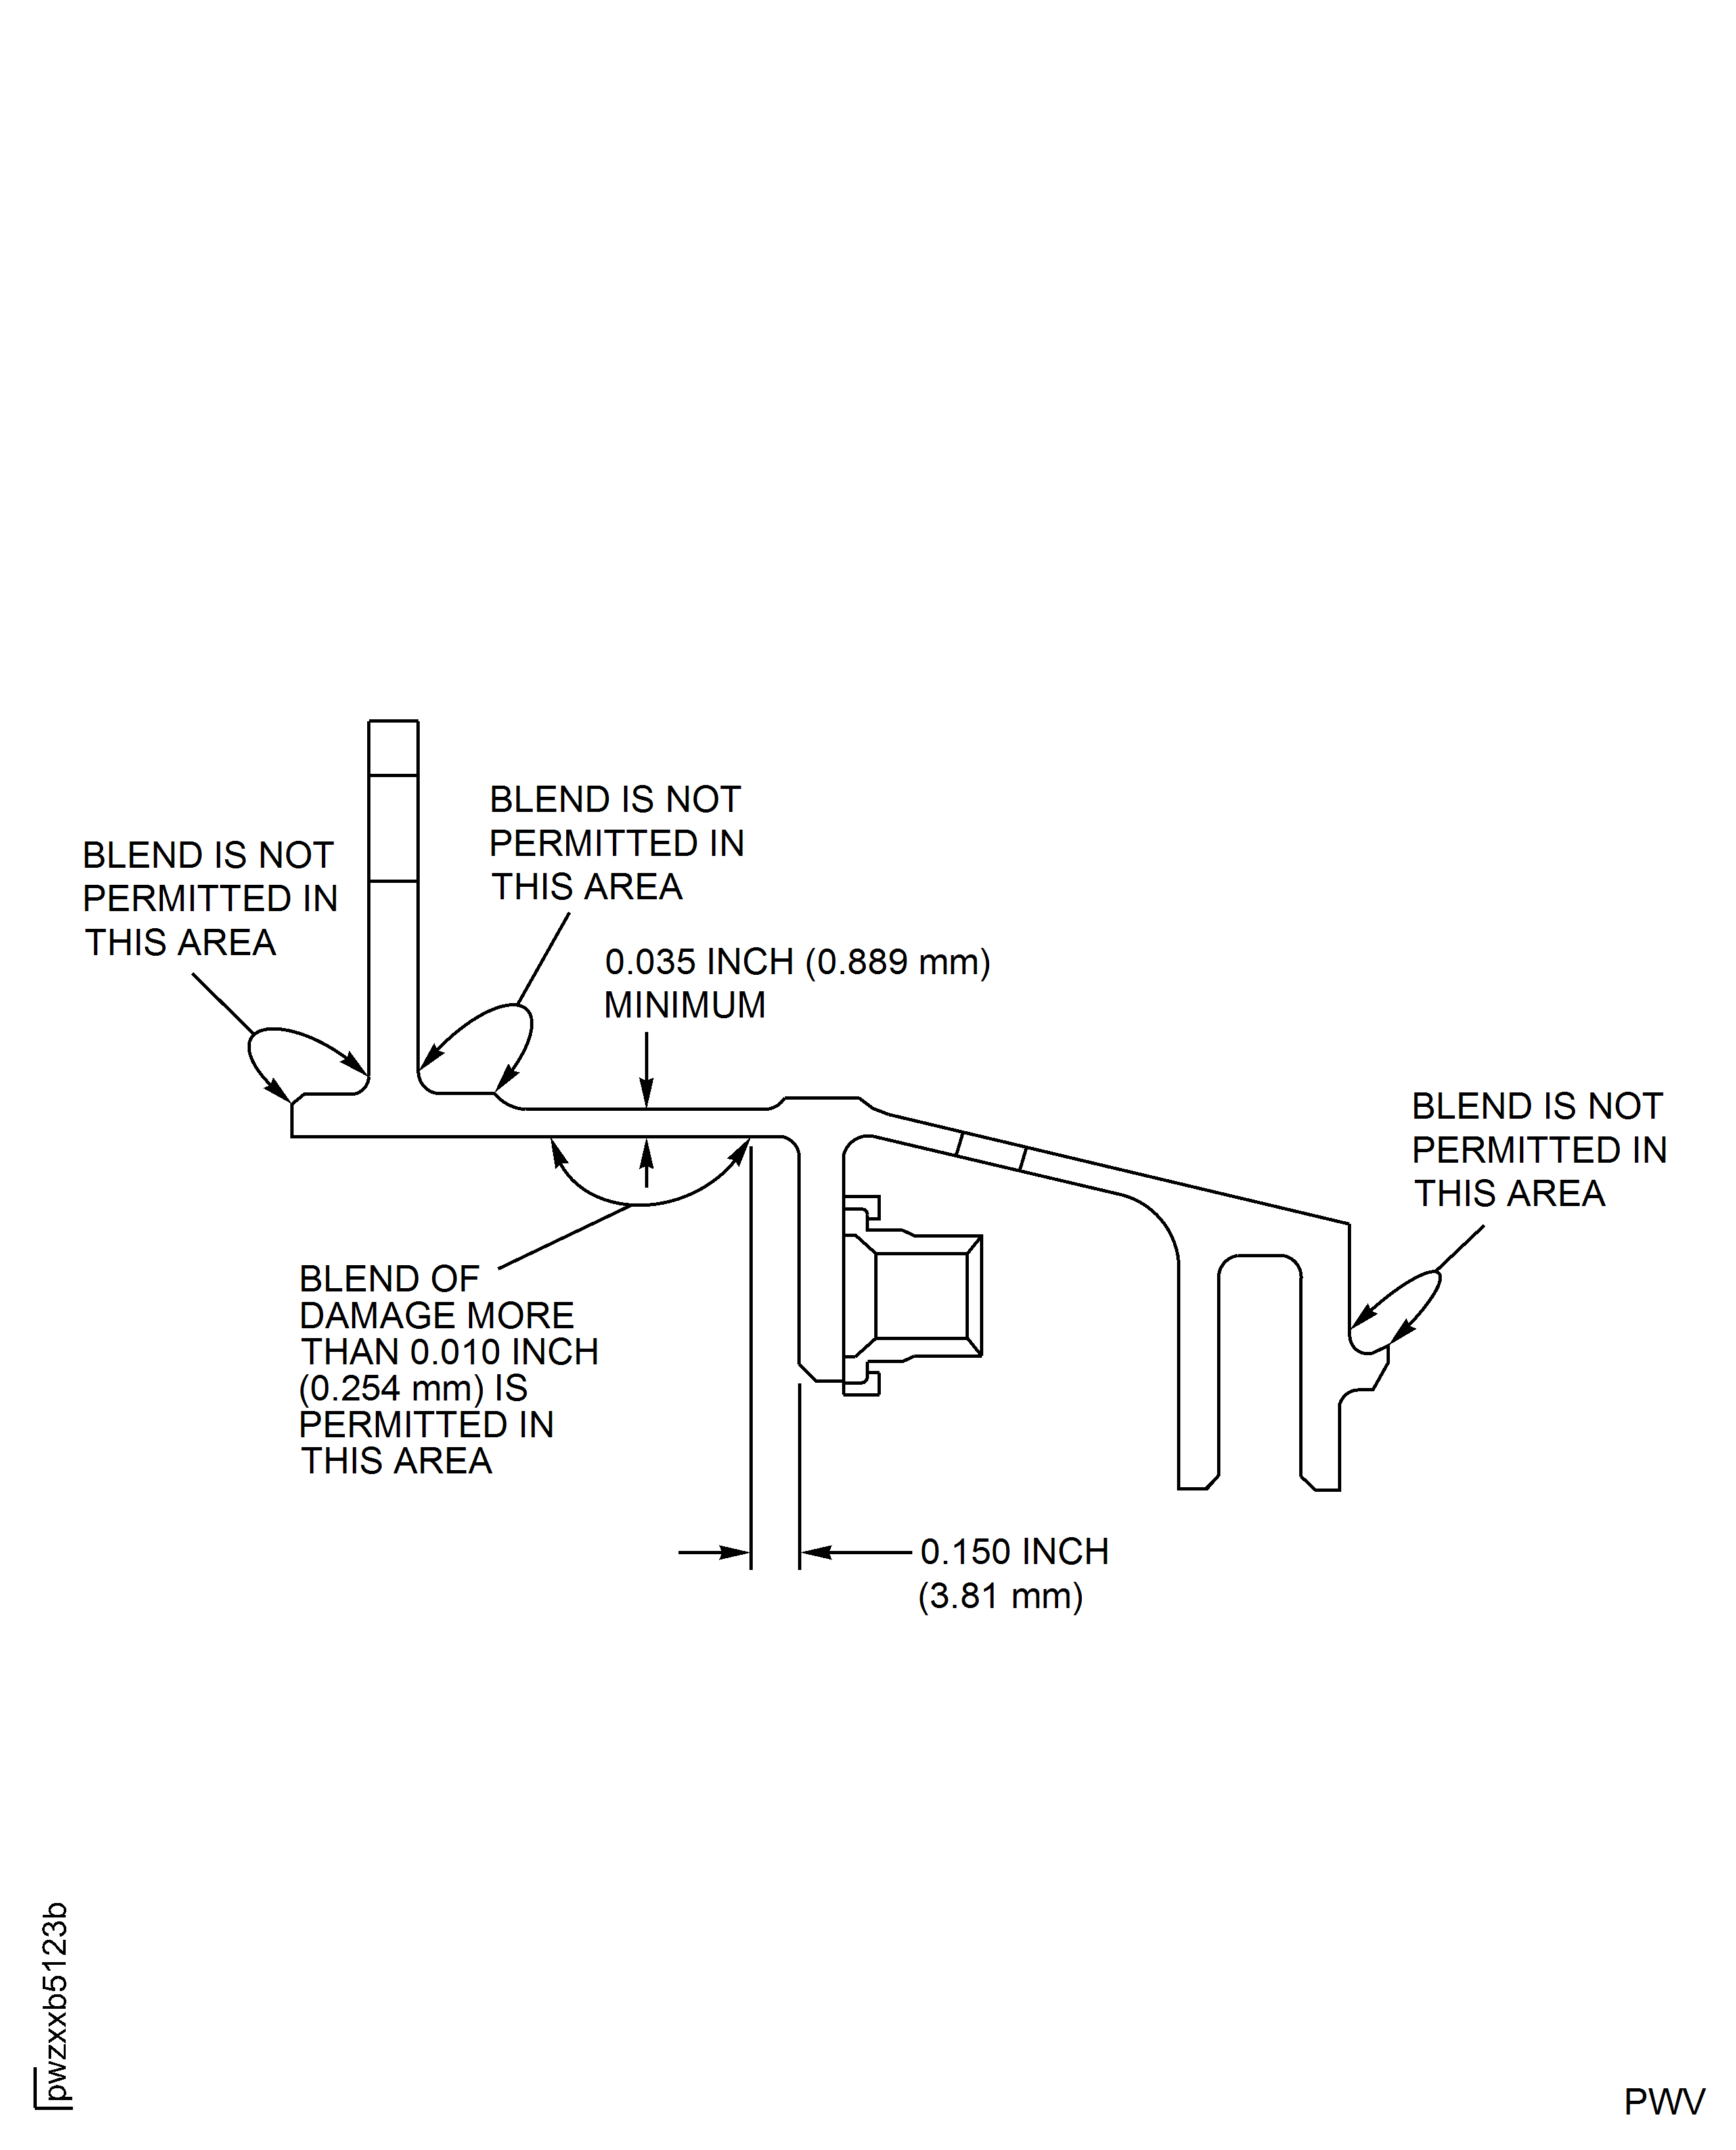
Only eight areas are permitted with surface damage more than 0.010 in. (0.254 mm).
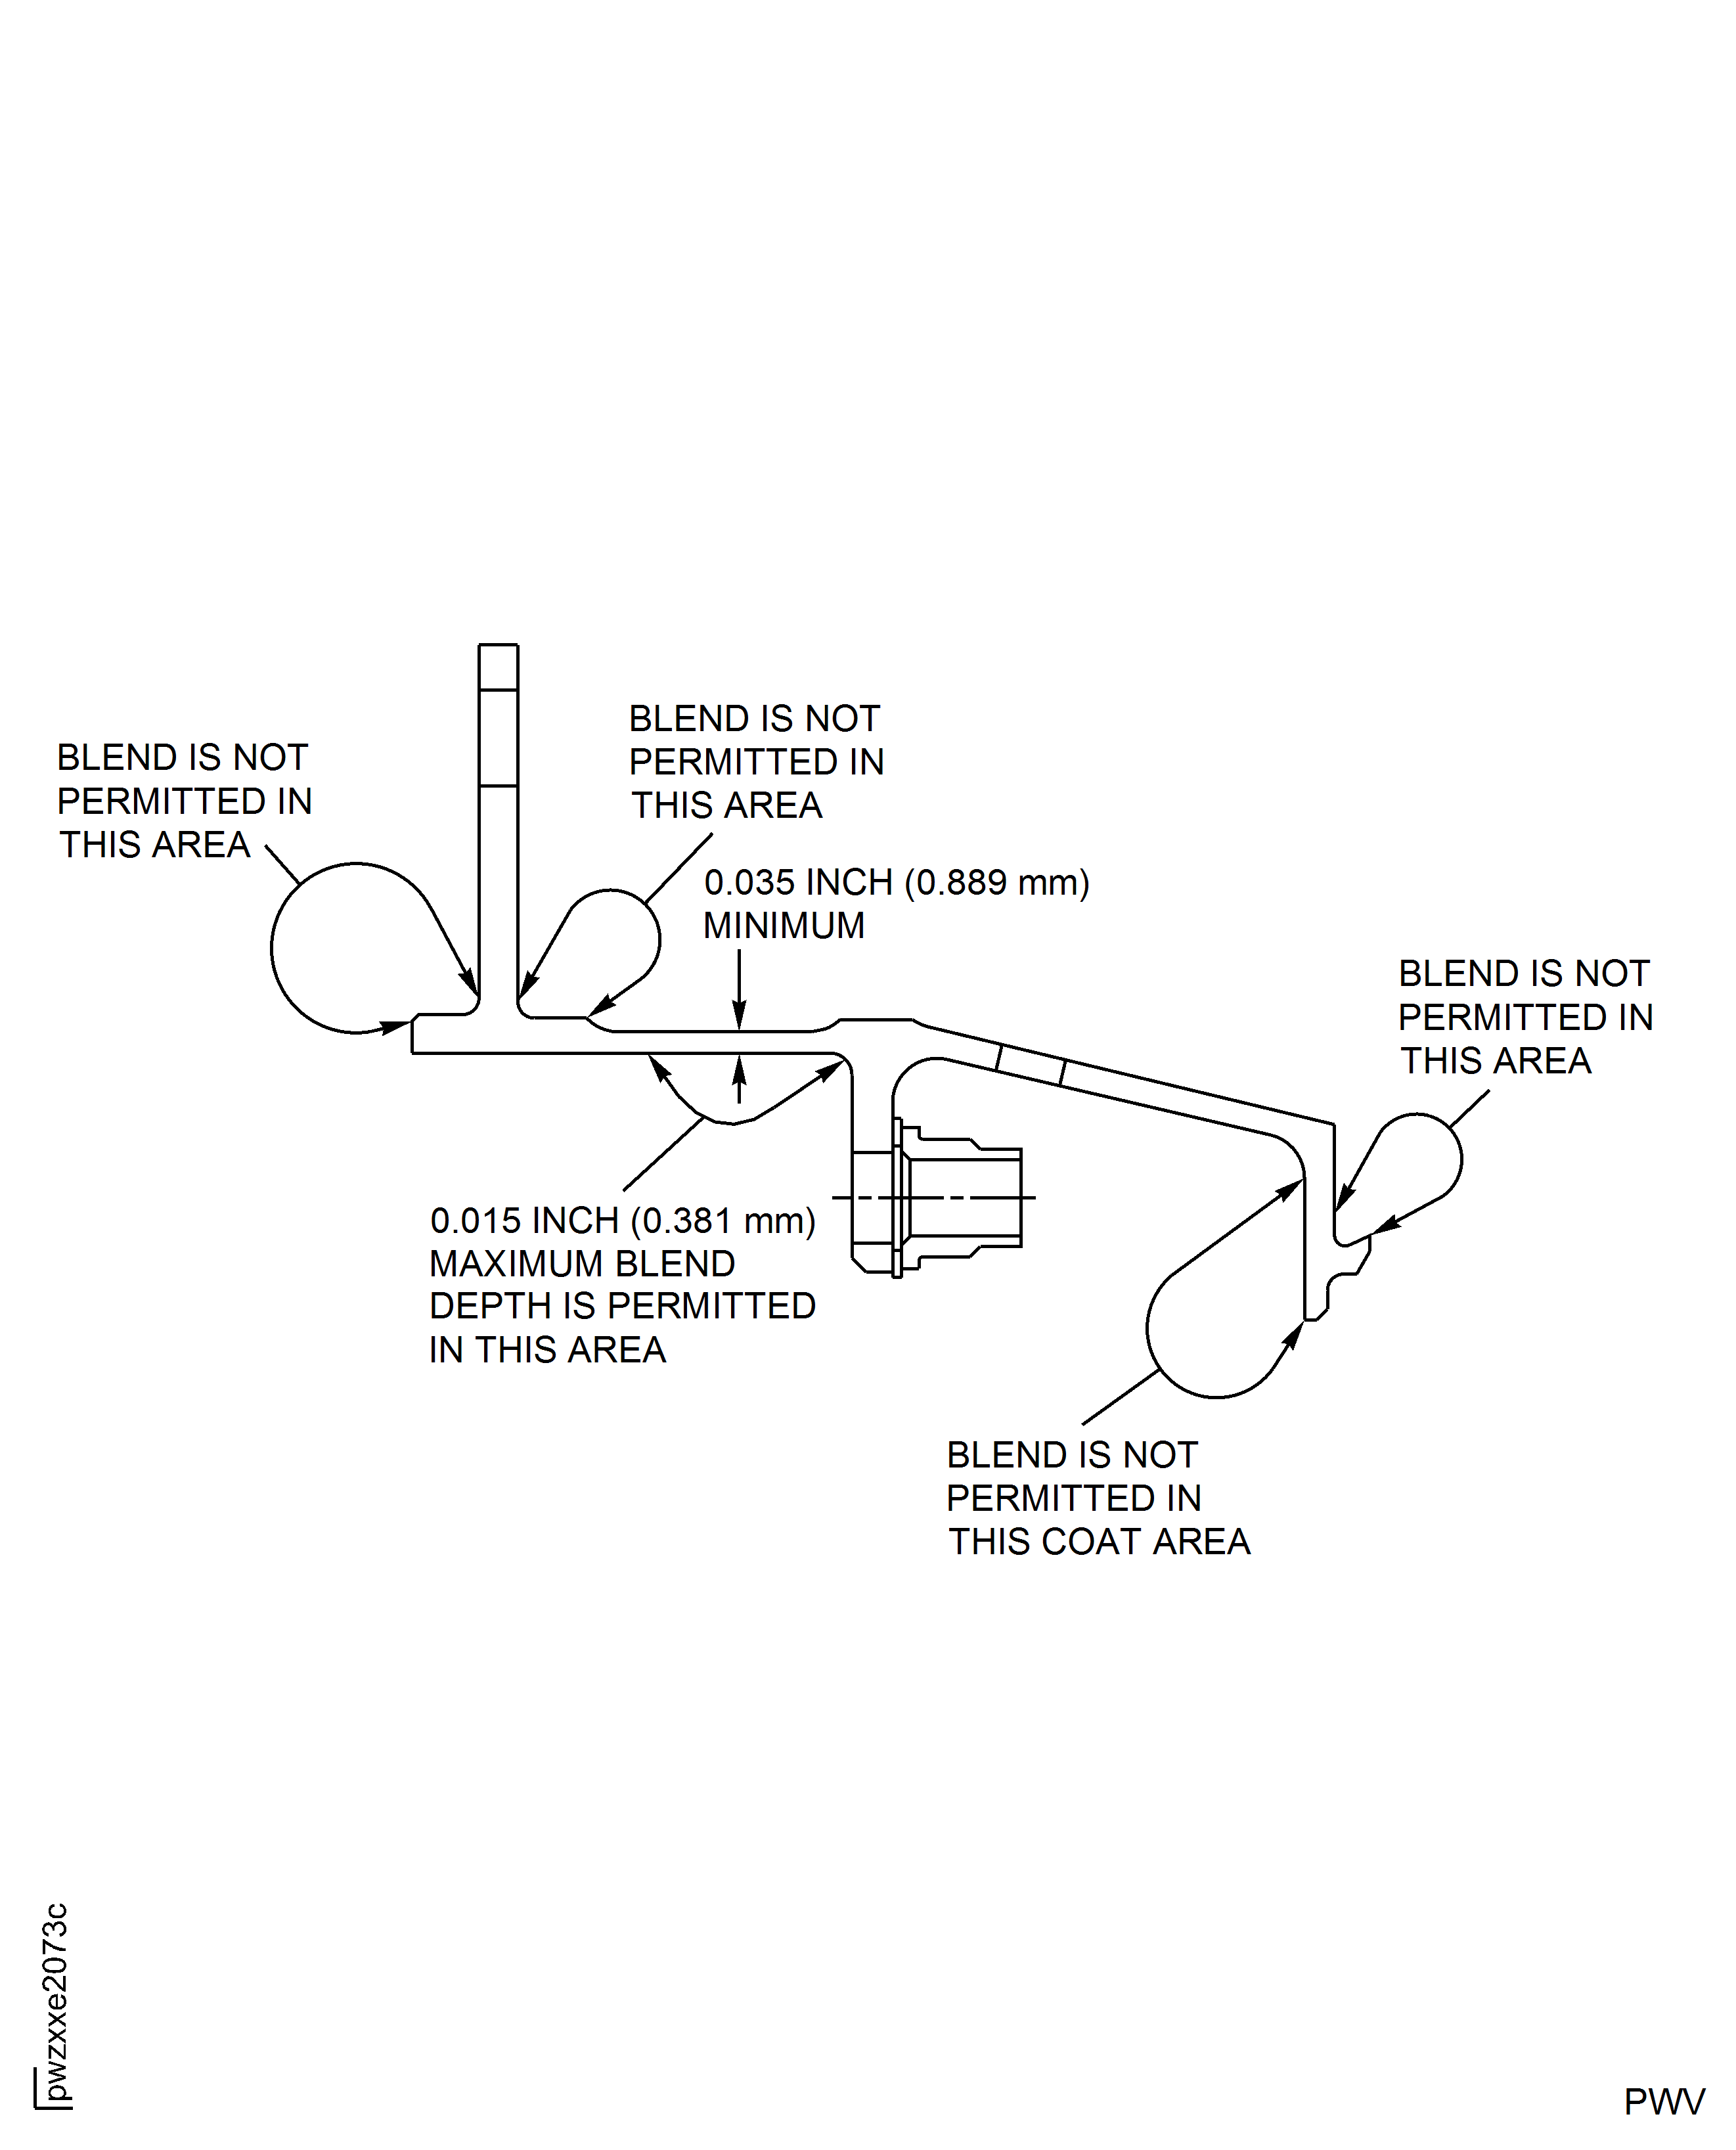
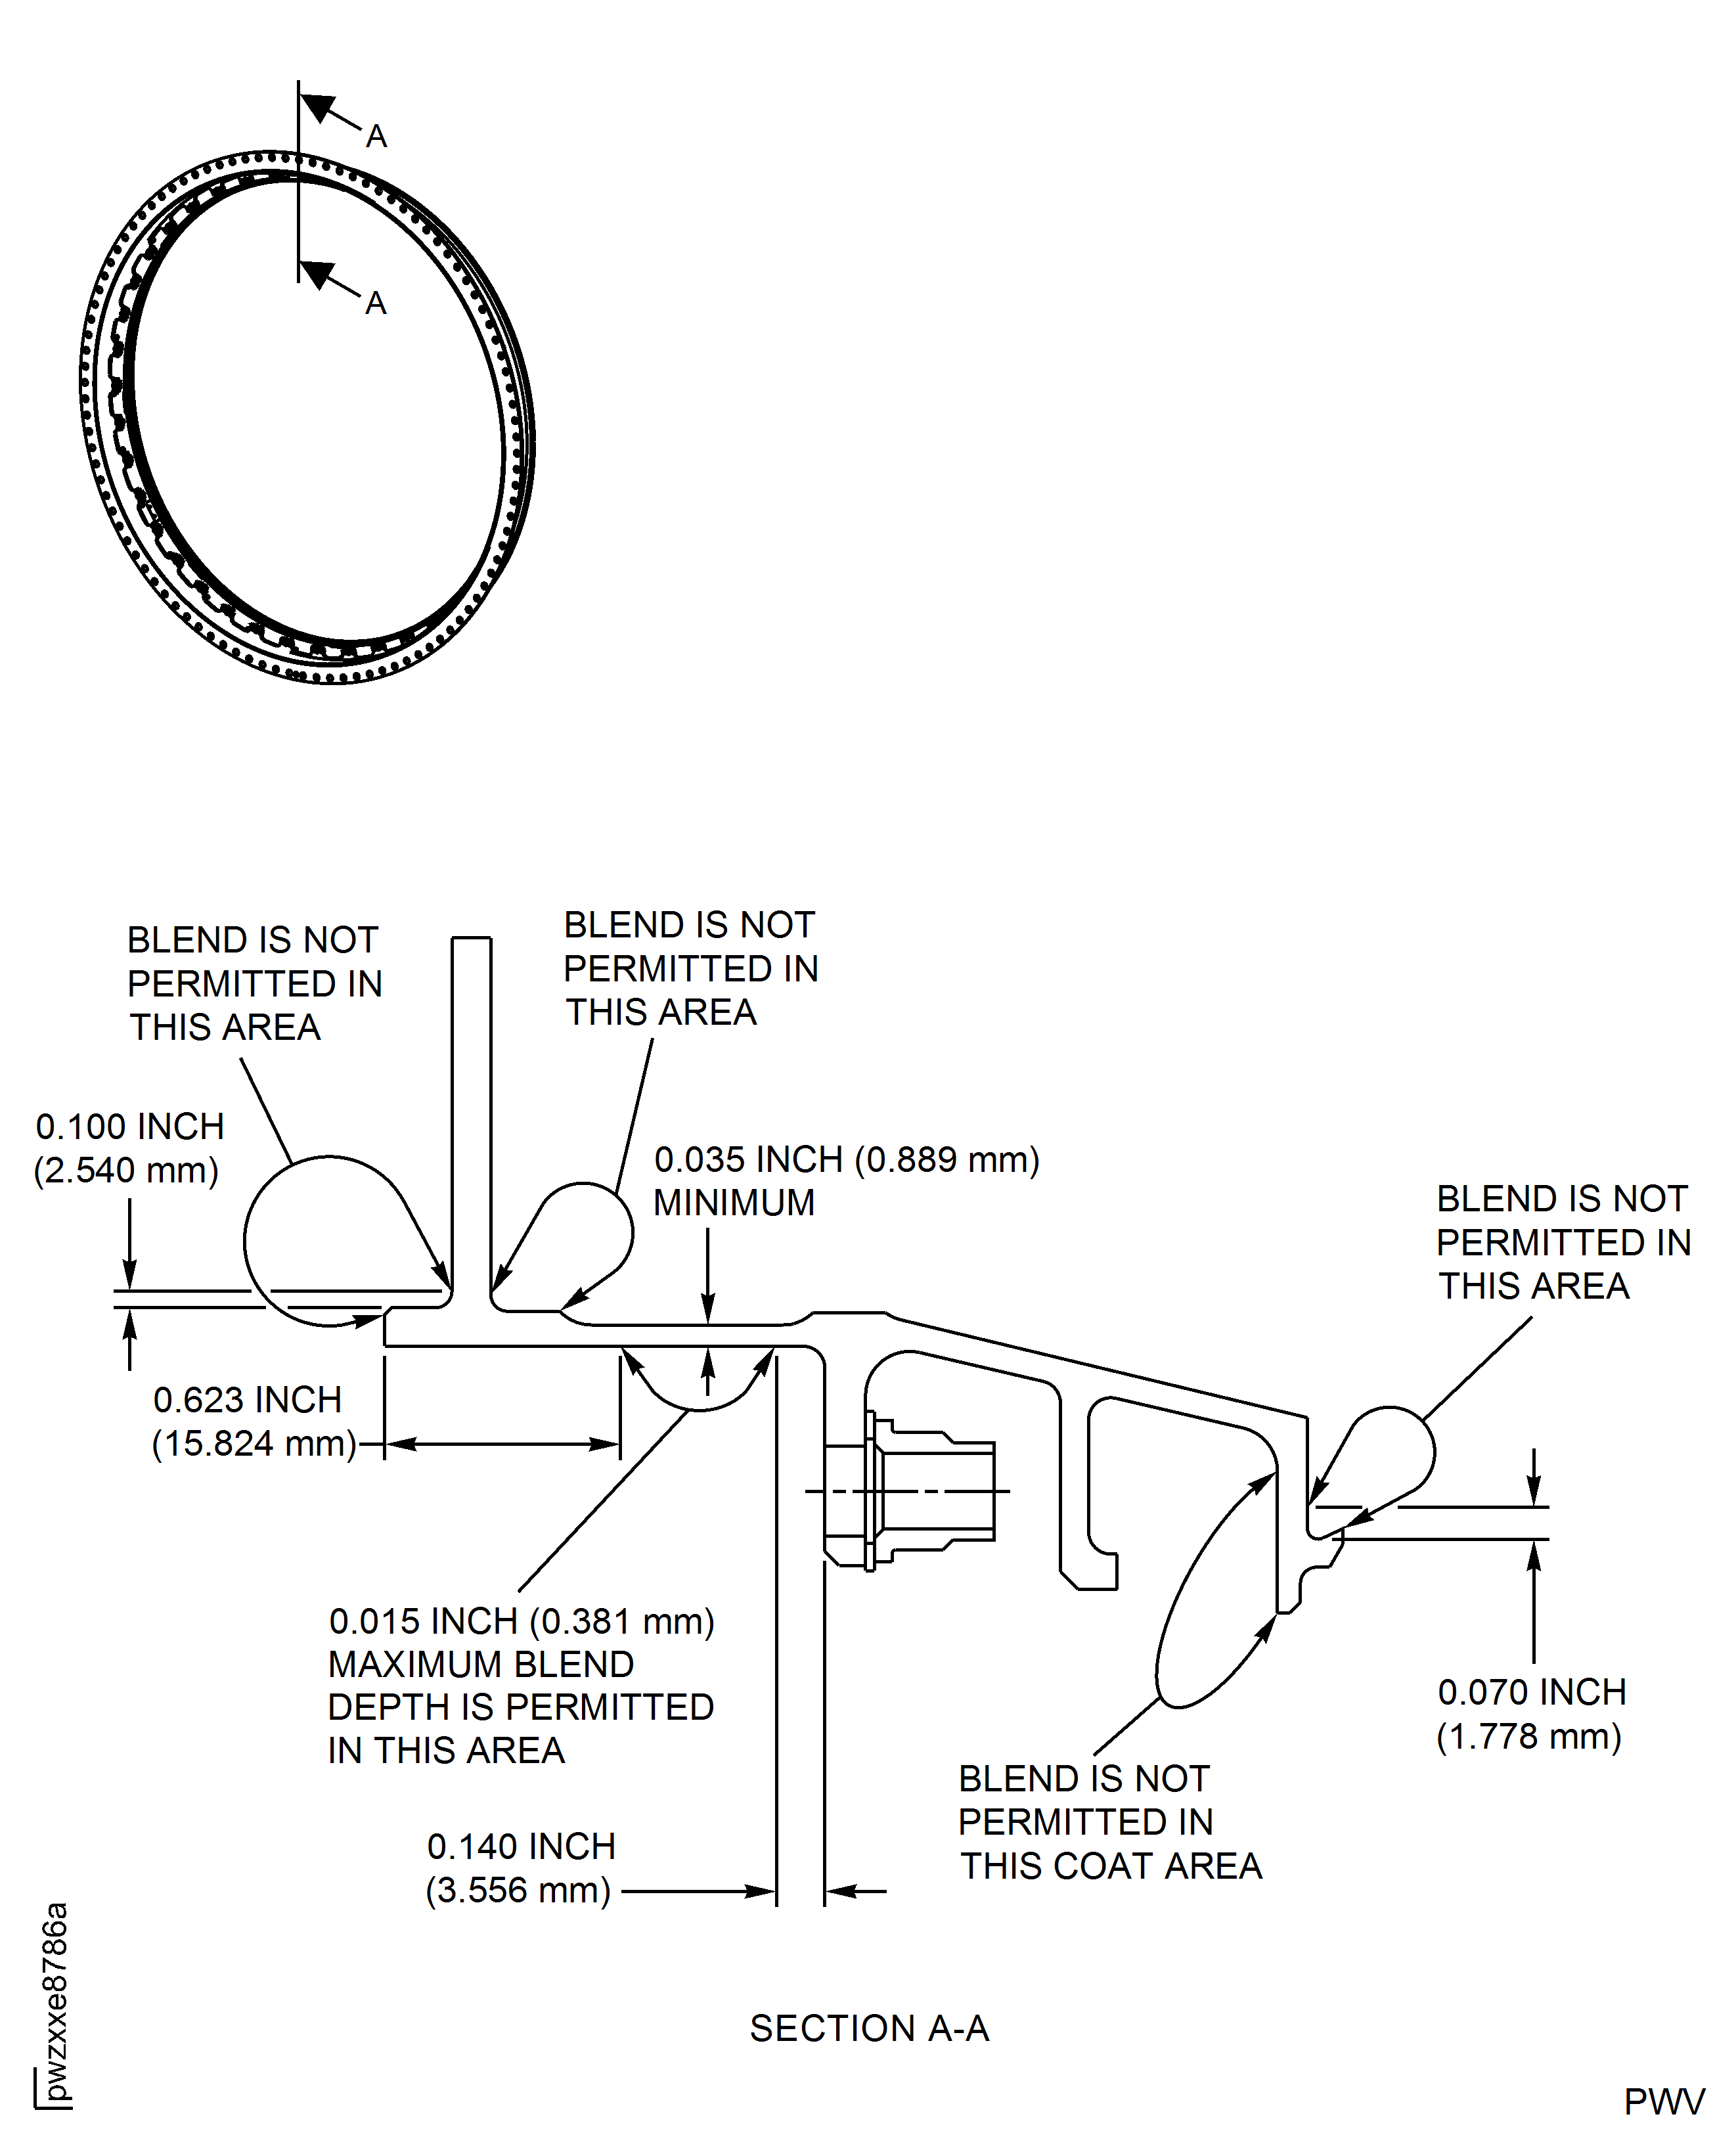
Minimum wall thickness of 0.035 in. (0.889 mm) must be maintained.
Only one area of surface damage more than 0.010 in. (0.254 mm) is permitted at a mounting lug location.
A maximum of two adjacent mount lug locations may be blend repaired if surface damage exceeds 0.010 in. (0.254 mm).
Maximum blend depth is 0.015 in. (0.381 mm) and the length to depth ratio must be 15 to 1 or more.
Blend only in the area shown in Figure.
Blend surface damage that is more than 0.010 in. (0.254 mm) in depth.
SUBTASK 72-44-10-350-057 Blend the Damaged Areas on the Stage 1 HPT Support
Refer to the SPM TASK 70-23-02-230-501.
Fluorescent penetrant inspect the support.
SUBTASK 72-44-10-230-056 Fluorescent Penetrant Inspect the Stage 1 HPT Support after Blend Repair
Refer to TASK 72-44-10-200-000 (INSPECTION-000).
Inspect the area of the support you repaired.
SUBTASK 72-44-10-220-098 Examine the Stage 1 HPT Support after Blend Repair
Figure: Repair Details and Dimensions (PN 2A1292, PN 2A1358 and PN 2A1664)
Repair Details and Dimensions (PN 2A1292, PN 2A1358 and PN 2A1664)

Repair Details and Dimensions (PN 2A1292, PN 2A1358 and PN 2A1664)

Repair Details and Dimensions (PN 2A1292, PN 2A1358 and PN 2A1664)

