Export Control
EAR Export Classification: Not subject to the EAR per 15 C.F.R. Chapter 1, Part 734.3(b)(3), except for the following Service Bulletins which are currently published as EAR Export Classification 9E991: SBE70-0992, SBE72-0483, SBE72-0580, SBE72-0588, SBE72-0640, SBE73-0209, SBE80-0024 and SBE80-0025.Copyright
© IAE International Aero Engines AG (2001, 2014 - 2021) The information contained in this document is the property of © IAE International Aero Engines AG and may not be copied or used for any purpose other than that for which it is supplied without the express written authority of © IAE International Aero Engines AG. (This does not preclude use by engine and aircraft operators for normal instructional, maintenance or overhaul purposes.).Applicability
All
Common Information
TASK 72-50-24-300-006 LPT Inner Diffuser Duct Segment - Weld Repair The Location Slot, Repair-006 (VRS4112)
General
Price and availability - none
The practices and processes referred to in the procedure by the TASK number are in the SPM.
NOTE
NOTE
Preliminary Requirements
Pre-Conditions
NONESupport Equipment
NONEConsumables, Materials and Expendables
| Name | Manufacturer | Part Number / Identification | Quantity | Remark |
|---|---|---|---|---|
| CoMat 03-283 COATING ALLOY | 0CZB2 | CoMat 03-283 |
Spares
NONESafety Requirements
NONEProcedure
Refer to the SPM TASK 70-11-34-300-503.
Aqueous degrease.
SUBTASK 72-50-24-110-135 Clean the Support Ring Assy
Refer to the SPM TASK 70-37-00-370-501.
Put it in an oven for two hours at 1575 to 1625 deg F (857 to 885 deg C).
Use argon or vacuum.
Cooling rate equivalent to air cooling.
Heat treat the component.
SUBTASK 72-50-24-370-058 Heat Treat After Weld Repair
Refer to the SPM TASK 70-23-05-230-501.
Fine surface cracks are permitted as follows:
An unlimited number of linear/non linear discontinuities are permitted in the weld material and heat affected zone as long as they do not extend to an edge.
Maximum length of linear discontinuities is 0.050in. (1.27 mm).
Maximum of non-linear discontinuities is 0.020in. (0.50 mm).
Do the test for cracks.
Refer to the SPM TASK 70-11-34-300-503.
Clean the component.
SUBTASK 72-50-24-230-094 Examine the Welded Areas for Cracks
Refer to the SPM TASK 70-23-05-230-501.
Only cracks referred to in SUBTASK 72-50-24-230-002 are permitted.
Do the test for cracks.
SUBTASK 72-50-24-230-095 Examine Machined Area for Cracks
Refer to the SPM TASK 70-11-34-300-503.
Clean the duct segment.
SUBTASK 72-50-24-110-139 Clean the Component
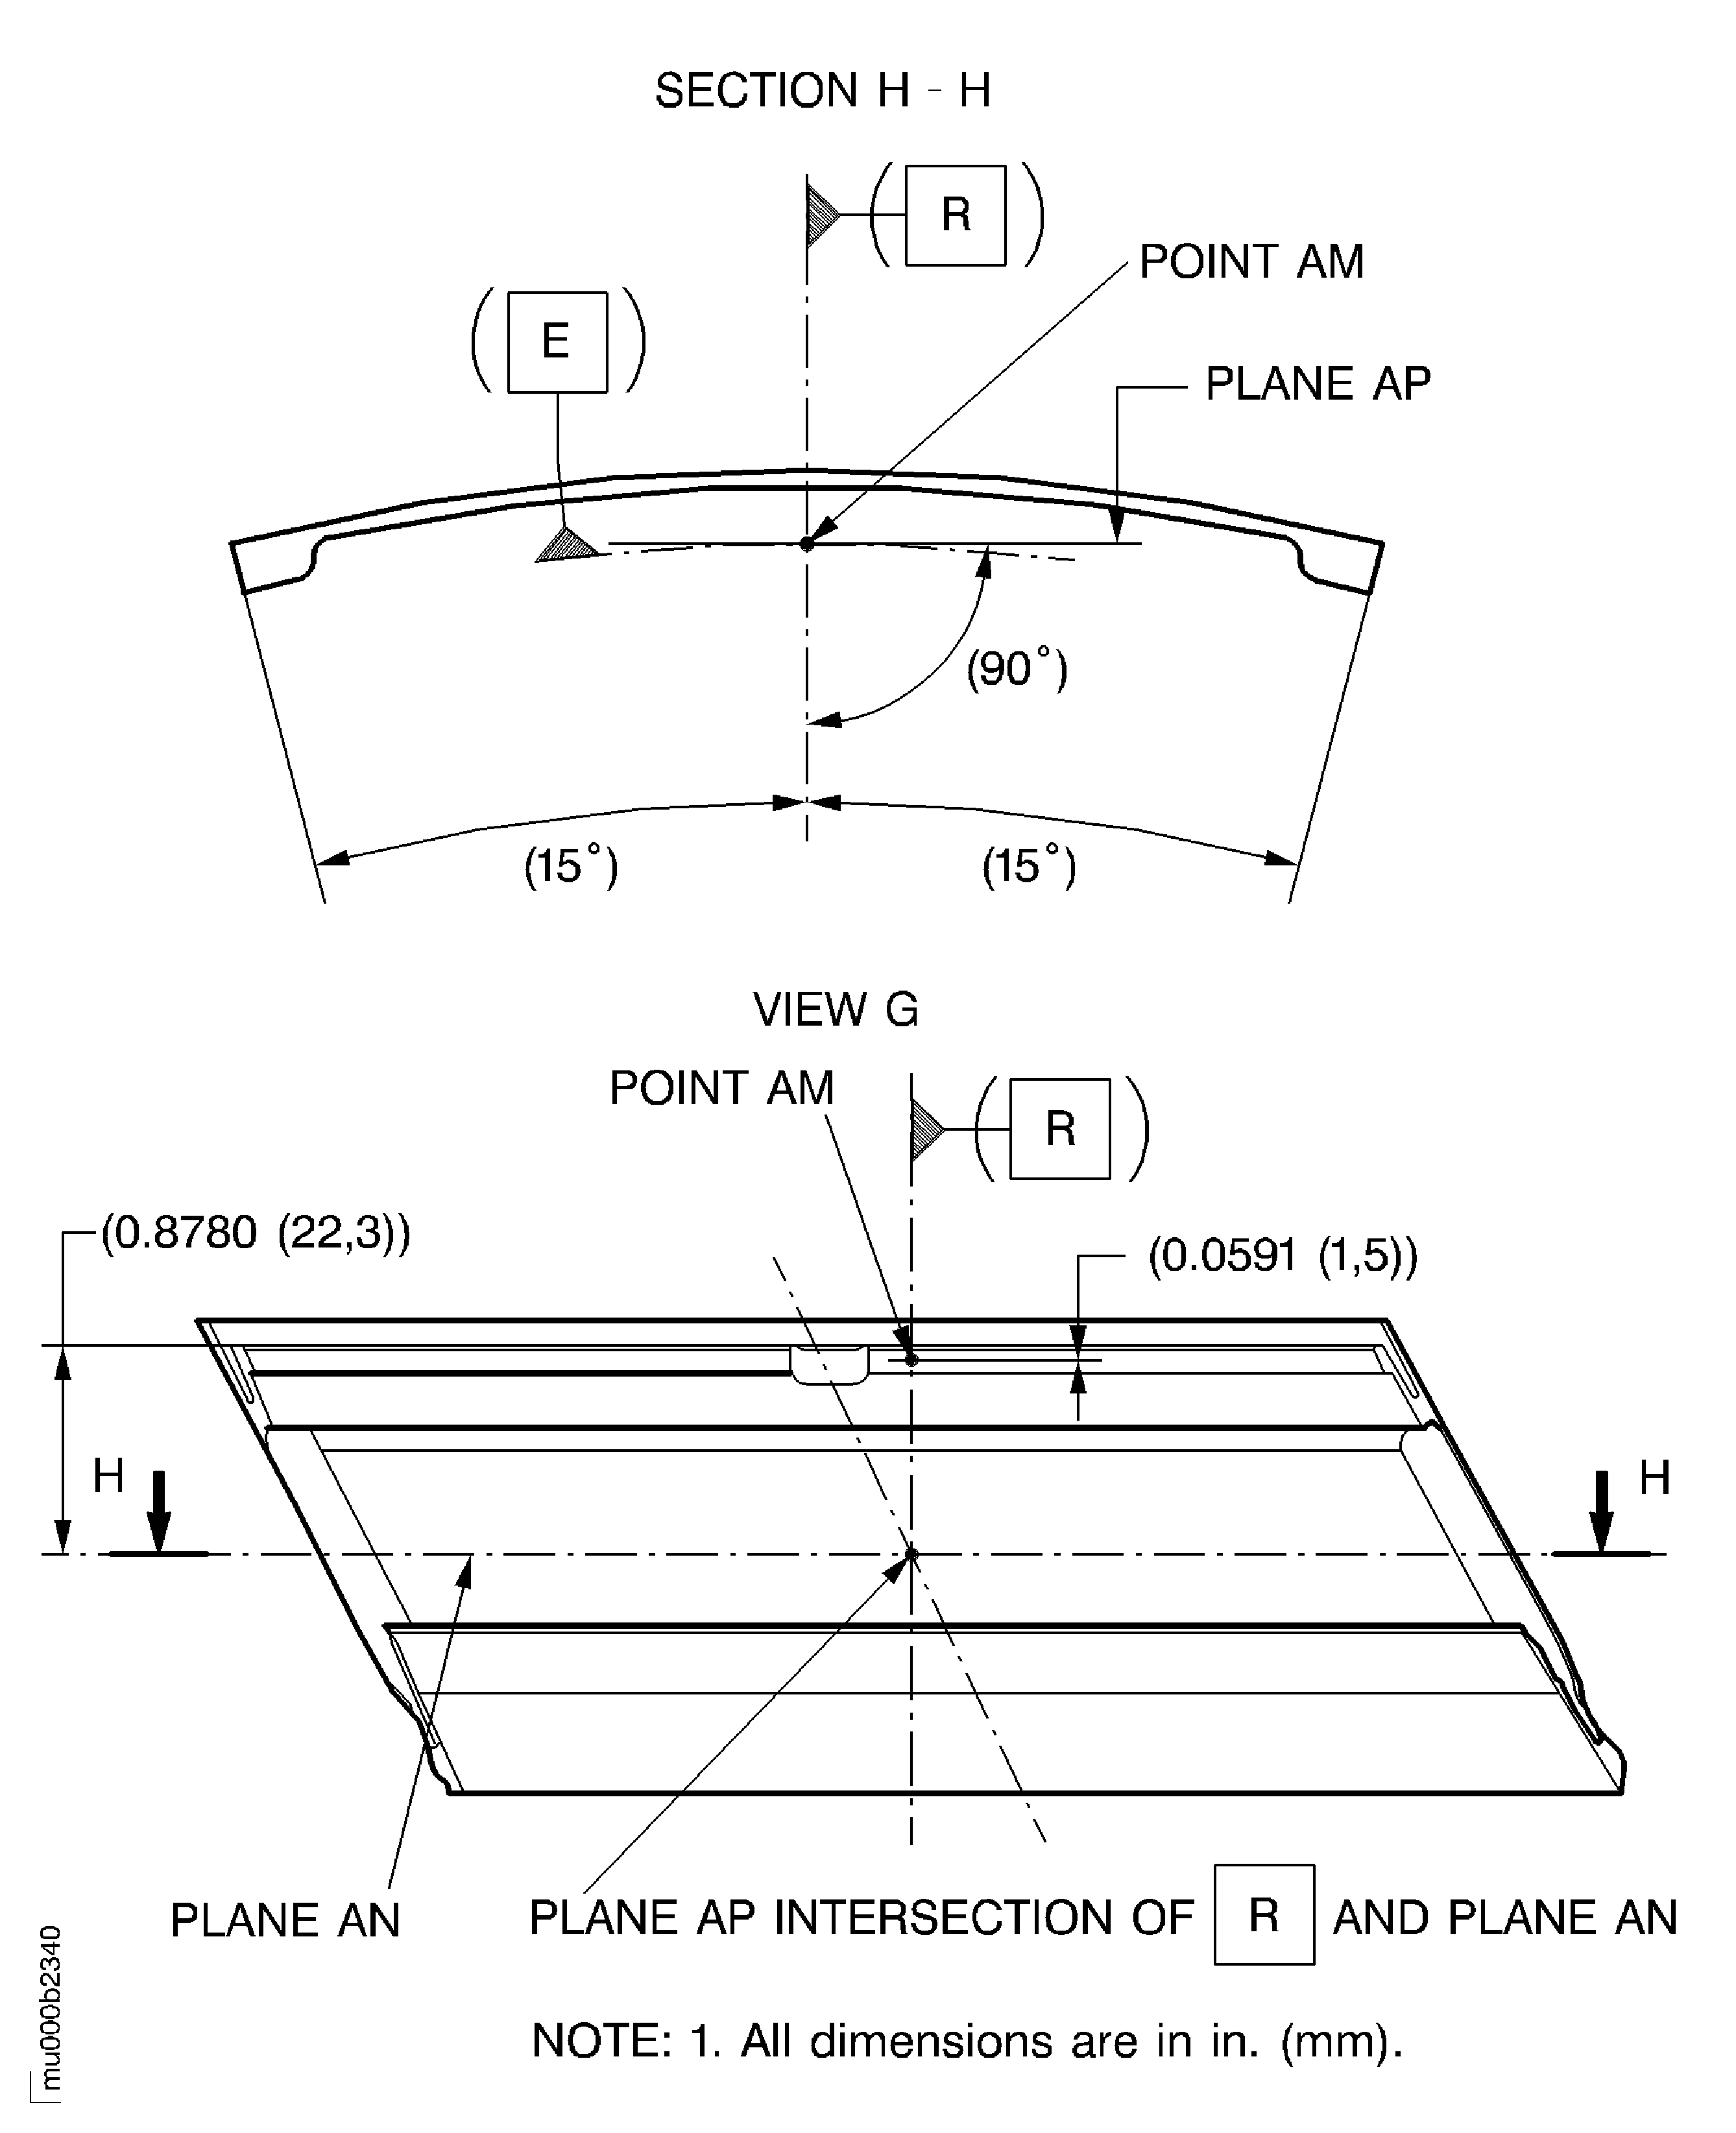
Figure: Dimensions for weld repair of the inner duct segment
Dimensions for weld repair of the inner duct segment

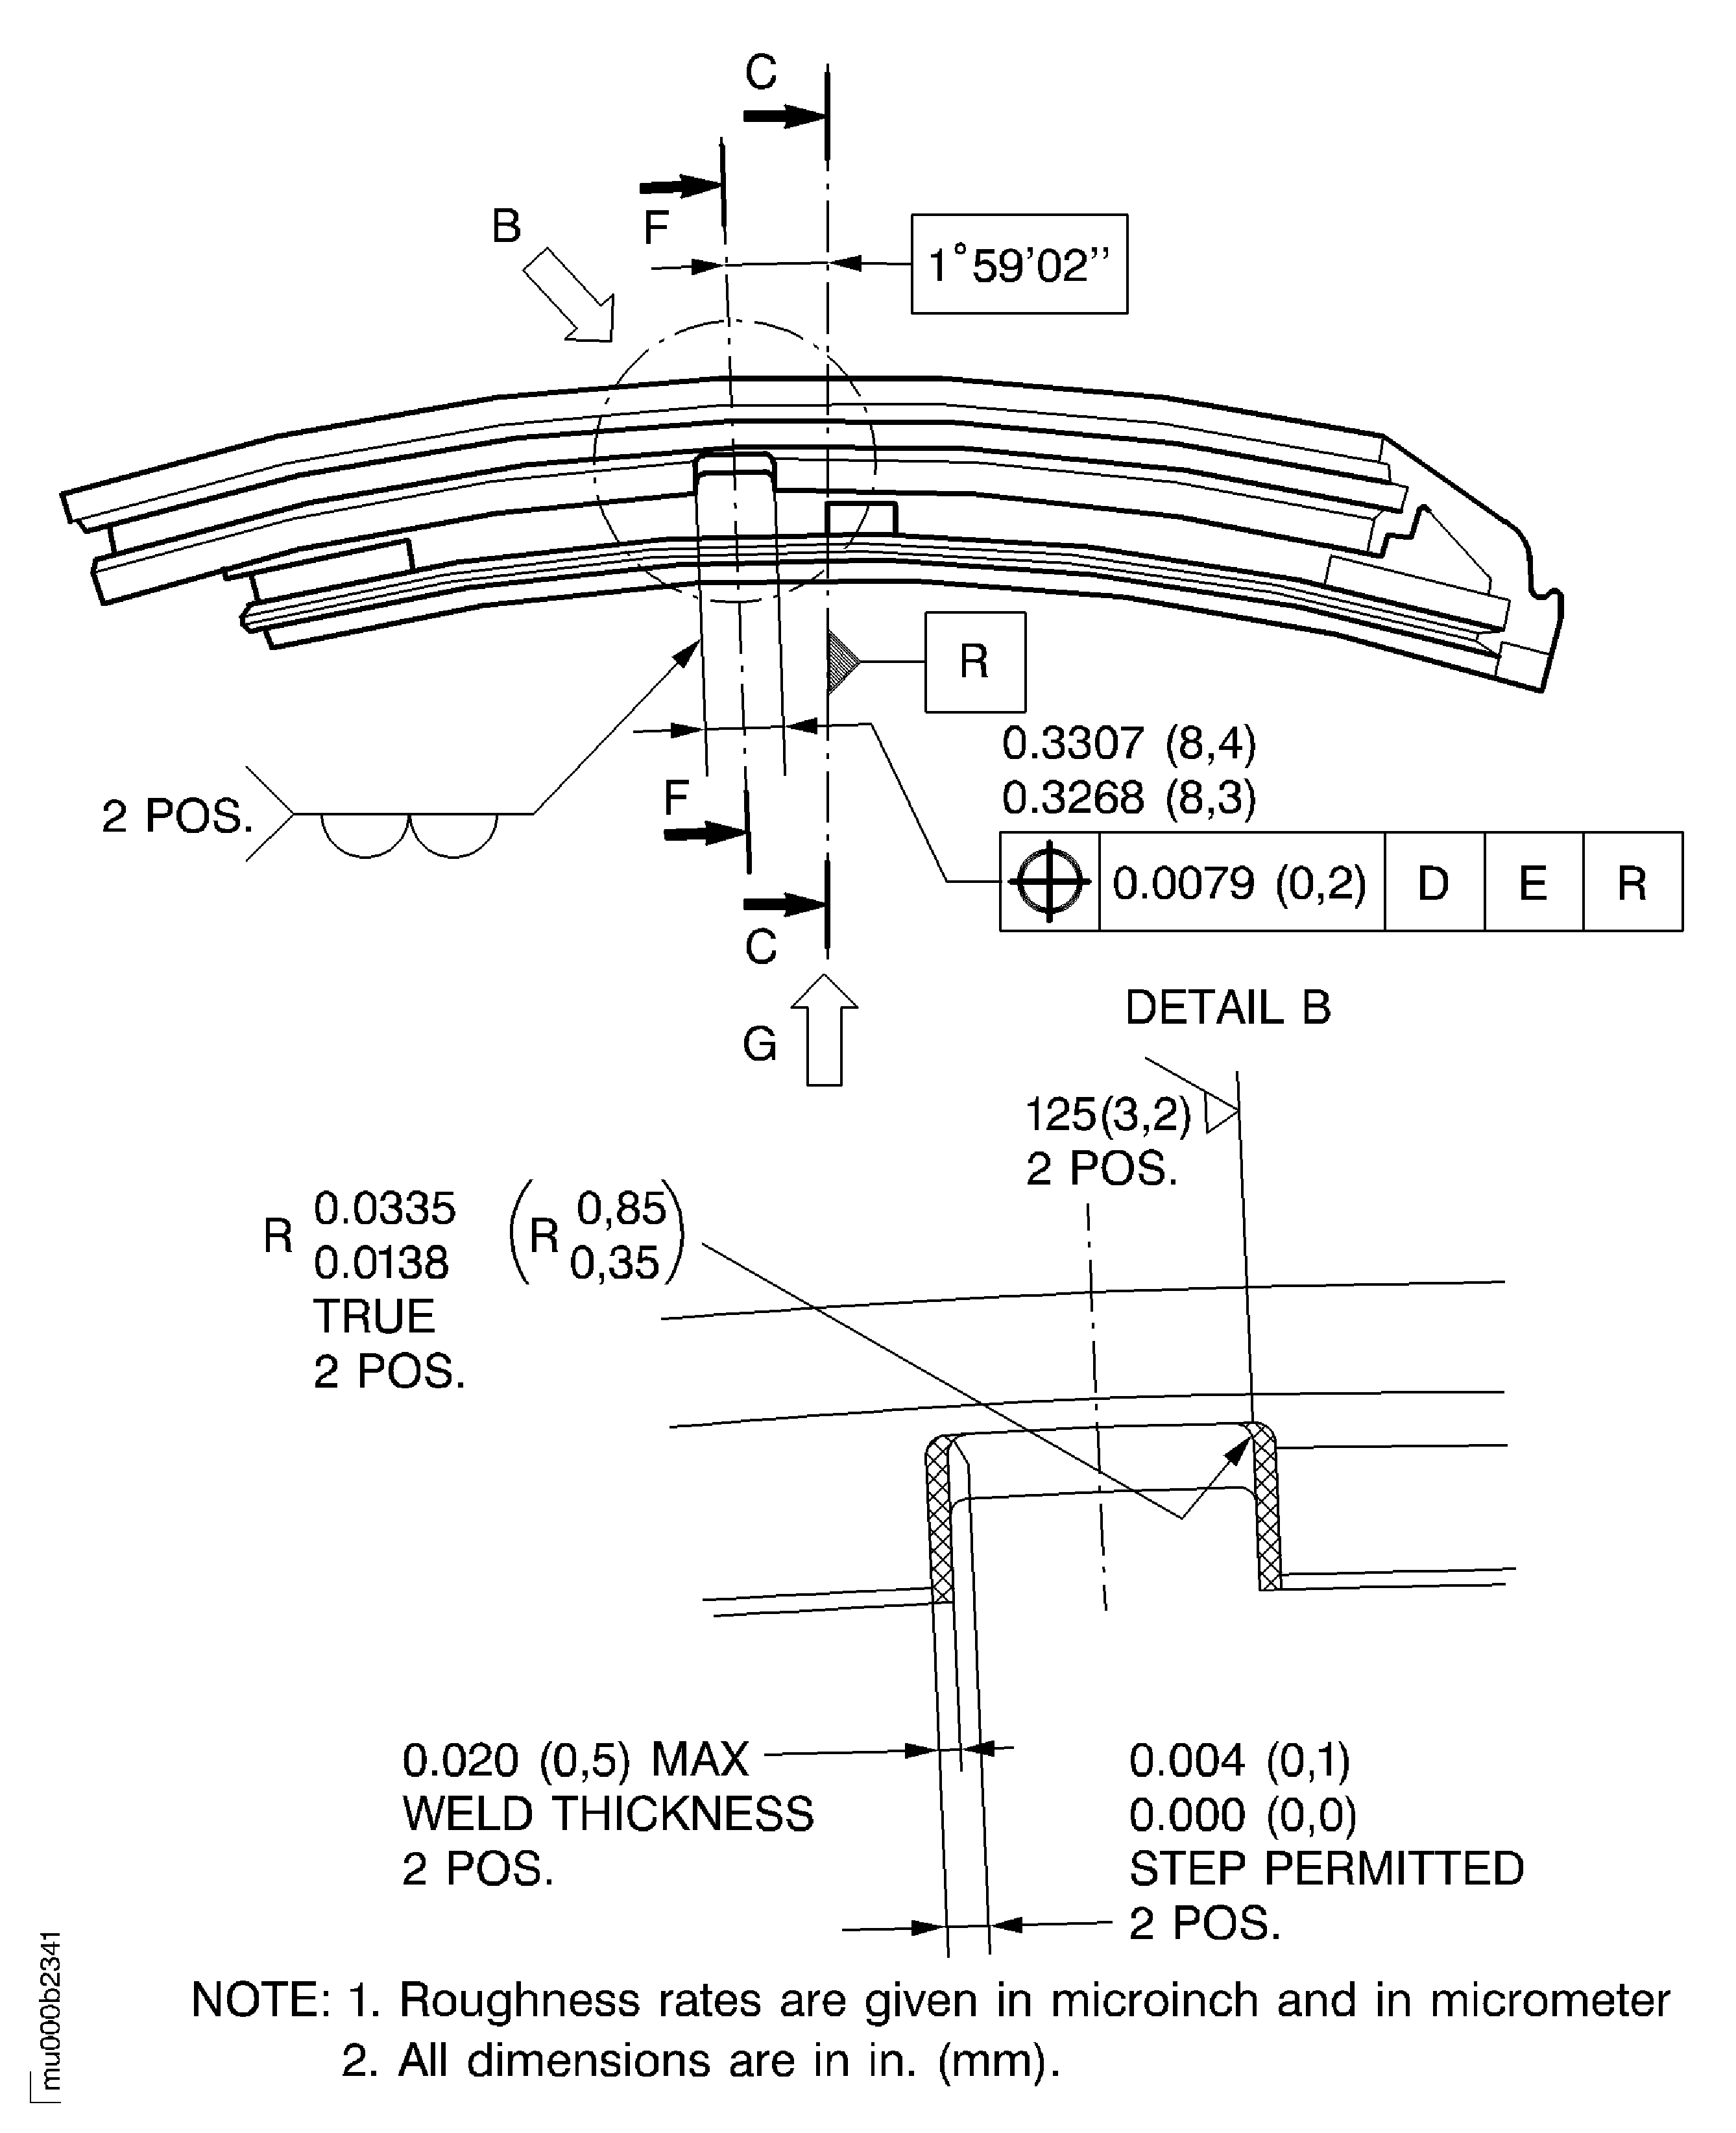
Figure: Dimensions for weld repair of the inner duct segment
Dimensions for weld repair of the inner duct segment

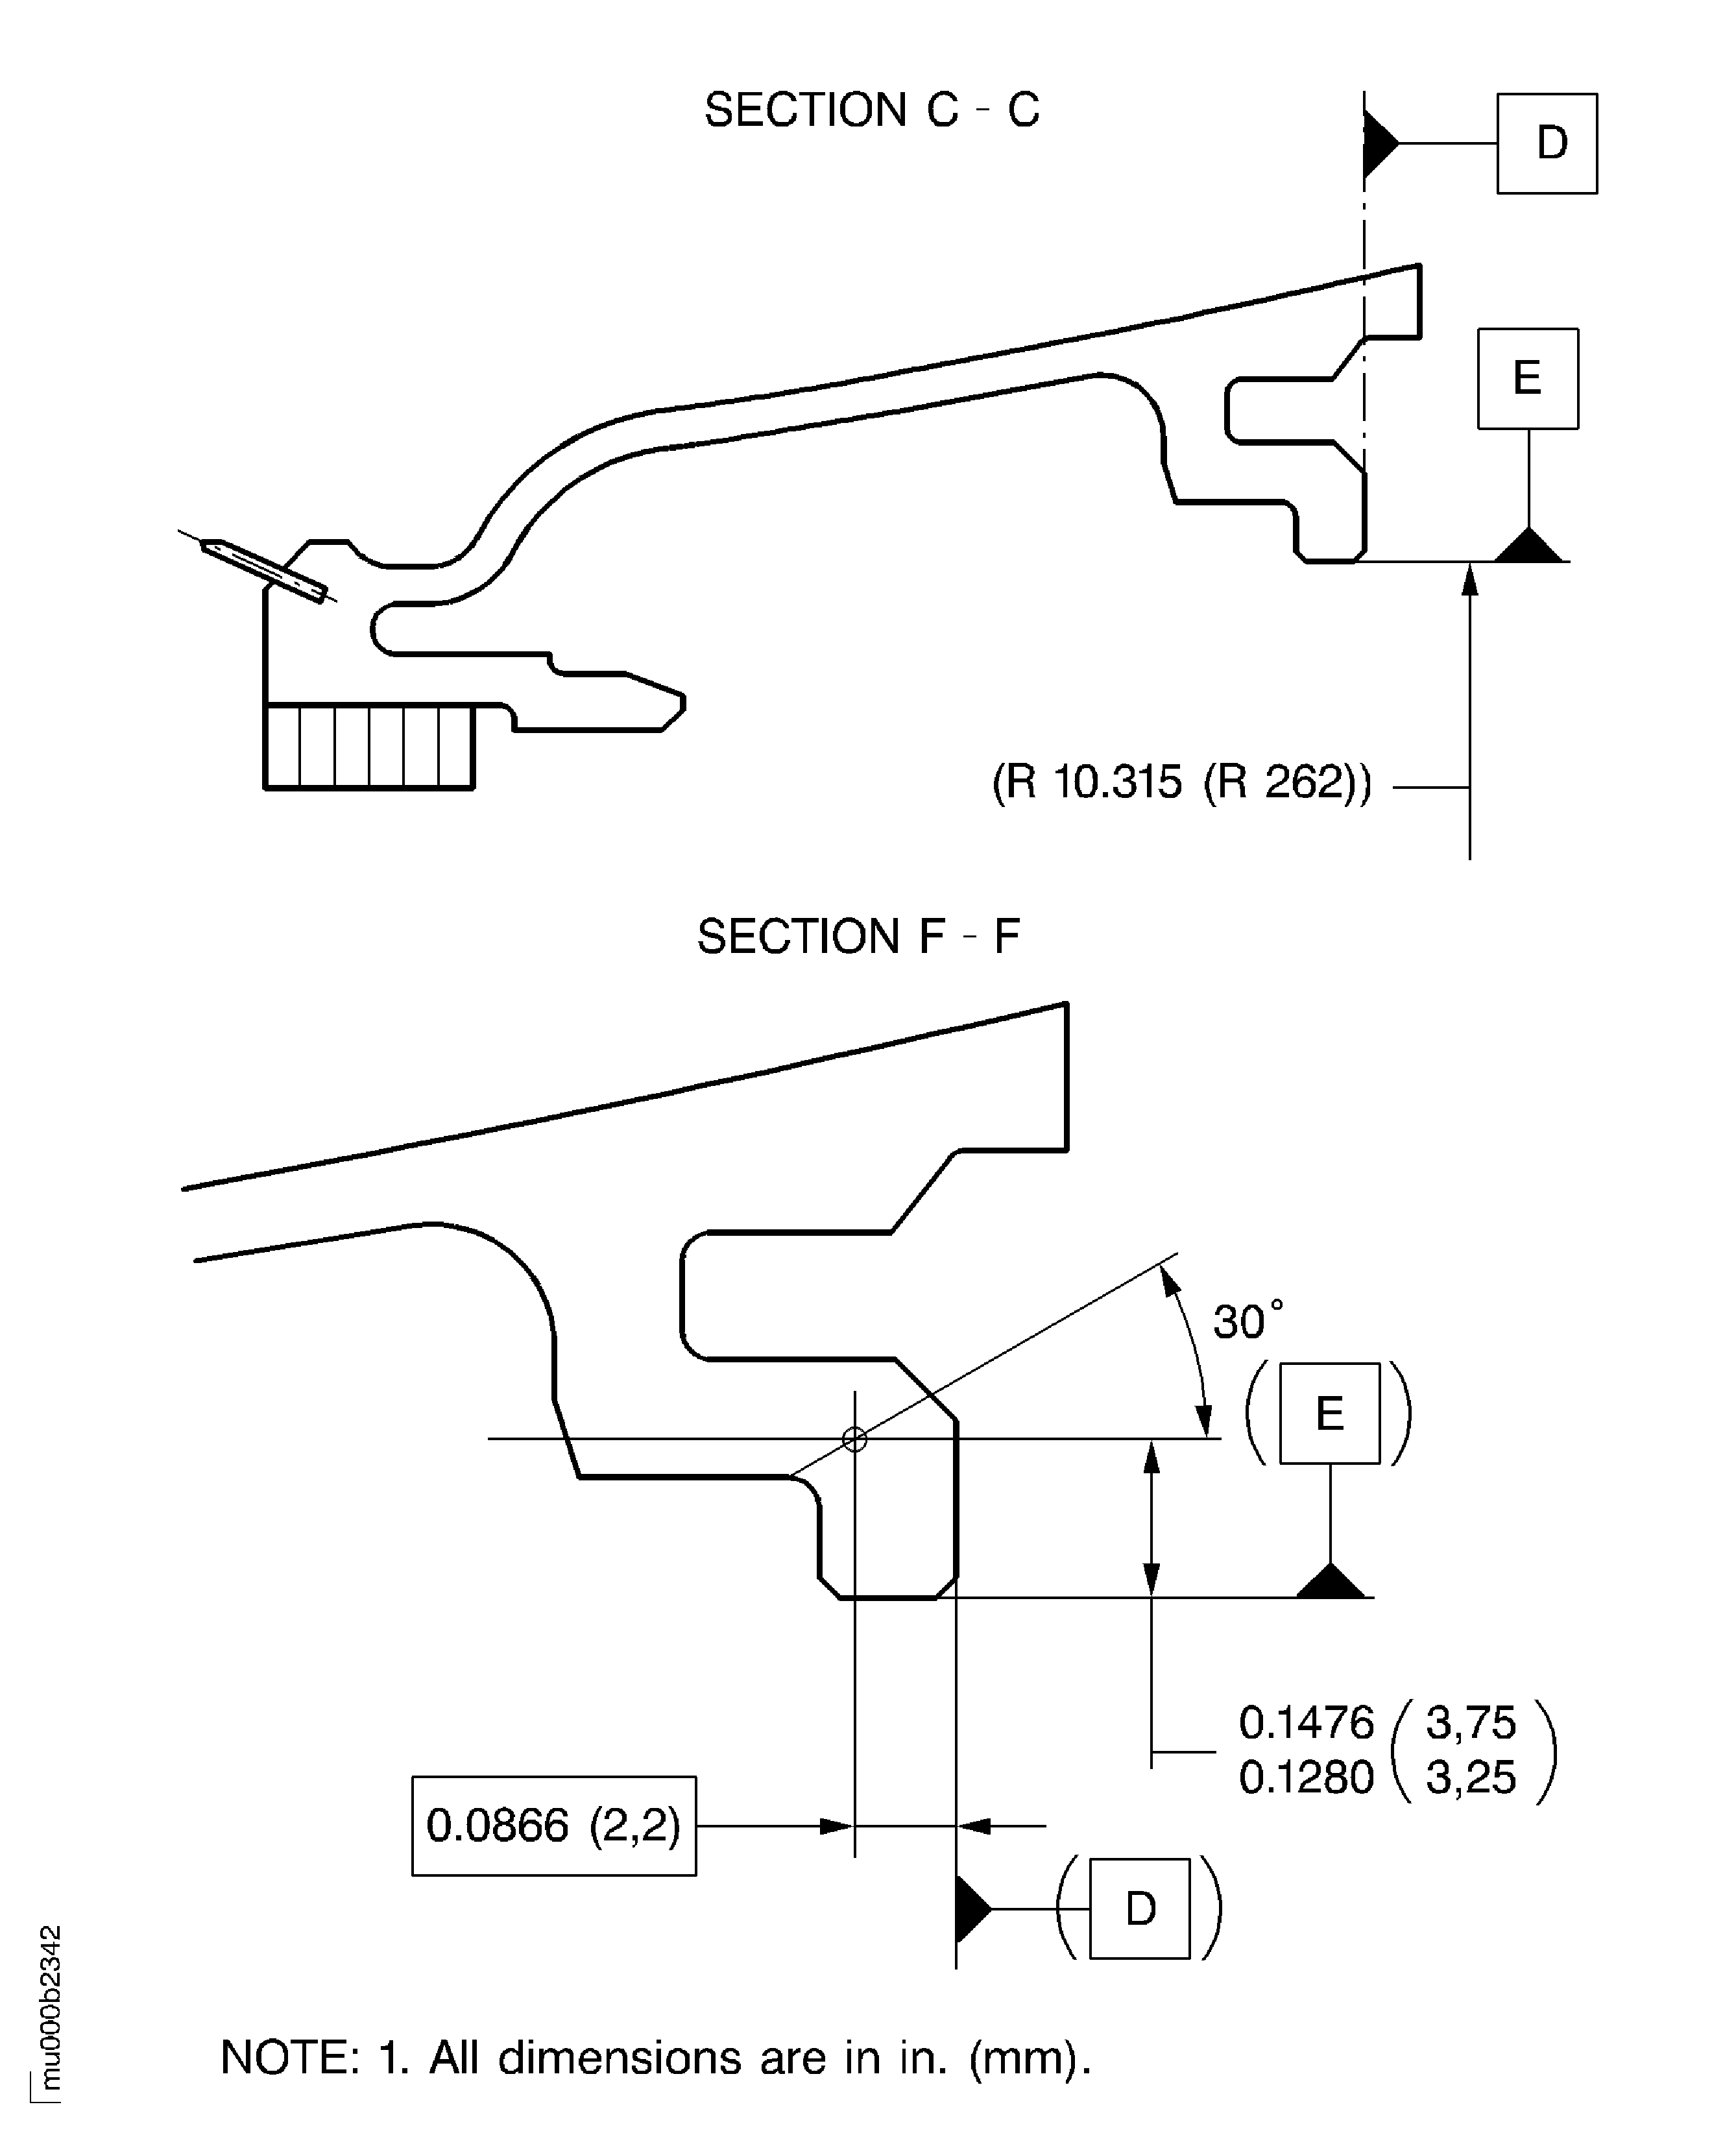
Figure: Dimensions for weld repair of the inner duct segment
Dimensions for weld repair of the inner duct segment

