Export Control
EAR Export Classification: Not subject to the EAR per 15 C.F.R. Chapter 1, Part 734.3(b)(3), except for the following Service Bulletins which are currently published as EAR Export Classification 9E991: SBE70-0992, SBE72-0483, SBE72-0580, SBE72-0588, SBE72-0640, SBE73-0209, SBE80-0024 and SBE80-0025.Copyright
© IAE International Aero Engines AG (2001, 2014 - 2021) The information contained in this document is the property of © IAE International Aero Engines AG and may not be copied or used for any purpose other than that for which it is supplied without the express written authority of © IAE International Aero Engines AG. (This does not preclude use by engine and aircraft operators for normal instructional, maintenance or overhaul purposes.).Applicability
All
Common Information
TASK 72-50-32-300-025 LPT Stage 3 Blade - Blend Repair, Repair-025 (VRS4203)
General
Price and availability - none
The practices and processes referred to in the procedure by the TASK numbers are in the SPM.
NOTE
For more equipment and materials necessary to do this repair refer to the SPM TASK 70-35-21-350-501.
Equivalent equipment may be used.
Preliminary Requirements
Pre-Conditions
NONESupport Equipment
NONEConsumables, Materials and Expendables
NONESpares
NONESafety Requirements
NONEProcedure
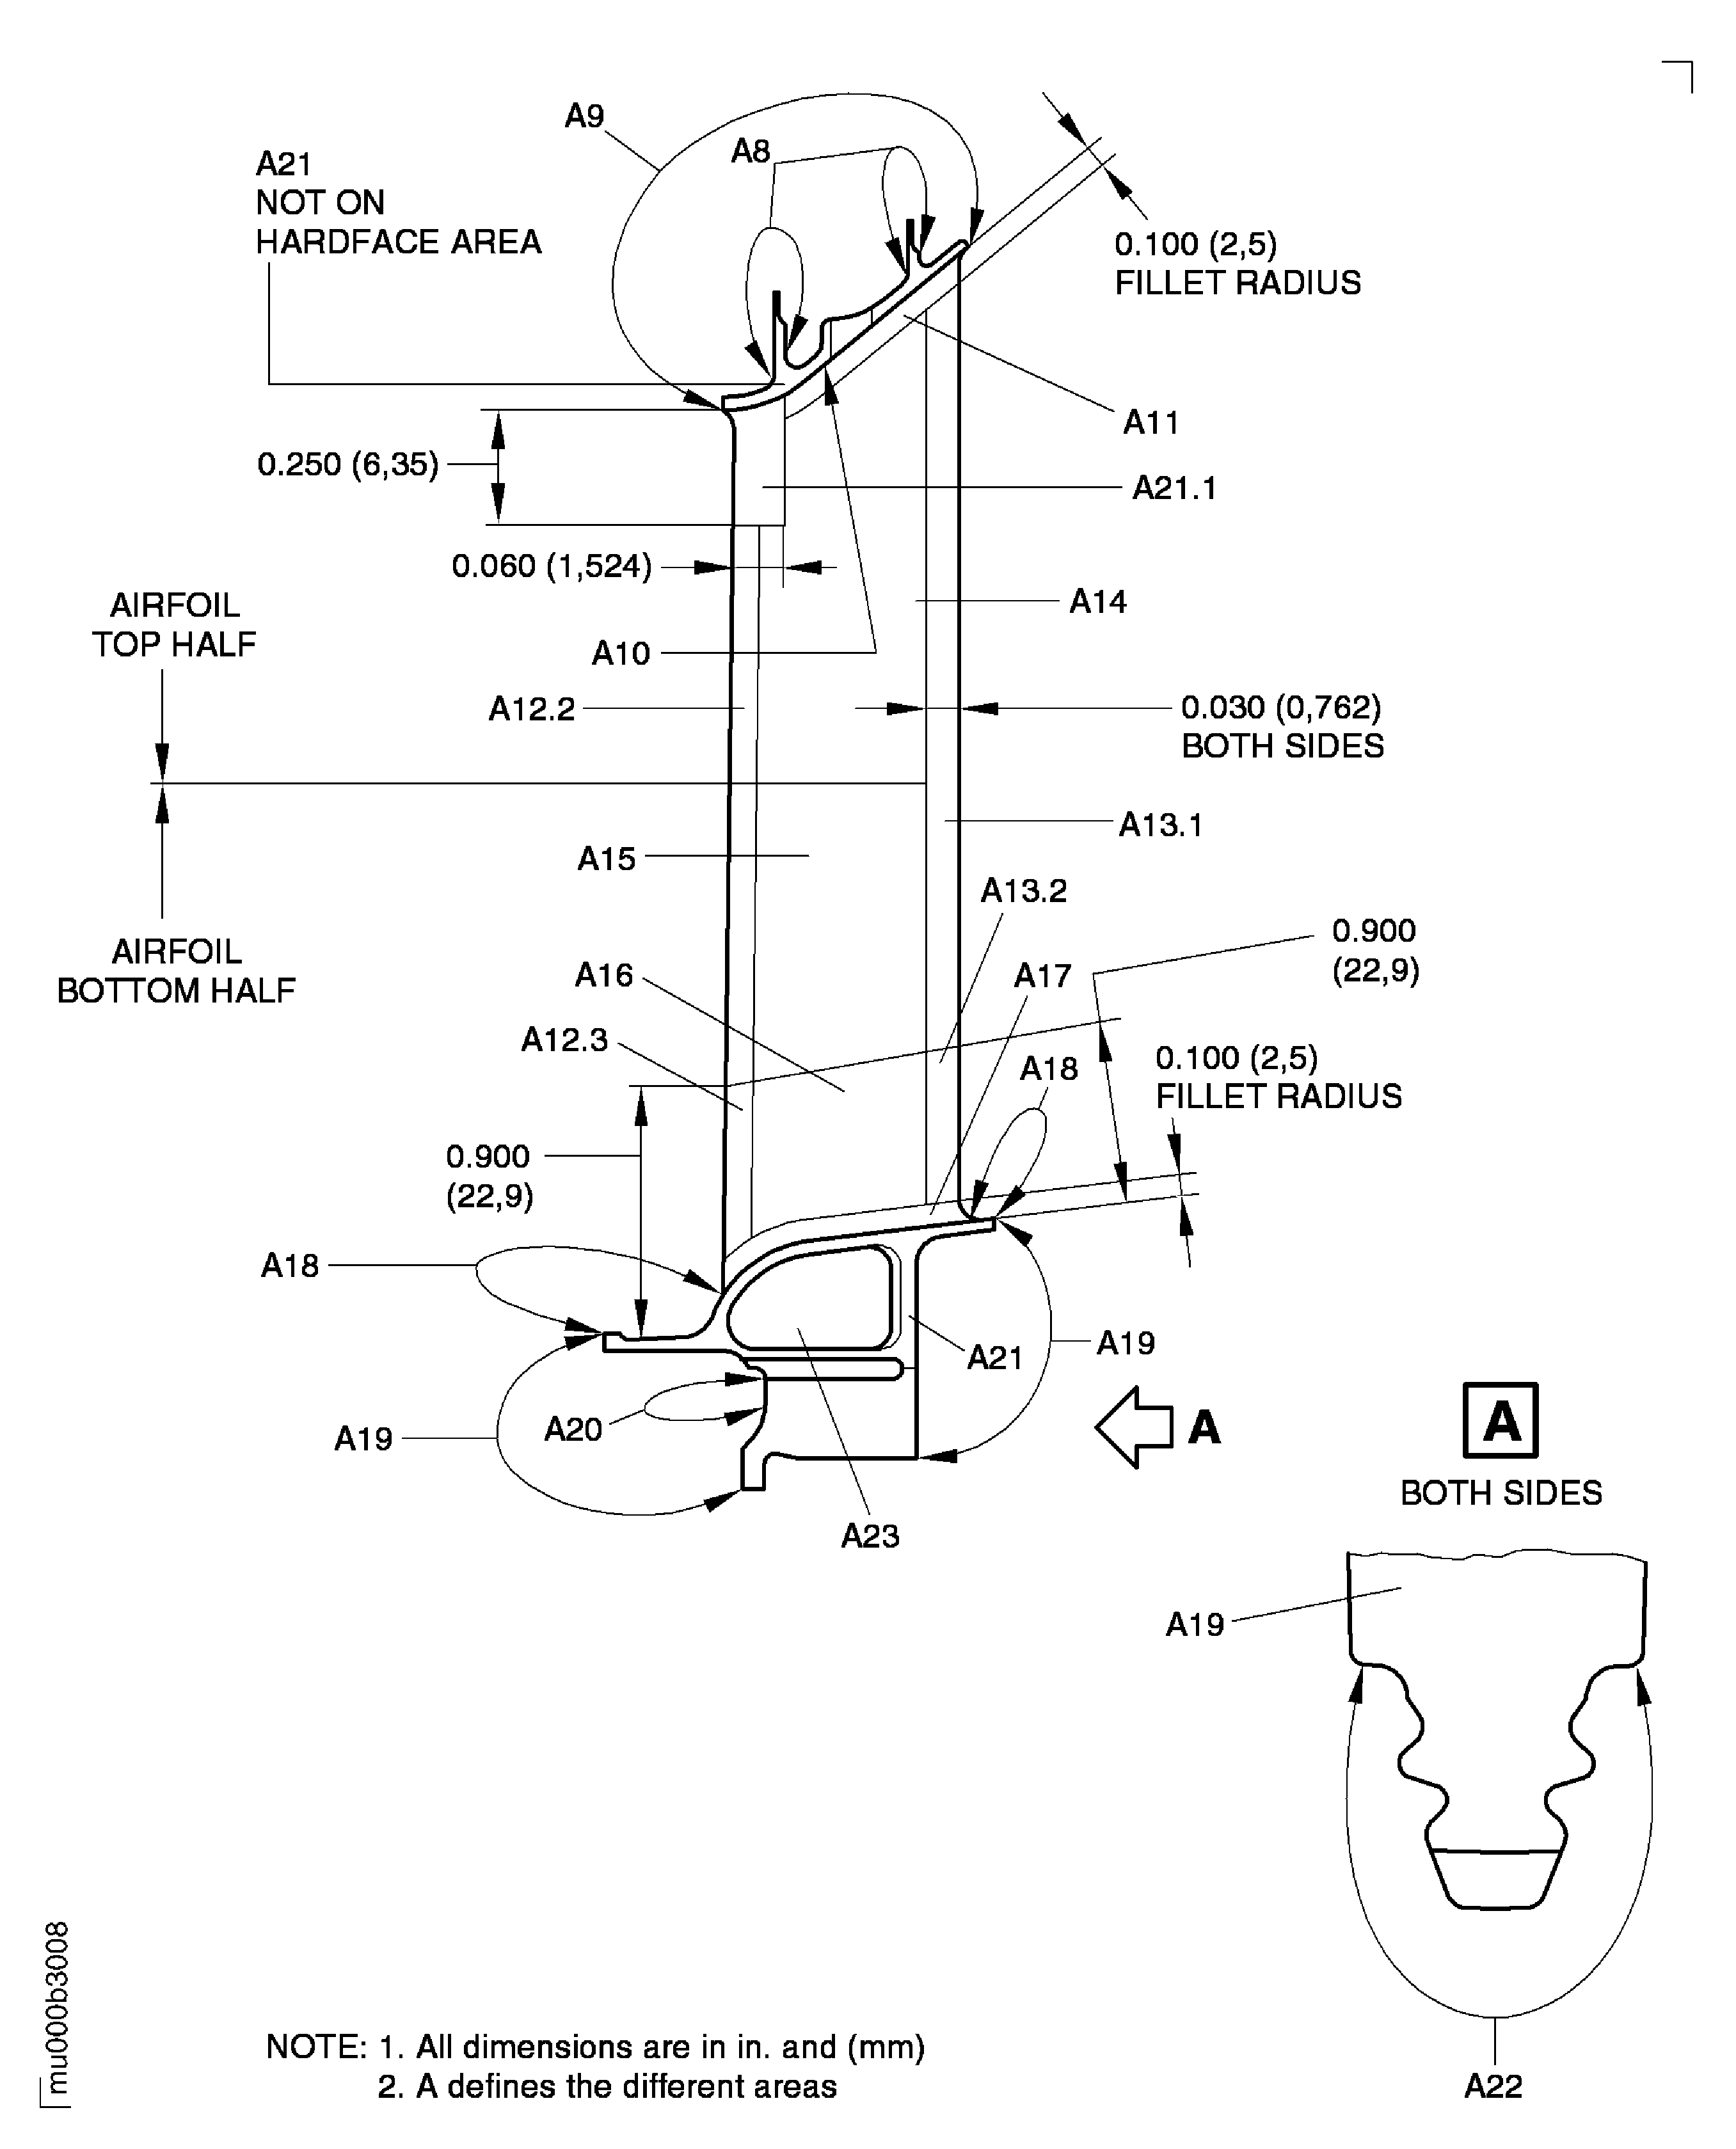
Refer to Figure.
NOTE
Refer to the SPM TASK 70-35-21-350-501 for blending surface damage.
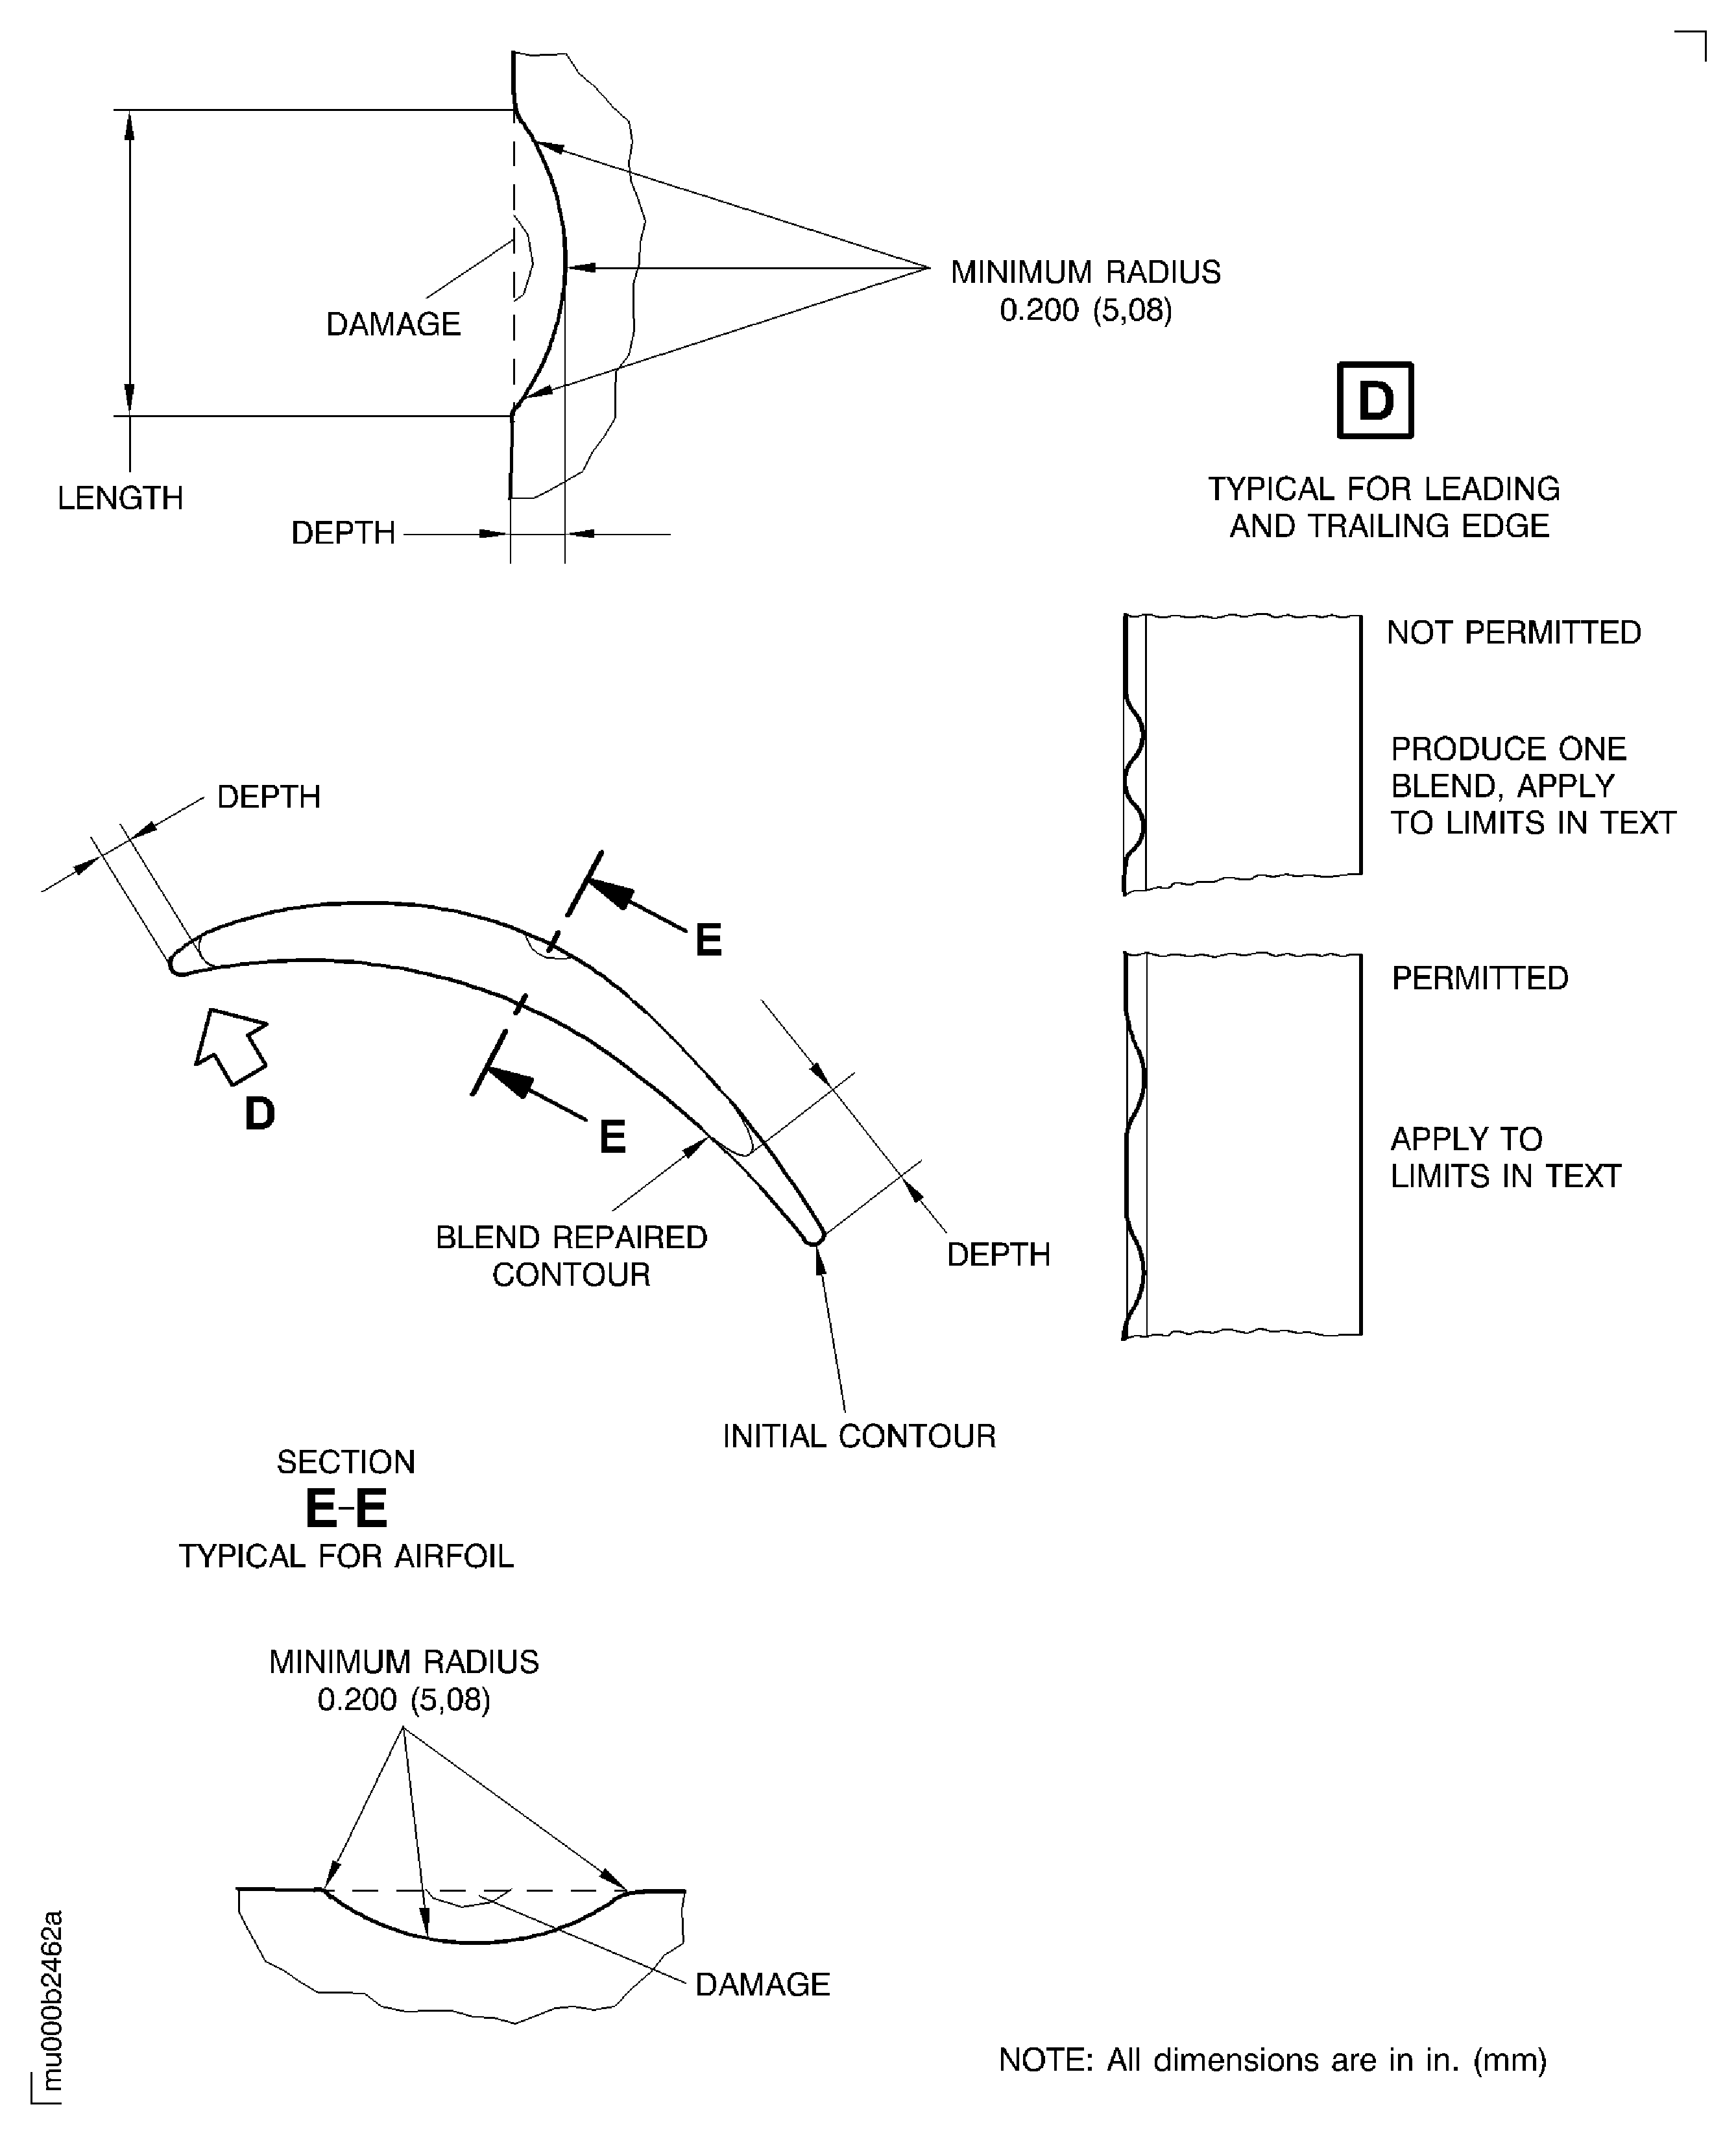
For local blending use a length to depth ratio of 10:1 minimum, refer to Figure.
The minimum distance between the blends is 0.200 in. (5.08 mm).
Do not blend repair dents except on leading edge and trailing edge.
Nicks within acceptable limits do not require blend repair. If present, remove raised material only.
Repeated blending in one place is acceptable to the specified maximum depth, measured from the initial unblended surface.
Area A8 must not be blended by this repair.
Maximum permitted blend depth from initial surface 0.060 in. (1.52 mm).
The maximum permitted total depth of opposite blends on leading and trailing edge is 0.060 in. (1.52 mm).
The total length of all blends on leading edge must not be more than 10 percent of the span.
The minimum transition radius to the outer shroud is 0.080 in. (2.03 mm).
Use a length to depth ratio of 5:1 minimum.
Blend the surface in area A12.1.
Maximum permitted blend depth from initial surface 0.030 in. (0.76 mm).
The maximum permitted total depth of opposite blends on leading and trailing edge is 0.060 in. (1.52 mm).
The total length of all blends on leading edge must not be more than 10 percent of the span.
Use a length to depth ratio of 6:1 minimum.
Blend the surface in area A12.2.
Maximum permitted blend depth from initial surface 0.030 in. (0.76 mm).
The maximum permitted total depth of opposite blends on leading and trailing edge is 0.060 in. (1.52 mm).
The total length of all blends on leading edge must not be more than 10 percent of the span.
Use a length to depth ratio of 6:1 minimum.
Blend the surface in area A12.3.
Maximum permitted blend depth from initial surface 0.030 in. (0.76 mm).
The maximum permitted total depth of opposite blends on leading and trailing edge is 0.060 in. (1.52 mm).
The total length of all blends on trailing edge must not be more than 10 percent of the span.
Use a length to depth ratio of 5:1 minimum.
Blend the surface in area A13.1.
Maximum permitted blend depth from initial surface 0.030 in. (0.76 mm).
The maximum permitted total depth of opposite blends on leading and trailing edge is 0.060 in. (1.52 mm).
The total length of all blends on trailing edge must not be more than 10 percent of the span.
Use a length to depth ratio of 5:1 minimum.
Blend the surface in area A13.2.
SUBTASK 72-50-32-350-076 Blend Repair the Stage 3 Turbine Blade (01-200)
Refer to VRS4205 TASK 72-50-32-300-027 (REPAIR-027).
Restore the coating if the removed coating is less than 1.000 sqin. (645.16 sqmm) total area (shrouds and airfoils together).
Refer to VRS4208 TASK 72-50-32-300-030 (REPAIR-030).
Restore the coating if the removed coating is more than 1.000 sqin. (645.16 mm) total area (shrouds and airfoils together).
SUBTASK 72-50-32-350-133 Do the Post Repair
Figure: Repair Details and Dimensions
Repair Details and Dimensions

Figure: Repair Details and Dimensions
Repair Details and Dimensions

