Export Control
EAR Export Classification: Not subject to the EAR per 15 C.F.R. Chapter 1, Part 734.3(b)(3), except for the following Service Bulletins which are currently published as EAR Export Classification 9E991: SBE70-0992, SBE72-0483, SBE72-0580, SBE72-0588, SBE72-0640, SBE73-0209, SBE80-0024 and SBE80-0025.Copyright
© IAE International Aero Engines AG (2001, 2014 - 2021) The information contained in this document is the property of © IAE International Aero Engines AG and may not be copied or used for any purpose other than that for which it is supplied without the express written authority of © IAE International Aero Engines AG. (This does not preclude use by engine and aircraft operators for normal instructional, maintenance or overhaul purposes.).Applicability
All
Common Information
TASK 72-50-42-300-015 No. 5 Bearing Seal Front Spacer - Lap And Chromium Plate The Contact Surface(s), Repair-015 (VRS3205)
Material of component
RR | ||
|---|---|---|
DESCRIPTION | SYMBOL | MATERIAL |
No. 5 bearing seal spacer | - | AMS 6322 or AMS 6323 |
steel alloy |
General
Price and avialability - refer to IAE
The practices and processes referred to in the procedure by the TASK numbers are in the SPM.
Preliminary Requirements
Pre-Conditions
NONESupport Equipment
| Name | Manufacturer | Part Number / Identification | Quantity | Remark |
|---|---|---|---|---|
| Workshop inspection equipment | LOCAL | Workshop inspection equipment | ||
| Grinding machine | LOCAL | Grinding machine | ||
| Furnace | LOCAL | Furnace |
Consumables, Materials and Expendables
NONESpares
NONESafety Requirements
NONEProcedure
If there is sufficient thickness, you can repair the seal spacer by lapping.
Refer to Step.
If the damage cannot be removed by lapping, do the chromium plate repair.
Check the thickness of the seal spacer and the wear.
SUBTASK 72-50-42-220-083 Examine the No. 5 Bearing Seal Spacer to Select the Repair Method
Keep the removal of material to the minimum necessary to remove the wear and damage and to permit sufficient plating thickness.
The plating thickness must be 0.002 to 0.008 in. (0.051 to 0.203 mm) after finish machining.
If the surface(s) were plated before, you can strip the plating. Refer to the SPM TASK 70-33-02-330-501.
Machine the contact surface(s).
SUBTASK 72-50-42-320-055 Machine the Contact Surface(s) of the No. 5 Bearing Seal Spacer before Chromium Plate
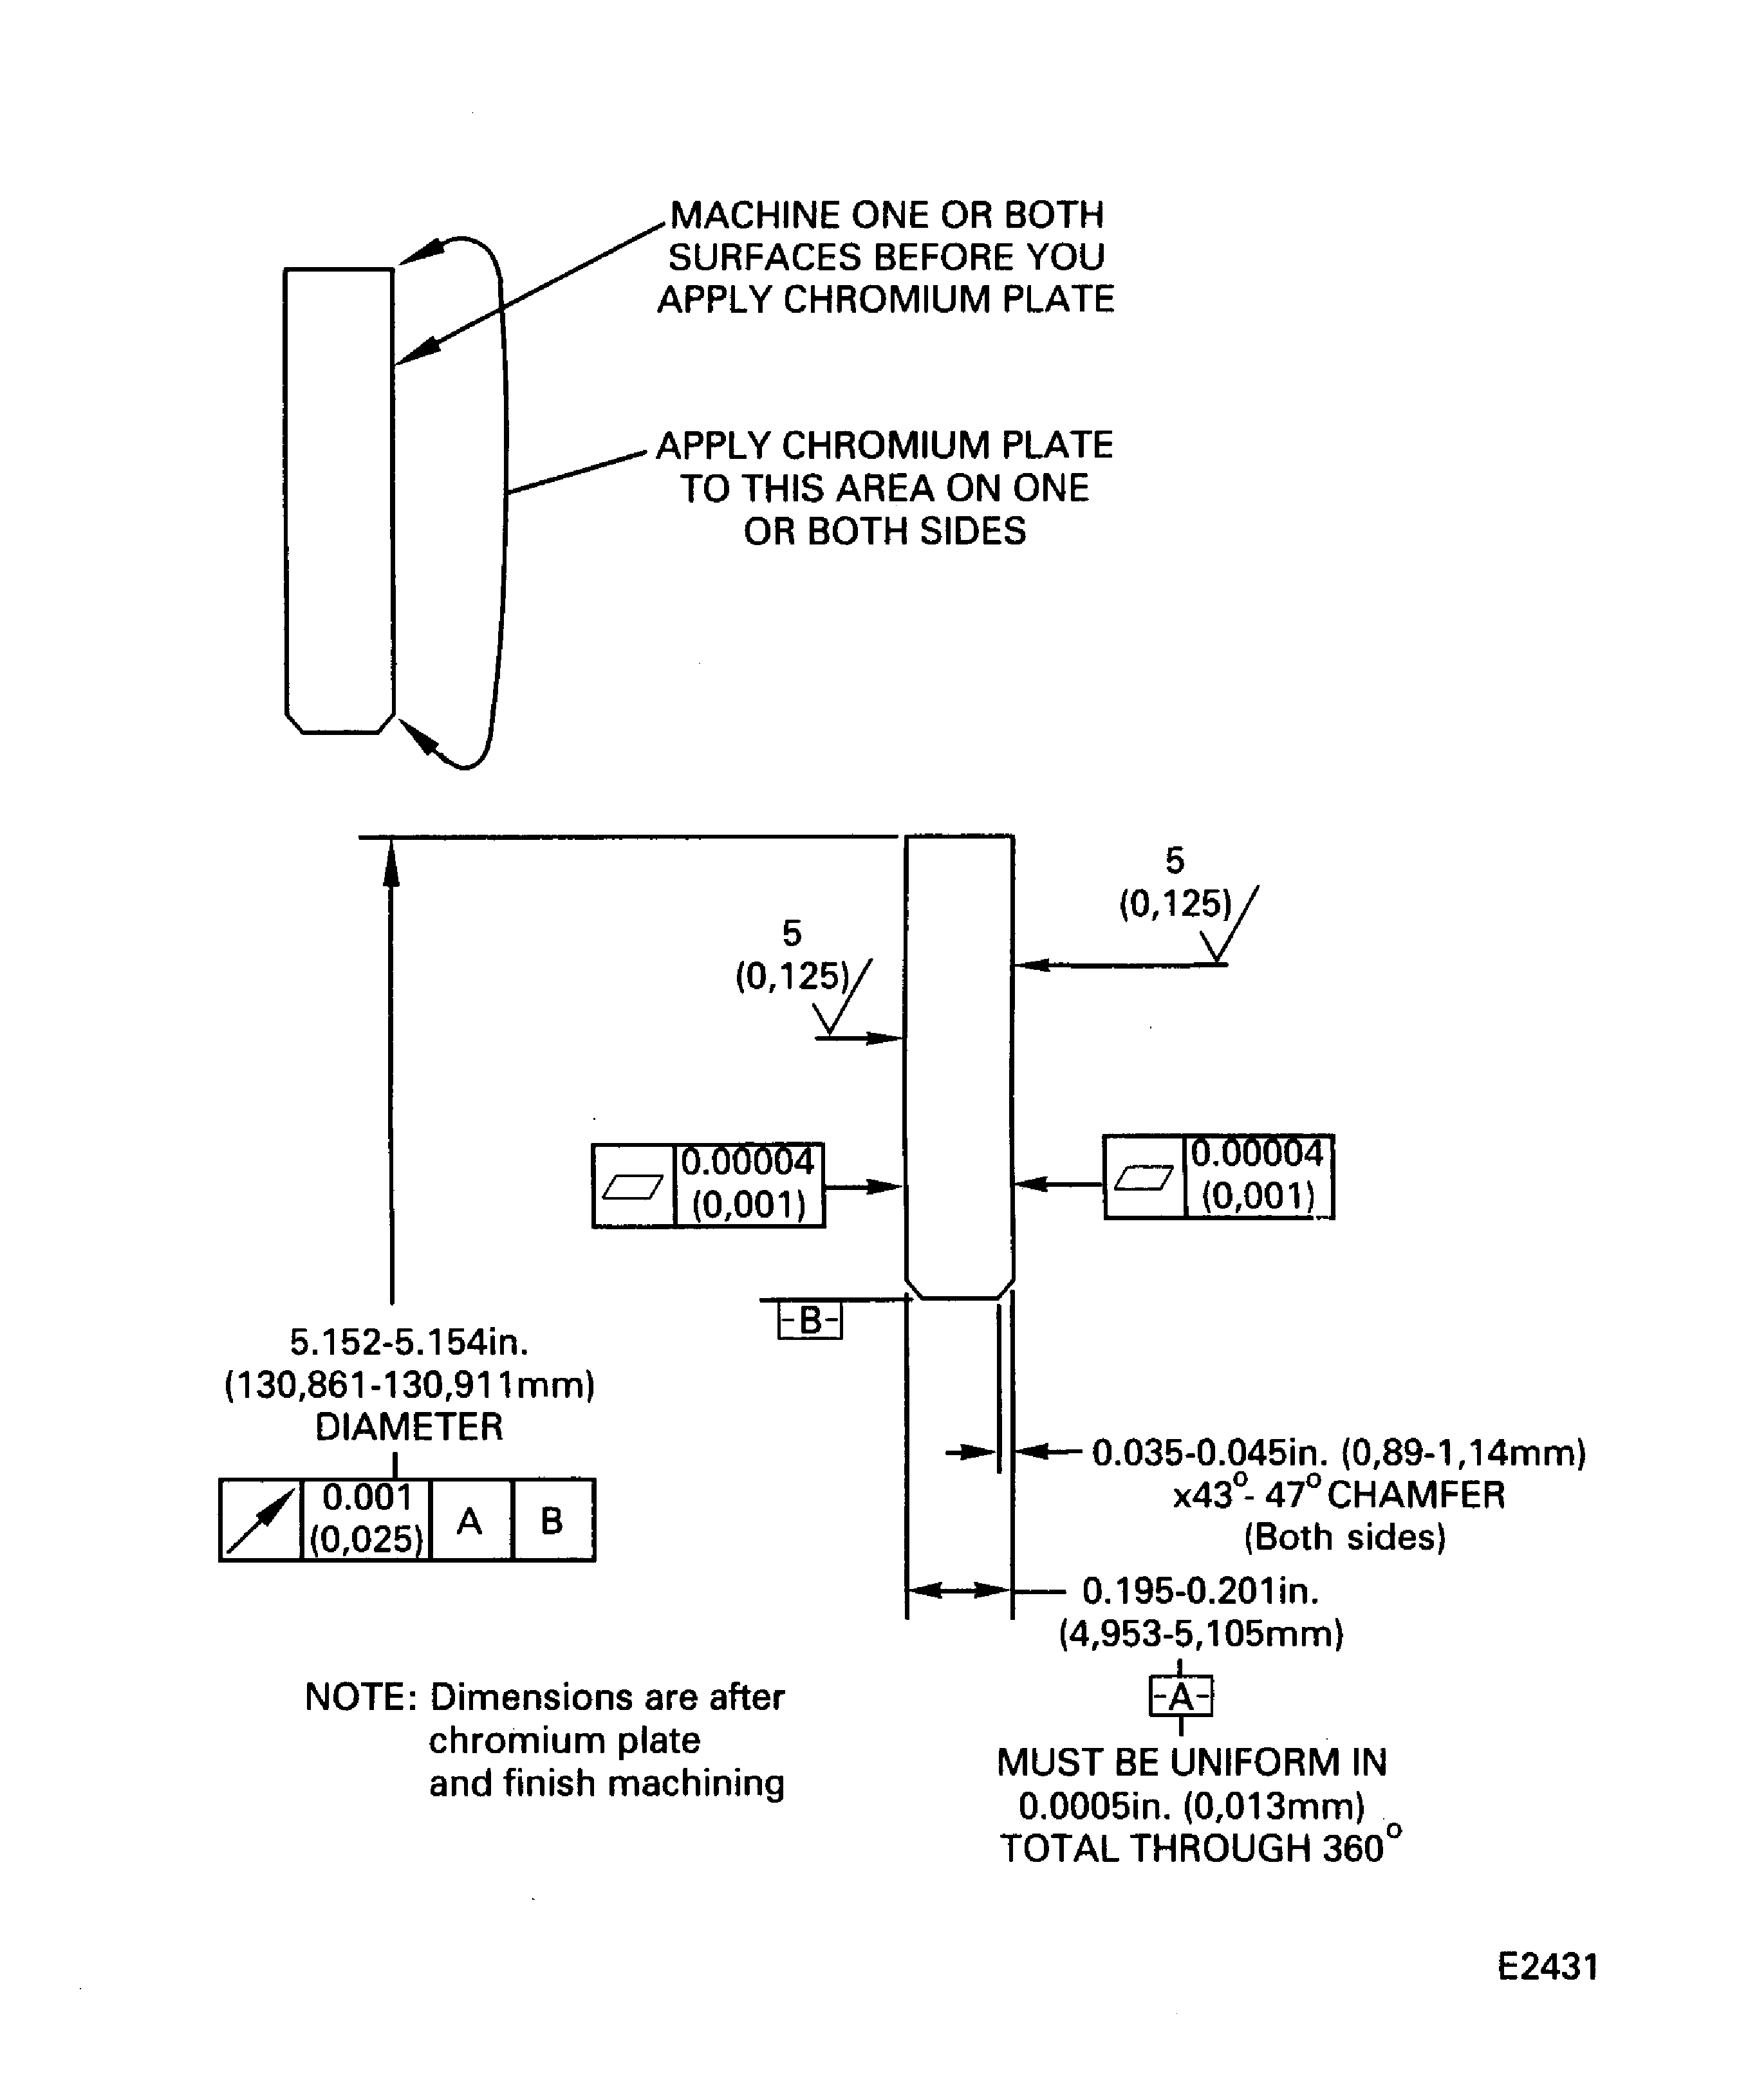
Refer to Figure and the SPM TASK 70-33-02-330-501.
Apply chromium plate to a sufficient thickness to permit finish machining.
Plating outside the repair area is permitted but must be removed.
Chromium plate the contact surface(s) of the seal spacer.
SUBTASK 72-50-42-330-053 Chromium Plate the Contact Surface(s) of the No. 5 Bearing Seal Spacer
Refer to Figure. Break the edges to 0.003 to 0.015 in. (0.08 to 0.38 mm) after machining.
Machine the contact surface(s) of the seal spacer after chromium plate.
SUBTASK 72-50-42-320-056 Machine the Contact Surface(s) of the No. 5 Bearing Seal Spacer after Chromium Plate
Refer to the SPM TASK 70-11-18-300-503.
Lap the seal spacer.
SUBTASK 72-50-42-110-056 Lap the Contact Surface(s) of the No. 5 Bearing Seal Spacer
Refer to Figure and TASK 72-50-42-200-000 (INSPECTION/CHECK-000).
Do a visual inspection of the plated area to examine for cracks and adhesion.
The thickness of the plate after finish machining must be 0.002 to 0.008 in. (0.051 to 0.203 mm). Examine for the flatness and surface finish after plating or lapping.
Examine the seal spacer after chromium plate or lapping.
SUBTASK 72-50-42-220-084 Examine the Repair
Figure: Chromium plate or lap the contact surface(s) of the No. 5 bearing seal spacer
Chromium plate or lap the contact surface(s) of the No. 5 bearing seal spacer

