Export Control
EAR Export Classification: Not subject to the EAR per 15 C.F.R. Chapter 1, Part 734.3(b)(3), except for the following Service Bulletins which are currently published as EAR Export Classification 9E991: SBE70-0992, SBE72-0483, SBE72-0580, SBE72-0588, SBE72-0640, SBE73-0209, SBE80-0024 and SBE80-0025.Copyright
© IAE International Aero Engines AG (2001, 2014 - 2021) The information contained in this document is the property of © IAE International Aero Engines AG and may not be copied or used for any purpose other than that for which it is supplied without the express written authority of © IAE International Aero Engines AG. (This does not preclude use by engine and aircraft operators for normal instructional, maintenance or overhaul purposes.).Applicability
All
Common Information
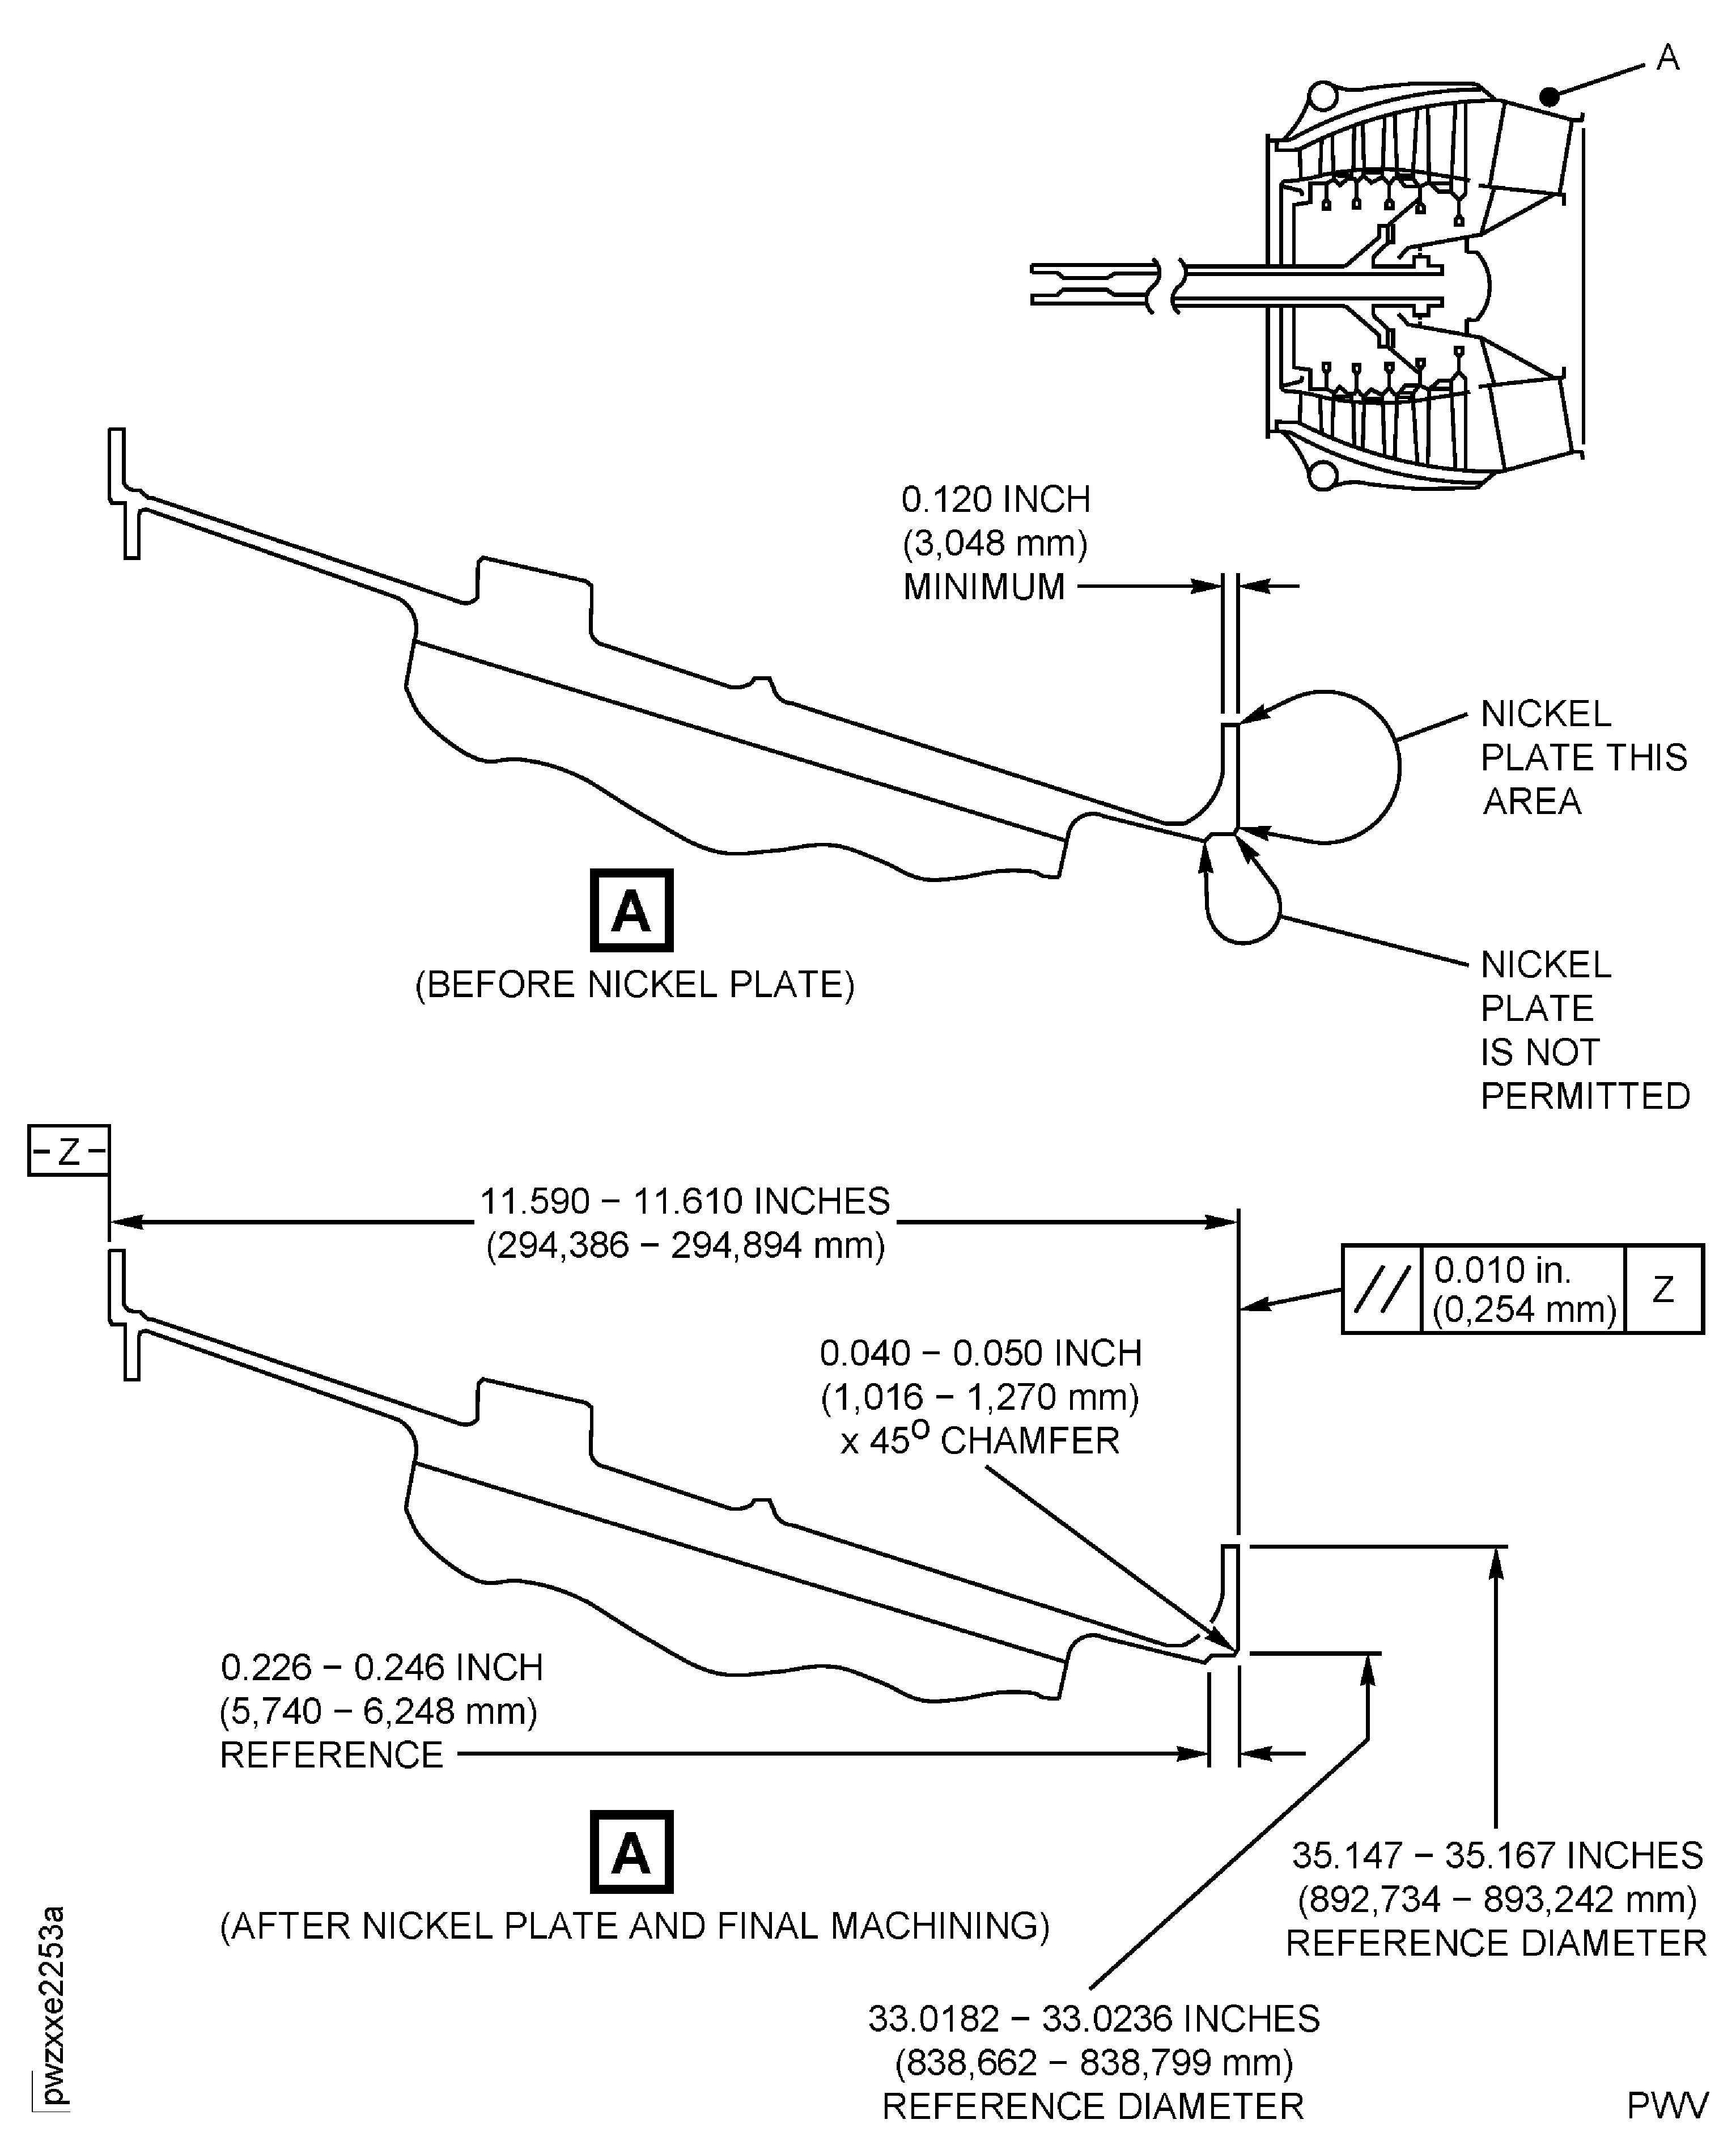
TASK 72-50-53-300-056 Turbine Exhaust Case (TEC) - Nickel Plate The Rear Outer Flange, Repair-056 (VRS3070)
Effectivity
FIG/ITEM PART NO. | |
|---|---|
21-300 | 2A1209-01 |
21-300 | 2A2620-01 |
21-300 | 2A3111-01 |
21-300 | 2A3183-01 |
21-300 | 2A3455-01 |
21-300 | 2A3183-101 |
21-300 | 2A4258-01 |
21-300 | 2A4263-01 |
Material of component
PART IDENT | SYMBOL | MATERIAL |
|---|---|---|
Turbine Exhaust Case | - | Corrosion and heat resistant steel |
General
Price and availability - refer to IAE
The practices and processes referred to in the procedure by the TASK numbers are in the SPM.
NOTE
Preliminary Requirements
Pre-Conditions
NONESupport Equipment
| Name | Manufacturer | Part Number / Identification | Quantity | Remark |
|---|---|---|---|---|
| Workshop inspection equipment | LOCAL | Workshop inspection equipment | ||
| Grinding machine | LOCAL | Grinding machine | ||
| Furnace | LOCAL | Furnace | ||
| Magnifying glass, 4X | LOCAL | Magnifying glass | ||
| Vibrating marking pencil | LOCAL | Vibrating marking pencil |
Consumables, Materials and Expendables
| Name | Manufacturer | Part Number / Identification | Quantity | Remark |
|---|---|---|---|---|
| CoMat 02-067 STRIPPABLE COATING | 71410 | CoMat 02-067 |
Spares
NONESafety Requirements
NONEProcedure
Refer to Figure.
SUBTASK 72-50-53-320-084 Machine the Rear Face of the Rear Outer Flange of the Turbine Exhaust Case
Refer to Figure.
Refer to the SPM TASK 70-33-06-300-503 or SPM TASK 70-33-28-300-503.
Apply nickel plate to a sufficient thickness to permit finish machining. Plating outside the repair area is permitted but must be removed.
Nickel plate the rear face of the rear outer flange.
SUBTASK 72-50-53-330-061 Nickel Plate the Rear Face of the Rear Outer Flange of the Turbine Exhaust Case
Refer to Figure.
Machine the rear face of the rear outer flange after nickel plate.
SUBTASK 72-50-53-320-085 Machine the Rear Face of the Rear Outer Flange of the Turbine Exhaust Case
Refer to Figure and TASK 72-50-53-200-000 (INSPECTION/CHECK-000).
Use a 4X magnifying glass to examine for cracks. The normal network of cracks that are emphasized by grinding are permitted.
The thickness of the plate after finish machining must be a minimum of 0.0006 in. (0.015 mm).
Examine the turbine exhaust case after nickel plate.
SUBTASK 72-50-53-220-179 Examine the Repair
Make a permanent mark by the procedure given in the SPM TASK 70-09-00-400-501.
Use a vibrating marking pencil.
Remove high metal caused by marking the number.
Mark VRS3070 on the repaired turbine exhaust case adjacent to the part number.
SUBTASK 72-50-53-350-091 Identify the Repair
Figure: Repair Details and Dimensions
Repair Details and Dimensions

