Export Control
EAR Export Classification: Not subject to the EAR per 15 C.F.R. Chapter 1, Part 734.3(b)(3), except for the following Service Bulletins which are currently published as EAR Export Classification 9E991: SBE70-0992, SBE72-0483, SBE72-0580, SBE72-0588, SBE72-0640, SBE73-0209, SBE80-0024 and SBE80-0025.Copyright
© IAE International Aero Engines AG (2001, 2014 - 2021) The information contained in this document is the property of © IAE International Aero Engines AG and may not be copied or used for any purpose other than that for which it is supplied without the express written authority of © IAE International Aero Engines AG. (This does not preclude use by engine and aircraft operators for normal instructional, maintenance or overhaul purposes.).Applicability
All
Common Information
TASK 72-58-01-300-003 No. 5 Bearing Cover - Nickel Plate, Repair-003 (VRS3250)
General
Price and availability - none
The practices and processes referred to in the procedure by TASK numbers are in the SPM.
Preliminary Requirements
Pre-Conditions
NONESupport Equipment
| Name | Manufacturer | Part Number / Identification | Quantity | Remark |
|---|---|---|---|---|
| Workshop Inspection Equipment | 0AM53 | Workshop Inspection Equipment | ||
| Grinding machine | 0AM53 | Grinding machine | ||
| Magnifying Glass, 5x | LOCAL | Magnifying Glass, 5x |
Consumables, Materials and Expendables
NONESpares
NONESafety Requirements
NONEProcedure
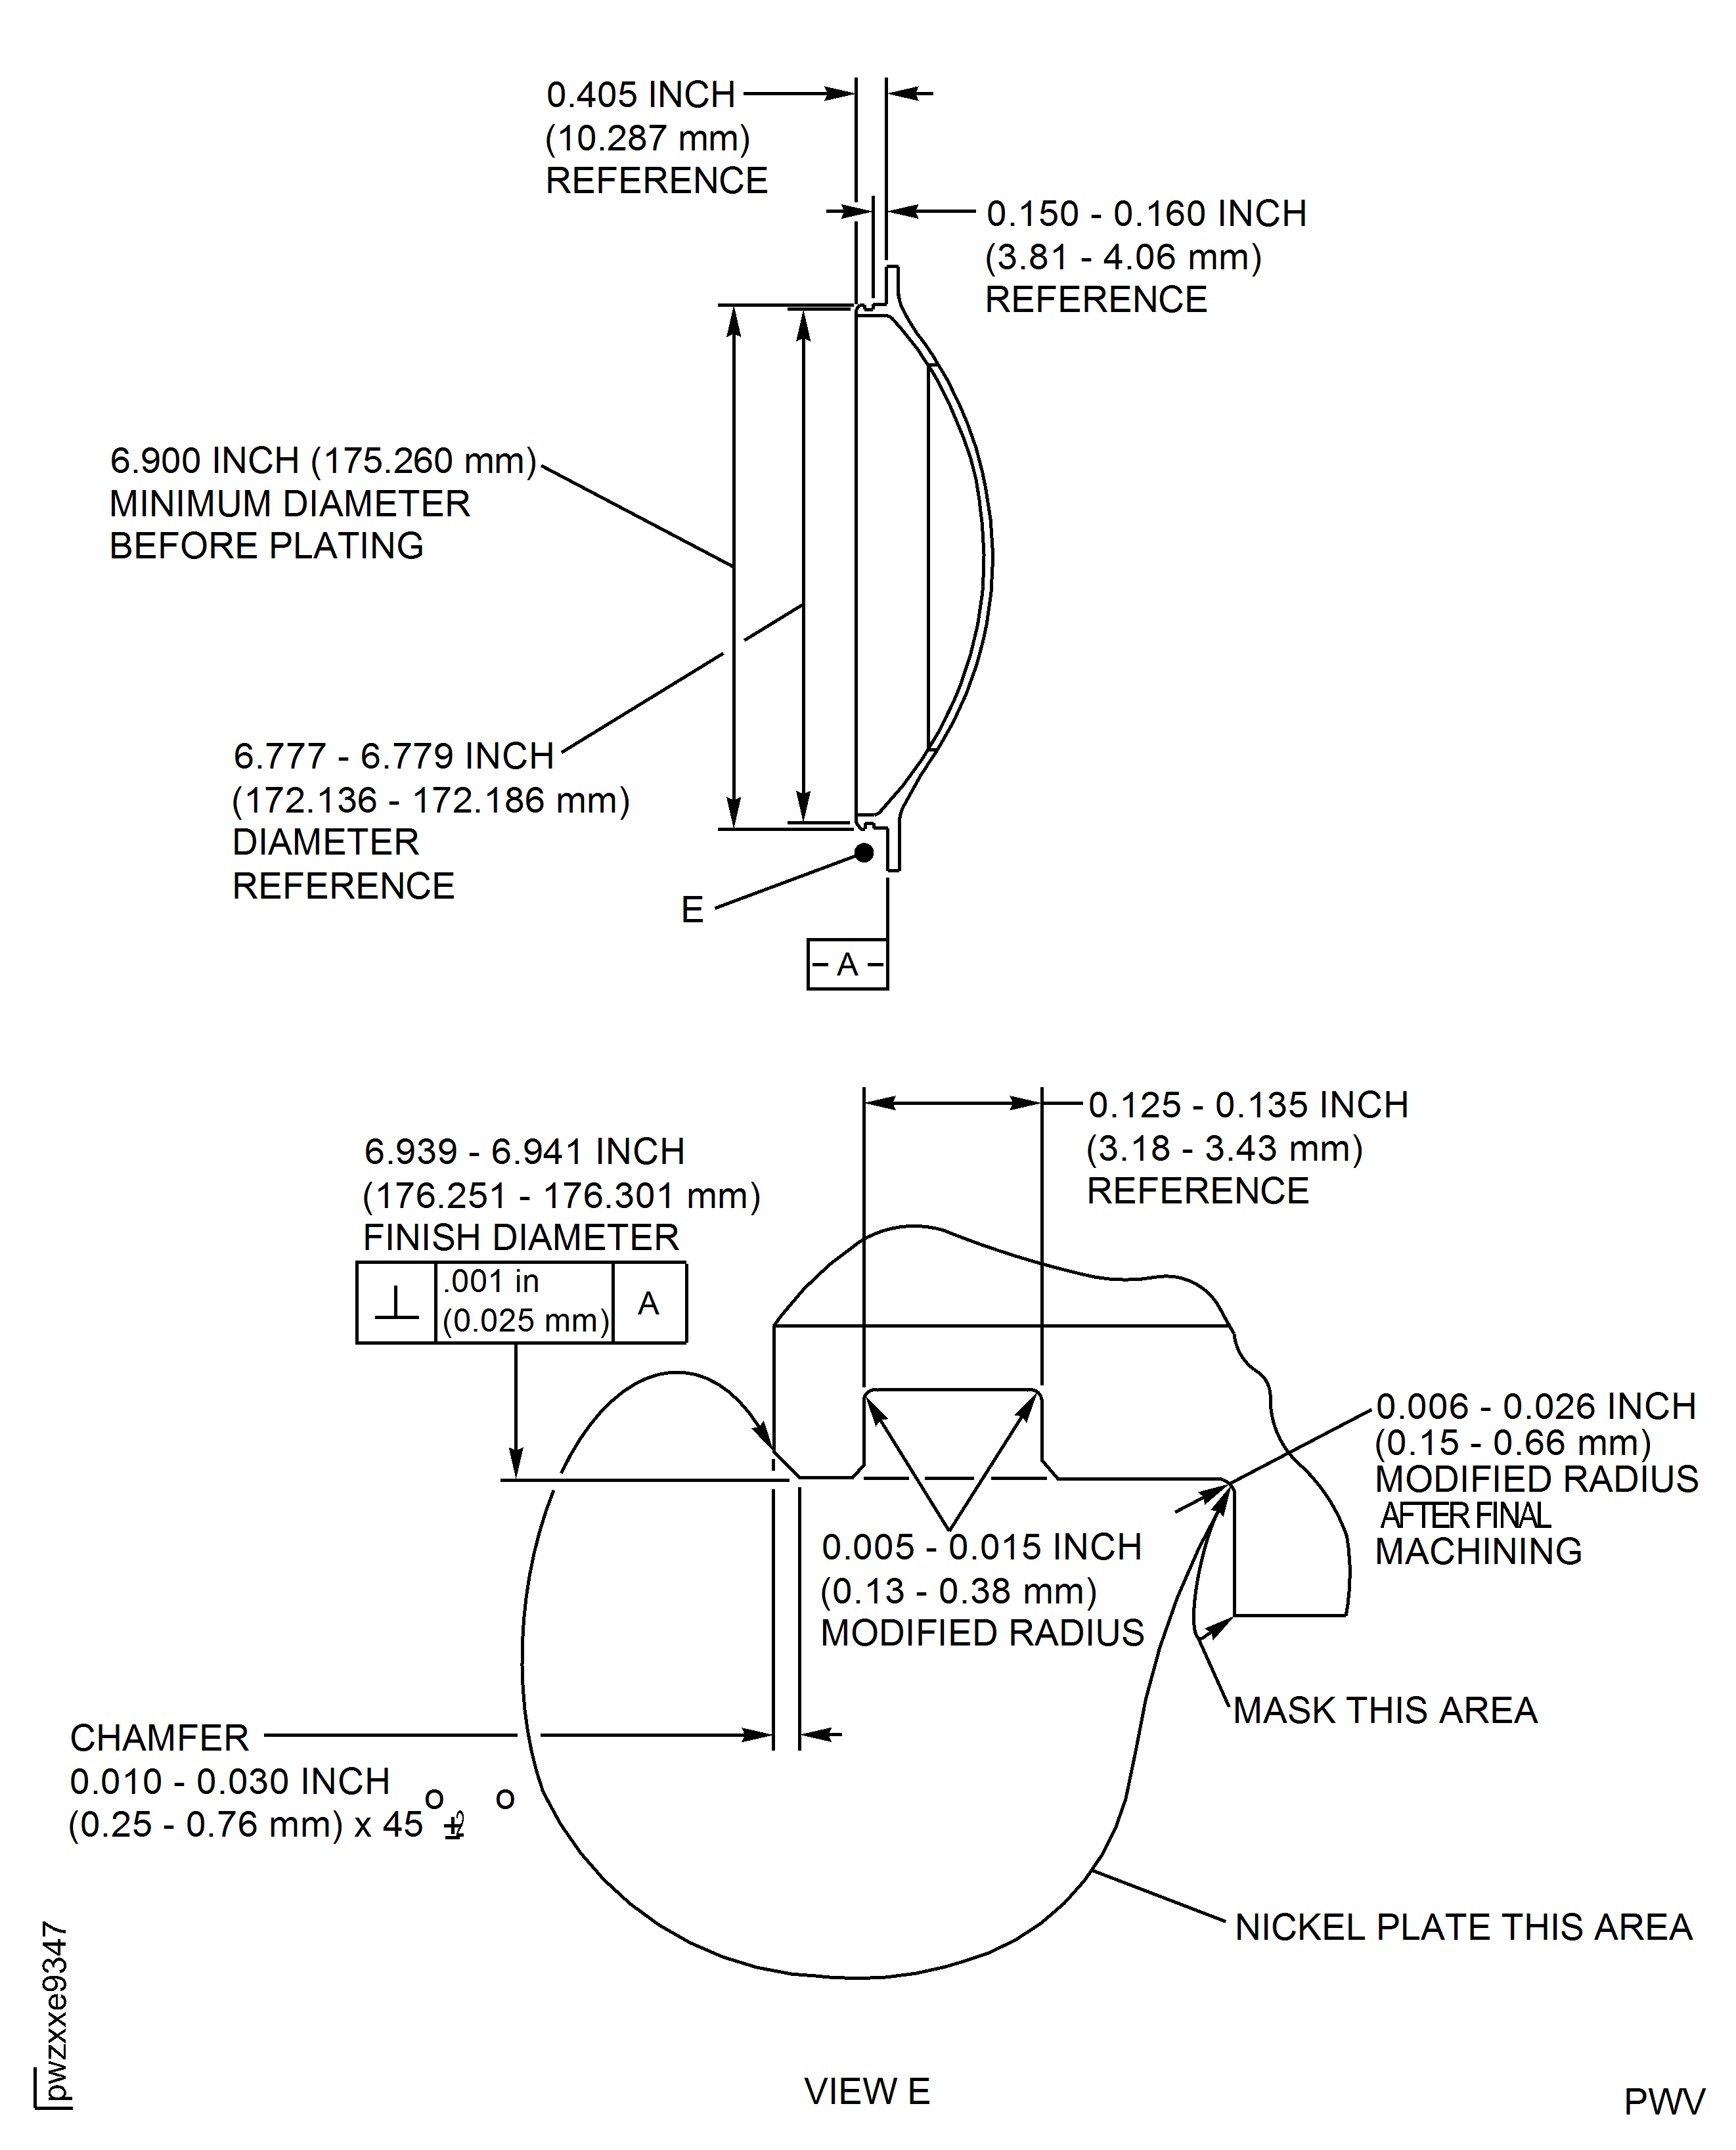
Refer to Figure.
Machine the pilot diameter to a minimum of 6.900 in (175.260 mm).
If the pilot diameter was plated before, you can strip the diameter.
Refer to SPM TASK 70-33-06-300-503.
Machine the pilot diameter.
SUBTASK 72-58-01-320-001 Machine the Pilot Diameter
Refer to Figure.
Refer to SPM TASK 70-33-06-300-503.
The plate must have sufficient thickness to permit finish machining.
NOTE
You can plate outside the enclosed area but you must remove it.
Apply nickel plate to the pilot diameter.
SUBTASK 72-58-01-330-001 Apply Nickel Plate to the Pilot Diameter
Refer to Figure.
Plating must have a constant color.
Circumferential cracks are not permitted.
Rough and blistered areas are not permitted.
Visually examine the plating for finish, cracks and adhesion.
SUBTASK 72-58-01-220-001 Examine the No. 5 Bearing Cover After Nickel Plate
Refer to Figure.
Machine the pilot diameter to 6.939 to 6.941 in. (176.251 to 176.301 mm).
The perpendicularity of the diameter must be within 0.001 in. (0.025 mm) in relation to Surface A.
Clean up the edges of the groove.
Chamfer where necessary.
Use Grinding machine.
Machine the pilot diameter.
SUBTASK 72-58-01-320-002 Machine the Pilot Diameter After Nickel Plate
Refer to Figure.
Use a Magnifying Glass, 5x.
The natural network crack emphasized by grinding, is permitted.
Visually examine the plated area for cracks and adhesion.
Measure the thickness of the plating.
SUBTASK 72-58-01-220-002 Examine the No. 5 Bearing Cover After Repair
Make a permanent mark by the procedure given in SPM TASK 70-09-00-400-501.
Use the vibration peen method.
Remove high metal caused by marking the number.
Mark VRS3250 on the repaired No. 5 Bearing Cover adjacent to the part number.
SUBTASK 72-58-01-350-001 Identify the Repair
Figure: Nickel Plate Pilot Diameter Repair
Nickel Plate Pilot Diameter Repair

