Export Control
EAR Export Classification: Not subject to the EAR per 15 C.F.R. Chapter 1, Part 734.3(b)(3), except for the following Service Bulletins which are currently published as EAR Export Classification 9E991: SBE70-0992, SBE72-0483, SBE72-0580, SBE72-0588, SBE72-0640, SBE73-0209, SBE80-0024 and SBE80-0025.Copyright
© IAE International Aero Engines AG (2001, 2014 - 2021) The information contained in this document is the property of © IAE International Aero Engines AG and may not be copied or used for any purpose other than that for which it is supplied without the express written authority of © IAE International Aero Engines AG. (This does not preclude use by engine and aircraft operators for normal instructional, maintenance or overhaul purposes.).Applicability
All
Common Information
TASK 72-60-41-300-008 Angle Gearbox Casing - Nickel Plate The Bearing Seat Diameter, Repair-008 (VRS5104)
General
Price and availability - none
The practices and processes referred to in the procedure by the TASK numbers are in the SPP
NOTE
Preliminary Requirements
Pre-Conditions
NONESupport Equipment
| Name | Manufacturer | Part Number / Identification | Quantity | Remark |
|---|---|---|---|---|
| Workshop inspection equipment | LOCAL | Workshop inspection equipment | ||
| Grinding Machine | LOCAL | Grinding Machine | ||
| FPI inspection station | LOCAL | FPI inspection station | ||
| Basket | LOCAL | Basket | ||
| Vapor degreaser | LOCAL | Vapor degreaser | ||
| Process Plating Tanks | LOCAL | Process plating tanks | ||
| Oven | LOCAL | Oven | ||
| Magnifying glass, 4x | LOCAL | Magnifying glass, 4x | ||
| Vibrating marking pencil | LOCAL | Vibrating marking pencil |
Consumables, Materials and Expendables
NONESpares
NONESafety Requirements
NONEProcedure
Refer to the SPM TASK 70-23-05-230-501.
No cracks are permitted.
Do the local fluorescent penetrant inspection for cracks.
SUBTASK 72-60-41-220-097 Examine the Angle Gearbox Casing
Refer to the SPM TASK 70-33-08-300-503.
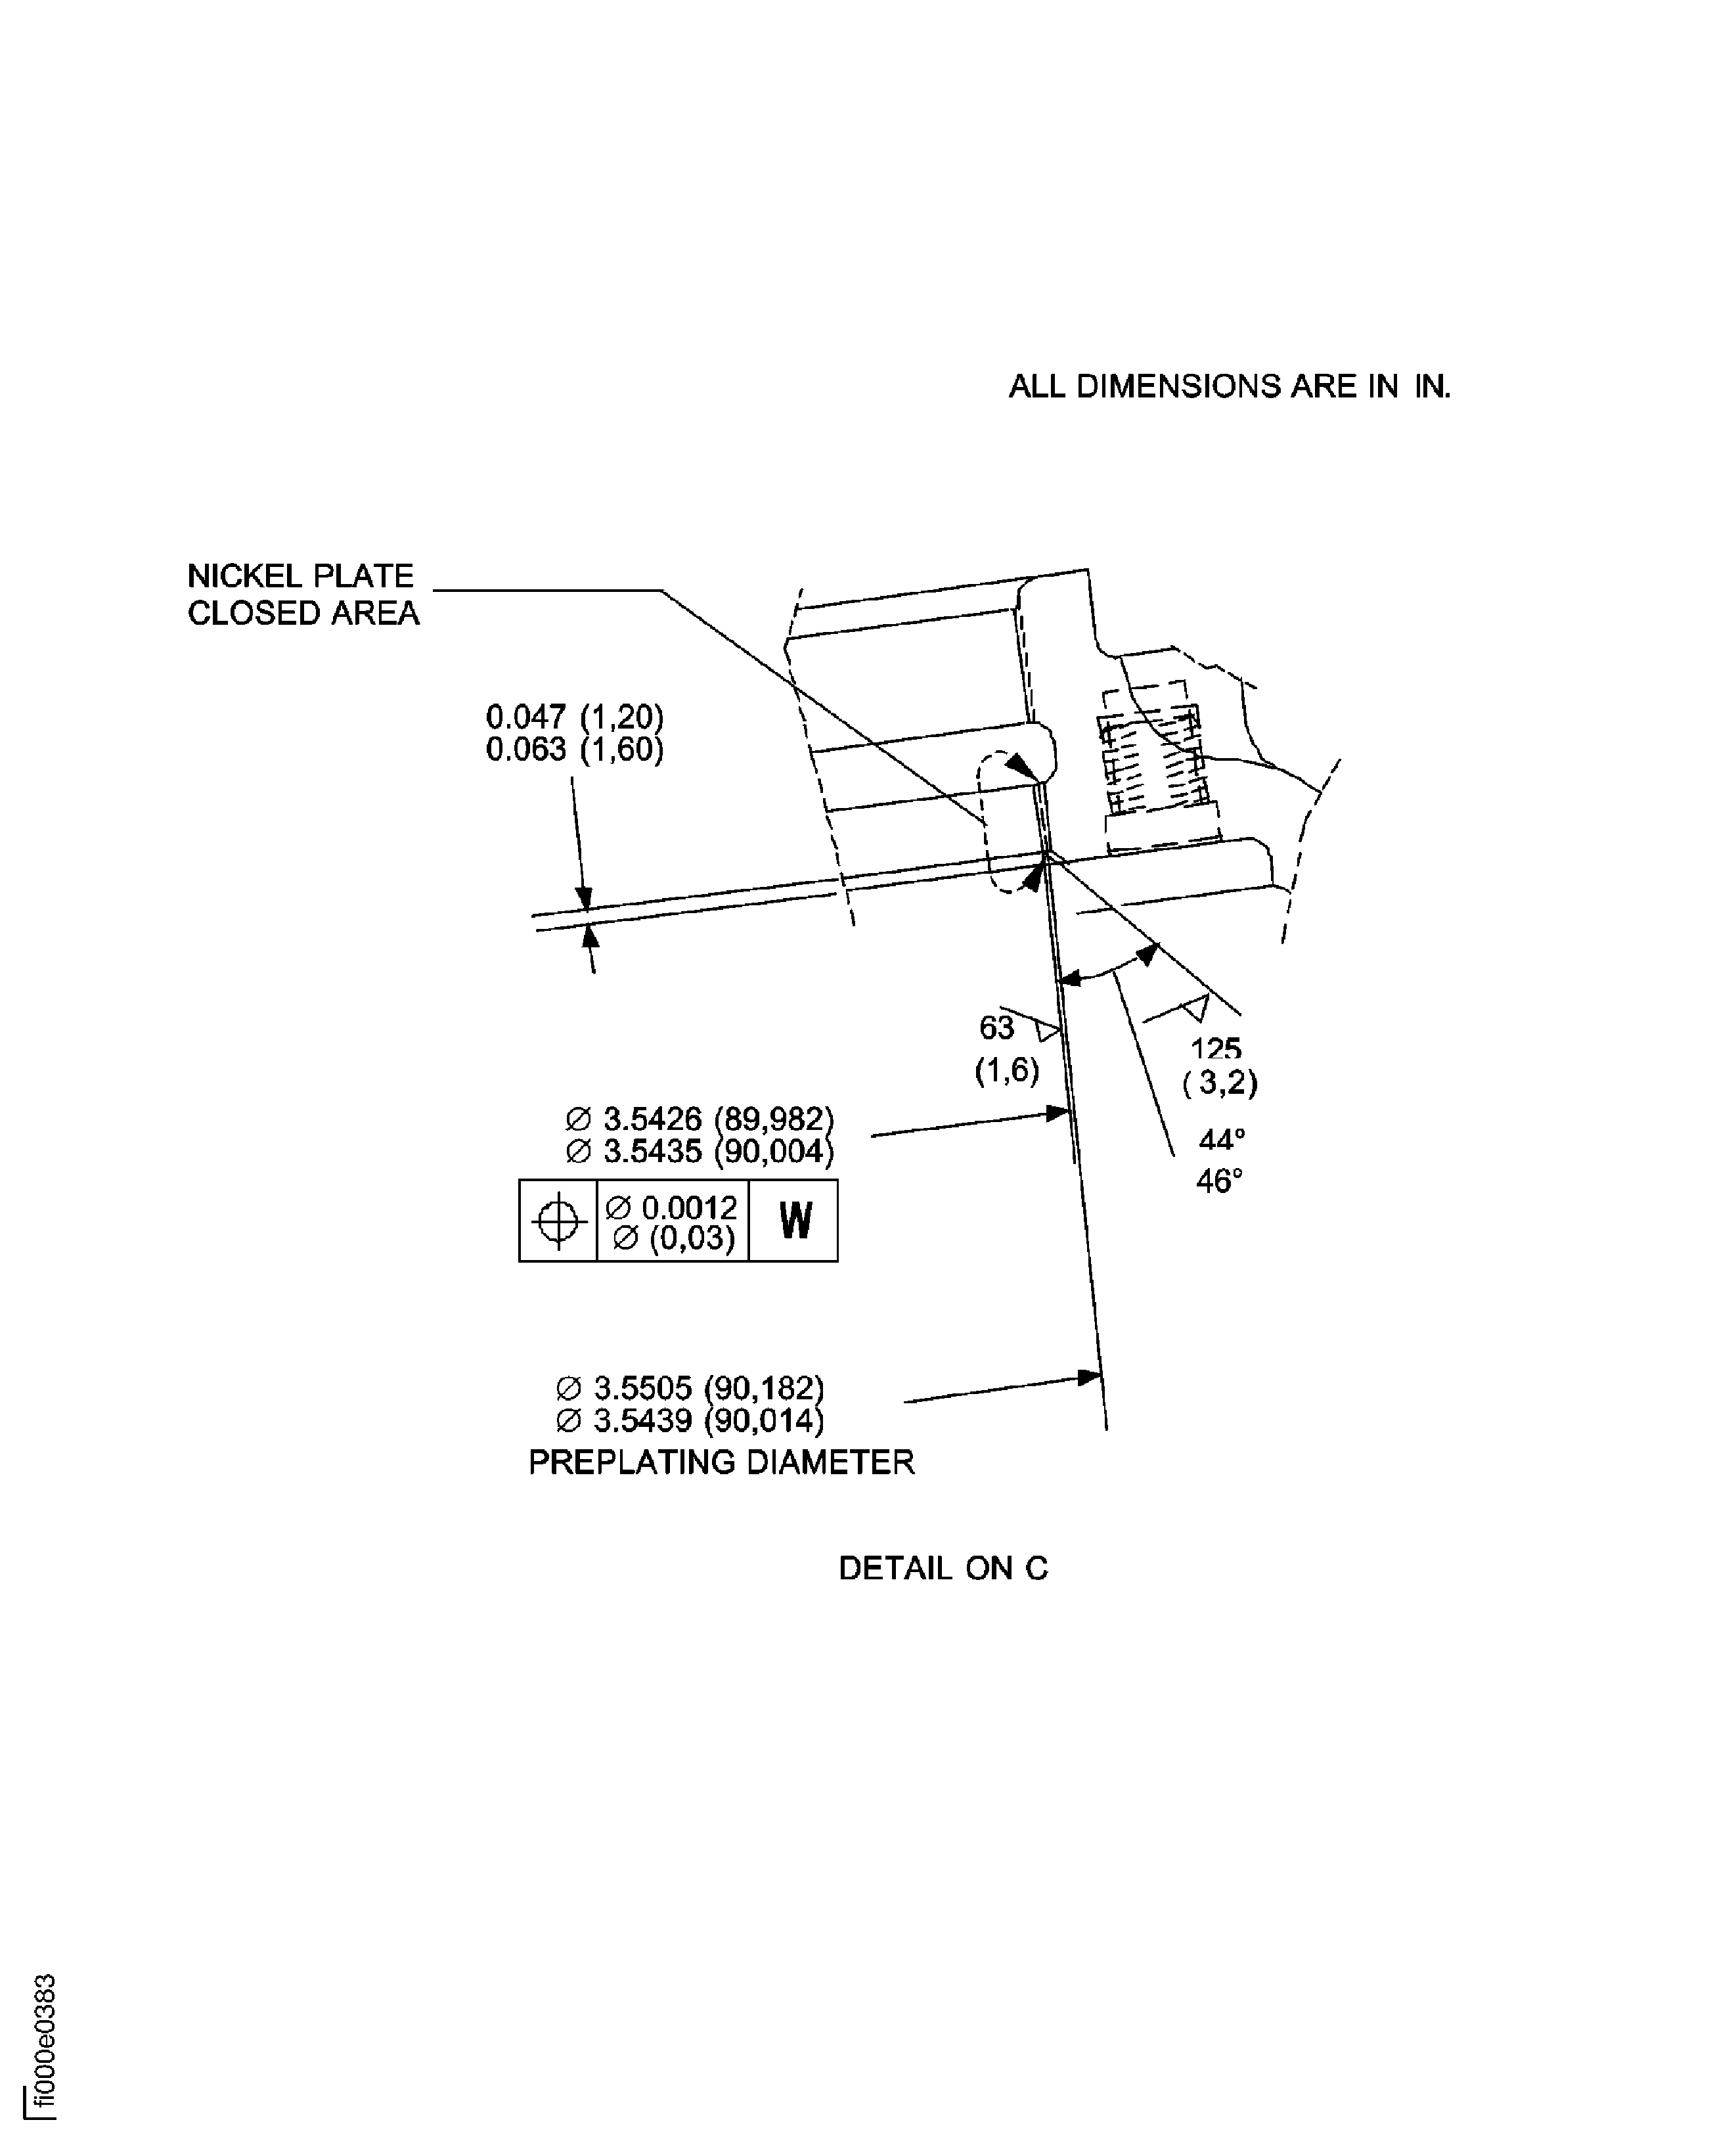
Plate to a sufficient thickness to permit machining to the last dimensions.
The plating out of the bearing seat diameter is permitted but must be removed.
Do the nickel plating.
SUBTASK 72-60-41-330-067 Nickel Plate the Bearing Seat Diameter of the Casing
Use a Magnifying glass, 4x. The natural network of crack, emphasized by grinding, is permitted.
Do the visual inspection of the plated area for cracks and adhesion.
SUBTASK 72-60-41-220-098 Examine the Nickel Plated Area
Refer to the SPM TASK 70-09-00-400-501. Remove the metal lifted by marking.
Vibro engrave VRS5104 adjacent to the part number.
SUBTASK 72-60-41-350-076 Record the Repair
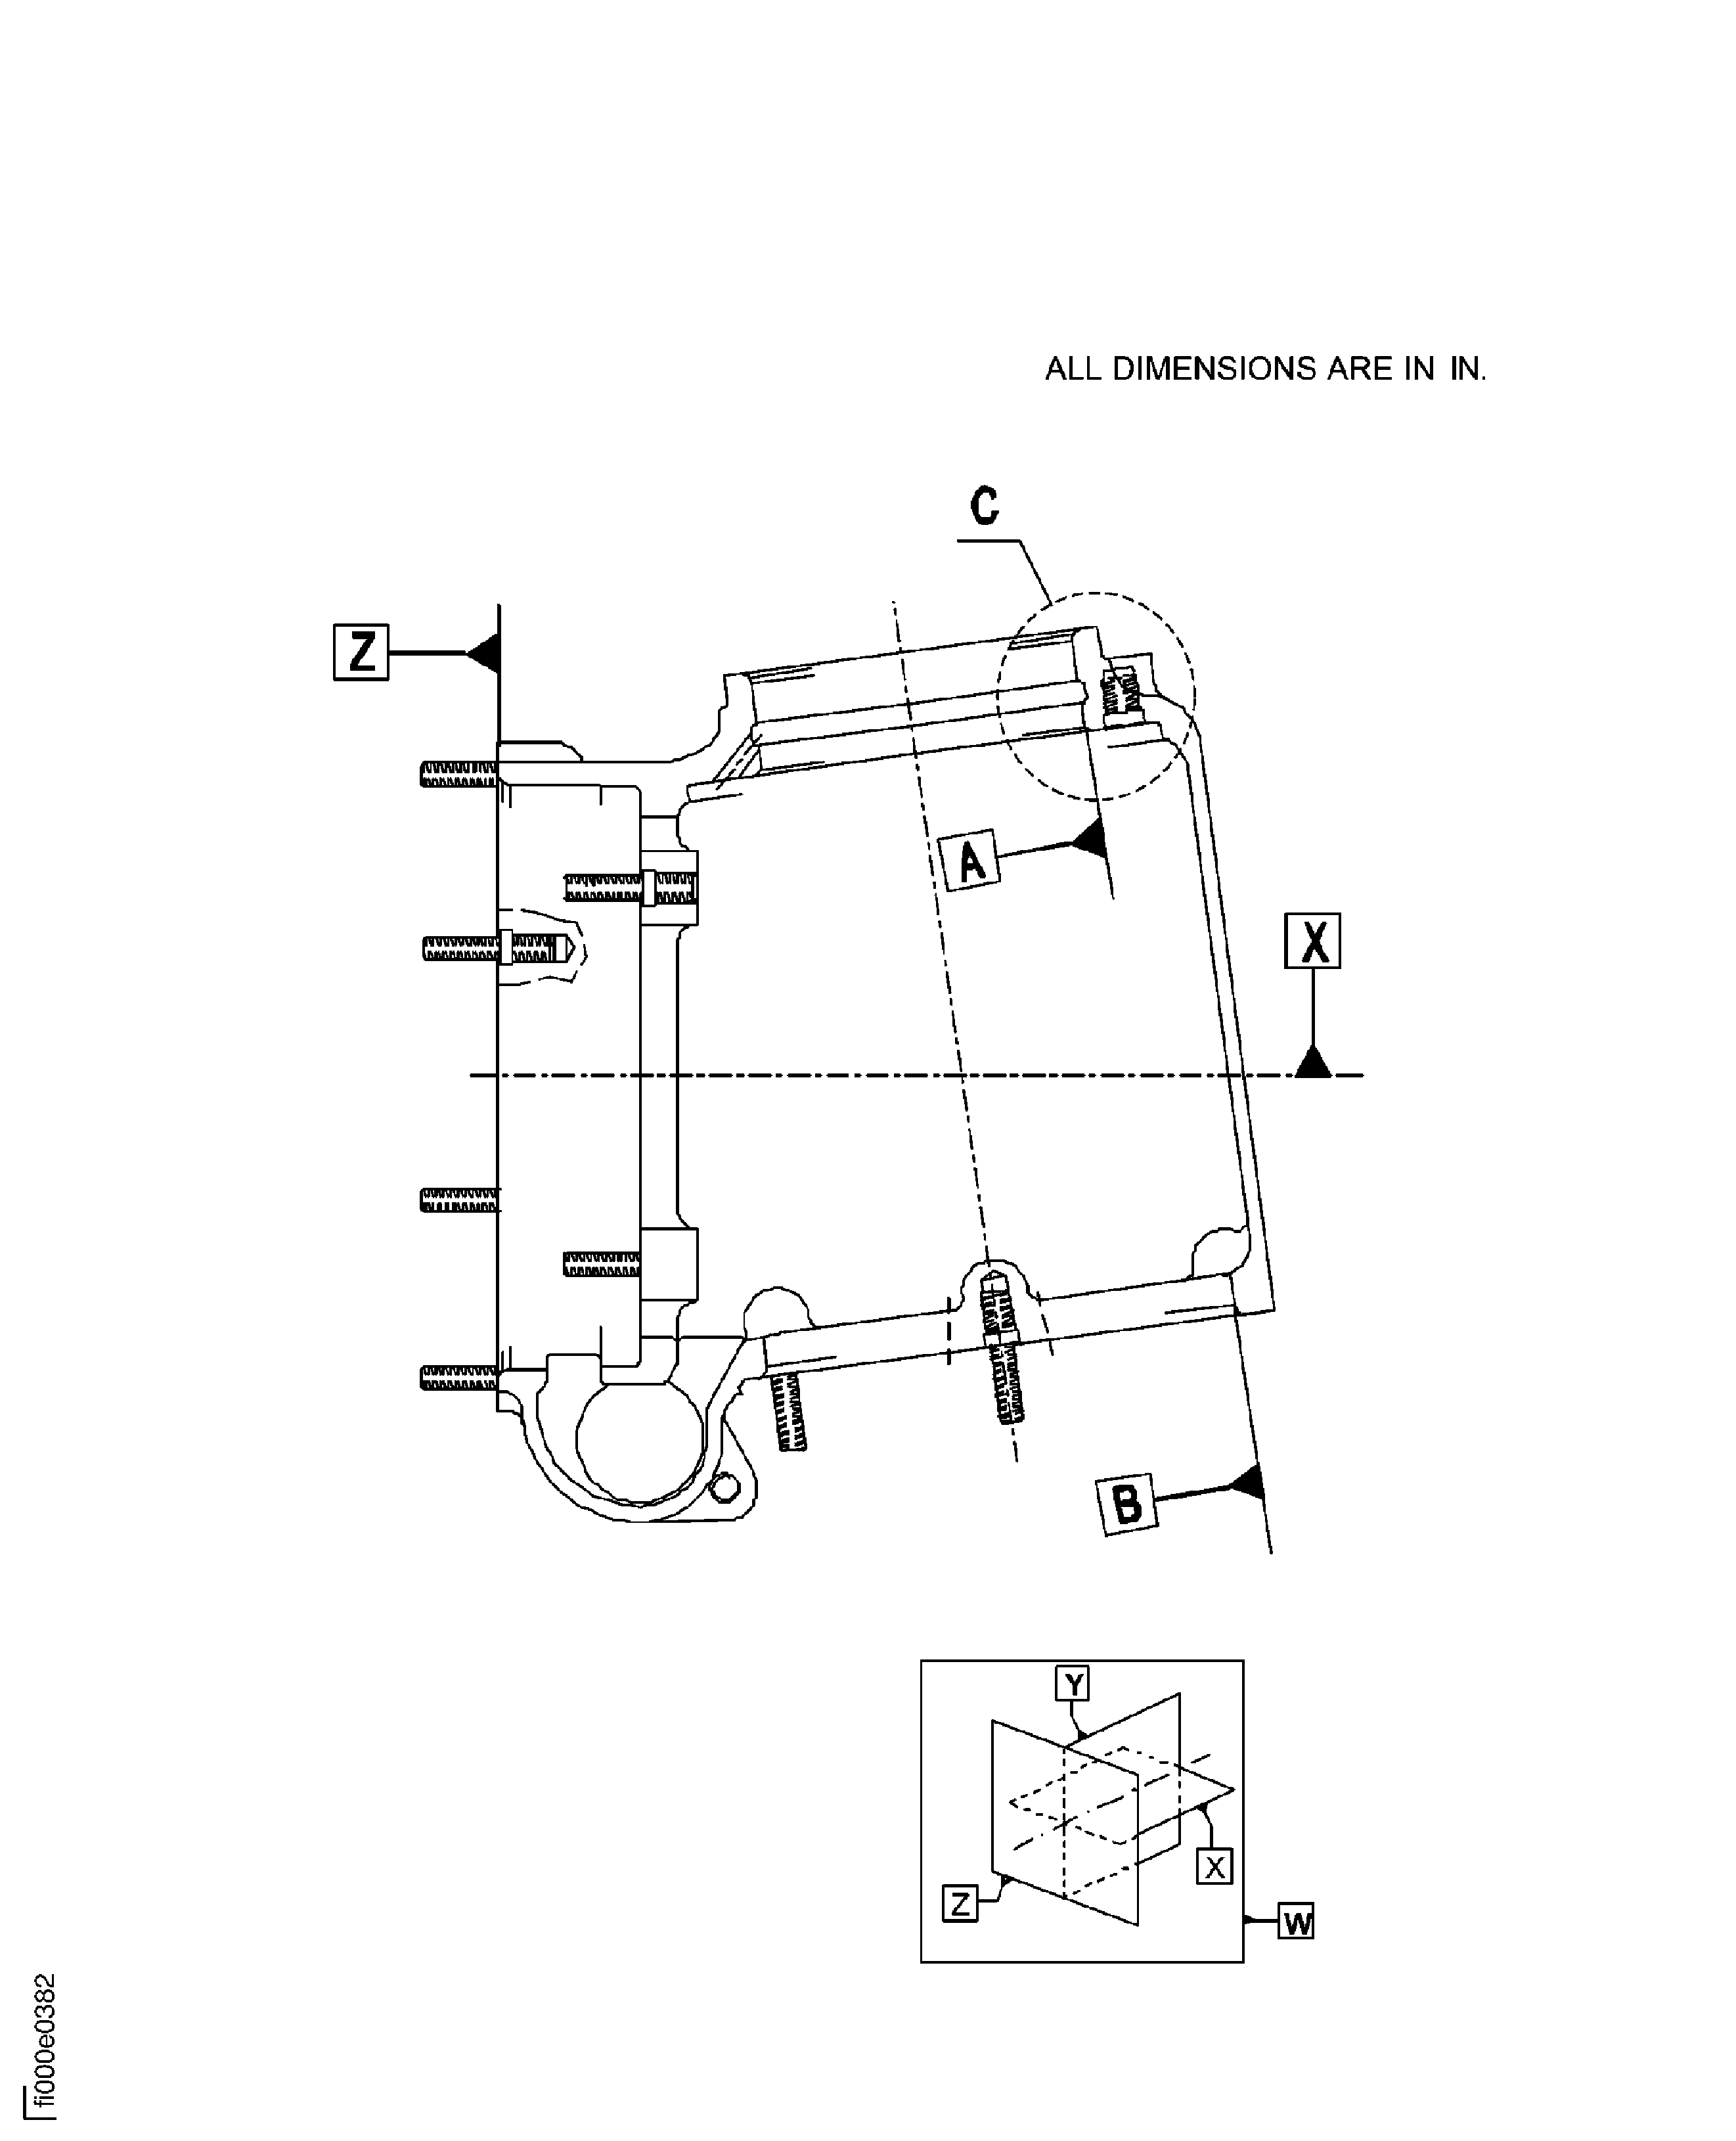
Figure: Repair details and dimensions
Repair details and dimensions

Figure: Repair details and dimensions
Repair details and dimensions

