DMC:V2500-A5-72-44-1001-00A-664A-CIssue No:001.00Issue Date:2021-02-01
Export Control
EAR Export Classification: Not subject to the EAR per 15 C.F.R. Chapter 1, Part 734.3(b)(3), except for the following Service Bulletins which are currently published as EAR Export Classification 9E991: SBE70-0992, SBE72-0483, SBE72-0580, SBE72-0588, SBE72-0640, SBE73-0209, SBE80-0024 and SBE80-0025.Copyright
© IAE International Aero Engines AG (2001, 2014 - 2021) The information contained in this document is the property of © IAE International Aero Engines AG and may not be copied or used for any purpose other than that for which it is supplied without the express written authority of © IAE International Aero Engines AG. (This does not preclude use by engine and aircraft operators for normal instructional, maintenance or overhaul purposes.).Applicability
All
Common Information
TASK 72-44-10-300-029 Stage 1 HPT Support Assembly - Center Flange Inner Diameter Restoration Repair, Repair-029 (VRS3851)
General
Price and availability - refer to IAE.
The practices and processes referred to in this procedure by the TASK numbers are in the SPM.
Preliminary Requirements
Pre-Conditions
NONESupport Equipment
NONEConsumables, Materials and Expendables
NONESpares
NONESafety Requirements
NONEProcedure
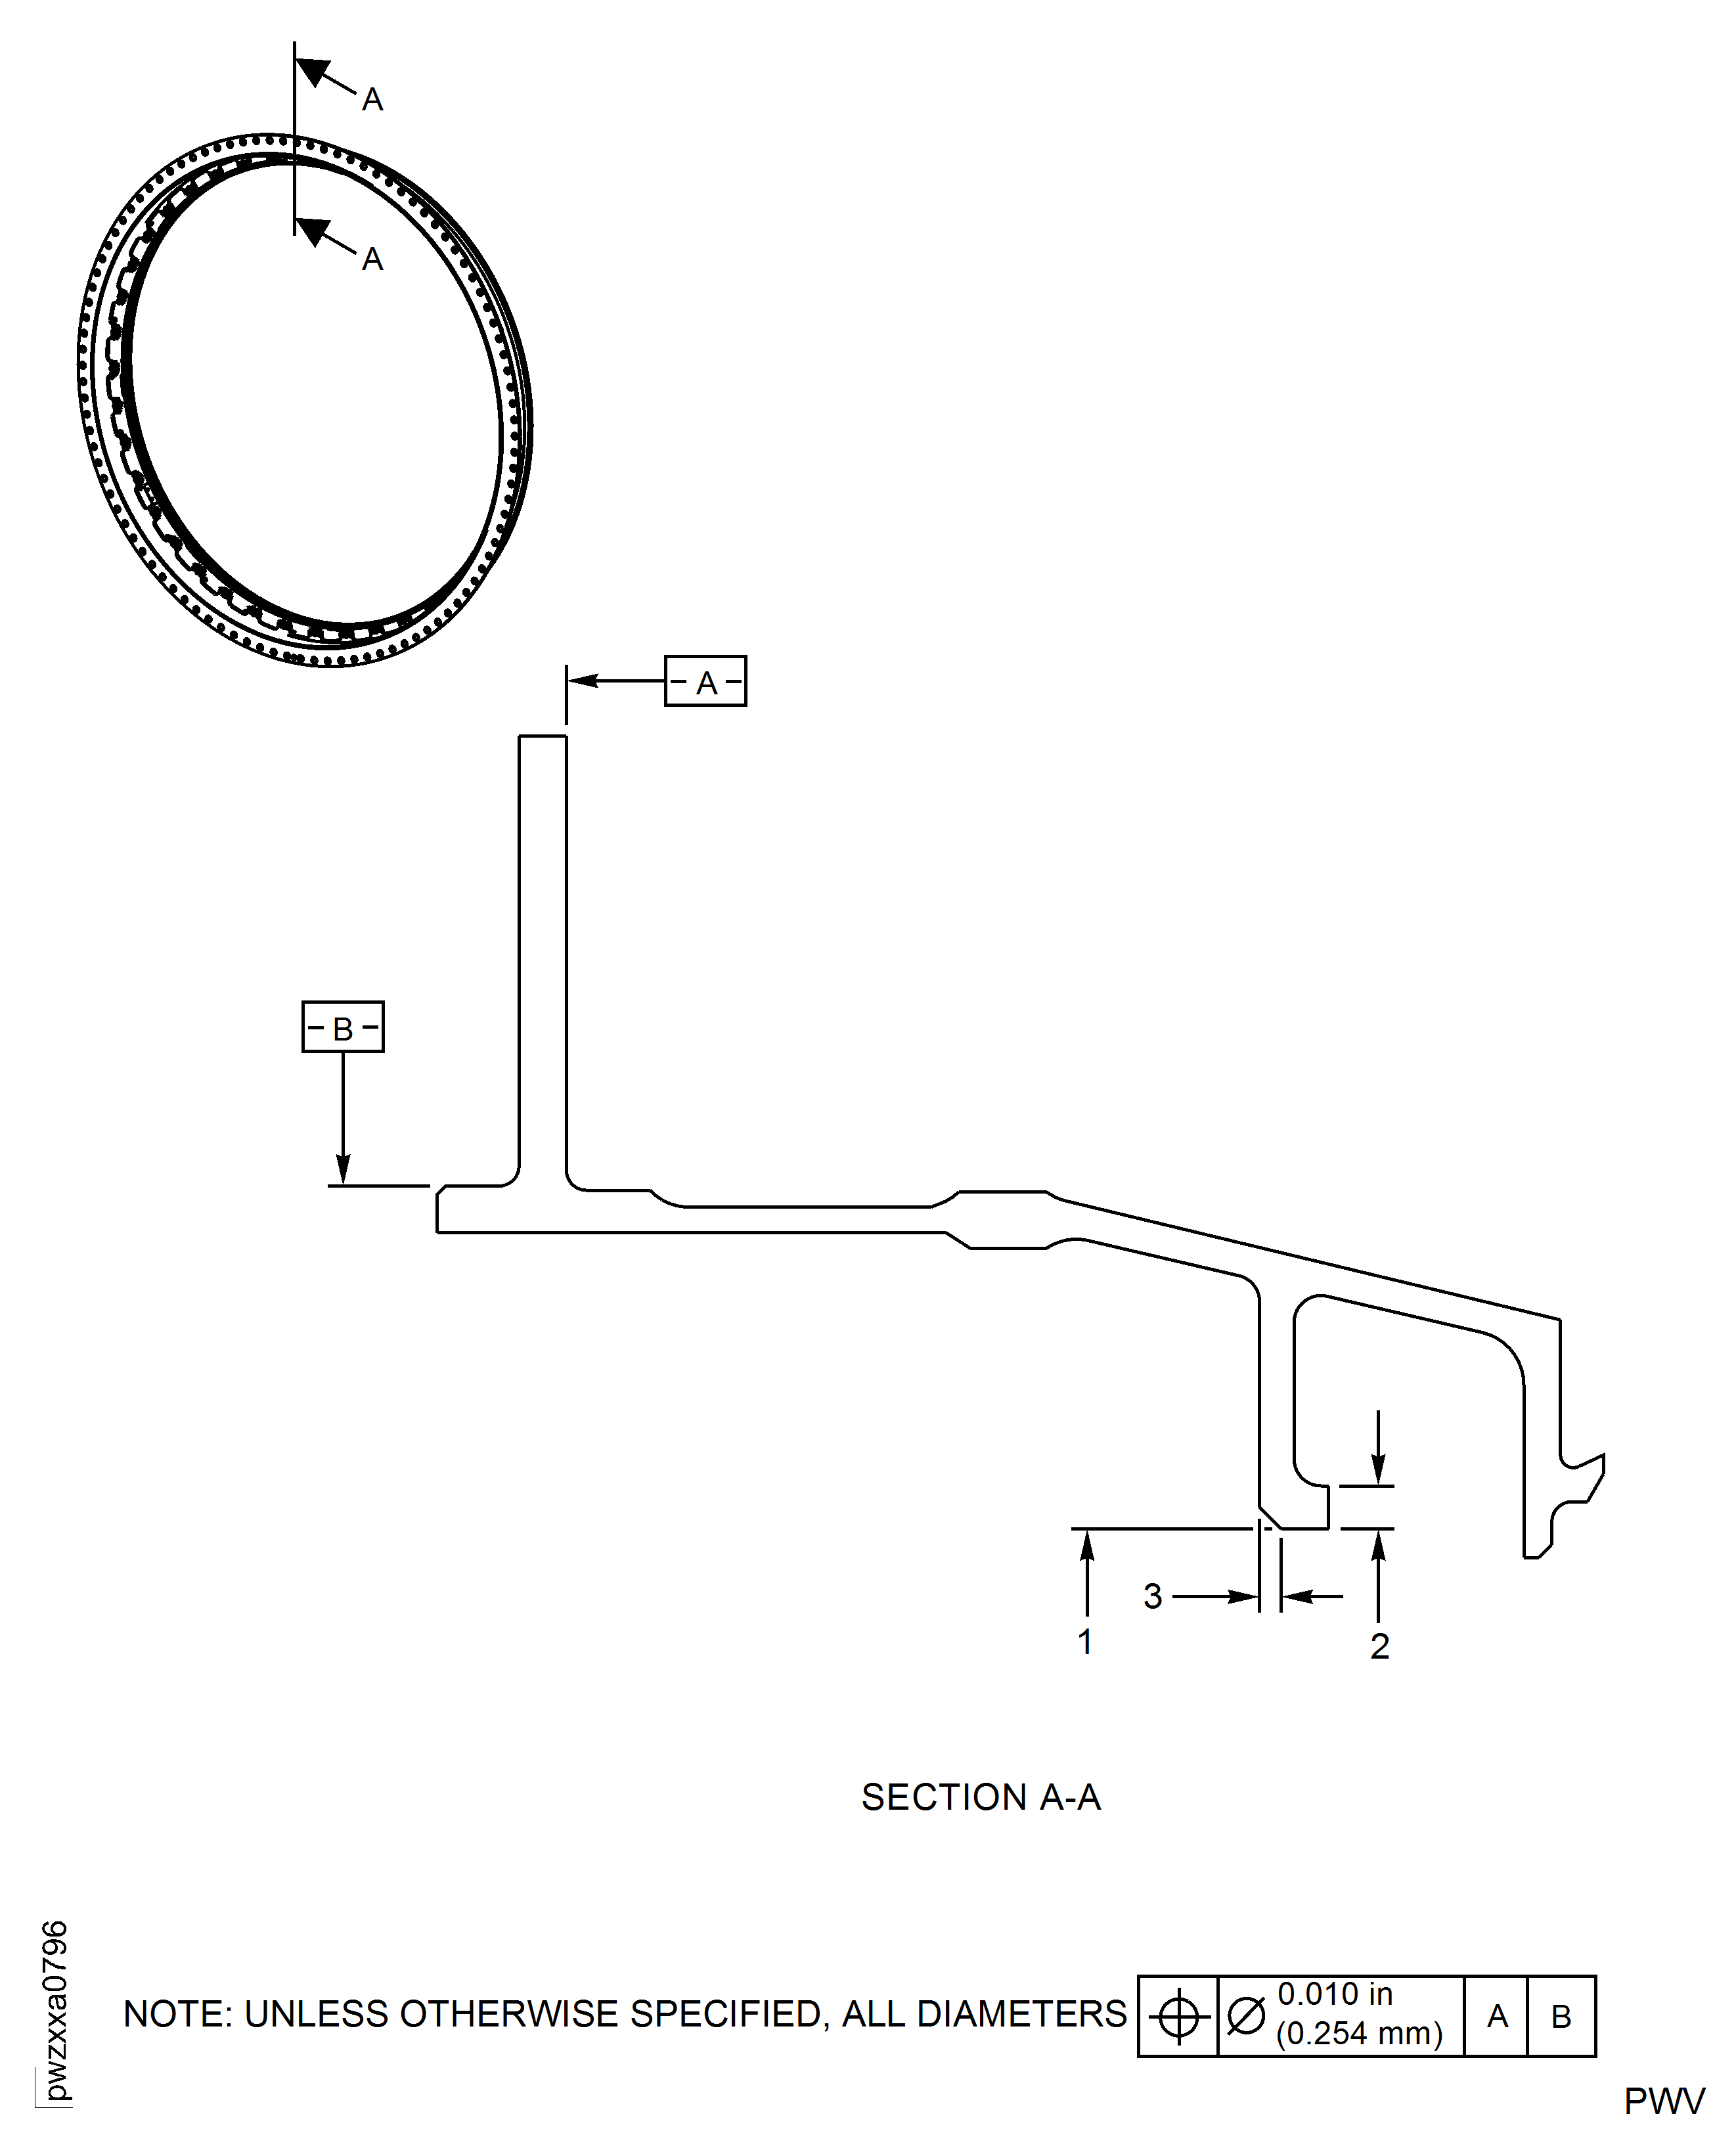
Refer to Figure.
Machine surface at Index 1 and 3 to restore diameter to 26.642 in. - 26.646 in. (676.707 mm - 676.808 mm).
SUBTASK 72-44-10-320-068 Machine Center Flange Inner Diameter on the Stage 1 HPT Support Assembly
Refer to the SPM TASK 70-11-03-300-503.
Clean the support.
SUBTASK 72-44-10-110-079 Clean the Stage 1 HPT Support
Use medium sensitivity.
No cracks are permitted.
Refer to Figure and SPM TASK 70-23-01-230-501.
Fluorescent penetrant inspect the repair area.
Refer to Figure.
Do a dimensional inspection of the part.
SUBTASK 72-44-10-220-208 Examine the Repair Area
Make a permanent mark by the procedure given in SPM TASK 70-09-00-400-501.
Use the vibration peen method.
Mark VRS3851 adjacent to the part number.
SUBTASK 72-44-10-350-078 Identify the Repair
Figure: Dimensions After Accomplishment Of Repair
Dimensions After Accomplishment Of Repair

