Export Control
EAR Export Classification: Not subject to the EAR per 15 C.F.R. Chapter 1, Part 734.3(b)(3), except for the following Service Bulletins which are currently published as EAR Export Classification 9E991: SBE70-0992, SBE72-0483, SBE72-0580, SBE72-0588, SBE72-0640, SBE73-0209, SBE80-0024 and SBE80-0025.Copyright
© IAE International Aero Engines AG (2001, 2014 - 2021) The information contained in this document is the property of © IAE International Aero Engines AG and may not be copied or used for any purpose other than that for which it is supplied without the express written authority of © IAE International Aero Engines AG. (This does not preclude use by engine and aircraft operators for normal instructional, maintenance or overhaul purposes.).Applicability
All
Common Information
TASK 36-21-49-300-002 Bleed Air Pressure Indicating Air Tubes - Blend Repair Surface Damage, Repair-002 (VRS2916)
Effectivity
FIG/ITEM | PART NO. |
|---|---|
01-100 | 740-5089-501 |
01-100 | 740-5089-503 |
01-100 | 740-5089-505 |
01-100 | 740-5645-505 |
01-100 | 745-5645-503 |
01-100 | 745-5645-505 |
01-500 | 740-5644-503 |
01-500 | 740-5644-505 |
01-500 | 740-5644-507 |
01-500 | 745-5644-501 |
01-500 | 745-5644-503 |
01-500 | 745-5644-505 |
01-500 | 745-5644-507 |
01-600 | 745-5166-501 |
02-100 | 740-5086-501 |
02-100 | 740-5074-507 |
02-110 | 740-5092-501 |
02-500 | 740-5093-501 |
02-500 | 740-5093-503 |
02-500 | 740-5093-501 |
02-725 | 745-5097-501 |
02-725 | 745-5097-503 |
General
This repair can be done on the pressure indicating tubes during overhaul.
The practices and processes referred to in the procedure by the TASK numbers are in (SPM).
NOTE
Preliminary Requirements
Pre-Conditions
NONESupport Equipment
| Name | Manufacturer | Part Number / Identification | Quantity | Remark |
|---|---|---|---|---|
| Micrometer | LOCAL | Micrometer | ball anvil type |
Consumables, Materials and Expendables
| Name | Manufacturer | Part Number / Identification | Quantity | Remark |
|---|---|---|---|---|
| CoMat 01-076 METHYL ETHYL KETONE | LOCAL | CoMat 01-076 | ||
| CoMat 02-099 LINT-FREE CLOTH | LOCAL | CoMat 02-099 |
Spares
NONESafety Requirements
NONEProcedure
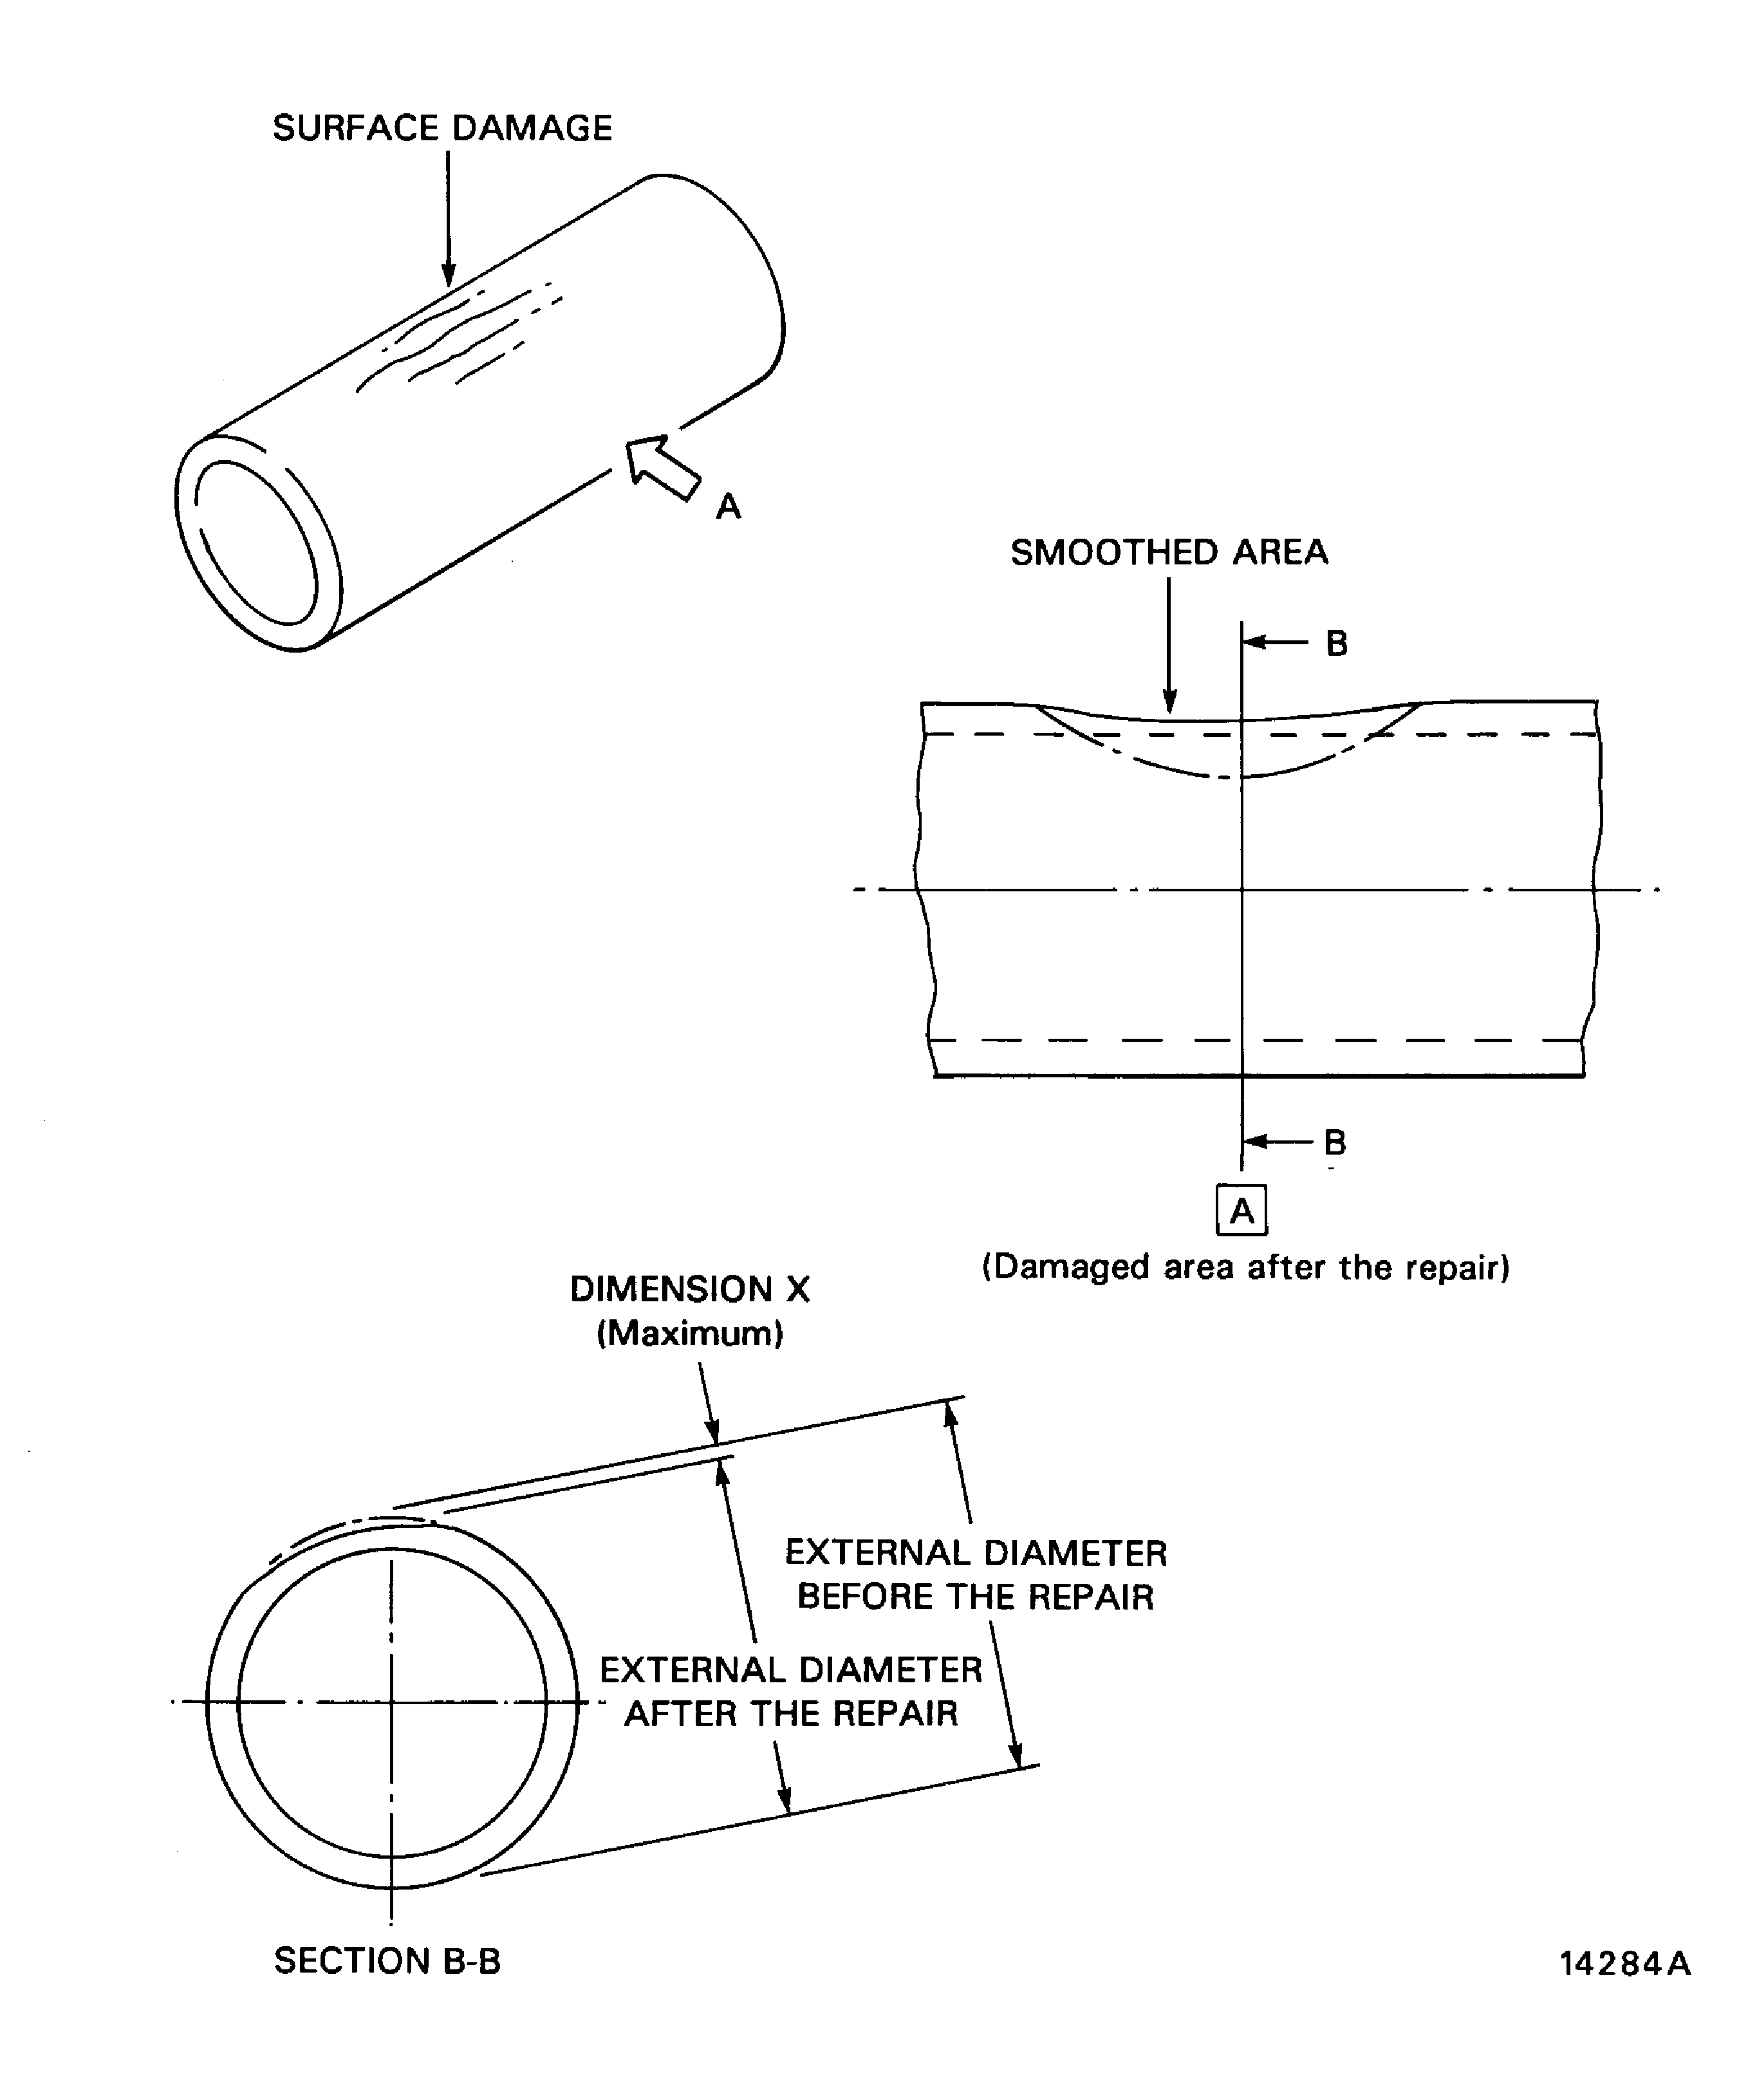
The repair area of the tube must measure a minimum dimension of 10 times the depth of the damage.
Mark the repair area of the tube.
Use the Micrometer and write the diameter.
Measure the external diameter of the tube at the damaged area.
SUBTASK 36-12-49-220-067 Examine the Area for Repair
Refer to SPM TASK 70-35-03-300-501.
Remove the damage.
SUBTASK 36-12-49-350-053 Repair the Area of Damage
Use the CoMat 01-076 METHYL ETHYL KETONE and the CoMat 02-099 LINT-FREE CLOTH. Make the area clean with a clean piece of lint-free cloth before the fluid dries.
Clean the repaired area
SUBTASK 36-12-49-110-053 Clean the Repaired Area

WARNING
DO NOT GET THE CLEANING FLUID ON YOUR SKIN OR IN YOUR EYES. PUT ON PROTECTIVE CLOTHING, GLOVES, GOGGLES AND A MASK. USE THE FLUID IN A WELL VENTILATED AREA. DO NOT BREATHE THE GAS. IF YOU GET THE FLUID ON YOUR SKIN OR IN YOUR EYES, FLUSH IT AWAY WITH WATER. GET MEDICAL AID IF YOUR SKIN OR EYES BECOME IRRITATED.Make sure that the repaired area is smooth and has no scratches. Make sure that the repaired area has no sudden changes in thickness.
Examine the repaired area.
Refer to Figure Use the micrometer. Make sure that the deepest area of the repair is measured. Write the diameter.
Measure the external diameter of the tube at the repaired area.
Refer to Figure.
(Dimension 'X'). Compare the external diameter measurement (after the repair) with the measurement made before the repair. The difference between the measurements must not be more than 0.003 in (0.0762 mm) if more than 0.003 in. (0.0762 mm) discard the tube.
Calculate the wall thickness of the tube in the repaired area.
SUBTASK 36-12-49-220-068 Examine the Repaired Area
Refer to Repair-001 TASK 36-21-49-700-101.
Do a pressure test on the repaired tube.
SUBTASK 36-12-49-780-055 Pressure Test the Repaired Tube
Refer to TASK 70-09-00-400-501.
Mark the repair scheme number VRS2916 on the tube adjacent to the part number using the electro-etch method.
SUBTASK 36-12-49-850-052 Put the Repair Scheme Number on the Tube
Figure: Repair Details And Dimensions
Repair Details And Dimensions

