Export Control
EAR Export Classification: Not subject to the EAR per 15 C.F.R. Chapter 1, Part 734.3(b)(3), except for the following Service Bulletins which are currently published as EAR Export Classification 9E991: SBE70-0992, SBE72-0483, SBE72-0580, SBE72-0588, SBE72-0640, SBE73-0209, SBE80-0024 and SBE80-0025.Copyright
© IAE International Aero Engines AG (2001, 2014 - 2021) The information contained in this document is the property of © IAE International Aero Engines AG and may not be copied or used for any purpose other than that for which it is supplied without the express written authority of © IAE International Aero Engines AG. (This does not preclude use by engine and aircraft operators for normal instructional, maintenance or overhaul purposes.).Applicability
All
Common Information
TASK 72-00-32-220-002-A00 LPC/Intermediate Case Module - Examine The Module Outer At Interface B-32, Inspection-002
General
This TASK is for A1 Engine.
The word "Reject" is used after an interface inspection statement to show that a higher level inspection and possible repair to the damaged part is necessary. Do the higher level inspection procedure as found in the applicable Chapter/Section/Subject of this manual on the damaged part(s). It is not necessary to do the higher level inspection on parts that are serviceable to the interface inspection standard.
Refer to TASK 72-00-00-200-000 (Examine the modular/non-modular interfaces) (INSPECTION/CHECK-000), before you do this TASK.
The policy that is necessary for inspection is given in the SPM TASK 70-20-01-200-501.
NOTE
Preliminary Requirements
Pre-Conditions
NONESupport Equipment
| Name | Manufacturer | Part Number / Identification | Quantity | Remark |
|---|---|---|---|---|
| IAE 2J13056 Gage, wear | 0AM53 | IAE 2J13056 | 1 |
Consumables, Materials and Expendables
NONESpares
NONESafety Requirements
NONEProcedure
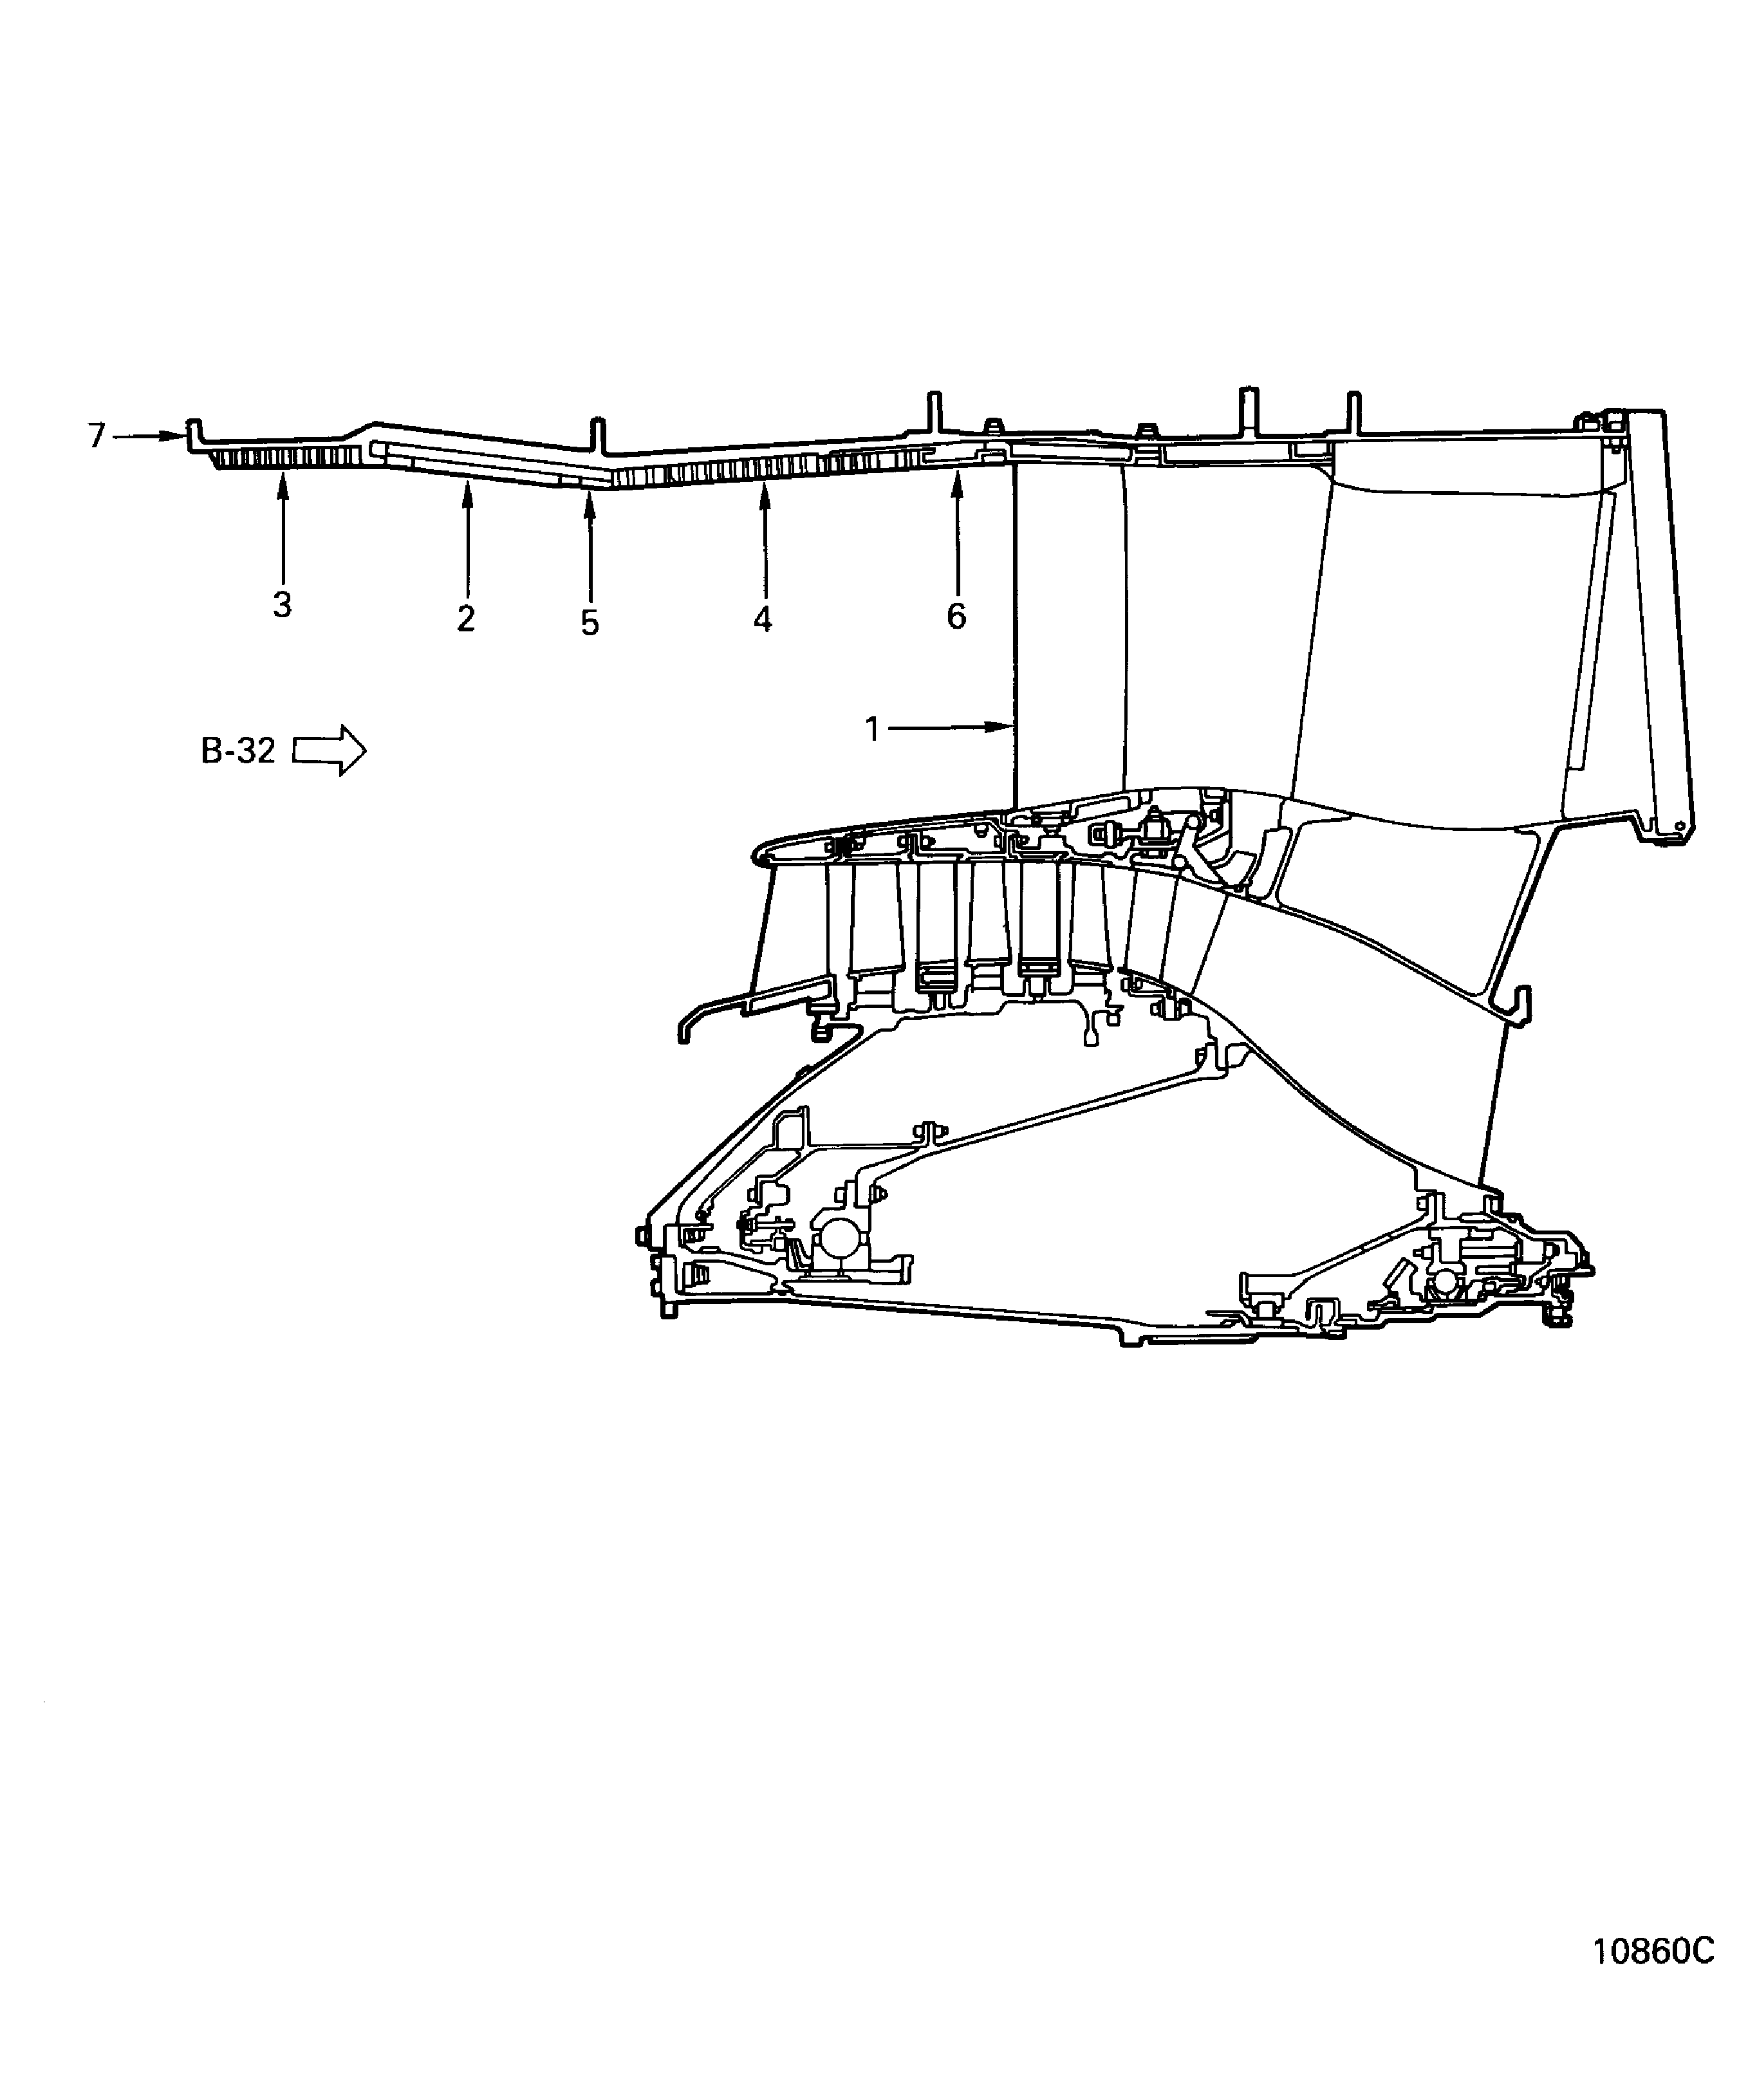
Refer to Figure.
SUBTASK 72-00-32-220-056 Visually Examine the Airfoils of the Fan Outer Outlet Guide Vane at Location 1
More than limits Step
Blade tip rub, use IAE 2J13056 Gage, wear 1 off.
More than Step
Circumferential scores.
SUBTASK 72-00-32-220-057 Visually Examine the Attrition Honeycomb and Filler at Location 2
Refer to Figure.
SUBTASK 72-00-32-220-058 Visually Examine the Front Acoustic Skin at Location 3
Refer to Figure.
SUBTASK 72-00-32-220-071 Visually Examine the Rear Acoustic Skin at Location 4
Refer to Figure.
SUBTASK 72-00-32-220-072 Visually Examine the Ice Impact Resistance Skin at Location 5
Refer to Figure.
SUBTASK 72-00-32-220-073 Visually Examine the Acoustic Lining Assembly at Location 6
Refer to Figure.
SUBTASK 72-00-32-220-074 Visually Examine the Fan Case Front Flange at Location 7
Figure: Locations at interface B-32
Locations at interface B-32

Figure: Inspection tool of attrition lining
Inspection tool of attrition lining

