Export Control
EAR Export Classification: Not subject to the EAR per 15 C.F.R. Chapter 1, Part 734.3(b)(3), except for the following Service Bulletins which are currently published as EAR Export Classification 9E991: SBE70-0992, SBE72-0483, SBE72-0580, SBE72-0588, SBE72-0640, SBE73-0209, SBE80-0024 and SBE80-0025.Copyright
© IAE International Aero Engines AG (2001, 2014 - 2021) The information contained in this document is the property of © IAE International Aero Engines AG and may not be copied or used for any purpose other than that for which it is supplied without the express written authority of © IAE International Aero Engines AG. (This does not preclude use by engine and aircraft operators for normal instructional, maintenance or overhaul purposes.).Applicability
All
Common Information
TASK 72-00-44-220-002 Stage 1 Turbine Nozzle Assembly - Examine The Stage 1 Turbine Nozzle Assembly Rear Face At Interface M-44, Inspection-002
General
The word "Reject" after an interface inspection statement requires that further detailed inspection or repair as applicable, of the affected area be accomplished using data in the applicable ATA section of the part in question. Contact IAE for FAA approved data if the referenced TASK is not in the manual.
Refer to TASK 72-00-00-200-001 (examine the modular/non-modular interfaces) before you do this TASK.
The policy that is necessary for inspection is given in the SPM TASK 70-20-01-200-501.
Installation of modules that are near the maximum interface limits can result in decreased module run times.
Use a bright light and a 3X magnifying glass to find surface cracks.
Preliminary Requirements
Pre-Conditions
NONESupport Equipment
NONEConsumables, Materials and Expendables
NONESpares
NONESafety Requirements
NONEProcedure
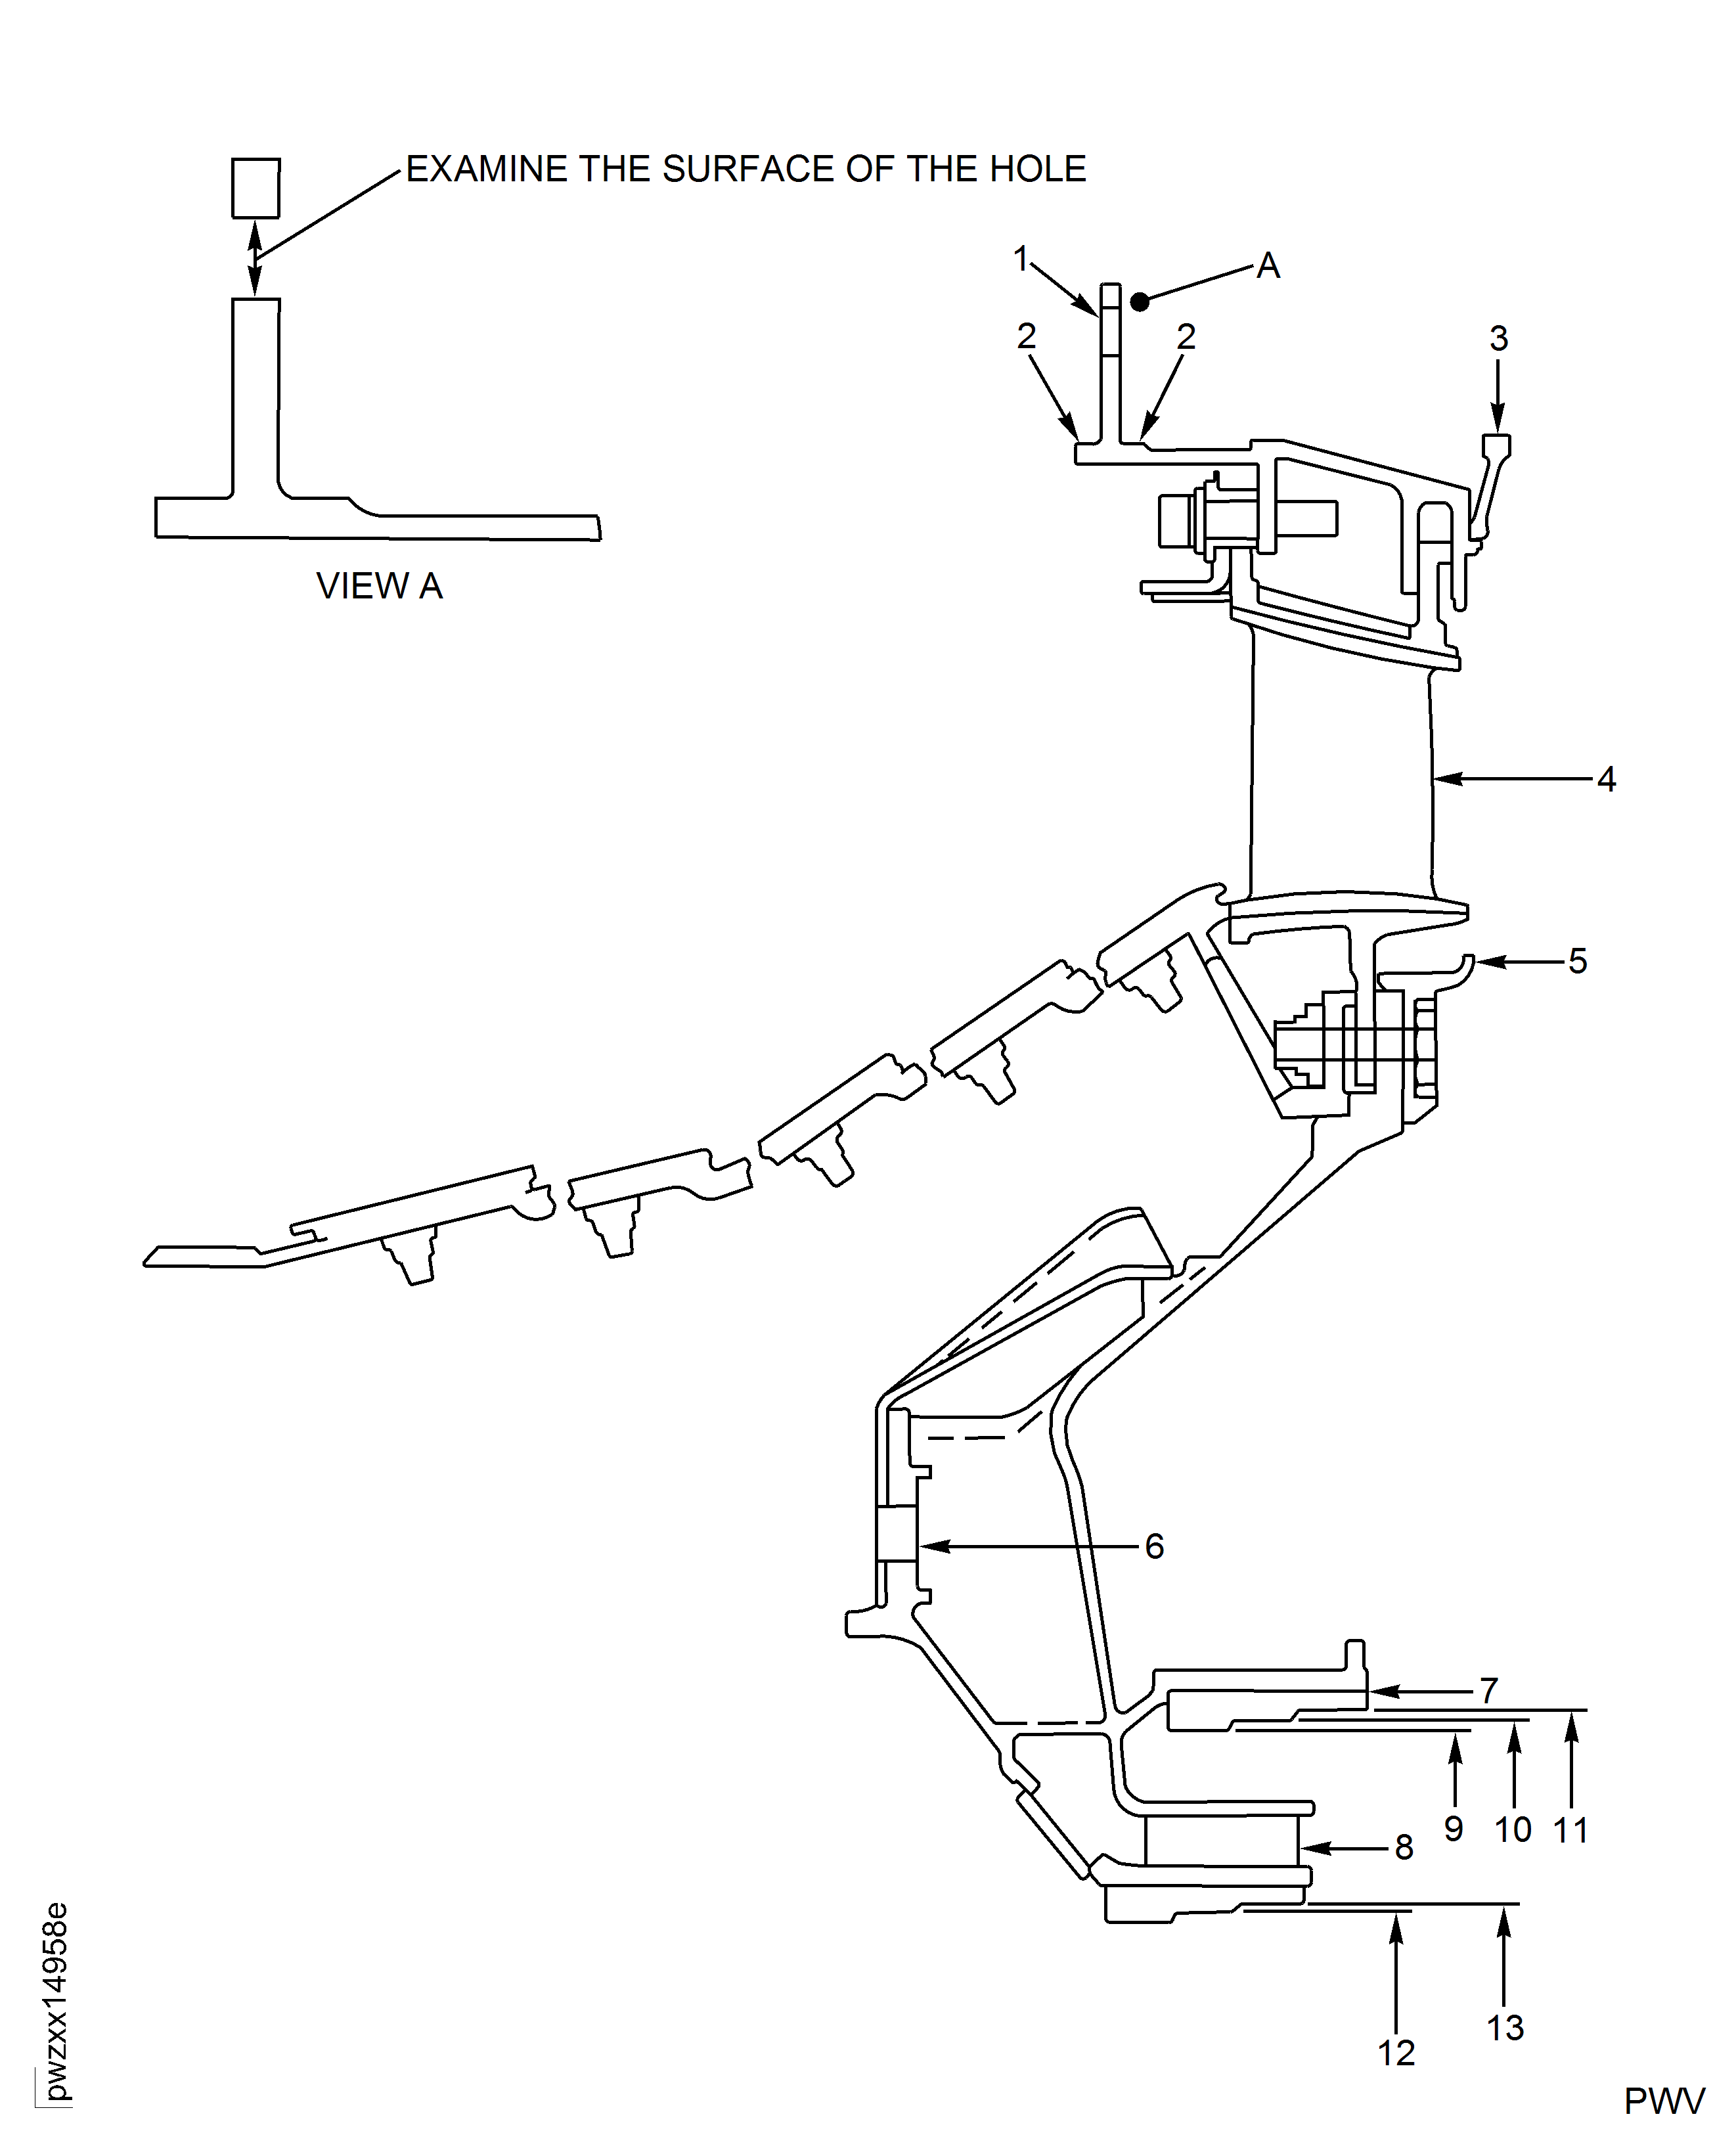
Refer to Figure.
SUBTASK 72-00-44-220-068 Visually Examine the Support Assembly Outer Flange Bolt Holes at Location 1
Refer to Figure.
Clean the bolt holes per SPM TASK 70-11-26-300-503 (PW equivalent SPOP 208).
Perform local FPI per SPM TASK 70-23-05-230-501 (high sensitivity) (or equivalent PW SPOP 70).
Examine the flange bolt holes carefully.
Reject.
If you find any indication.
SUBTASK 72-00-44-220-084 Examine the Support Assembly Outer Flange Bolt Holes at Location 2
Refer to Figure.
SUBTASK 72-00-44-220-069 Visually Examine the Support Assembly Front and Rear of the Outer Flange Area at Location 2
Refer to Figure.
SUBTASK 72-00-44-220-070 Visually Examine the Rear Turbine Seal of the Stage 1 Turbine Nozzle Assembly at Location 3
Refer to Figure.
Concave or convex side axial cracks up to 1.500 in. (38.100 mm) long and/or concave or convex side radial cracks up to 1.500 in. (38.100 mm) long. All cracks must be less than 0.050 in. (1.270 mm) wide and must not have connected loop cracks more than 0.400 in. (10.160 mm) long or look like this will occur
Trailing edge burns less than 25 percent of chord length from the trailing edge and less than 0.500 in. (12.700 mm) (five cooling slots) in width except as given in Step.
SUBTASK 72-00-44-220-071 Visually Examine the Stage 1 Turbine Vanes at Location 4
Refer to Figure.
SUBTASK 72-00-44-220-072 Visually Examine the Duct Segment at Location 5
Refer to Figure.
SUBTASK 72-00-44-220-073 Visually Examine the Bolt Holes of the Cooling Duct at Location 6
Refer to Figure.
SUBTASK 72-00-44-220-075 Visually Examine the Cooling Holes of the Cooling Duct at Location 8
Refer to Figure.
SUBTASK 72-00-44-220-076 Measure the Outer Seal Land Diameters at Locations 9, 10 and 11
Refer to Figure.
SUBTASK 72-00-44-220-077 Measure the Inner Seal Land Diameters at Locations 12 and 13
Figure: Locations at Interface M-44
Locations at Interface M-44

