Export Control
EAR Export Classification: Not subject to the EAR per 15 C.F.R. Chapter 1, Part 734.3(b)(3), except for the following Service Bulletins which are currently published as EAR Export Classification 9E991: SBE70-0992, SBE72-0483, SBE72-0580, SBE72-0588, SBE72-0640, SBE73-0209, SBE80-0024 and SBE80-0025.Copyright
© IAE International Aero Engines AG (2001, 2014 - 2021) The information contained in this document is the property of © IAE International Aero Engines AG and may not be copied or used for any purpose other than that for which it is supplied without the express written authority of © IAE International Aero Engines AG. (This does not preclude use by engine and aircraft operators for normal instructional, maintenance or overhaul purposes.).Applicability
All
Common Information
TASK 72-32-16-200-003 Gearbox Driven Bevel Gearshaft Bearings - Examine The Roller Bearing Assembly, Inspection-003
General
This TASK gives the procedure for the inspection of the roller bearing outer rings. For the other parts of the internal gearbox driven gear assembly, refer to TASK 72-32-16-200-000 (INSPECTION-000).
All Fig/Item numbers in parentheses in the procedure agree with those used in the IPC.
The policy that is necessary for inspection is given in the SPM TASK 70-20-01-200-501.
All the parts must be cleaned before any part is examined. Refer to TASK 72-32-16-100-000 (CLEANING-000).
All the parts must be visually examined for damage, corrosion and wear. Any defects that are not identified in the procedure must be referred to IAE.
For data on the inspection and preservation of bearings, refer to SPM TASK 70-29-01-290-501.
Do not discard any part until you are sure there are no repairs available. Refer to the instructions in repair before a discarded part is used again or oversize parts are installed.
Parts which should be discarded can be held although no repair is available. The repair of a discarded part could be shown to be necessary at a later date.
All the must be examined to make sure that all the repairs have been completed satisfactorily.
The practices and processes referred to in the procedure by the TASK numbers are in the SPM.
Bearings that are rejected must not be repaired if the cause is as follows:
They have become too hot because of a decrease of oil, the inner ring has turned on its hub, a compartment fire, or skidding.
Because of an engine failure.
References
Refer to the SPM for data on these items.
Definitions of Damage, SPM TASK 70-29-01-290-501
Inspection of Parts, SPM TASK 70-20-01-200-501
Some data on these items are contained in this TASK. For more data on these items refer to the SPM.
Method of Testing for Crack Indications
Chemical Processes
Surface Protection
Preliminary Requirements
Pre-Conditions
NONESupport Equipment
| Name | Manufacturer | Part Number / Identification | Quantity | Remark |
|---|---|---|---|---|
| Rockwell A (HRA) tester | LOCAL |
Consumables, Materials and Expendables
NONESpares
NONESafety Requirements
NONEProcedure
Clean the roller bearing. Refer to TASK 72-32-16-100-000 (CLEANING-000).
SUBTASK 72-32-16-110-062 Clean the Roller Bearing (01-240 and 01-500)
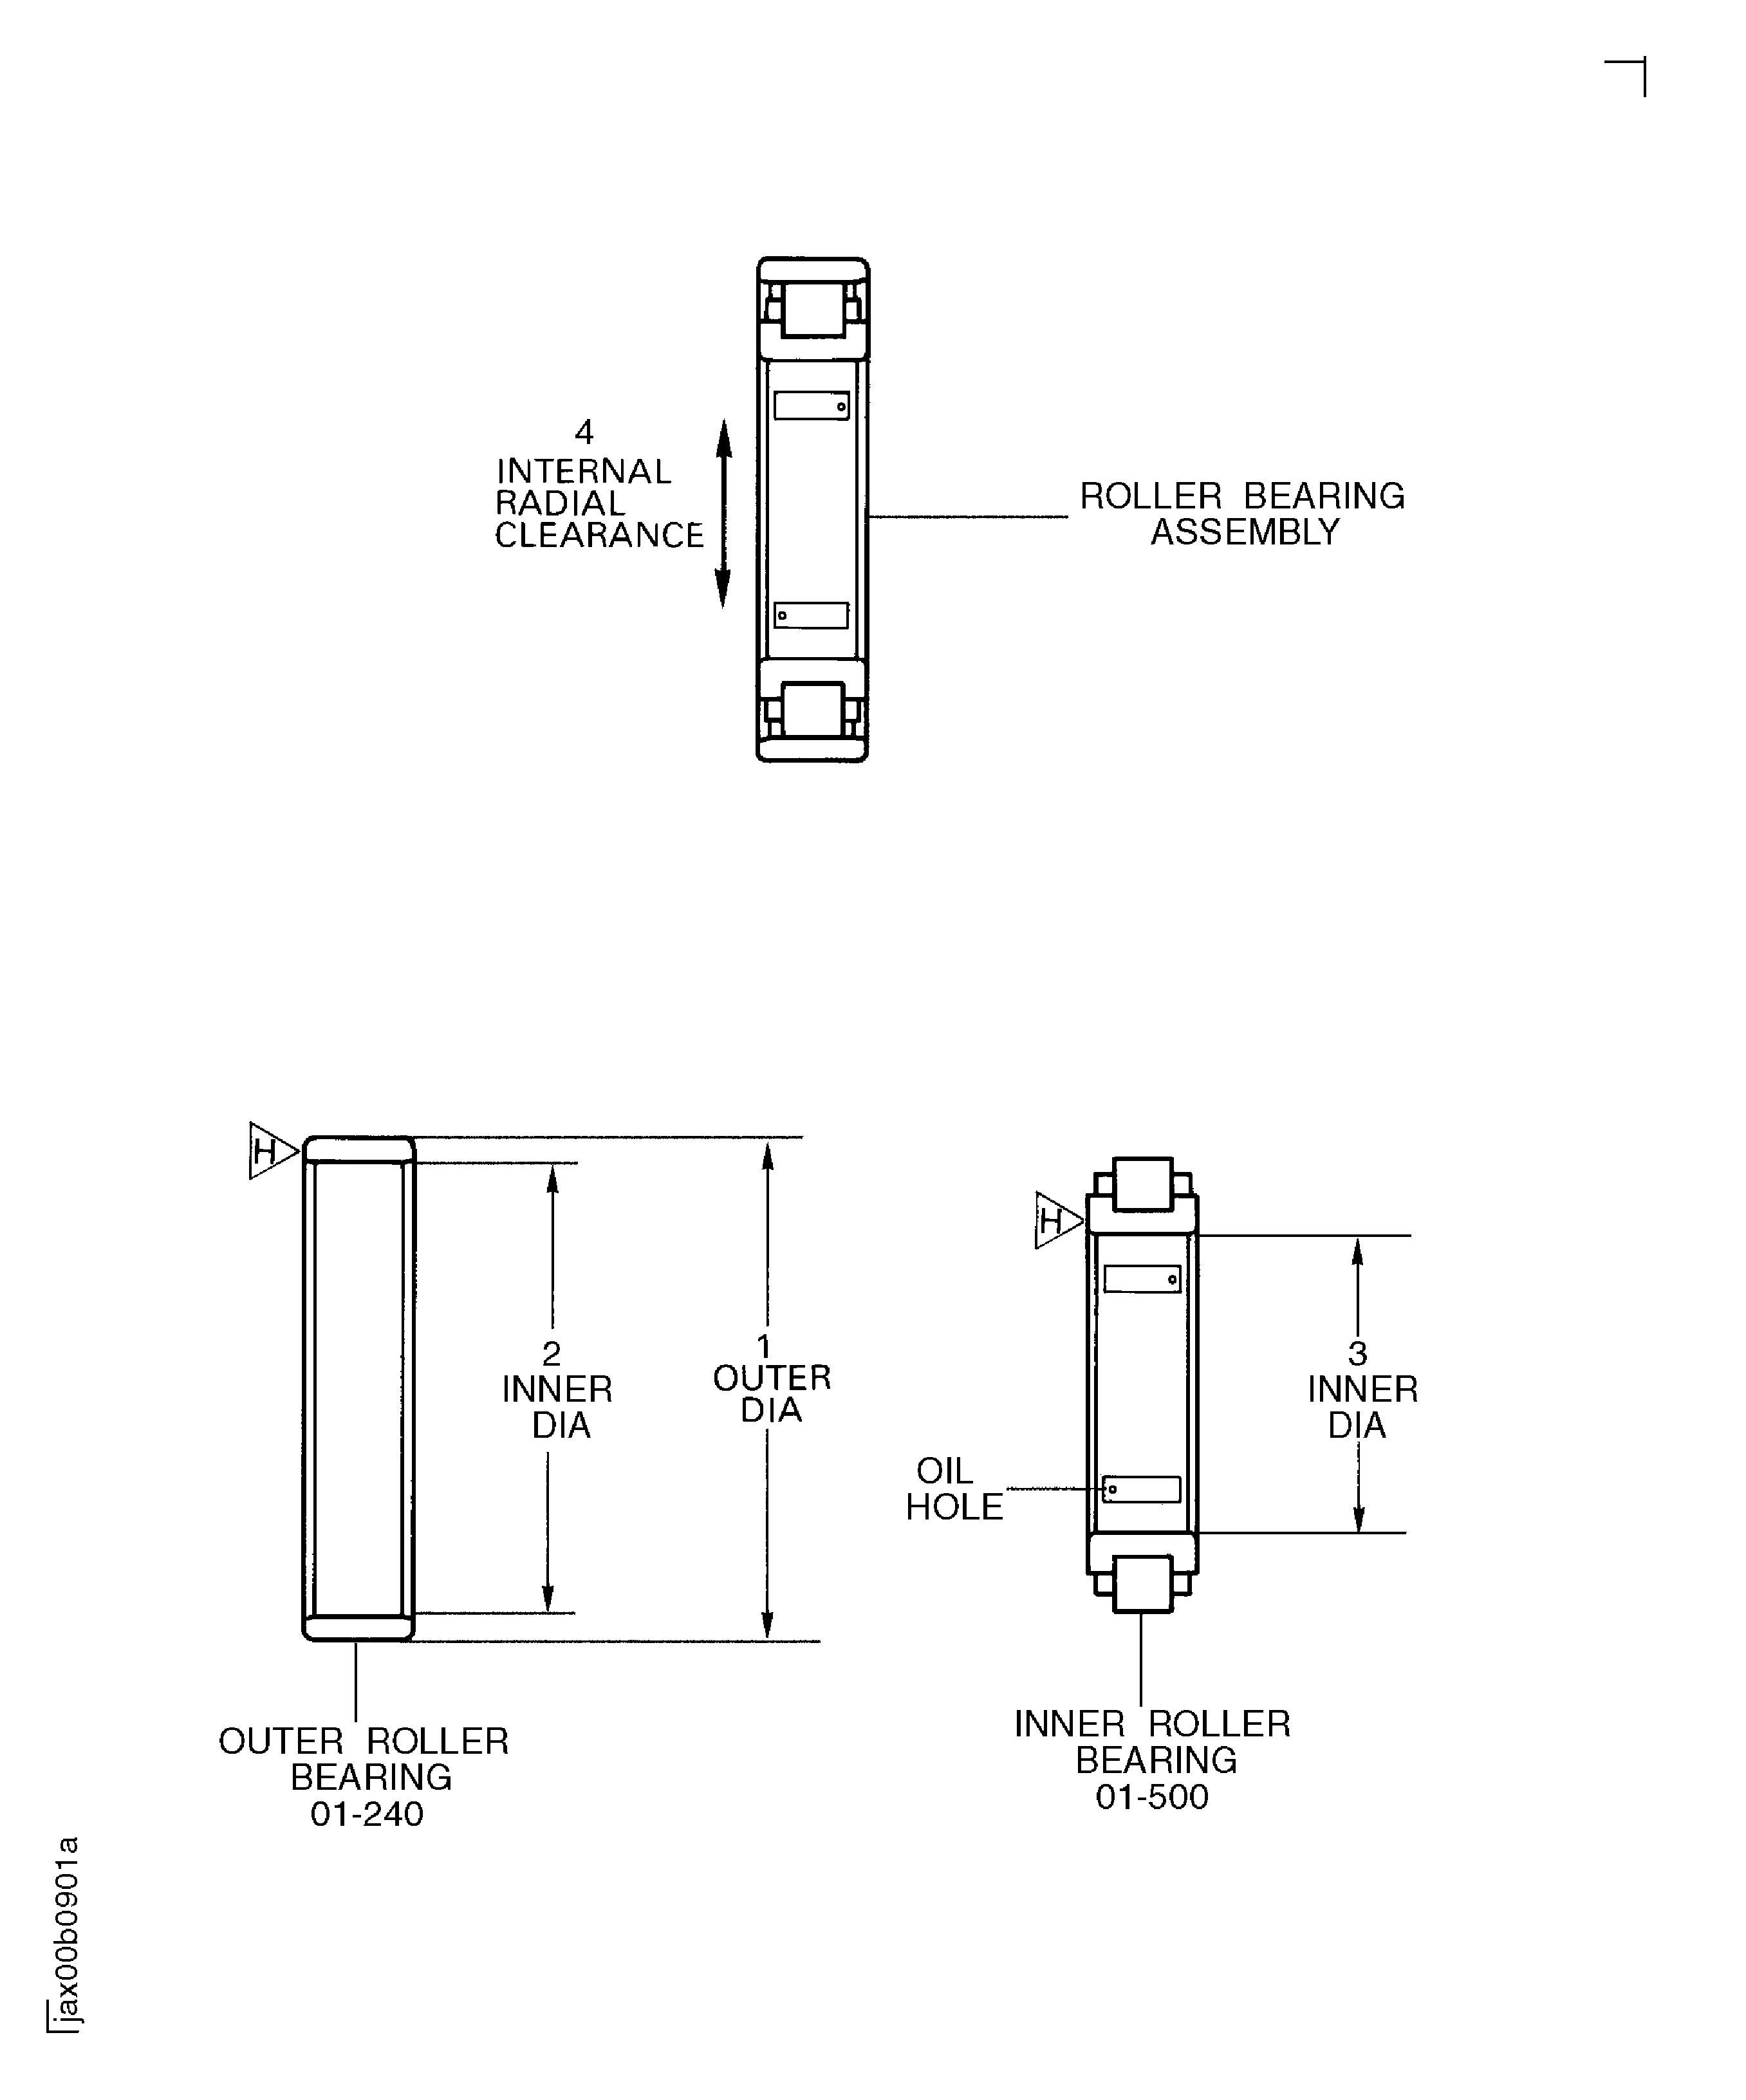
Refer to Figure.
Visually examine, without magnification, the bearing and it's components, checking in particular for defects as shown in the SPM TASK 70-29-01-290-501.
SUBTASK 72-32-16-220-093 Visually Examine the Roller Bearing (01-240 and 01-500) for Surface Damage
Refer to Figure.
SUBTASK 72-32-16-220-094 Dimensionally Examine the Roller Bearing Outer Ring (01-240)
Refer to Figure.
SUBTASK 72-32-16-220-052 Examine the Roller Bearing Inner Assembly (01-500)
Refer to Figure.
Out of the limits in Step
Examine the inner and outer roller bearings to see if they show signs that they have become too hot. Do the test on the side face at location H. Use a Rockwell A (HRA) tester or equivalent.
SUBTASK 72-32-16-220-095 Do a Hardness Test on the Roller Bearing (01-240 and 01-500)
Demagnetize the bearings. Refer to the SPM TASK 70-11-22-300-503.
SUBTASK 72-32-16-110-063 Demagnetize the Roller Bearing (01-240 and 01-500)
Do the applicable preservation procedure. Refer to the SPM TASK 70-29-01-290-501.
SUBTASK 72-32-16-620-054 Do the Preservation Procedure on the Roller Bearing (01-240 and 01-500)
Figure: Roller bearing assembly
Roller bearing assembly

