Export Control
EAR Export Classification: Not subject to the EAR per 15 C.F.R. Chapter 1, Part 734.3(b)(3), except for the following Service Bulletins which are currently published as EAR Export Classification 9E991: SBE70-0992, SBE72-0483, SBE72-0580, SBE72-0588, SBE72-0640, SBE73-0209, SBE80-0024 and SBE80-0025.Copyright
© IAE International Aero Engines AG (2001, 2014 - 2021) The information contained in this document is the property of © IAE International Aero Engines AG and may not be copied or used for any purpose other than that for which it is supplied without the express written authority of © IAE International Aero Engines AG. (This does not preclude use by engine and aircraft operators for normal instructional, maintenance or overhaul purposes.).Applicability
All
Common Information
TASK 72-41-12-300-016 HPC Stage 9 - 12 Drum Disk - Blend Repair On The Front Face, Repair-016 (VRS6087)
Effectivity
FIG/ITEM | PART NO. | |
|---|---|---|
01-600 | 6A4131 | Assembly A |
01-600 | 6A4156 | Assembly B |
01-600 | 6A6546 | Assembly C |
01-600 | 6A7545 | Assembly A |
01-600 | 6A7546 | Assembly C |
01-600 | 6A7547 | Assembly B |
01-600 | 6A7574 | Assembly A |
Material of component
PART IDENT | SYMBOL | MATERIAL |
|---|---|---|
HP Compressor stage 9 to 12 disks assembly | QMP | 52 percent Nickel, 19 percent Chromium, 18 percent Iron and 5 percent Niobium |
General
This Repair must only be done when the instruction to do so is given in TASK 72-41-12-200-000 (INSPECTION-000).
This Repair permits the removal of damaged material from the Zone(s) identified on the front face of the HP Compressor stage 9 to 12 disks assembly.
The shotpeened part of this repair requires to be source demonstrated and can only be done by approved vendors. The shotpeen areas of this repair are "Peening Critical" areas.
This Repair can only be done six times in each of the Zone(s) identified on the front face of the HP Compressor stage 9 to 12 disks assembly.
Local areas of damage (nicks and scratches), up to 0.005 in. (0.127 mm) in depth, may be removed.
Do not discard this component part, until contact is made with the Manager Repair Services at International Aero Engines.
Price and availability.
Refer to International Aero Engines.
Related repairs - none.
Preliminary Requirements
Pre-Conditions
| Action/Condition | Data Module/Technical Publication |
|---|---|
| Make sure that all cleaning and inspection procedures are done before this repair. |
Support Equipment
| Name | Manufacturer | Part Number / Identification | Quantity | Remark |
|---|---|---|---|---|
| IAE 3R19134 Almen test strip | 0AM53 | IAE 3R19134 | ||
| IAE 3R19163 Dummy Disk | 0AM53 | IAE 3R19163 | ||
| IAE 3R19163 Dummy Disk | 0AM53 | IAE 3R19163 | 1 | |
| IAE 3R19164 Dummy Shaft | 0AM53 | IAE 3R19164 | 1 | |
| IAE 3R19167 Fixture | 0AM53 | IAE 3R19167 | 1 | |
| IAE 3R19168 Fixture | 0AM53 | IAE 3R19168 | 1 | |
| IAE 3R19199 Dummy Shaft | 0AM53 | IAE 3R19199 | 1 | |
| IAE 3R19200 Fixture | 0AM53 | IAE 3R19200 | 1 |
Consumables, Materials and Expendables
NONESpares
NONESafety Requirements
NONEProcedure
Only the shot peening part of this Repair requires Source Demonstration. This means that any facility not authorized to shot peen, either utilize the Authorized Repair Vendors listed below or contact the IAE Repair Services Group to determine if a qualification program can be initiated at their facility.
IAE International Aero Engines AG
400 Main Street
M/S 121-10
East Hartford CT 06118
U.S.A.
Attn: Manager Technical Services
The designation by IAE of an Authorized Repair Vendor indicates that the Repair Vendor has demonstrated the necessary capability to enable it to carry out the listed repair work. However, IAE makes no warranties or representations concerning the qualifications or quality standards of the Repair Vendors to carry out the repair work, and accepts no responsibility whatsoever for any work that may be carried out by a Repair Vendor other than when IAE is listed as the Repair Vendor. Authorized Repair Vendors do not act as agents or representatives of IAE.
Authorized Repair Vendors for the shot peening portion of VRS6087 are listed below:
METAL IMPROVEMENT COMPANY INC.
DERBY DIVISION (UK)
ASCOT DRIVE
DERBY DE2 8ST
ENGLAND
METAL IMPROVEMENT COMPANY INC.
145 ADDISON ROAD
WINDSOR
CONNECTICUT
CT06095
U.S.A.
ISHIKAWAJIMA-HARIMA HEAVY INDUSTRIES CO. LTD.
229 TONOGAYA, MIZUHO-MACHI
NISHITAMA-GUN
TOKYO 190-1292
JAPAN
Christchurch Engine Center (CHCEC)
115 Orchard Road
Christchurch International Airport
Christchurch 8051
New Zealand
Repair Facilities
You cannot repair the HP Compressor Stage 9 to 12 disks assembly again if the damaged Zone or Zones has been repaired six times before and the assembly is identified VRS6087/AA5 and/or /AB5.
Visually examine the HP Compressor stage 9 to 12 disks assembly, to tell you if shot peening has been done before in the Zone(s) of the front face.
SUBTASK 72-41-12-220-206-A00 Make Sure the Assembly A can be Repaired
You cannot repair the HP Compressor Stage 9 to 12 disks assembly again if the damaged Zone or Zones has been repaired six times before and the assembly is identified VRS6087/AA5 and/or /AB5.
Visually examine the HP Compressor Stage 9 to 12 disks assembly, to tell you if shot peening has been done before in the Zone(s) of the front face.
SUBTASK 72-41-12-220-206-B00 Make Sure the Assembly B can be Repaired
You cannot repair the HP Compressor stage 9 to 12 disks assembly again if the damaged Zone or Zones has been repaired six times before and the assembly is identified VRS6087/AA5 and/or /AB5.
Visually examine the HP Compressor stage 9 to 12 disks assembly, to tell you if shot peening has been done before in the Zone(s) of the front face.
Reject, refer to Paragraph.
If damage is shown on surface(s) identified AF, AN and/or AR.
SUBTASK 72-41-12-220-206-C00 Make Sure the Assembly C can be Repaired
Refer to SPM TASK 70-35-03-300-501.
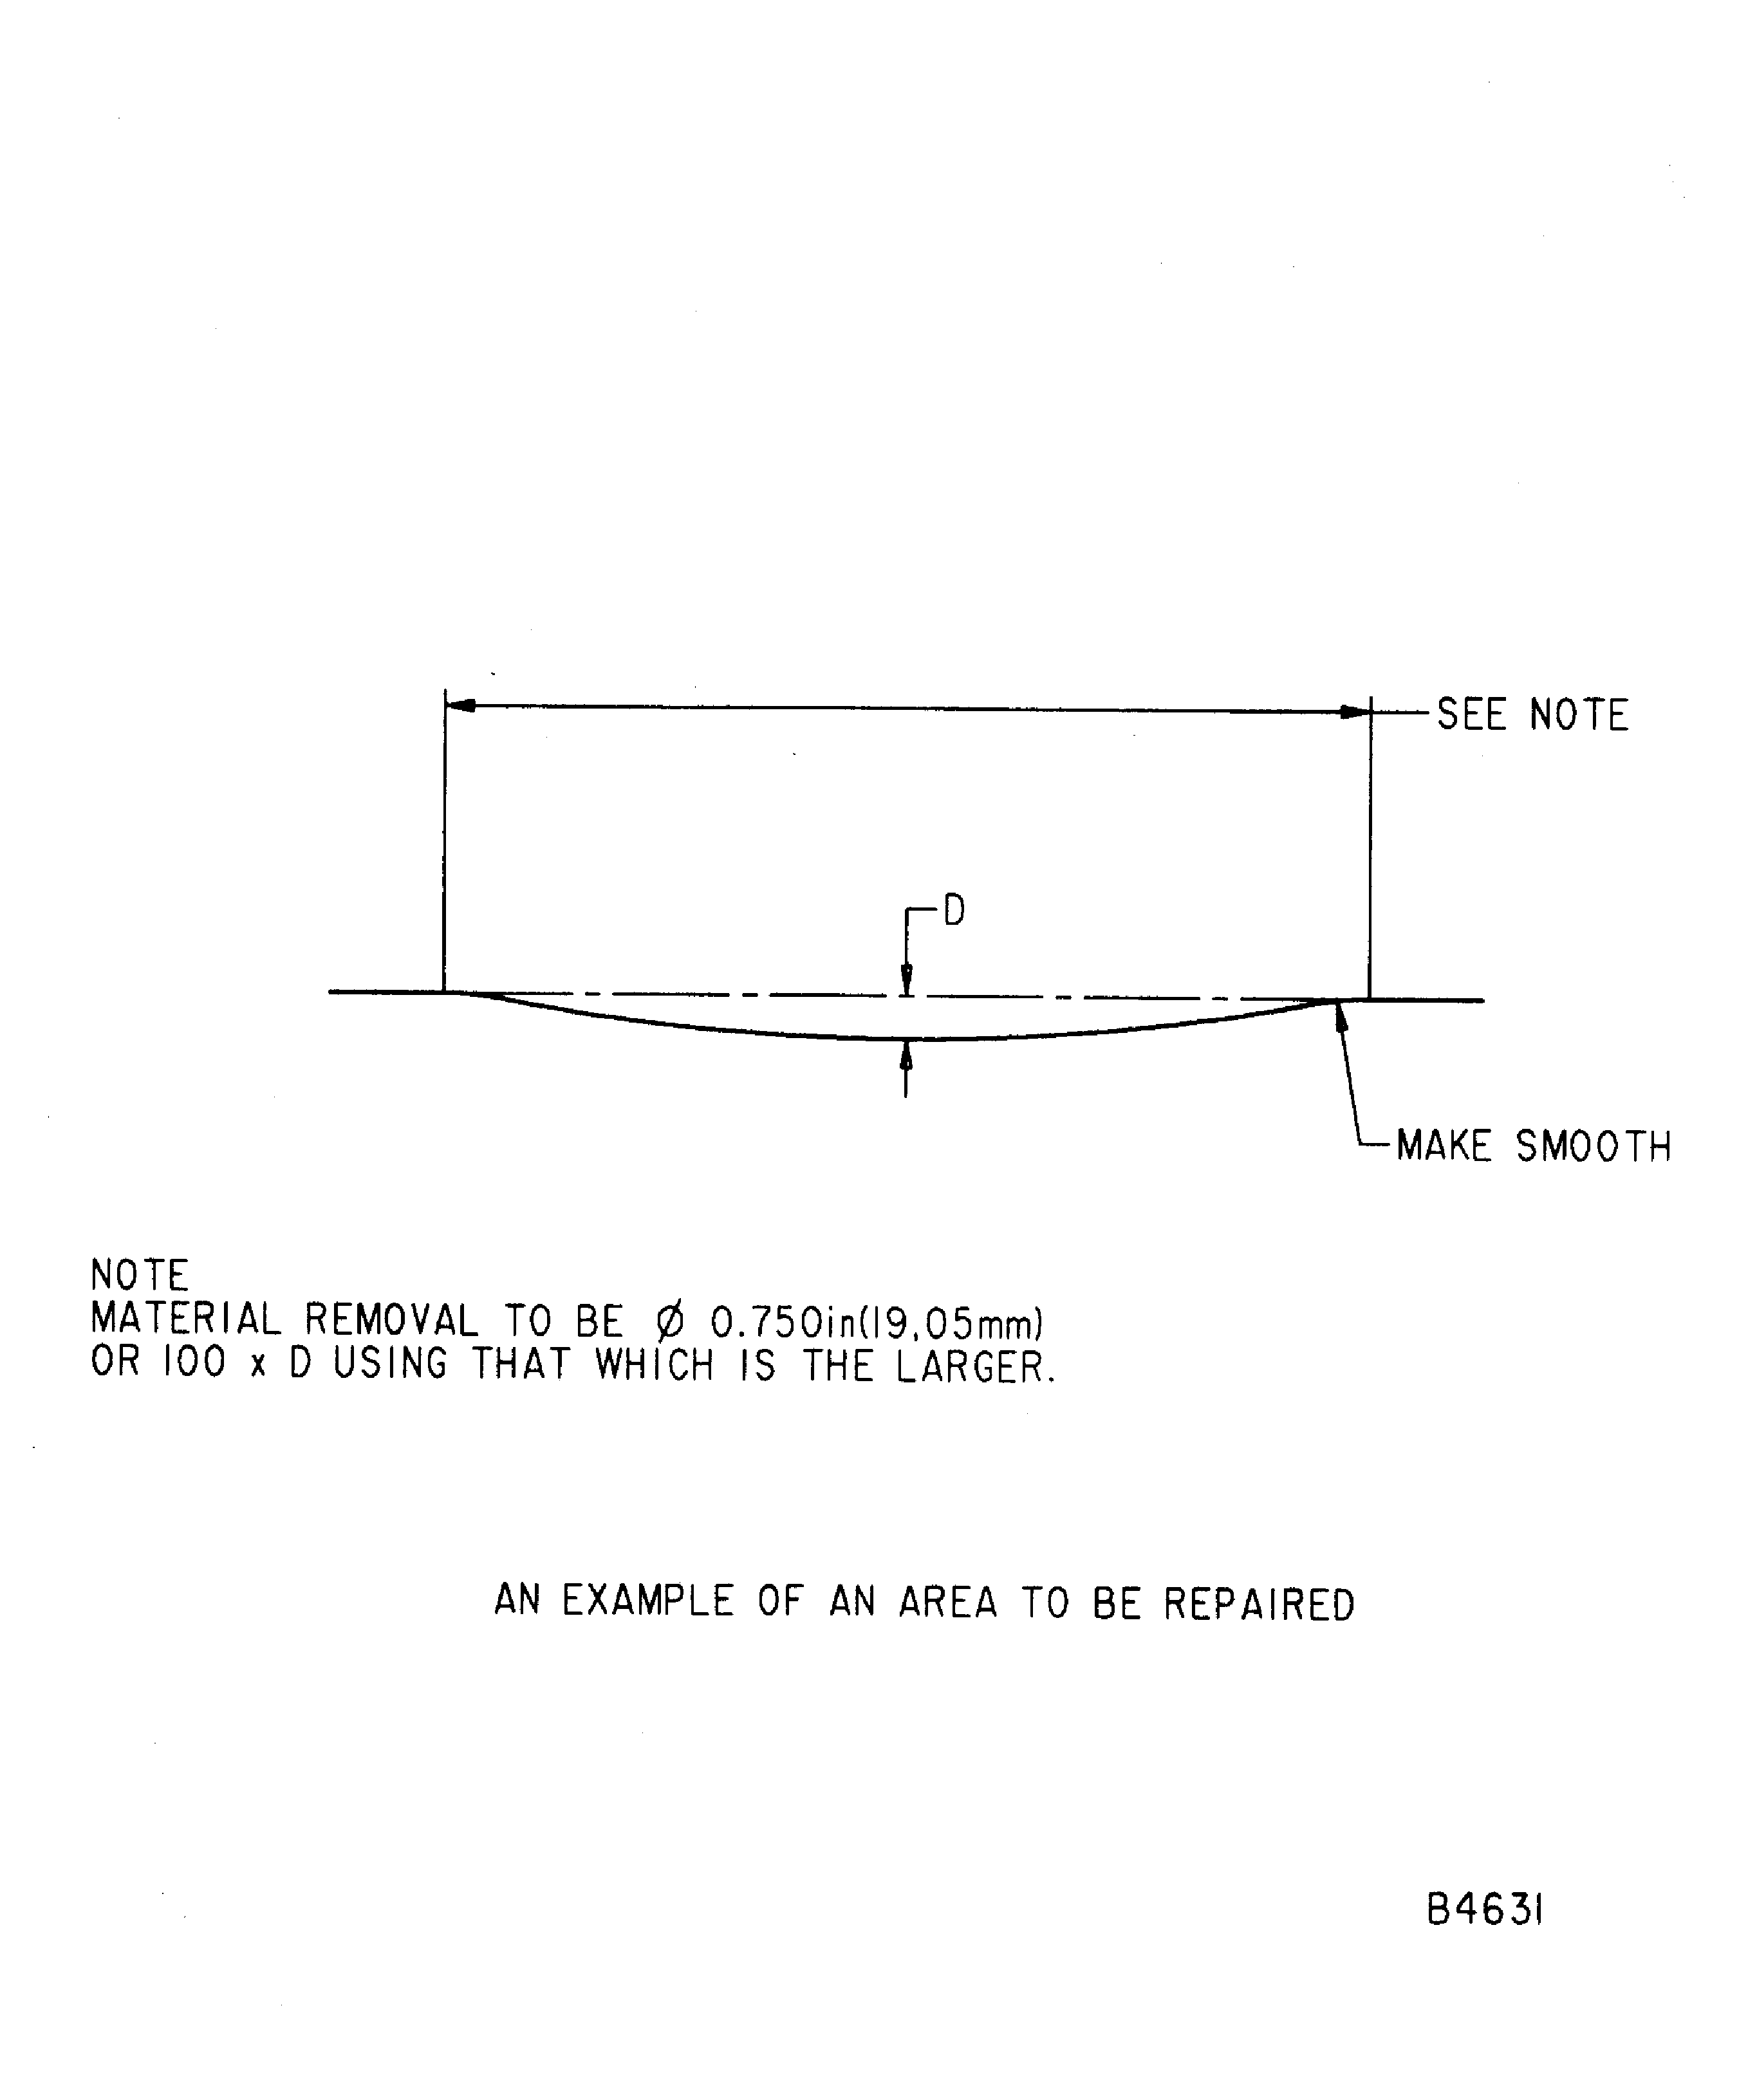
Remove material to two times the depth of damage, up to a maximum of 0.010 in. (0.254 mm) material removed.
NOTE
Keep material removal to the larger limit of 0.750in. (19.05 mm), or 100 X D.Remove the damaged material, from the Zone(s) on the front face, as necessary. Do not remove more than is necessary.
Refer to SPM TASK 70-35-03-300-501.
Make sure all damage marks are completely removed and the area(s) made smooth into the adjacent material.
Remove sharp corners.
Make smooth the repaired area(s).
Refer to SPM TASK 70-35-03-300-501.
Polish the repaired area(s) to remove the scratches and to give a smooth surface finish.
Polish the repaired area(s).
SUBTASK 72-41-12-350-143-A00 Remove the Damaged Area(s), Assembly A
Refer to SPM TASK 70-35-03-300-501.
Remove material to two times the depth of damage, up to a maximum of 0.010 in. (0.254 mm) material removed.
NOTE
Keep material removal to the larger limit of 0.750 in. (19.05 mm), or 100 X D.Remove the damaged material, from the Zone(s) on the front face, as necessary. Do not remove more than is necessary.
Refer to SPM TASK 70-35-03-300-501.
Make sure all damage marks are completely removed and the area(s) made smooth into the adjacent material.
Remove sharp corners.
Make smooth the repaired area(s).
Refer to SPM TASK 70-35-03-300-501.
Polish the repaired area(s) to remove the scratches and to give a smooth surface finish.
Polish the repaired area(s).
SUBTASK 72-41-12-350-143-B00 Remove the Damaged Area(s), Assembly B
Refer to SPM TASK 70-35-03-300-501.
Remove material to two times the depth of damage, up to a maximum of 0.010 in. (0.254 mm) material removed.
Remove the damaged material, from the Zone(s) on the front face, as necessary. Do not remove more than is necessary.
Refer to SPM TASK 70-35-03-300-501.
Make sure all the damaged marks are completely removed and the area(s) made smooth into the adjacent material.
Remove sharp corners.
Make smooth the repaired area(s).
Refer to SPM TASK 70-35-03-300-501.
Polish the repaired area(s) to remove the scratches and to give a smooth surface finish.
Polish the repaired area(s).
SUBTASK 72-41-12-350-143-C00 Remove the Damaged Area(s), Assembly C
Do a local penetrant crack test of the repaired area(s) by the SPM TASK 70-23-05-230-501. Use ultra-high sensitivity. No cracks are permitted.
Do a penetrant crack test of the repaired area(s) by TASK 72-41-12-200-000 and applicable part number. No cracks are permitted.
Do a penetrant crack test of the repaired area(s) by one of the methods that follow.
SUBTASK 72-41-12-230-148 Do a Crack Test
Vibration peen adjacent to the assembly number. Refer to the SPM TASK 70-09-00-400-501, SUBTASK 70-09-00-400-001.
SUBTASK 72-41-12-350-144-A00 Identify the Repair, Assembly A
Vibration peen adjacent to the assembly number. Refer to the SPM TASK 70-09-00-400-501, SUBTASK 70-09-00-400-001.
SUBTASK 72-41-12-350-144-B00 Identify the Repair, Assembly B
Vibration peen adjacent to the assembly number. Refer to the SPM TASK 70-09-00-400-501, SUBTASK 70-09-00-400-001.
SUBTASK 72-41-12-350-144-C00 Identify the Repair, Assembly C
Refer to Step.
Find the repaired area(s) to be shot peened.
Refer to SPM TASK 70-38-13-380-501.
Mask all identification marks and symbols.
Mask the full assembly but for the repaired Zone(s), in the front face, as necessary, which have to be shot peened.
Refer to SPM TASK 70-38-13-380-501.
Use IAE 3R19134 Almen test strip 10 off, IAE 3R19163 Dummy Disk 1 off, IAE 3R19164 Dummy Shaft 1 off, IAE 3R19167 Fixture 1 off, IAE 3R19168 Fixture 1 off and/or approved Vendors in 4. Repair Facilities, Para B.
Use S-110, CW-14 or SCW-14 shot size and an intensity of 6A to 9A.
A coverage of 100 percent must be applied.
Use controlled shot peening equipment.
Shot-Peening Data
Machine type
Metal shot-peen
Process type/mode
Dry/auto
Shot type
Use S-110, CW-14 or SCW-14 shot size and intensity of 6A - 9A
NOTE
For information, the table speed, oscillation speed, height, type, air pressure, nozzle type/diameter and work distance may change if different equipment is being used. You must achieve the full coverage and almen intensity.
Shotpeen the repaired area(s) in the front face.
SUBTASK 72-41-12-380-094-A00 ShotPeen the Repaired Area(s), Assembly A
Refer to Step.
Find the repaired area(s) to be shot peened.
Refer to SPM TASK 70-38-13-380-501.
Mask all identification marks and symbols.
Mask the full assembly but for the repaired Zone(s), in the front face, as necessary, which have to be shot peened.
Refer to SPM TASK 70-38-13-380-501.
Use IAE 3R19134 Almen test strip 10 off, IAE 3R19163 Dummy Disk 1 off, IAE 3R19164 Dummy Shaft 1 off, IAE 3R19167 Fixture 1 off, IAE 3R19168 Fixture 1 off and/or approved Vendors in 4. Repair Facilities, Para B.
Use S-110, CW-14 or SCW-14 shot size and an intensity of 6A to 9A.
A coverage of 100 percent must be applied.
Use controlled shot peening equipment.
Shot-Peening Data
Machine type
Metal shot-peen
Process type/mode
Dry/auto
Shot type
Use S-110, CW-14 or SCW-14 shot size and intensity of 6A - 9A
NOTE
For information, the table speed, oscillation speed, height, type, air pressure, nozzle type/diameter and work distance may change if different equipment is being used. You must achieve the full coverage and almen intensity.
Shotpeen the repaired area(s) in the front face.
SUBTASK 72-41-12-380-094-B00 ShotPeen the Repaired Area(s), Assembly B
Refer to Step.
Find the repaired area(s) to be shot peened.
Refer to SPM TASK 70-38-13-380-501.
Mask all identification marks and symbols.
Seal the full assembly but for the repaired Zone(s), in the front face, as necessary, which have to be shot peened.
Refer to SPM TASK 70-38-13-380-501.
Use IAE 3R19134 Almen test strip 11 off, IAE 3R19163 Dummy Disk 1 off, IAE 3R19167 Fixture 1 off, IAE 3R19199 Dummy Shaft 1 off, IAE 3R19200 Fixture 1 off and/or approved Vendors in 4. Repair Facilities, Para B.
Use S-110, CW-14 or SCW-14 shot size and an intensity of 6A to 9A.
A coverage of 100 percent must be applied.
Use controlled shot peening equipment.
Shot-Peening Data
Machine type
Metal shot-peen
Process type/mode
Dry/auto
Shot type
Use S-110, CW-14 or SCW-14 shot size and intensity of 6A - 9A
NOTE
For information, the table speed, oscillation speed, height, type, air pressure, nozzle type/diameter and work distance may change if different equipment is being used. You must achieve the full coverage and almen intensity.
Shotpeen the repaired area(s) in the front face.
SUBTASK 72-41-12-380-094-C00 ShotPeen the Repaired Area(s), Assembly C
Figure: Repair details and dimensions - Assembly A, Assembly B and Assembly C
Repair details and dimensions - Assembly A, Assembly B and Assembly C
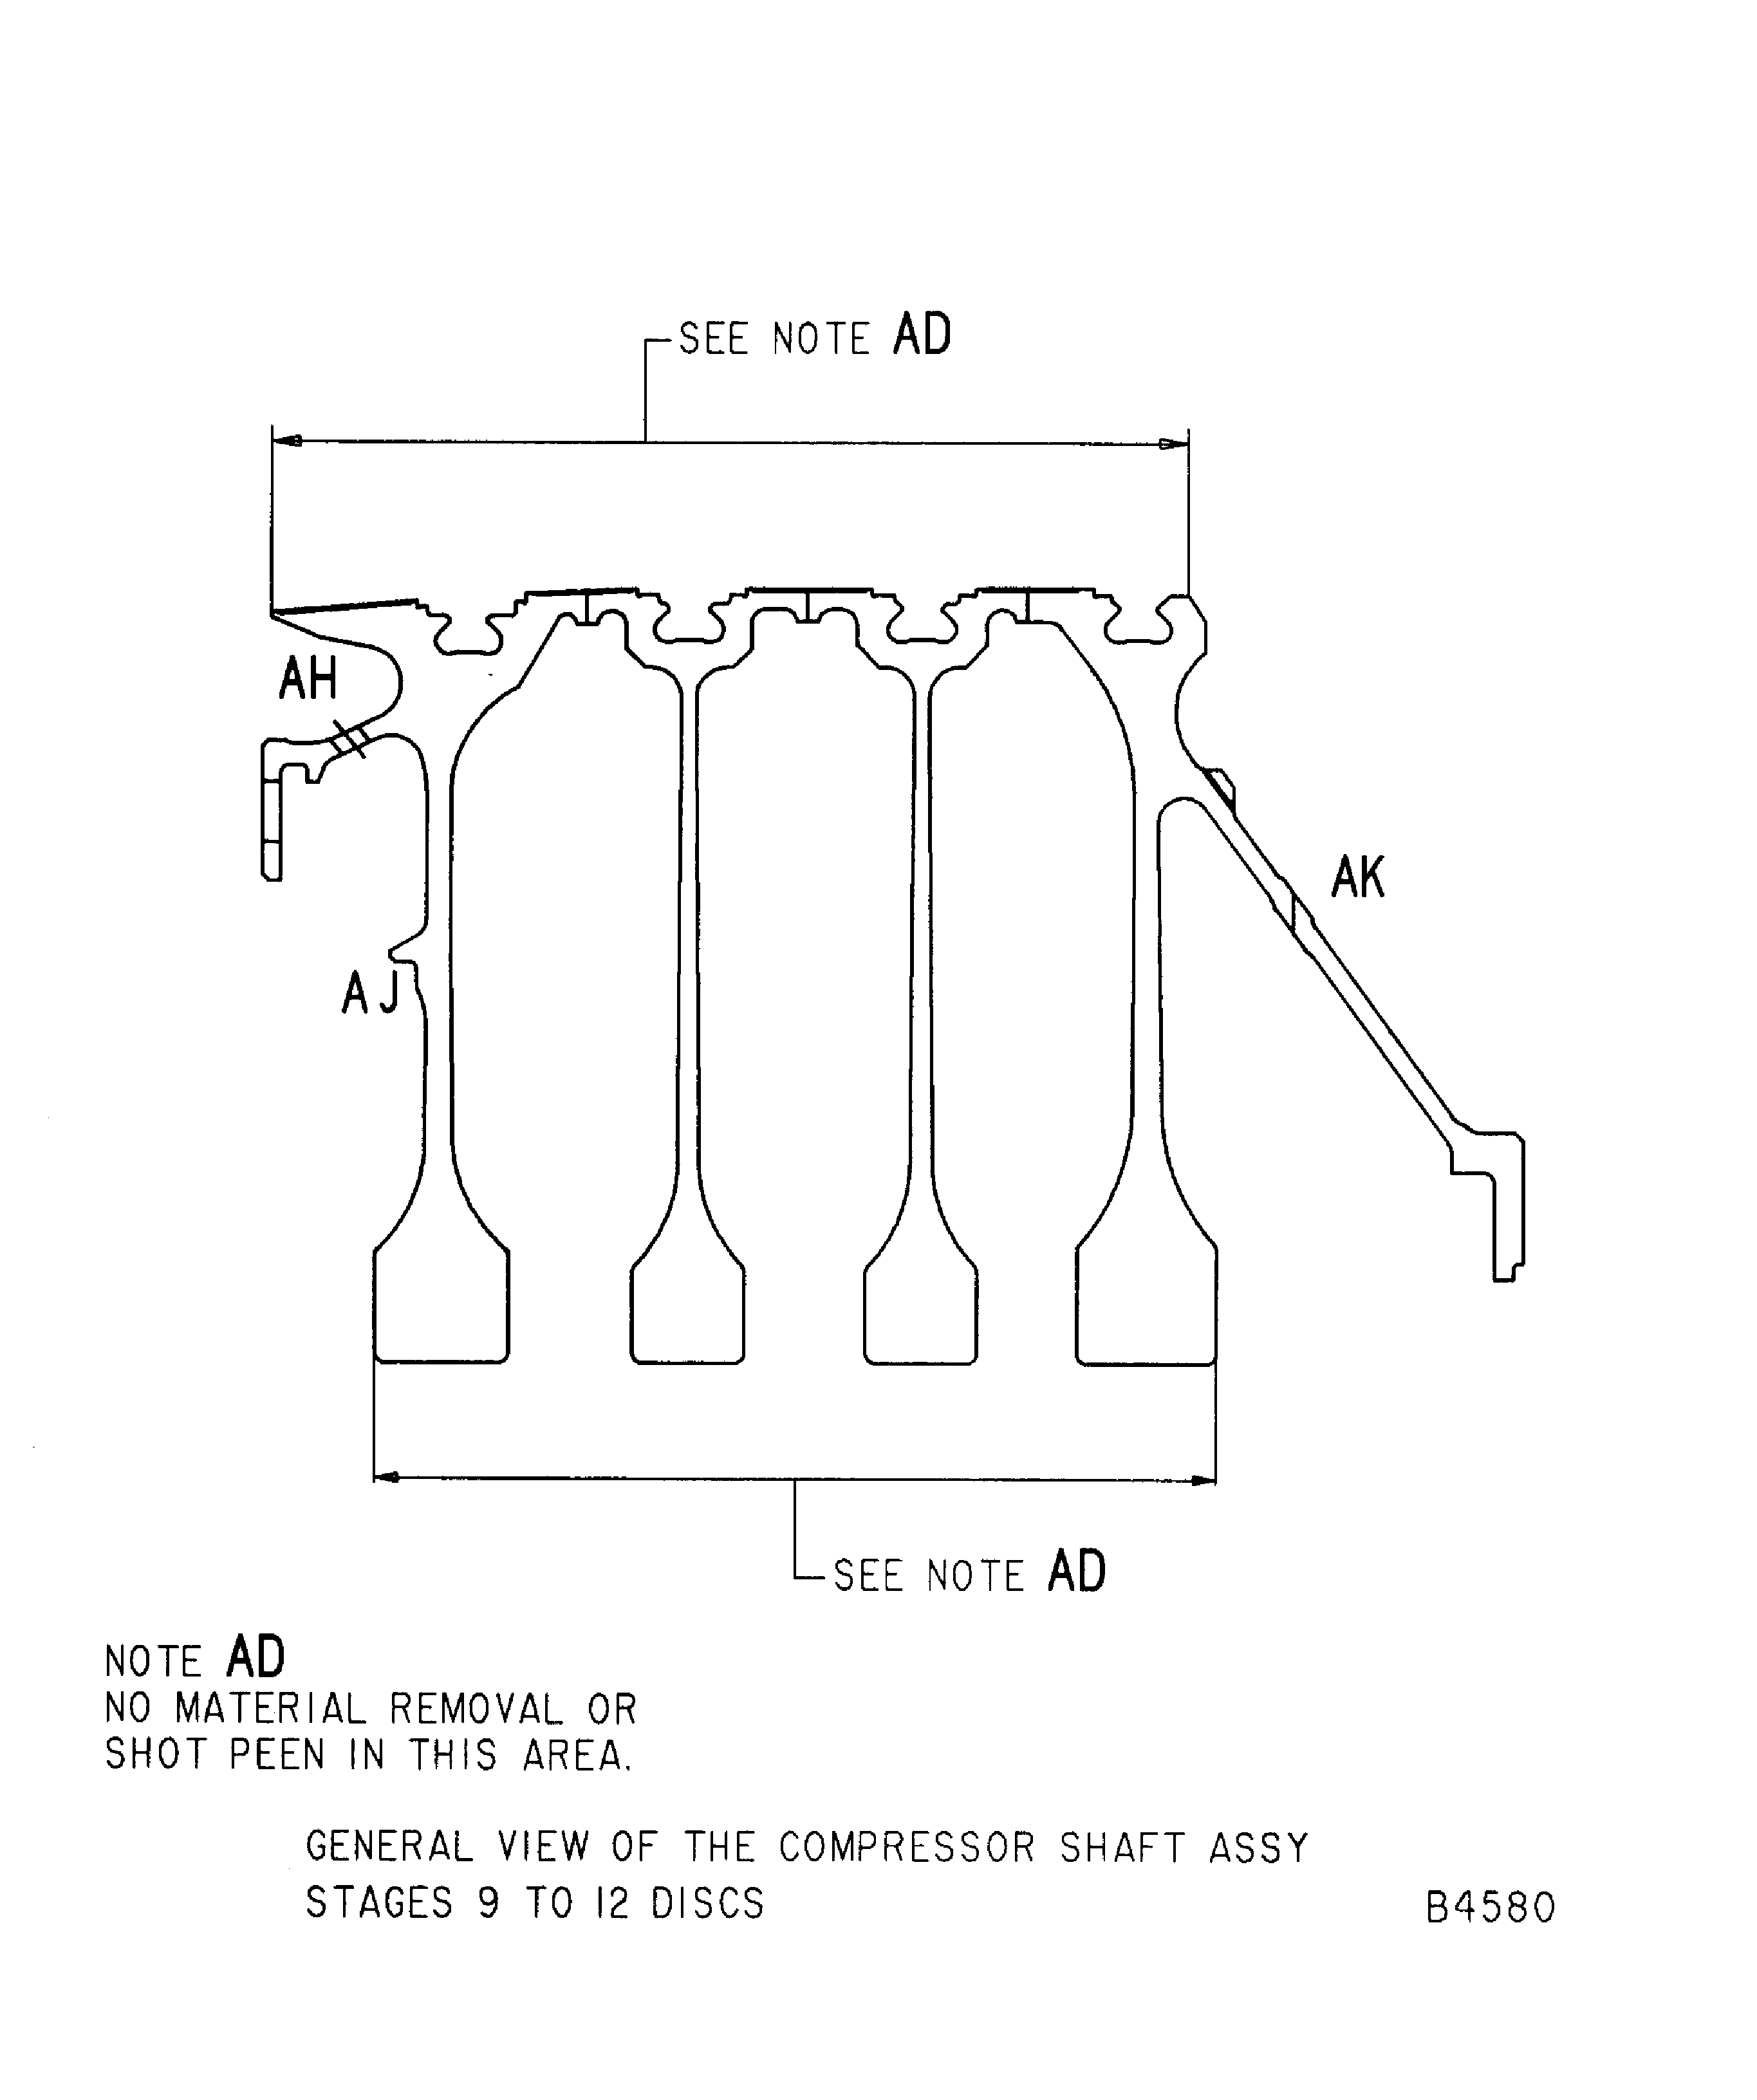
Figure: Repair details and dimensions - Assembly A, Assembly B and Assembly C
Repair details and dimensions - Assembly A, Assembly B and Assembly C
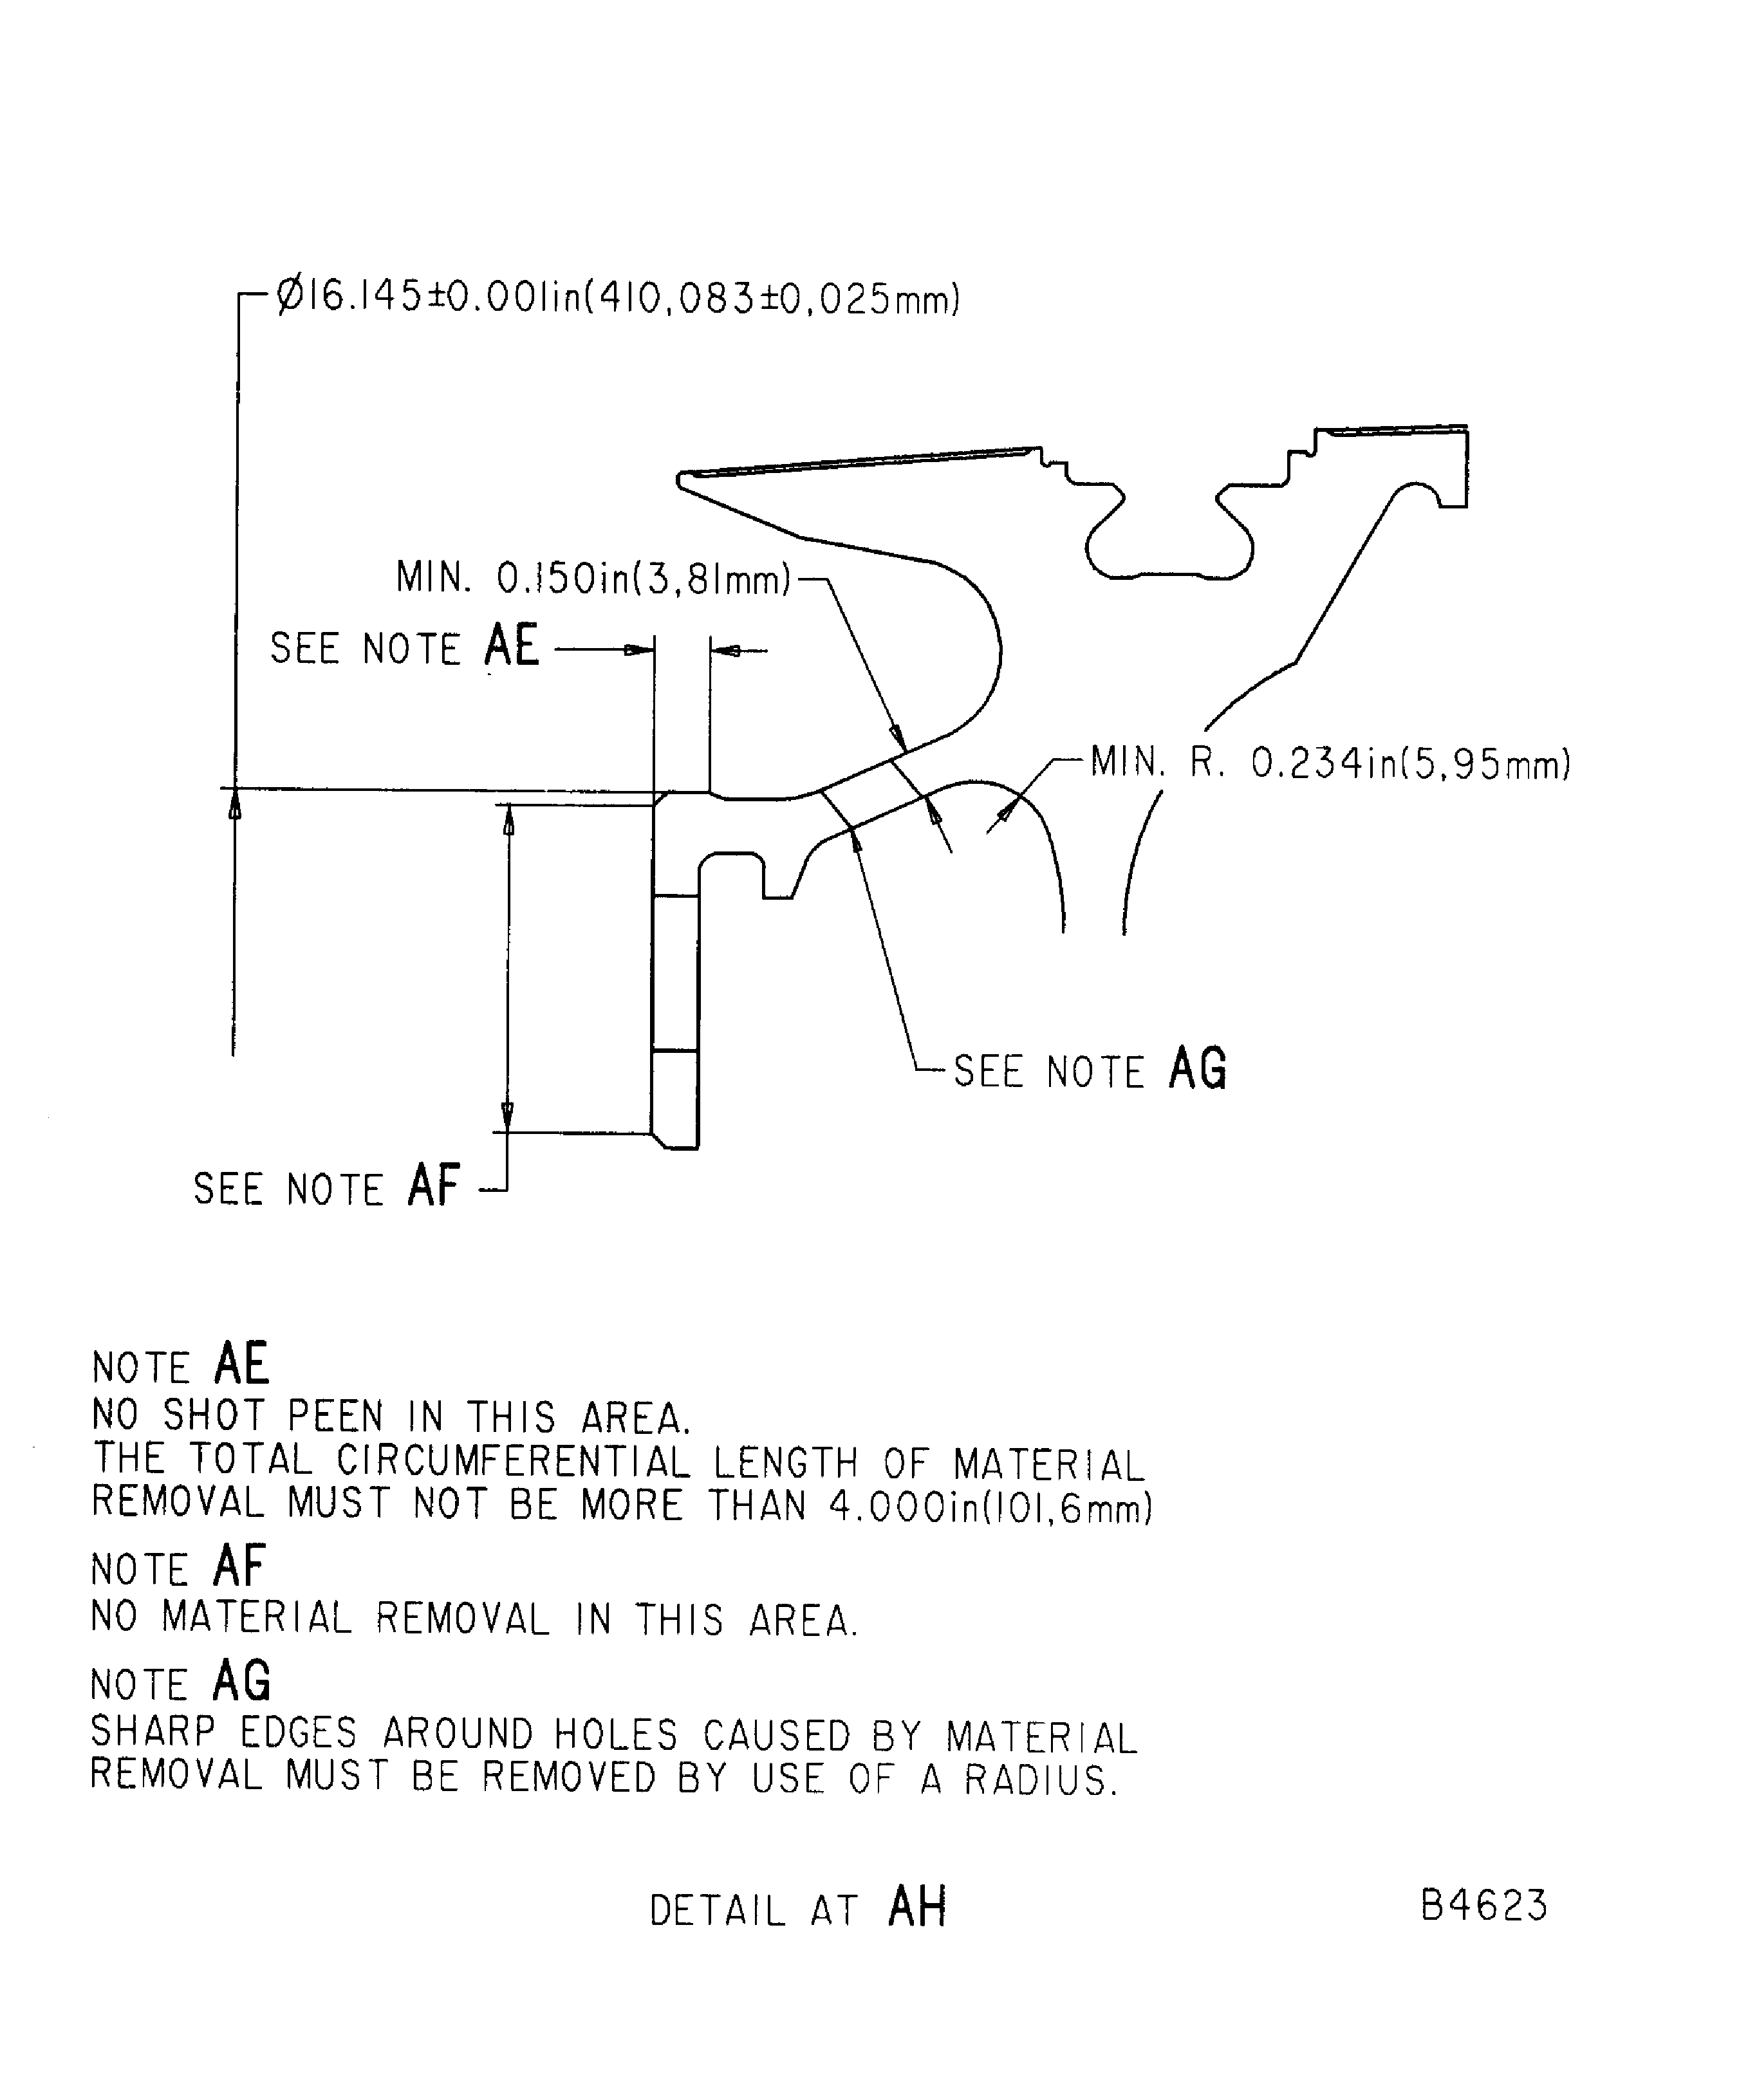
Figure: Repair details and dimensions - Assembly A, Assembly B and Assembly C
Repair details and dimensions - Assembly A, Assembly B and Assembly C
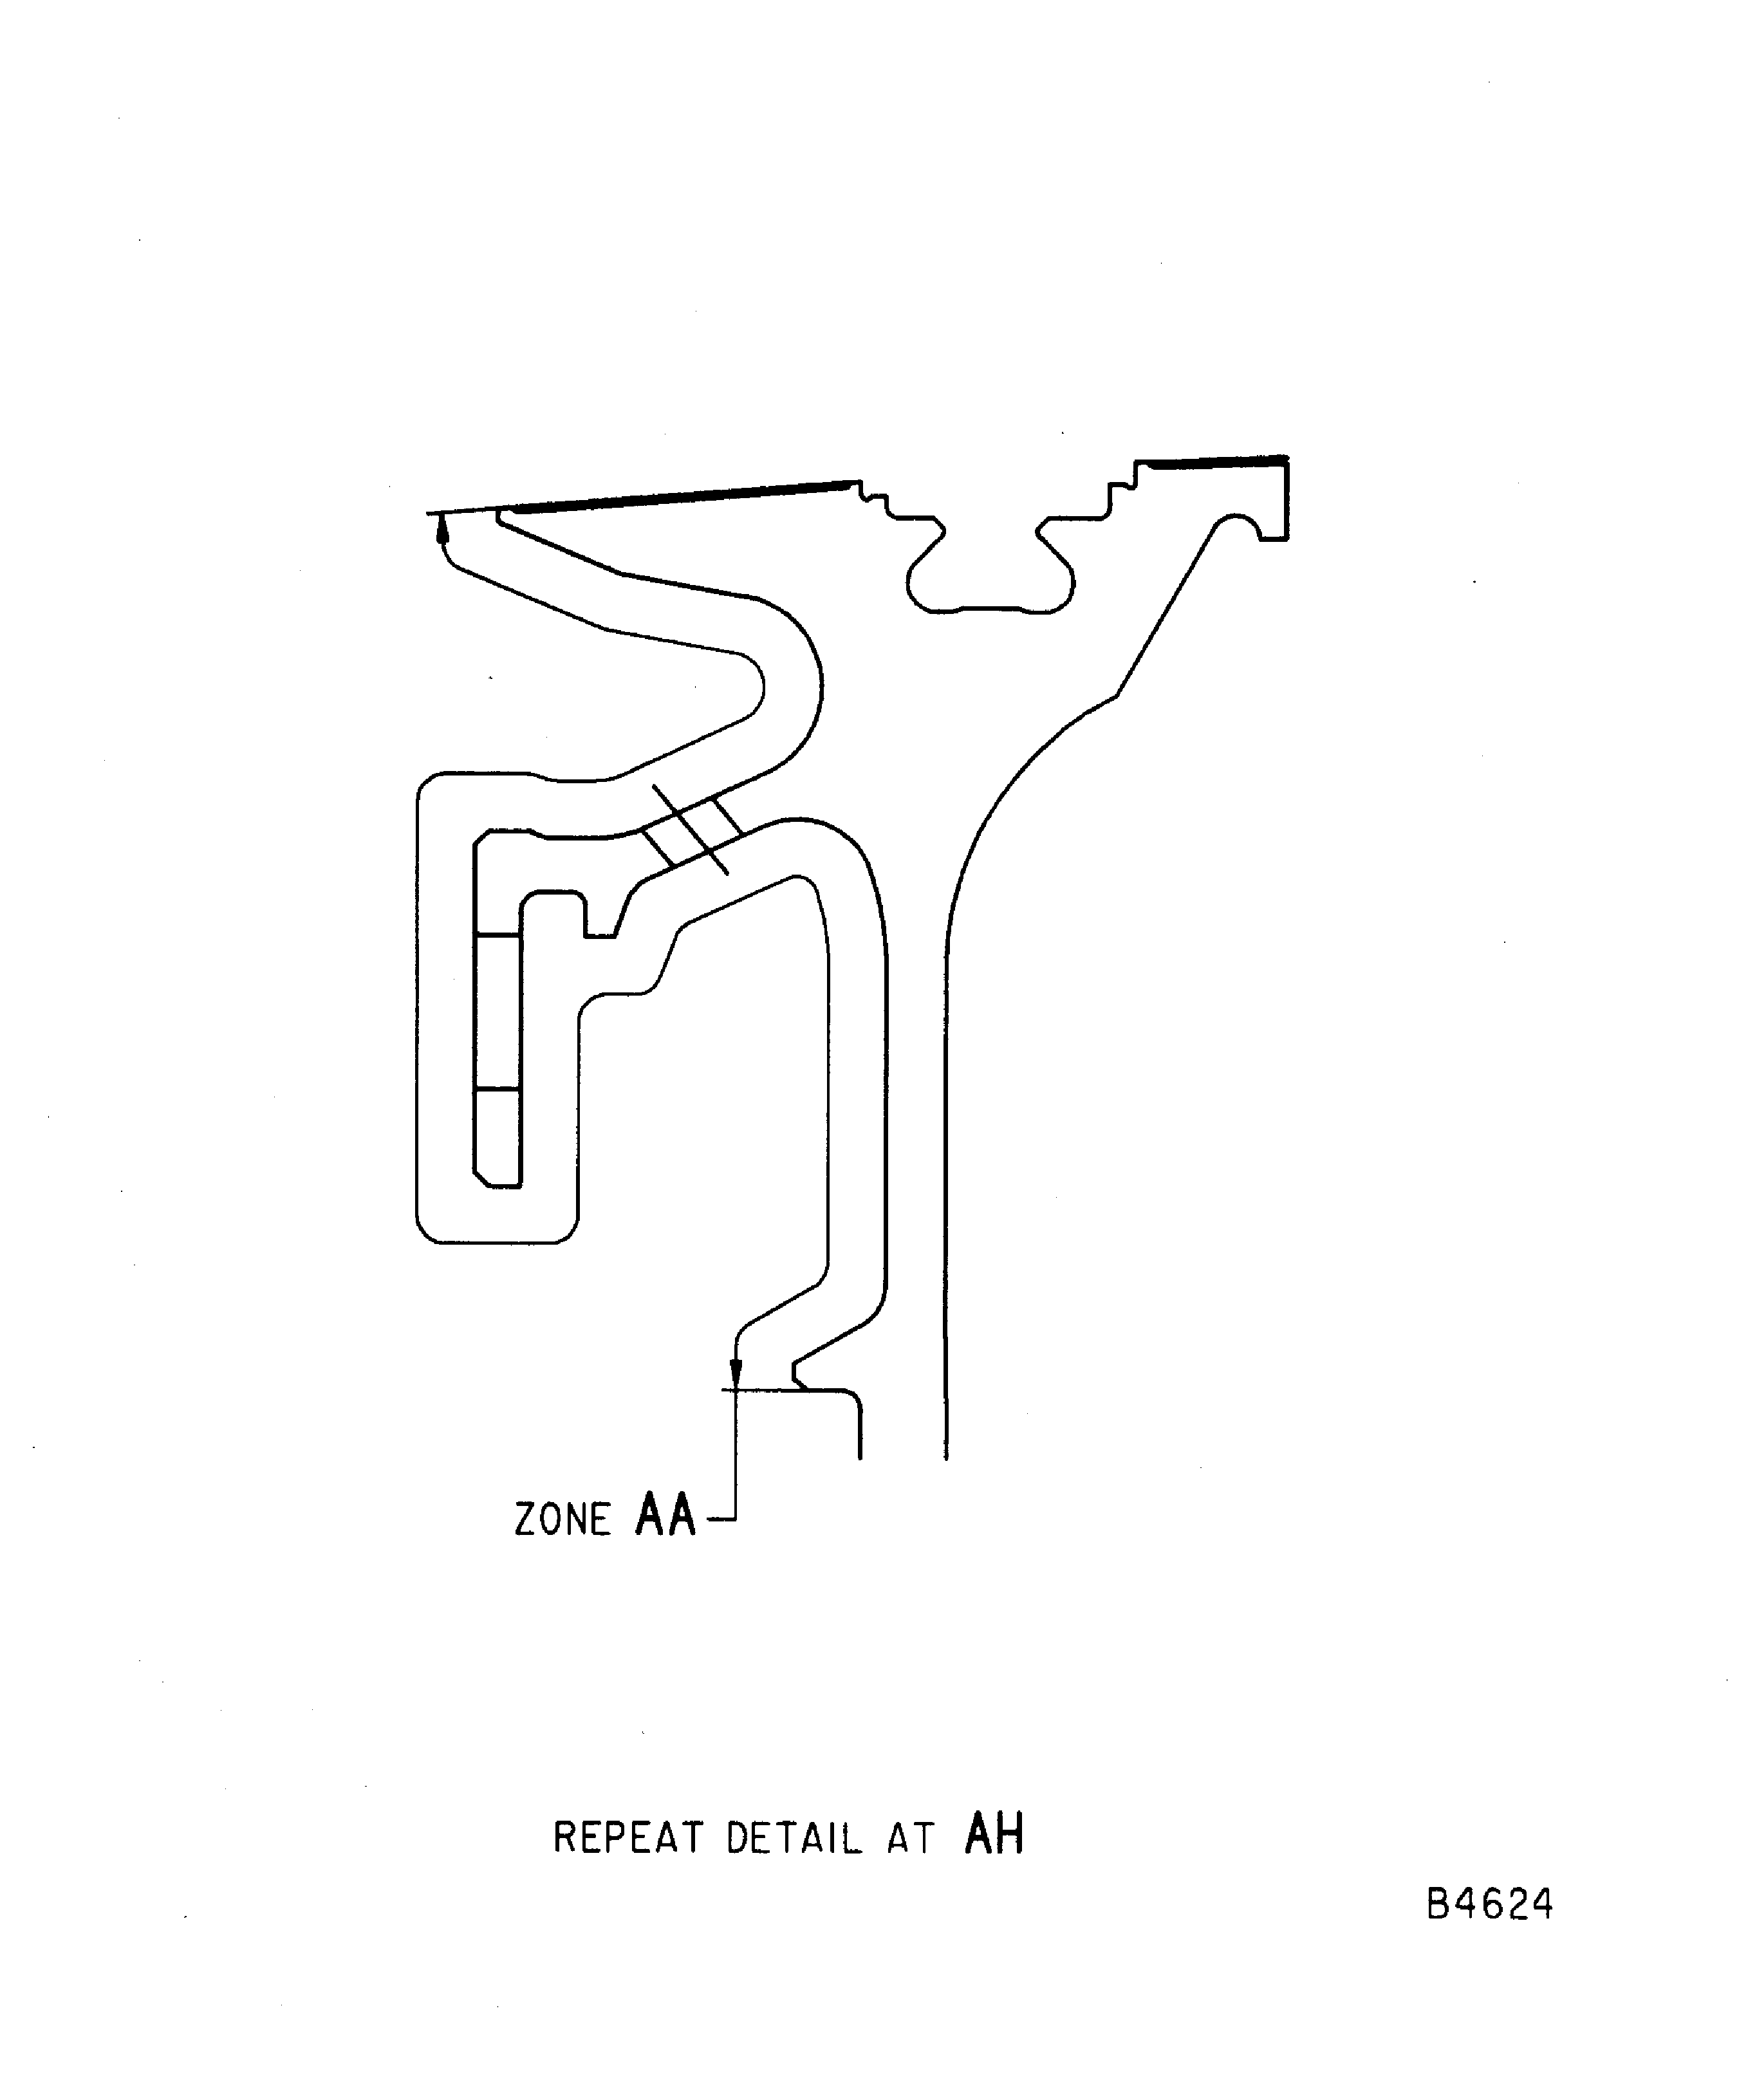
Figure: Repair details and dimensions - Assembly A, Assembly B and Assembly C
Repair details and dimensions - Assembly A, Assembly B and Assembly C
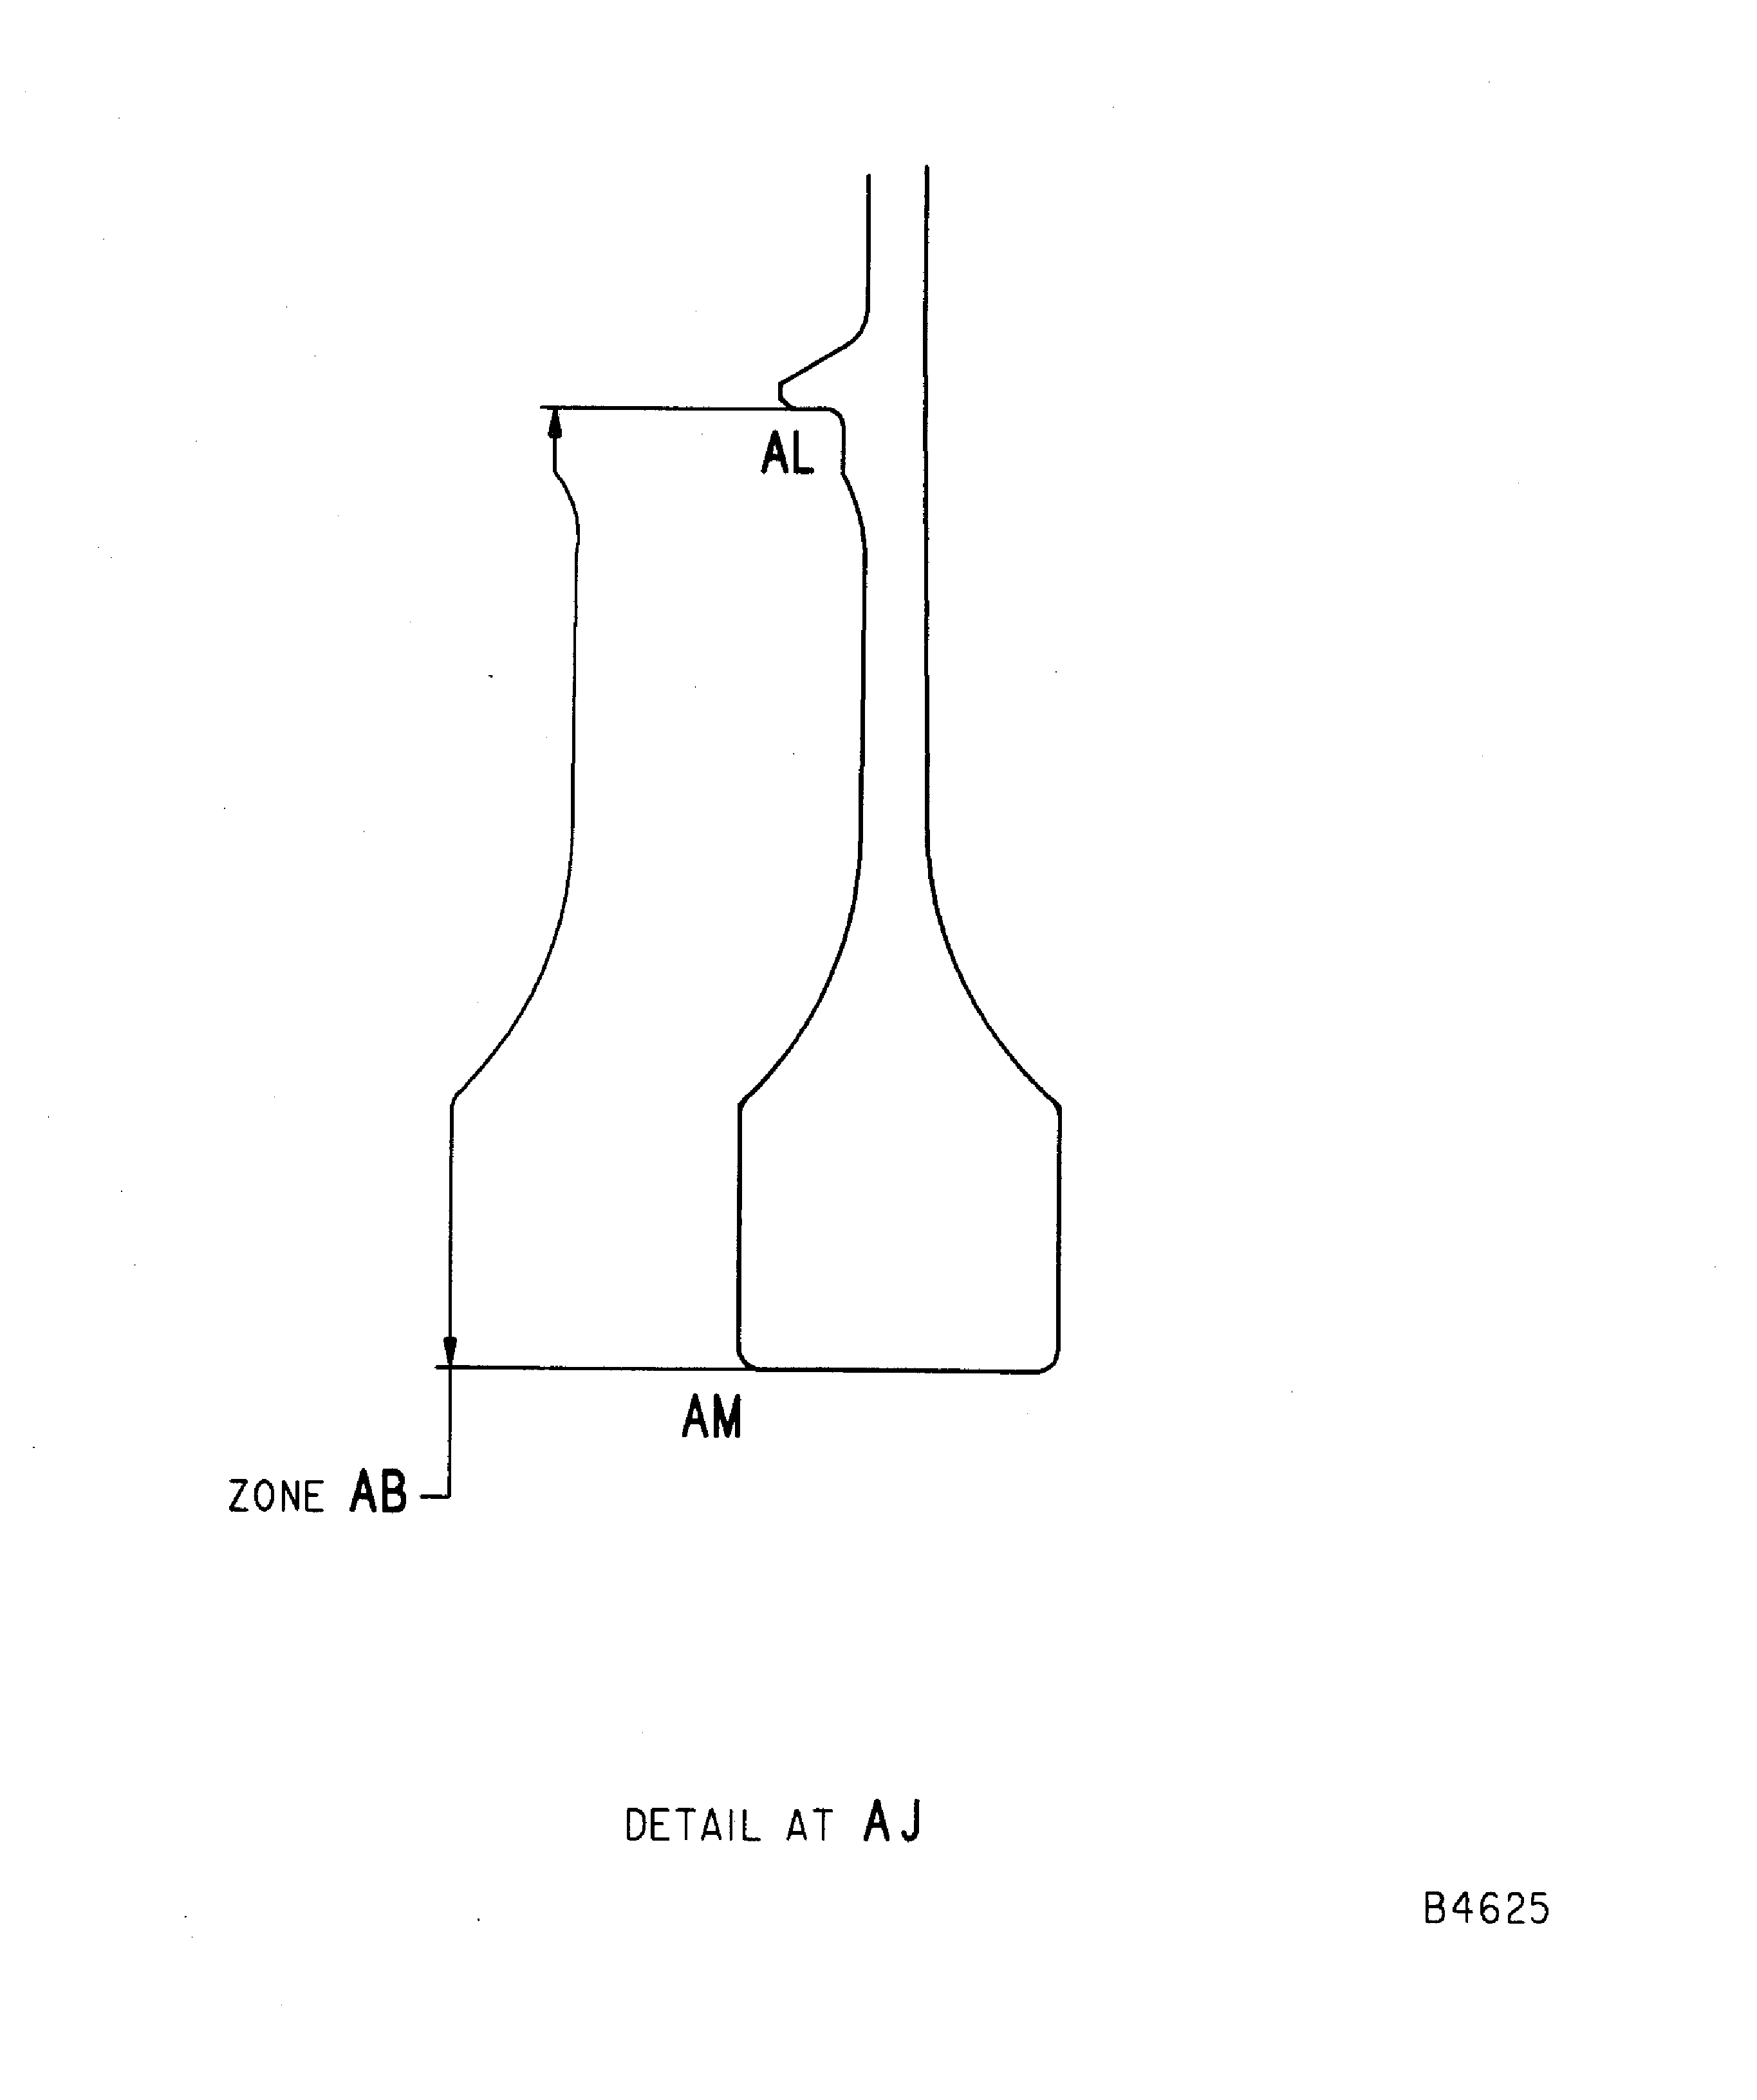
Figure: Repair details and dimensions - Assembly A, Assembly B and Assembly C
Repair details and dimensions - Assembly A, Assembly B and Assembly C
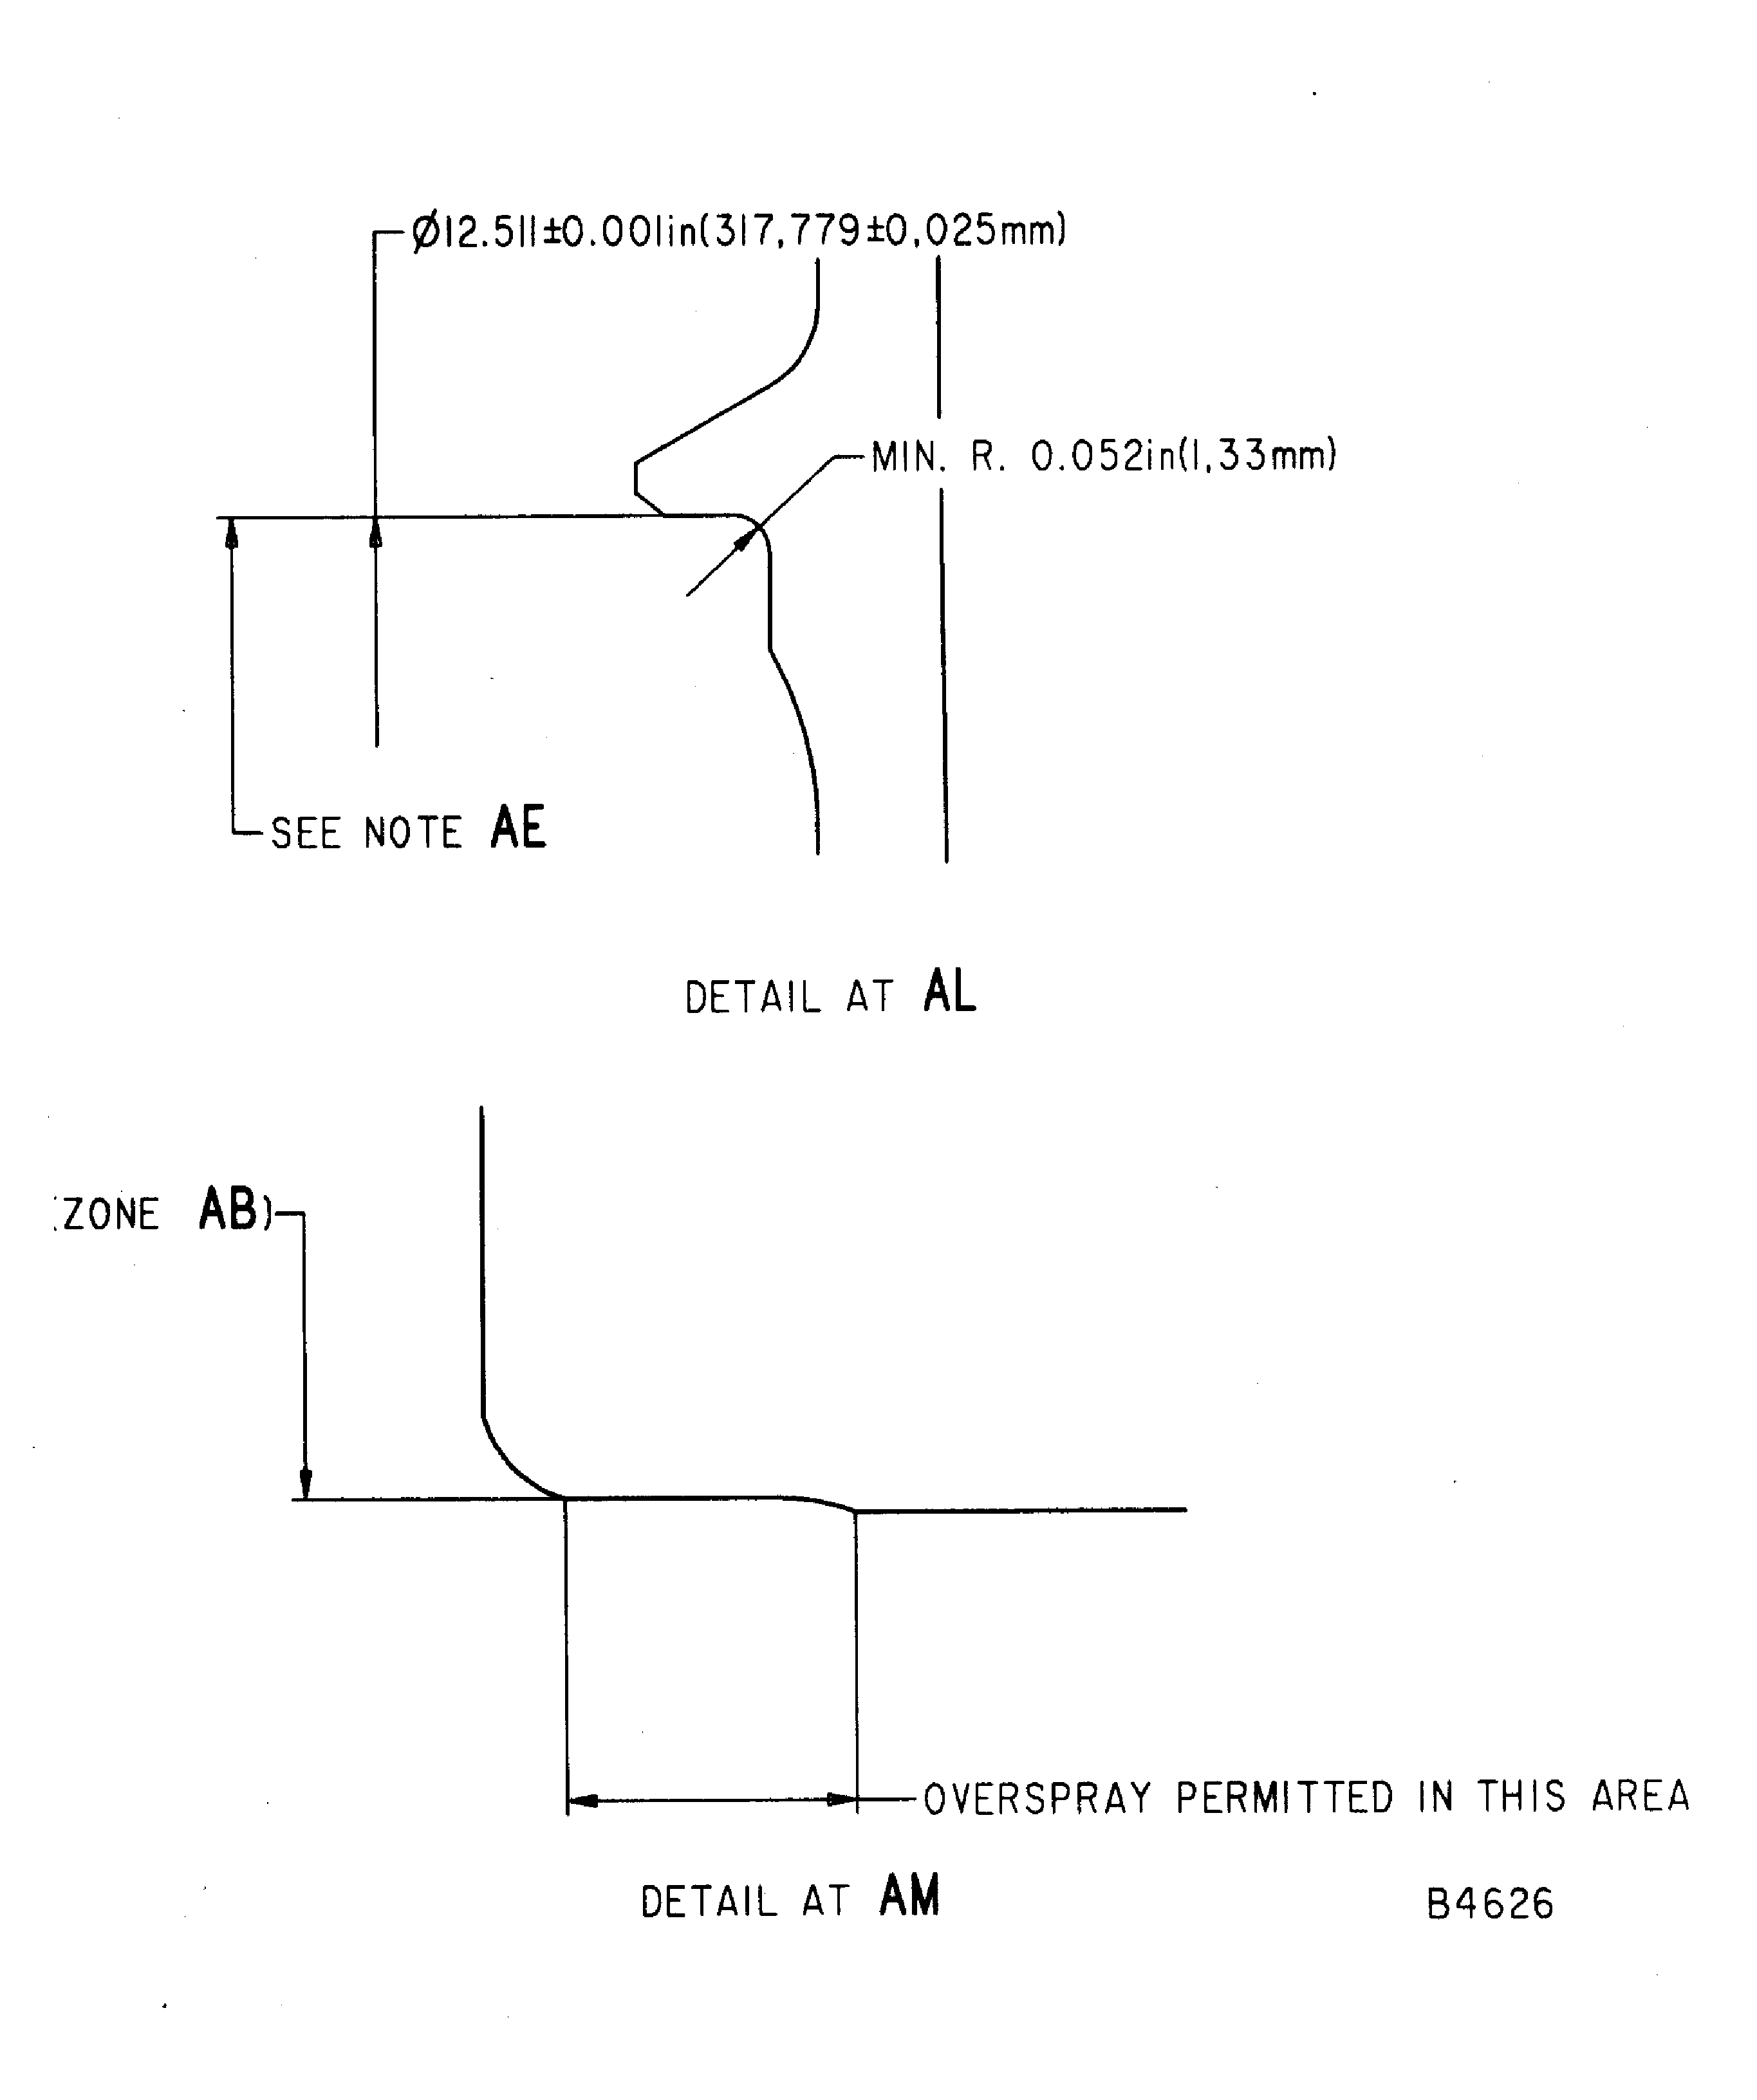
Figure: Repair details and dimensions - Assembly A
Repair details and dimensions - Assembly A
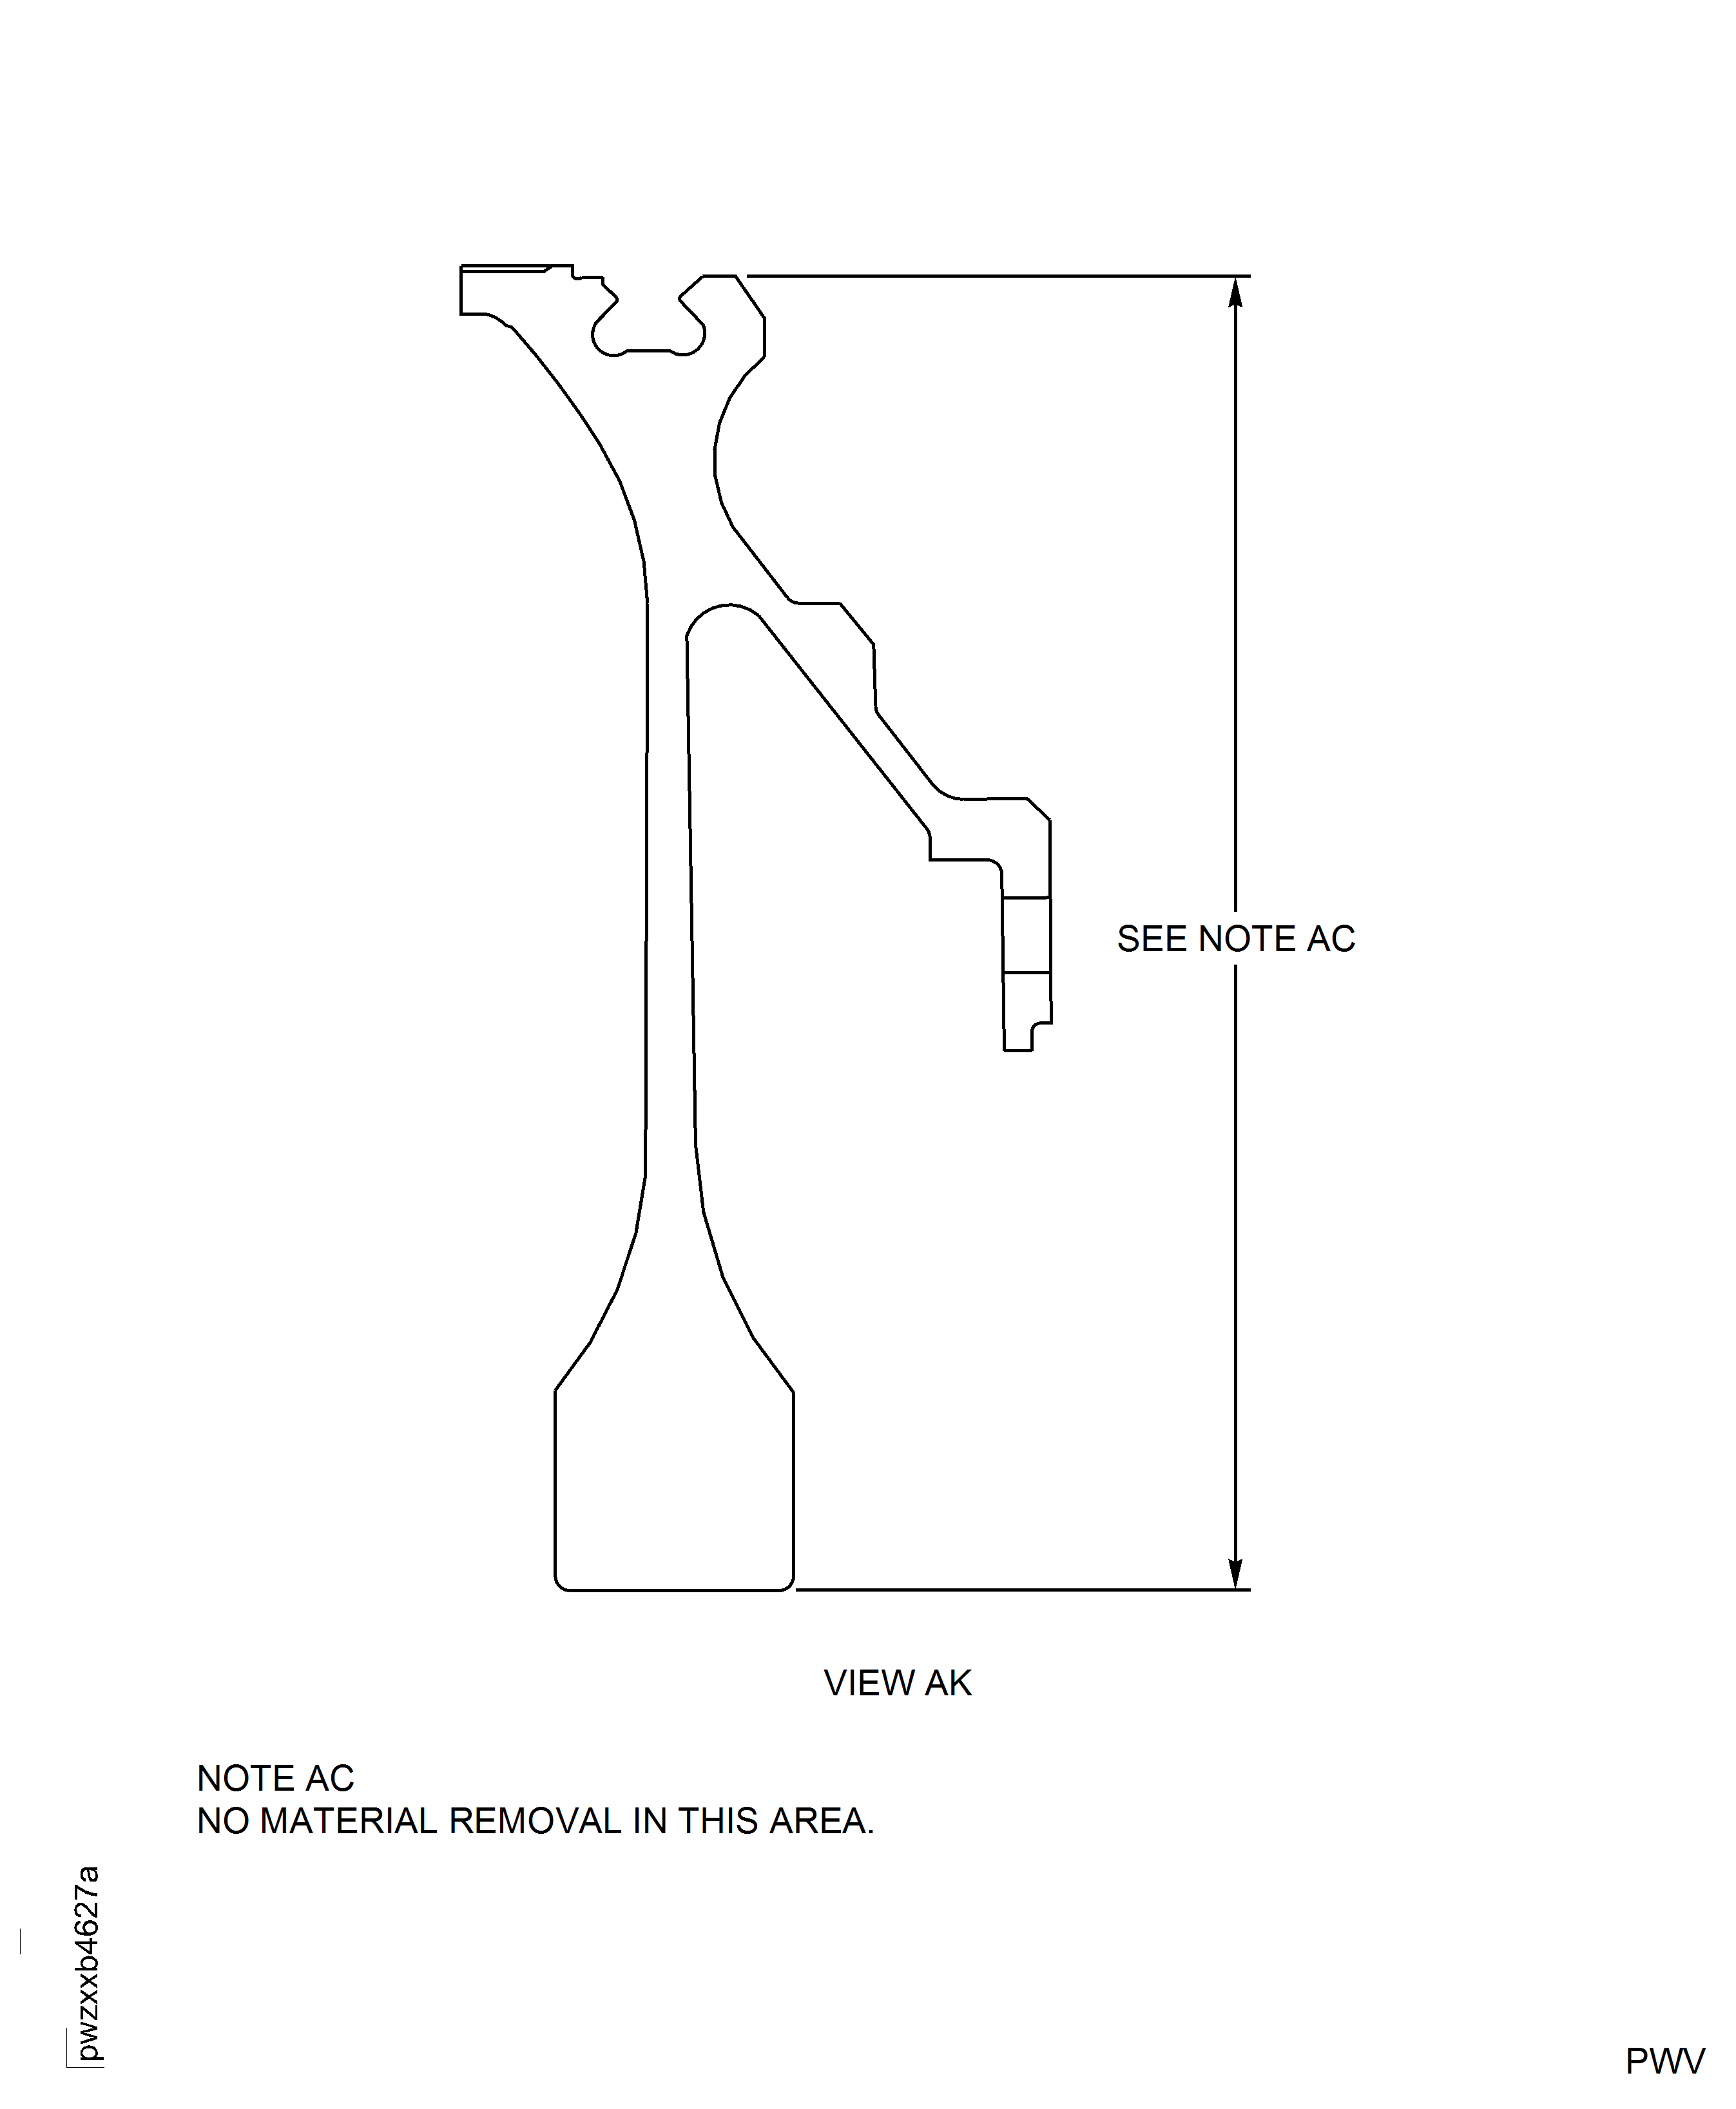
Figure: Repair details and dimensions - Assembly B
Repair details and dimensions - Assembly B
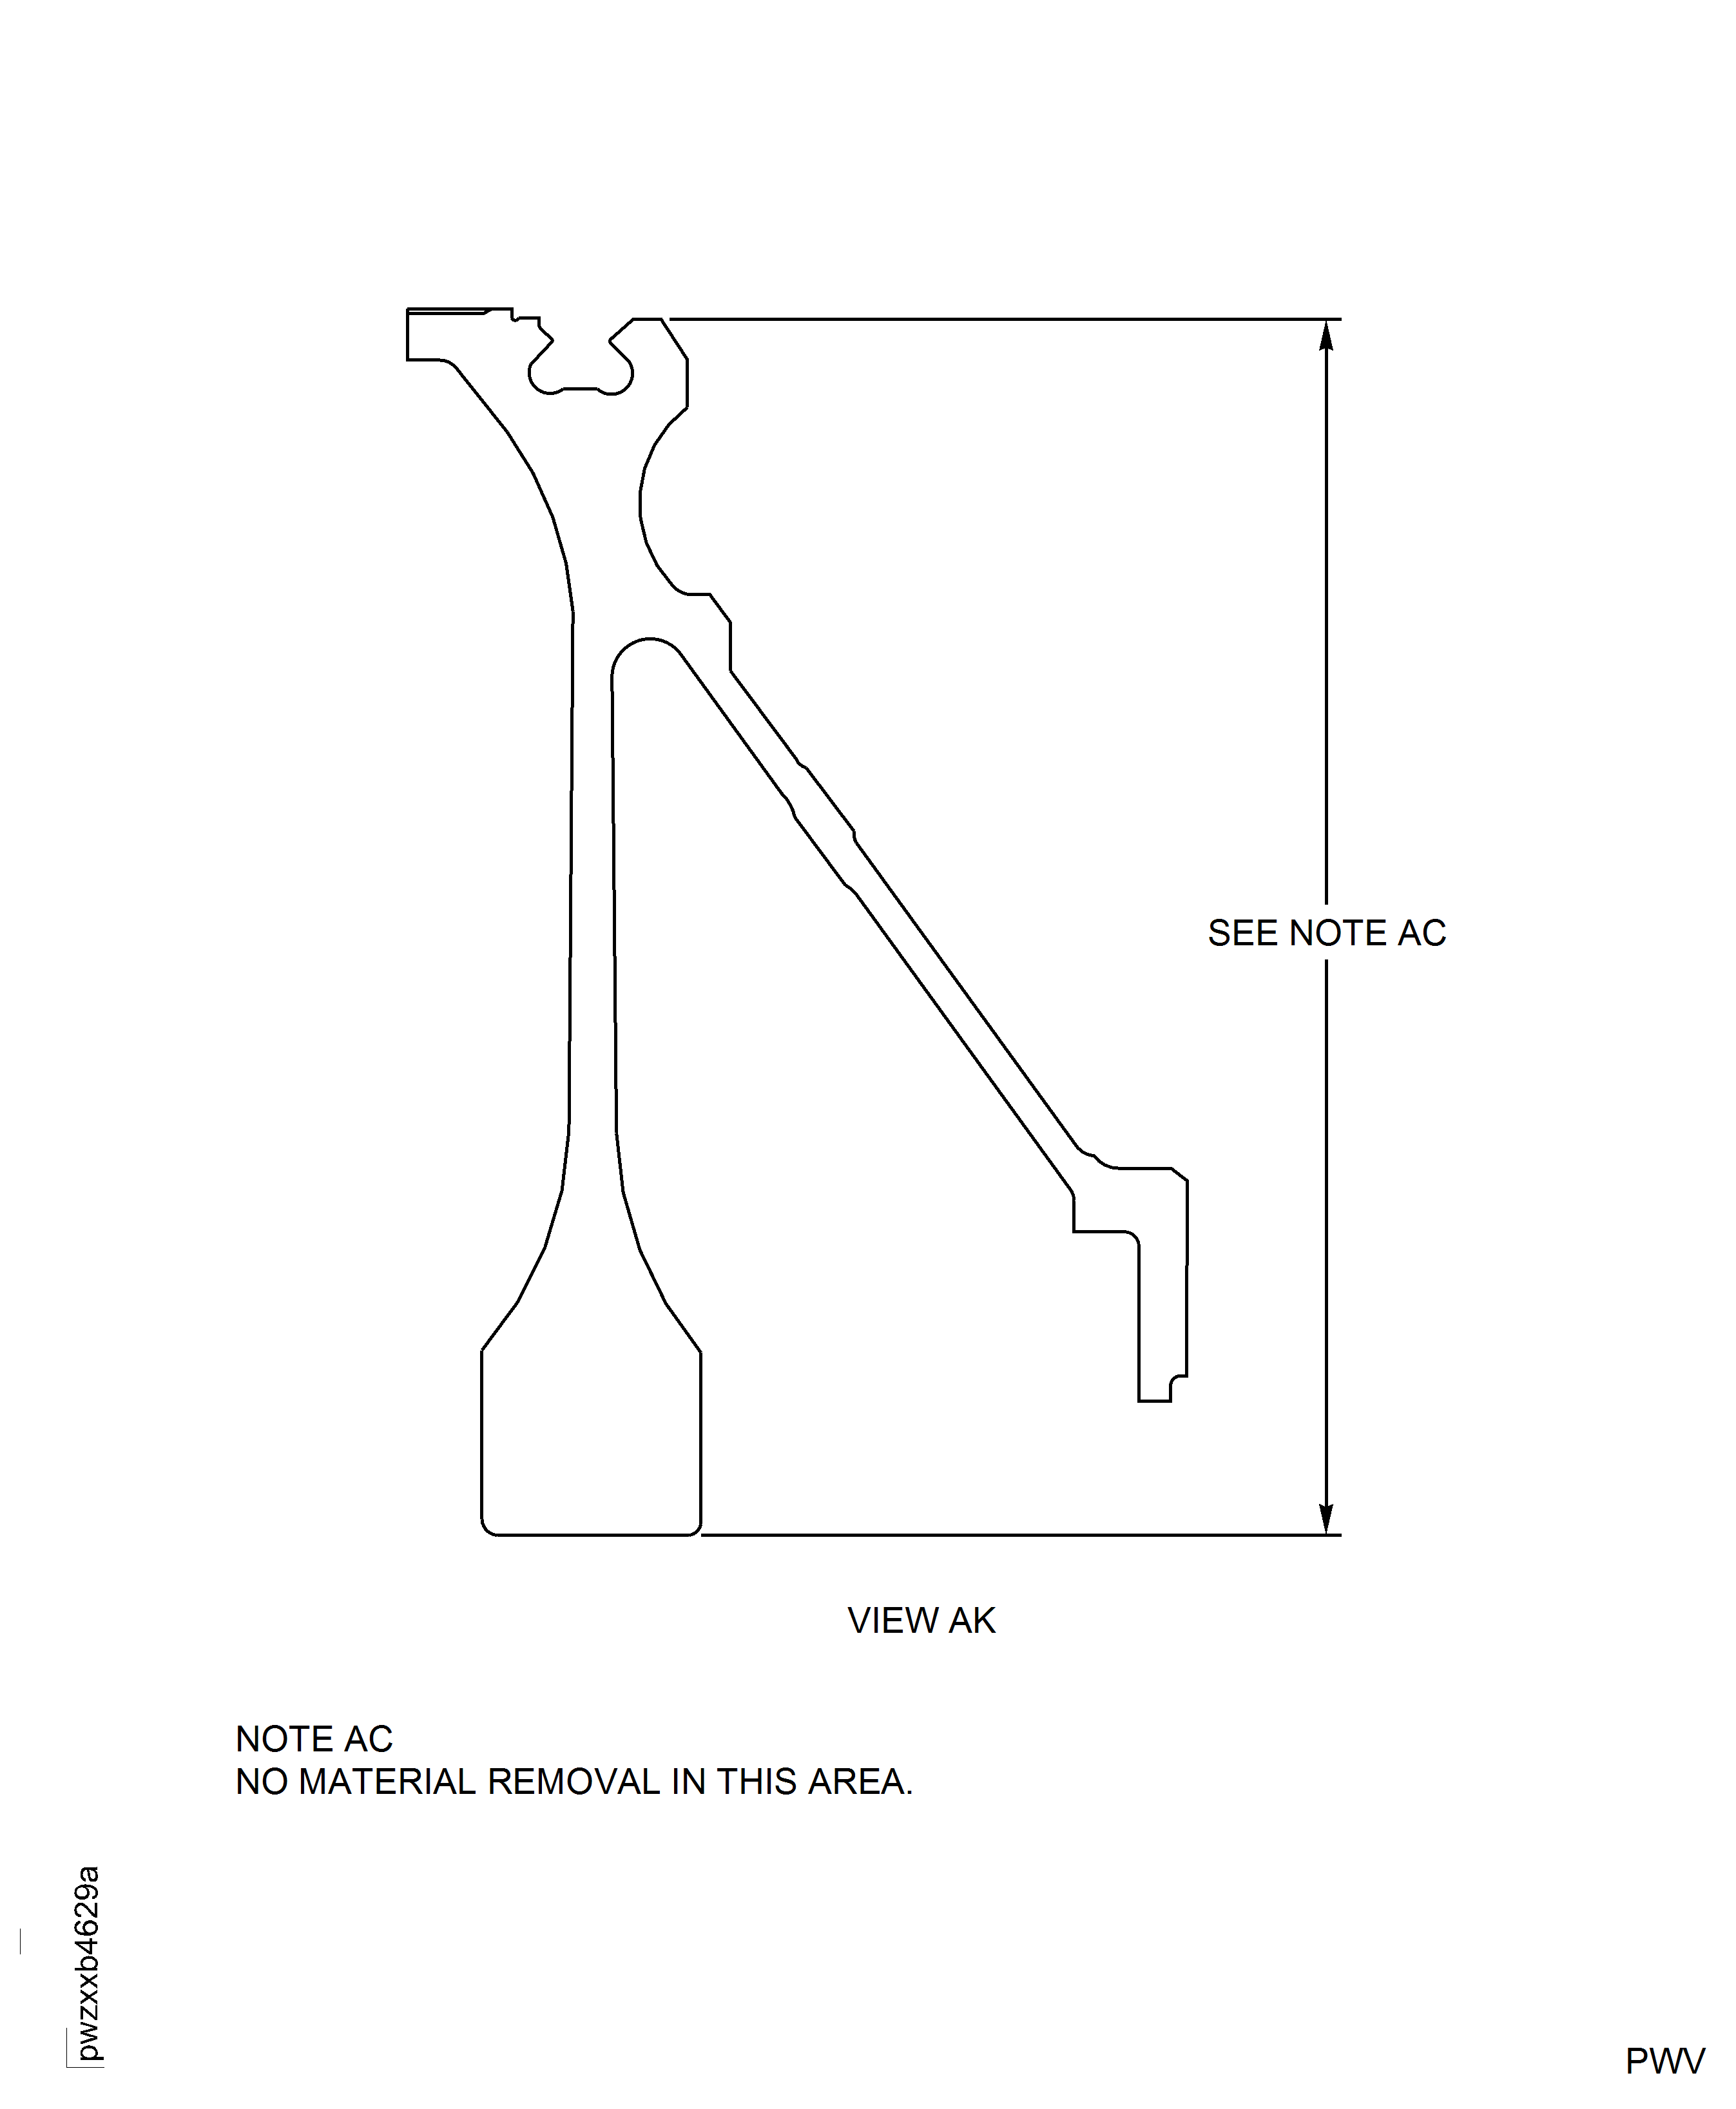
Figure: Repair details and dimensions - Assembly C
Repair details and dimensions - Assembly C
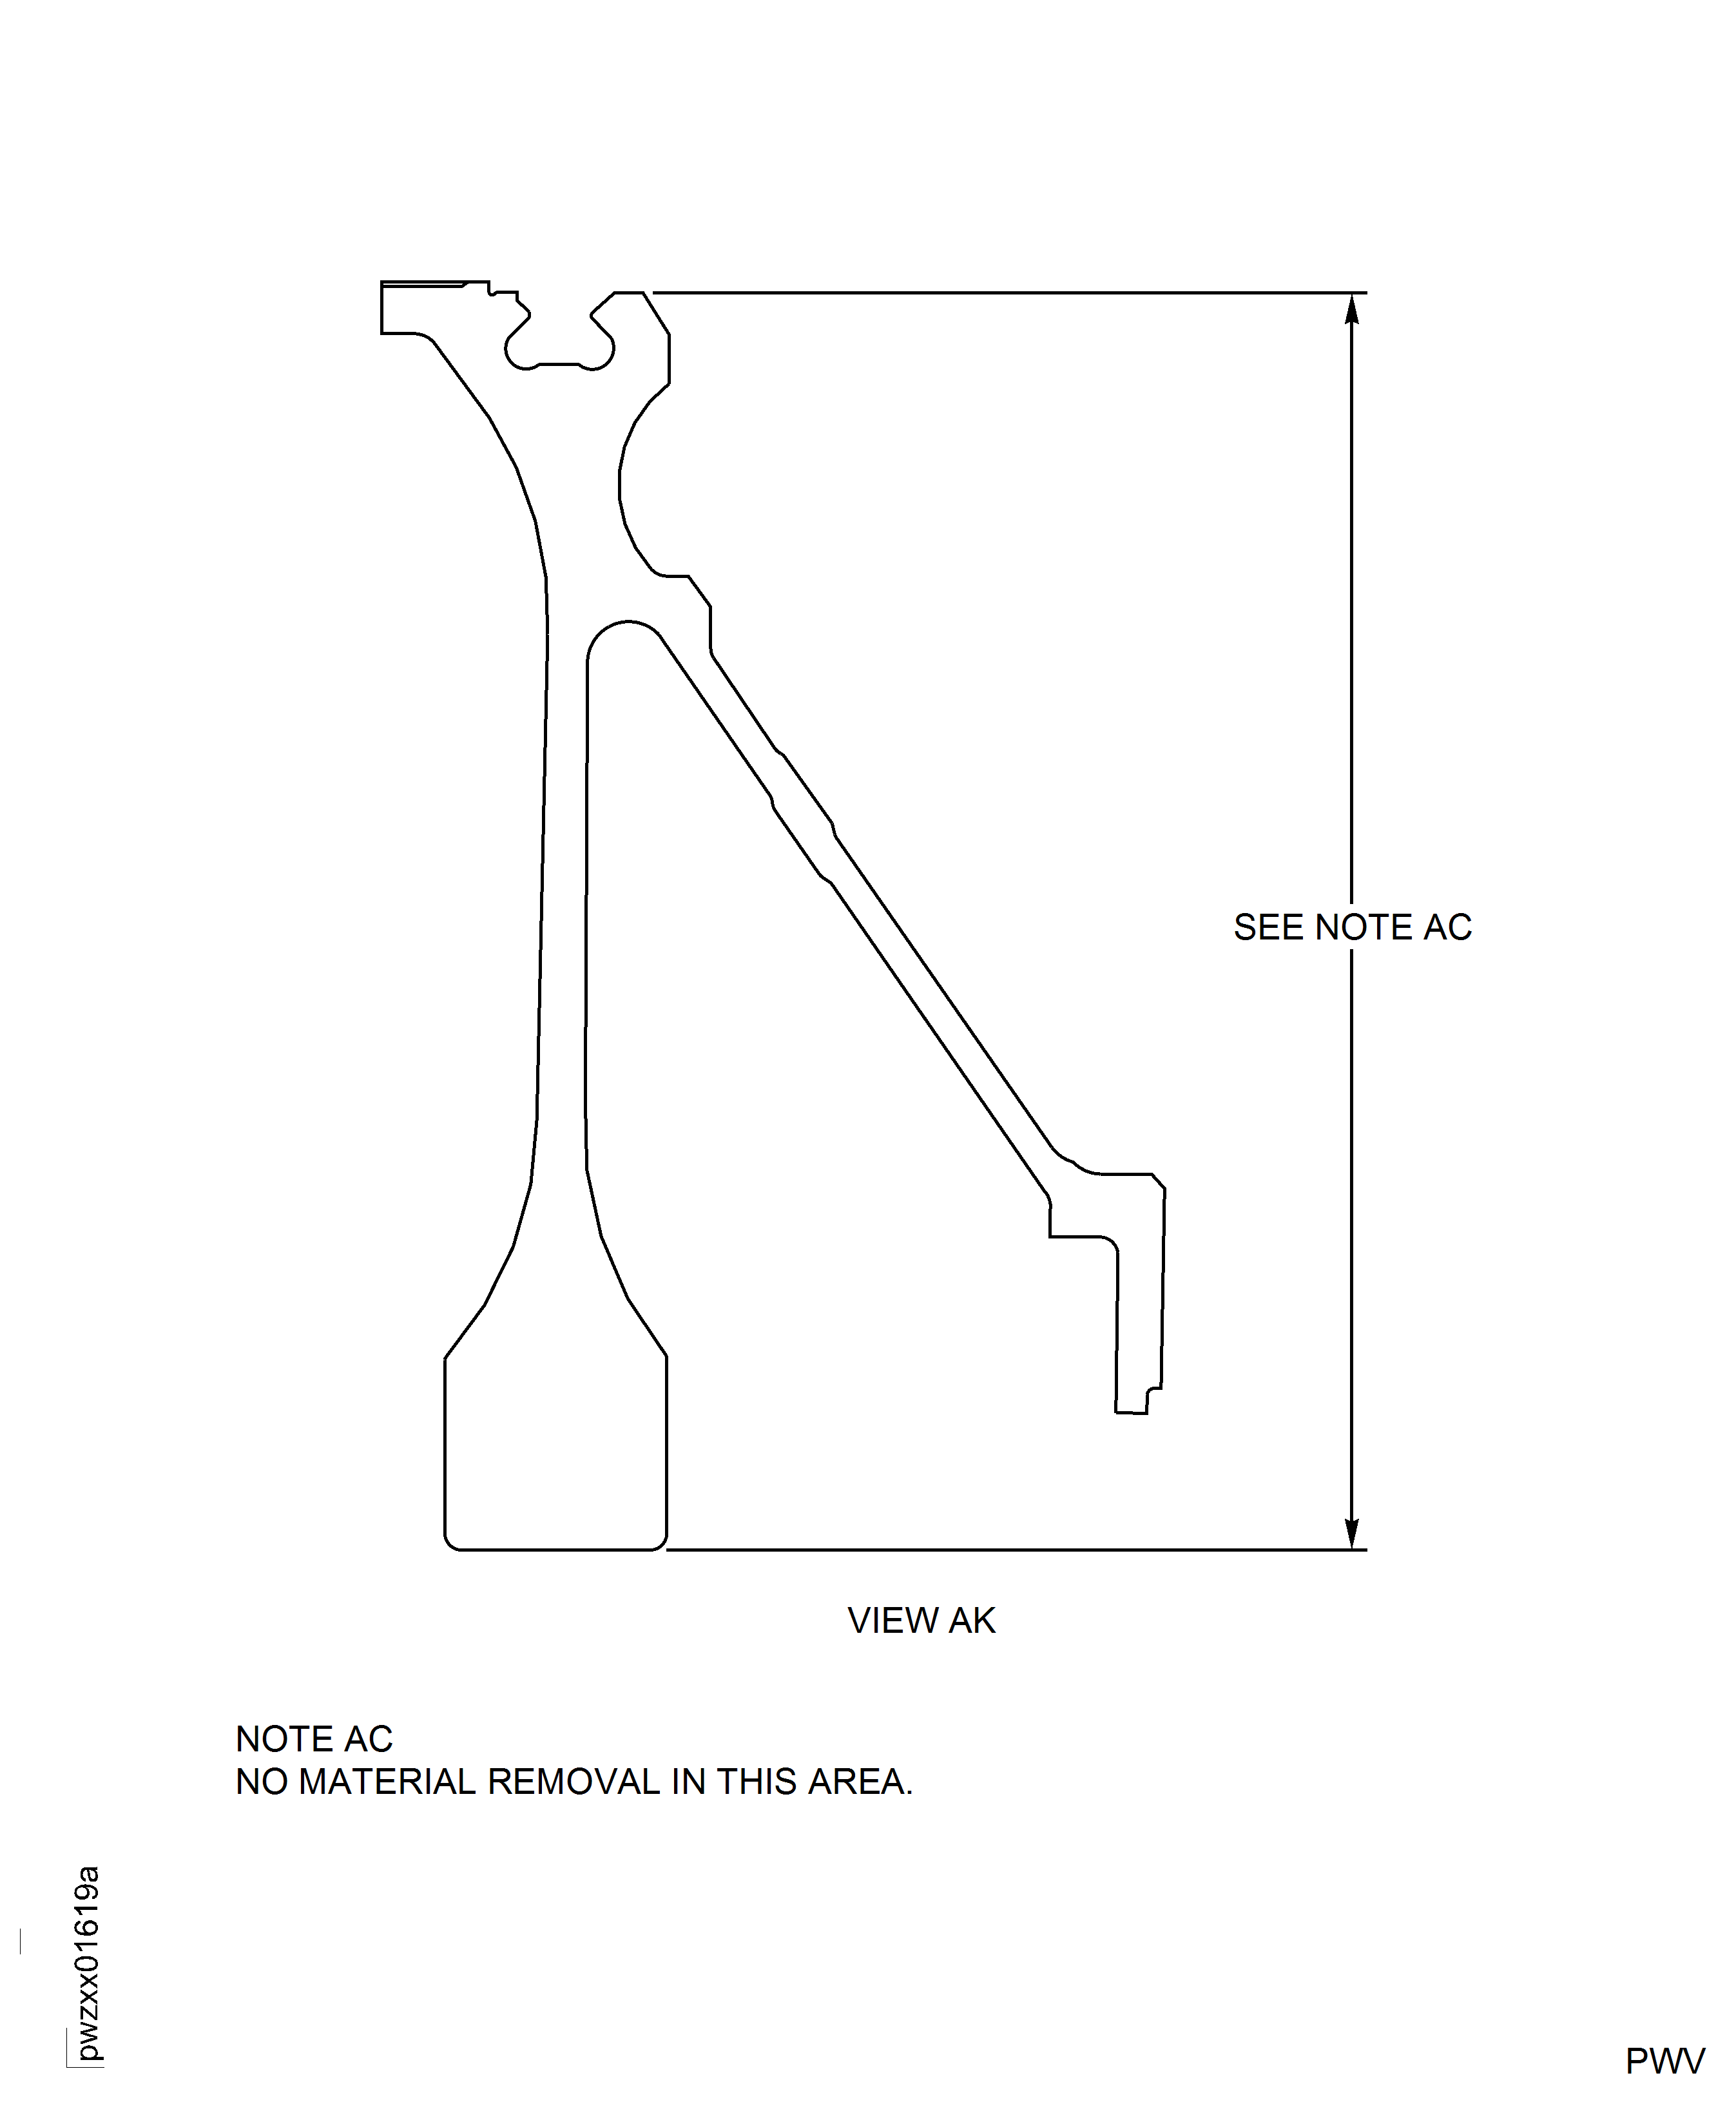
Figure: Repair details and dimensions - Assembly A, Assembly B and Assembly C
Repair details and dimensions - Assembly A, Assembly B and Assembly C
