Export Control
EAR Export Classification: Not subject to the EAR per 15 C.F.R. Chapter 1, Part 734.3(b)(3), except for the following Service Bulletins which are currently published as EAR Export Classification 9E991: SBE70-0992, SBE72-0483, SBE72-0580, SBE72-0588, SBE72-0640, SBE73-0209, SBE80-0024 and SBE80-0025.Copyright
© IAE International Aero Engines AG (2001, 2014 - 2021) The information contained in this document is the property of © IAE International Aero Engines AG and may not be copied or used for any purpose other than that for which it is supplied without the express written authority of © IAE International Aero Engines AG. (This does not preclude use by engine and aircraft operators for normal instructional, maintenance or overhaul purposes.).Applicability
All
Common Information
TASK 72-41-13-300-014 HPC Rear Shaft - Repair The Heat Shield Mating Diameter By Nickel Plate, Repair-014 (VRS3466)
General
Price and availability - refer to IAE
The practices and processes referred to in this procedure by TASK numbers are in the SPM.
Preliminary Requirements
Pre-Conditions
NONESupport Equipment
| Name | Manufacturer | Part Number / Identification | Quantity | Remark |
|---|---|---|---|---|
| Machining equipment | LOCAL | Machining equipment | ||
| Plating equipment | LOCAL | Plating equipment | ||
| Workshop inspection equipment | LOCAL | Workshop inspection equipment | ||
| IAE 3P16393 Hanger, Plating | 0AM53 | IAE 3P16393 | 1 |
Consumables, Materials and Expendables
NONESpares
NONESafety Requirements
NONEProcedure
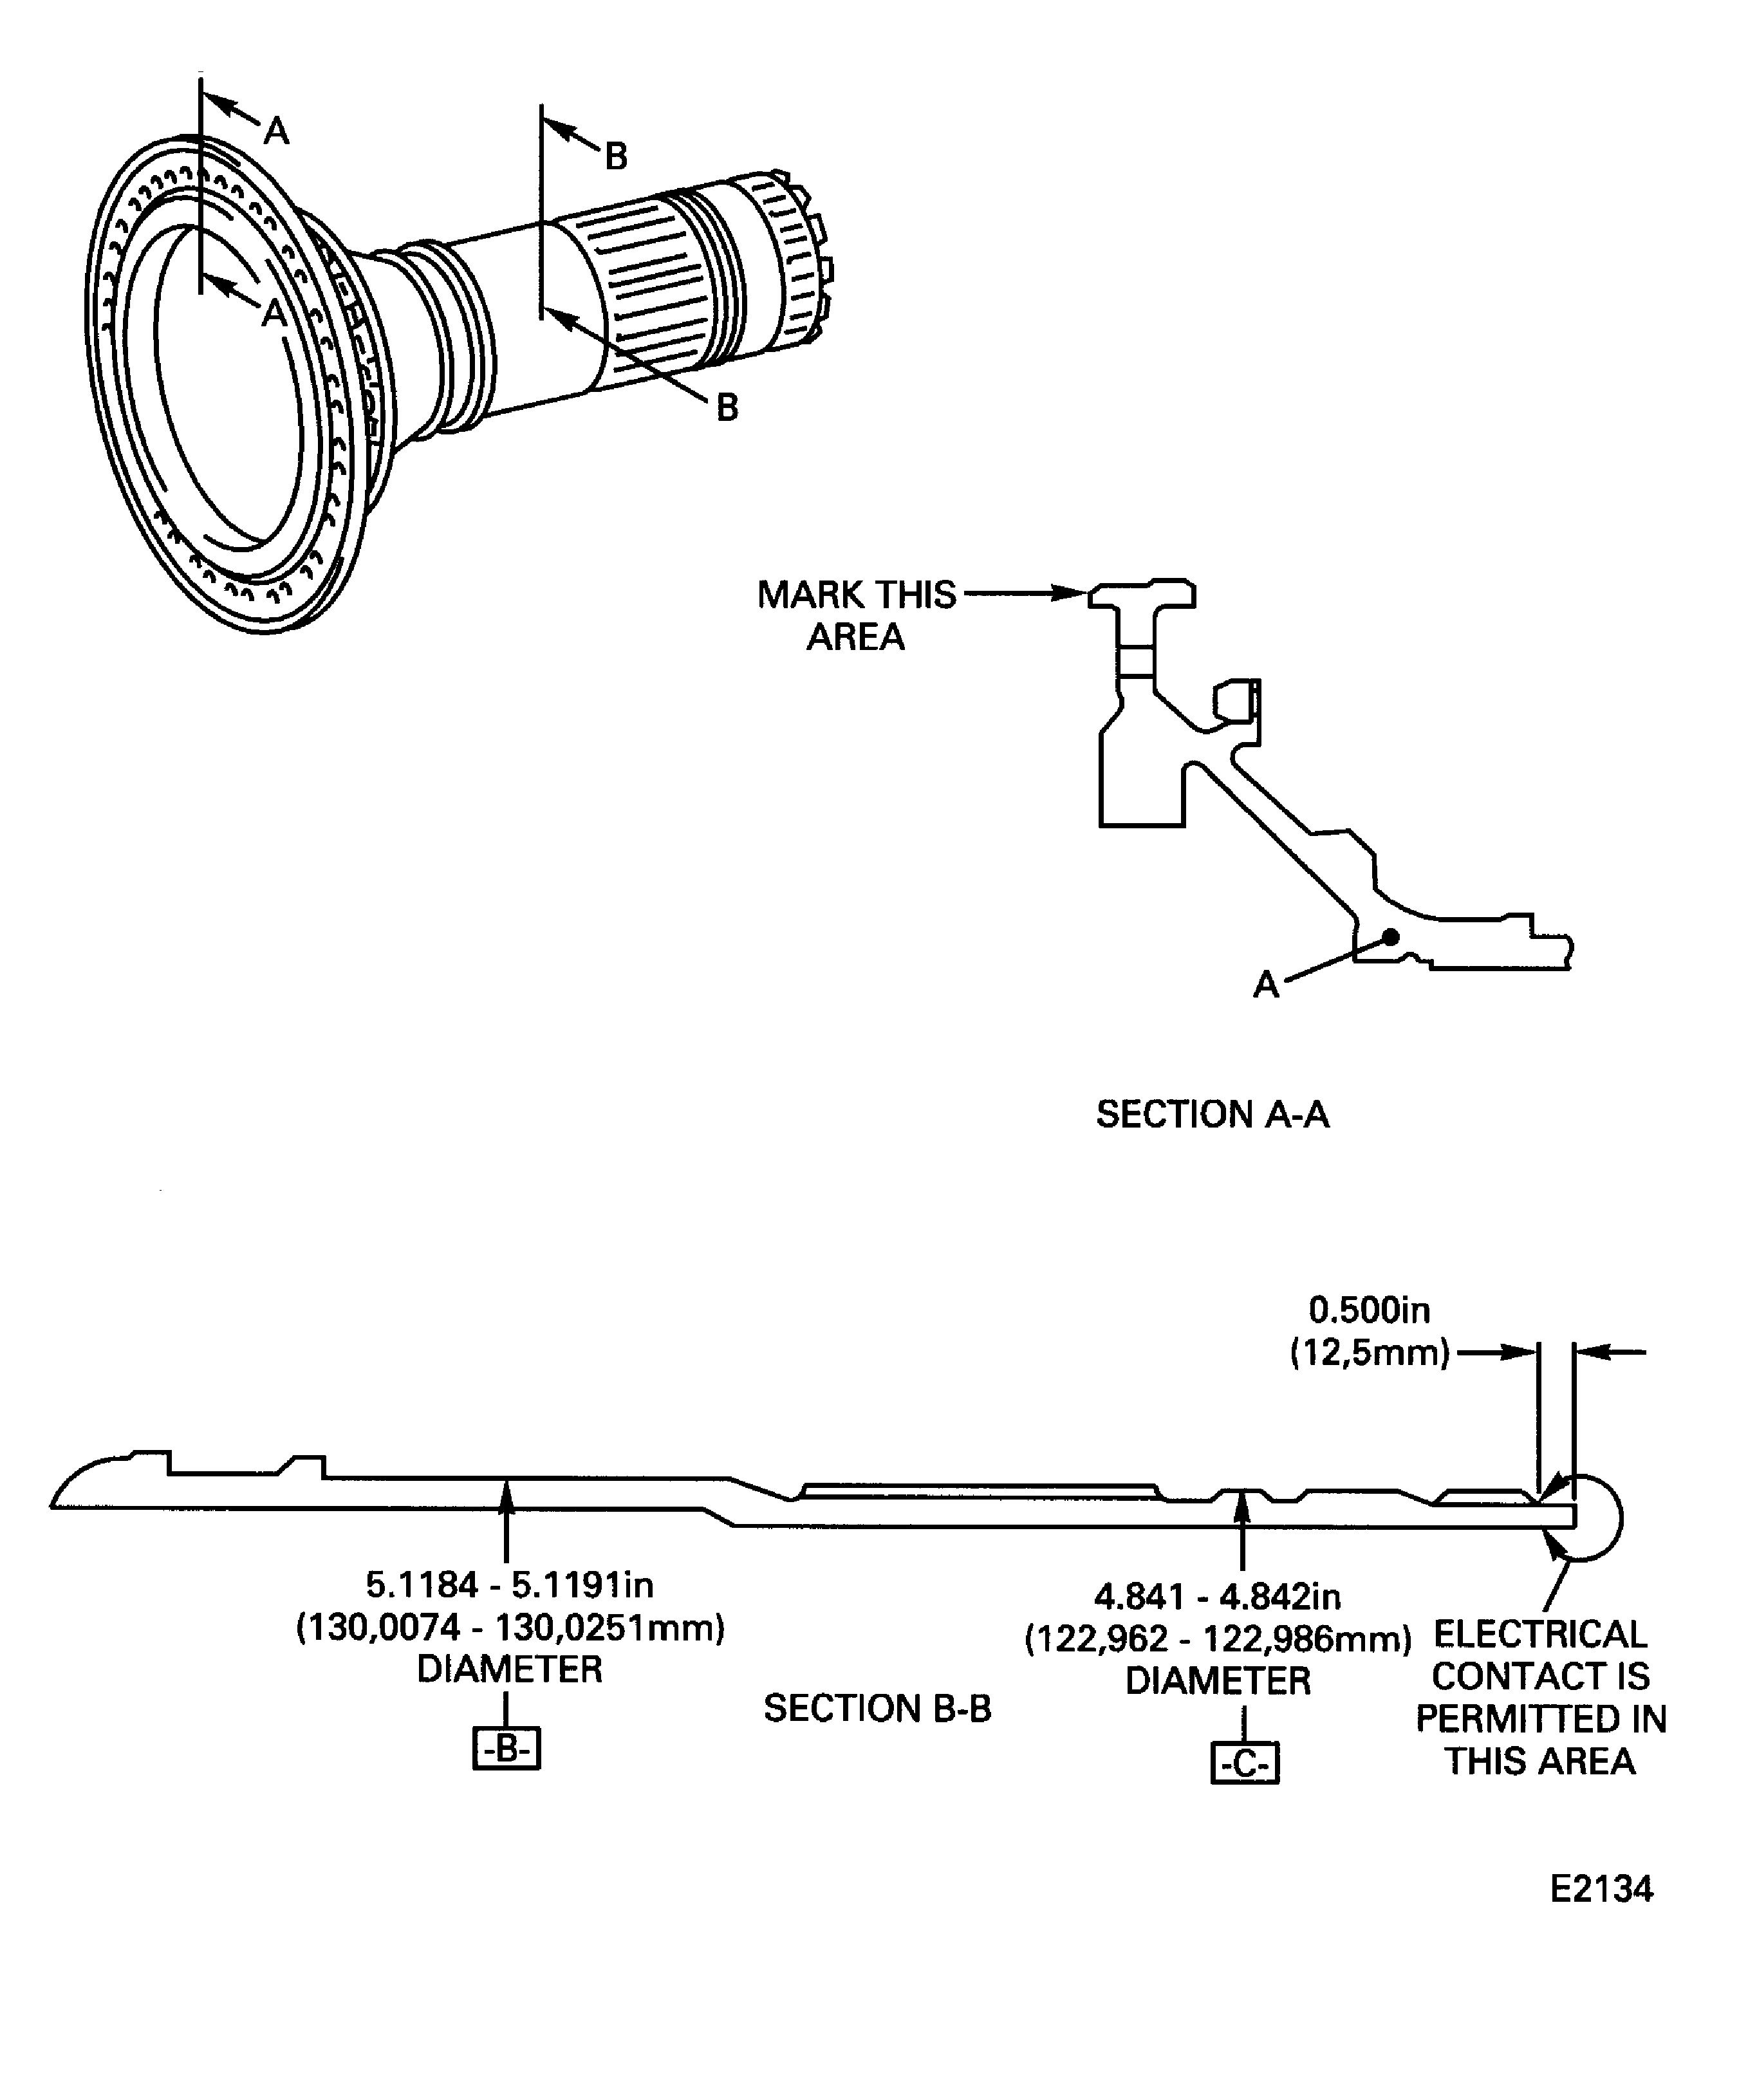
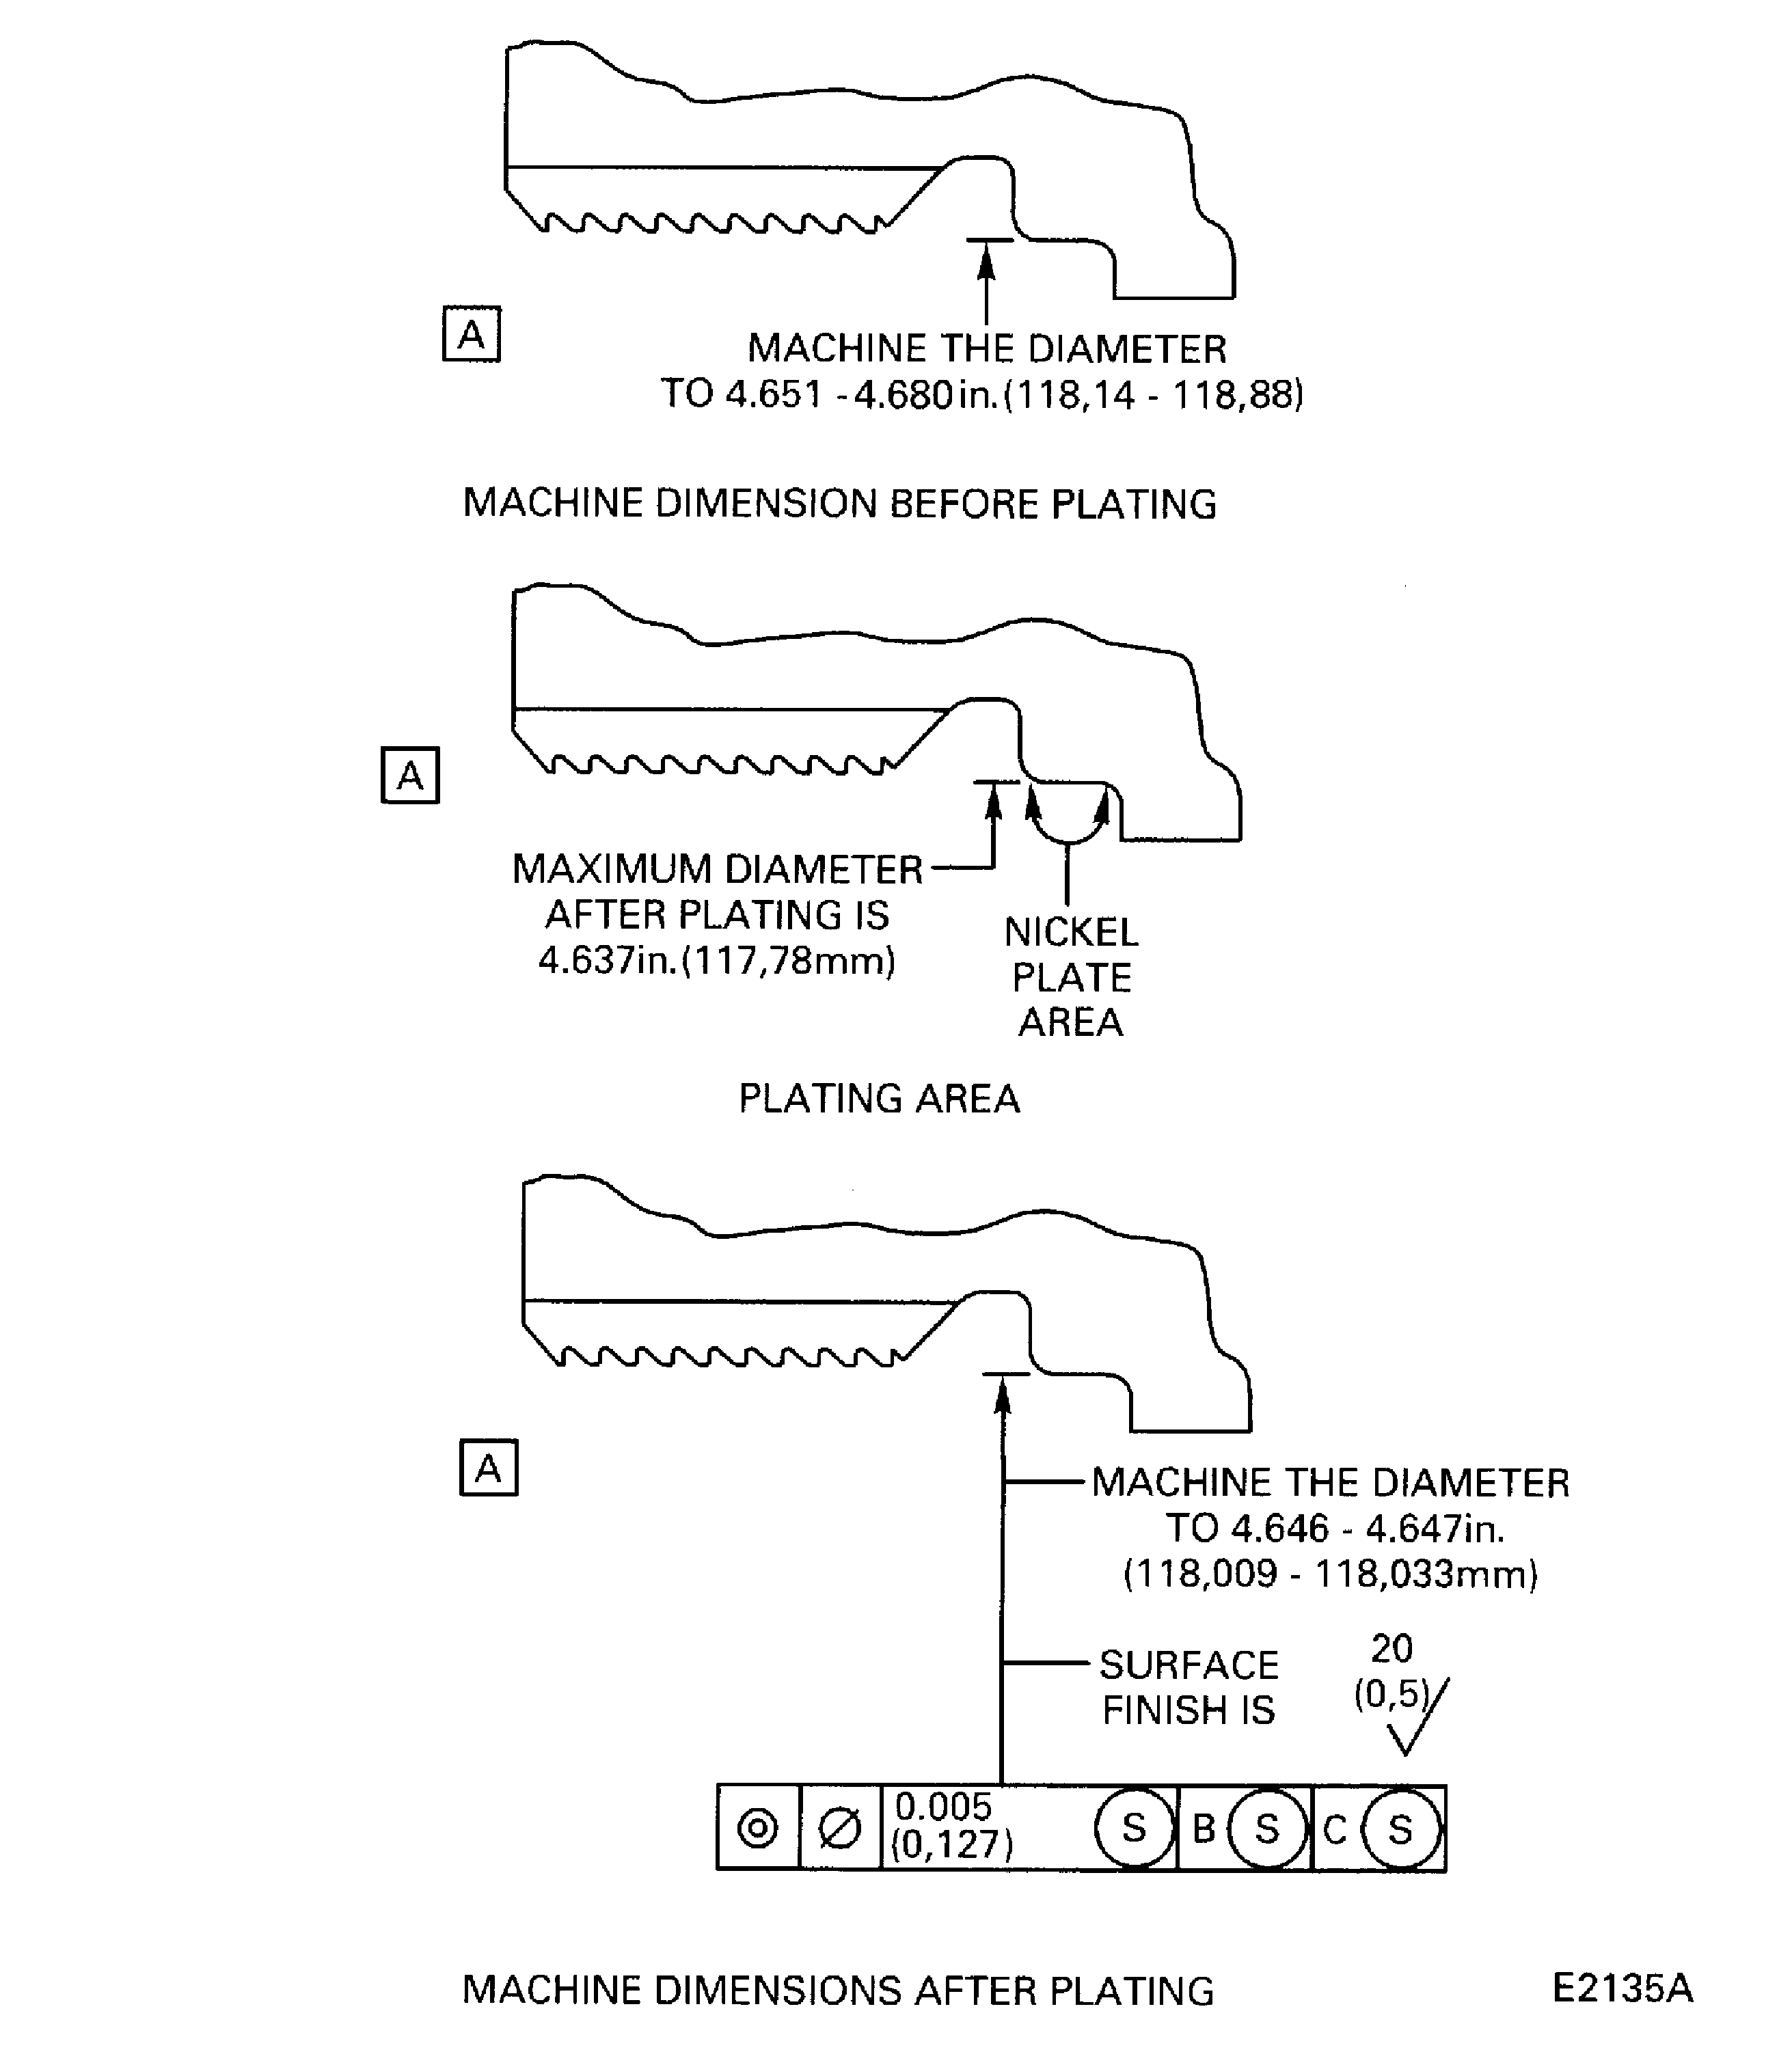
Refer to Figure.
SUBTASK 72-41-13-320-061 Machine the Heat Shield Mating Diameter before Plating
Refer to Figure.
No cracks permitted.
Do the penetrant procedure given in the SPM TASK 70-23-04-230-501.
Examine the machined diameter for cracks.
SUBTASK 72-41-13-230-074 Examine the Heat Shield Mating Diameter for Cracks
Refer to Figure.
Shot peen at an intensity of 6A.
Do not overspray on the threads.
Do the procedure given in the SPM TASK 70-38-13-380-501.
Shot peen the machined heat shield mating diameter and adjacent radii.
SUBTASK 72-41-13-380-059 Shot Peen the Heat Shield Mating Diameter
Refer to Figure.
Install the IAE 3P16393 Hanger, Plating 1 off on the threads of the shaft.
Electrical contact is permitted only in the area given in the figure.
In this area no burns, pits or selective attack is permitted.
No plate is permitted in the radii as given in the figure.
Plate outside the area is permitted, but the plate must be removed.
Do the plating procedures given in the SPM TASK 70-33-02-100-501.
NOTE
Do not put the part in an oven before or after chromium plate.Nickel plate the heat shield mating diameter to the maximum plate diameter given in the figure.
SUBTASK 72-41-13-330-055 Nickel Plate the Heat Shield Mating Diameter
Refer to Figure.
SUBTASK 72-41-13-320-062 Machine the Heat Shield Mating Diameter after Plating
Refer to Figure.
Mark the part by the procedures given in the SPM TASK 70-09-00-400-501.
Use the shallow electrolytic etch method.
NOTE
If the VRS repair number is marked on the part, do not mark the repair number again.Mark the repair number VRS3466 adjacent to the part number at the location given in the figure.
SUBTASK 72-41-13-350-070 Mark the Part
Figure: HPC rear shaft heat shield mating diameter repair areas
HPC rear shaft heat shield mating diameter repair areas

Figure: HPC rear shaft heat shield mating diameter repair areas
HPC rear shaft heat shield mating diameter repair areas

