Export Control
EAR Export Classification: Not subject to the EAR per 15 C.F.R. Chapter 1, Part 734.3(b)(3), except for the following Service Bulletins which are currently published as EAR Export Classification 9E991: SBE70-0992, SBE72-0483, SBE72-0580, SBE72-0588, SBE72-0640, SBE73-0209, SBE80-0024 and SBE80-0025.Copyright
© IAE International Aero Engines AG (2001, 2014 - 2021) The information contained in this document is the property of © IAE International Aero Engines AG and may not be copied or used for any purpose other than that for which it is supplied without the express written authority of © IAE International Aero Engines AG. (This does not preclude use by engine and aircraft operators for normal instructional, maintenance or overhaul purposes.).Applicability
All
Common Information
TASK 72-41-31-300-022 HPC Front Cases - Blend Repair On The Inner Gas Washed Surface, Repair-022 (VRS6511)
Preliminary Requirements
Pre-Conditions
| Action/Condition | Data Module/Technical Publication |
|---|---|
| Make sure that all the cleaning and inspection procedures are done before this repair. |
Support Equipment
NONEConsumables, Materials and Expendables
NONESpares
NONESafety Requirements
NONEProcedure
If the damage is in the limits of repair, do Step.
If the damage is more than the limits of repair, refer to Repair, VRS6629 TASK 72-41-31-300-027 (REPAIR-027).
Visually examine and measure the dimensions, AF, for damage on the VIGV, stage 3, 4, 5, and 6 VSV gas washed surface.
SUBTASK 72-41-31-220-204 Examine the HP Compressor Front Case, Assembly A
Refer to SPM TASK 70-11-08-300-503, SUBTASK 70-11-08-300-001.
Chemically clean the repaired area(s).
Refer to SPM TASK 70-11-08-300-503, SUBTASK 70-11-08-300-002.
Swab etch the repaired area(s).
SUBTASK 72-41-31-110-078 Do a Swab Etch
Fluorescent penetrant inspection by SPM TASK 70-23-04-230-501. Cracks are not permitted.
Local fluorescent penetrant inspection by SPM TASK 70-23-05-230-501, ultra high sensitivity. Cracks are not permitted.
Do a penetrant crack test on the repaired area(s) by one of the following methods:
SUBTASK 72-41-31-230-084 Do a Crack Test
Refer to SPM TASK 70-11-03-300-503.
Chemically clean the repaired area(s) to remove fluorescent penetrant.
SUBTASK 72-41-31-110-126 Chemically Clean
Refer to SPM TASK 70-09-00-400-501, SUBTASK 70-09-00-400-001.
Vibration peen VRS6511 adjacent to the part number.
SUBTASK 72-41-31-350-076 Identify the Repair
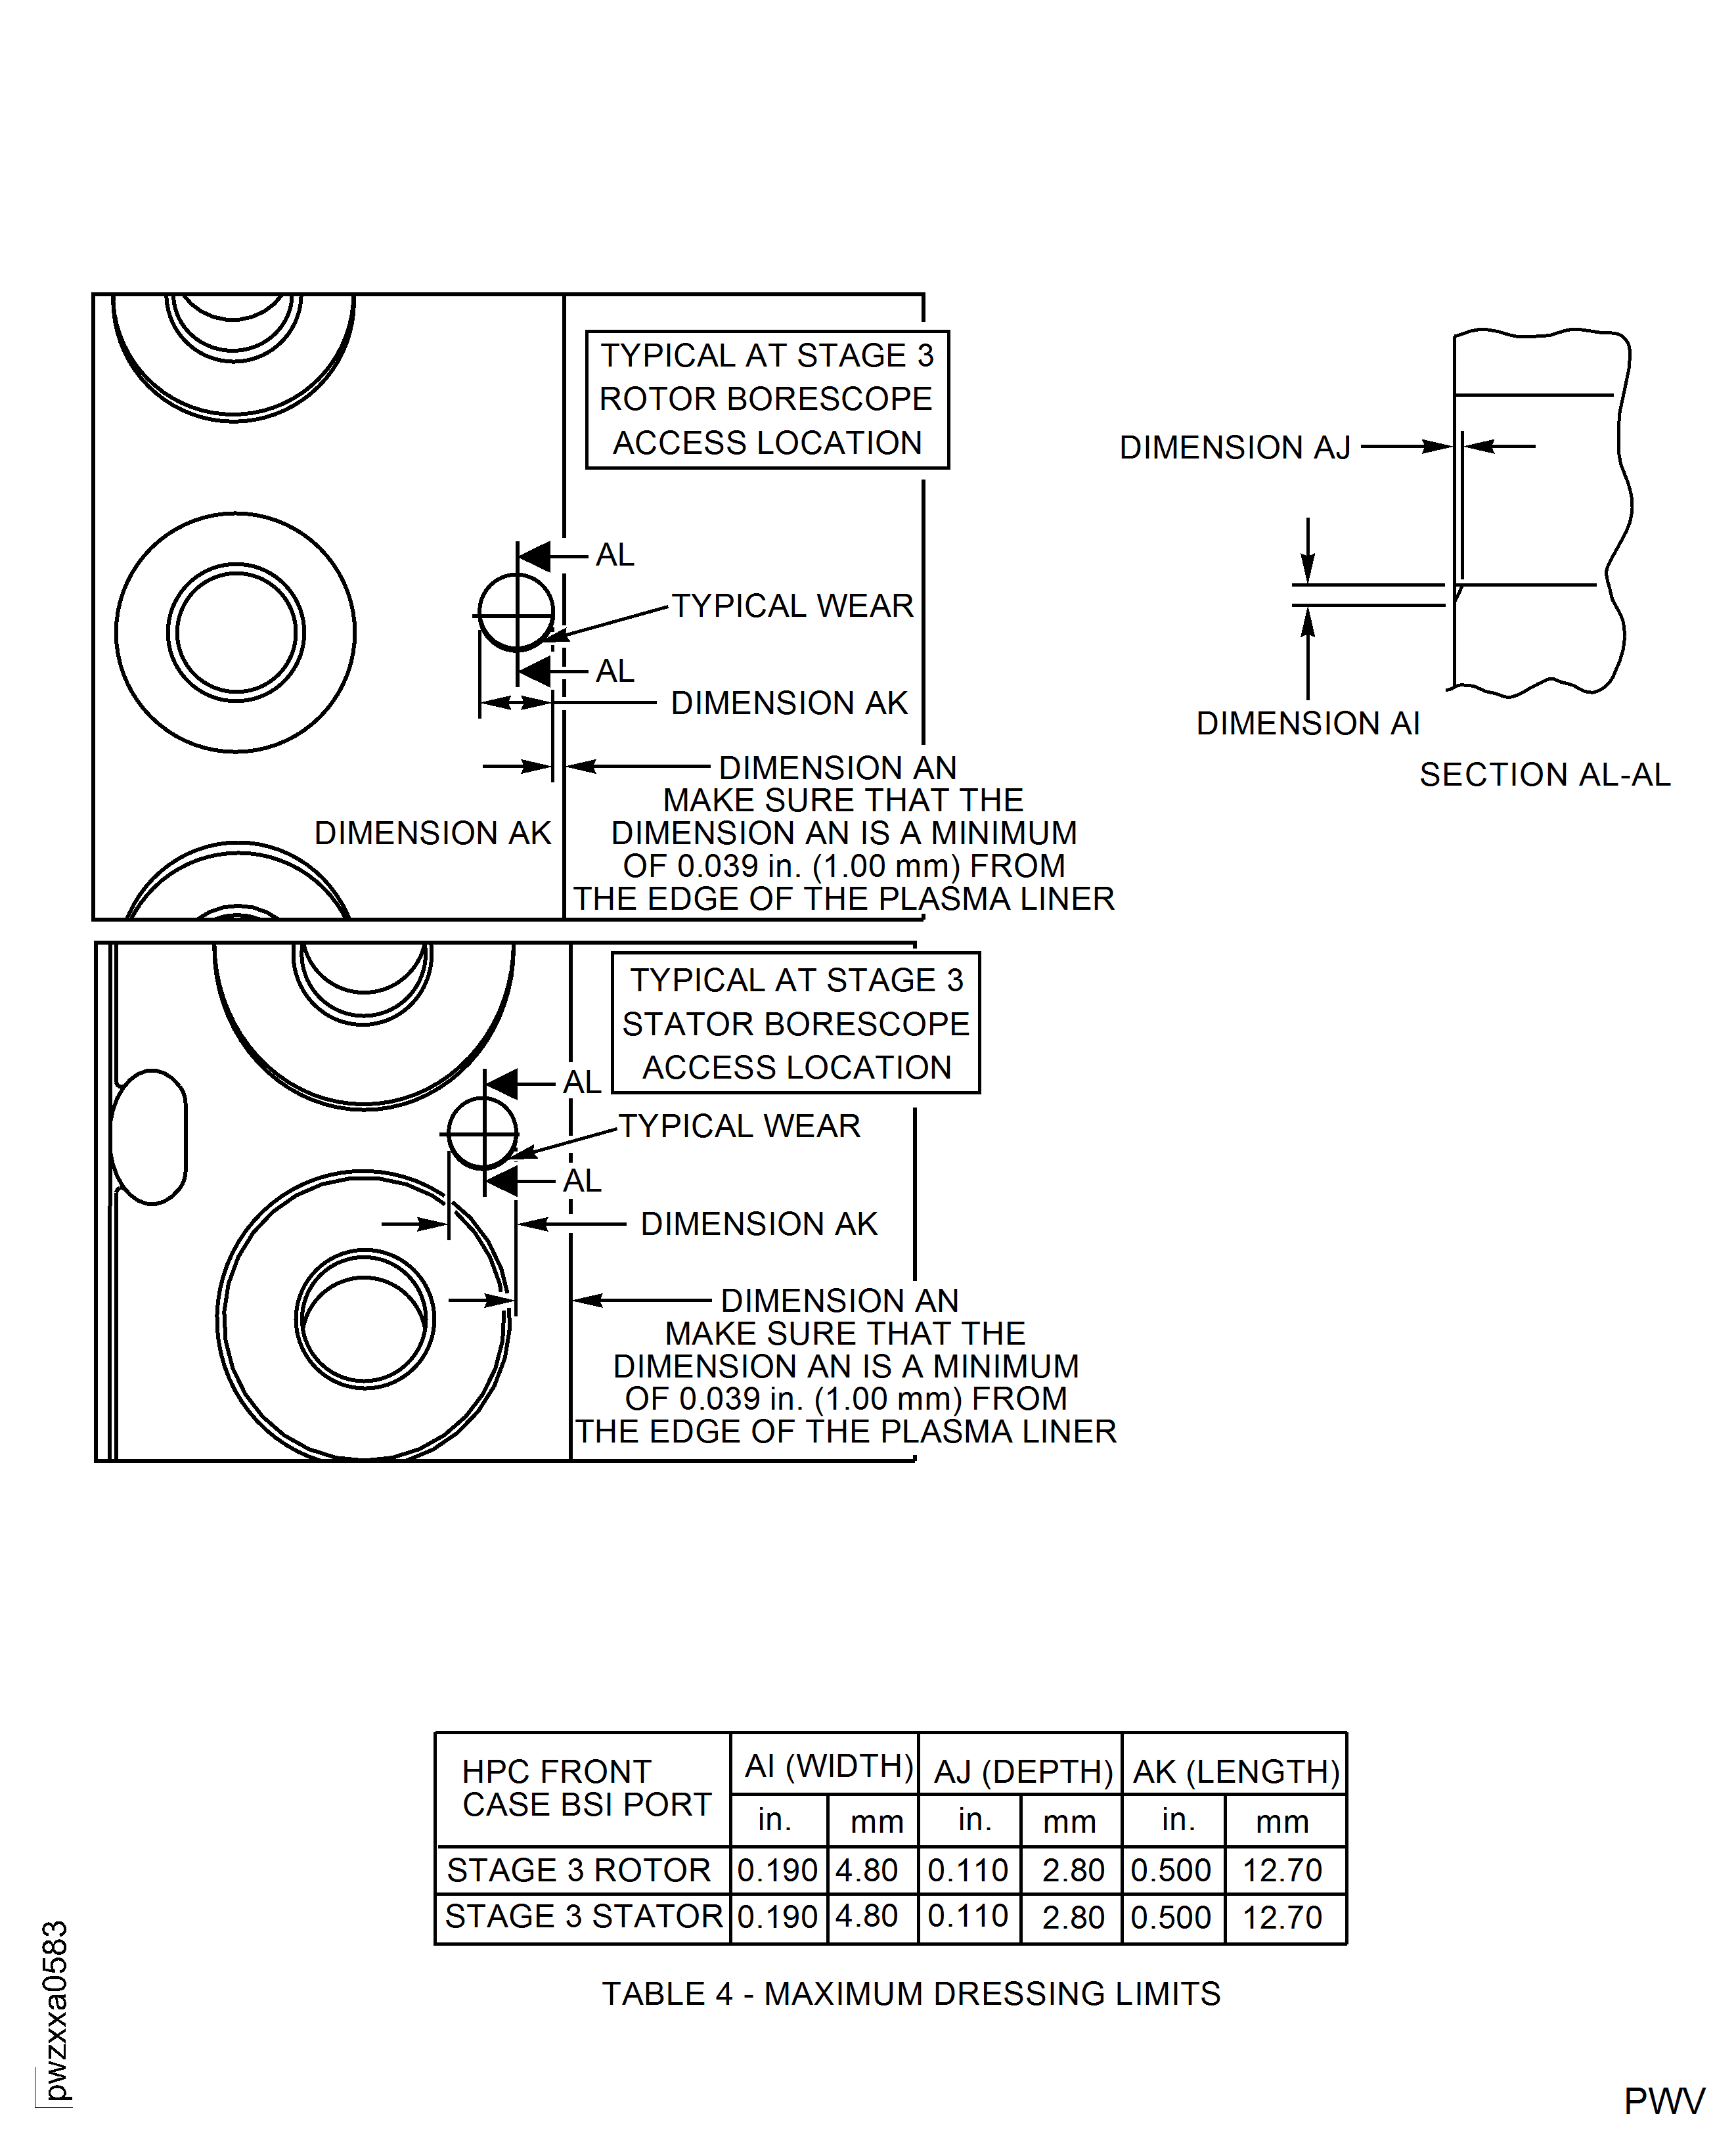
Figure: Repair Details and Dimensions - Assembly A
Repair Details and Dimensions - Assembly A
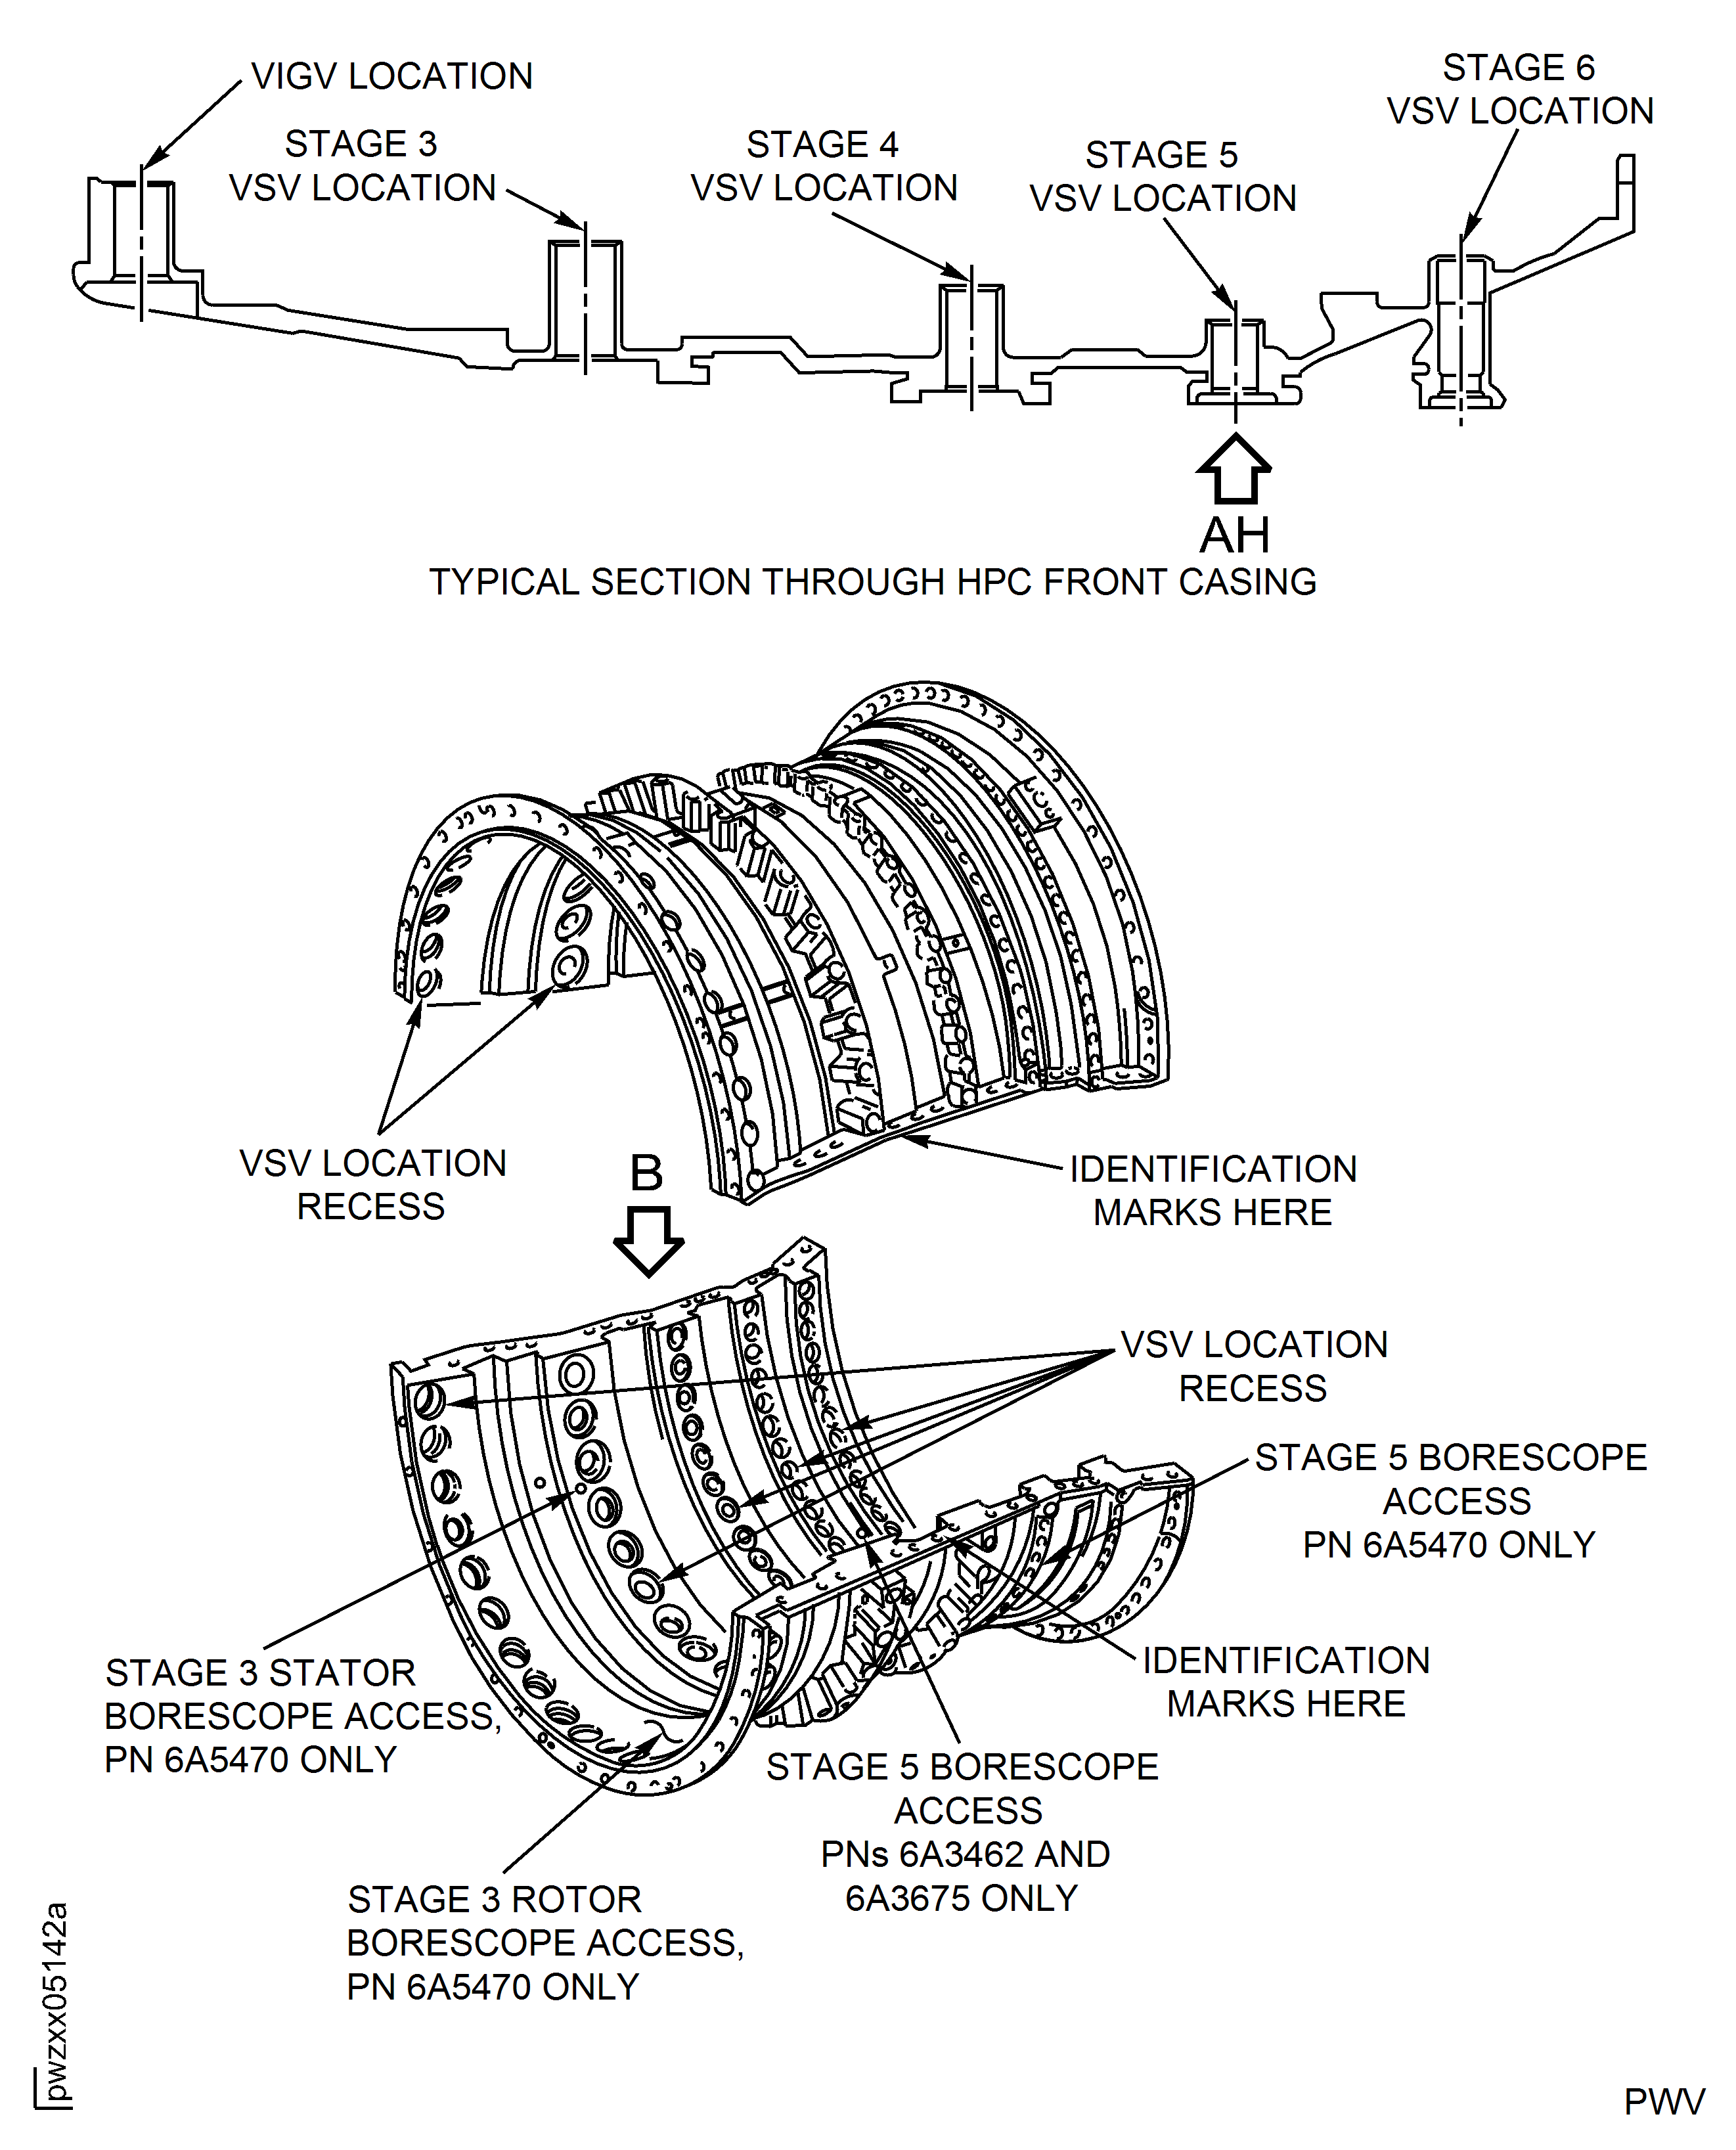
Figure: Repair Details and Dimensions - Assembly A
Repair Details and Dimensions - Assembly A
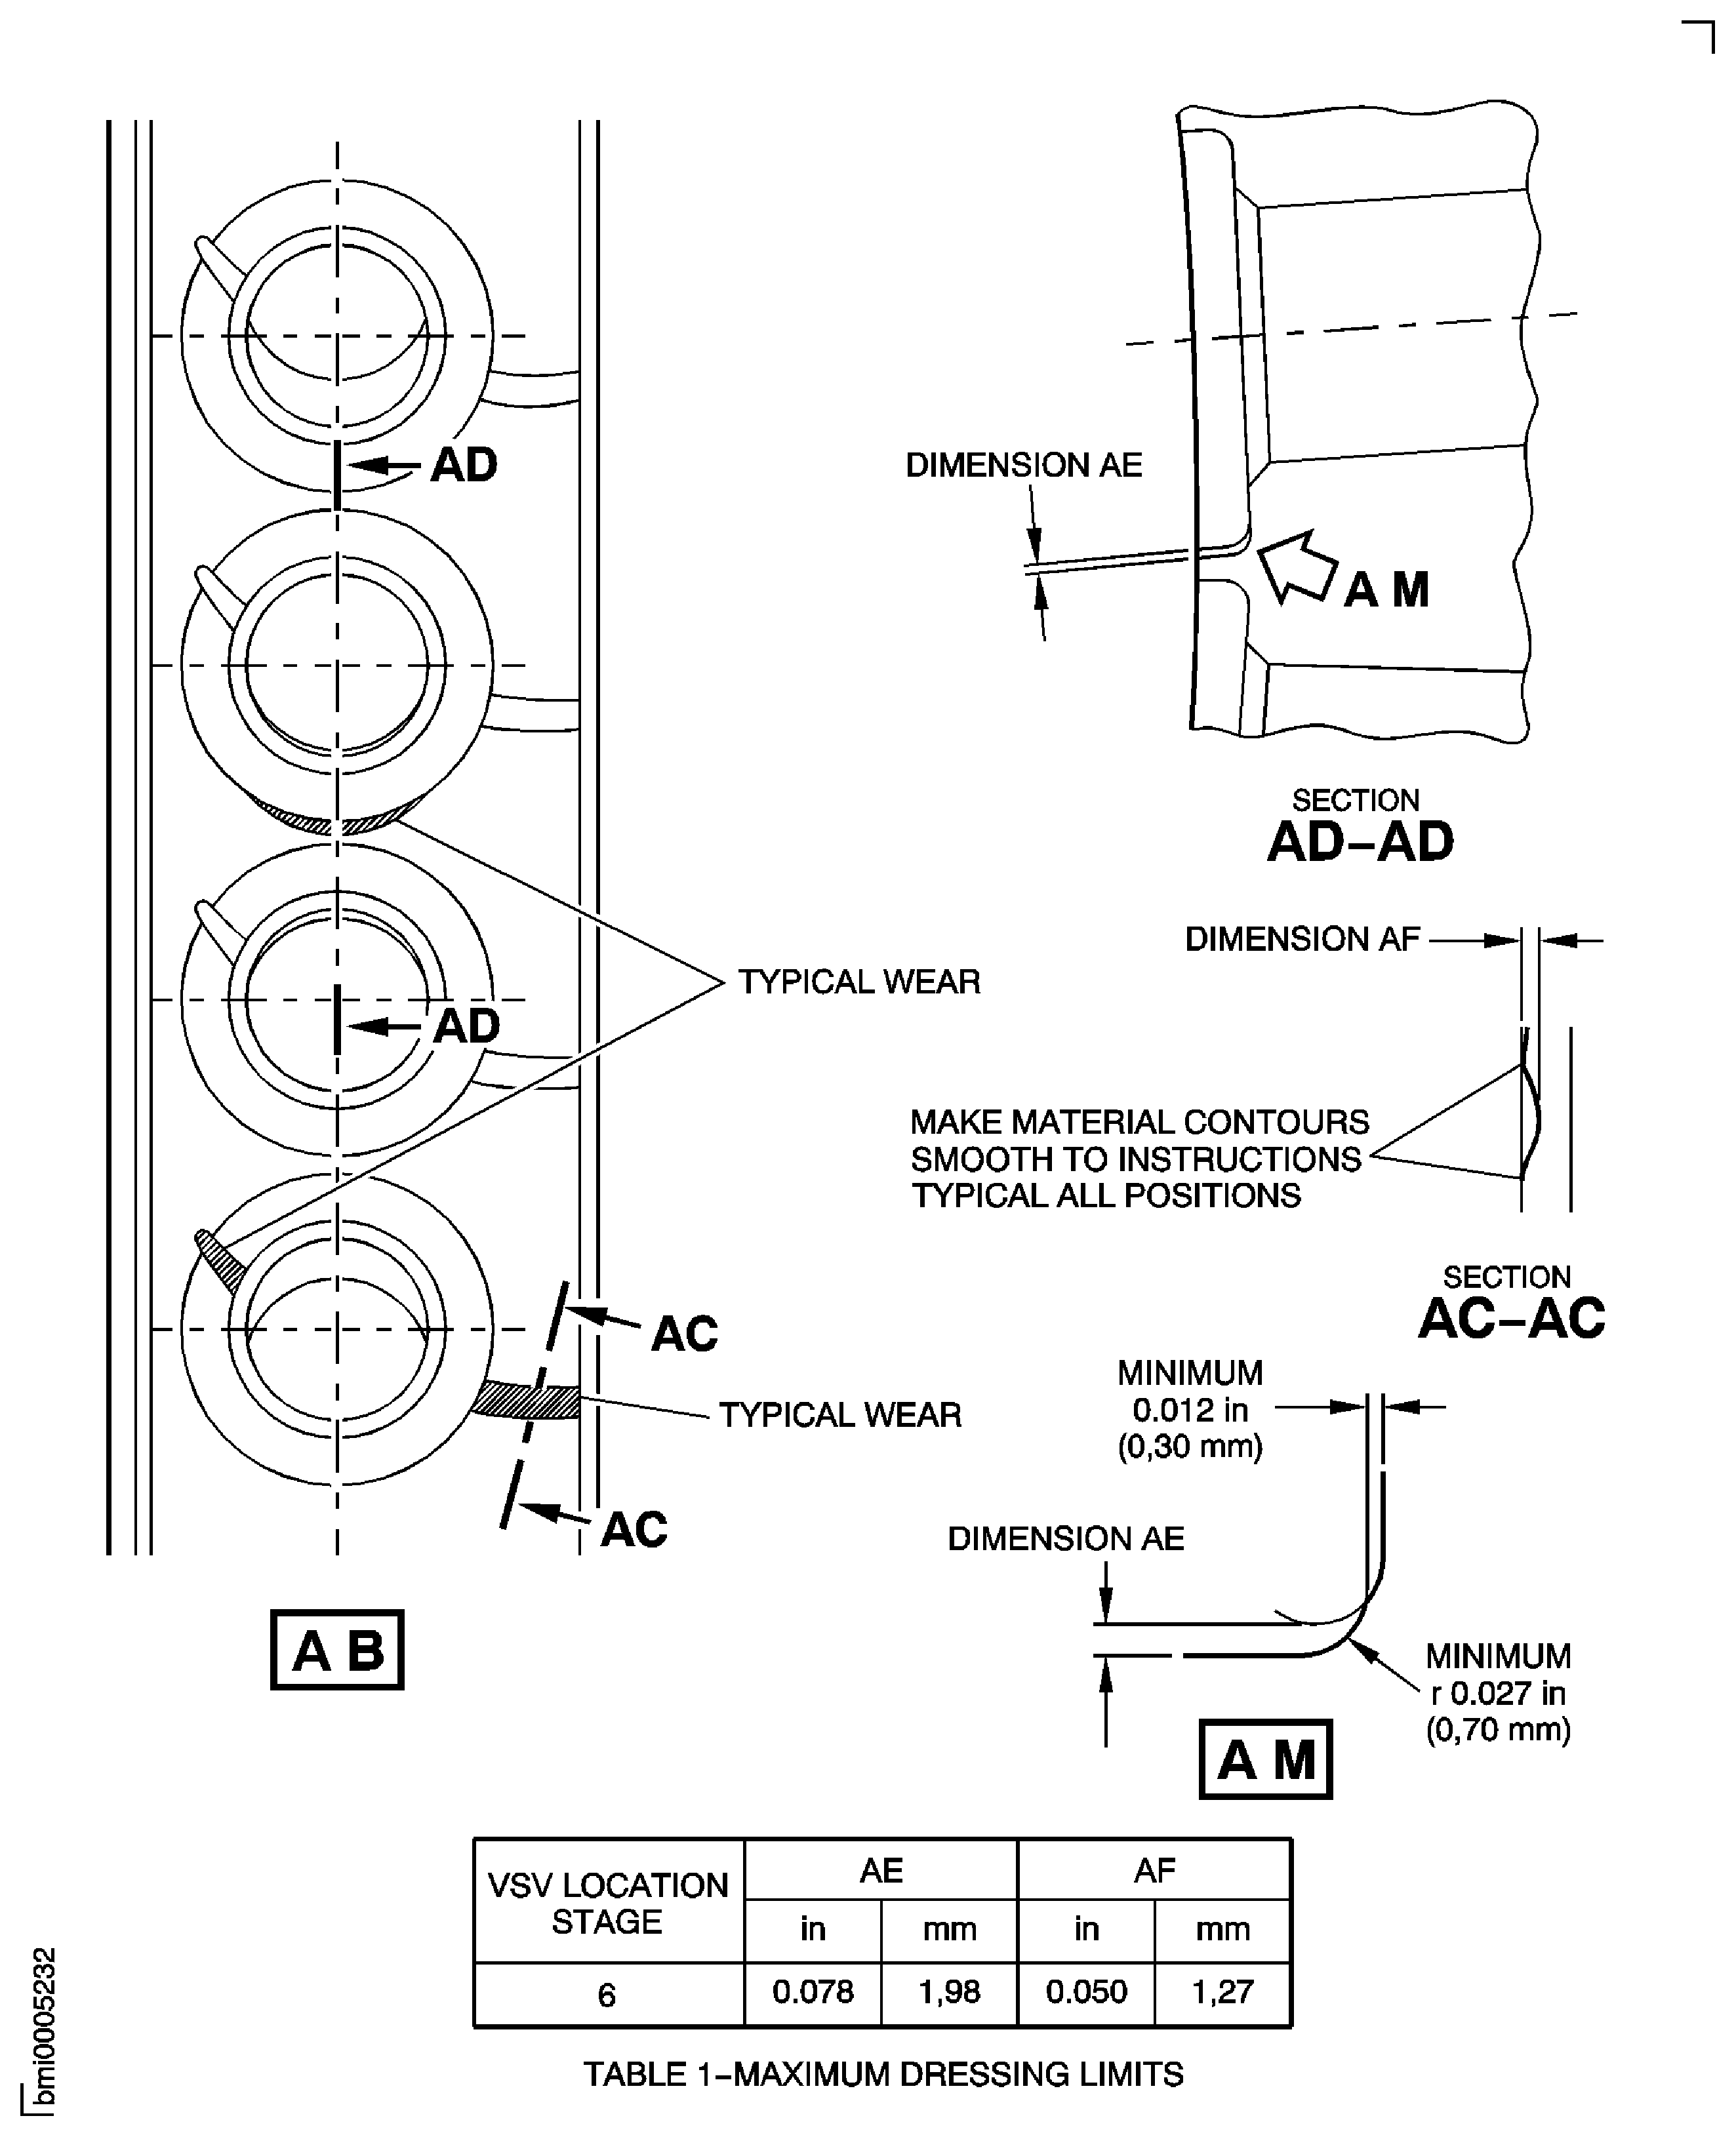
Figure: Repair Details and Dimensions - Assembly B
Repair Details and Dimensions - Assembly B
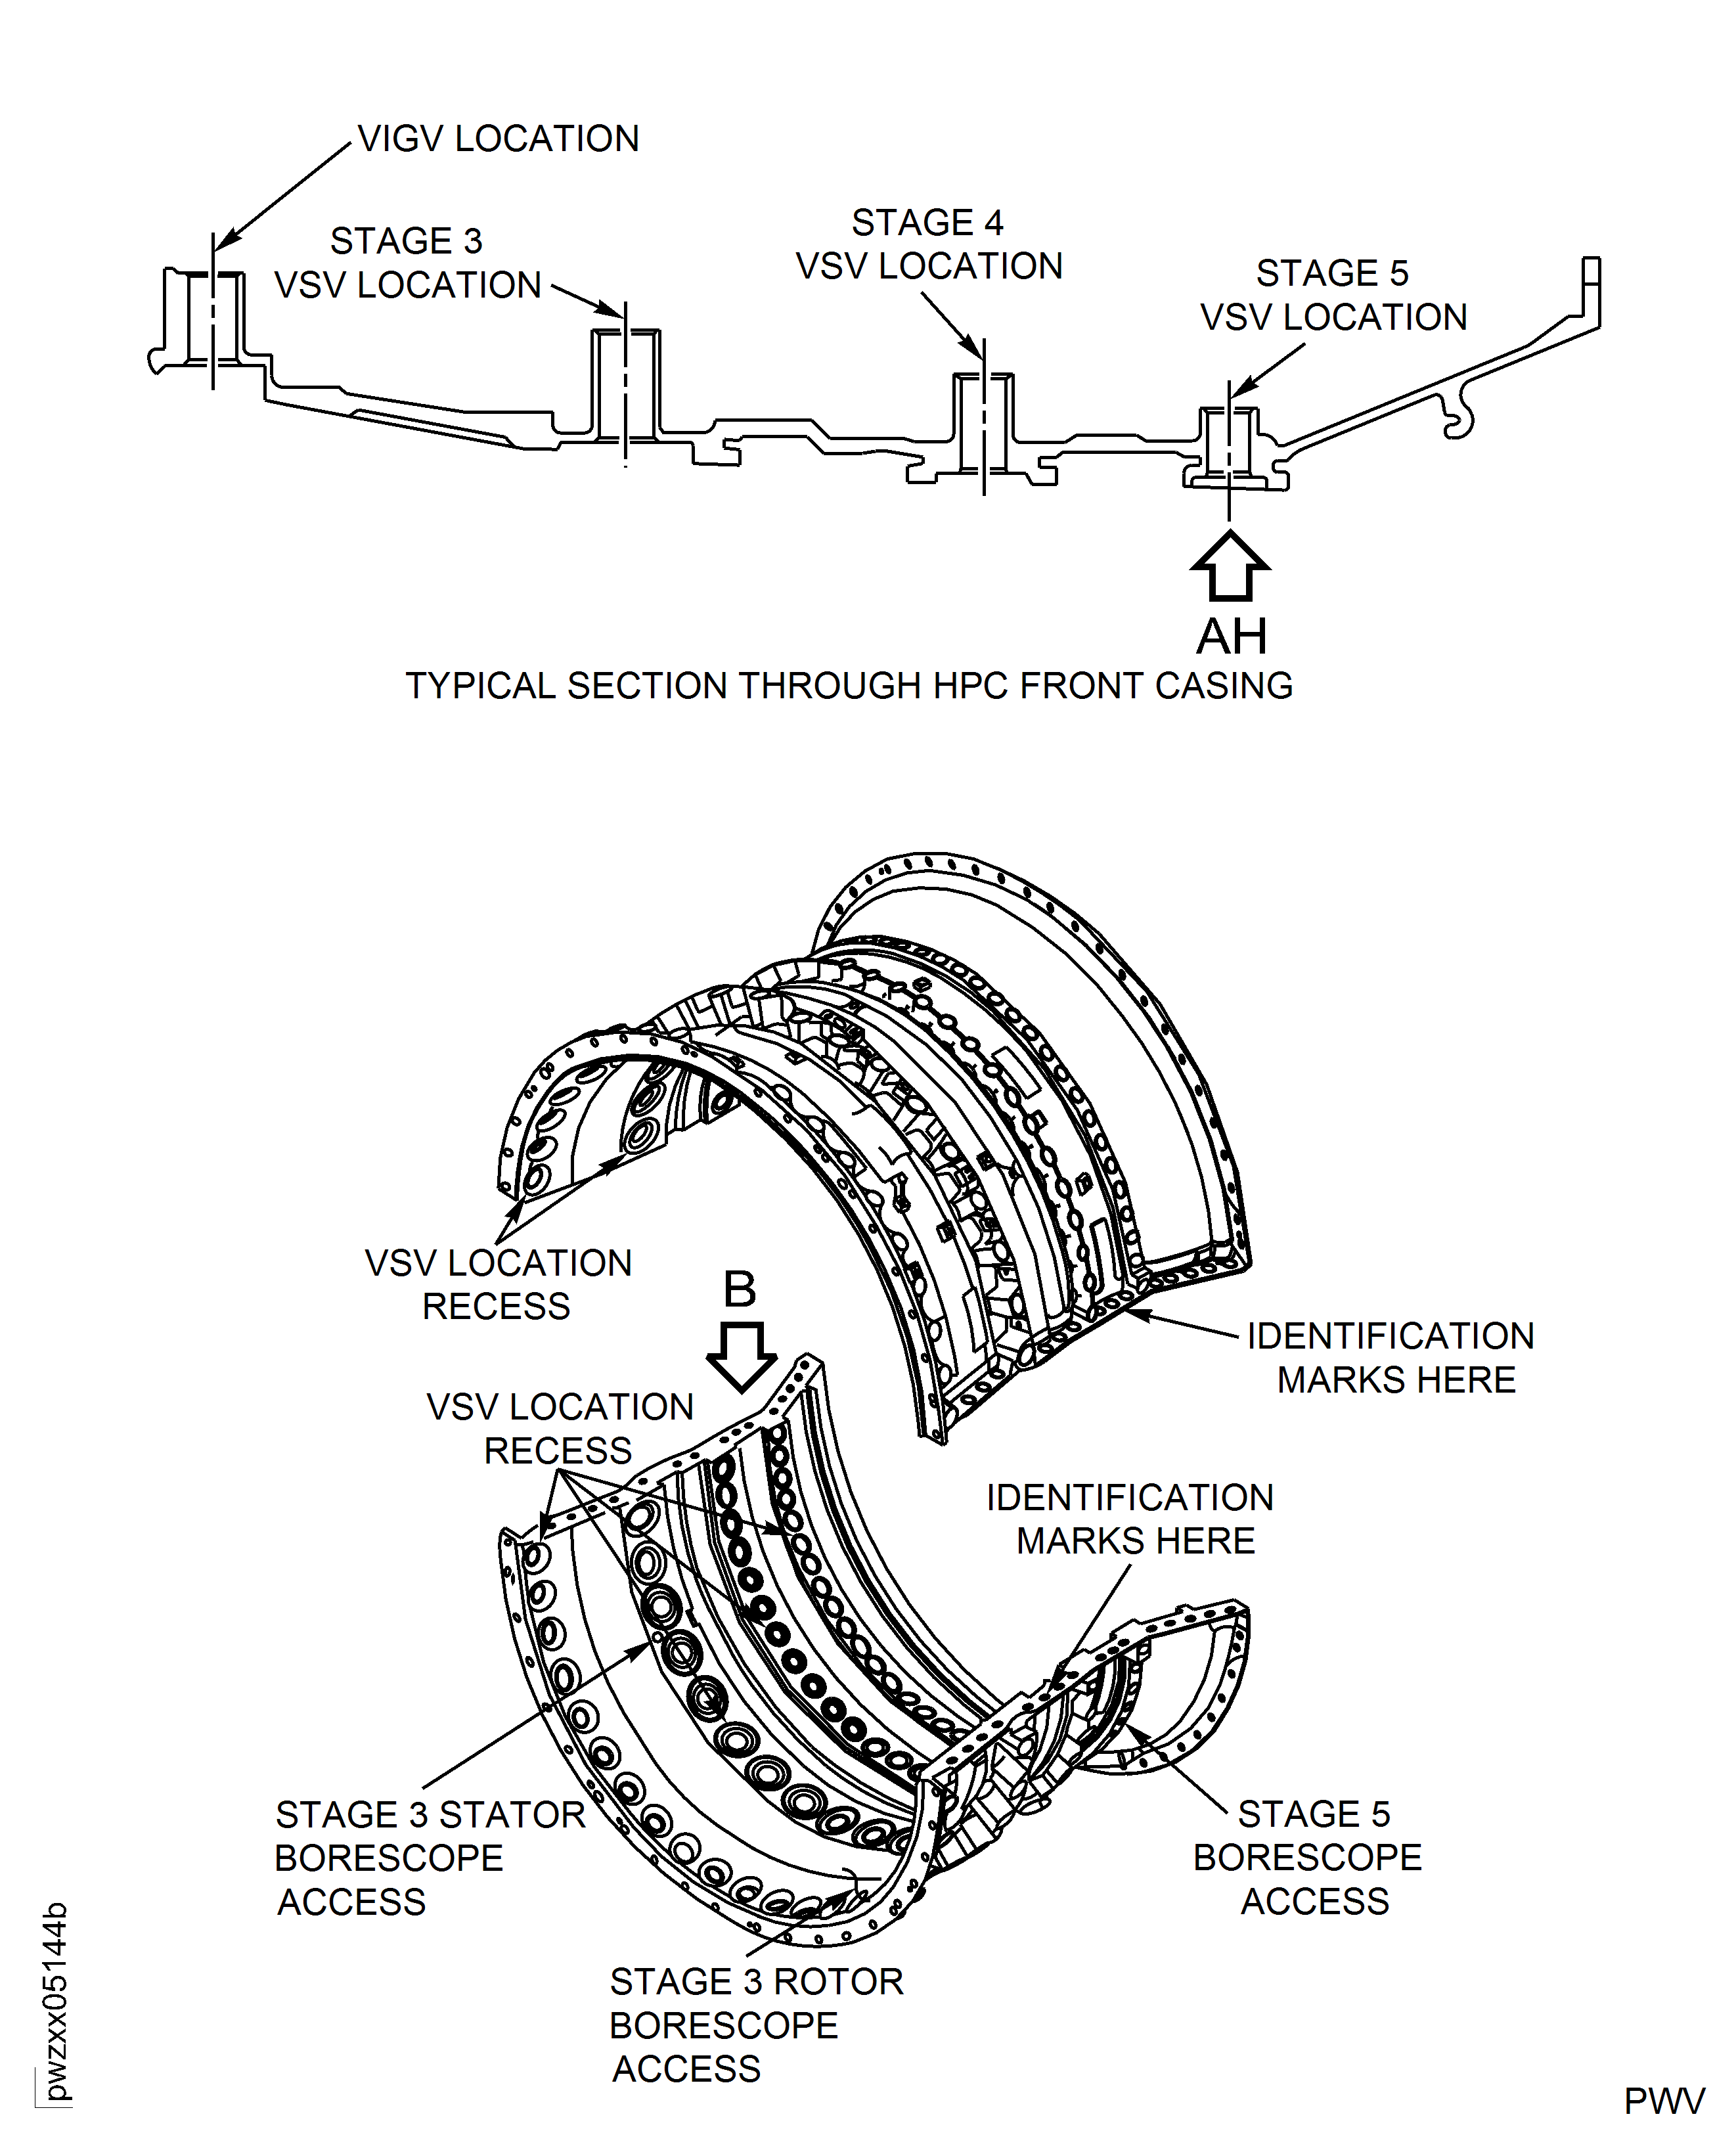
Figure: Repair Details and Dimensions - Assembly A and Assembly B
Repair Details and Dimensions - Assembly A and Assembly B
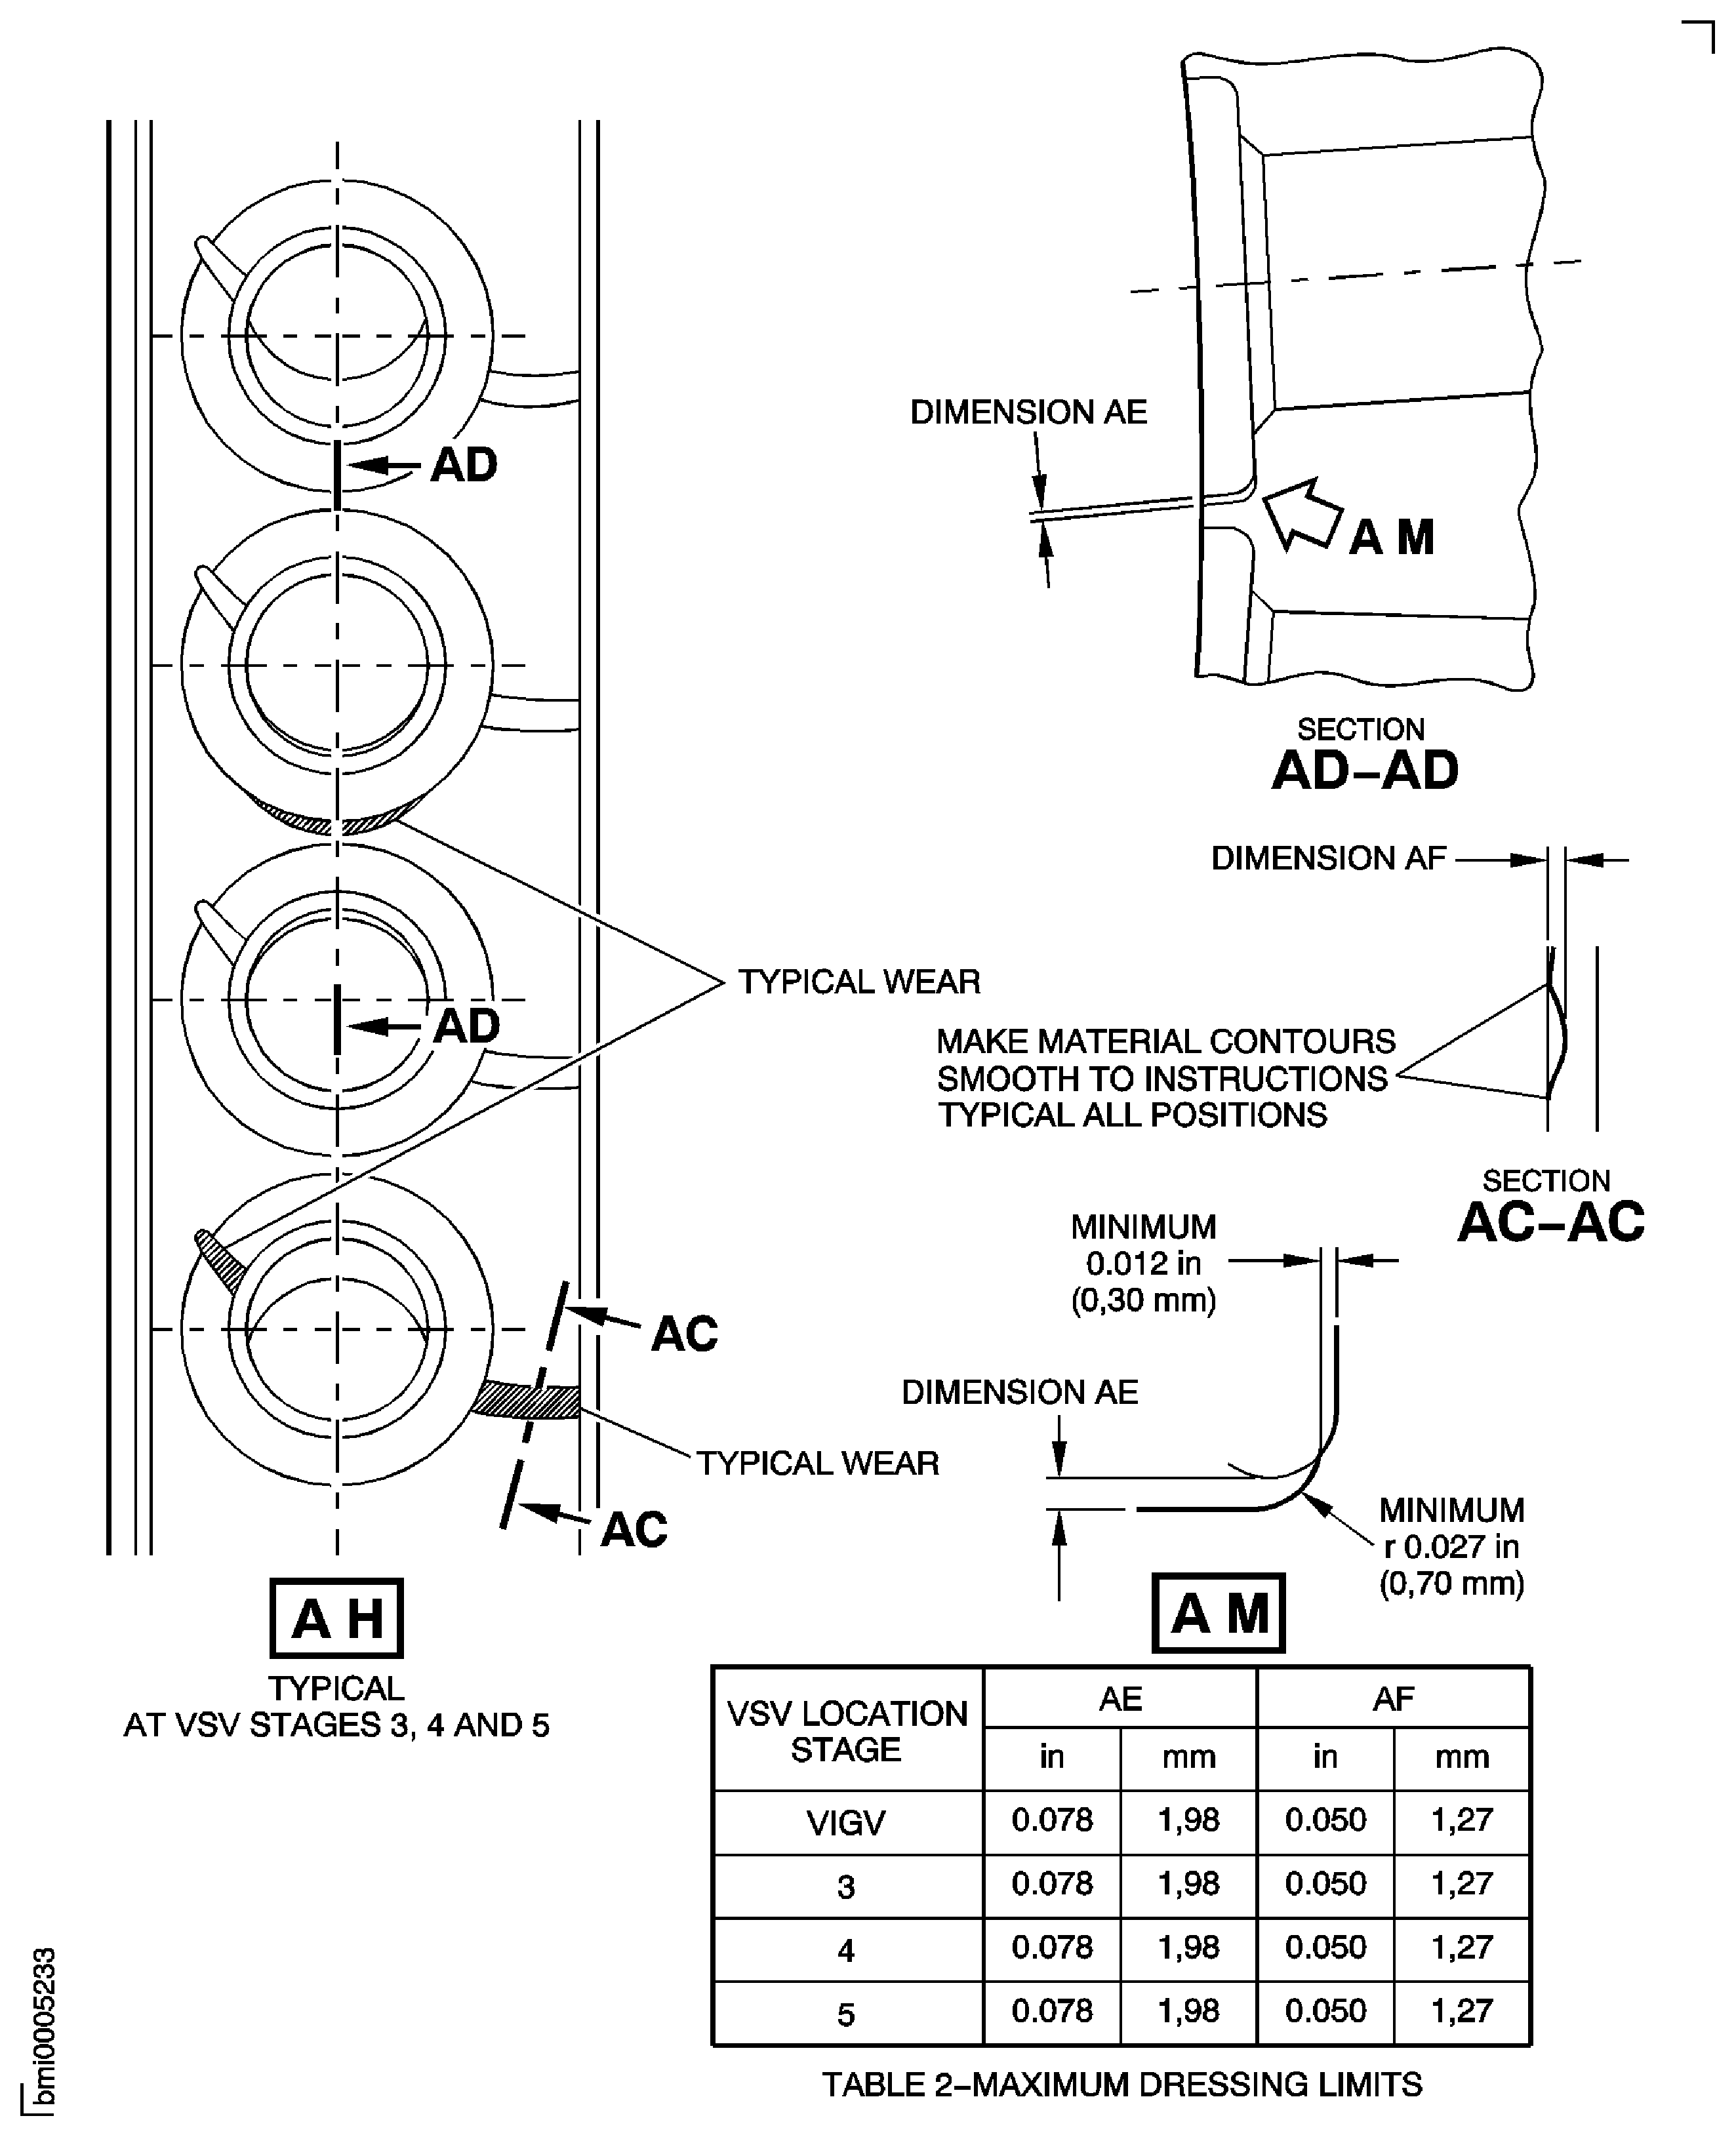
Figure: Repair Details and Dimensions - Assembly A and Assembly B
Repair Details and Dimensions - Assembly A and Assembly B
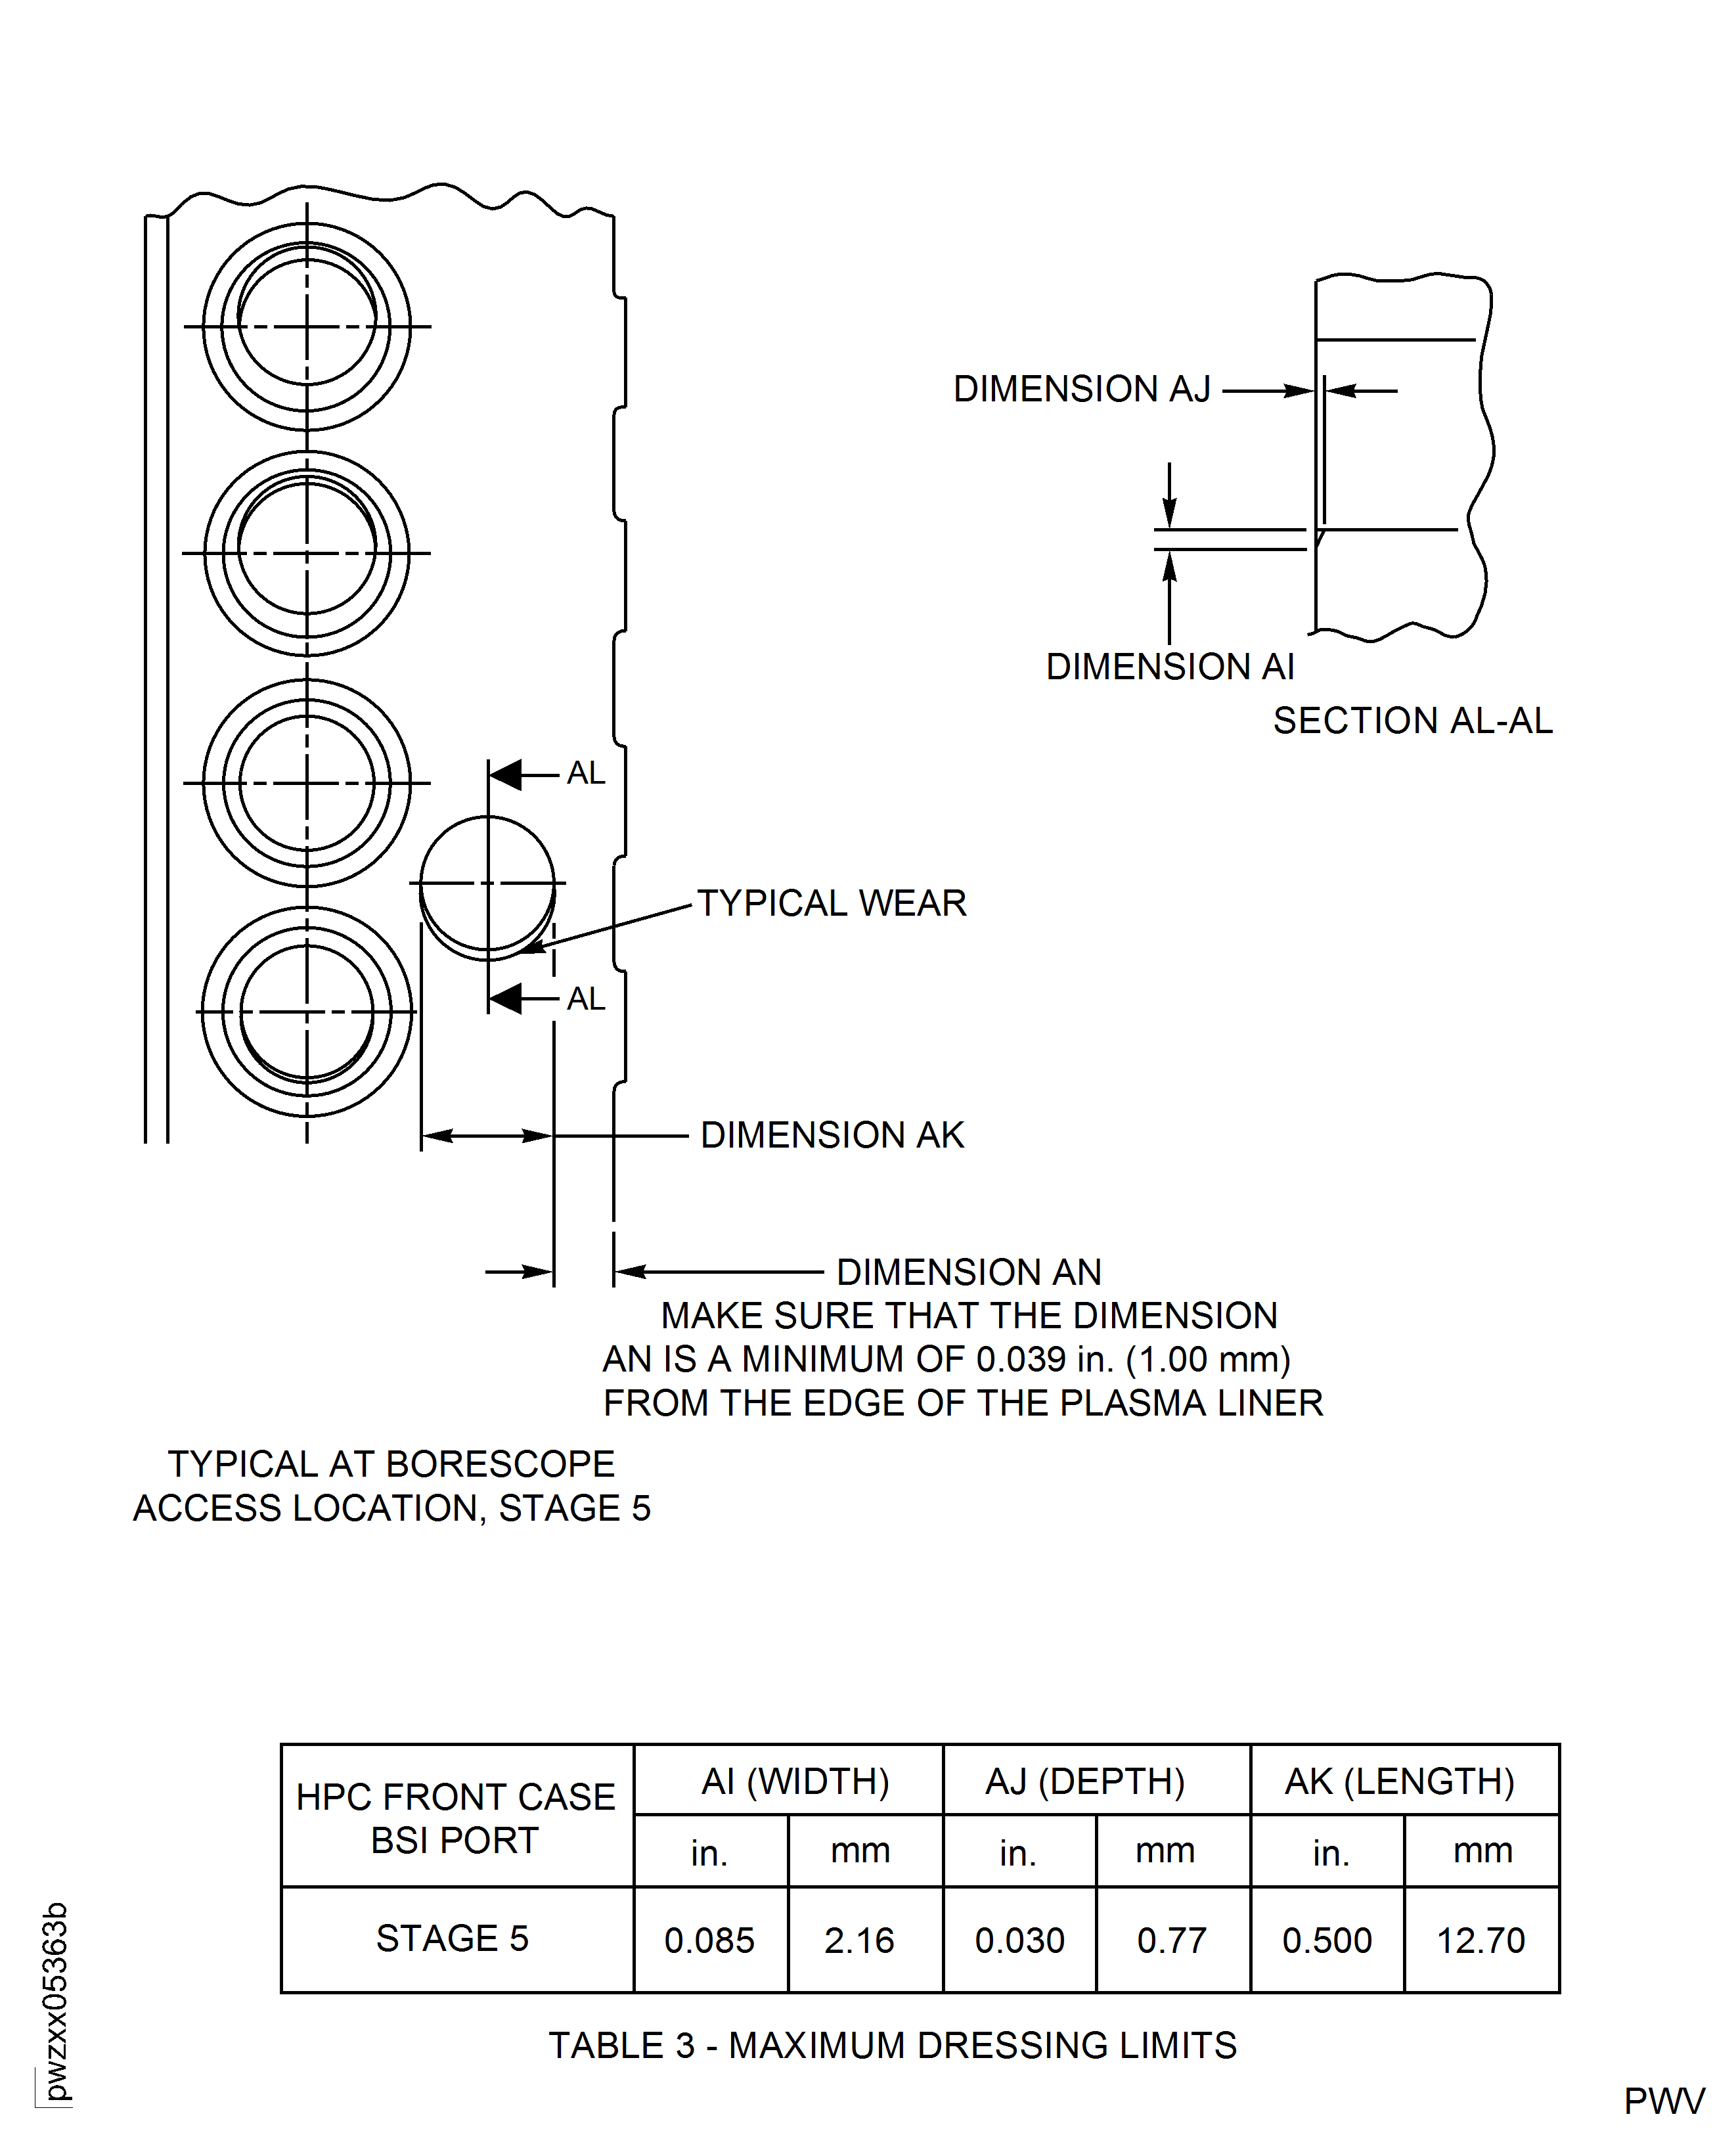
Figure: Repair Details and Dimensions - Assembly A
Repair Details and Dimensions - Assembly A
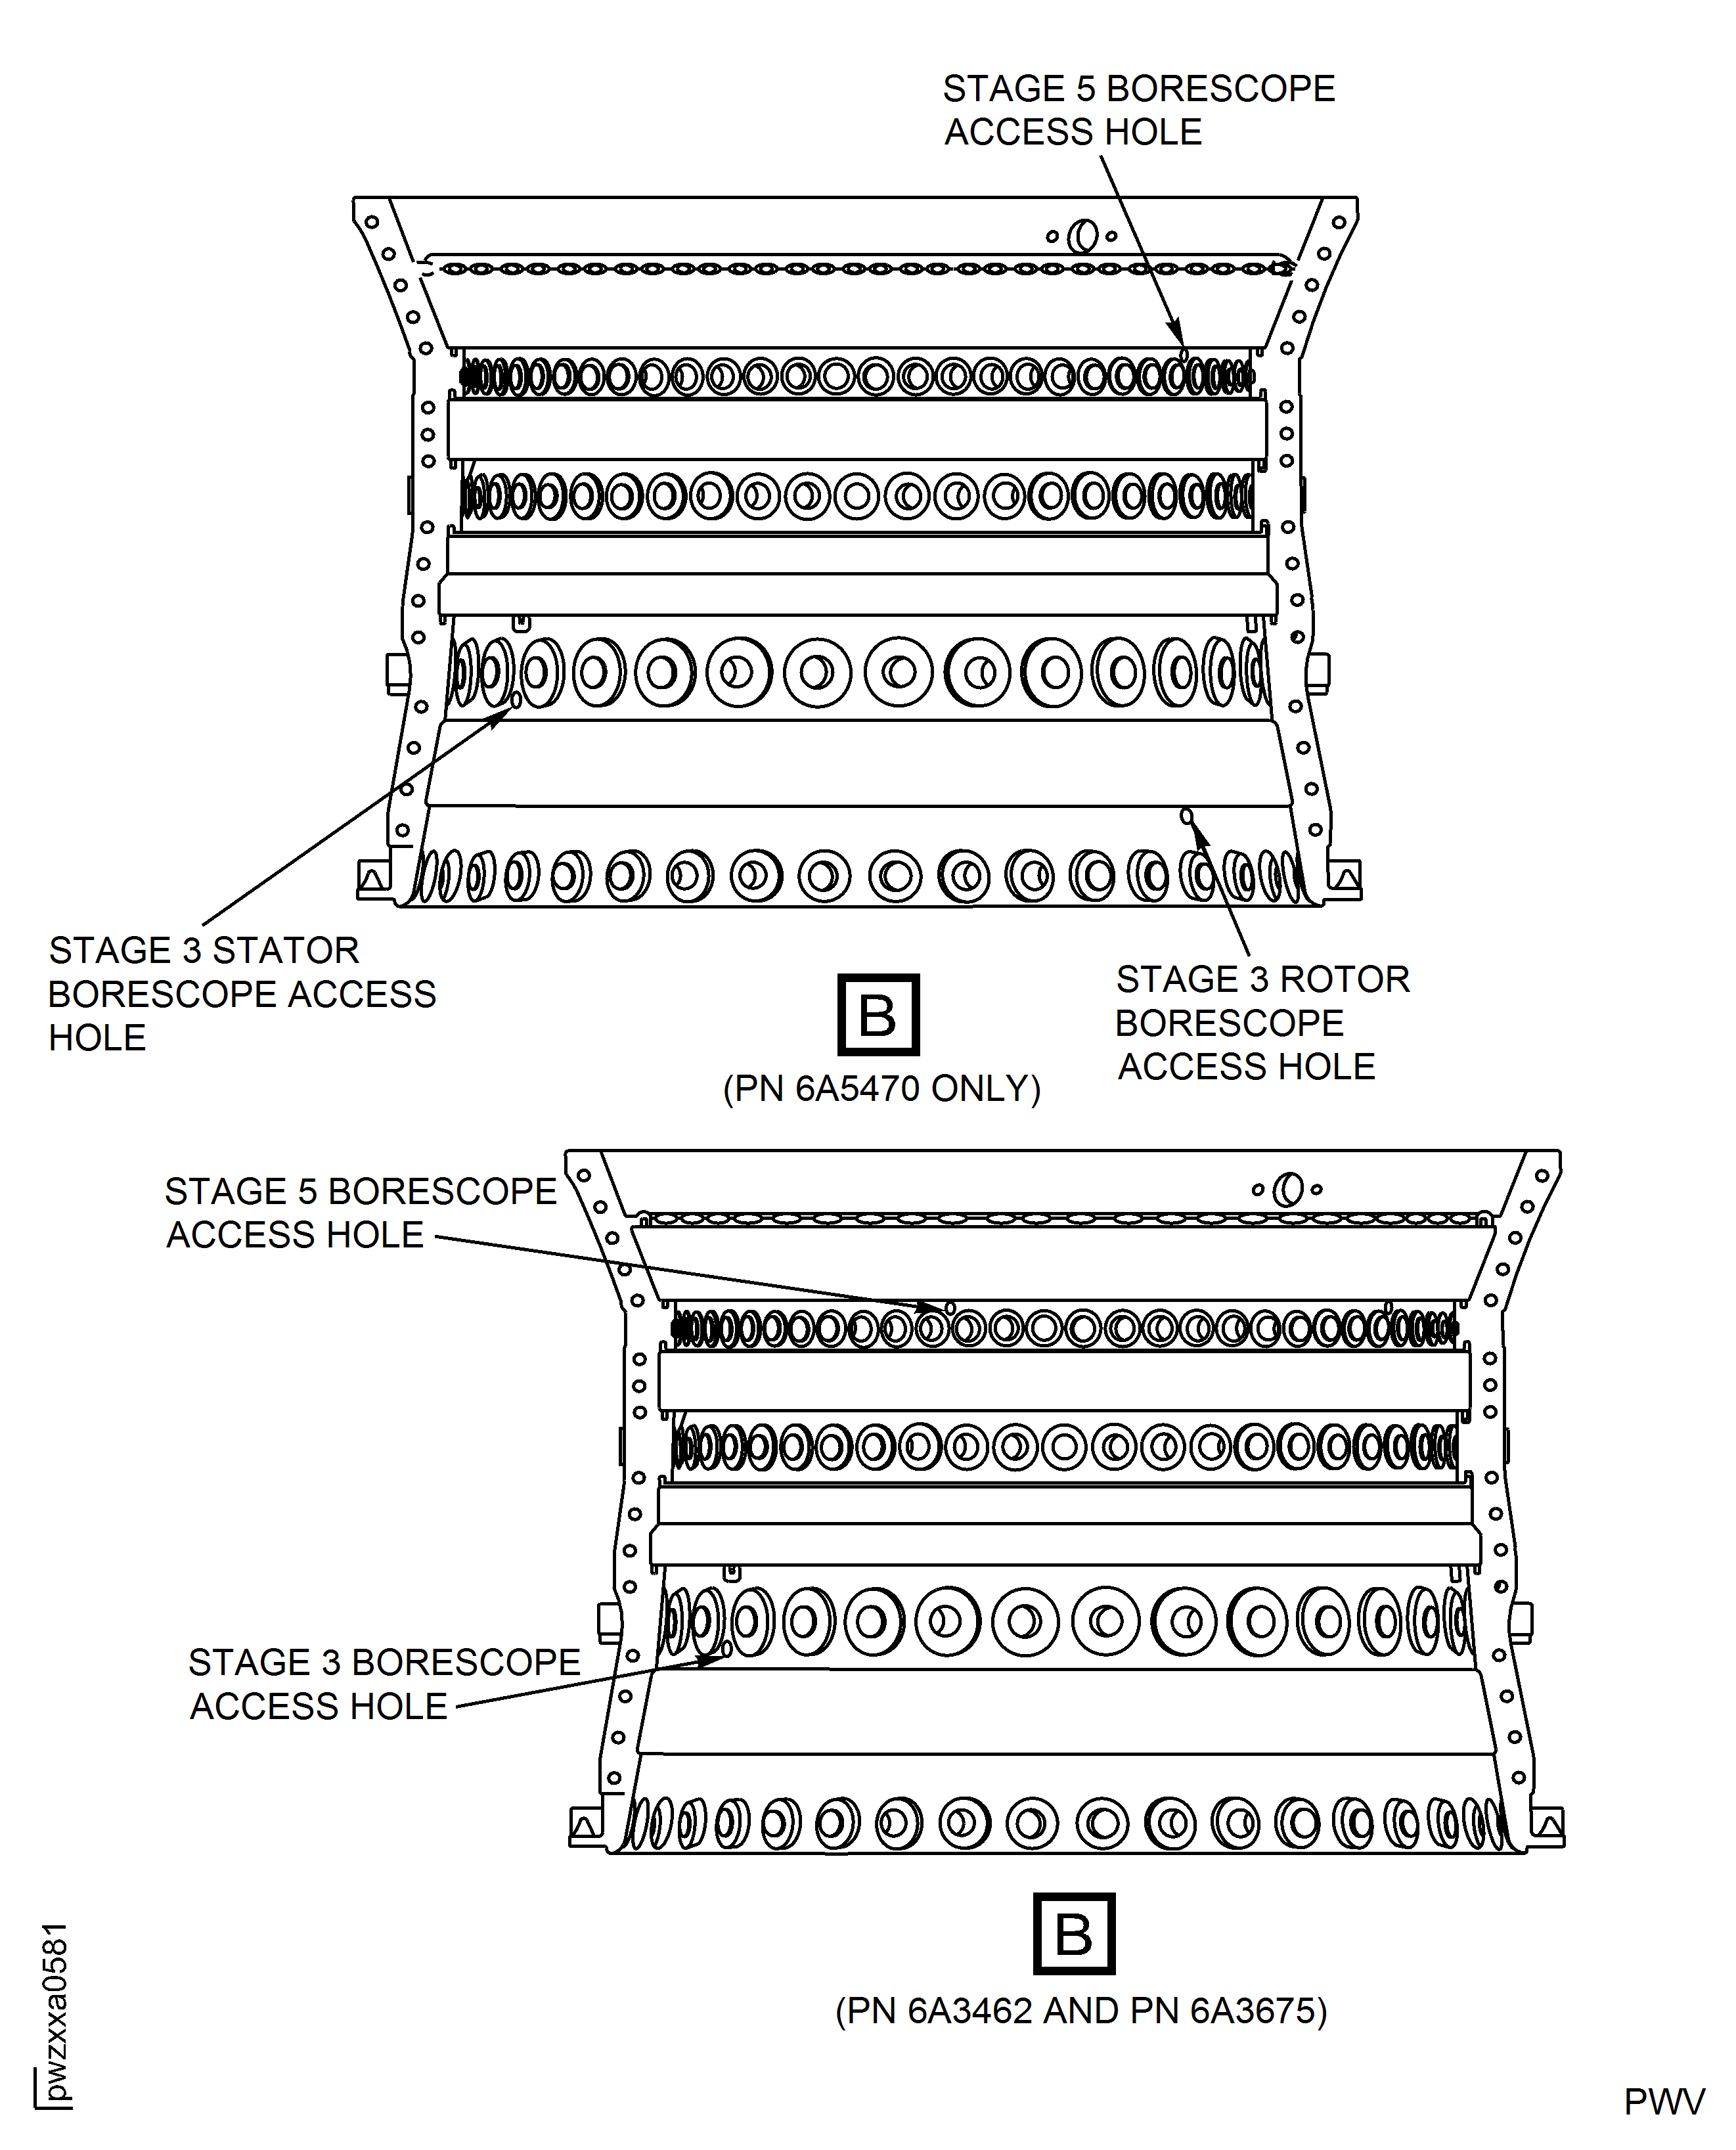
Figure: Repair Details and Dimensions - Assembly B
Repair Details and Dimensions - Assembly B
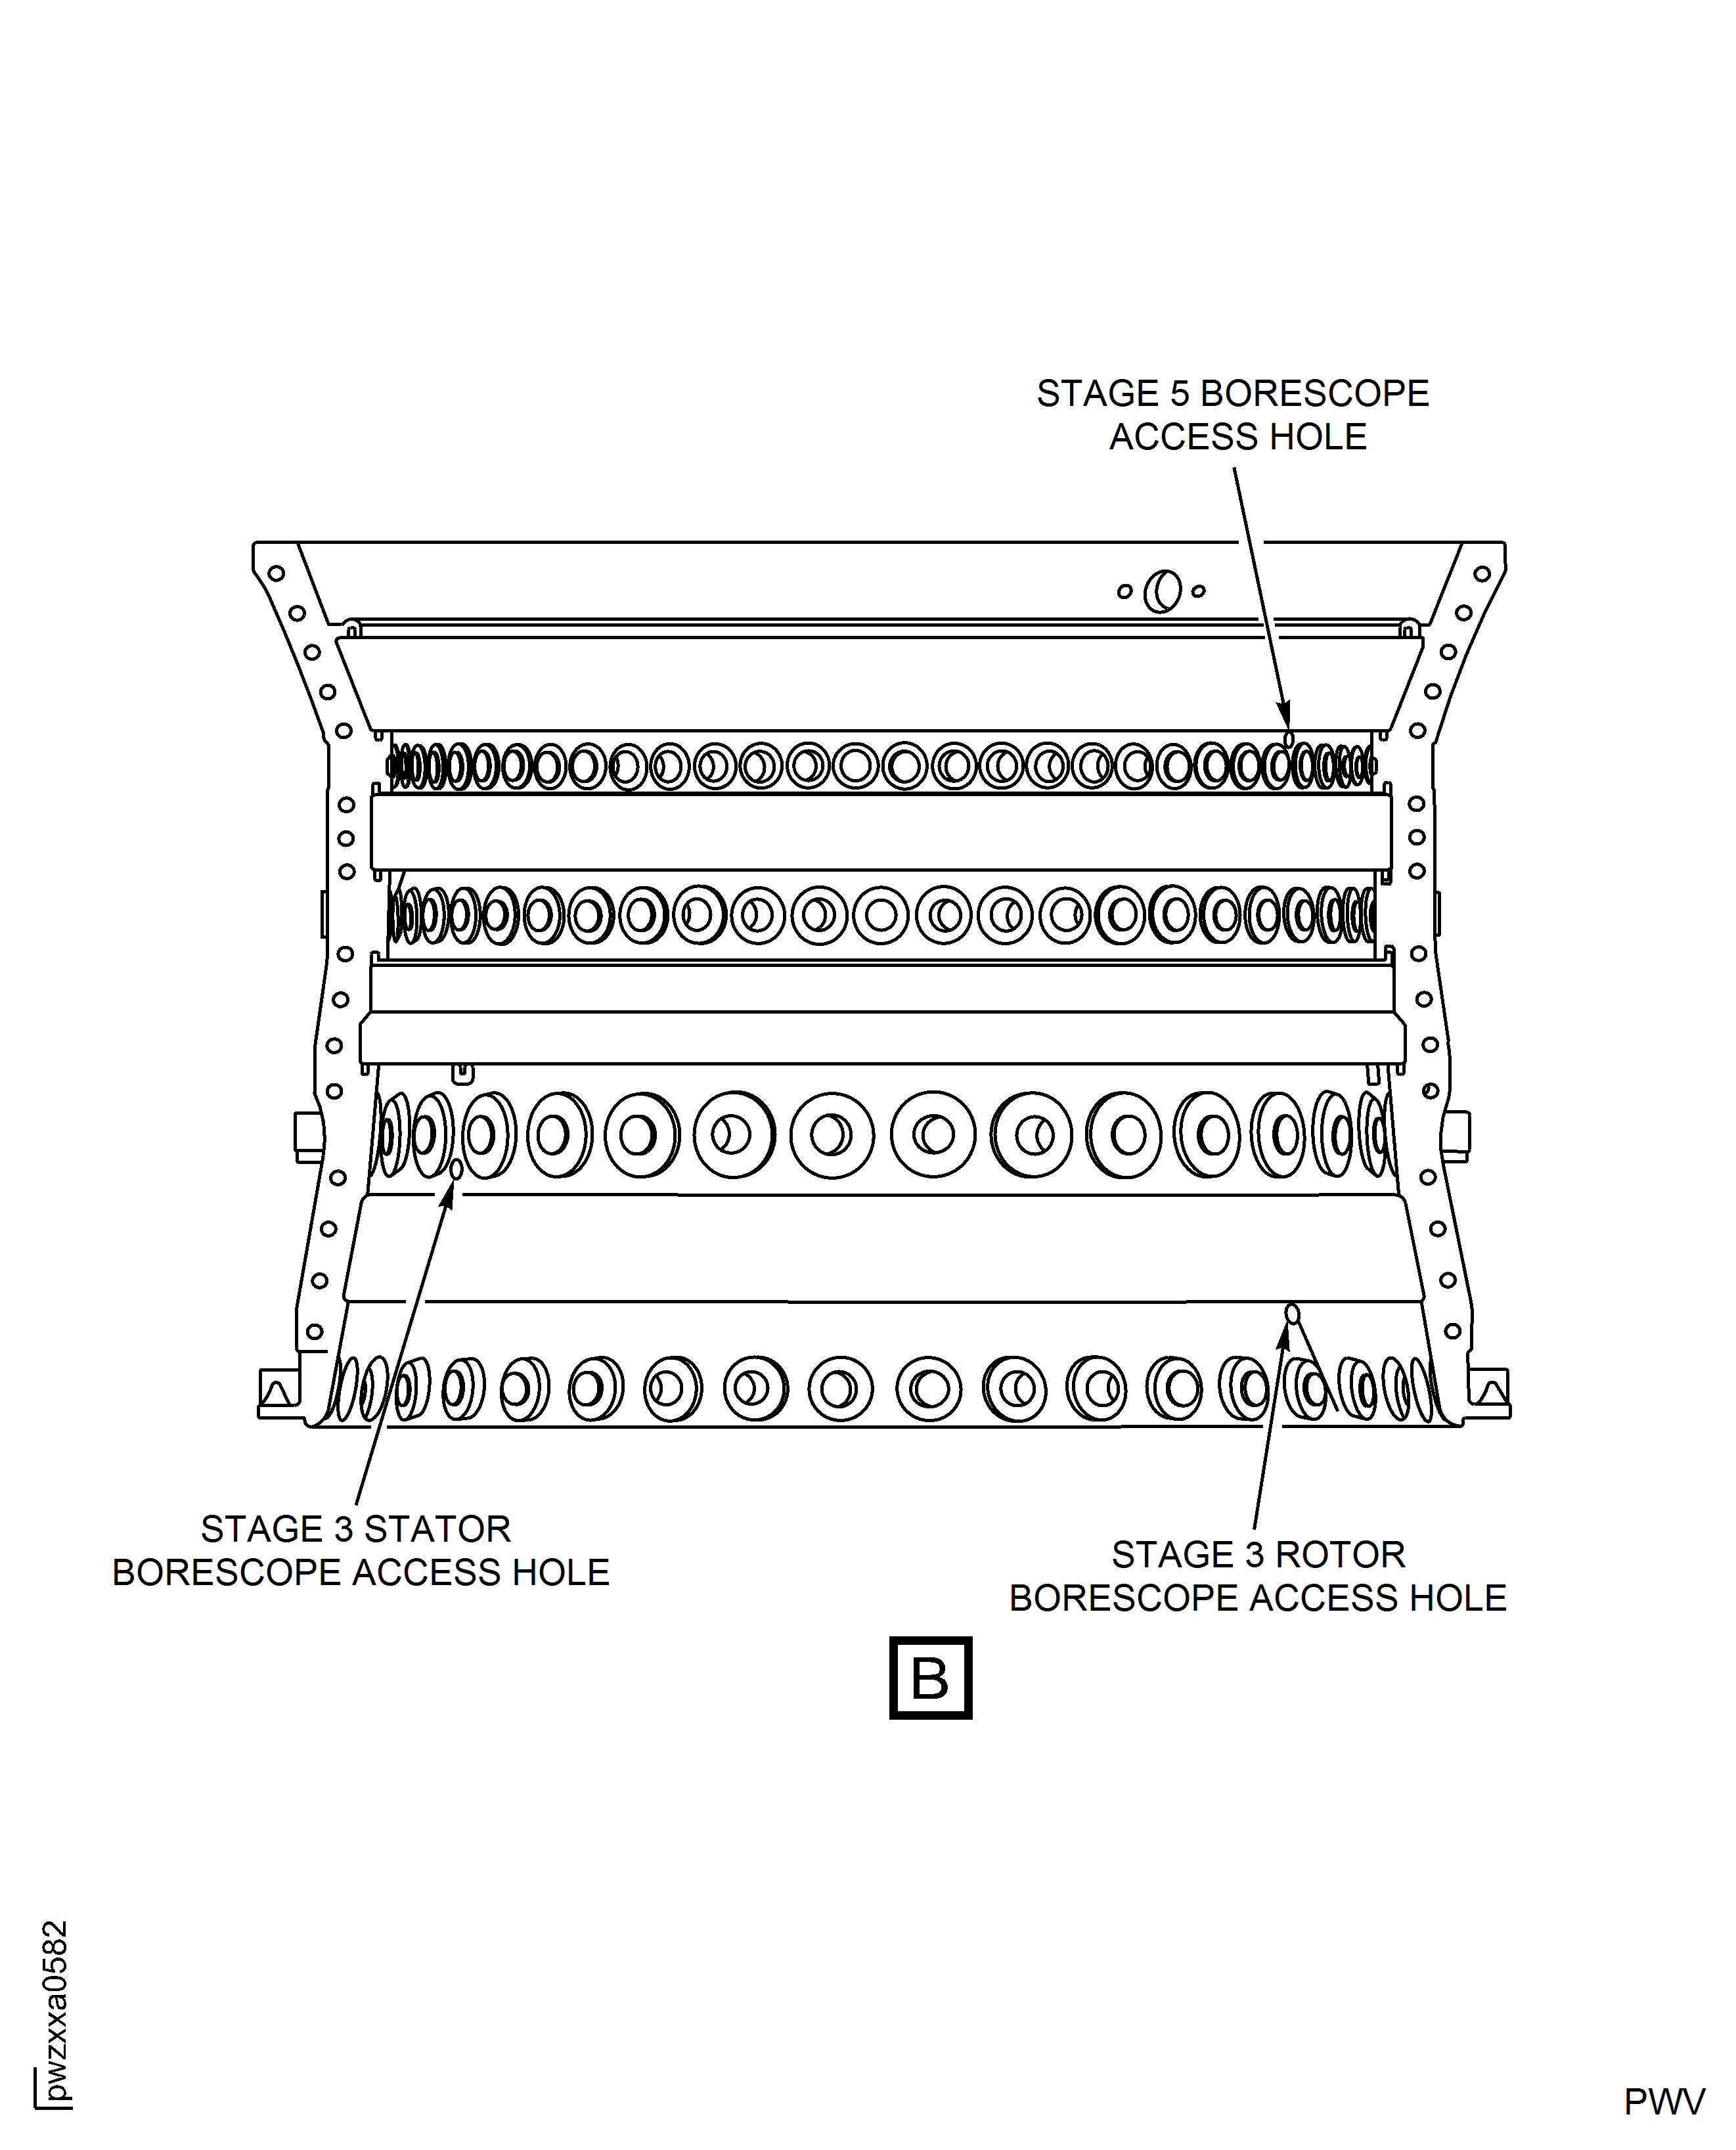
Figure: Repair Details and Dimensions - Assembly A and Assembly B
Repair Details and Dimensions - Assembly A and Assembly B
