Export Control
EAR Export Classification: Not subject to the EAR per 15 C.F.R. Chapter 1, Part 734.3(b)(3), except for the following Service Bulletins which are currently published as EAR Export Classification 9E991: SBE70-0992, SBE72-0483, SBE72-0580, SBE72-0588, SBE72-0640, SBE73-0209, SBE80-0024 and SBE80-0025.Copyright
© IAE International Aero Engines AG (2001, 2014 - 2021) The information contained in this document is the property of © IAE International Aero Engines AG and may not be copied or used for any purpose other than that for which it is supplied without the express written authority of © IAE International Aero Engines AG. (This does not preclude use by engine and aircraft operators for normal instructional, maintenance or overhaul purposes.).Applicability
All
Common Information
TASK 72-42-11-300-031 Diffuser Case - Repair The Thread Of The Burner Pin Boss, Repair-031 (VRS3739)
Effectivity
FIG/ITEM PART NO. | |
|---|---|
01-010 | 2A0051 |
01-010 | 2A2081-01 |
01-010 | 2A2581-01 |
01-010 | 2A2883-01 |
01-010 | 2A2885-01 |
01-010 | 2A2889-01 |
01-010 | 2A2891-01 |
01-010 | 2A2896-01 |
01-010 | 2A2897-01 |
01-010 | 2A3132 |
General
Price and availability - refer to IAE
The practices and processes referred to in the procedure by the TASK numbers are in the SPM.
Preliminary Requirements
Pre-Conditions
NONESupport Equipment
NONEConsumables, Materials and Expendables
| Name | Manufacturer | Part Number / Identification | Quantity | Remark |
|---|---|---|---|---|
| Nickel Alloy (Inconel 718) | LOCAL | AMS 5663 |
Spares
NONESafety Requirements
NONEProcedure
Refer to the SPM TASK 70-11-03-300-503.
SUBTASK 72-42-11-110-057 Clean the Diffuser Case
Refer to the SPM TASK 70-23-05-230-501, high sensitivity.
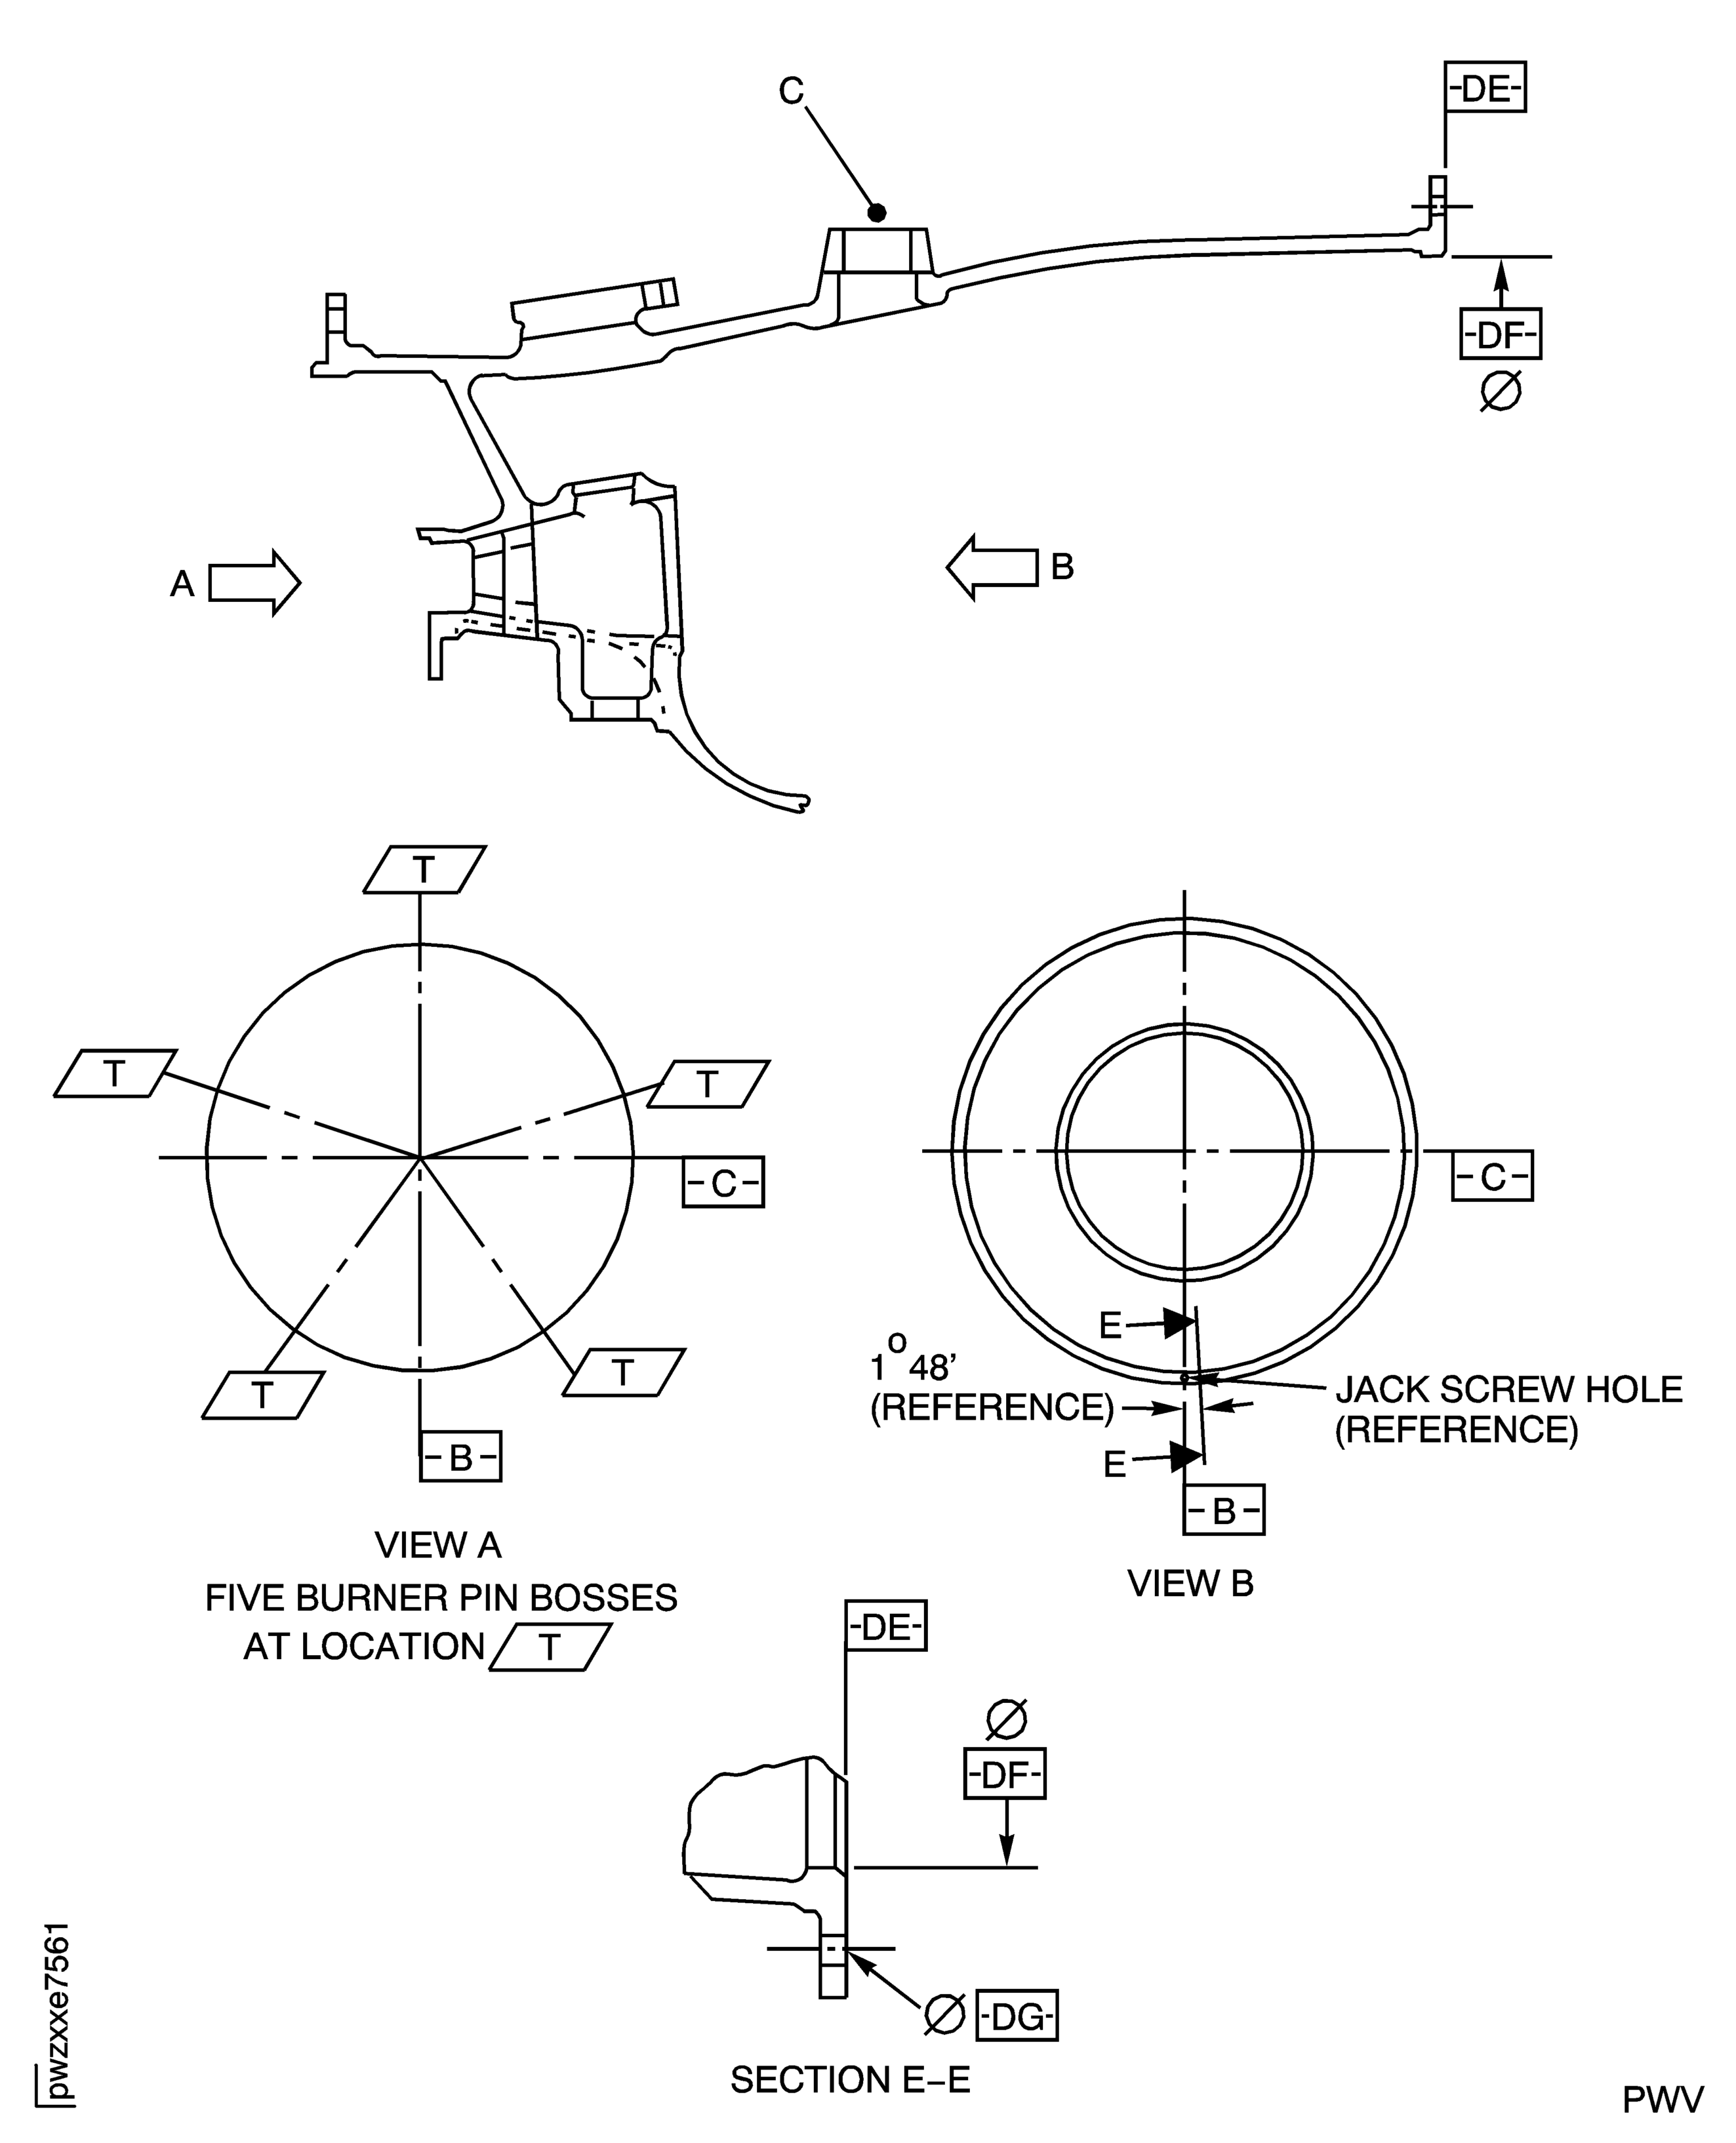
SUBTASK 72-42-11-230-059 Examine the Repair Area
Refer to Figure.
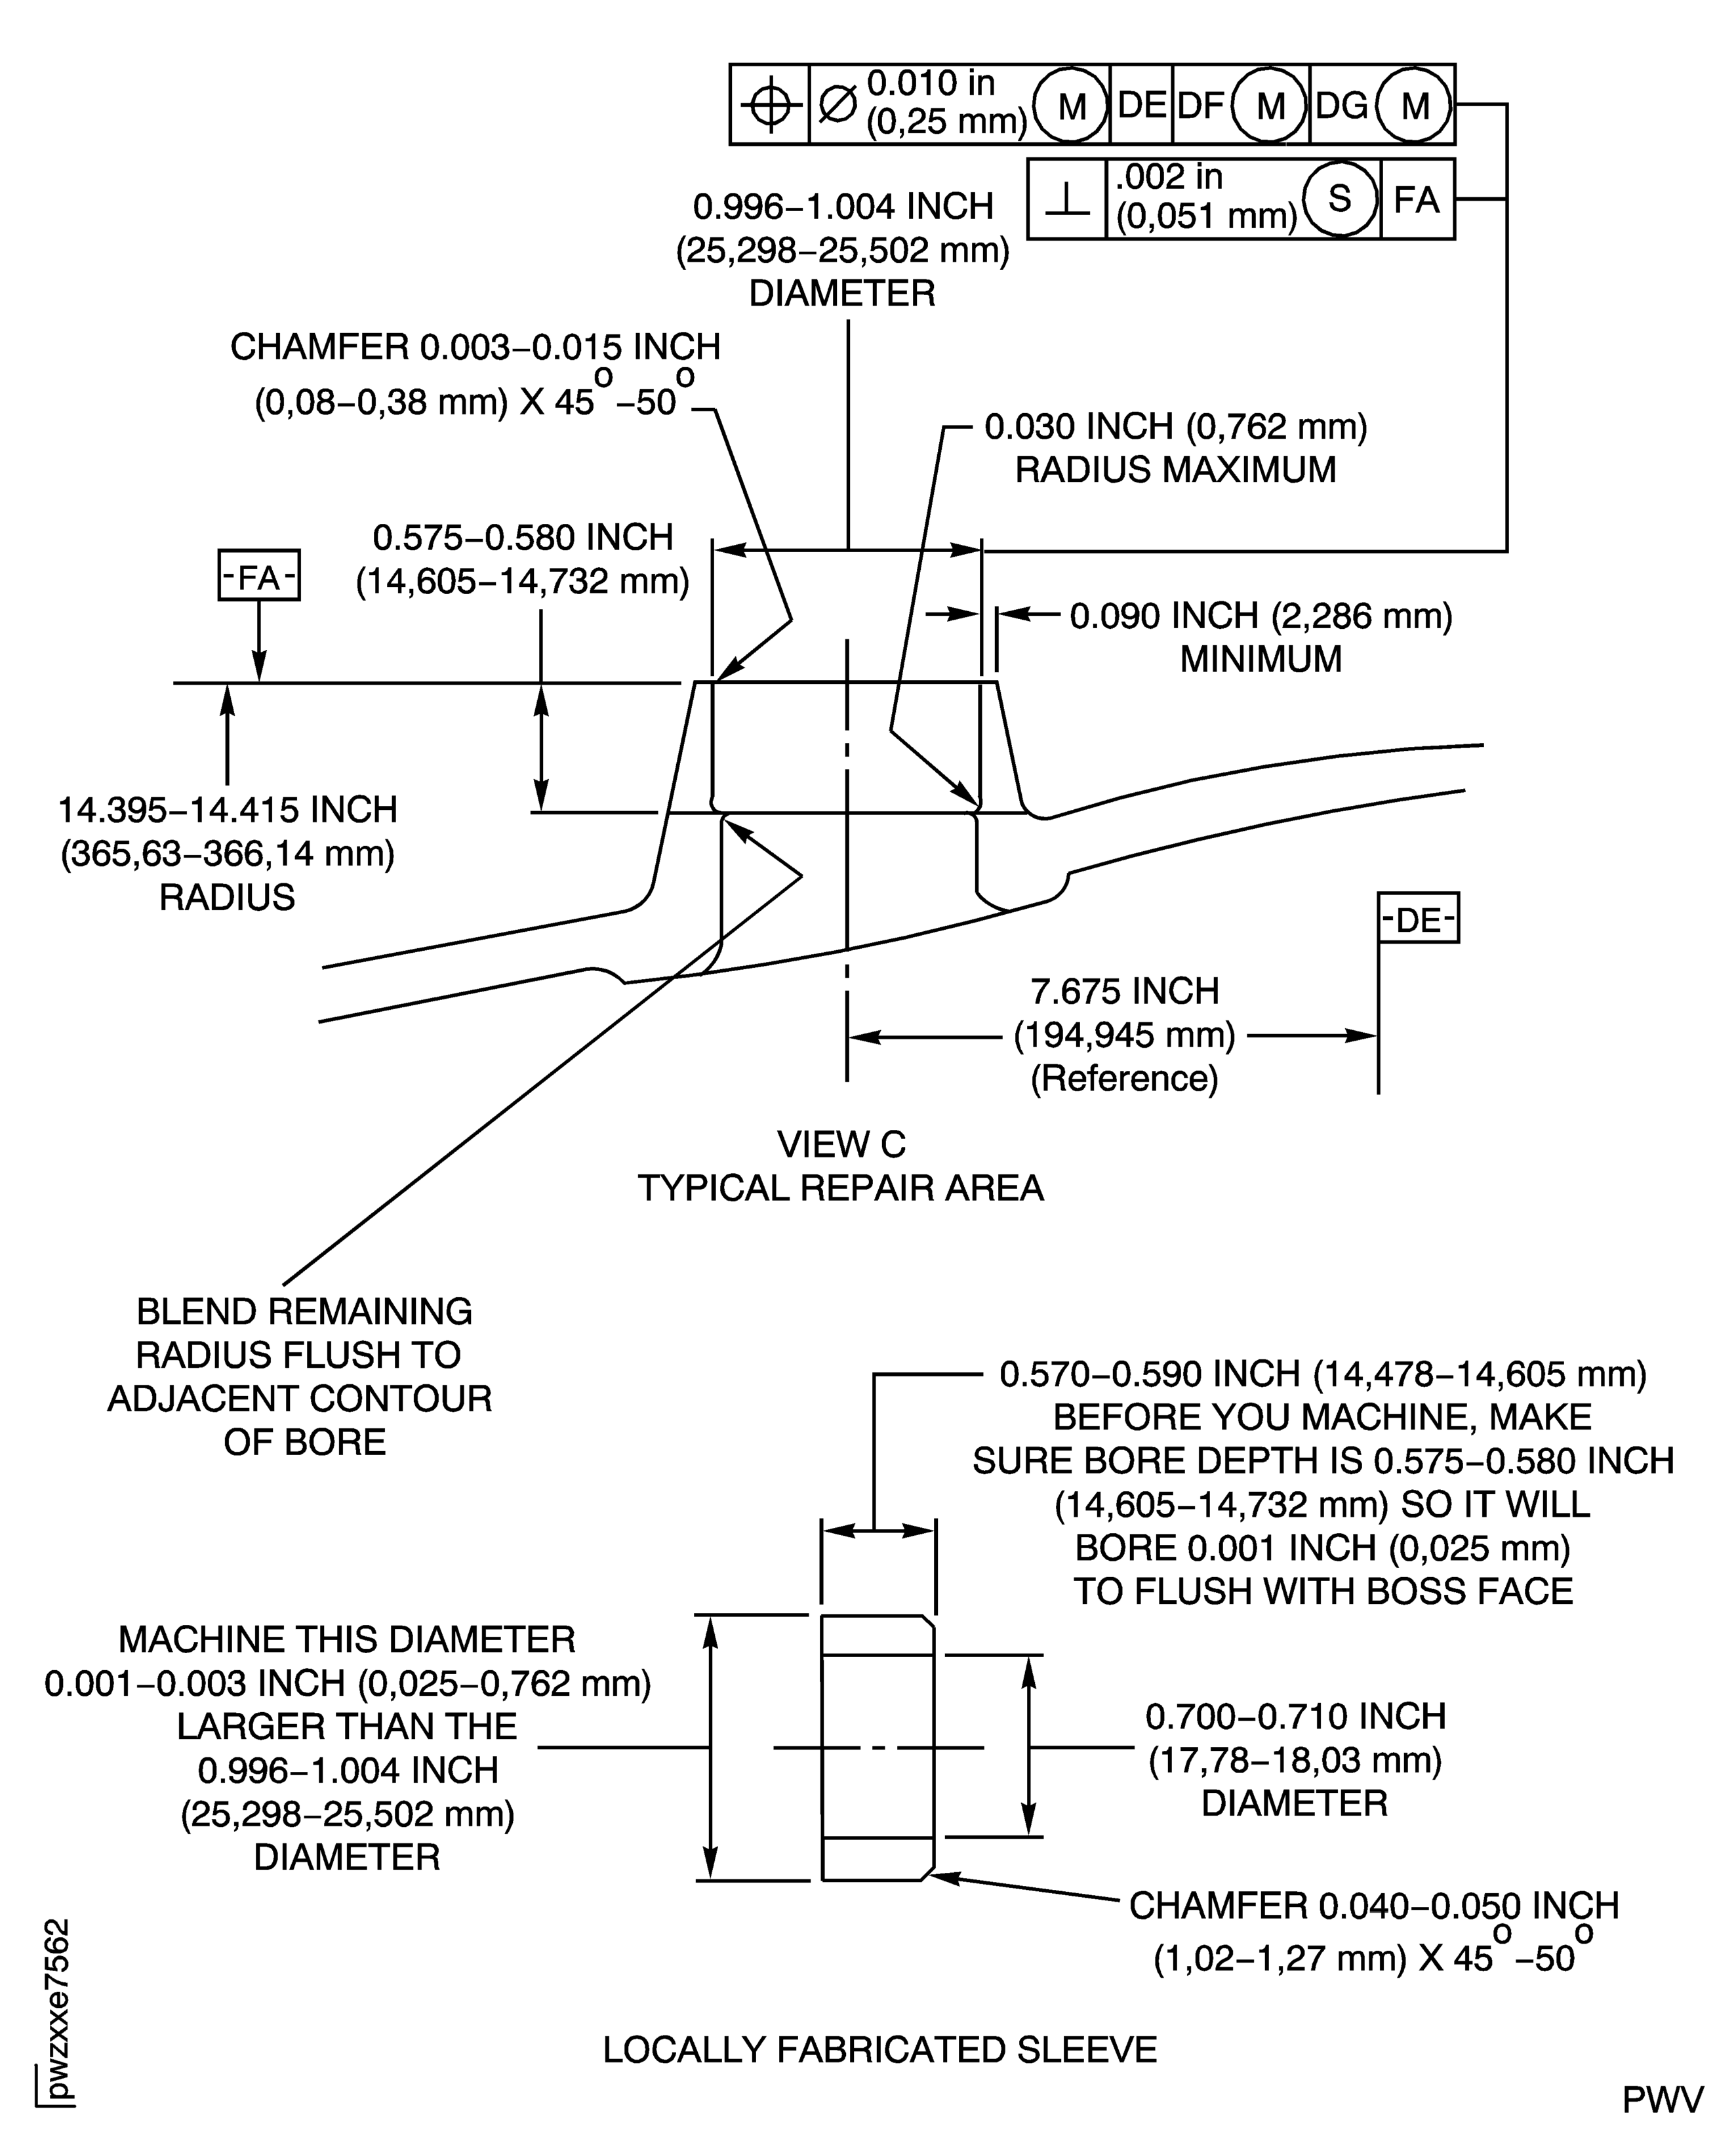
SUBTASK 72-42-11-220-091 Examine the Boss
Use AMS 5663 to make a sleeve to the dimensions given in Figure.
SUBTASK 72-42-11-320-074 Make a Sleeve for the Bore
Refer to the SPM TASK 70-11-03-300-503.
SUBTASK 72-42-11-110-058 Clean the Sleeve
Refer to the SPM TASK 70-23-05-230-501, high sensitivity.
SUBTASK 72-42-11-230-060 Examine the Sleeve
Refer to the SPM TASK 70-11-26-300-503.
SUBTASK 72-42-11-110-059 Clean the Sleeve
Refer to the SPM TASK 70-42-06-400-501.
Finish machine to the dimensions given in Figure.
SUBTASK 72-42-11-350-101 Install the Sleeve to the Bore
Refer to the SPM TASK 70-11-03-300-503.
SUBTASK 72-42-11-110-060 Clean the Diffuser Case
Refer to the SPM TASK 70-23-03-230-501 or SPM TASK 70-23-05-230-501, high sensitivity.
SUBTASK 72-42-11-230-061 Examine the Diffuser Case
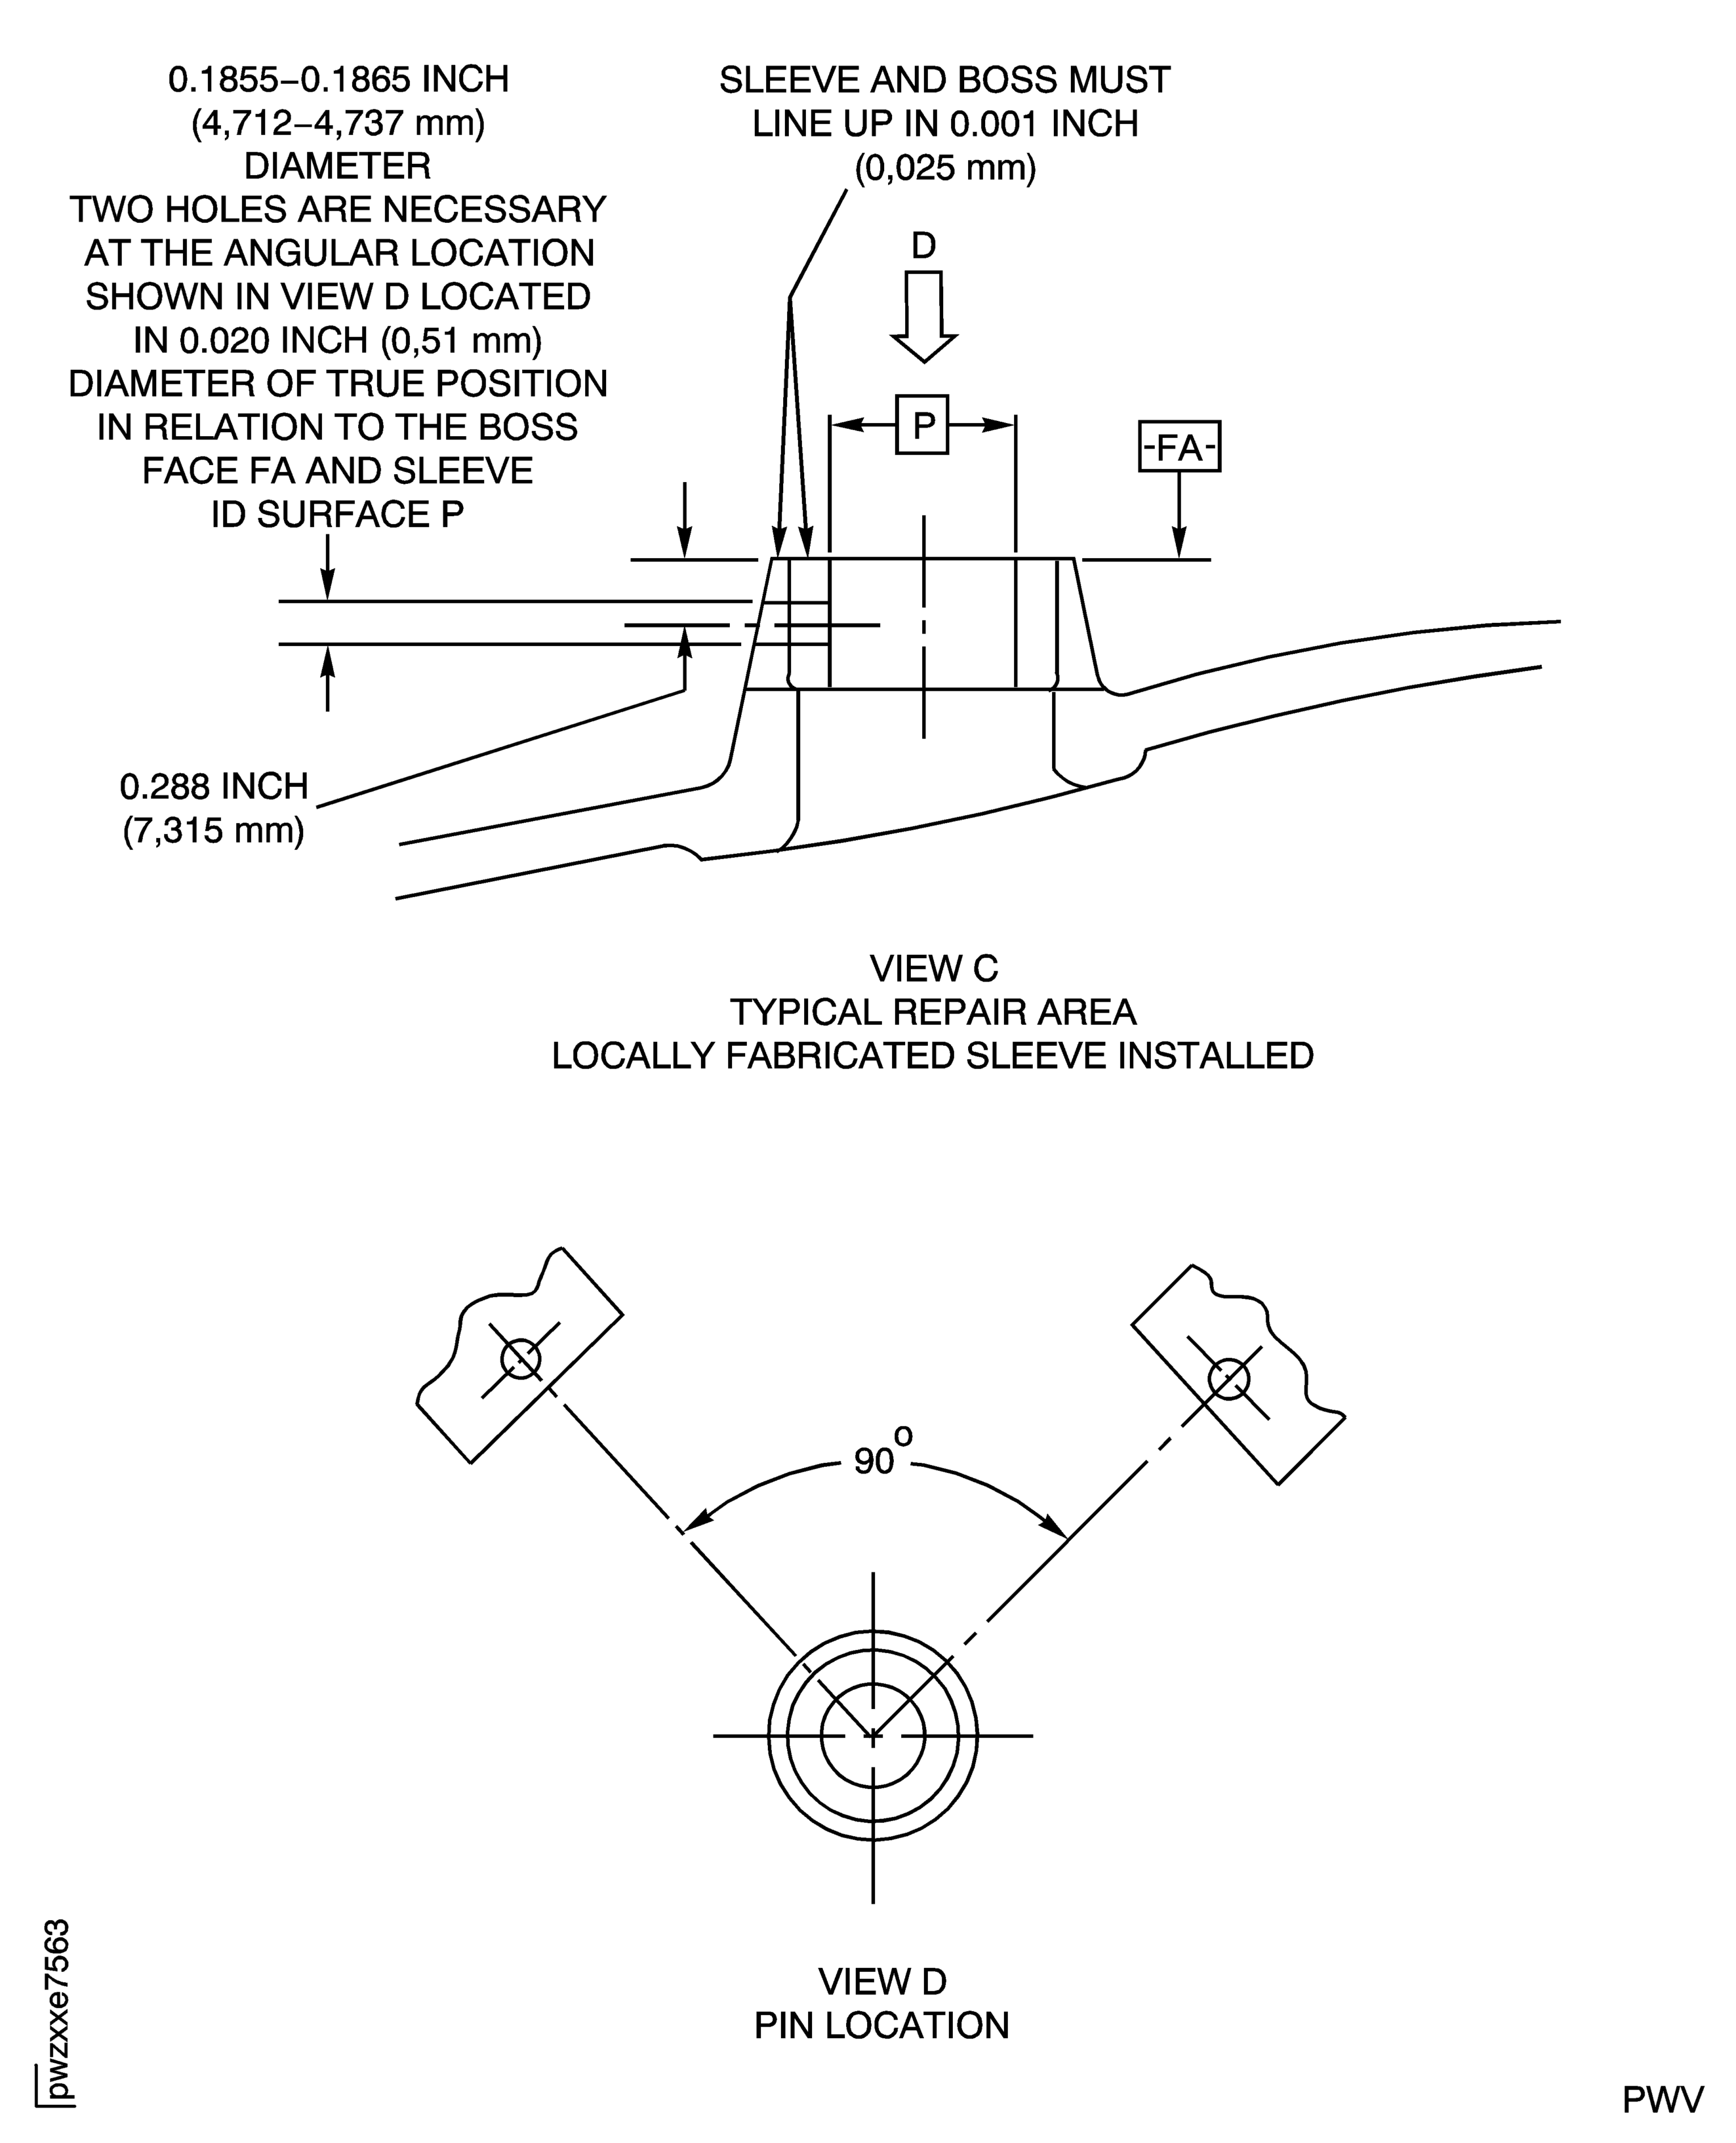
Refer to Figure.
SUBTASK 72-42-11-220-093 Examine the Repaired Area
Figure: Repair Details and Dimensions
Sheet 1

Figure: Repair Details and Dimensions
Sheet 2

Figure: Repair Details and Dimensions
Sheet 3

Figure: Repair Details and Dimensions
Sheet 4

