Export Control
EAR Export Classification: Not subject to the EAR per 15 C.F.R. Chapter 1, Part 734.3(b)(3), except for the following Service Bulletins which are currently published as EAR Export Classification 9E991: SBE70-0992, SBE72-0483, SBE72-0580, SBE72-0588, SBE72-0640, SBE73-0209, SBE80-0024 and SBE80-0025.Copyright
© IAE International Aero Engines AG (2001, 2014 - 2021) The information contained in this document is the property of © IAE International Aero Engines AG and may not be copied or used for any purpose other than that for which it is supplied without the express written authority of © IAE International Aero Engines AG. (This does not preclude use by engine and aircraft operators for normal instructional, maintenance or overhaul purposes.).Applicability
All
Common Information
TASK 72-43-20-300-003 No. 4 Bearing Seal Ring Holder - Repair An Oversize Seal Ring Groove, Repair-003 (VRS3118)
General
The practices and processes referred to in the procedure by the TASK number are in the SPM.
Price and availability - not applicable
Preliminary Requirements
Pre-Conditions
NONESupport Equipment
| Name | Manufacturer | Part Number / Identification | Quantity | Remark |
|---|---|---|---|---|
| Machining equipment | LOCAL | Machining equipment | ||
| Nickel plate equipment | LOCAL | Nickel plate equipment |
Consumables, Materials and Expendables
NONESpares
| Name | Manufacturer | Part Number / Identification | Quantity | Remark |
|---|---|---|---|---|
| Seal ring | 2A0074P5 | AR | ||
| Seal ring | 2A0074P10 | AR | ||
| Seal ring | 2A0074P15 | AR | ||
| Seal ring | 2A0074P20 | AR |
Safety Requirements
NONEProcedure
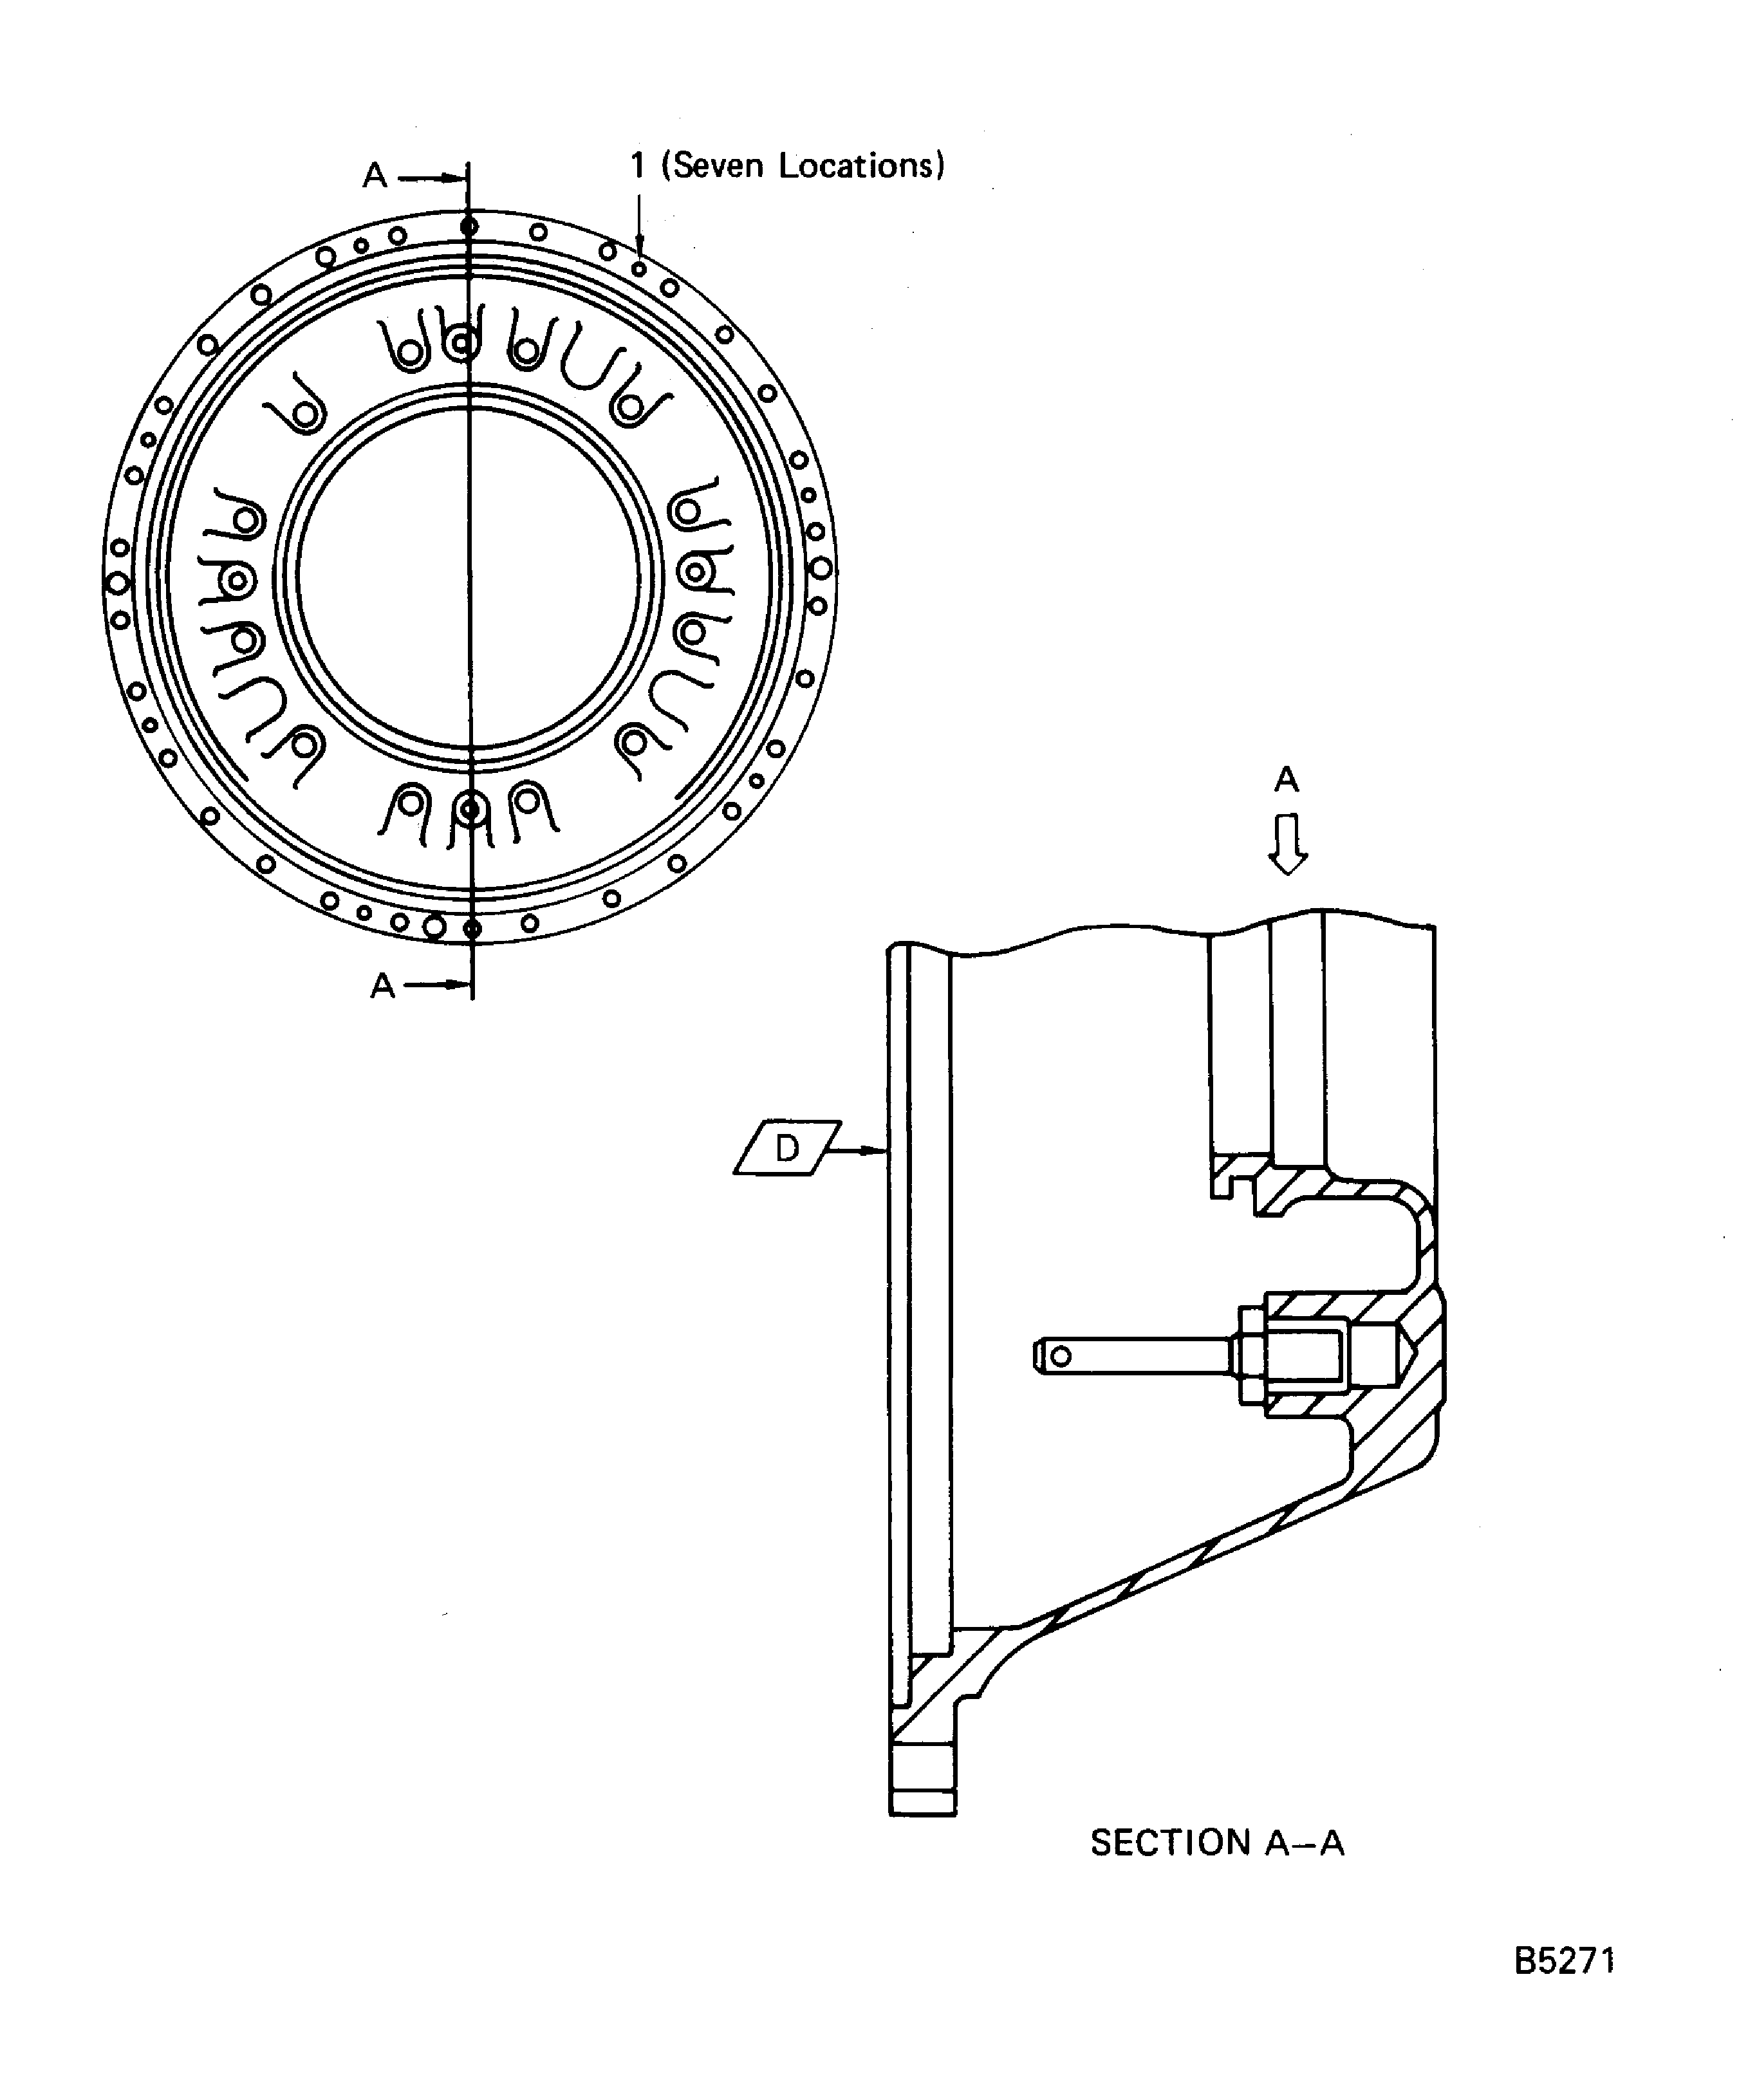
Refer to Figure.
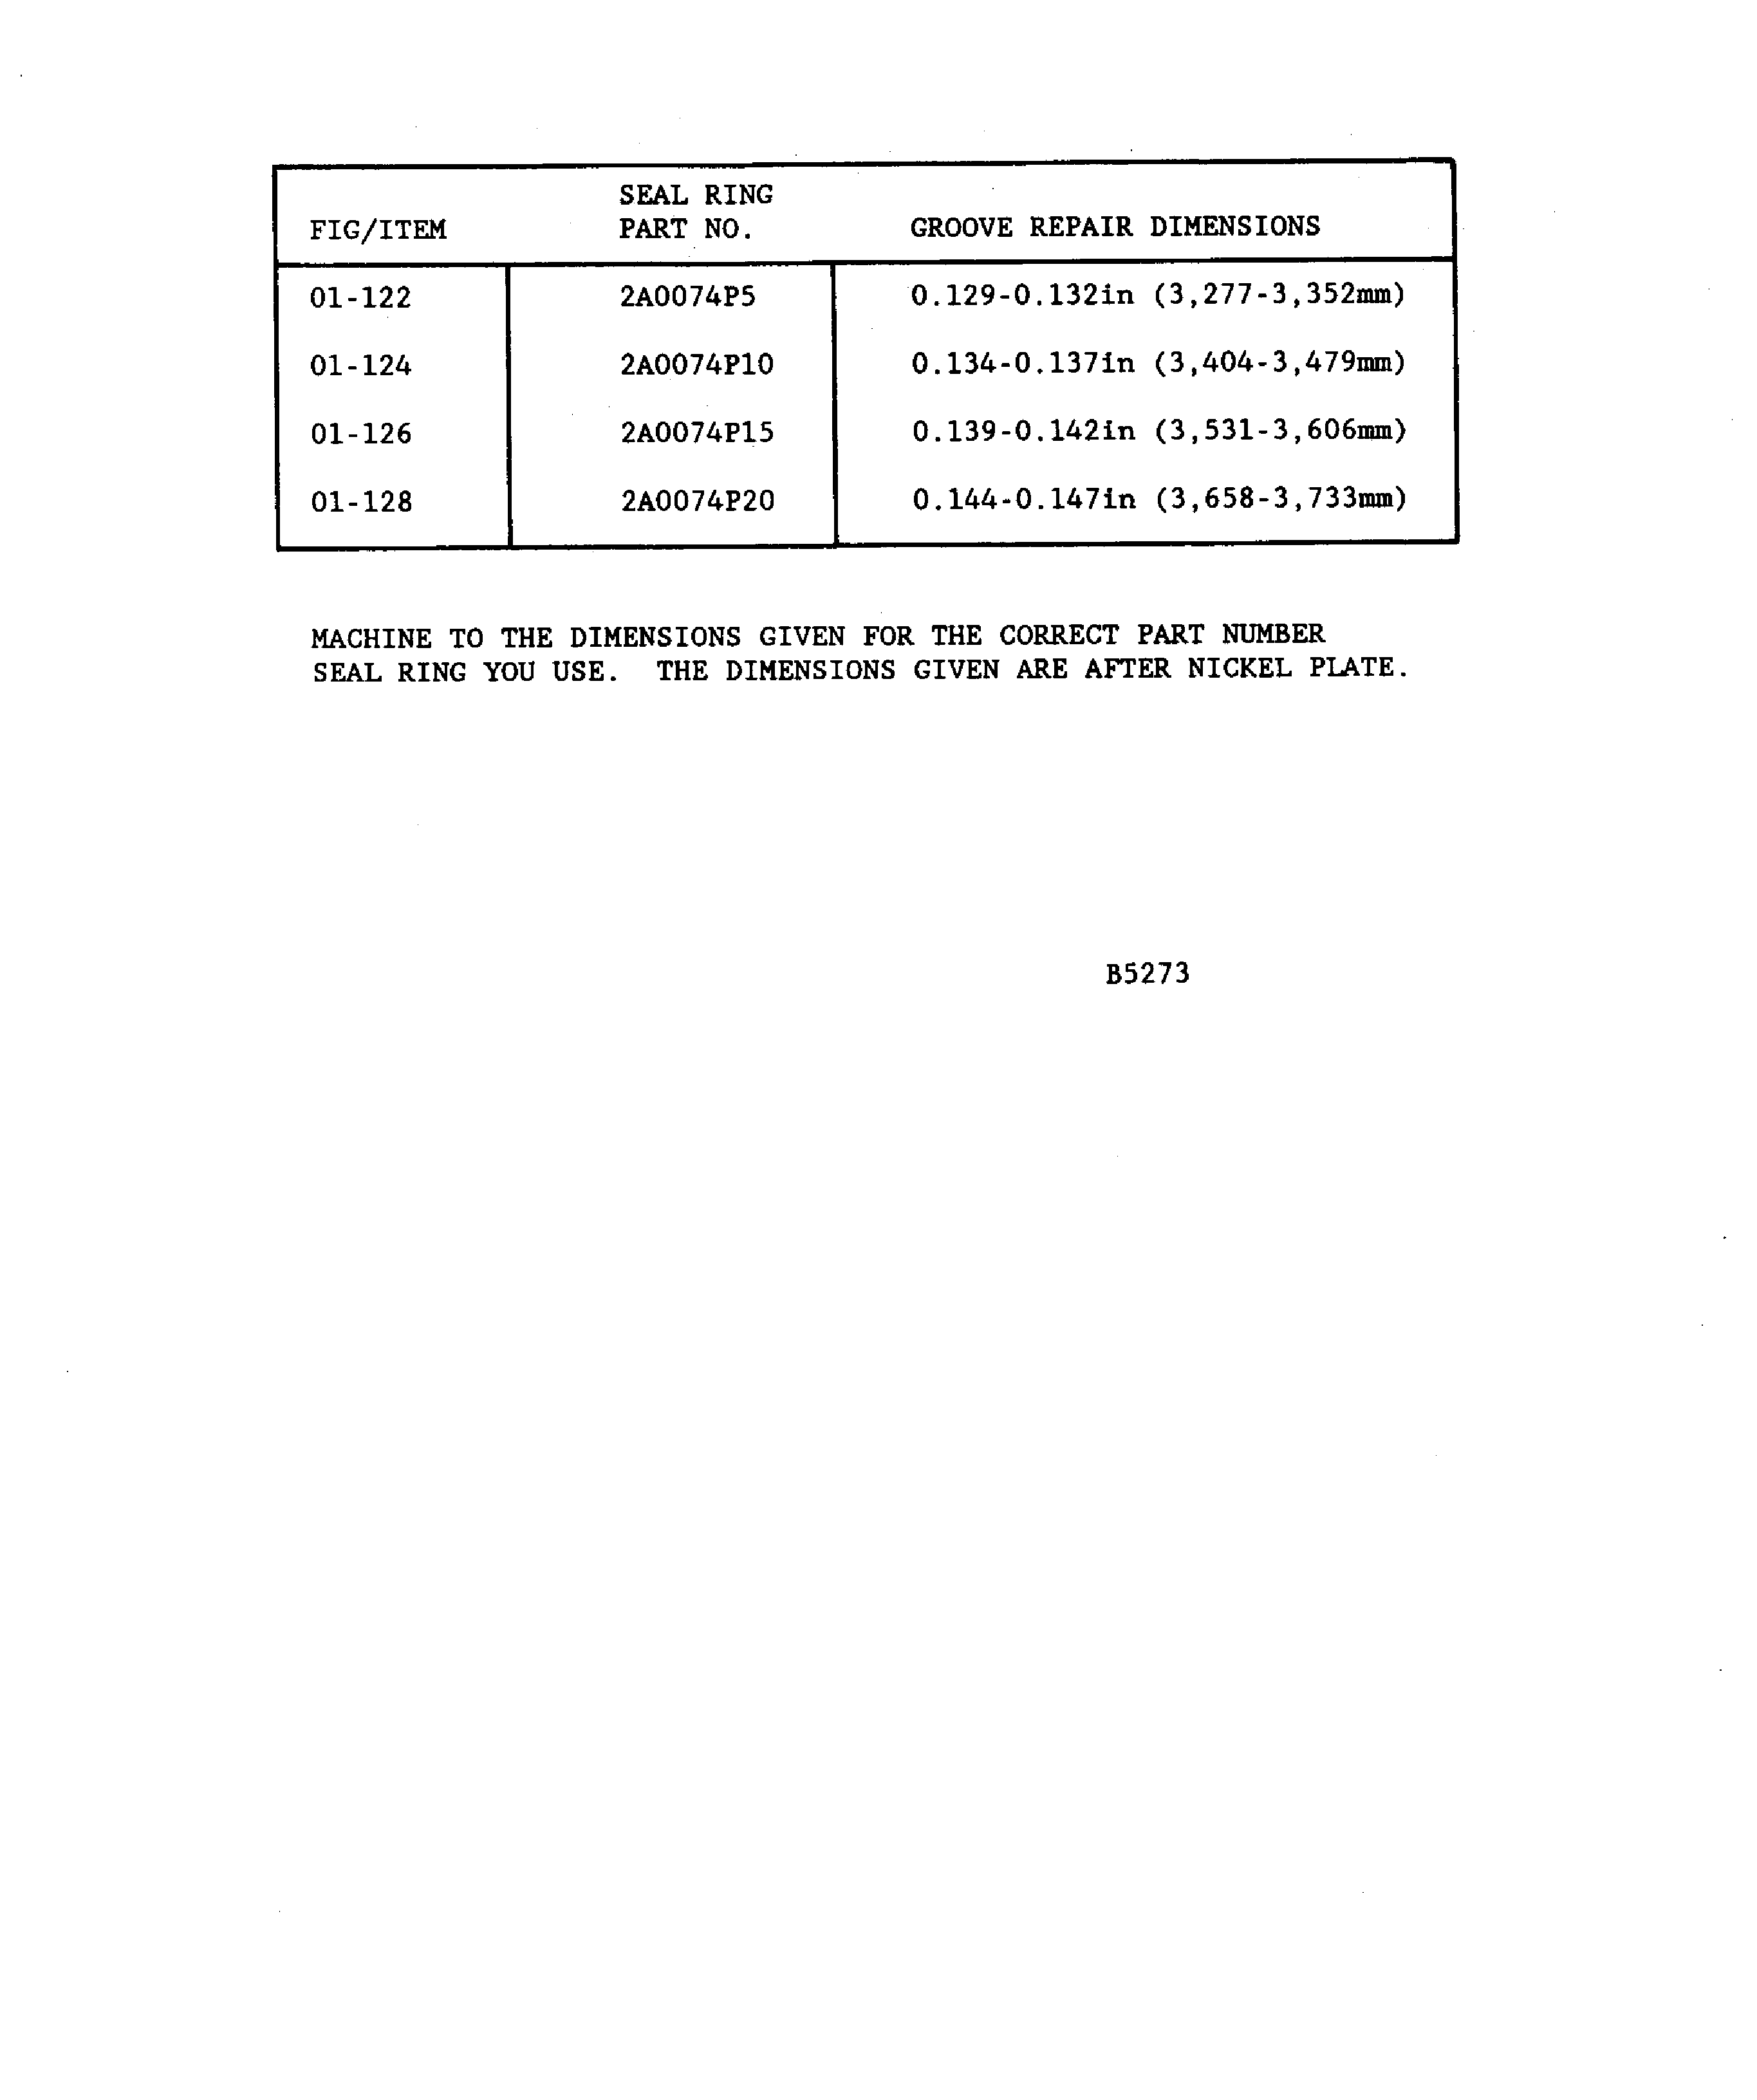
Refer to the table given in the figure for the seal ring groove machining dimensions.
Remove the minimum quantity of base material.
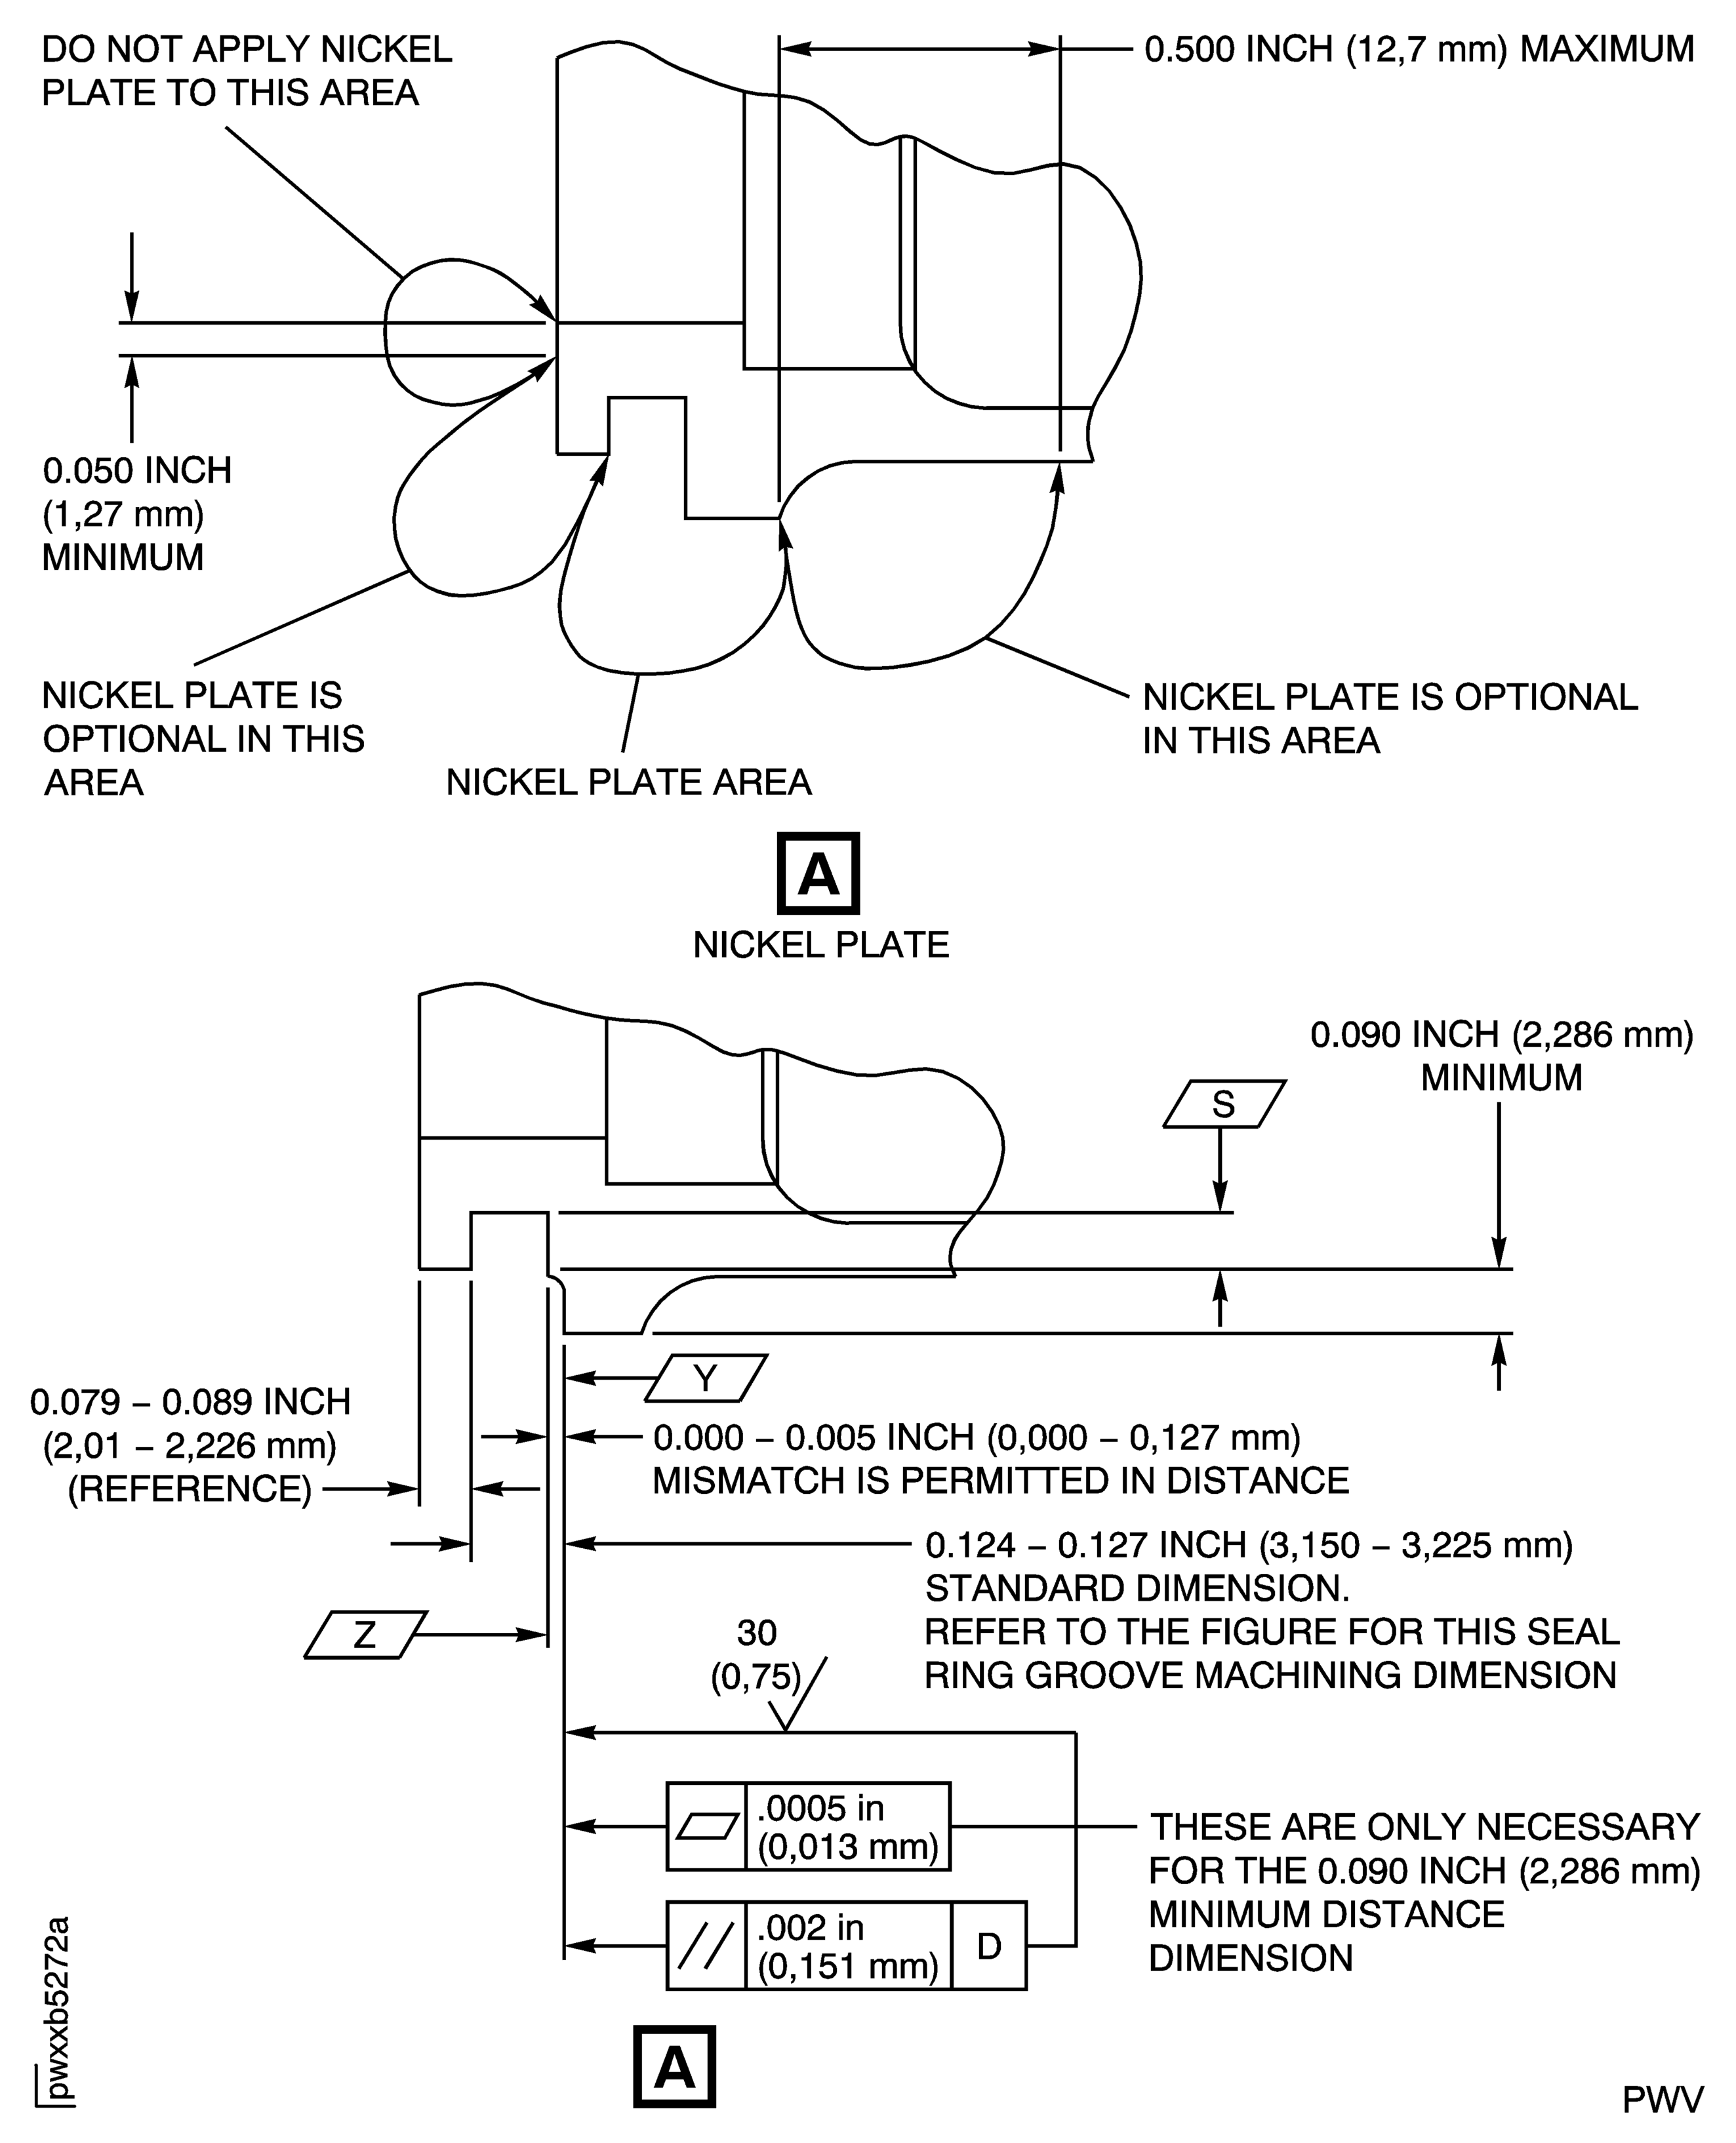
Machine the groove sufficiently to permit a plating thickness of 0.0005 to 0.0015 in. (0.013 to 0.038 mm).
Make sure you use the dimensions given for the correct part number seal ring you use.
Set-up and machine Surface Y and Surface Z by the requirements given in the figure.
SUBTASK 72-43-20-320-051 Machine the Seal Ring Groove
Refer to Figure.
Do the procedure given in the SPM TASK 70-33-25-300-503.
Nickel plate the seal ring groove and the seal ring pilot diameter to a thickness of between 0.0005 and 0.0015 in. (0.013 and 0.038 mm).
SUBTASK 72-43-20-330-052 Nickel Plate the Seal Ring Groove
Refer to Figure requirements.
Examine the repair.
SUBTASK 72-43-20-220-077 Examine the Repair
Refer to Figure requirements.
Make a permanent mark by the procedure given in the SPM TASK 70-09-00-400-501.
Use the vibration peen method.
Mark the seal ring oversize number adjacent to the part number. Example of the oversize number is P5, P10, P15 or P20.
SUBTASK 72-43-20-350-055 Identify the Repair
Figure: Repair Details and Dimensions
Sheet 1

Figure: Repair Details and Dimensions
Sheet 2

Figure: Repair Details and Dimensions
Sheet 3

