Export Control
EAR Export Classification: Not subject to the EAR per 15 C.F.R. Chapter 1, Part 734.3(b)(3), except for the following Service Bulletins which are currently published as EAR Export Classification 9E991: SBE70-0992, SBE72-0483, SBE72-0580, SBE72-0588, SBE72-0640, SBE73-0209, SBE80-0024 and SBE80-0025.Copyright
© IAE International Aero Engines AG (2001, 2014 - 2021) The information contained in this document is the property of © IAE International Aero Engines AG and may not be copied or used for any purpose other than that for which it is supplied without the express written authority of © IAE International Aero Engines AG. (This does not preclude use by engine and aircraft operators for normal instructional, maintenance or overhaul purposes.).Applicability
All
Common Information
TASK 72-45-33-300-002 HPT Stage 2 Blade Retaining Plate - Blend Repair, Repair-002 (VRS3255)
General
Deleted.
Deleted.
The practices and processes referred to in this procedure by TASK numbers are in the SPM.
NOTE
NOTE
NOTE
NOTE
Preliminary Requirements
Pre-Conditions
| Action/Condition | Data Module/Technical Publication |
|---|---|
| Make sure that all the cleaning and inspection procedures are done before the repair. |
Support Equipment
NONEConsumables, Materials and Expendables
NONESpares
NONESafety Requirements
CAUTION
Procedure
No damage permitted in Area 5 and no blending permitted in Areas 5, 6, 9 and 10. Areas 9 and 10 are restricted to within 0.100 in. (2.540 mm) from the slot edge on the rear face as shown in Figure.
Remove 0.002 in. - 0.003 in. (0.051 mm - 0.076 mm) beyond damage depth.
Minimum blend length to depth ratio is 15 to 1.
Blend must be smooth and continuous.
Remove the minimum amount of parent material necessary to remove the damage.
Refer to SPM TASK 70-35-03-300-501.
Refer to Step for shotpeen requirements.
Locally blend all damage and corrosion in area 1 to a maximum depth of 0.008 in. (0.203 mm). The following requirements must be met.
Remove 0.002 in. - 0.003 in. (0.051 mm - 0.076 mm ) beyond damage depth.
Minimum blend length to depth ratio is 15 to 1.
Blend must be smooth and continuous.
Remove the minimum amount of parent material necessary to remove the damage.
Blend length must not be more than 0.500 in. (12.700 mm) maximum in circumferential direction.
A minimum distance of 2.000 in. (50.800 mm) must be kept between blended areas.
Refer to SPM TASK 70-35-03-300-501.
Refer to Step for shotpeen requirements.
Blend to a depth of 0.005 in. (0.127 mm) maximum to remove scattered damage and corrosion on diameter 8. The following requirements must be met.
Remove 0.002 in. - 0.003 in. (0.051 mm - 0.076 mm ) beyond damage depth.
Minimum blend length to depth ratio is 30 to 1 for area 3 and minimum blend length to depth ratio is 15 to 1 for area 4.
Blend must be smooth and continuous.
Remove the minimum amount of parent material necessary to remove the damage.
Refer to SPM TASK 70-35-03-300-501.
Refer to Step for shotpeen requirements.
Locally blend all damage and corrosion in areas 3 and 4 to a maximum depth of 0.010 in (0.254 mm). The following requirements must be met.
Remove 0.002 in. - 0.003 in. (0.051 mm - 0.076 mm ) beyond damage depth.
Minimum blend length to depth ratio is 30 to 1.
Blend must be smooth and continuous.
Remove the minimum amount of parent material necessary to remove the damage.
After blending in area 7, mark blended slot with an "X" in area indicated in Figure. Do not use slot with "X" marking as the retaining slot during assembly. Marking must be accomplished with only deep electrolytic etch, vibration peen, or deep dot peen. Do not mark over previously blended areas.
Refer to SPM TASK 70-35-03-300-501.
Refer to Step for shotpeen requirements.
Locally blend all damage and corrosion in area 7 to a maximum depth of 0.005 in (0.127 mm). The following requirements must be met. Area 7 is restricted to within 0.100 in. (25.400 mm) from the slot as shown in Figure.
Area 6 and Area 10 is 0.001 in. (0.026 mm).
Area 7 and Area 9 is 0.002 in. (0.051 mm).
If raised material or sharp edge is removed at Area 6, Area 7 or Area 10 then mark the repaired slot with "X" by the procedure given in the SPM TASK 70-09-00-400-501. Marking must be accomplished with only deep electrolytic etch, vibration peen or deep dot peen. Refer to Figure for marking area.
Remove raised material and sharp edges only when the maximum damage depth at:
SUBTASK 72-45-33-350-051 Blend Repair Stage 2 Blade Retaining Plate
FPI repair area(s) by SPM TASK 70-23-04-230-501. Cracks are not permitted.
FPI repair area(s) by SPM TASK 70-23-05-230-501, use ultra-high sensitivity level. Cracks are not permitted.
Fluorescent Penetrant Inspect of the Blend Repair Area(s) by one of the methods that follow.
SUBTASK 72-45-33-230-062 Do a Fluorescent Penetrant Inspection of the Blend Repair Area(s)
Refer to Figure.
Do the procedure given in the SPM TASK 70-38-13-380-501.
Use S-170, CW-20 or SCW-20 shot size with a hardness of 45 to 55 HRC or equivalent.
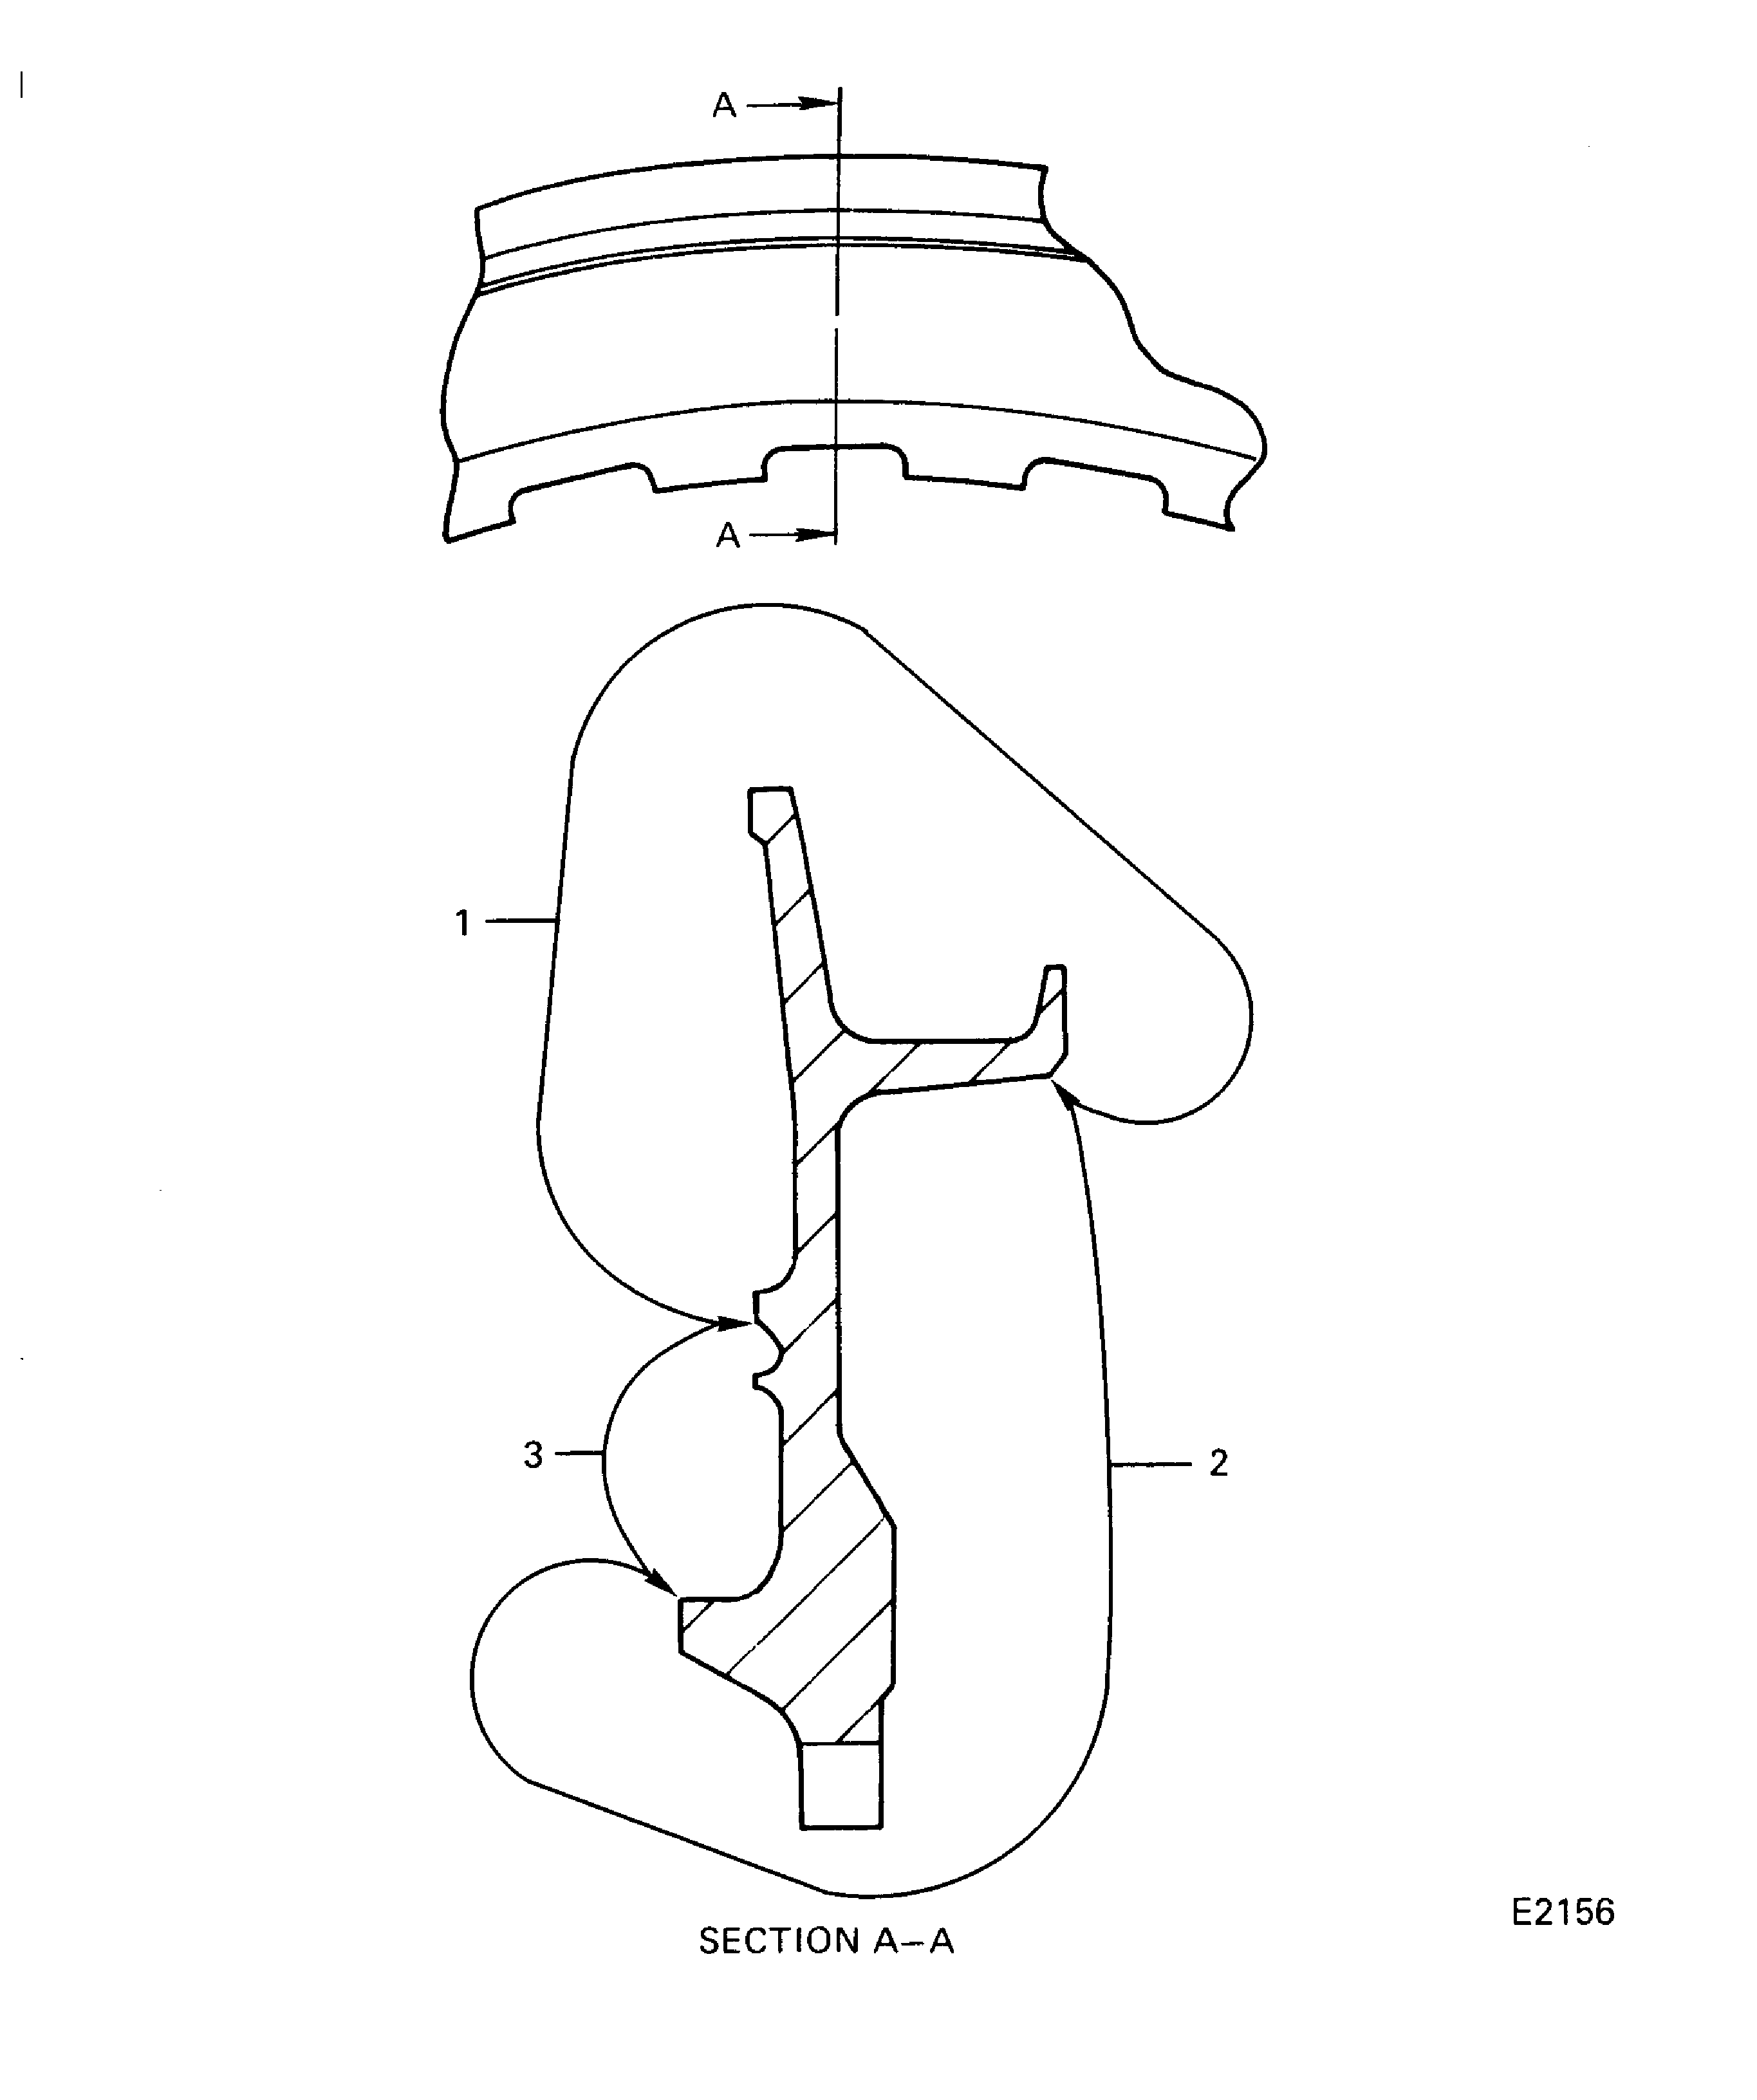
Shotpeen repaired area given in the figure. In area 3 a minimum intensity of 4A must be maintained. In area 2 full coverage is necessary but minimum intensity of 4A is not necessary. No shotpeen allowed in area 1.
SUBTASK 72-45-33-380-051 Shotpeen the Blend Repair Area(s)
Refer to Figure.
SUBTASK 72-45-33-220-086 Inspect the Stage 2 HPT Blade Retaining Plate
Refer to Figure.
Make a permanent mark by the procedure given in the SPM TASK 70-09-00-400-501. Marking must be accomplished with only deep electrolytic etch, vibration peen, or deep dot peen.
Mark VRS3255 adjacent to the part number.
SUBTASK 72-45-33-350-052 Identify the Repair
Figure: HPT Stage 2 Blade retaining Plate Repair Areas
HPT Stage 2 Blade retaining Plate Repair Areas

Figure: HPT Stage 2 Blade Retaining Plate Areas of Peening
HPT Stage 2 Blade Retaining Plate Areas of Peening

