Export Control
EAR Export Classification: Not subject to the EAR per 15 C.F.R. Chapter 1, Part 734.3(b)(3), except for the following Service Bulletins which are currently published as EAR Export Classification 9E991: SBE70-0992, SBE72-0483, SBE72-0580, SBE72-0588, SBE72-0640, SBE73-0209, SBE80-0024 and SBE80-0025.Copyright
© IAE International Aero Engines AG (2001, 2014 - 2021) The information contained in this document is the property of © IAE International Aero Engines AG and may not be copied or used for any purpose other than that for which it is supplied without the express written authority of © IAE International Aero Engines AG. (This does not preclude use by engine and aircraft operators for normal instructional, maintenance or overhaul purposes.).Applicability
All
Common Information
TASK 72-50-00-300-009 LPT Stage 6 Inner Air Seal - Blend Repair, Repair-009 (VRS4585)
General
Price and availability - none
The practices and processes referred to in the procedure by the TASK numbers are in the SPM.
NOTE
Preliminary Requirements
Pre-Conditions
NONESupport Equipment
NONEConsumables, Materials and Expendables
NONESpares
NONESafety Requirements
NONEProcedure
NOTE
Refer to the SPM TASK 70-35-21-350-501 for blending surface damage.
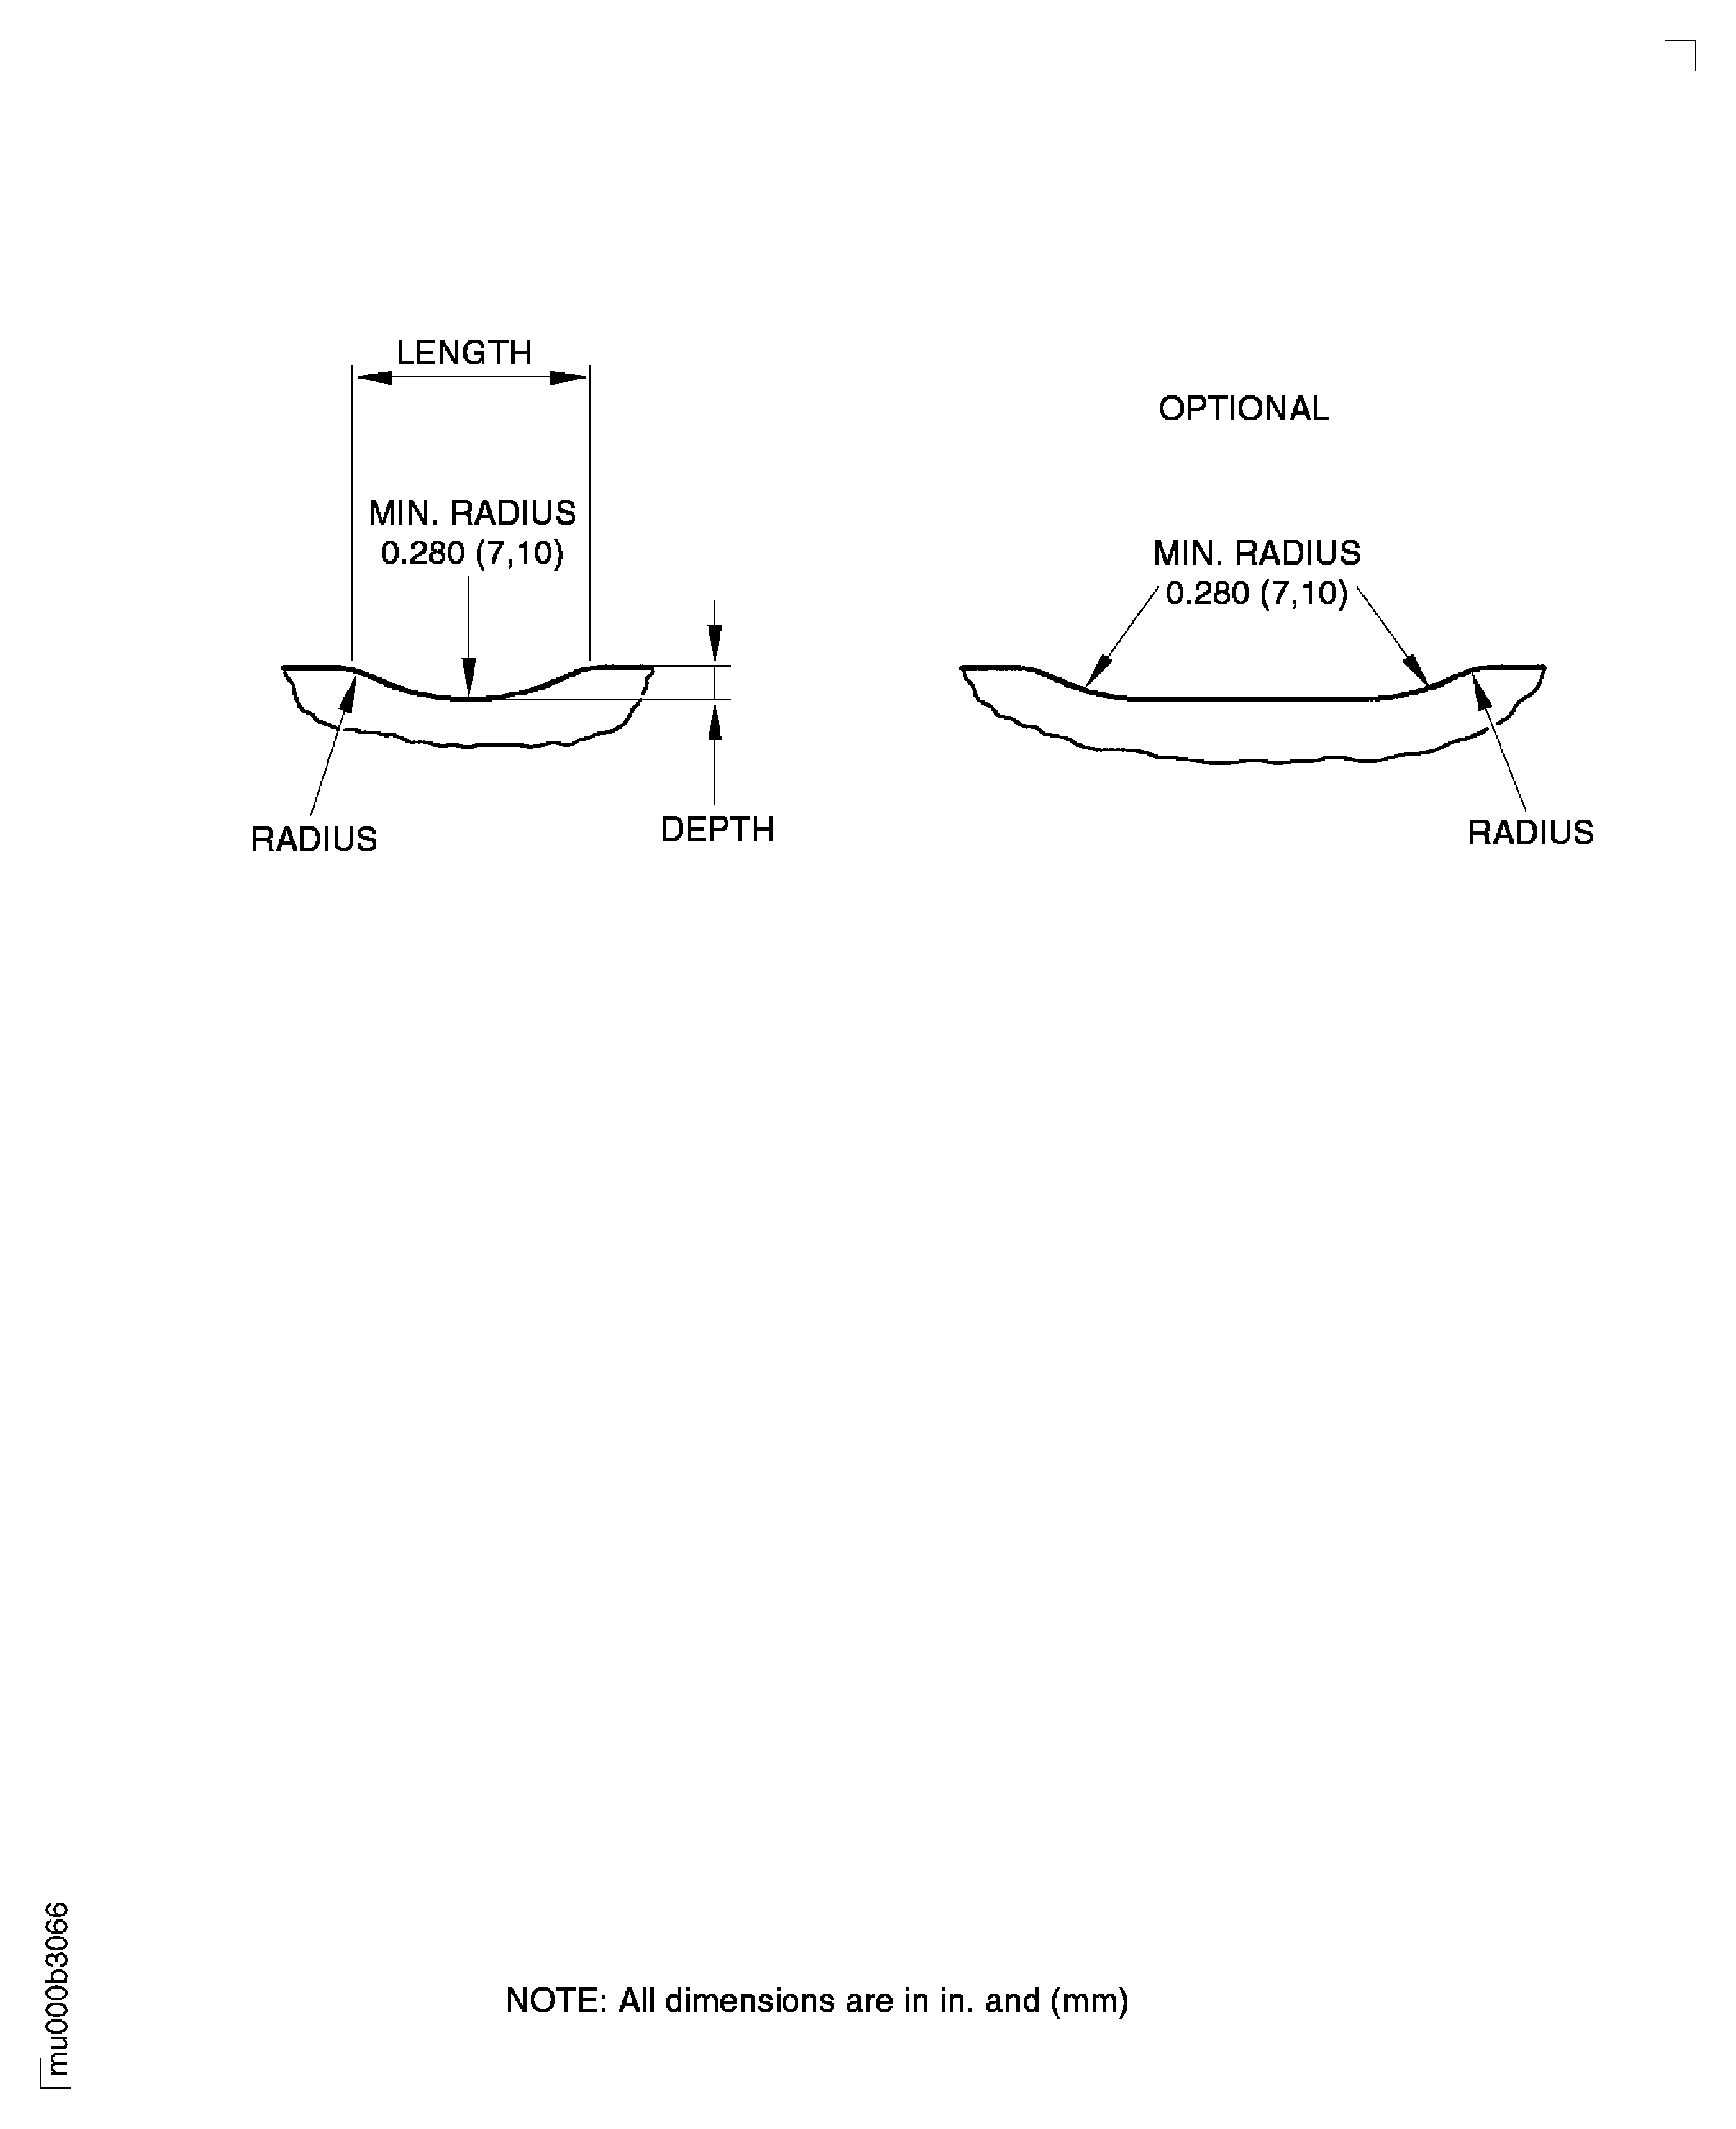
For local blending use a length to depth ratio of 100:1 minimum, refer to Figure.
If there is a number of damage marks close together blend the whole area to the specified depth. No more than 25 blends are permitted. Tell IAE if more than 25 blends are necessary.
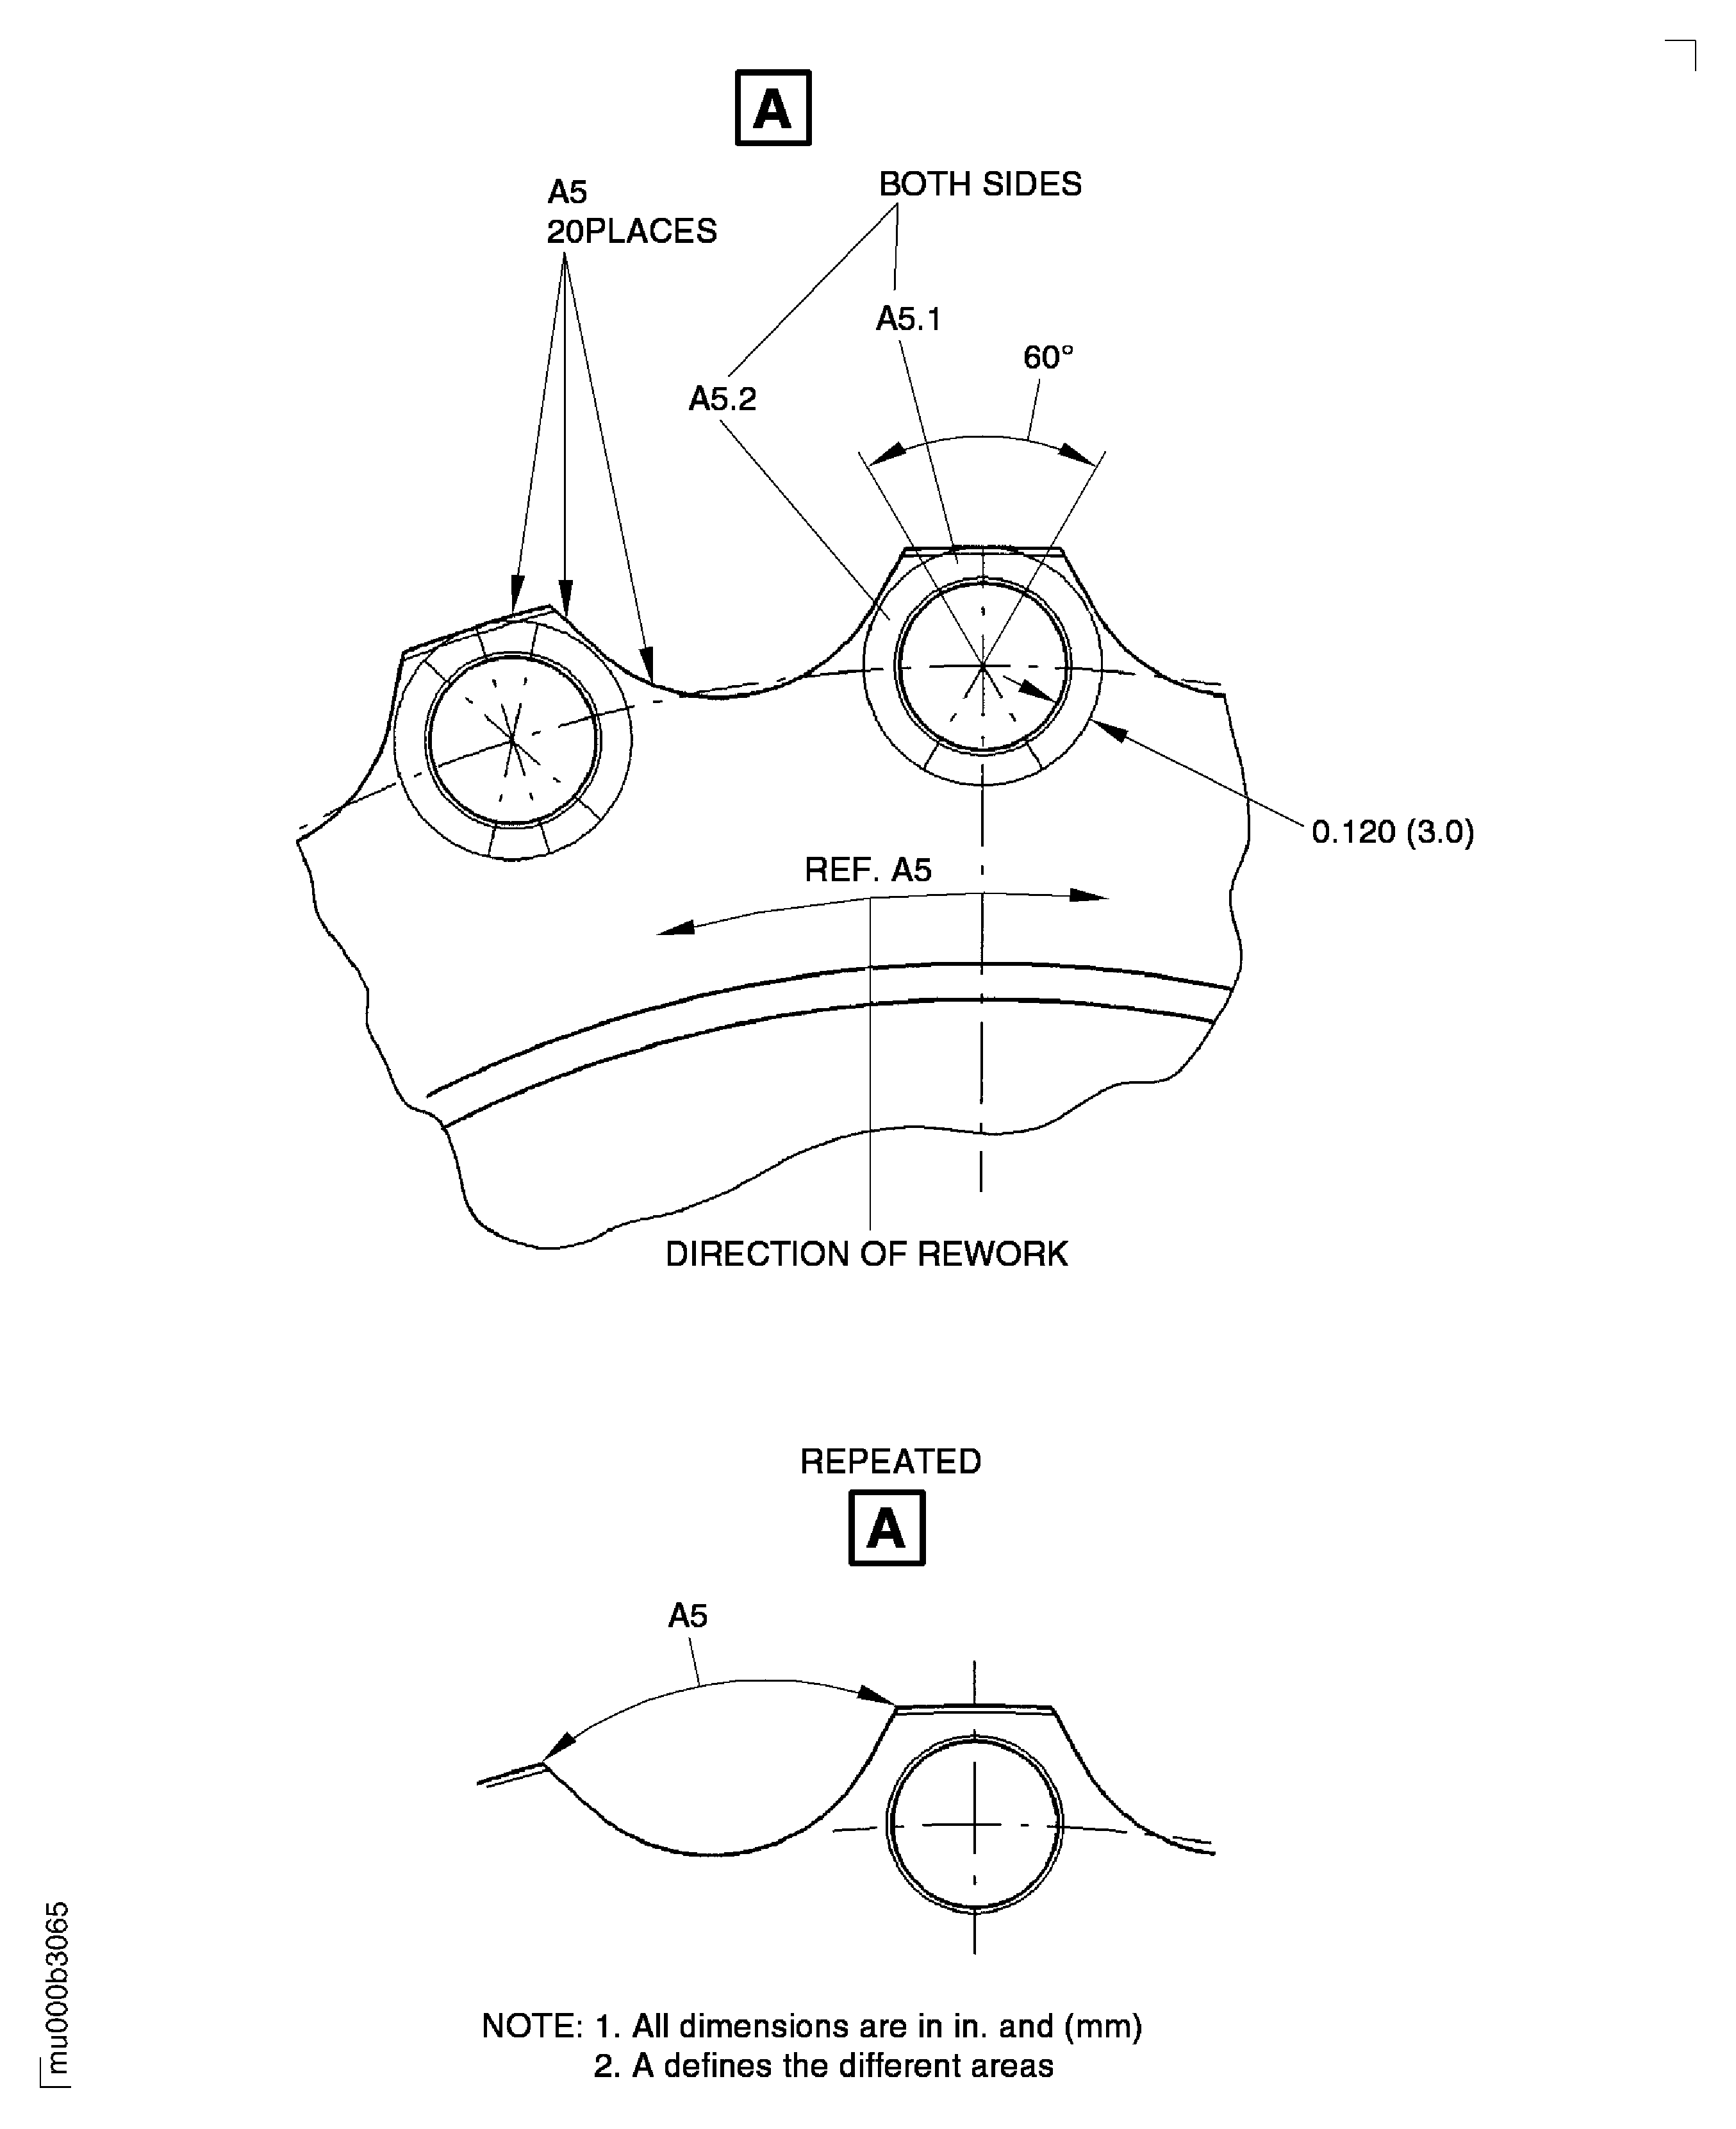
For direction of blend repair, where specified, refer to Figure.
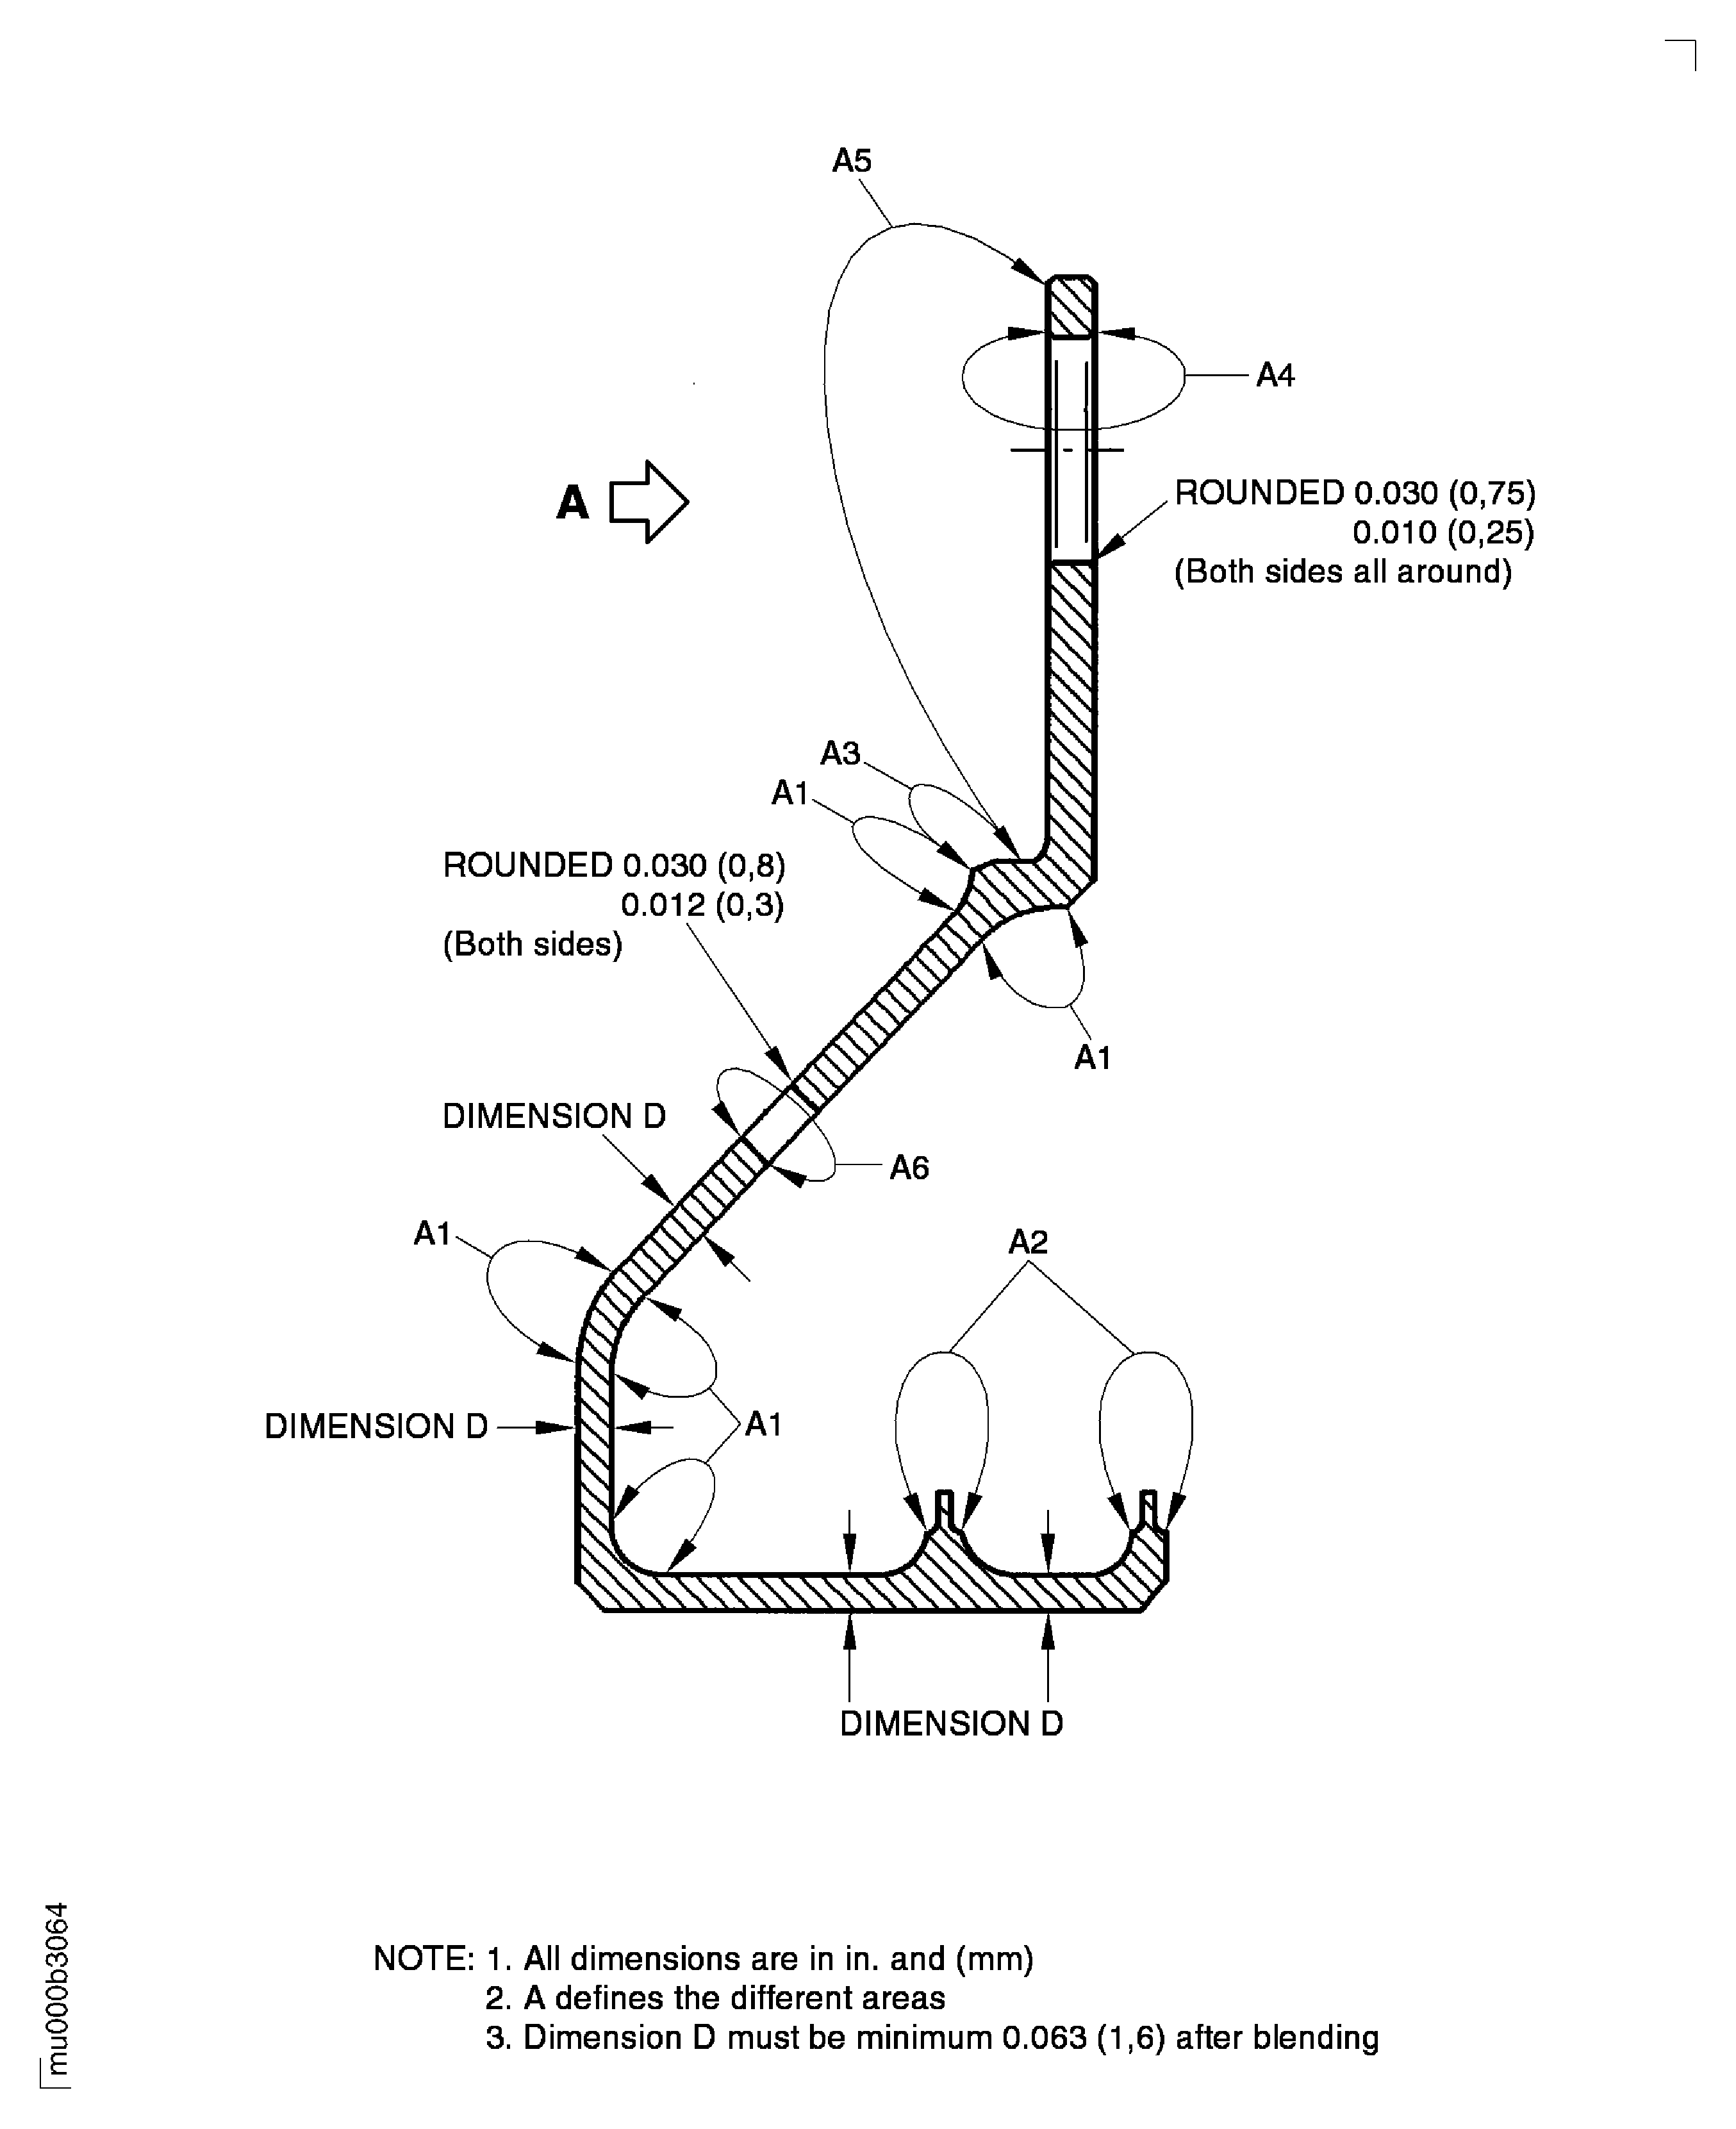
Area A2 must not be blended by this repair.
Maximum permitted blend repair depth is 0.005 in. (0.13 mm), maximum permitted length of blends for scratches and scores is 0.500 in. (12.70 mm). Minimum distance between blends 0.500 in. (12.70 mm). For damage outside the spacing limits maximum blend repair depth is 0.003 in. (0.08 mm), maximum blend area is 0.25 sq in. (160.00 sq mm).
Blend repair in area A1.
Maximum permitted diameter of the holes is 0.538 in. (13.67 mm). Refer to the SPM TASK 70-35-19-350-501.
Blend repair in area A4.
Damage not more than 0.002 in. (0.05 mm) maximum depth to be blended to a 0.003 in. (0.08 mm) maximum depth. Blend to sufficient depth to remove damage plus an additional 0.001 in. (0.025 mm).
The total area of blend repair must not be more than 30 percent of the whole area A5.1. Use a length to depth ratio of 15:1 minimum.
Blend repair in area A5.1.
Damage not more than 0.002 in. (0.05 mm) maximum depth to be blended to a 0.003 in. (0.08 mm) maximum depth. Blend to sufficient depth to remove damage plus an additional 0.001 in. (0.03 mm).
The total area of blend repair must not be more than 50 percent of the whole area A5.2. Use a length to depth ratio of 15:1 minimum.
Blend repair in area A5.2.
Maximum permitted diameter of the holes is 0.231 in. (5.87 mm). Refer to the SPM TASK 70-35-19-350-501.
Blend repair in area A6.
SUBTASK 72-50-00-350-069 Blend Repair the Stage 6 Turbine Inner Air Seal
Refer to the SPM TASK 70-35-19-350-501.
Butterfly polish all repaired holes.
SUBTASK 72-50-00-380-056 Polish the Repaired Areas of Stage 6 Turbine Inner Air Seal
Refer to VRS4027 TASK 72-50-00-300-006 (REPAIR-006).
Rebalance the stage 6 inner air seal.
SUBTASK 72-50-00-350-070 Do the Post Repair
Figure: Repair Details and Dimensions
Sheet 1

Figure: Repair Details and Dimensions
Sheet 2

Figure: Repair Details and Dimensions
Repair Details and Dimensions

