Export Control
EAR Export Classification: Not subject to the EAR per 15 C.F.R. Chapter 1, Part 734.3(b)(3), except for the following Service Bulletins which are currently published as EAR Export Classification 9E991: SBE70-0992, SBE72-0483, SBE72-0580, SBE72-0588, SBE72-0640, SBE73-0209, SBE80-0024 and SBE80-0025.Copyright
© IAE International Aero Engines AG (2001, 2014 - 2021) The information contained in this document is the property of © IAE International Aero Engines AG and may not be copied or used for any purpose other than that for which it is supplied without the express written authority of © IAE International Aero Engines AG. (This does not preclude use by engine and aircraft operators for normal instructional, maintenance or overhaul purposes.).Applicability
All
Common Information
TASK 72-50-22-300-031 LPT Stage 3 Vane - Weld Repair The Inner Buttress Location Slot, Repair-031 (VRS4074)
General
Price and availability - none
The practices and processes referred to in the procedure by the TASK number are in the SPM.
NOTE
NOTE
NOTE
Preliminary Requirements
Pre-Conditions
NONESupport Equipment
| Name | Manufacturer | Part Number / Identification | Quantity | Remark |
|---|---|---|---|---|
| Milling machine | LOCAL | Milling machine | ||
| Hand held grinder | LOCAL | Hand held grinder | ||
| IAE 3M14506 Milling fixture | 0AM53 | IAE 3M14506 | 1 |
Consumables, Materials and Expendables
| Name | Manufacturer | Part Number / Identification | Quantity | Remark |
|---|---|---|---|---|
| CoMat 03-185 WELDING FILLER WIRE | LOCAL | CoMat 03-185 |
Spares
NONESafety Requirements
NONEProcedure
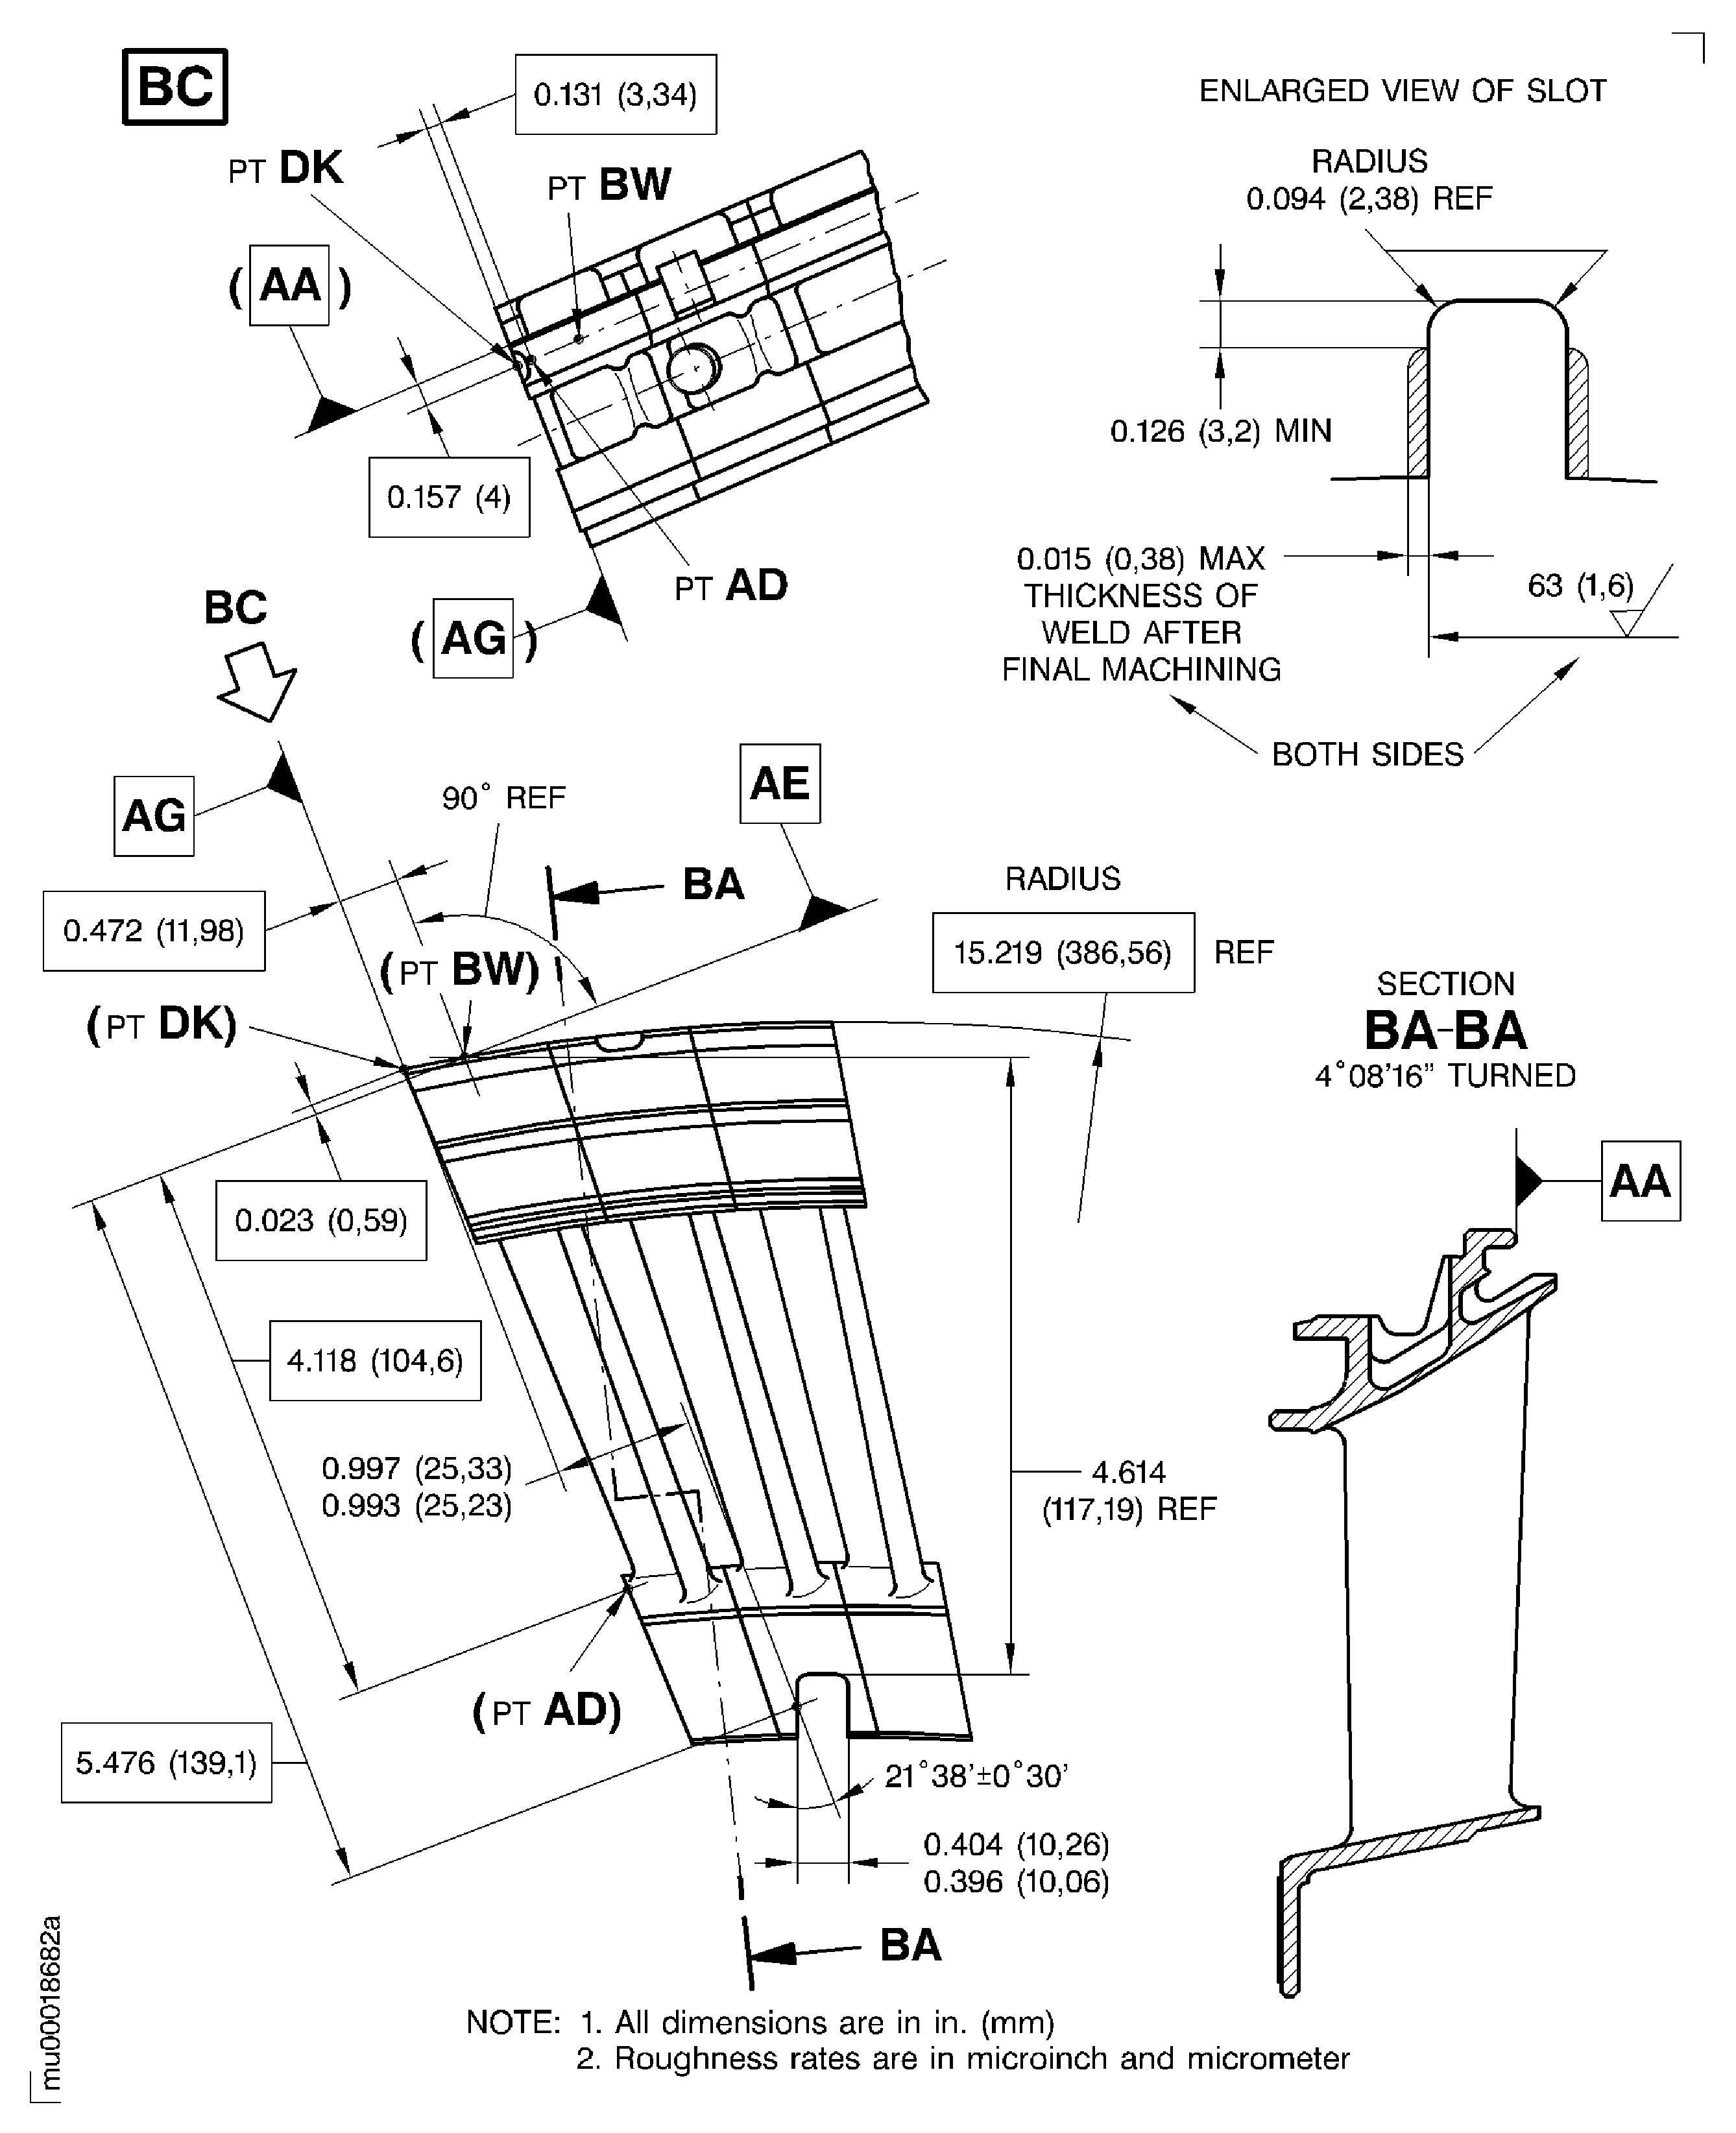
Refer to the SPM TASK 70-31-13-310-501 and to Figure.
Build up sufficient material to do last machining.
Tungsten inert gas weld up the worn slot surfaces.
SUBTASK 72-50-22-350-061 Weld Repair the Vane
Refer to the SPM TASK 70-37-10-370-501.
Heat treat the vane.
SUBTASK 72-50-22-350-062 Heat Treat after Weld Repair
Refer to the SPM TASK 70-23-05-230-501.
Use medium sensitivity level.
Fine surface cracks are permitted as follows:
Any number of linear/non linear discontinuities are permitted in the weld material and heat affected zone, as long as they do not extend to an edge.
The maximum length of linear discontinuities is 0.100 in. (2.54 mm).
The maximum length of non-linear discontinuities is 0.020 in. (0.50 mm).
Do the test for cracks.
SUBTASK 72-50-22-230-085 Examine the Welded Areas
Refer to Figure.
Dimensionally examine the reworked areas.
SUBTASK 72-50-22-220-124 Do the Post Repair Inspection
Refer to the SPM TASK 70-09-00-400-501.
Vibro-peen VRS4074 adjacent to the part number.
SUBTASK 72-50-22-380-060 Make a Mark to Identify the Repair
Figure: Weld up repair the inner buttress location slot of the stage 3 turbine vane
Weld up repair the inner buttress location slot of the stage 3 turbine vane

Figure: Heat treat cycles after weld up repair the inner buttress slot areas of the vane
Heat treat cycles after weld up repair the inner buttress slot areas of the vane

