Export Control
EAR Export Classification: Not subject to the EAR per 15 C.F.R. Chapter 1, Part 734.3(b)(3), except for the following Service Bulletins which are currently published as EAR Export Classification 9E991: SBE70-0992, SBE72-0483, SBE72-0580, SBE72-0588, SBE72-0640, SBE73-0209, SBE80-0024 and SBE80-0025.Copyright
© IAE International Aero Engines AG (2001, 2014 - 2021) The information contained in this document is the property of © IAE International Aero Engines AG and may not be copied or used for any purpose other than that for which it is supplied without the express written authority of © IAE International Aero Engines AG. (This does not preclude use by engine and aircraft operators for normal instructional, maintenance or overhaul purposes.).Applicability
All
Common Information
TASK 72-50-32-300-017 LPT Stage 5 Blade - Weld Build Up Repair Of Outer Shroud Hardfacing, Repair-017 (VRS4195)
General
Price and availability - none
The practices and processes referred to in the procedure by the TASK number are in the SPM.
NOTE
NOTE
NOTE
NOTE
If repair of pre-twist is also required, then do VRS4194 ** first before start of this repair.
Before start of repair, record the stage 5 turbine blade manufacturing code part number, heat code, blade life figure and serial number, if marked on the blade.
Preliminary Requirements
Pre-Conditions
NONESupport Equipment
| Name | Manufacturer | Part Number / Identification | Quantity | Remark |
|---|---|---|---|---|
| Cleaning facility | LOCAL | Cleaning facility | ||
| Welding facility | LOCAL | Welding facility | ||
| Inspection facility | LOCAL | Inspection facility | ||
| Machining facility | LOCAL | Machining facility | ||
| Heat treatment facility | LOCAL | Heat treatment facility | ||
| Crack inspection equipment | LOCAL | Crack inspection equipment | ||
| Blasting facility | LOCAL | Blasting facility | ||
| Marking facility | LOCAL | Marking facility | ||
| IAE 2M14168 Inspection gage | 0AM53 | IAE 2M14168 | 1 | |
| IAE 3M14403 Welding mounting block | 0AM53 | IAE 3M14403 | 1 | |
| IAE 3M14499 Welding fixture | 0AM53 | IAE 3M14499 | 1 | |
| IAE 3M14510 Grinding fixture (convex/concave side) | 0AM53 | IAE 3M14510 | 1 |
Consumables, Materials and Expendables
| Name | Manufacturer | Part Number / Identification | Quantity | Remark |
|---|---|---|---|---|
| CoMat 03-283 COATING ALLOY | 0CZB2 | CoMat 03-283 | ||
| CoMat 05-030 CAST STEEL SHOT DELETED | 0AM53 | CoMat 05-030 | ||
| CoMat 02-001 ADHESIVE TAPE (MASKING) | LOCAL | CoMat 02-001 |
Spares
NONESafety Requirements
NONEProcedure
Refer to the SPM TASK 70-11-01-300-503.
Vapor degrease.
SUBTASK 72-50-32-110-072 Clean the Stage 5 Turbine Blade
Refer to Figure and the SPM TASK 70-31-08-310-501.
Use IAE 3M14499 Welding fixture 1 off and IAE 3M14403 Welding mounting block 1 off.
Build up sufficient material to do the last machining.
In area A4, electrical contact is permitted.
No burning, pitting or selective attack is permitted.
Tungsten inert gas weld build-up the worn surfaces.
SUBTASK 72-50-32-310-054 Weld Build-Up Repair the Worn Surfaces
Use a pneumatic hand held grinder.
Refer to Figure for the finishing dimensions and the affected areas.
Remove burrs and sharp edges.
SUBTASK 72-50-32-320-054 Machine the Welded Areas
Refer to the SPM TASK 70-37-00-370-501 and SPM TASK 70-37-10-370-501.
Heating and cooling rate to be maximum 40 deg F (22 deg C) per minute.
Heat treat the stage 5 turbine blade.
SUBTASK 72-50-32-370-056 Heat Treat after Machining
Refer to the SPM TASK 70-23-03-230-501 or SPM TASK 70-23-08-230-501.
The maximum permitted length of the discontinuties is 0.016 in. (0.4 mm) in the repaired areas.
Do the test for cracks.
SUBTASK 72-50-32-230-080 Examine the Stage 5 Turbine Blade for Cracks after Heat Treatment
Refer to the SPM TASK 70-11-01-300-503.
Vapor degrease.
SUBTASK 72-50-32-110-073 Clean the Stage 5 Turbine Blade
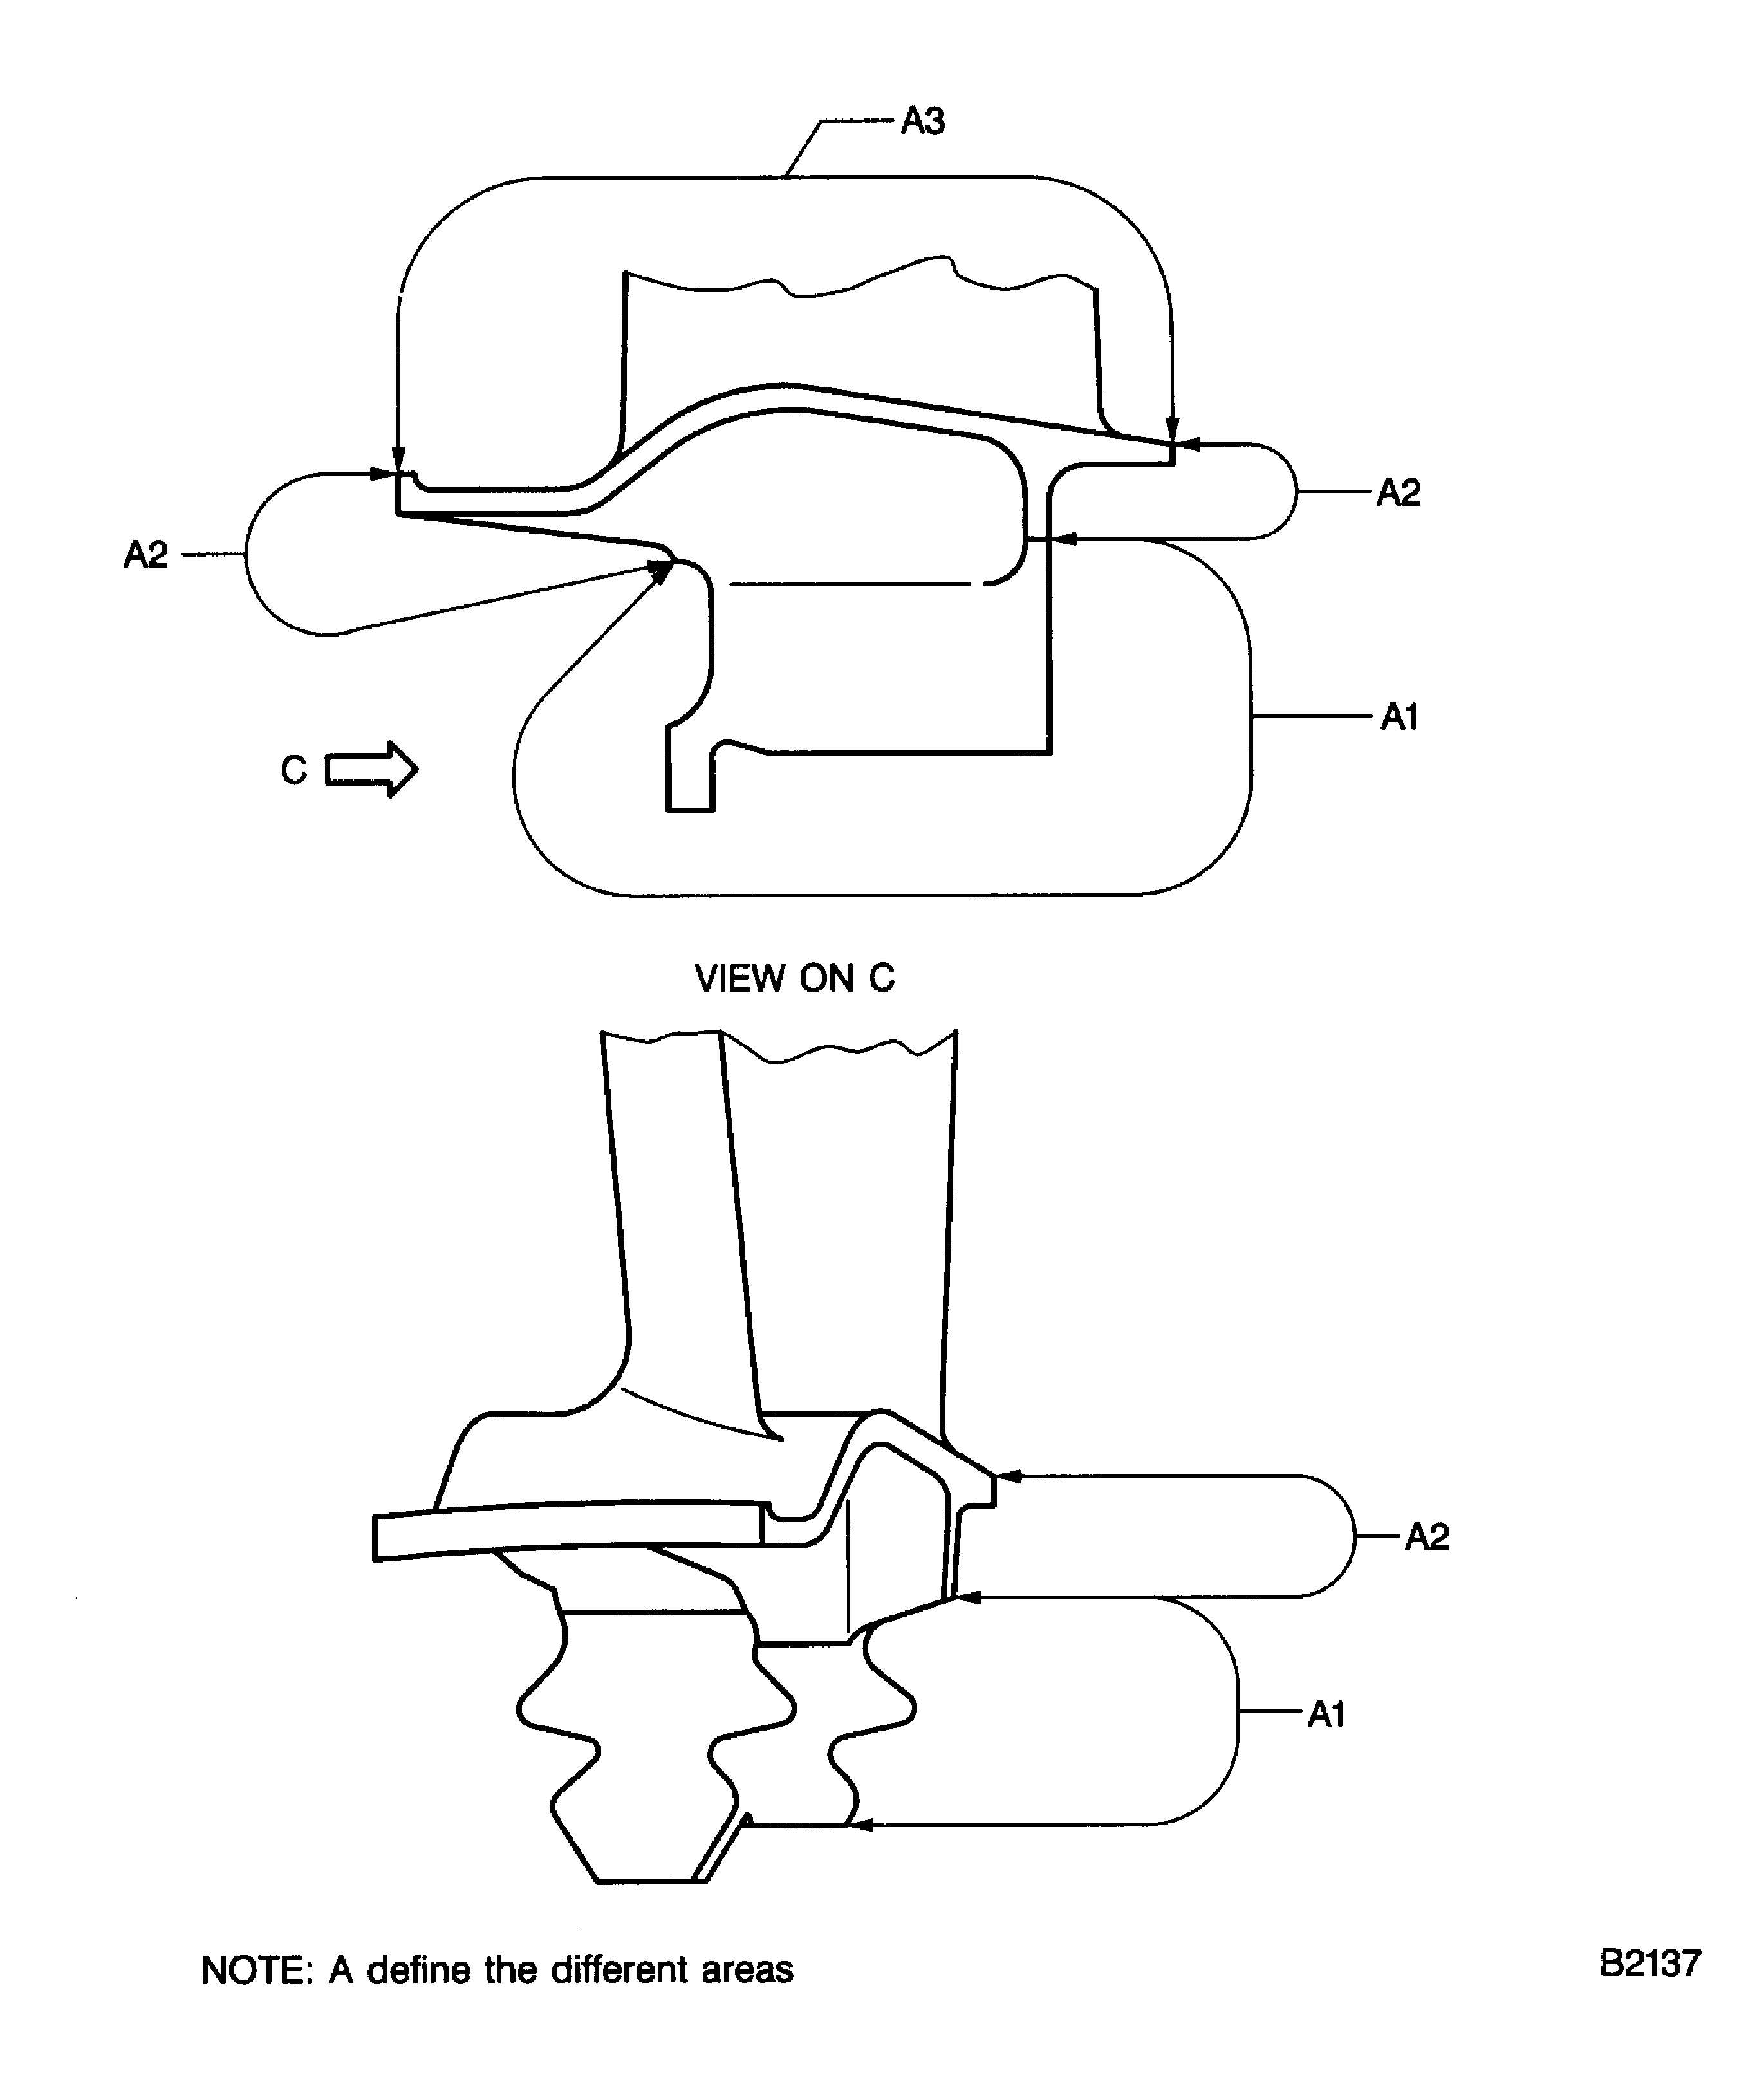
Refer to Figure. Use CoMat 02-001 ADHESIVE TAPE (MASKING).
Mask the turbine blade surface in area A3.
Refer to the SPM TASK 70-38-04-300-503.
Use CoMat 05-030 CAST STEEL SHOT DELETED to an intensity of 6A.
Shot-peening is permitted in the area A2 but must not be complete.
Refer to Figure.
Shot-peen area A1.
SUBTASK 72-50-32-380-058 Shot-Peen the Surface A1 of the Stage 5 Turbine Blade
If you cannot read any fo these, make new marks.
Use the roll stamp method.
Refer to the SPM TASK 70-09-00-400-501.
Examine the markings of the stage 5 turbine blade manufacturing code, part number, heat code and serial number.
If you cannot read this marking, make a new mark.
Use the vibro-peen method.
Refer to the SPM TASK 70-09-00-400-501.
Examine the marking of the stage 5 turbine blade life.
SUBTASK 72-50-32-220-169 Examine the Blade Markings
Figure: Weld build-up of outer shroud hardfacing
Weld build-up of outer shroud hardfacing
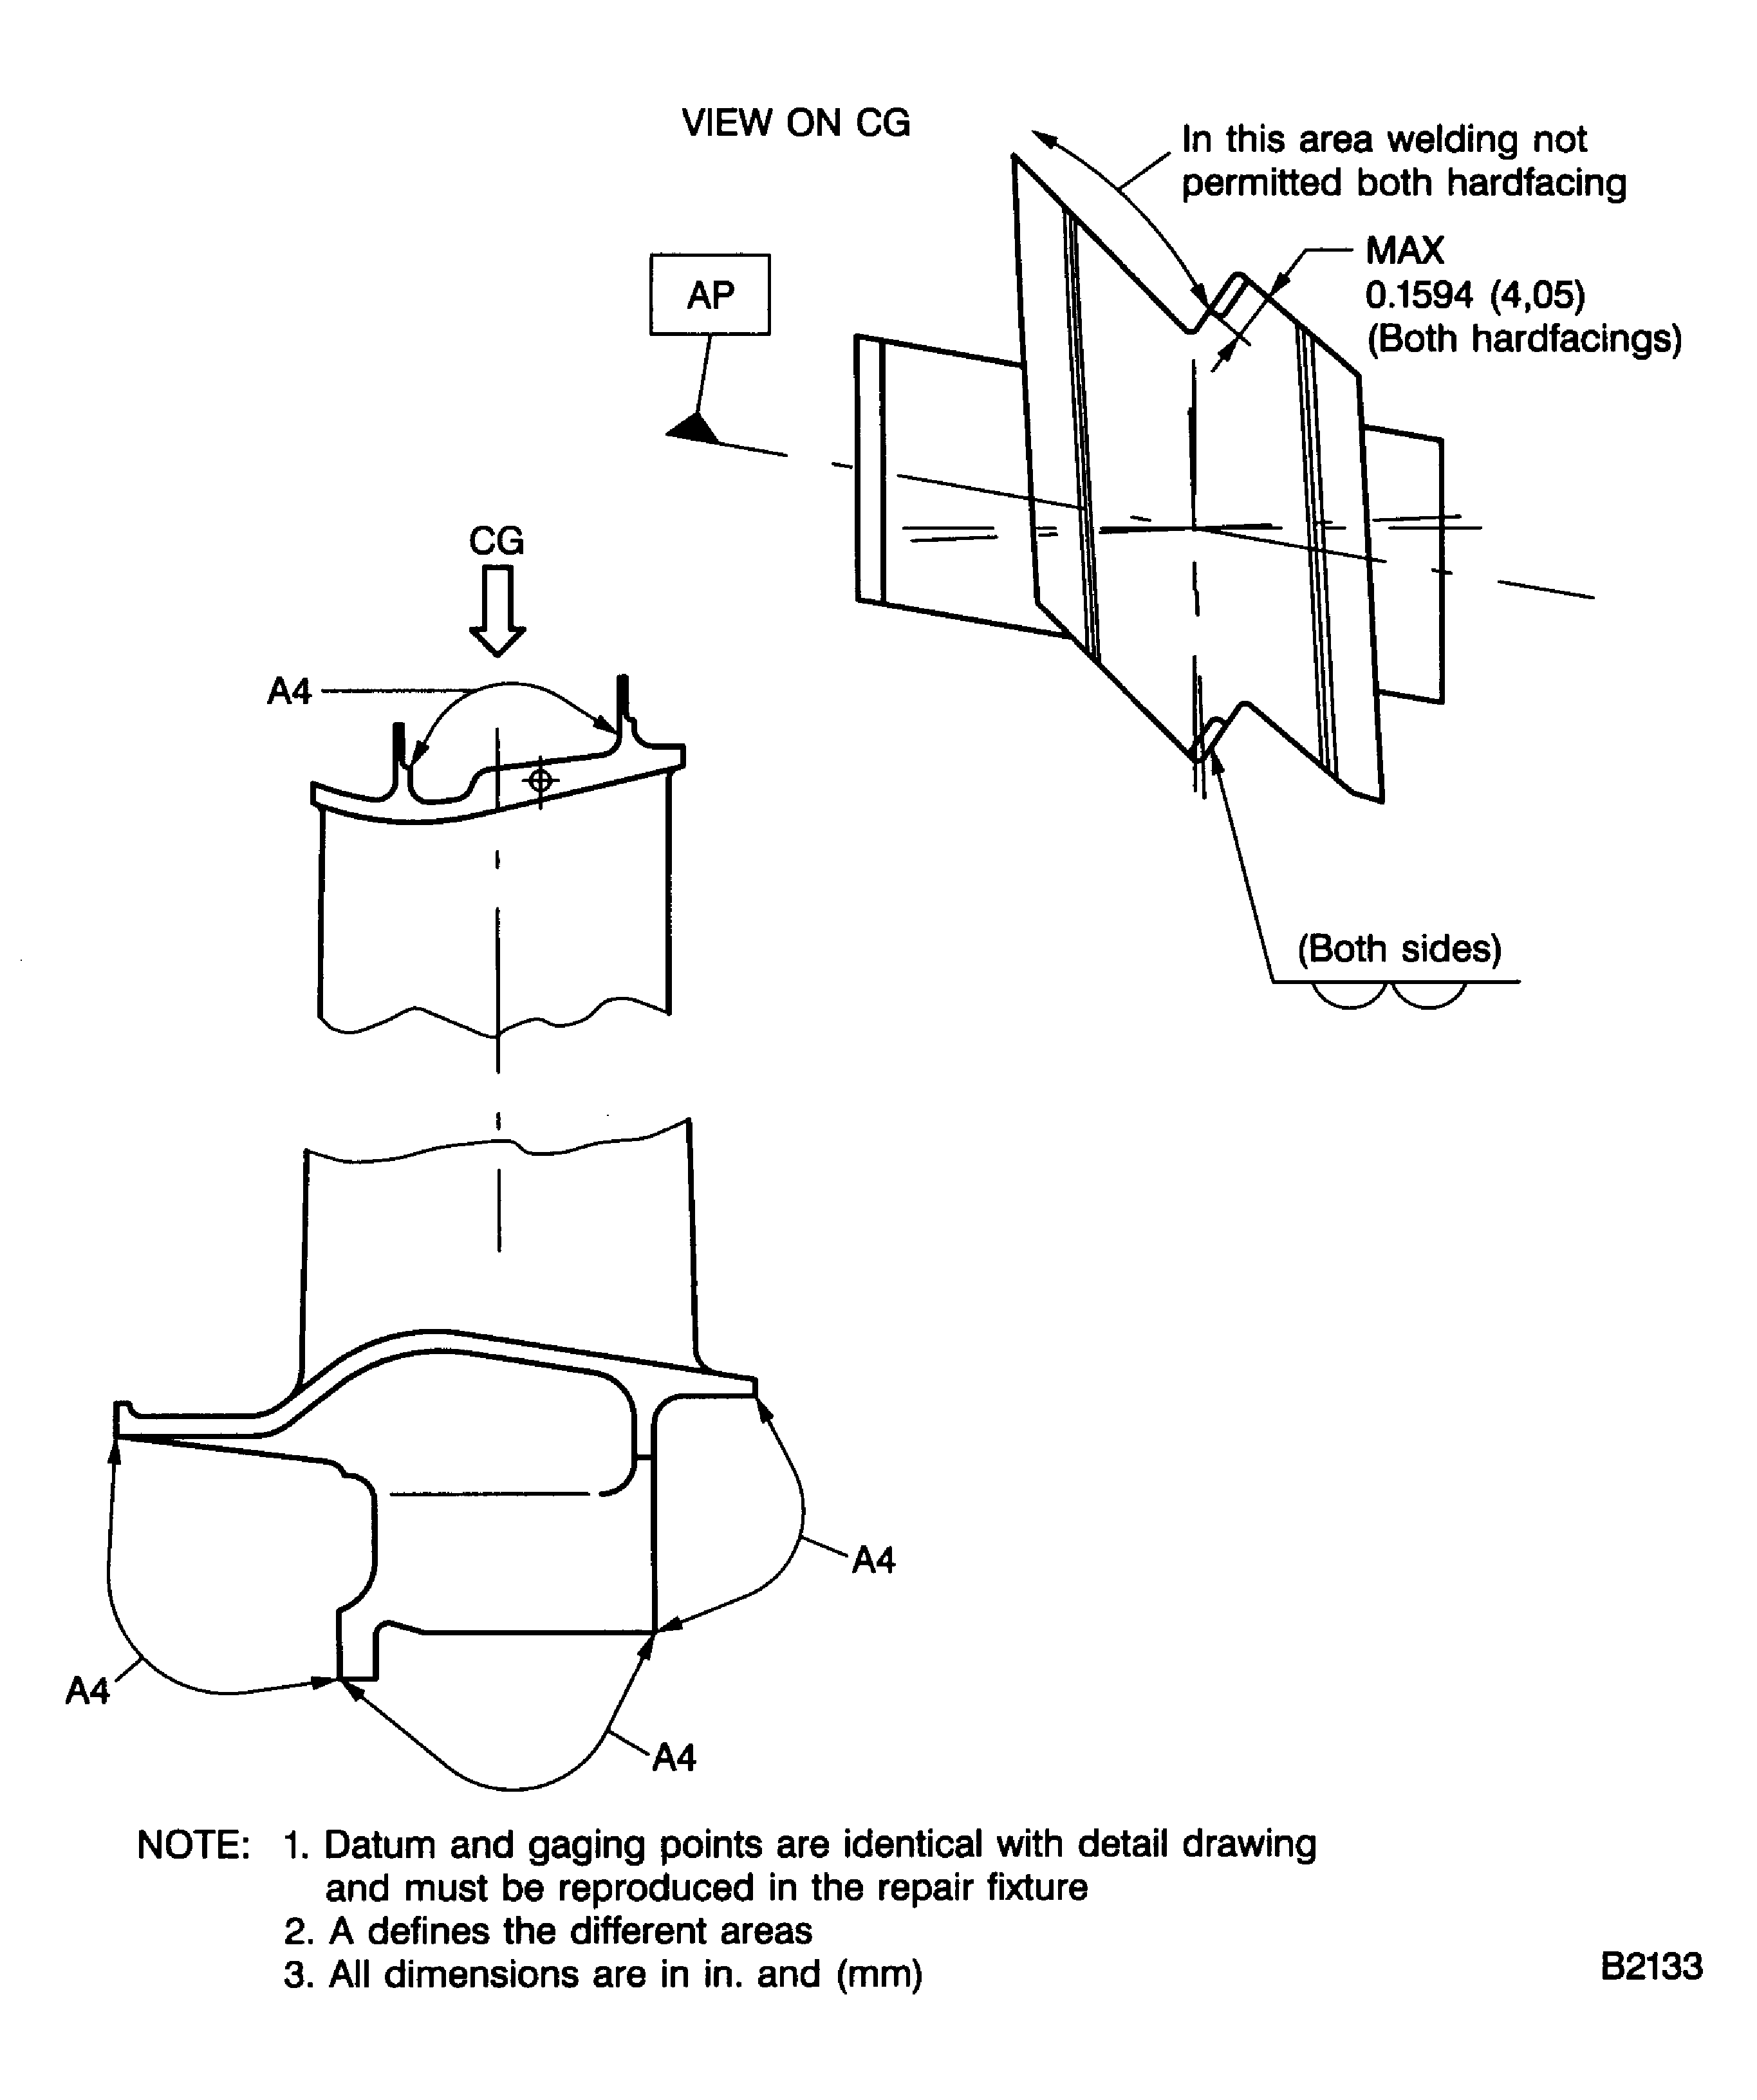
Figure: Weld build-up of outer shroud hardfacing
Sheet 1
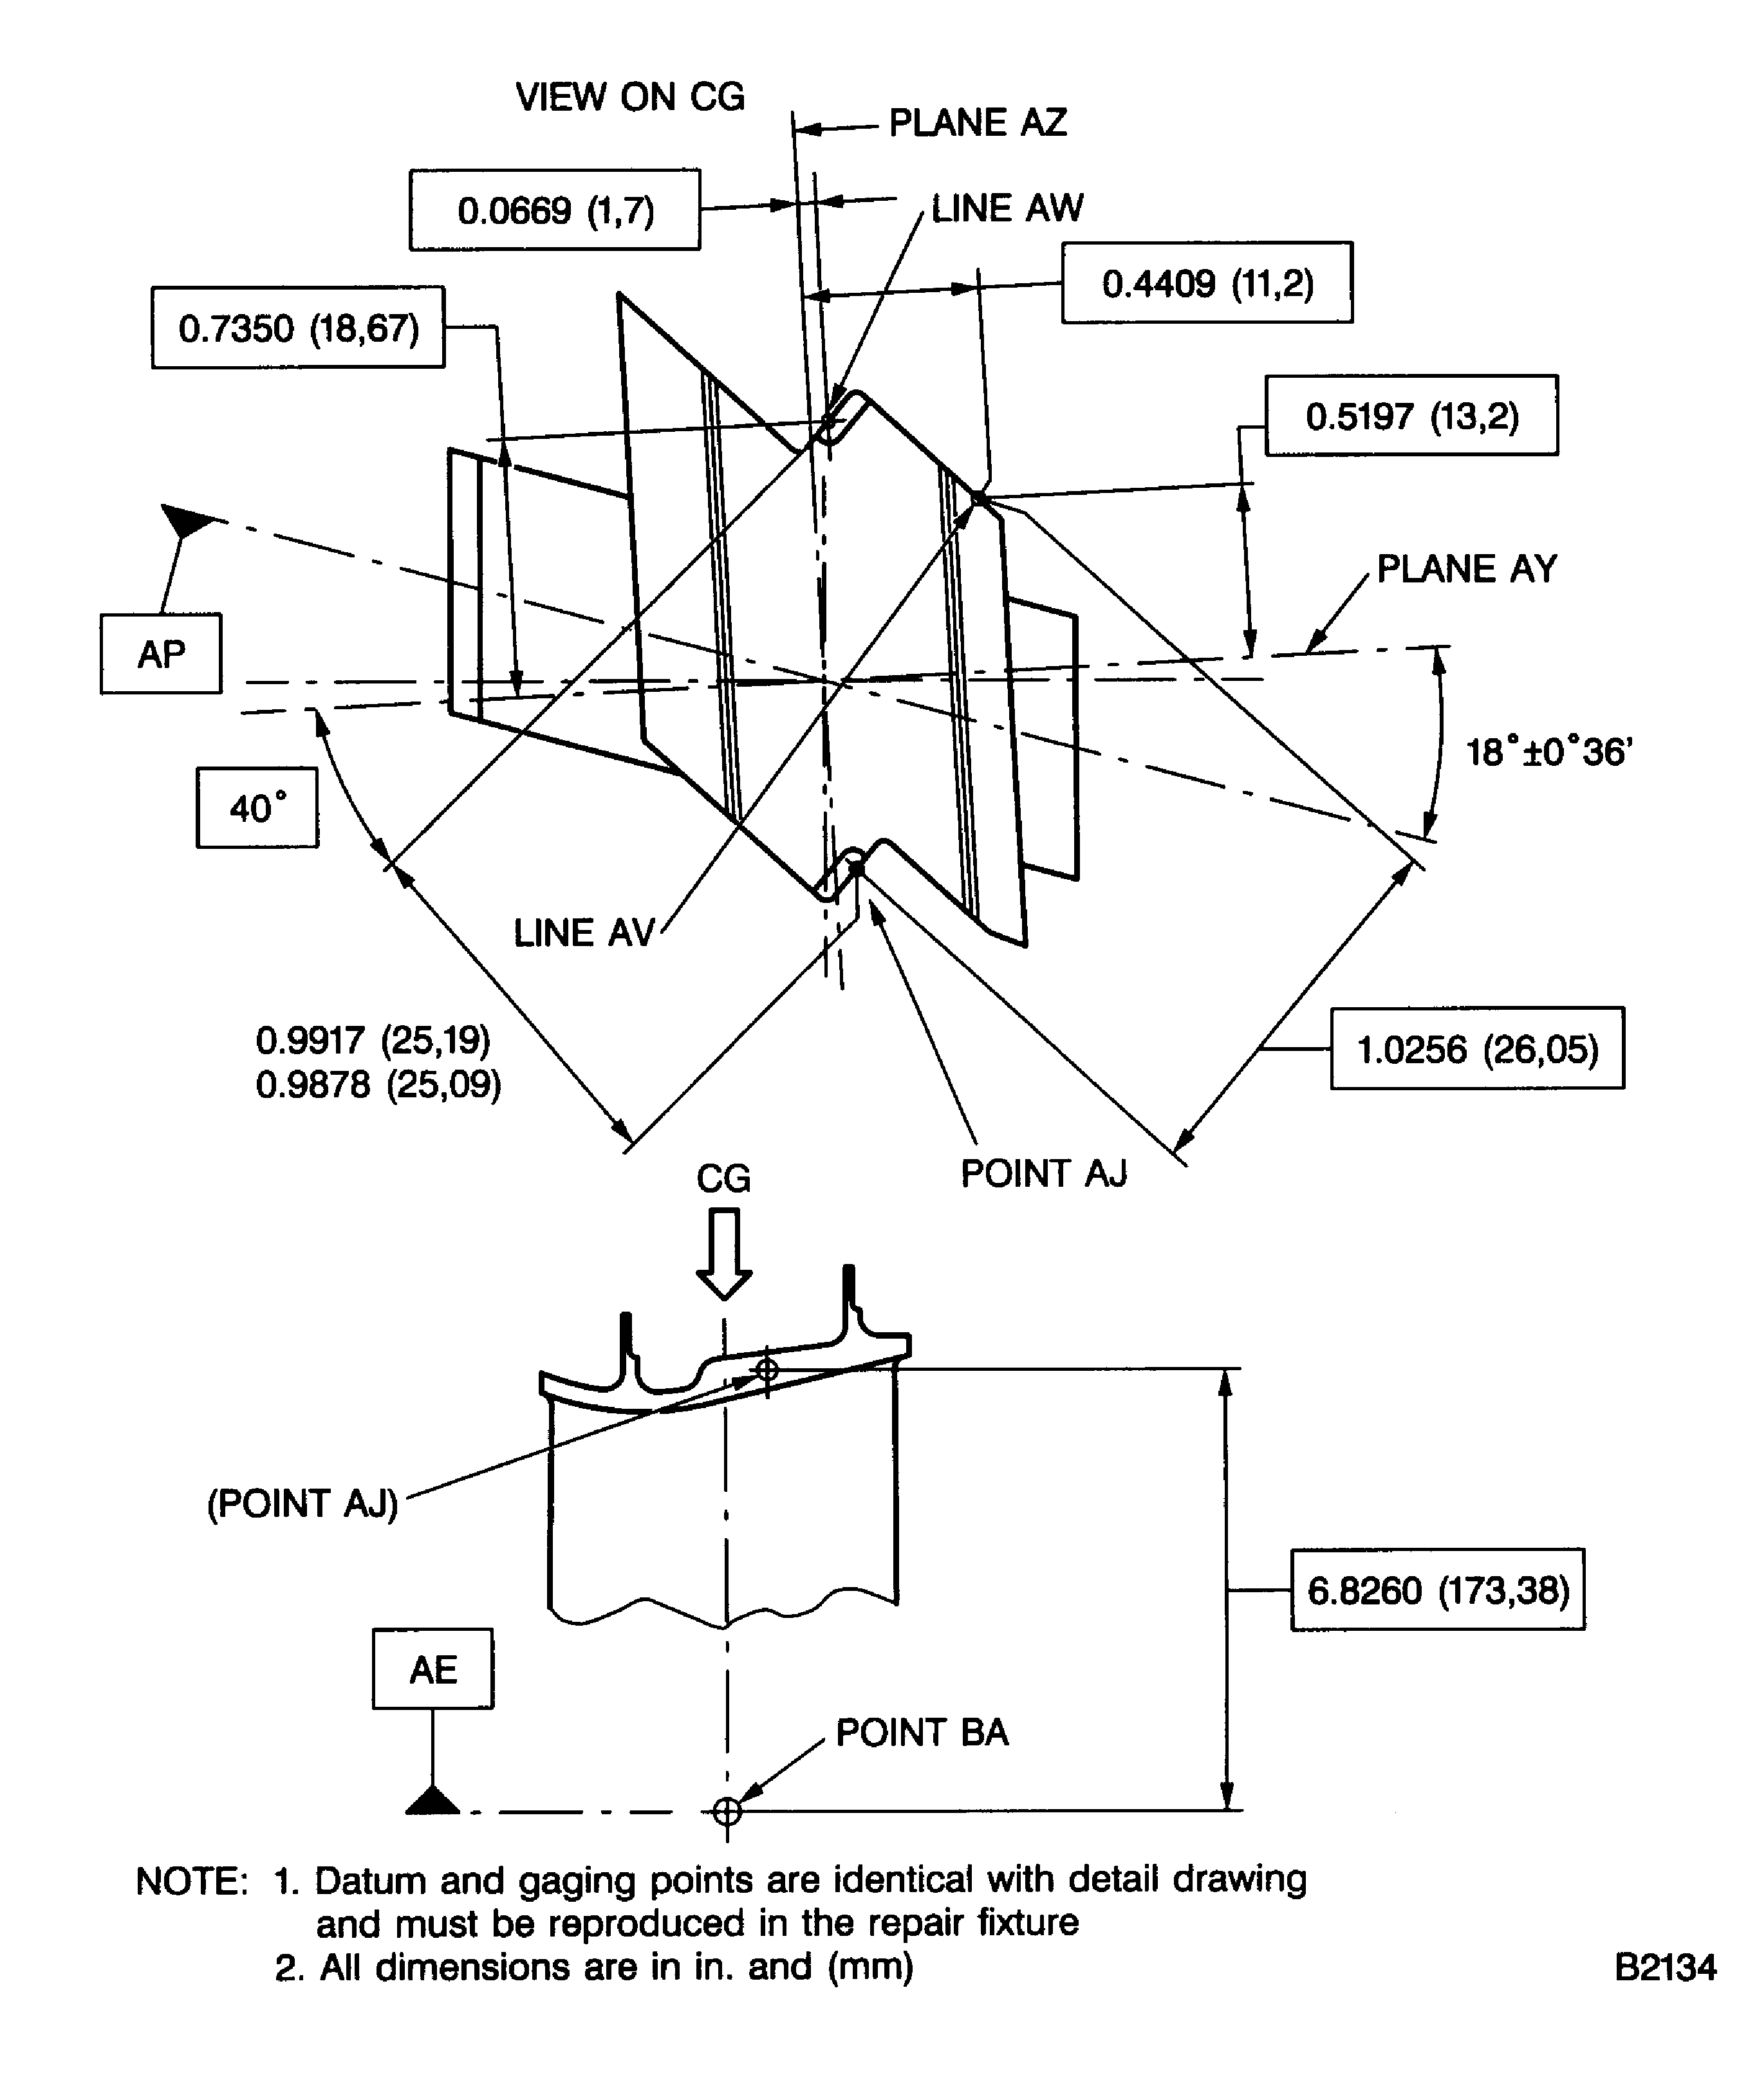
Figure: Weld build-up of outer shroud hardfacing
Sheet 2
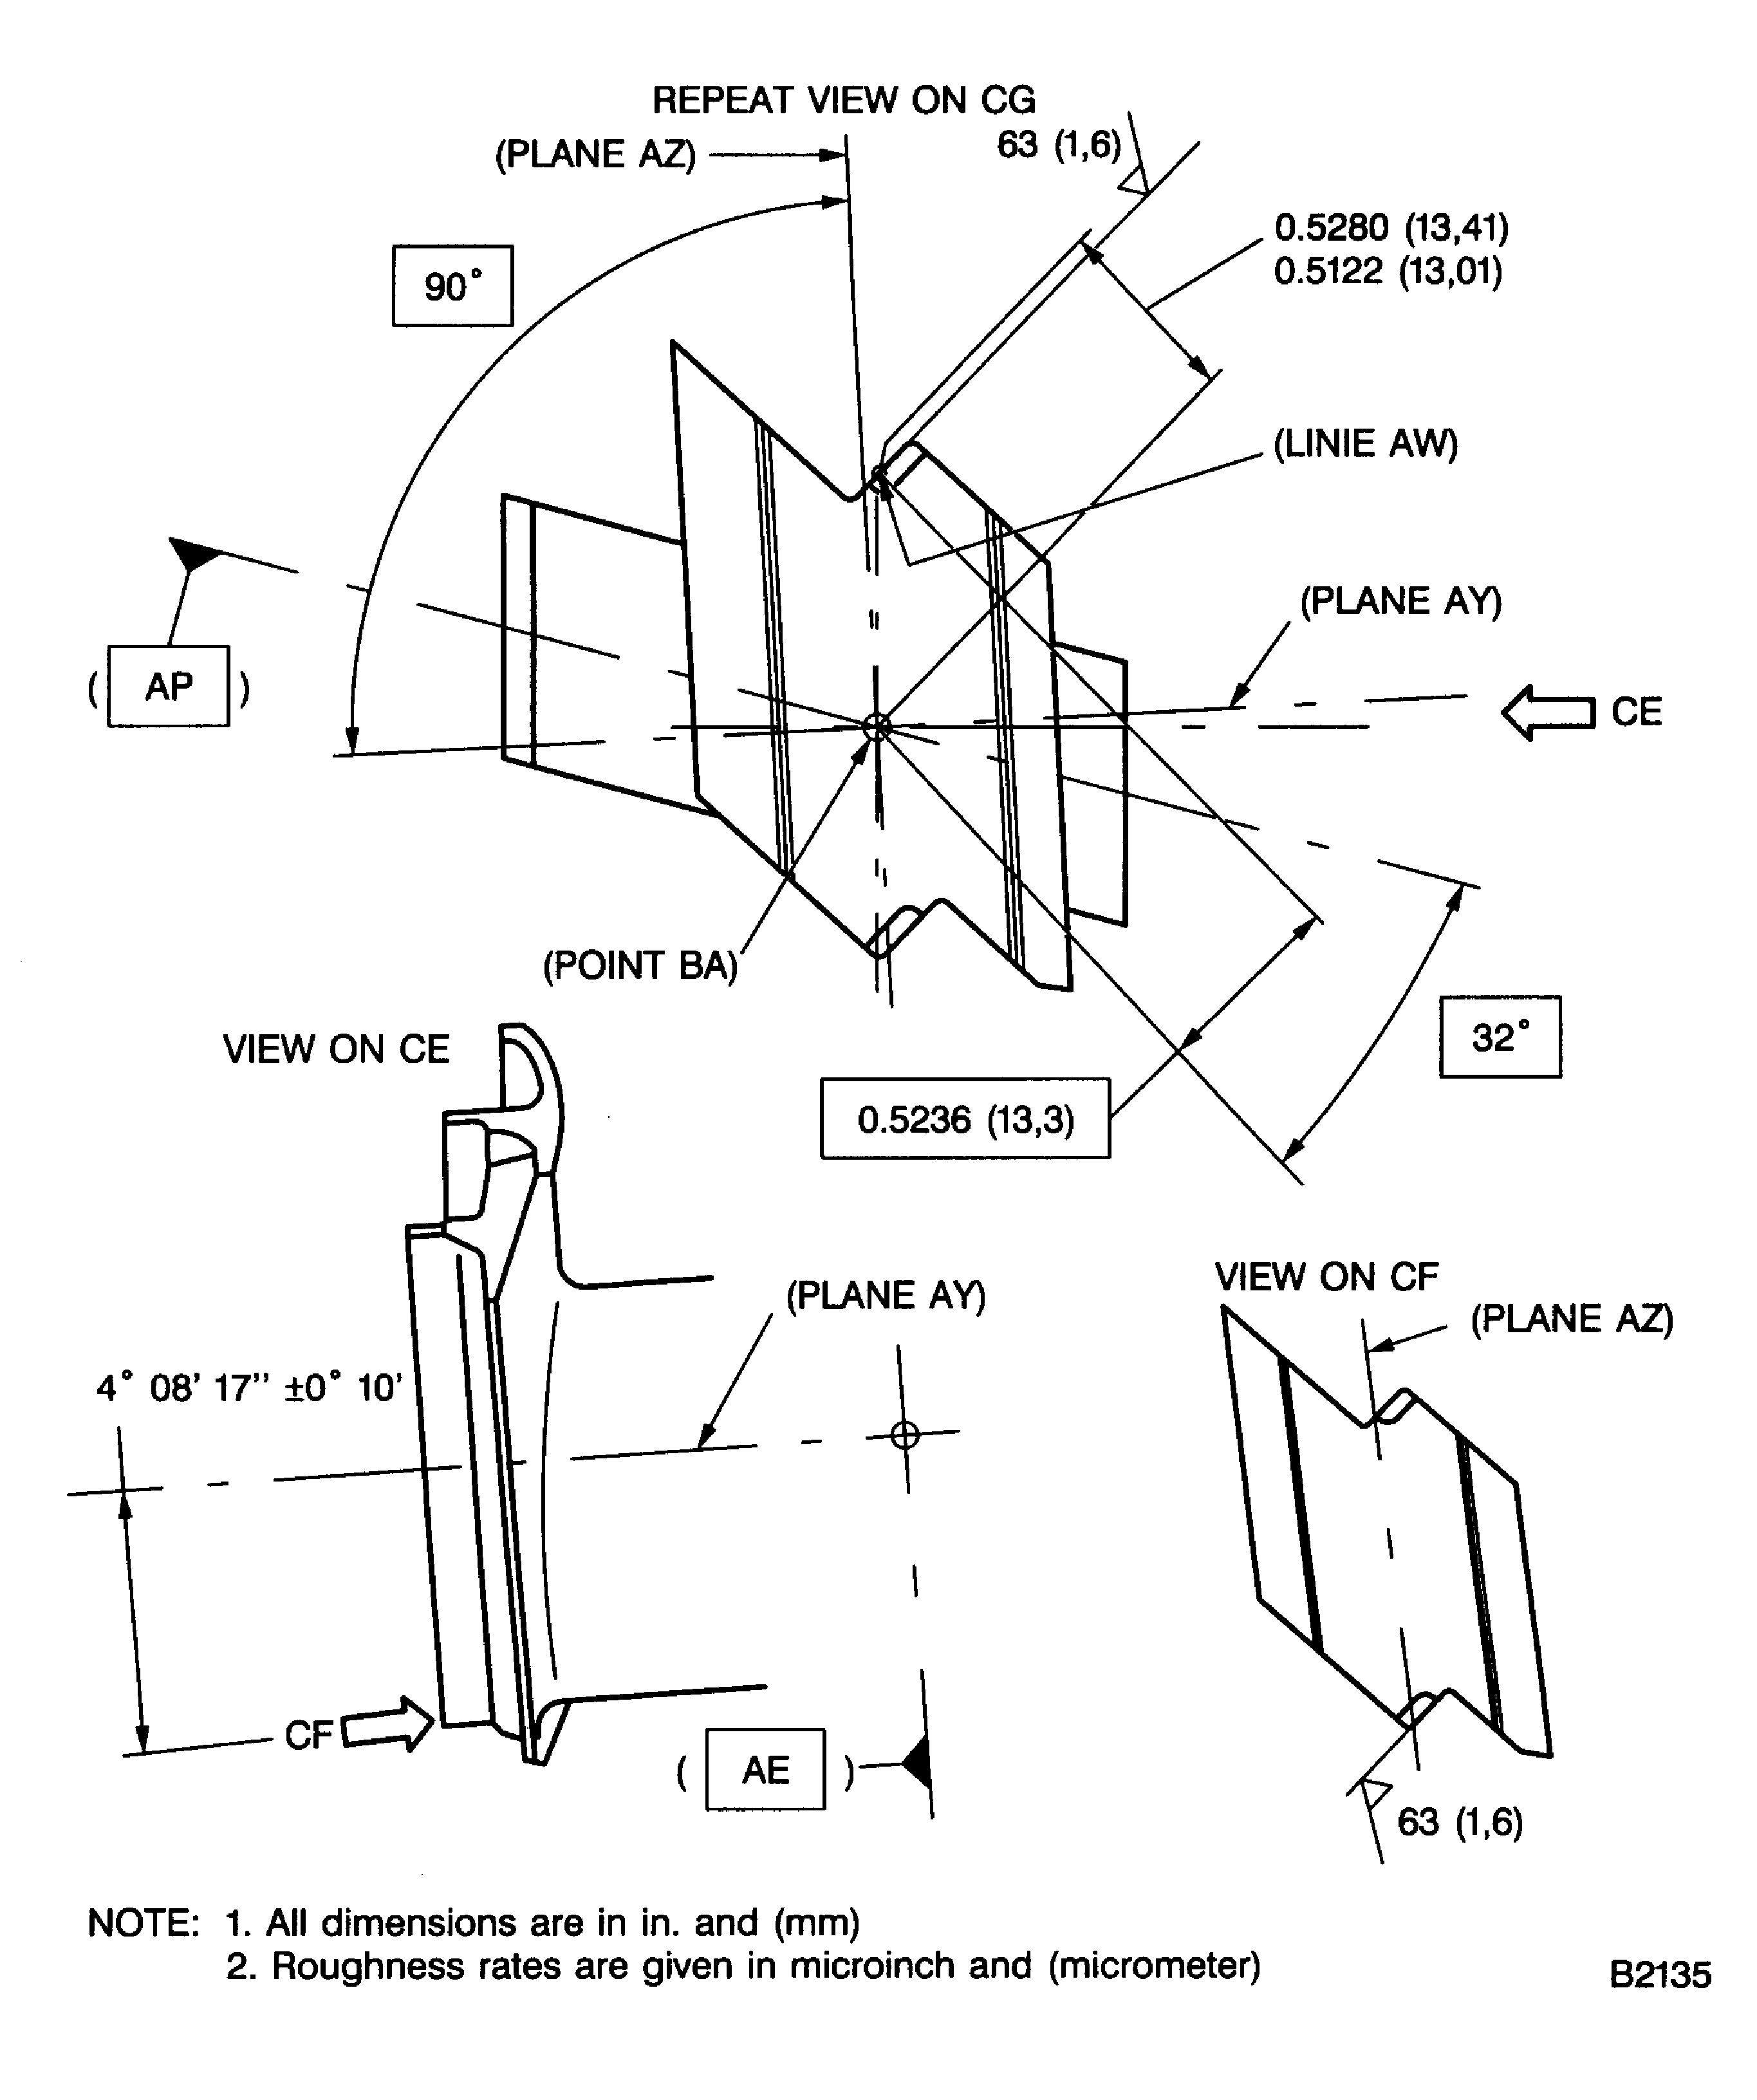
Figure: Weld build-up of outer shroud hardfacing
Weld build-up of outer shroud hardfacing
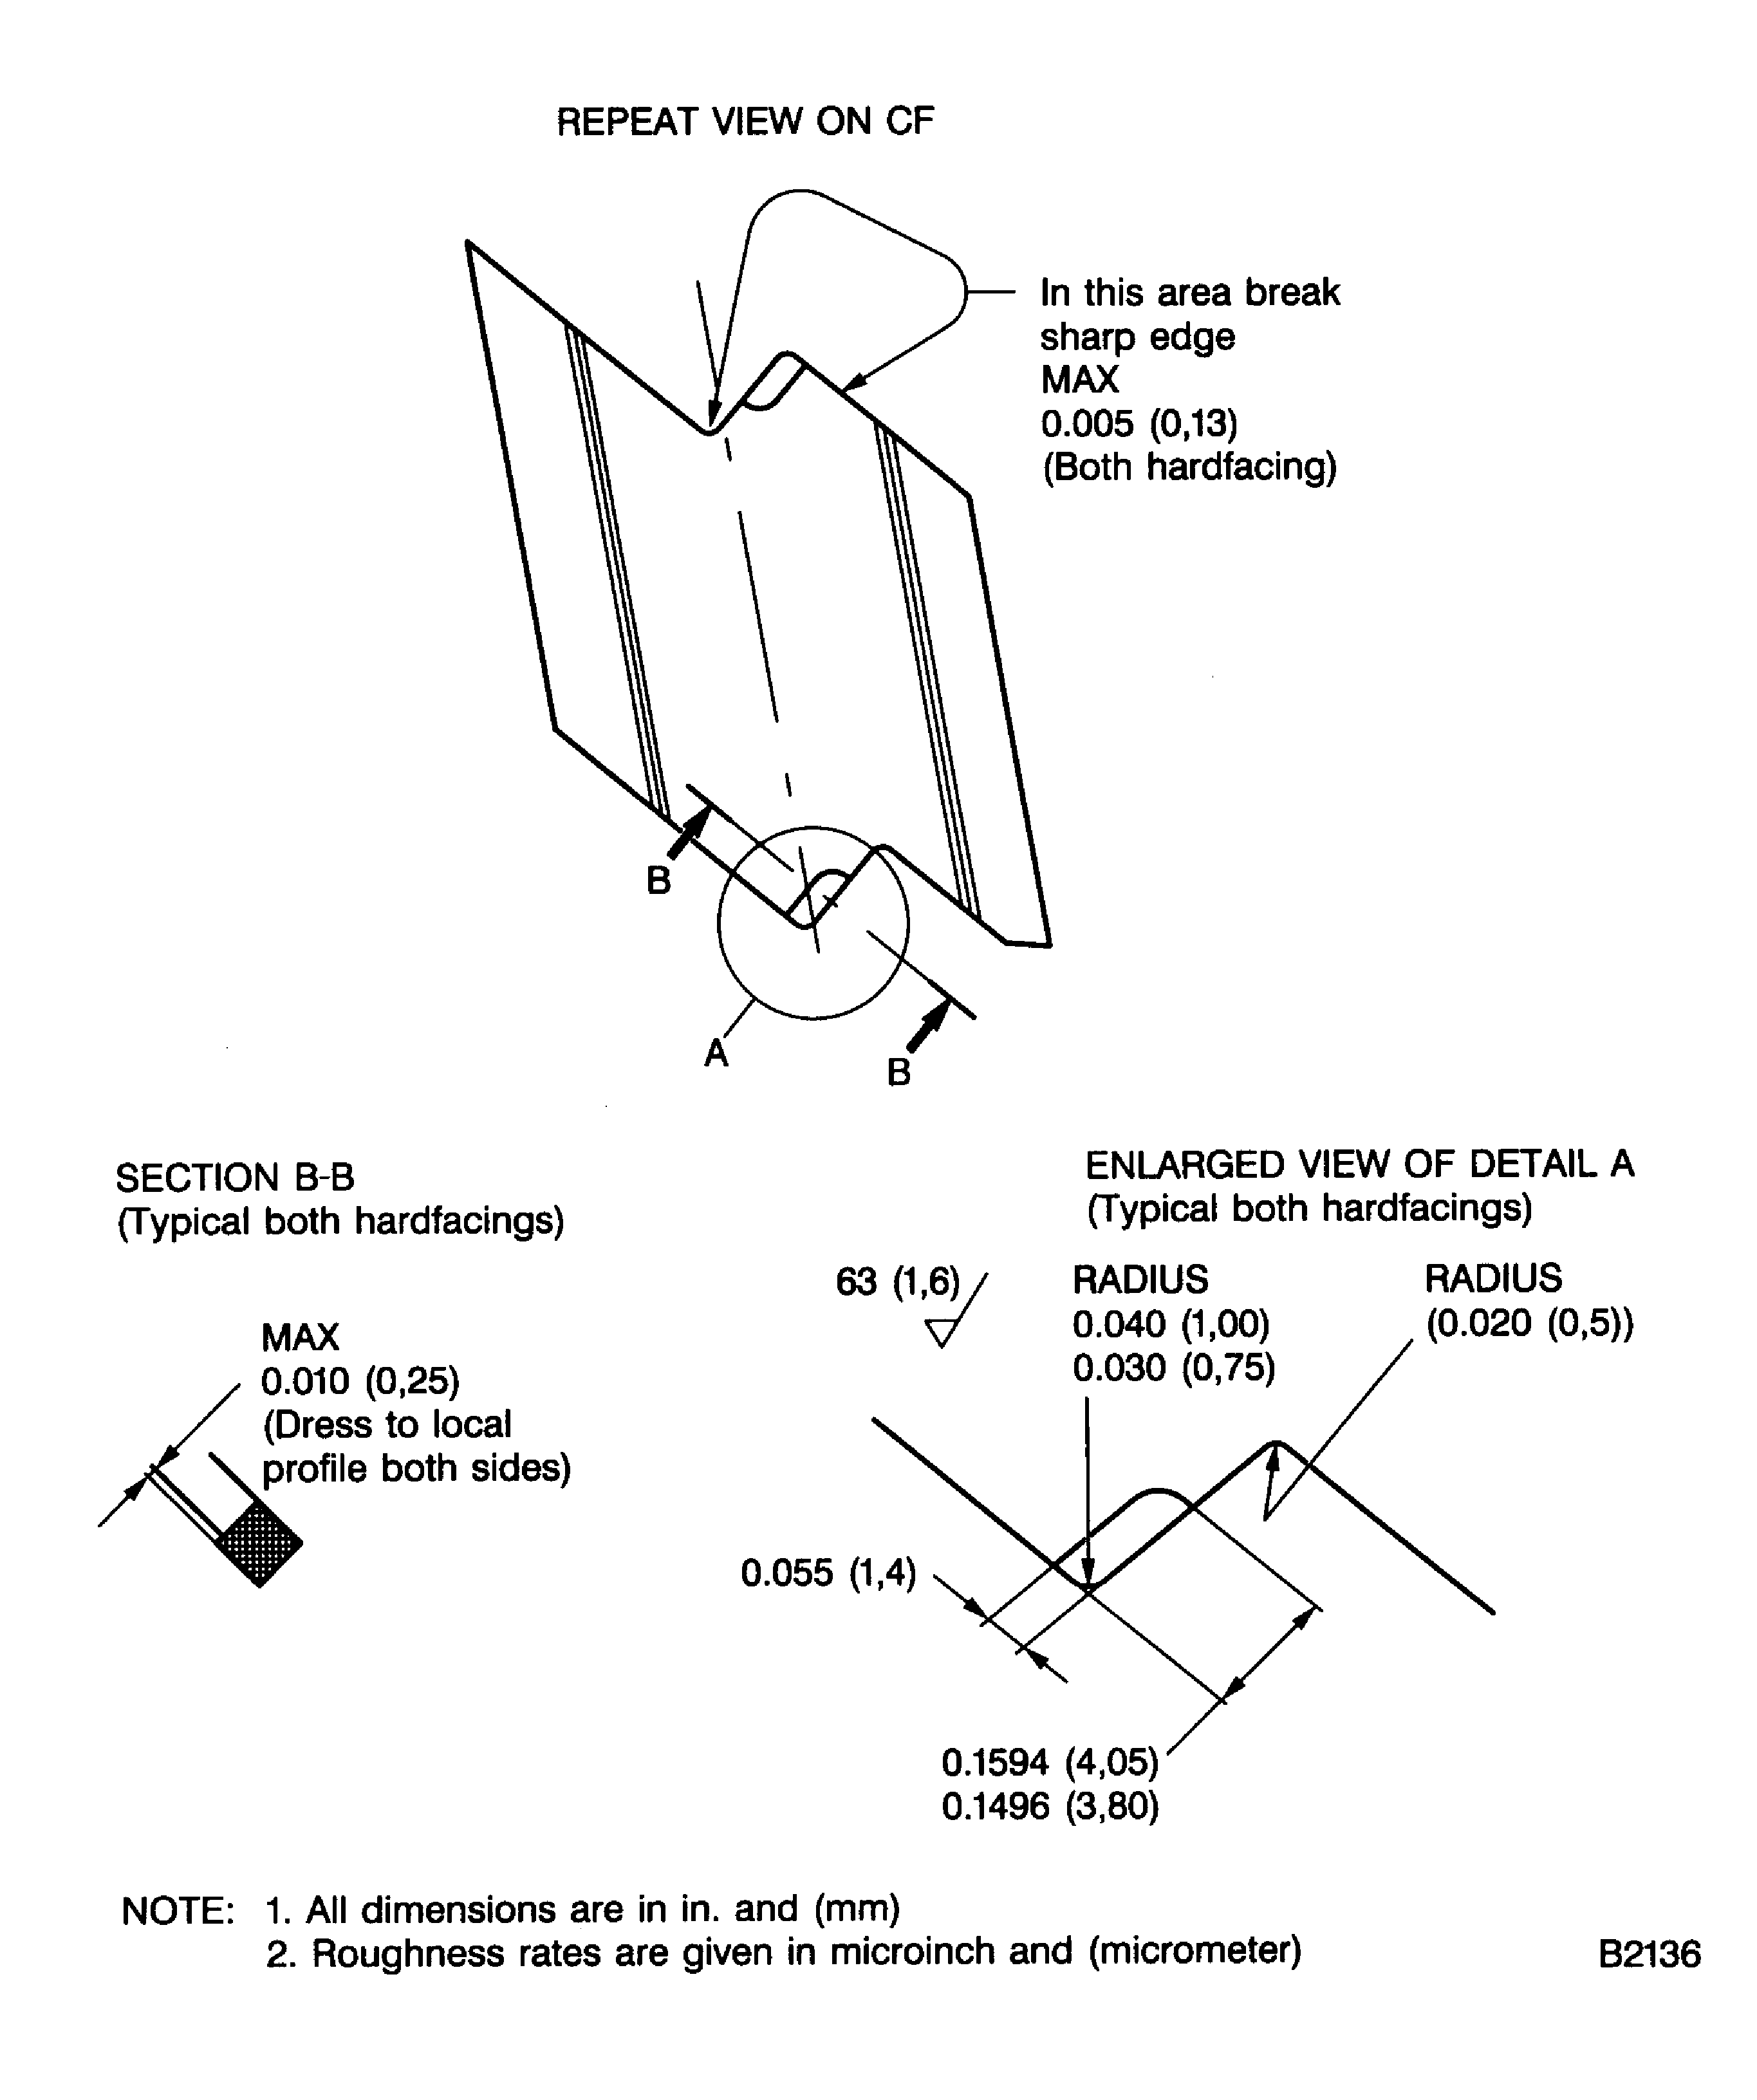
Figure: Weld build-up of outer shroud hardfacing
Weld build-up of outer shroud hardfacing
