Export Control
EAR Export Classification: Not subject to the EAR per 15 C.F.R. Chapter 1, Part 734.3(b)(3), except for the following Service Bulletins which are currently published as EAR Export Classification 9E991: SBE70-0992, SBE72-0483, SBE72-0580, SBE72-0588, SBE72-0640, SBE73-0209, SBE80-0024 and SBE80-0025.Copyright
© IAE International Aero Engines AG (2001, 2014 - 2021) The information contained in this document is the property of © IAE International Aero Engines AG and may not be copied or used for any purpose other than that for which it is supplied without the express written authority of © IAE International Aero Engines AG. (This does not preclude use by engine and aircraft operators for normal instructional, maintenance or overhaul purposes.).Applicability
All
Common Information
TASK 72-50-32-300-056 LPT Stage 6 Blade - Weld Build Up Repair Of Outer Shroud Hardfacing, Repair-056 (VRS4285)
General
Price and availability - none
The practices and processes referred to in the procedure by the TASK number are in the SPM.
NOTE
NOTE
NOTE
NOTE
If repair of pre-twist is also required, then do VRS4303 TASK 72-50-32-300-054 (REPAIR-054) first, before start of this repair.
Before repair, write down turbine part number and serial number.
Preliminary Requirements
Pre-Conditions
NONESupport Equipment
| Name | Manufacturer | Part Number / Identification | Quantity | Remark |
|---|---|---|---|---|
| Rockwell hardness tester | LOCAL | Rockwell hardness tester | ||
| 10X Illuminated magnifier | LOCAL | 10X Illuminated magnifier | ||
| Hand held grinder | LOCAL | Hand held grinder | ||
| IAE 2M14191 Inspection gage | 0AM53 | IAE 2M14191 | 1 | |
| IAE 3M14400 Welding mounting block | 0AM53 | IAE 3M14400 | 1 | |
| IAE 3M14404 Grinding fixture (convex/concave side) | 0AM53 | IAE 3M14404 | 1 | |
| IAE 3M14499 Welding fixture | 0AM53 | IAE 3M14499 | 1 |
Consumables, Materials and Expendables
| Name | Manufacturer | Part Number / Identification | Quantity | Remark |
|---|---|---|---|---|
| CoMat 03-283 COATING ALLOY | 0CZB2 | CoMat 03-283 | ||
| CoMat 05-029 CAST STEEL SHOT, S110 | LOCAL | CoMat 05-029 | ||
| CoMat 05-030 CAST STEEL SHOT DELETED | 0AM53 | CoMat 05-030 | ||
| CoMat 05-031 CAST STEEL SHOT DELETED | 0AM53 | CoMat 05-031 | ||
| CoMat 05-138 SHOT, CAST STEEL, S110 | 11851 | CoMat 05-138 | ||
| CoMat 05-177 CUT WIRE SHOT,CW-14 | LOCAL | CoMat 05-177 |
Spares
NONESafety Requirements
NONEProcedure
Refer to the SPM TASK 70-11-03-300-503.
Aqueous cleaning.
SUBTASK 72-50-32-110-125 Clean the Stage 6 Turbine Blade
Refer to Figure.
Refer to the SPM TASK 70-31-08-310-501.
Use IAE 3M14499 Welding fixture 1 off and IAE 3M14400 Welding mounting block 1 off.
Make sure that there is sufficient material to do last machining.
Decrease temperature of the turbine blade to reduce heat affected zone to a minimum.
In area A4 electrical contact is permitted.
No burning, pitting or selective attack is permitted.
Gas tungsten arc weld surfaces.
SUBTASK 72-50-32-310-073 Weld Build-Up Repair the Worn Sufaces
Use IAE 2M14191 Inspection gage 1 off.
Examine the machined areas dimensionally.
SUBTASK 72-50-32-220-319 Examine the Machined Outer Shroud Hardfacing
Refer to the SPM TASK 70-37-10-370-501, Stress-Relief Cycle 5.
Stress-relieve the turbine blade.
SUBTASK 72-50-32-370-087 Heat Treatment after Machining
NOTE
Do the stress-relief after all weld operations.Refer to the SPM TASK 70-23-08-230-501.
The maximum permitted length of discontinuities is 0.016 in. (0.4 mm) in the repaired areas.
Do the test for cracks.
SUBTASK 72-50-32-230-142-001 Examine the Machined Areas for Cracks
Refer to the SPM TASK 70-11-03-300-503.
Aqueous cleaning.
SUBTASK 72-50-32-110-126 Clean the Stage 6 Turbine Blade
Refer to the SPM TASK 70-38-13-380-501.
Use CoMat 05-029 CAST STEEL SHOT, S110 or CoMat 05-030 CAST STEEL SHOT DELETED or CoMat 05-031 CAST STEEL SHOT DELETED or CoMat 05-138 SHOT, CAST STEEL, S110 or CoMat 05-177 CUT WIRE SHOT,CW-14 to an intensity of 6A.
Shotpeen blade root flanks plus corner radii to end faces.
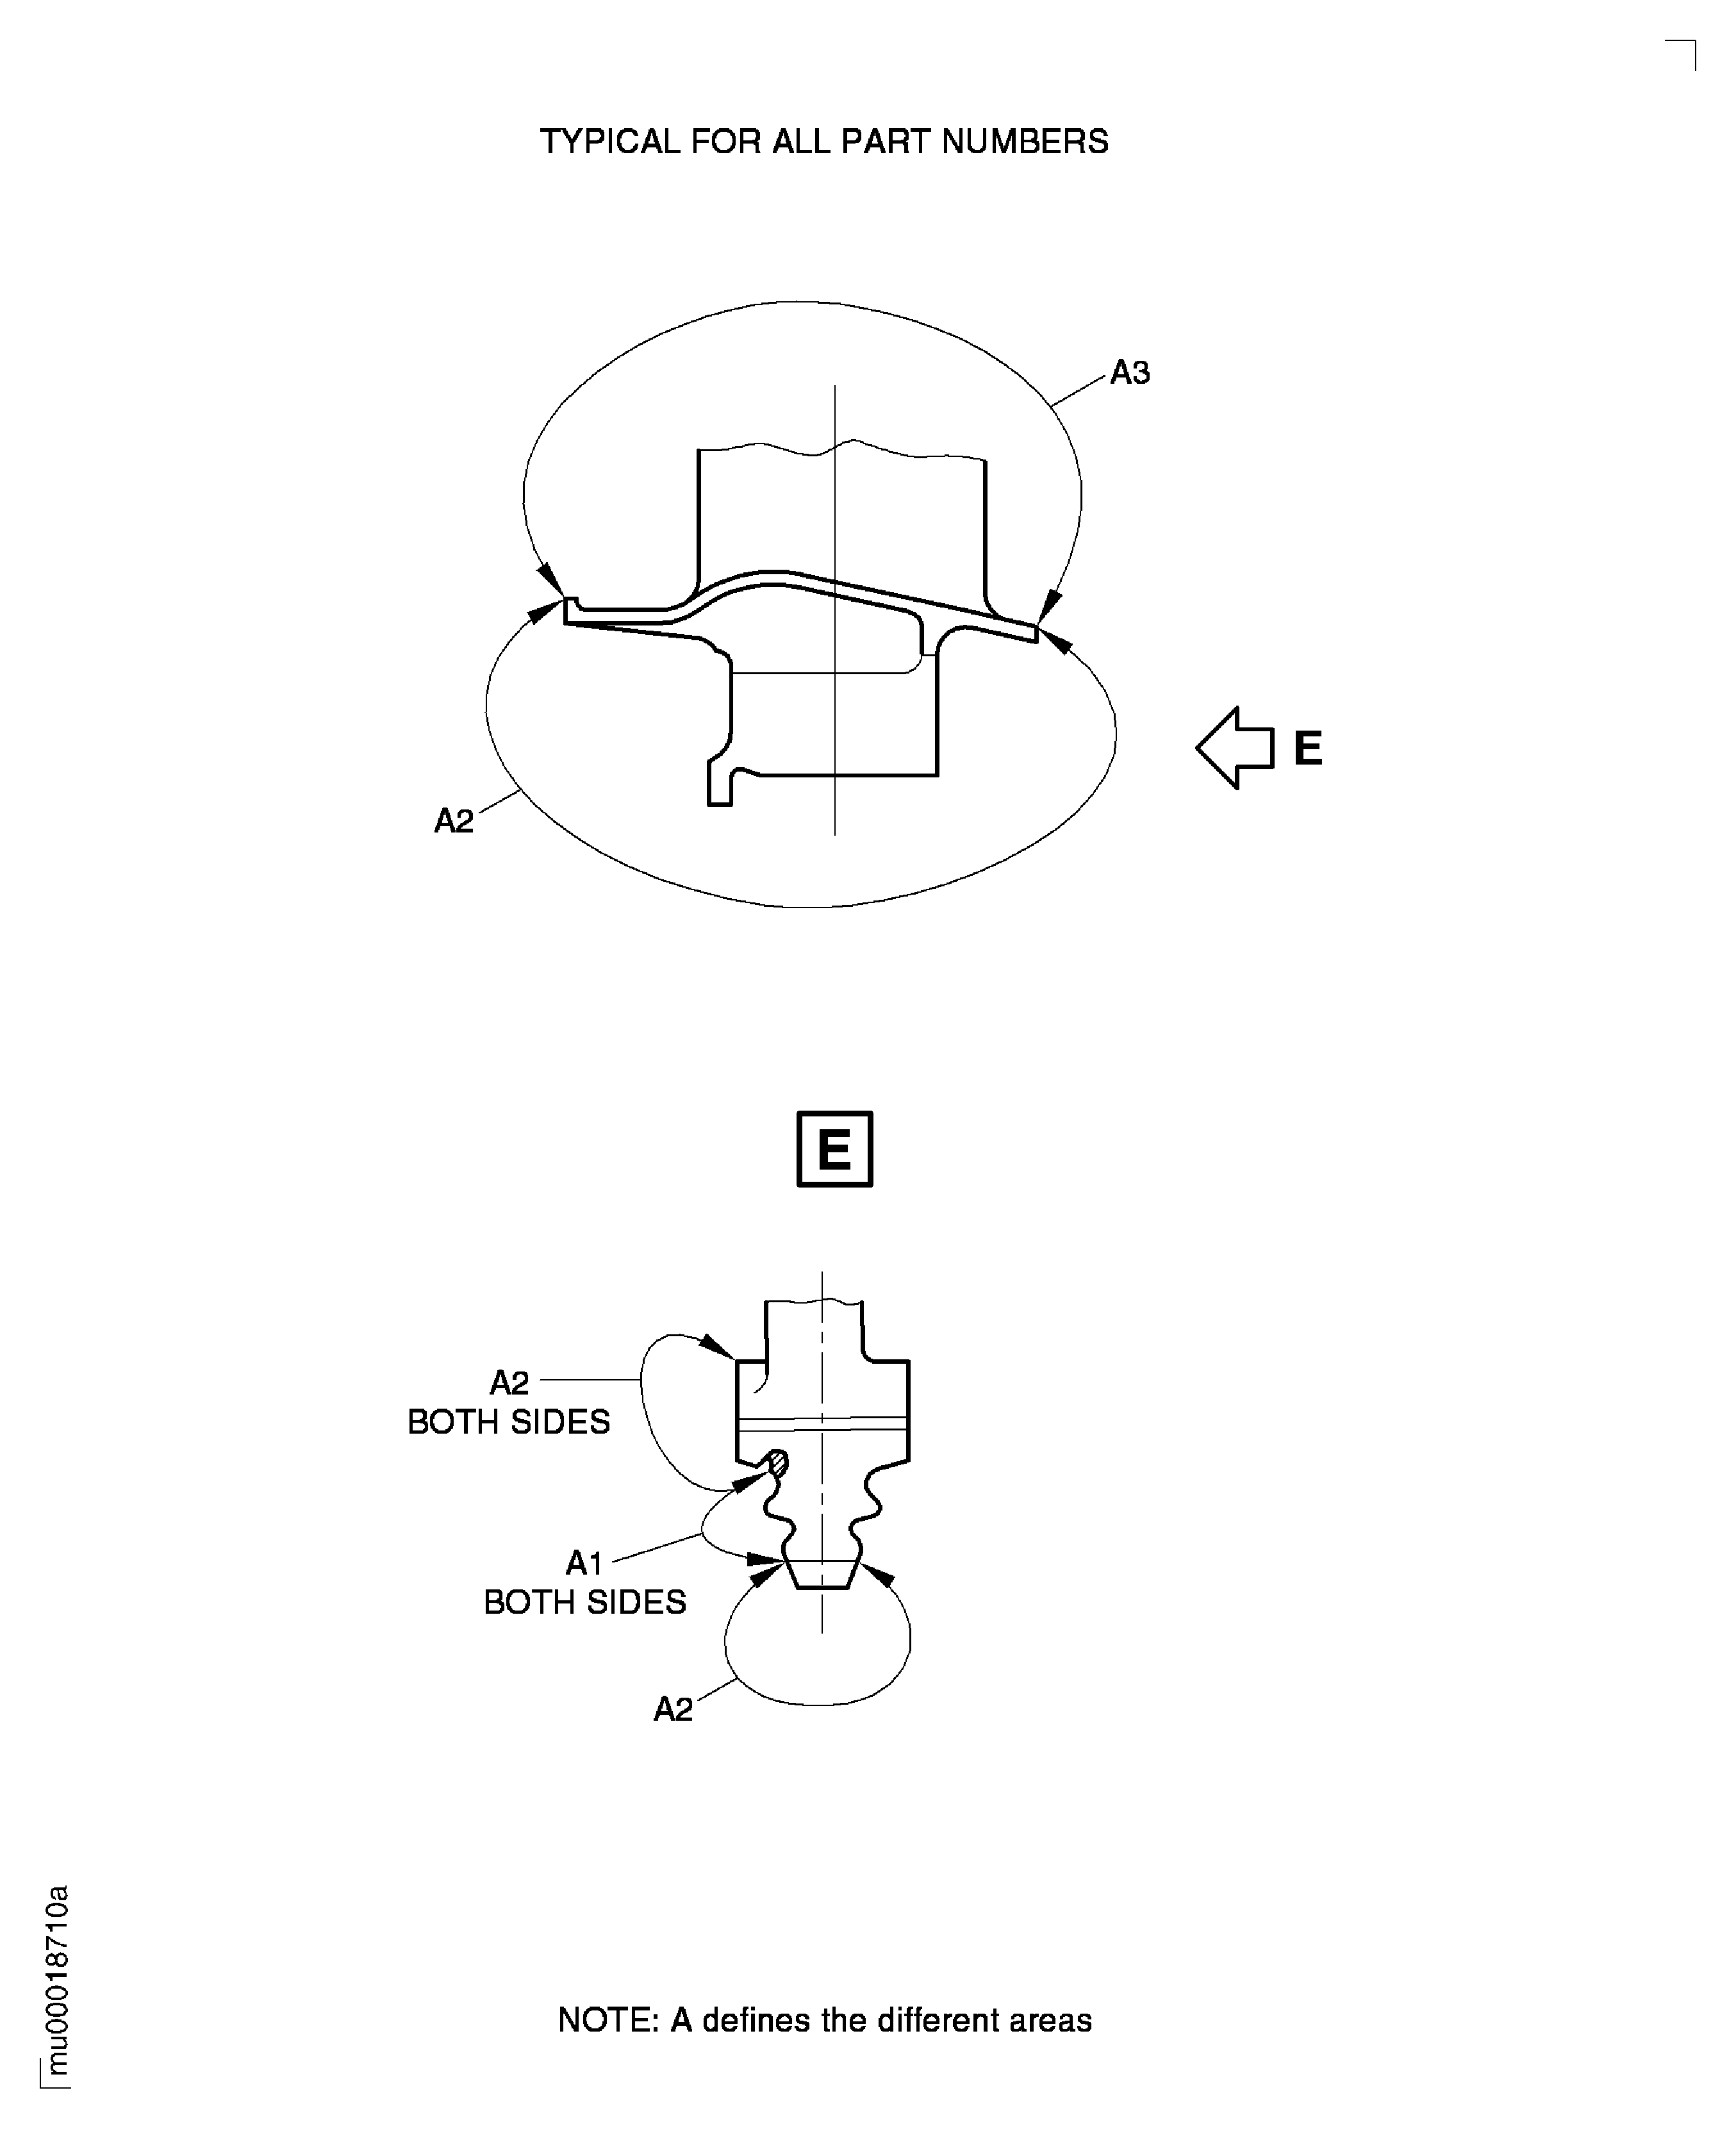
Shotpeening is permitted in area A2.
Shotpeen area A1.
SUBTASK 72-50-32-380-083 Shotpeen the Surface A1 of the Stage 6 Turbine Blade
If you cannot read any of these, make new marks.
Use the roll stamp method.
Refer to the SPM TASK 70-09-00-400-501.
Examine the markings of part number and serial number.
SUBTASK 72-50-32-220-320 Examine the Stage 6 Turbine Blade Markings
Figure: Repair Details and Dimensions
Repair Details and Dimensions
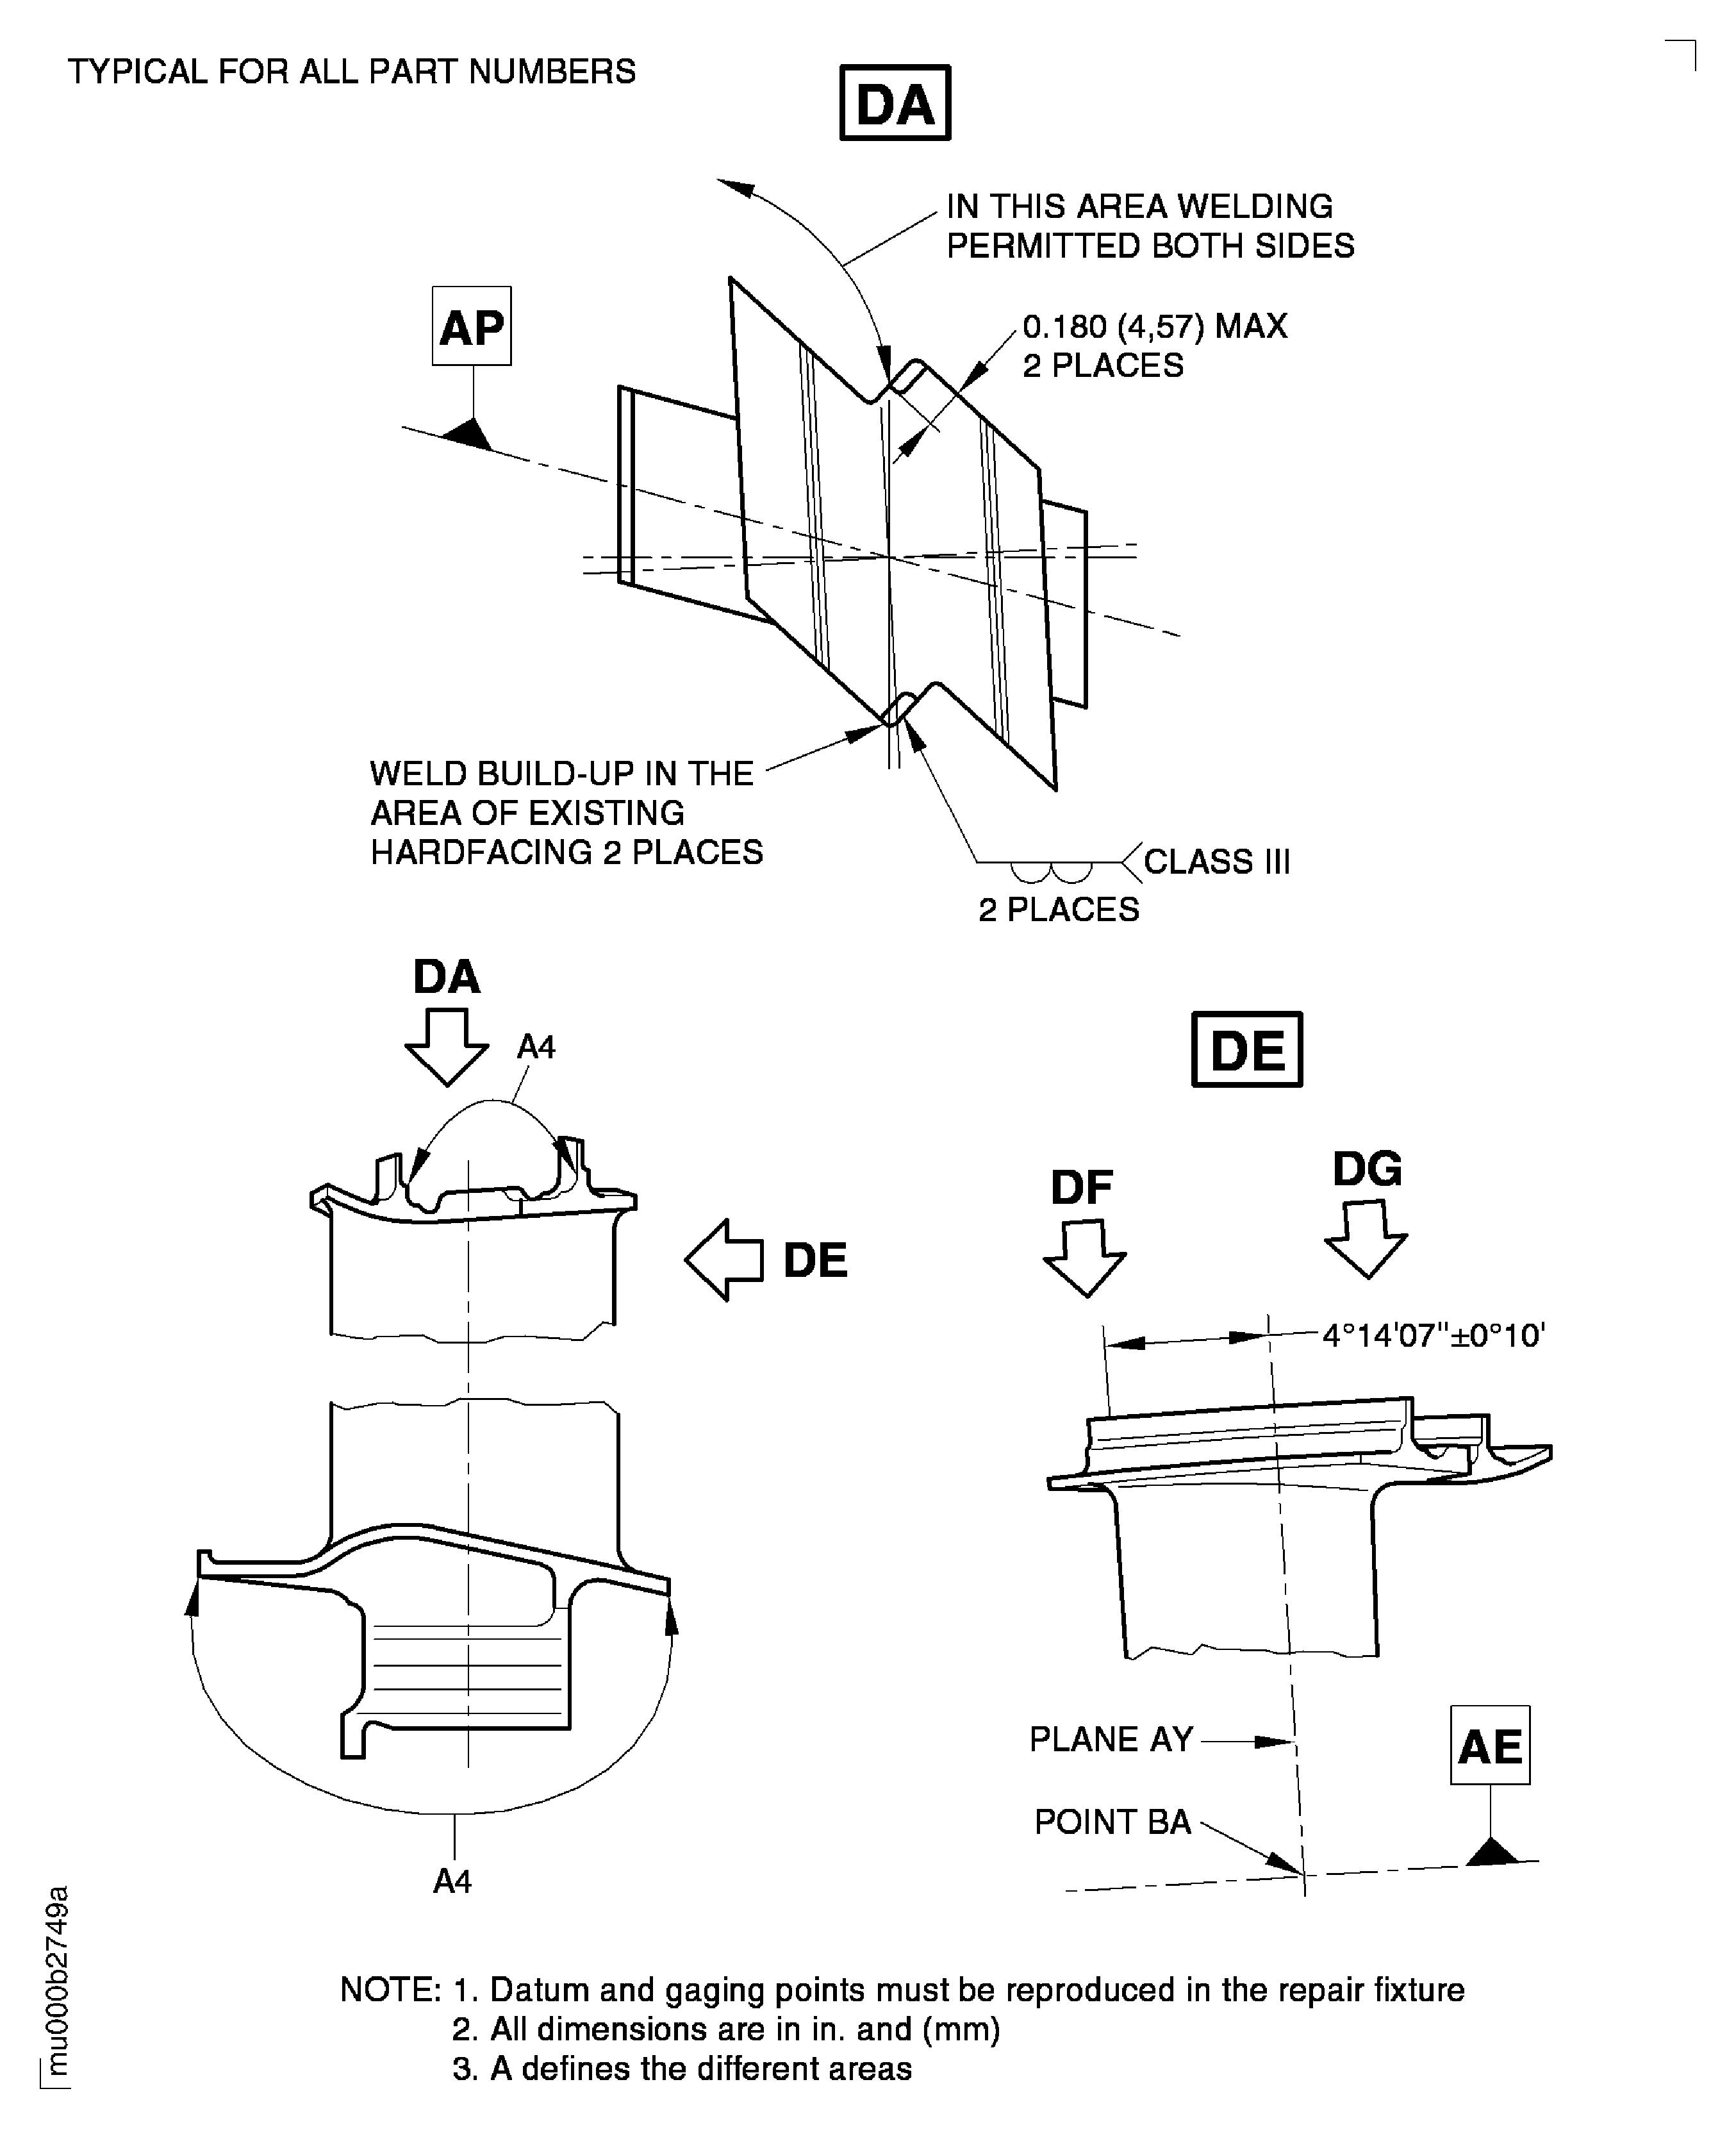
Figure: Repair Deatails and Dimensions
Sheet 1
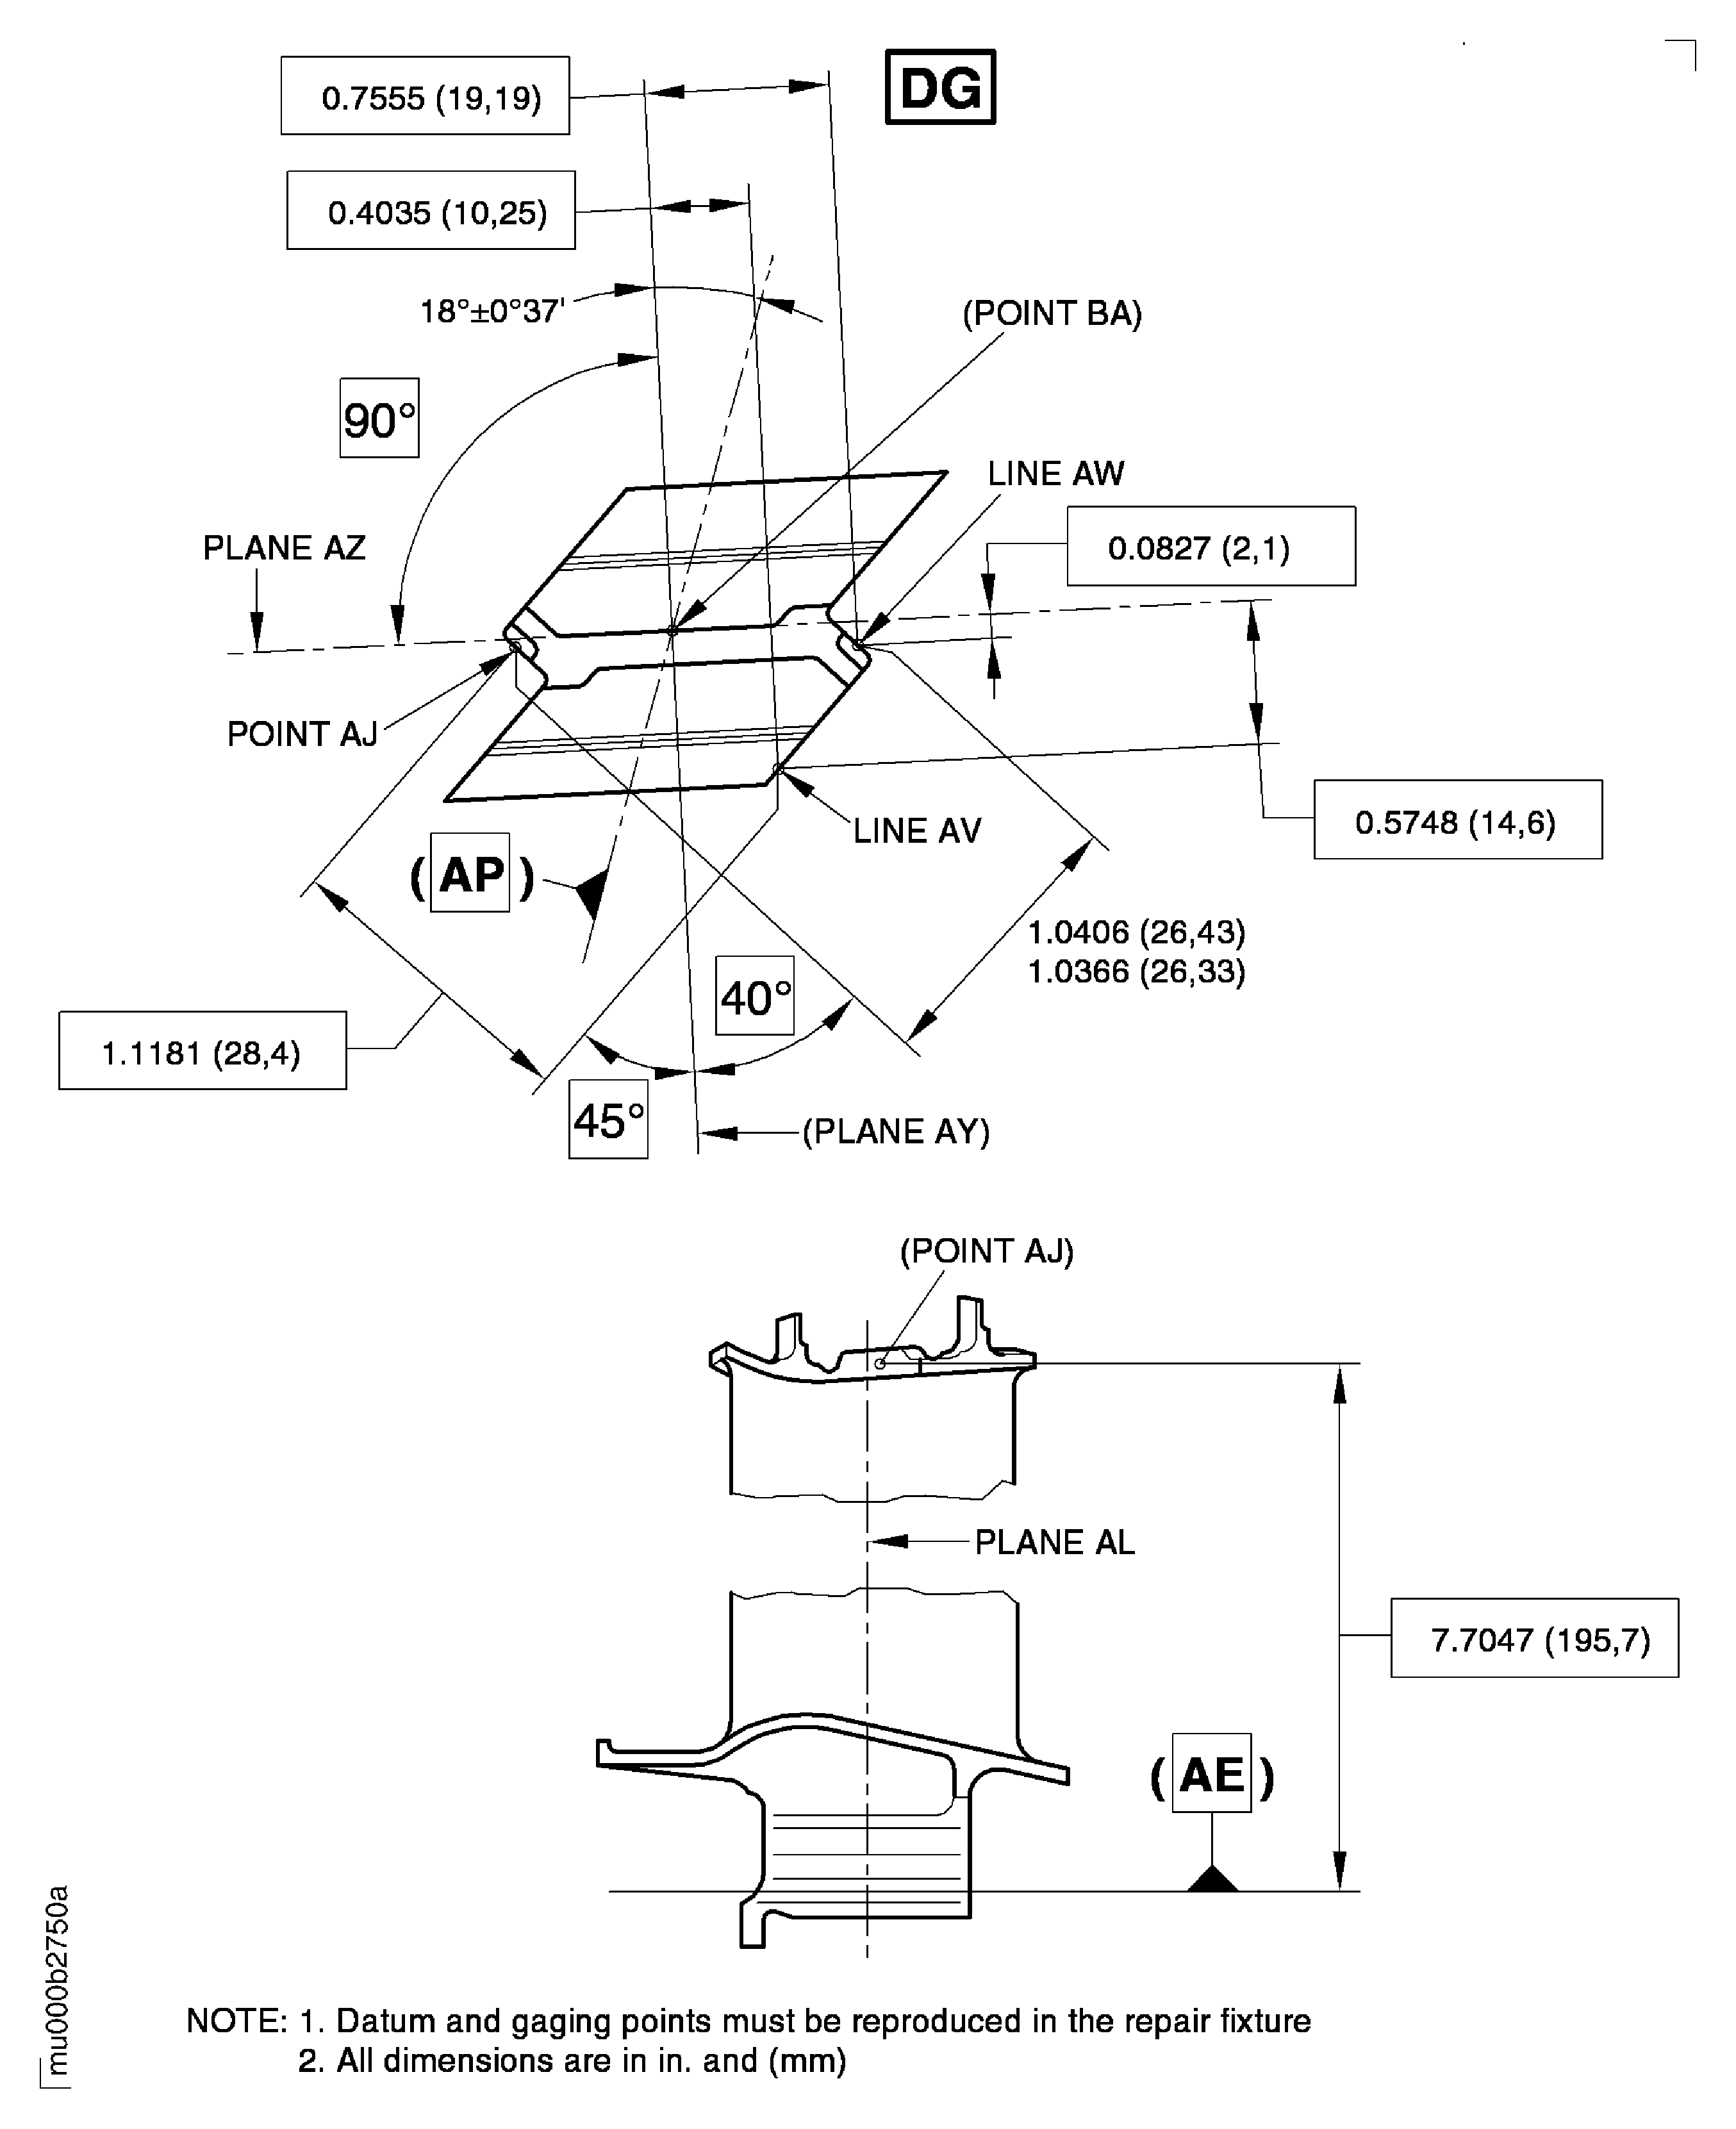
Figure: Repair Deatails and Dimensions
Sheet 2
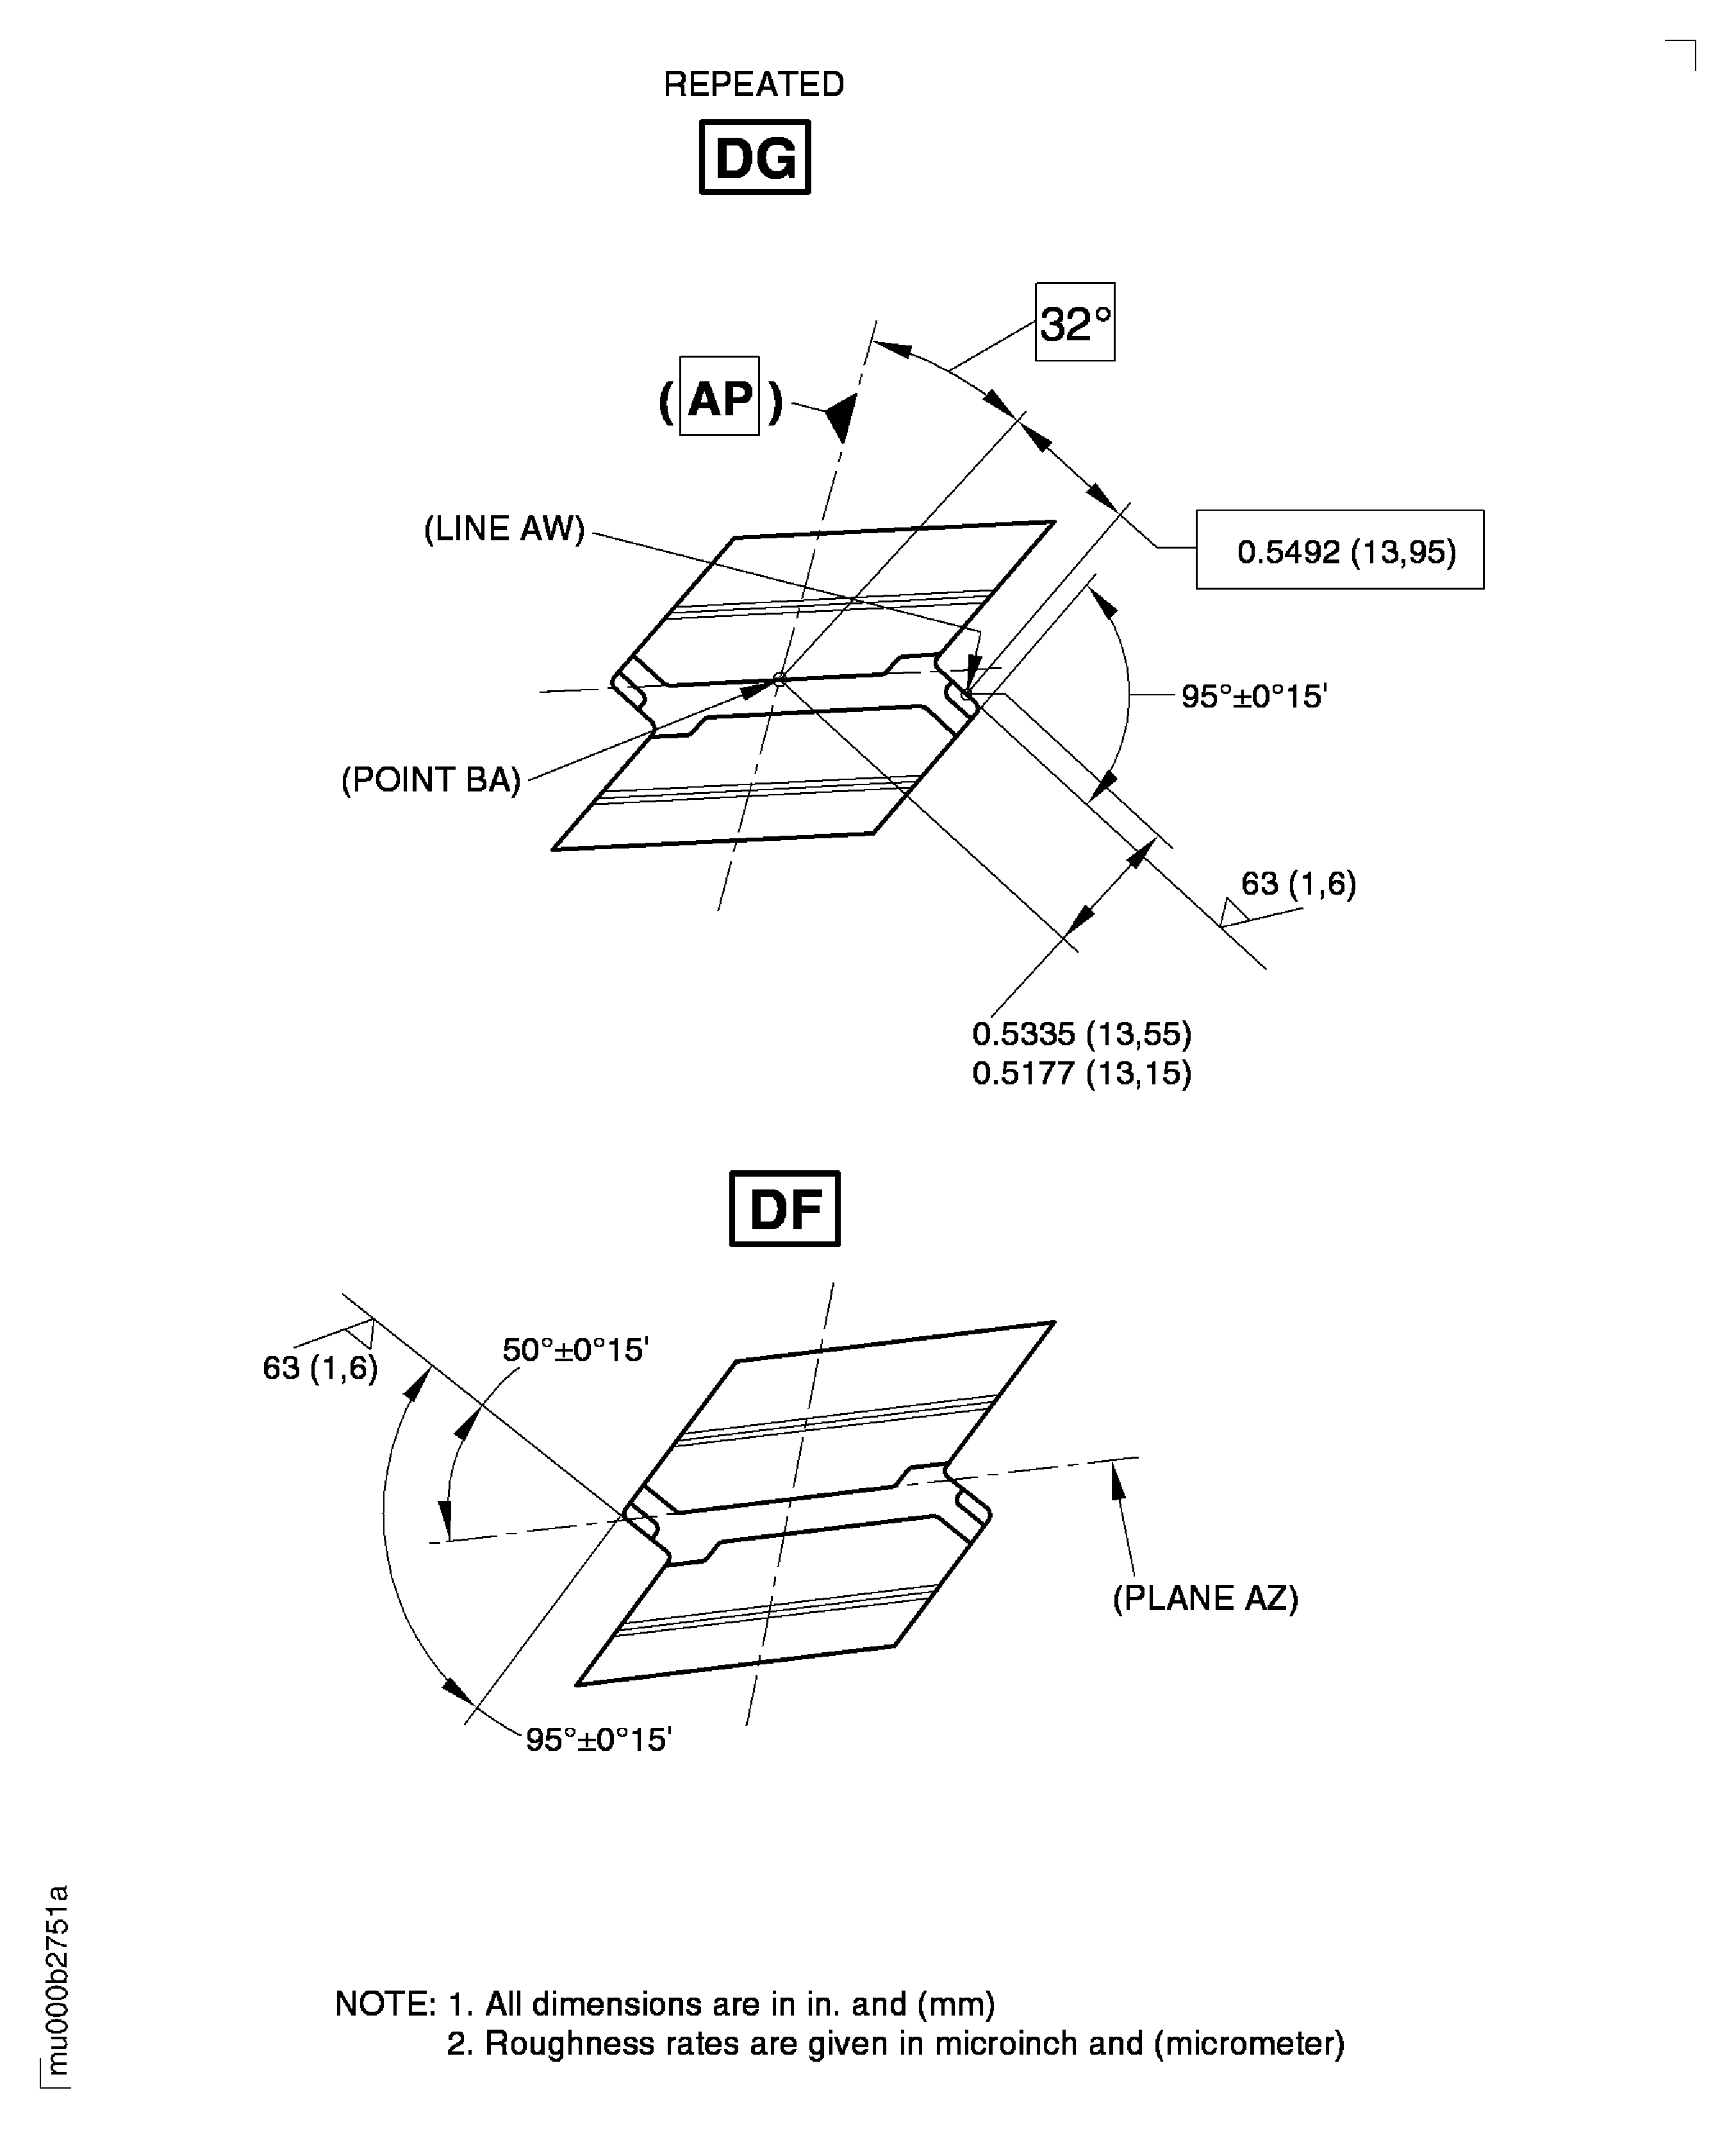
Figure: Repair Deatails and Dimensions
Repair Deatails and Dimensions
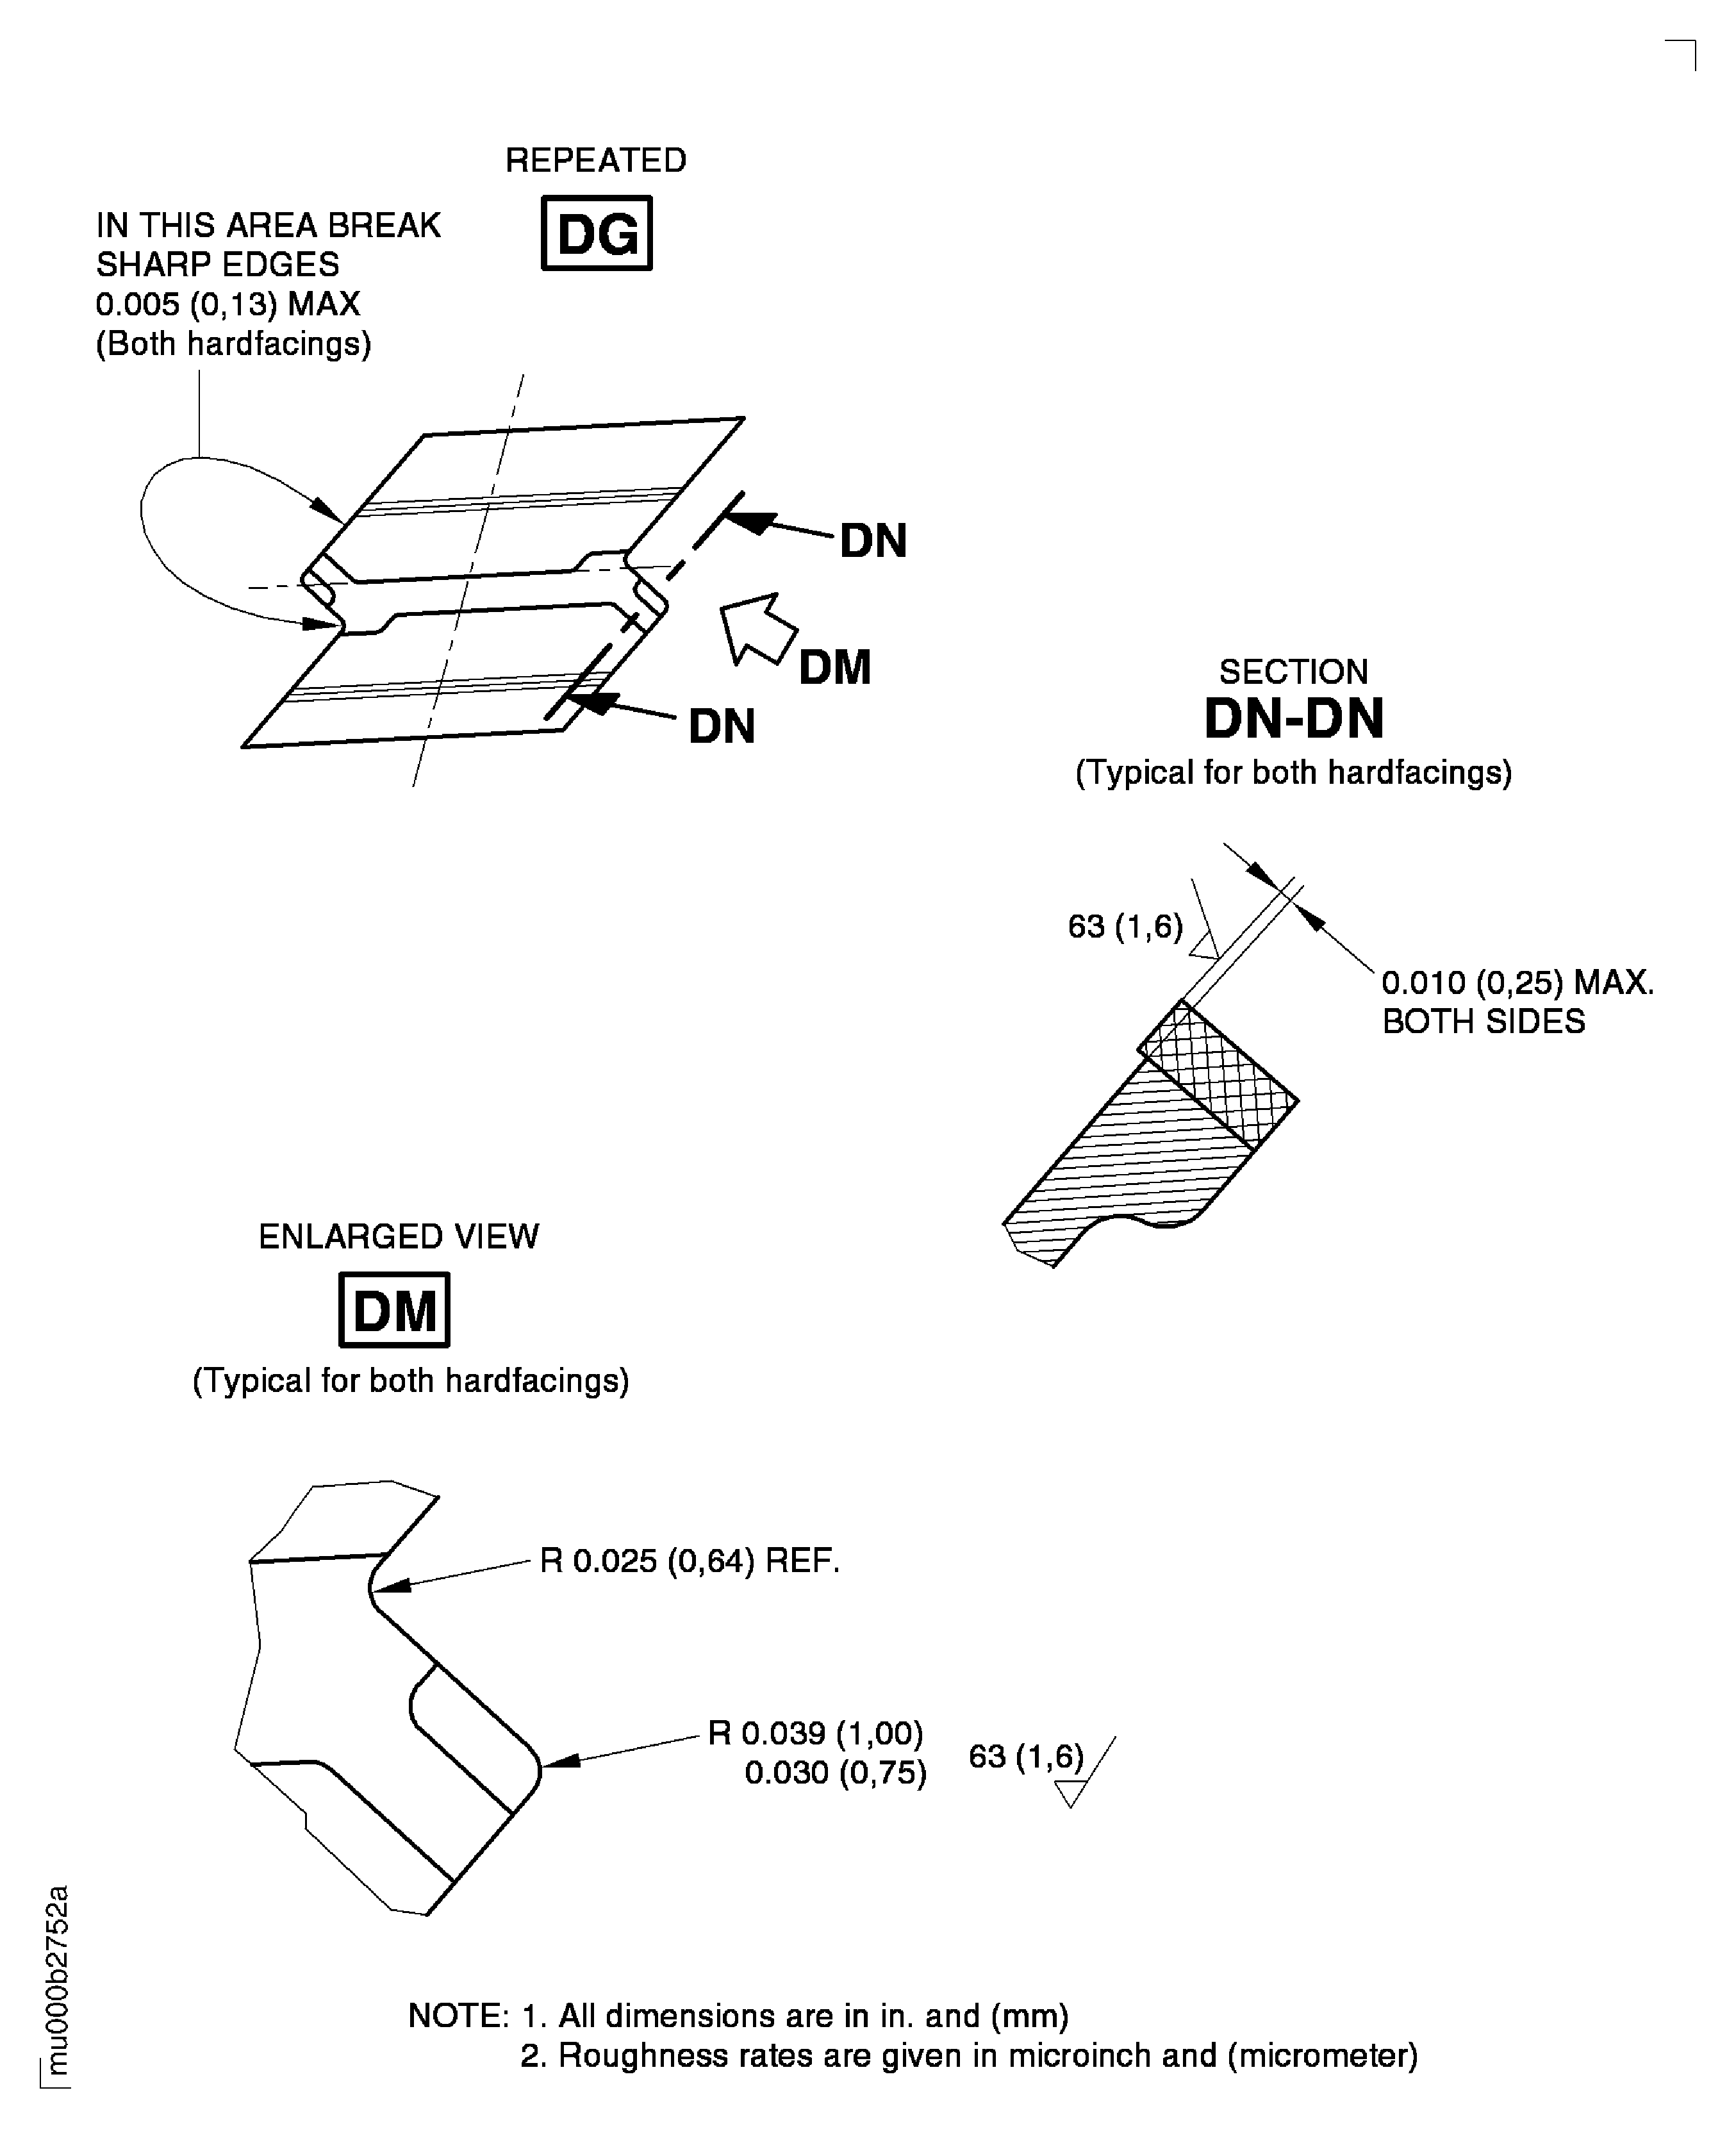
Figure: Repair Deatails and Dimensions
Repair Deatails and Dimensions
