Export Control
EAR Export Classification: Not subject to the EAR per 15 C.F.R. Chapter 1, Part 734.3(b)(3), except for the following Service Bulletins which are currently published as EAR Export Classification 9E991: SBE70-0992, SBE72-0483, SBE72-0580, SBE72-0588, SBE72-0640, SBE73-0209, SBE80-0024 and SBE80-0025.Copyright
© IAE International Aero Engines AG (2001, 2014 - 2021) The information contained in this document is the property of © IAE International Aero Engines AG and may not be copied or used for any purpose other than that for which it is supplied without the express written authority of © IAE International Aero Engines AG. (This does not preclude use by engine and aircraft operators for normal instructional, maintenance or overhaul purposes.).Applicability
V2500-A1
Common Information
TASK 72-50-53-300-014 Turbine Exhaust Case (TEC) - Plasma Coat The Inner Diameter Of The Front Flange, Repair-014 (VRS5398)
Material of component
DESCRIPTION SYMBOL MATERIAL | ||
|---|---|---|
Turbine exhaust case | Corrosion and heat resistant | |
iron base alloy | ||
General
Price and availability - none
The practices and processes referred to in the procedure by the TASK numbers are in the SPM.
NOTE
To identify the consumable materials refer to the PCI.
Consumable materials are given in the SPM.
Preliminary Requirements
Pre-Conditions
NONESupport Equipment
NONEConsumables, Materials and Expendables
| Name | Manufacturer | Part Number / Identification | Quantity | Remark |
|---|---|---|---|---|
| CoMat 03-096 PLASMA SPRAY POWDER | LOCAL | CoMat 03-096 | ||
| CoMat 07-123 WIRE | 0AM53 | CoMat 07-123 |
Spares
NONESafety Requirements
NONEProcedure
Refer to: Figure
The inner diameter must be between 38.665 to 38.752 in. (982.09 to 984.30 mm) after the removal of the damage.
Remove all damage and wear.
Keep the removal of material to the minimum necessary to remove the damage and not to exceed 0.025 in. (0.635 mm).
NOTE
If machined diameter is between 38.676 to 38.752 in. (982.370 to 984.3 mm), CoMat 07-123 WIRE must be used.
Machine the inner diameter of the front flange.
SUBTASK 72-50-53-320-071 Machine the Inner Diameter of the Front Flange
Refer to the SPM TASK 70-23-02-230-501.
No cracks are permitted.
NOTE
This step is required if the method of machining used in Step (4) was grinding. For all other methods, this step is optional.
Do the fluorescent penetrant inspection for cracks.
SUBTASK 72-50-53-230-068 Examine the Inner Diameter
Refer to the SPM TASK 70-11-03-300-503.
Degrease by aqueous cleaning.
SUBTASK 72-50-53-110-059 Clean the Turbine Exhaust Case
Refer to Figure.
Refer to the SPM TASK 70-34-18-380-501.
Prepare surface of part for plasma and other thermal spray coating.
SUBTASK 72-50-53-120-052 Prepare the Inner Diameter of the Front Flange
Refer to Figure.
Refer to the SPM TASK 70-34-03-340-501.
If machined diameter is less than 38.676 in. (982.37 mm) use CoMat 03-096 PLASMA SPRAY POWDER.
Otherwise use CoMat 07-123 WIRE.
Spraying distance
5.510 in. (140 mm)
Spraying angle
90 degrees
Component rotation speed
16 RPM
Gun traverse speed
3.149 in./min (80 mm/min)
Maximum working temperature
392 deg F (200 deg C)
Metal plasma spray the inner diameter of the front flange.
SUBTASK 72-50-53-370-064 Metal Plasma Spray the Inner Diameter of the Front Flange

CAUTION
METAL PLASMA SPRAY THE FRONT FACE AS SOON AS POSSIBLE IN LESS THAN TWO HOURS AFTER THE ABRASIVE BLASTING.DO AGAIN THE ABRASIVE BLASTING IF YOU EXCEED THE ABOVE TIME LIMIT.Refer to: Figure
SUBTASK 72-50-53-320-072 Machine the Inner Diameter of the Front Flange
Refer to Figure.
SUBTASK 72-50-53-220-130 Examine the Coated Area
Refer to: Figure
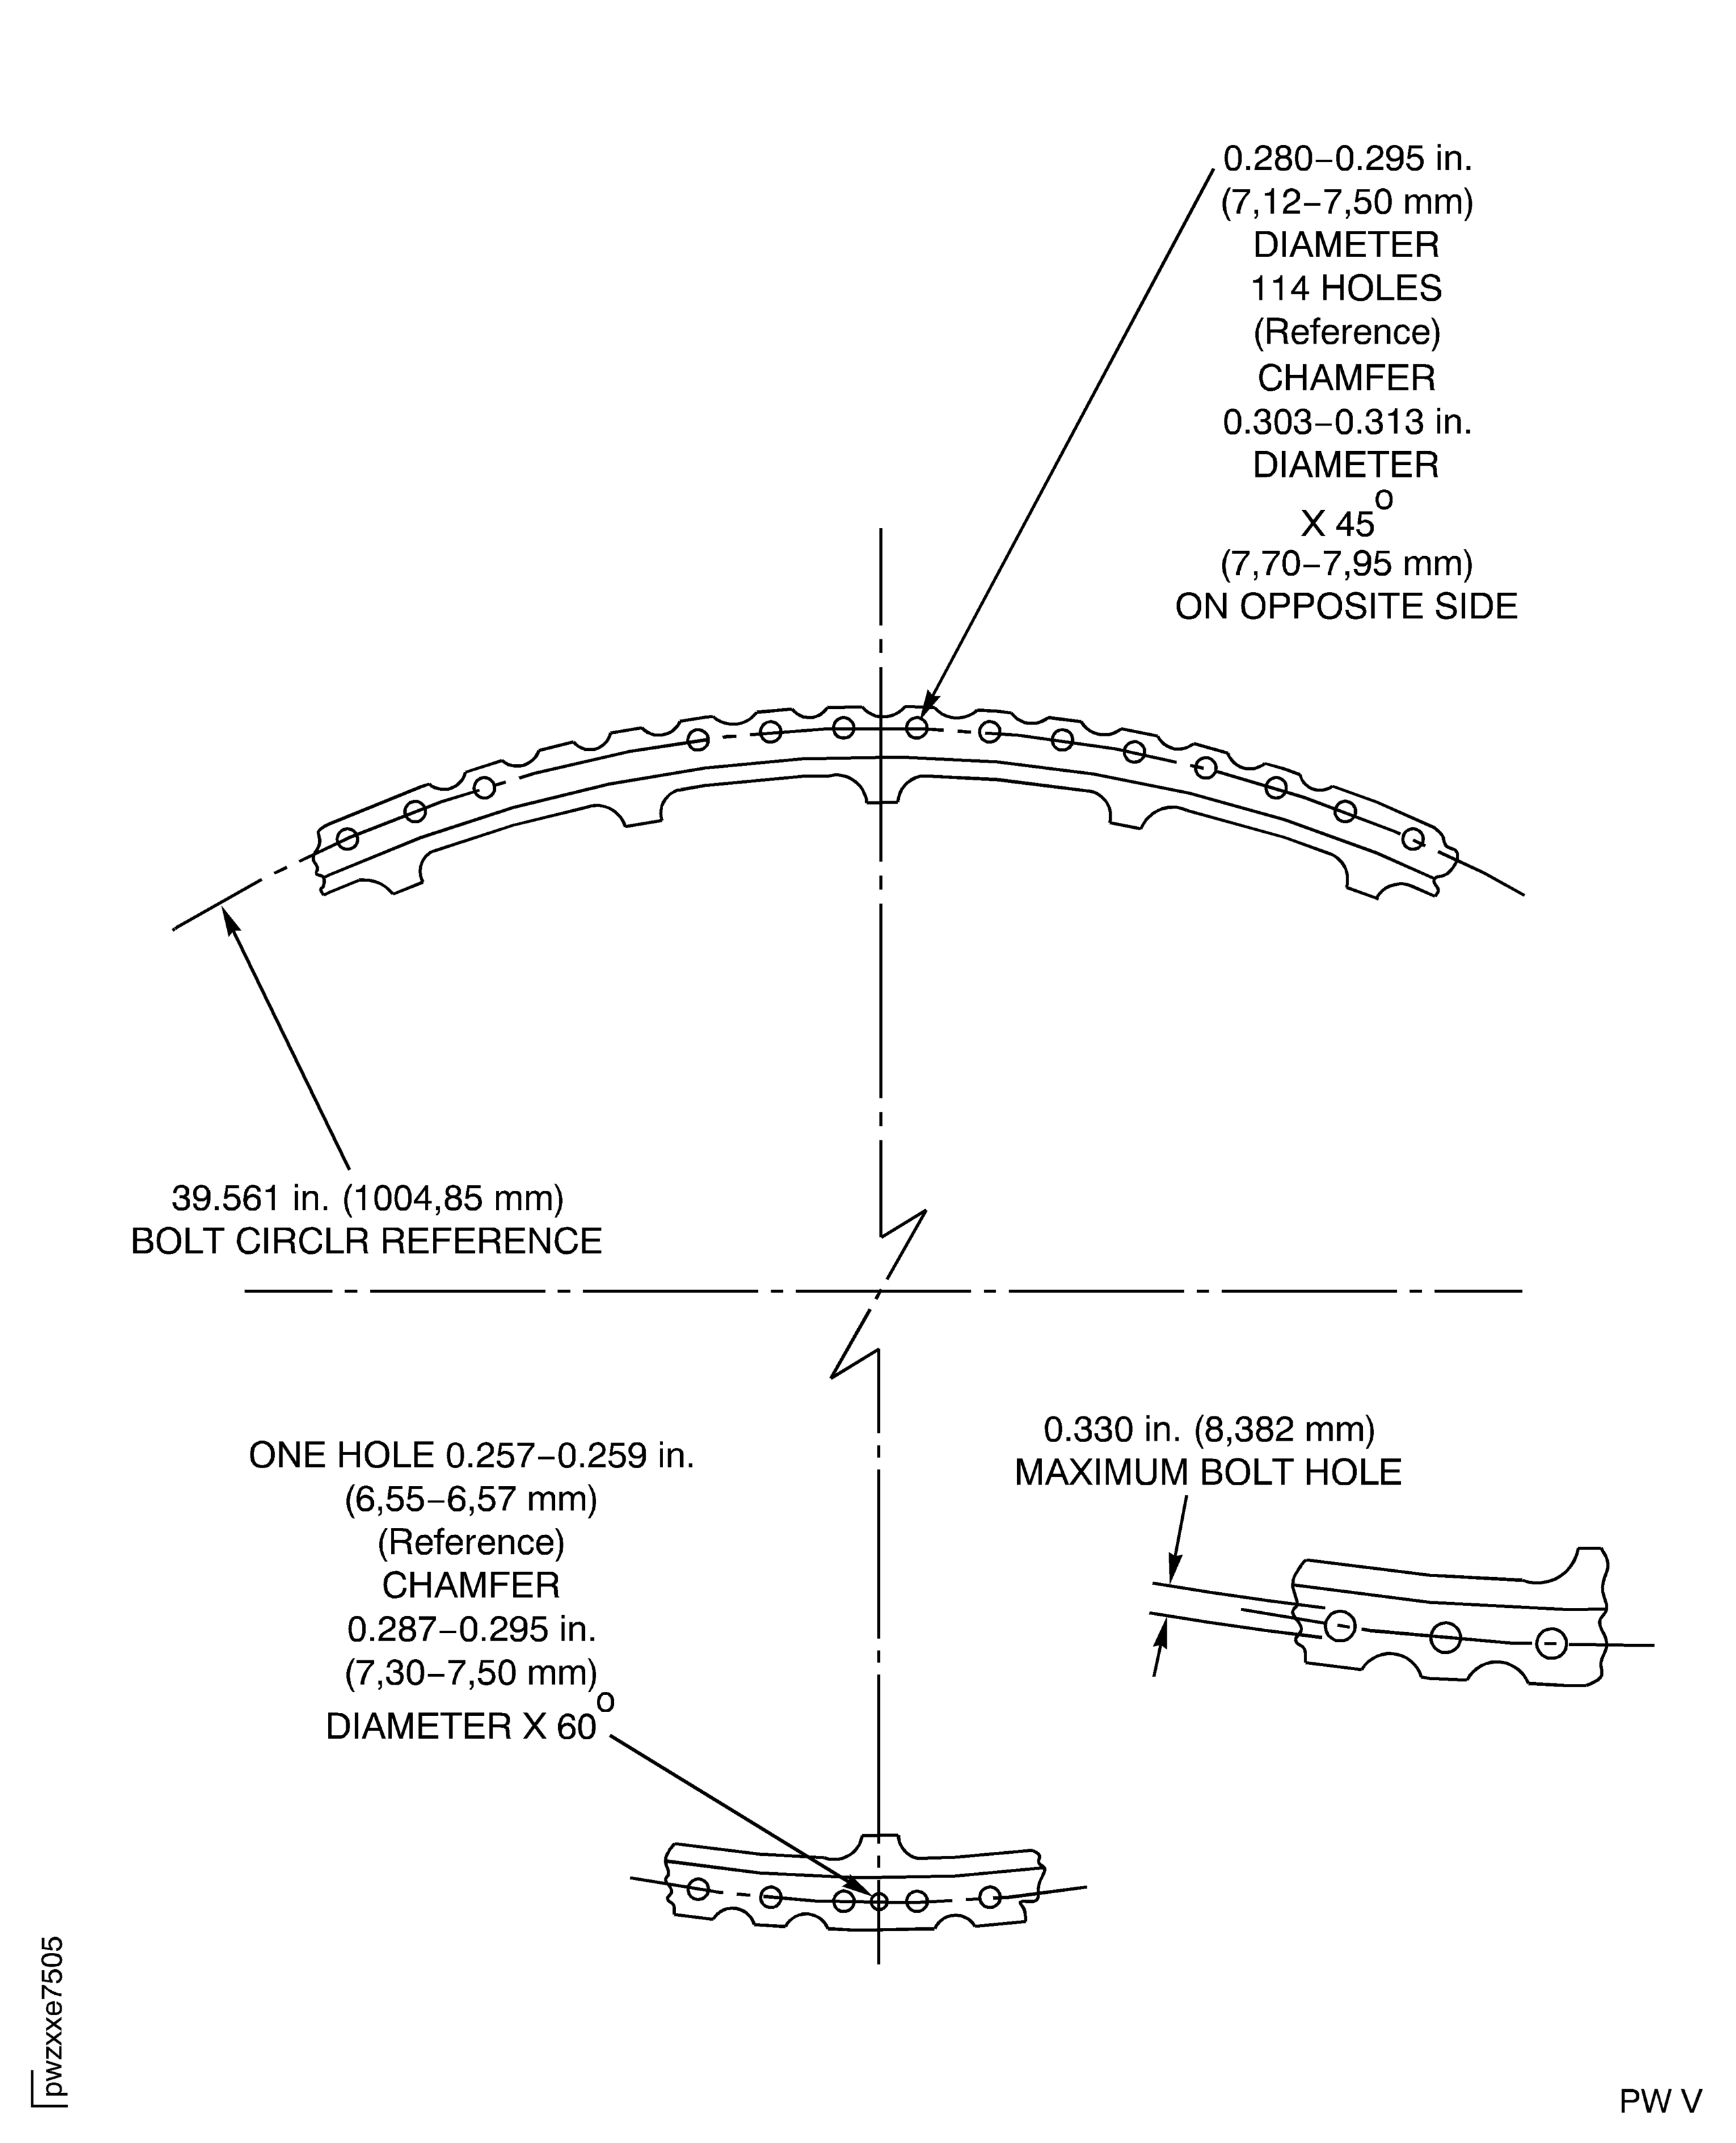
SUBTASK 72-50-53-220-227 Examine the Bolt Holes and Pin Hole to Establish the Bolt Circle Diameter
Refer to the SPM TASK 70-09-00-400-501. Use the vibration peen method with 0.006 in. (0.15 mm) maximum depth.
Vibration peen VRS5398 adjacent to the part number.
SUBTASK 72-50-53-350-064 Record the Repair
Figure: Repair Details and Dimensions
Repair Details and Dimensions

Figure: Repair Details and Dimensions
Repair Details and Dimensions

