Export Control
EAR Export Classification: Not subject to the EAR per 15 C.F.R. Chapter 1, Part 734.3(b)(3), except for the following Service Bulletins which are currently published as EAR Export Classification 9E991: SBE70-0992, SBE72-0483, SBE72-0580, SBE72-0588, SBE72-0640, SBE73-0209, SBE80-0024 and SBE80-0025.Copyright
© IAE International Aero Engines AG (2001, 2014 - 2021) The information contained in this document is the property of © IAE International Aero Engines AG and may not be copied or used for any purpose other than that for which it is supplied without the express written authority of © IAE International Aero Engines AG. (This does not preclude use by engine and aircraft operators for normal instructional, maintenance or overhaul purposes.).Applicability
V2500-A5
Common Information
TASK 72-45-27-200-001-B00 HPT Stage 2 Support Seal - Examine, Inspection-001
General
This TASK gives the procedure for the inspection of the stage 2 HPT seal. For the other stage 2 HPT support assembly parts, refer to TASK 72-45-27-200-000, (INSPECTION/CHECK-000).
Fig/item numbers in parentheses in the procedure agree with those used in the IPC.
The policy that is necessary for inspection is given in the SPM TASK 70-20-00-200-501.
All the parts must be cleaned before any part is examined. Refer to the SPM TASK 70-10-00-100-501.
All parts must be visually examined for damage, corrosion and wear. Any defects that are not identified in the procedure must be referred to IAE.
The procedure for those parts which must have a crack test is given in SUBTASK 72-45-27-230-053. Do the test before the part is visually examined.
Do not discard any part until you are sure there are no repairs available. Refer to the instructions in Repair before a discarded part is used again or oversize parts are installed.
Parts which should be discarded can be held although no repair is available. The repair of a discarded part could be shown to be necessary at a later date.
All parts must be examined to make sure that all the repairs have been completed satisfactorily.
The practices and processes referred to in the procedure by the TASK numbers are in the SPM.
References
Refer to the SPM for data on these items.
Definitions of Damage, SPM TASK 70-02-02-350-501
Inspection of Parts, SPM TASK 70-20-01-200-501
Some data on these items is contained in this TASK. For more data on these items refer to the SPM.
Method of Testing for Crack Indications
Chemical Processes
Surface Protection
Preliminary Requirements
Pre-Conditions
NONESupport Equipment
NONEConsumables, Materials and Expendables
NONESpares
NONESafety Requirements
NONEProcedure
Clean the part. Refer to TASK 72-45-27-100-000 (CLEANING-000).
SUBTASK 72-45-27-230-053-001 Examine the Stage 2 HPT Seal (01-060) for Cracks
Clean the part. Refer to TASK 72-45-27-100-000 (CLEANING-000).
SUBTASK 72-45-27-230-053-002 Examine the Stage 2 HPT Seal (01-060) for Cracks
Refer to: Figure
NOTE
Under magnification the coating will look more porous and rougher than the base metal. The base metal will look smooth.Repair, VRS3539 TASK 72-45-27-300-008 (REPAIR-008)
Other than (a)
Wear.
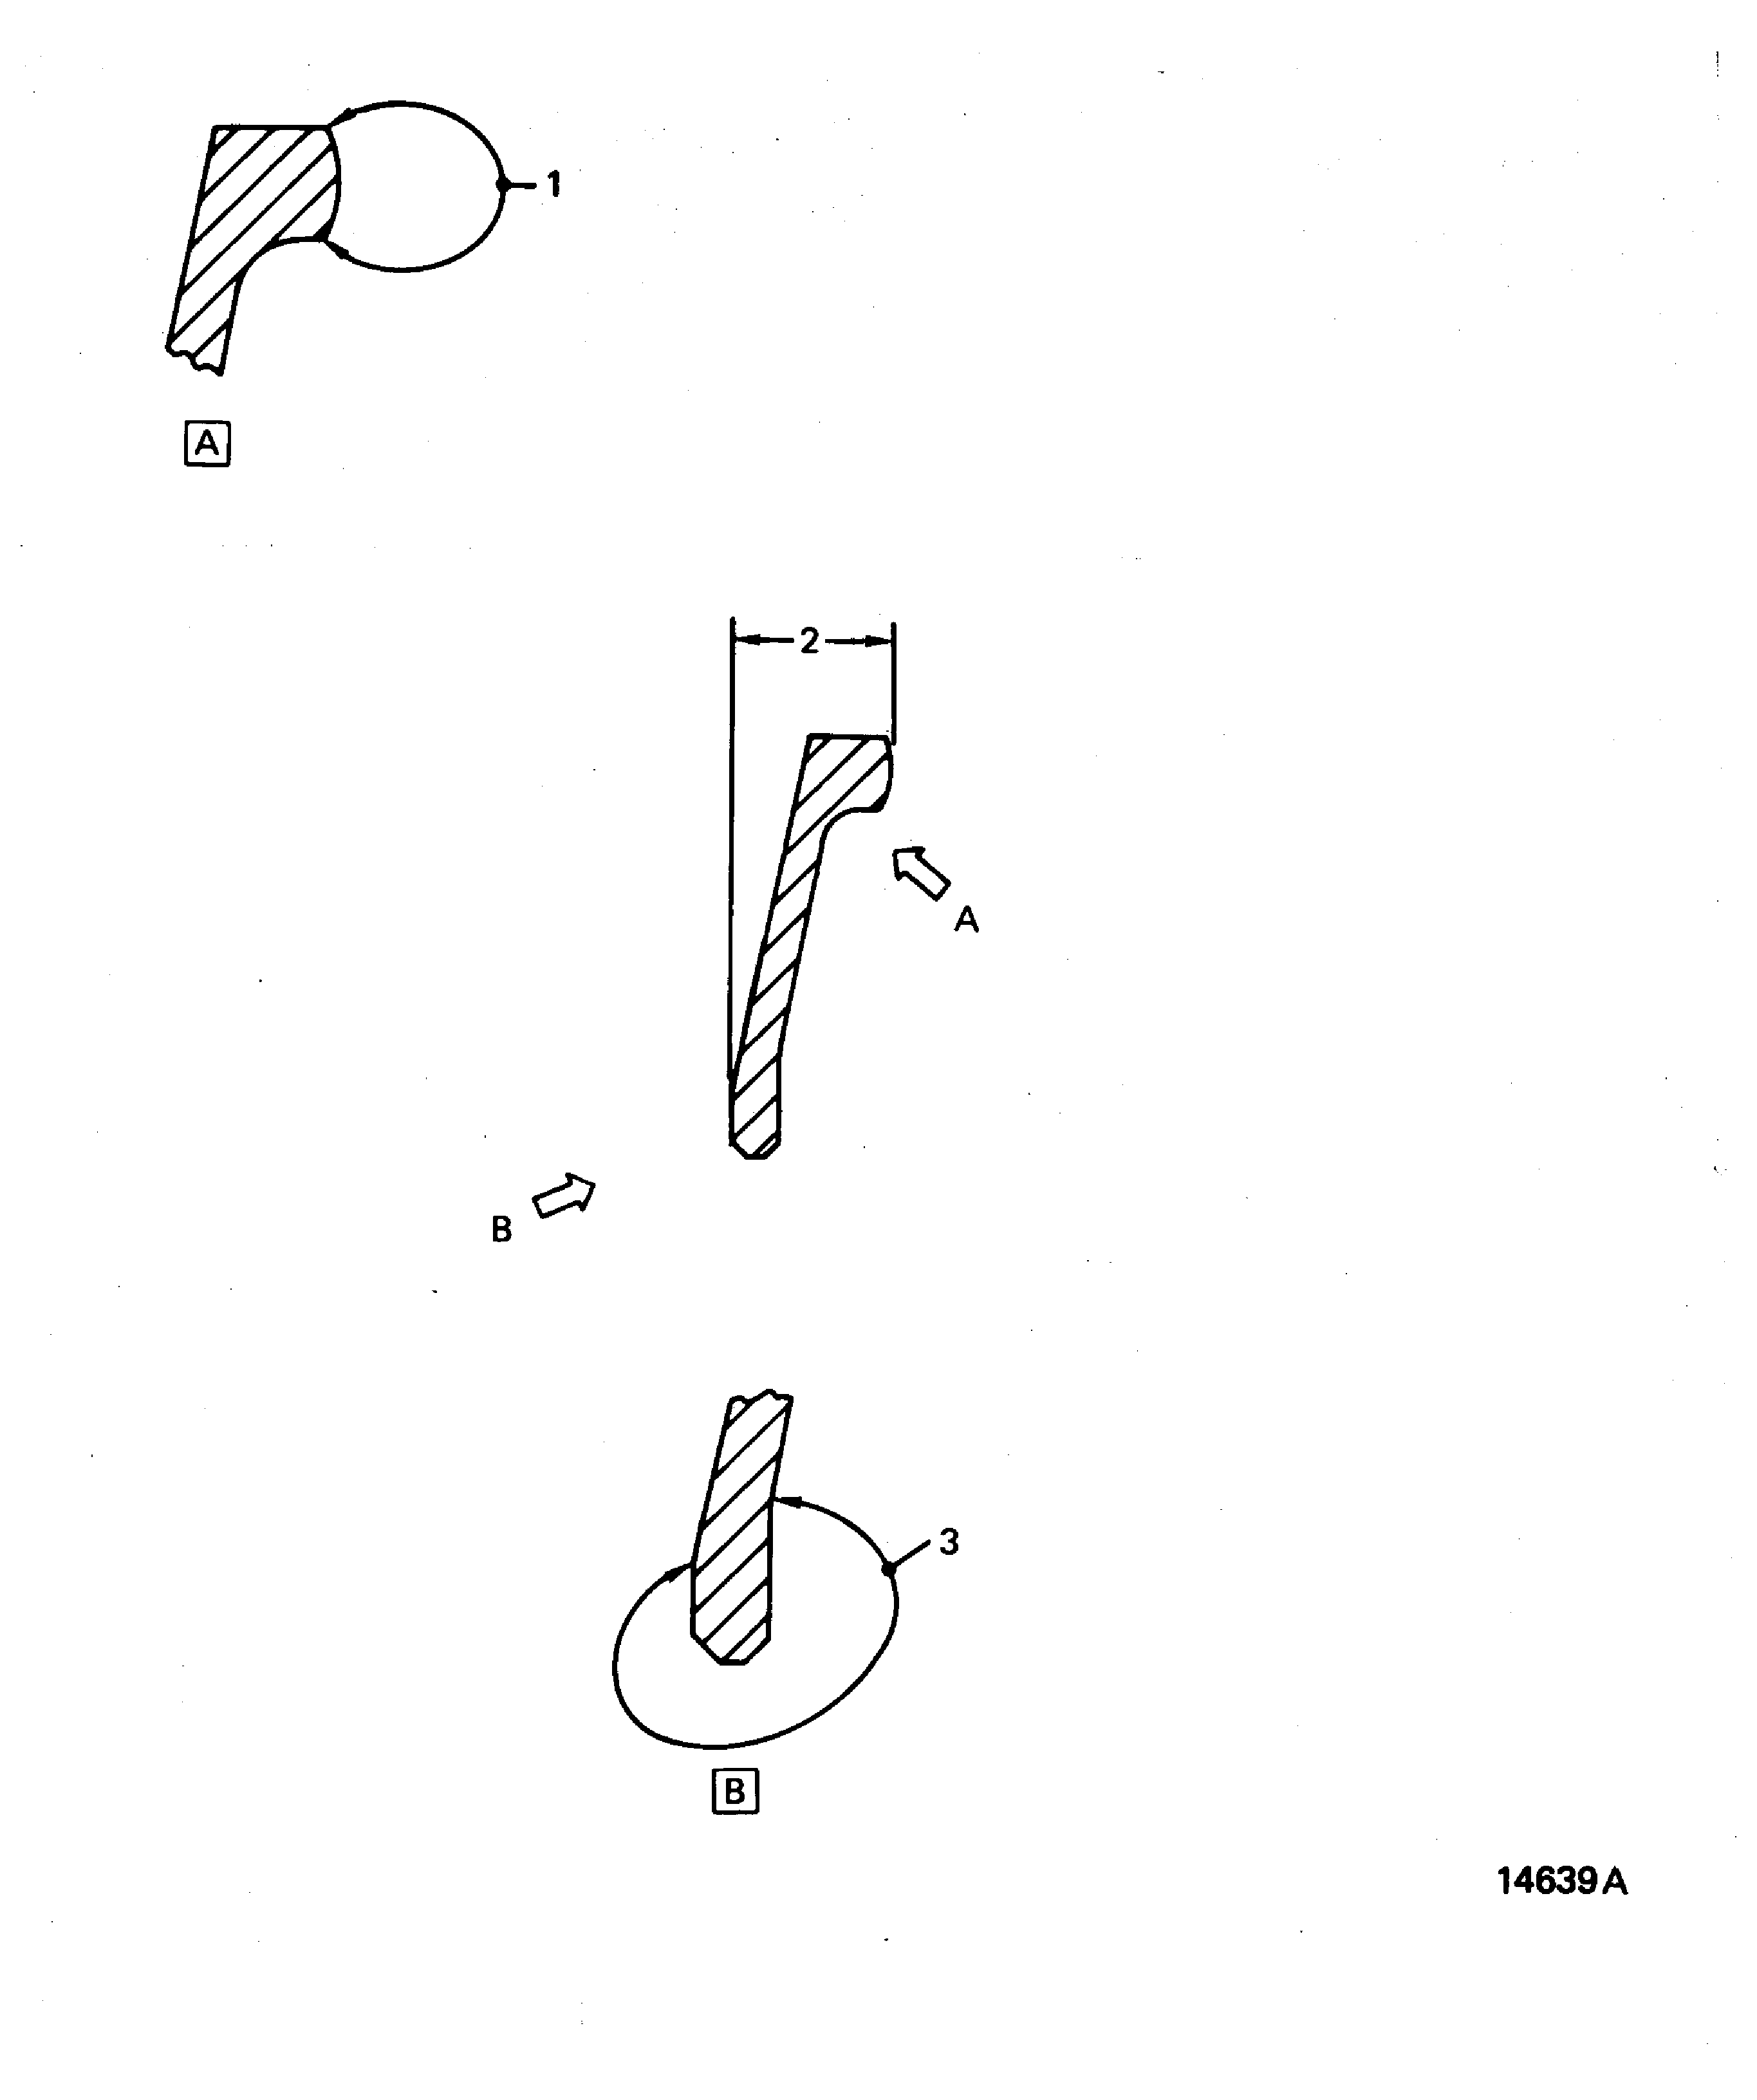
Use a 10X magnifying glass to examine the stage 2 HPT seal at location 1, for wear on the outside diameter contact surface.
Repair, VRS3539 TASK 72-45-27-300-008 (REPAIR-008)
Other than (a)
Chipped.
Examine the stage 2 HPT seal at location 1 for chipped plasma spray coating on the outside diameter contact surface.
SUBTASK 72-45-27-220-064 Examine the Stage 2 HPT Seal (01-060) for Wear and Chipped Plasma Spray Coating on the Outside Diameter Contact Surface
Refer to: Figure
If the axial height is between 0.224 and 0.240in. (5.69 and 6.10 mm). All 25 measurements must be within 0.009in. (0.229 mm) of each other in a free condition. There must be a continuous sealing mark all round the circumference at the outside diameter contact surface and at the inside contact surface (front and rear)
Axial height.
Examine the stage 2 HPT seal at location 2, for a change in the initial shape of the axial height. Measure the seal at 25 equally spaced locations.
SUBTASK 72-45-27-220-065 Examine the Stage 2 HPT Seal (01-060) for a Change in the Initial Shape of the Axial Height
Refer to: Figure
NOTE
Under magnification the coating will look more porous and rougher than the base metal. The base metal will look smooth.Repair, VRS3539 TASK 72-45-27-300-008 (REPAIR-008)
Other than (a)
Wear.
Use a 10X magnification glass to examine the stage 2 HPT seal at location 3, for wear on the inside diameter contact surface.
Repair, VRS3539 TASK 72-45-27-300-008 (REPAIR-008)
Other than (a)
Chipped.
Examine the stage 2 HPT seal at location 3 for chipped plasma spray coating on the inside diameter contact surface.
SUBTASK 72-45-27-220-066 Examine the Stage 2 HPT Seal (01-060) for Wear and Chipped Plasma Spray Coating on the Inside Diameter Contact Surface
Figure: Stage 2 HPT seal inspection locations
Stage 2 HPT seal inspection locations

