Export Control
EAR Export Classification: Not subject to the EAR per 15 C.F.R. Chapter 1, Part 734.3(b)(3), except for the following Service Bulletins which are currently published as EAR Export Classification 9E991: SBE70-0992, SBE72-0483, SBE72-0580, SBE72-0588, SBE72-0640, SBE73-0209, SBE80-0024 and SBE80-0025.Copyright
© IAE International Aero Engines AG (2001, 2014 - 2021) The information contained in this document is the property of © IAE International Aero Engines AG and may not be copied or used for any purpose other than that for which it is supplied without the express written authority of © IAE International Aero Engines AG. (This does not preclude use by engine and aircraft operators for normal instructional, maintenance or overhaul purposes.).Applicability
All
Common Information
TASK 70-31-02-310-501-003 Argonarc Welding Repairs - Orbital Torch Welding
General
Orbital torch welding is an automatic argonarc welding operation where the workpiece is held stationary and the welding torch is turned. It is used to weld tube and tube fittings. Where specifc use of this type of equipment is necessary instructions will be given in the Engine Manual.
The pipe and fittings can be located by fixtures or tack-welds.
Tooling must provide a good ground connection (earth) as close to the weld as possible.
NOTE
NOTE
Preliminary Requirements
Pre-Conditions
NONESupport Equipment
NONEConsumables, Materials and Expendables
| Name | Manufacturer | Part Number / Identification | Quantity | Remark |
|---|---|---|---|---|
| CoMat 01-277 KEROSINE | LOCAL | CoMat 01-277 |
Spares
NONESafety Requirements
WARNING
Procedure
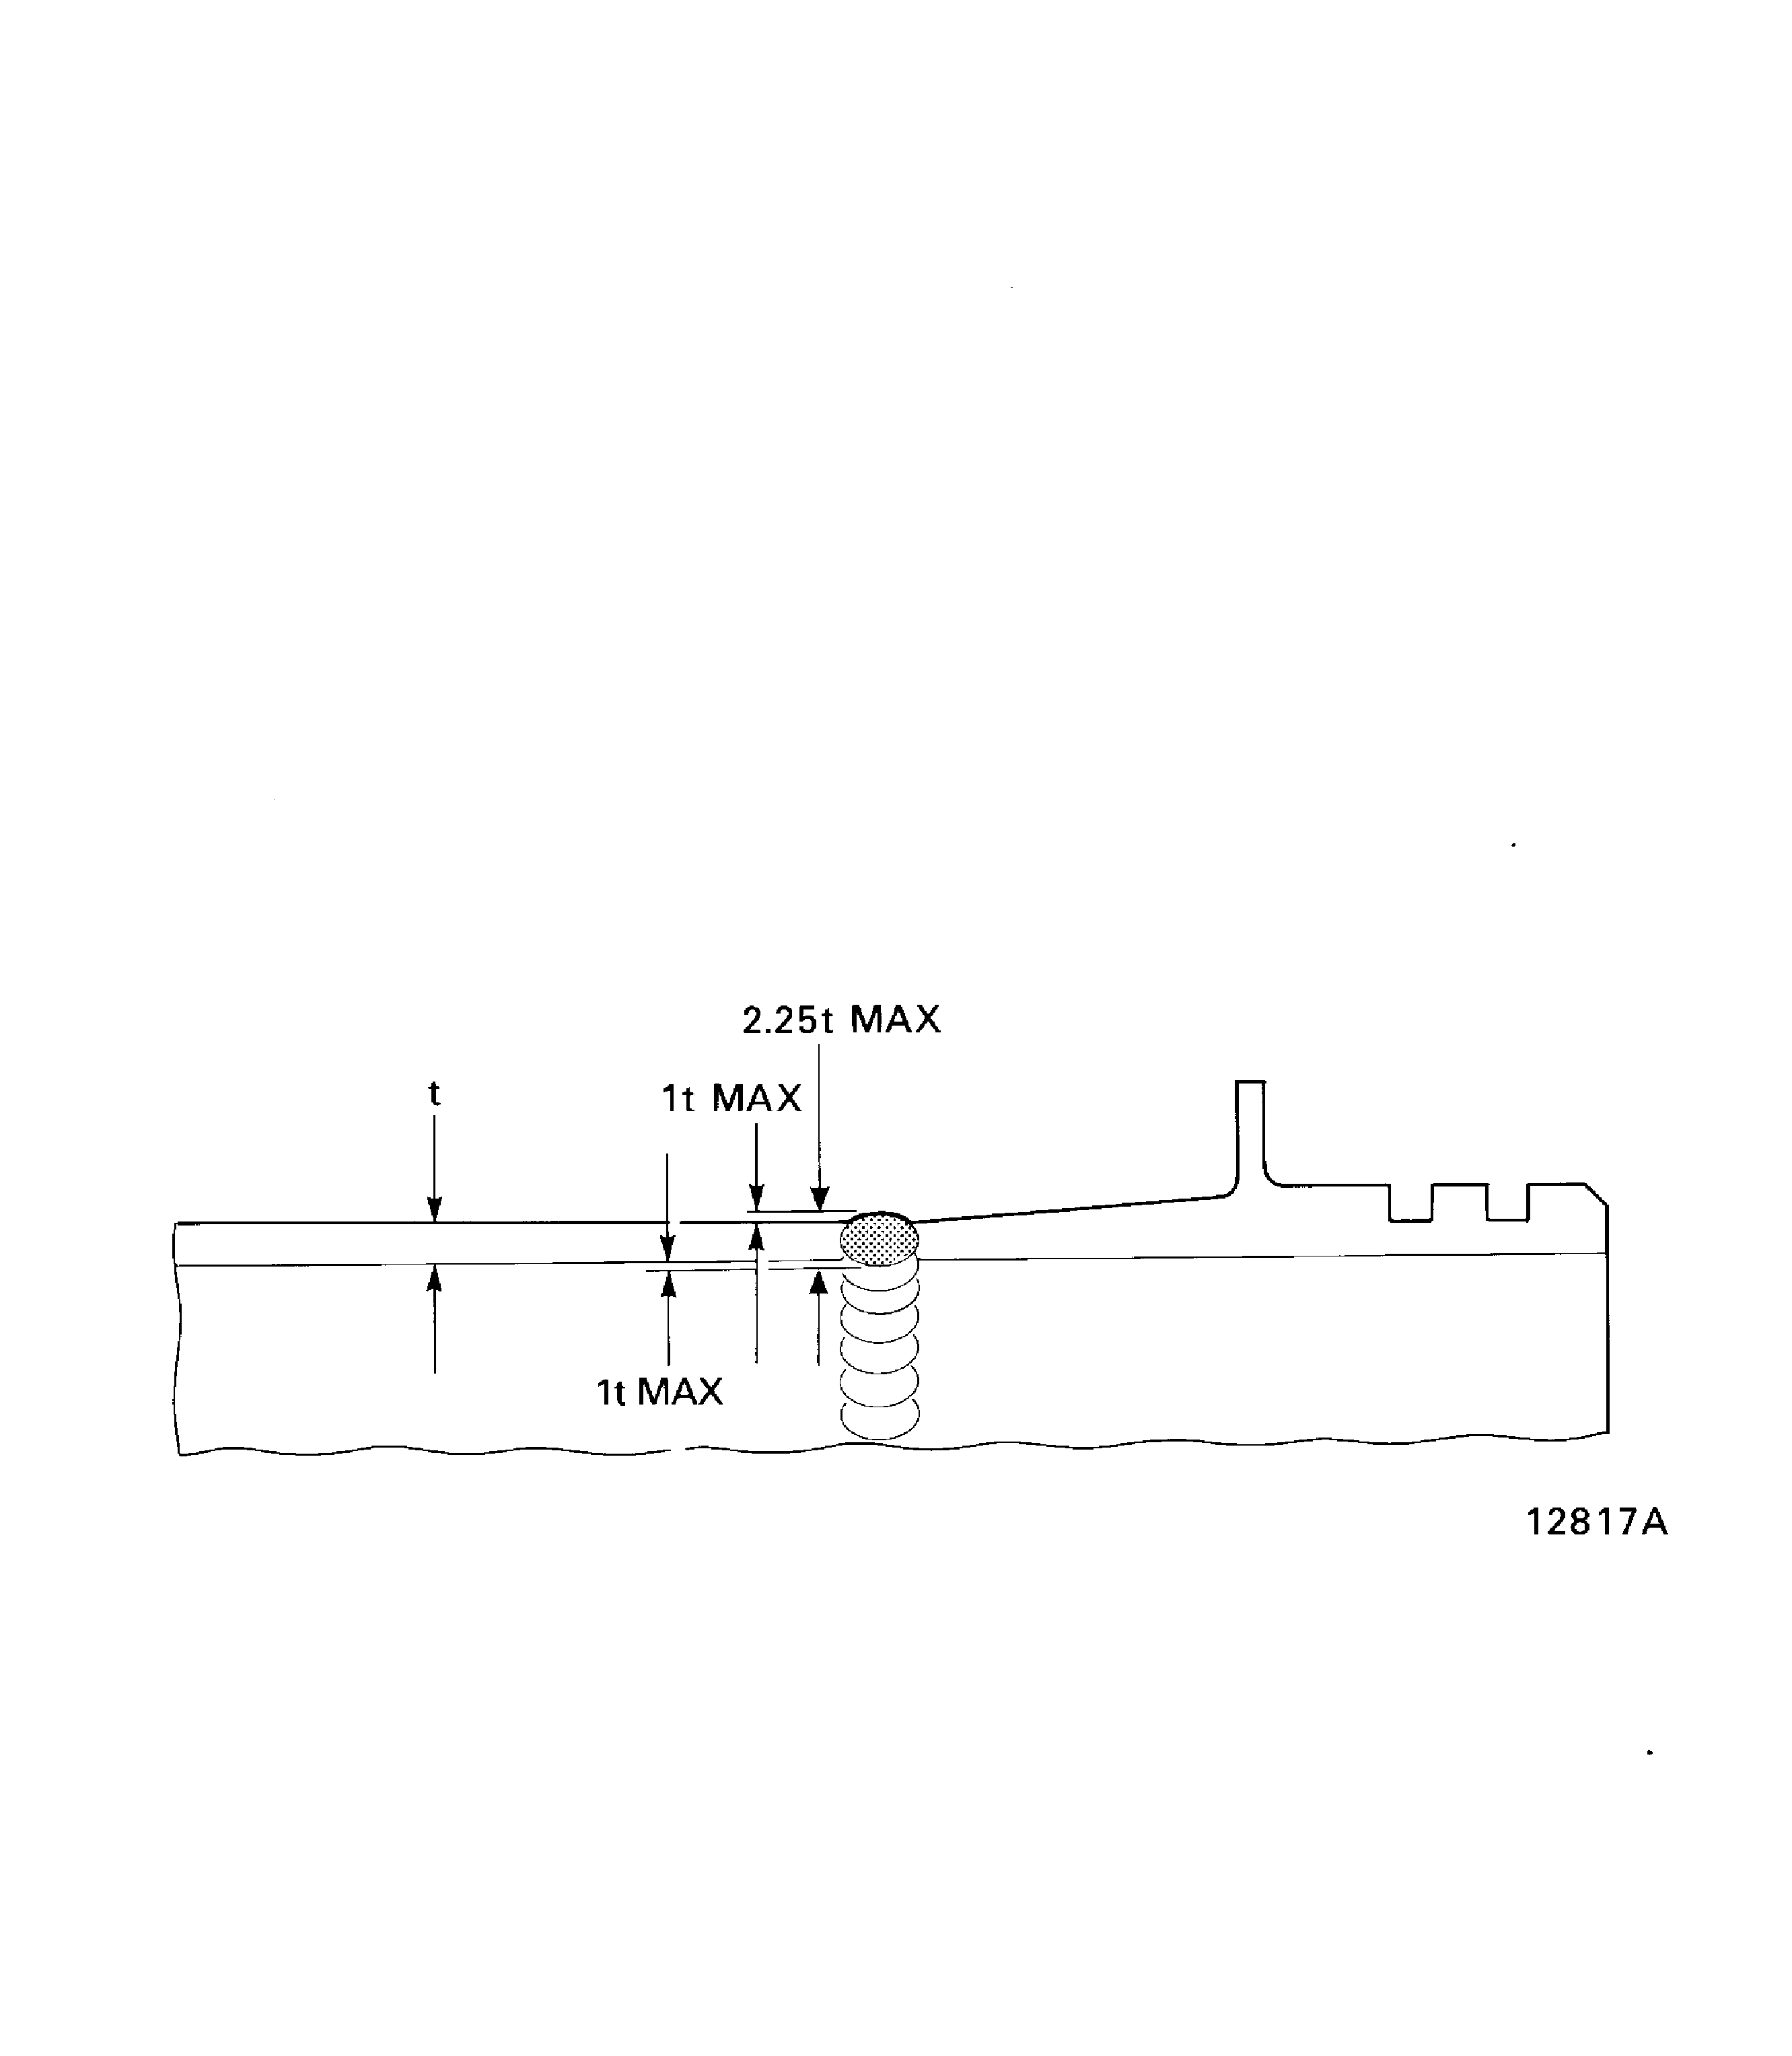
Weld bead shape. See Figure.
For general porosity limits, refer to the SPM TASK 70-31-02-310-501-001, SUBTASK 70-31-02-260-001.
Subsurface porosity.
Permitted defects in the weld.
SUBTASK 70-31-02-220-003 Inspection Limits of Orbital Torch Welds.
All welds must be visually examined as specified in Step. The weld crown must be examined visually without magnification aids and where possible examine the underbead with an intrascope.
Where the geometry of the tube permits, the tube must be visually examined to make sure it is not blocked. If this is not possible a ball check must be done. To do this check, a sphere of applicable diameter is passed along the bore of the tube. Alternatively do a flow check with CoMat 01-277 KEROSINE.
SUBTASK 70-31-02-220-004 Visual Inspection of Orbital Torch Welds.
Subsequent to a visual inspection it is important that all welds are examined with an approved penetrant procedure. Refer to the SPM TASK 70-23-00-230-501.
Inspect to the standard given in Step.
SUBTASK 70-31-02-230-002 Penetrant Inspection of Orbital Torch Welds.
Radiographic inspection of welds shows defects which cannot be found with visual or penetrant procedures. All tube assemblies must be radiographically examined. Refer to the SPM TASK 70-26-01-260-501.
Inspect to the standard given in Step.
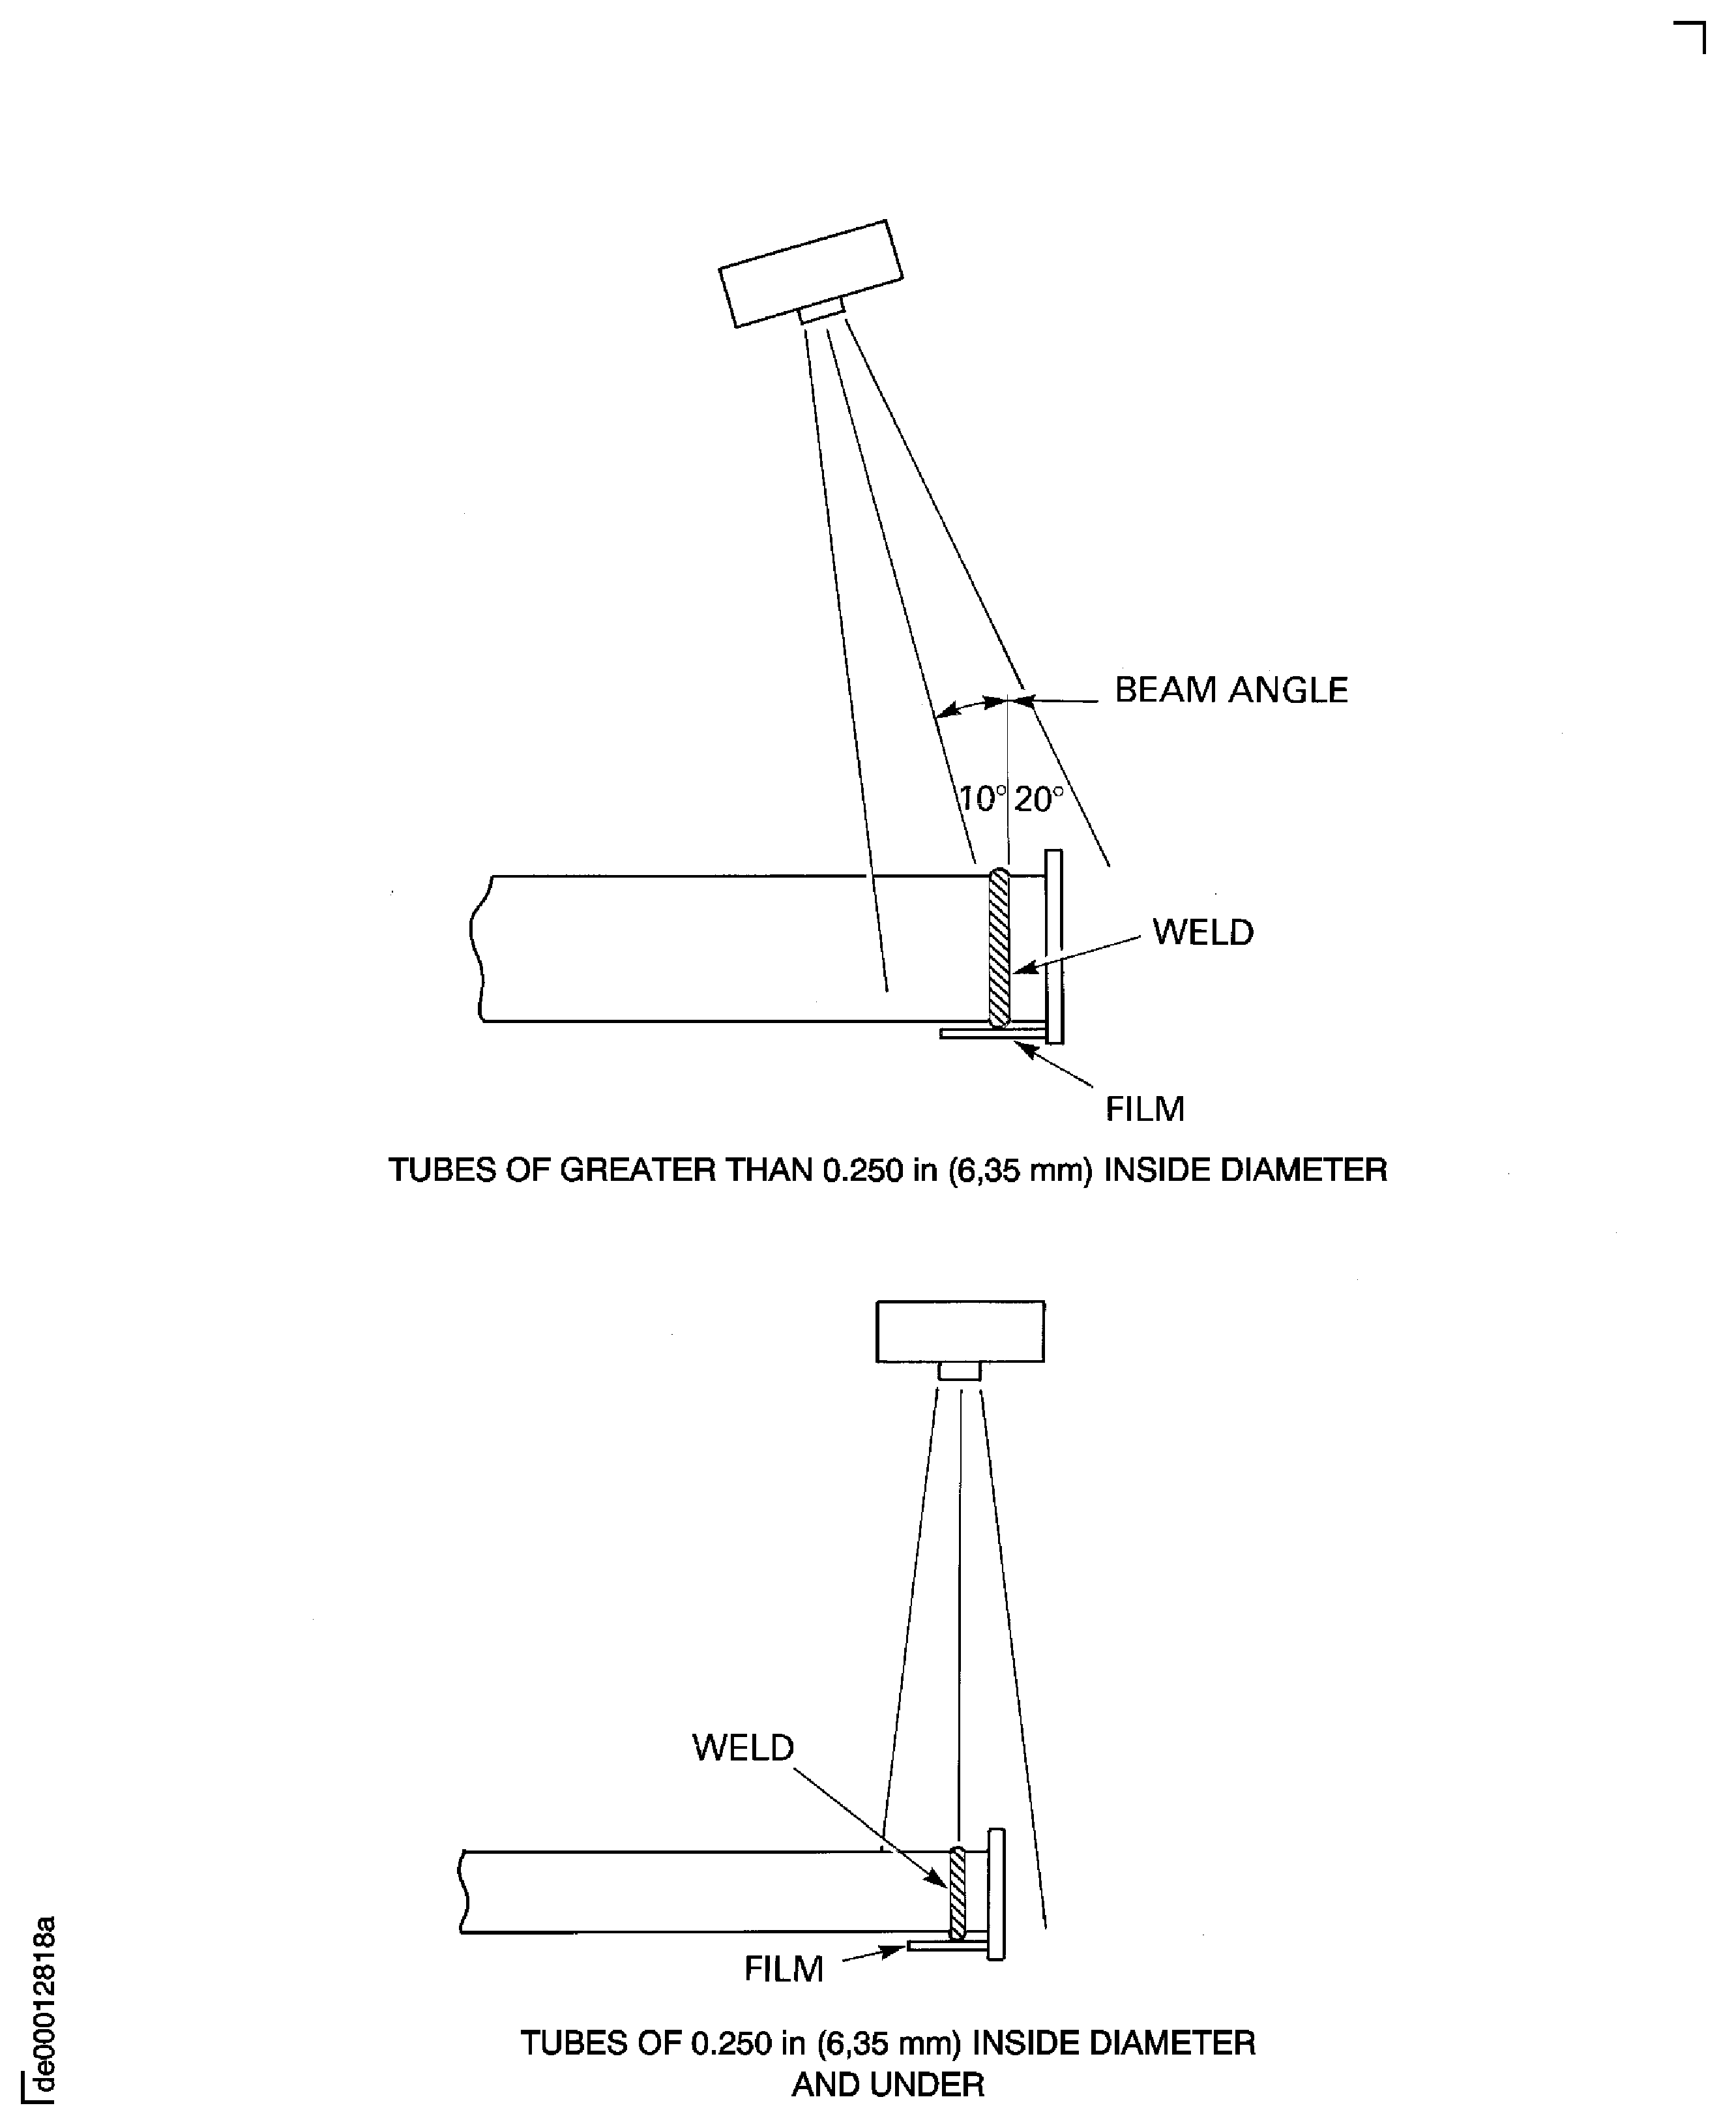
Do as follows for a radiographic inspection of tubes with an internal diameter of less than 1.50 in. (38.1 mm). It is necessary to use a double-wall double image procedure with two exposures at right angles to each other. Refer to Figure this shows the beam angle for different tube diameters.
Refer to the SPM TASK 70-26-01-260-501 for methods and control of Radiographic inspection.
SUBTASK 70-31-02-260-003 Radiographic Inspection of Oribital Torch Welds.
The weld bead can be cut back mechanically to make its geometry better and to remove small surface defects within the limitations of Step.Cutting back of the parent material is acceptable up to a maximum depth of 0.1t.
SUBTASK 70-31-02-320-001 Cut Back the Weld Bead
Where the geometry of the tube permits, it is permitted to ream the underbead to the limits given in Step. The location of the reamer is important to make sure the underbead is reamed concentric with the tube wall. All swarf must be removed.
Sharp edges remaining after the underbead is reamed must be removed. Make sure the weld bead geometry is in the specified limits.
.
SUBTASK 70-31-02-350-001 Ream the Weld Underbead
Figure: Weld bead dimensions
Weld bead dimensions

Figure: Radiographic inspection of butt welded tubes
Radiographic inspection of butt welded tubes

