Export Control
EAR Export Classification: Not subject to the EAR per 15 C.F.R. Chapter 1, Part 734.3(b)(3), except for the following Service Bulletins which are currently published as EAR Export Classification 9E991: SBE70-0992, SBE72-0483, SBE72-0580, SBE72-0588, SBE72-0640, SBE73-0209, SBE80-0024 and SBE80-0025.Copyright
© IAE International Aero Engines AG (2001, 2014 - 2021) The information contained in this document is the property of © IAE International Aero Engines AG and may not be copied or used for any purpose other than that for which it is supplied without the express written authority of © IAE International Aero Engines AG. (This does not preclude use by engine and aircraft operators for normal instructional, maintenance or overhaul purposes.).Applicability
All
Common Information
TASK 72-00-00-200-015 Engine General - Do An Ultrasonic Inspection Of Dovetail Root Flanks On The LPC Fan Blades, Inspection-015
General
The TASK gives the procedure for the ultrasonic inspection of dovetail root flanks of the LP compressor fan blades. For the inspection of the other parts of the engine, refer to TASK 72-00-00-200-000 (INSPECTION/CHECK-000).
Primary clean LP compressor blades in accordance with TASK 72-31-11-100-002 (CLEANING-002).
NOTE
NOTE
NOTE
Special tools are identified in the procedure by the tool primary number.
NOTE
Preliminary Requirements
Pre-Conditions
NONESupport Equipment
| Name | Manufacturer | Part Number / Identification | Quantity | Remark |
|---|---|---|---|---|
| Ultrasonic flaw detector - For operation in 5 - 10 MHz range (eg Buehler Krautkramer - USN52 (Krautkramer Branson - USN52), EPOCH 3B) | LOCAL | Ultrasonic flaw detector - For operation in 5 - 10 MHz range | ||
| Desk Lamp (local supply) - 40-50W bulb with shade, less than 110mm dia. and 110mm length | LOCAL | Desk Lamp 40-50W | ||
| Blade Mounting Fixture - Local Manufacture | LOCAL | Blade Mounting Fixture - Local Manufacture | ||
| Binocular (local supply) - Minimum magnification range of x10 to x30 and overhang such that the centre of the binocular can be positioned 350mm away from the edge of base mounting | LOCAL | Binocular 10-30x | Advice on suitable binoculars can be provided by IAE. An example of a suitable binocular would be a Nikon SMZ645 with x10 eyepiece and C-US2 stand. | |
| IAE 2R19429 Test set | 0AM53 | IAE 2R19429 | 1 | |
| IAE 2R19315 Test block QC6827 | 0AM53 | IAE 2R19315 | 1 | |
| IAE 2R19316 Ultrasonic probe | 0AM53 | IAE 2R19316 | 1 |
Consumables, Materials and Expendables
| Name | Manufacturer | Part Number / Identification | Quantity | Remark |
|---|---|---|---|---|
| CoMat 06-148 ULTRASONIC COUPLANT | LOCAL | CoMat 06-148 |
Spares
NONESafety Requirements
NONEProcedure
Apply CoMat 06-148 ULTRASONIC COUPLANT to rear angled flank and position probe on IAE 2R19315 Test block QC6827.
SUBTASK 72-00-00-490-058 Calibrate the Ultrasonic Detector
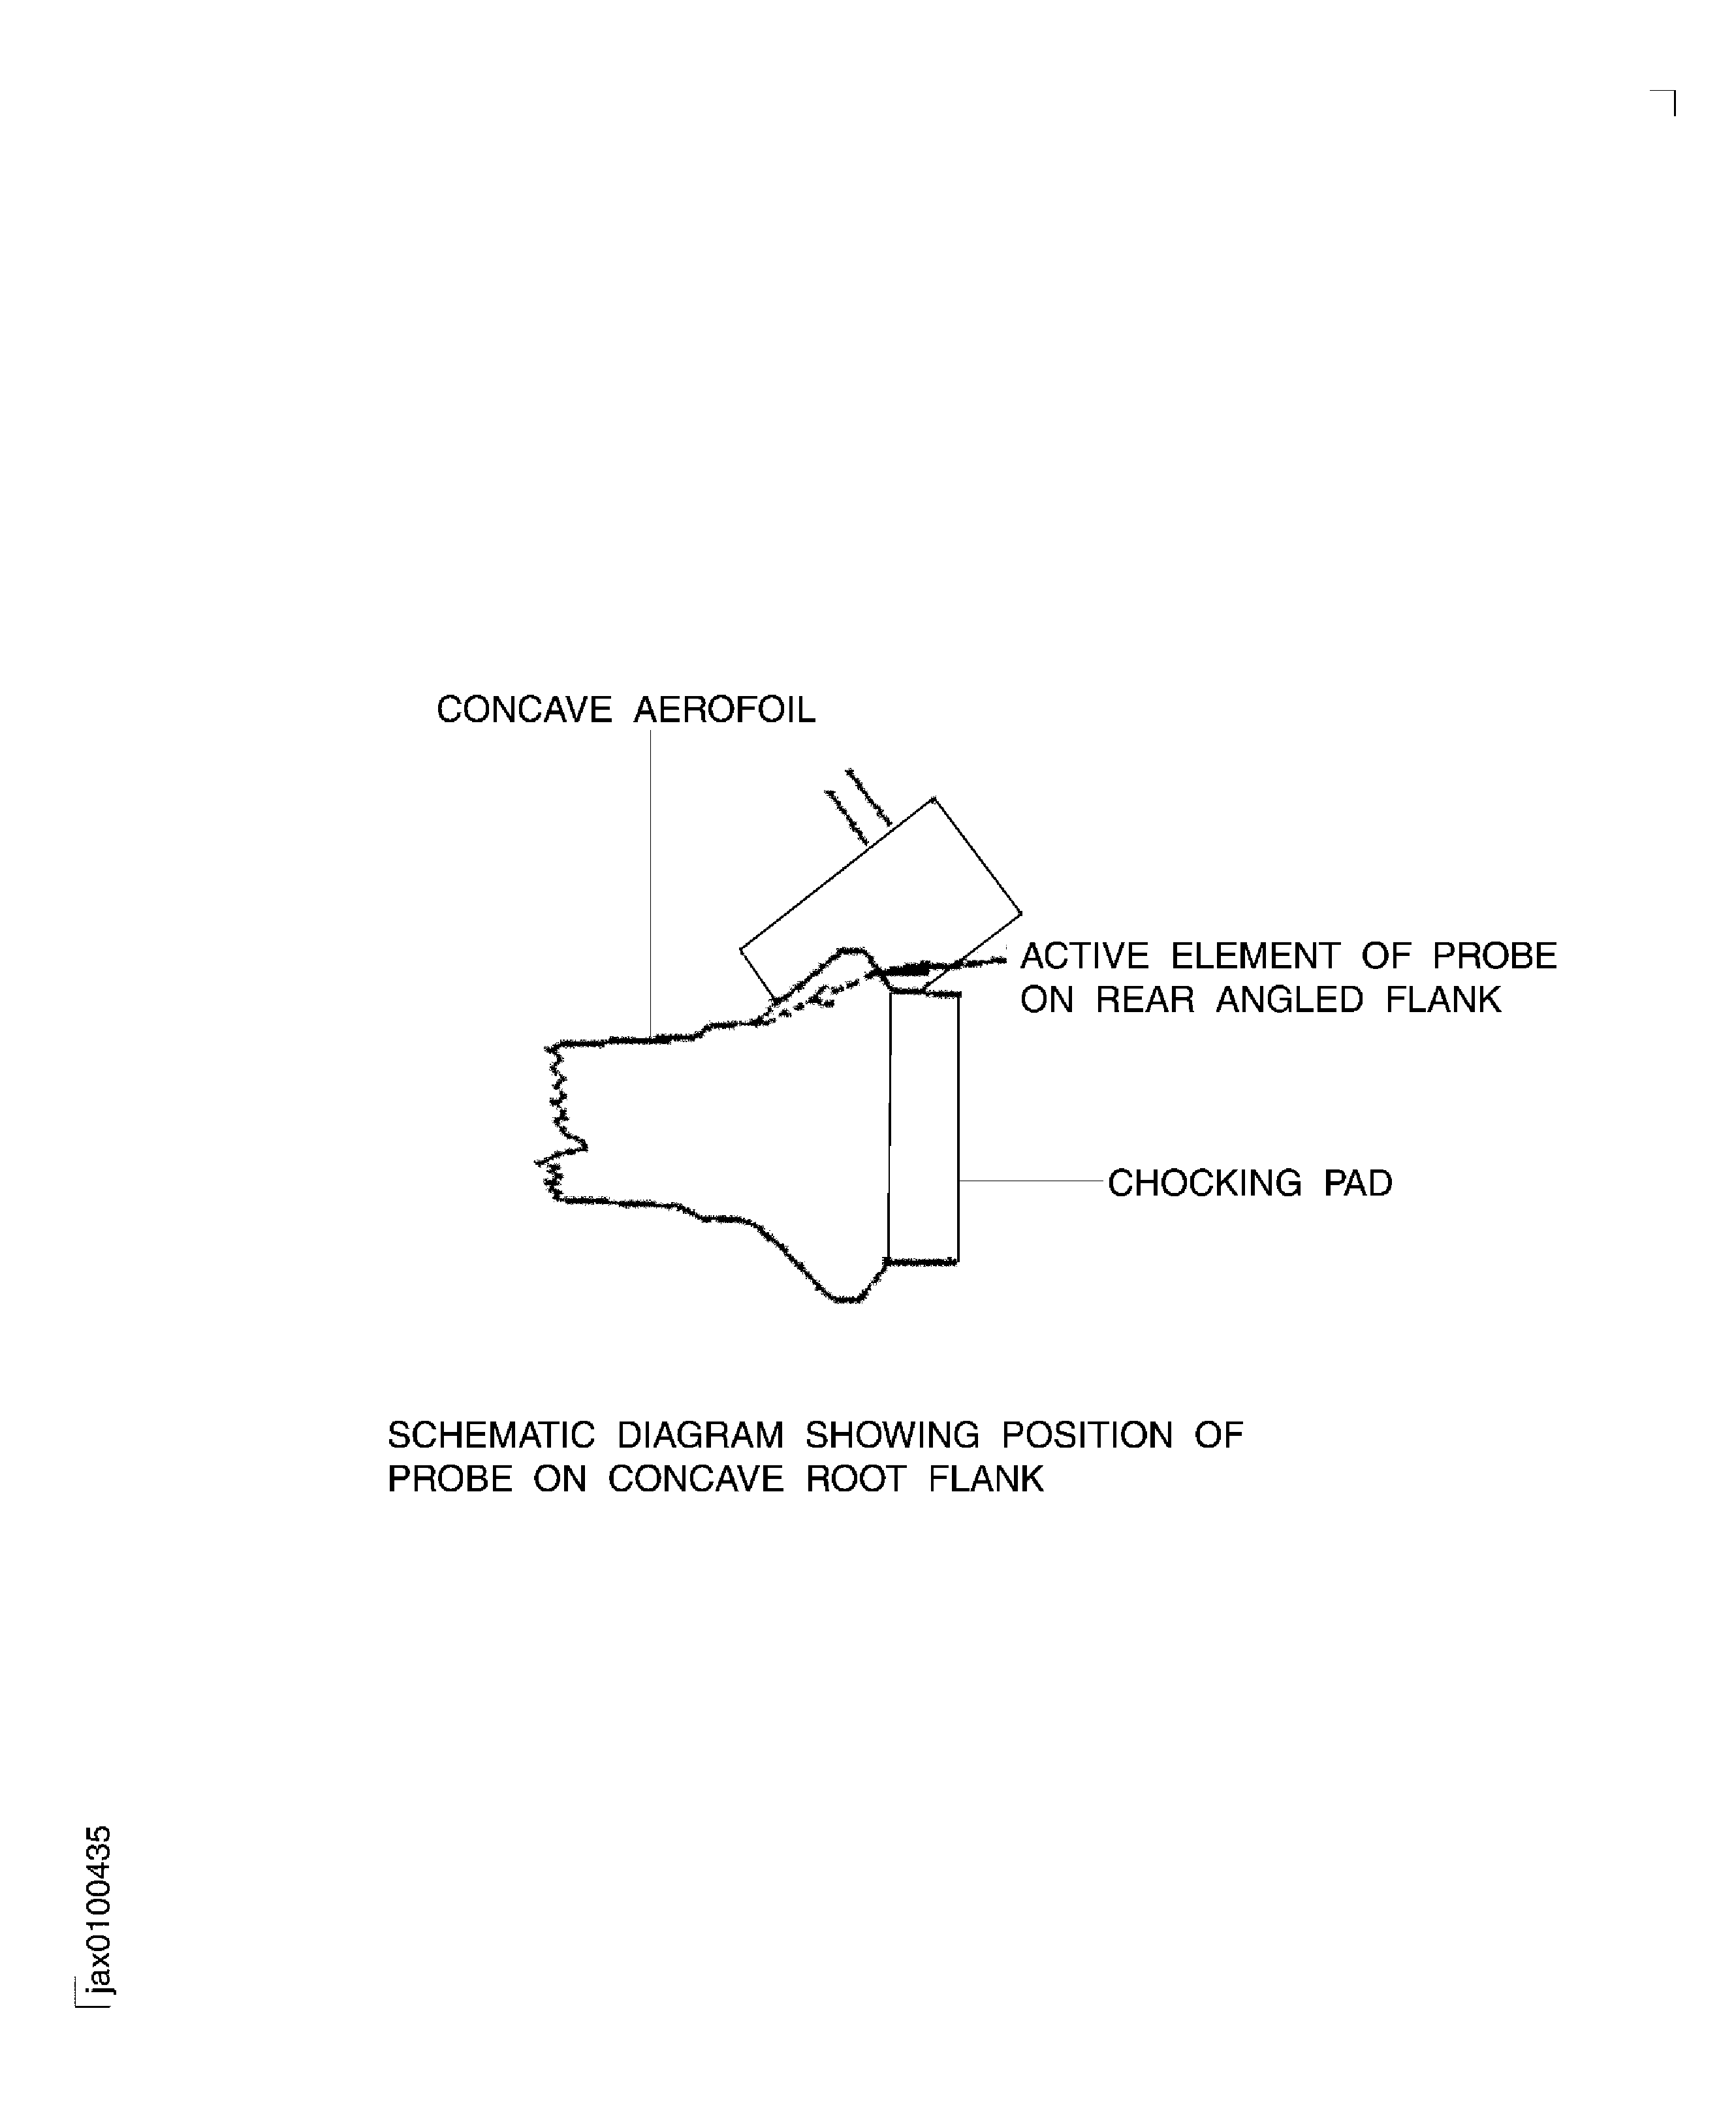
Refer to Figure.
Apply CoMat 06-148 ULTRASONIC COUPLANT to concave surface of blade root flank.
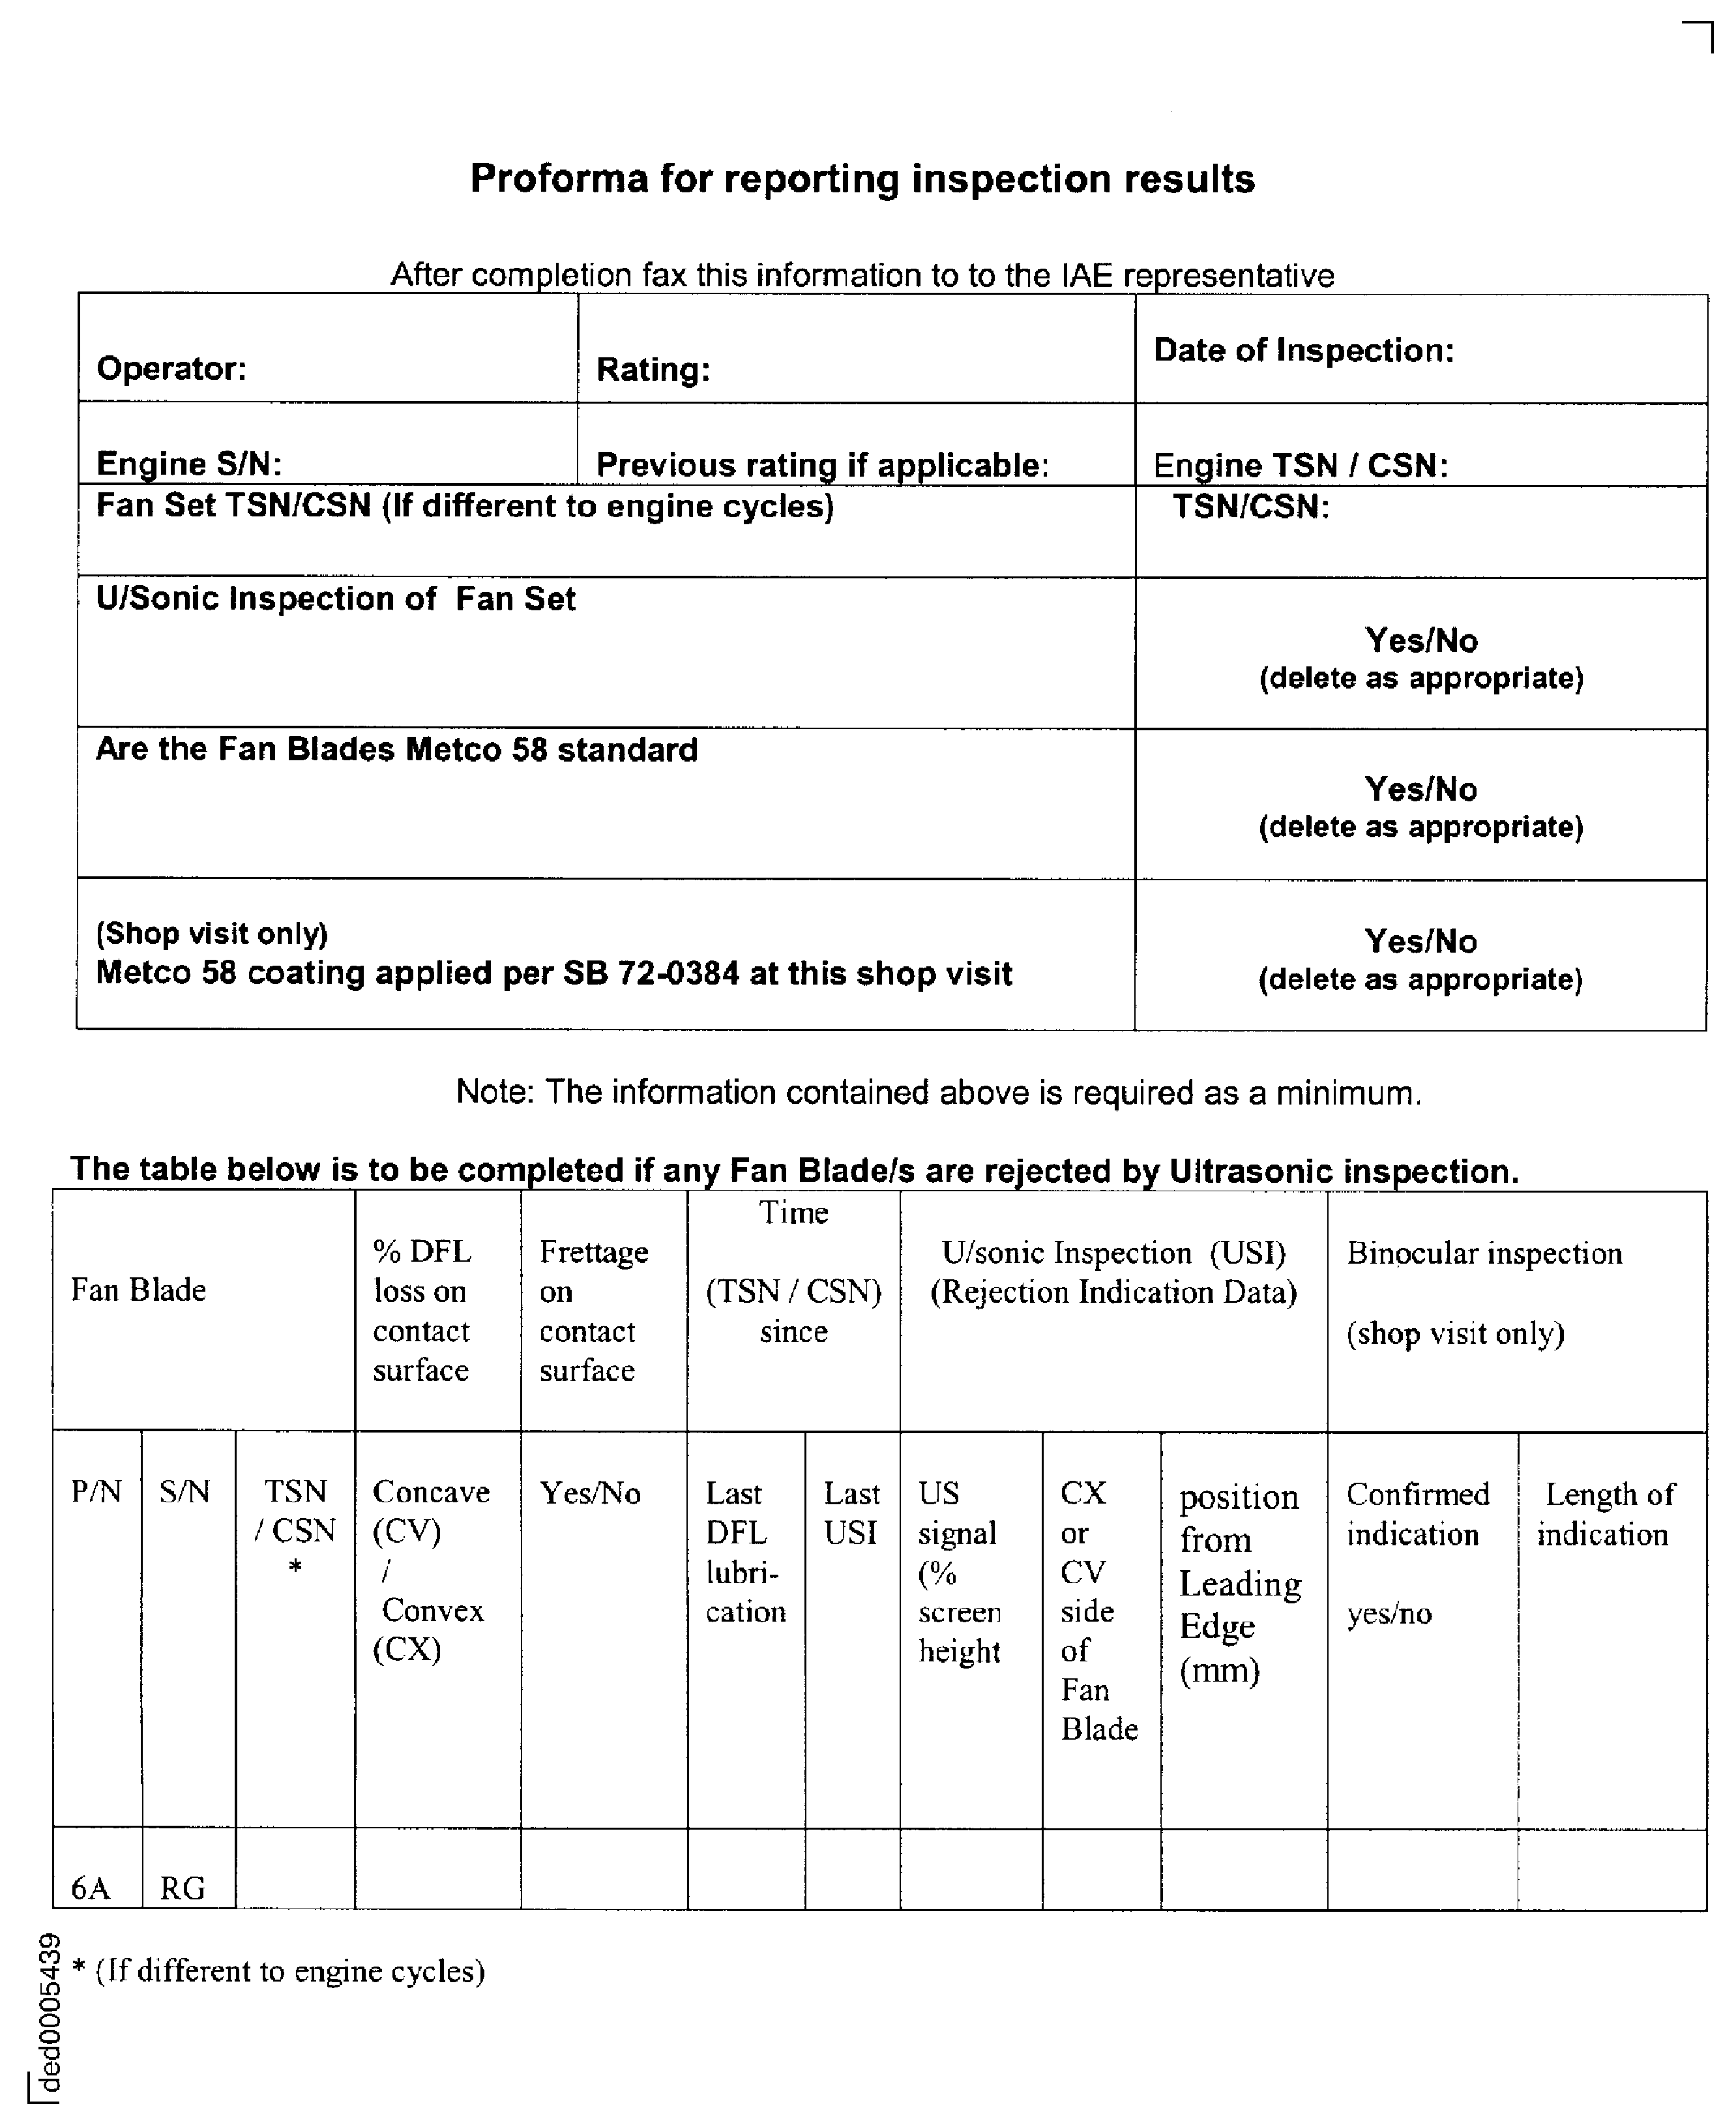
If a signal greater than 60 percent screen height is produced between 4.5 and 5.5 division lines on time base identify the locations of all indications over 60 percent screen height from the root front face and record on the proforma (refer to figure 802) the ultrasonic signal percentage height and position from the front face. Then perform paragraph E or F depending on the standard of blade.
If no cracking is present after step 1, the blade is considered suitable for completion of any further engine manual inspection/rework operations required to return it to service operation. On any such blade, record on the proforma that a x30 binocular inspection has been successfully completed with no cracking being detected.
This procedure applies to fan blades that are pre SBE 72-0375 or pre SBE 72-0384 only. Fan blades that have failed ultrasonic inspection can be further inspected using binocular inspection to establish if they are serviceable.
If no cracking is present after step 1, the blade is considered suitable for completion of any further engine manual inspection/rework operations required to return it to service operation. On any such blade, record on the proforma that the Ultrasonic Inspection was successfully completed following Metco 58 removal, with no cracking being detected.
This procedure applies to fan blades that are post SBE 72-0375 or post SBE 72-0384 only. Fan blades that have failed ultrasonic inspection can be further inspected following removal of the Metco coating using the procedure that follows.
SUBTASK 72-00-00-270-053 Examine the Root Flank of the LP Compressor Fan Blades
Introduction.
This technique covers the additional binocular inspection of V2500 fan blade roots for possible top edge of bedding cracking, detected by ultrasonic inspection as shown in Figure.
The person carrying out this inspection should be proficient at binocular inspections. Additional specific training is recommended for this inspection, contact IAE.
Ensure that dry film lubricant (DFL) has been removed from the fan blade root TASK 72-31-11-100-002-A00 for Non Metco 58 coated root.
Preparation.
SUBTASK 72-00-00-280-055 Binocular Inspection on a Fan Blade Rejected following the Ultrasonic Inspection (Pre SBE 72-0375 and Pre SBE 72-0384)
Introduction.
This technique covers the repeat ultrasonic inspection of V2500 fan blade roots for possible top edge of bedding cracking, detected by the initial ultrasonic inspection, refer to Figure.
Ensure that dry film lubricant (DFL) has been removed from the fan blade root TASK 72-31-11-100-002-B00 for Metco 58 coated root.
Preparation.
SUBTASK 72-00-00-280-056 Ultrasonic Inspection on a Fan Blade Rejected Following the Initial Ultrasonic Inspection (SBE 72-0375 and SBE 72-0384)
Figure: Schematic diagram showing position of probe on concave root flank
Schematic diagram showing position of probe on concave root flank

Figure: Inspection Proforma
Inspection Proforma

Figure: Inspection areas
Inspection areas

