Export Control
EAR Export Classification: Not subject to the EAR per 15 C.F.R. Chapter 1, Part 734.3(b)(3), except for the following Service Bulletins which are currently published as EAR Export Classification 9E991: SBE70-0992, SBE72-0483, SBE72-0580, SBE72-0588, SBE72-0640, SBE73-0209, SBE80-0024 and SBE80-0025.Copyright
© IAE International Aero Engines AG (2001, 2014 - 2021) The information contained in this document is the property of © IAE International Aero Engines AG and may not be copied or used for any purpose other than that for which it is supplied without the express written authority of © IAE International Aero Engines AG. (This does not preclude use by engine and aircraft operators for normal instructional, maintenance or overhaul purposes.).Applicability
All
Common Information
TASK 72-32-22-200-001-B00 No. 3 Bearing Seal Support - The Table Of Part Numbers/Task Numbers, Inspection-001
General
This TASK gives the procedure for the inspection of the No.3 bearing seal support assembly.
Fig/item numbers in parentheses in the procedure agree with those used in the IPC.
The policy that is necessary for inspection is given in the SPM TASK 70-20-00-200-501.
All the parts must be cleaned before any part is examined. Refer to the SPM TASK 70-10-00-100-501.
All parts must be visually examined for damage, corrosion and wear. Any defects that are not identified in the procedure must be referred to IAE.
The procedure for those parts which must have a crack test is given in SUBTASK 72-32-22-230-052. Do the test before the part is visually examined.
A ** following repair referenced in this inspection indicates that the repair is not yet published in the current revision of the manual and the part must be rejected. Contact IAE for additional information concerning FAA approved repair date.
Do not discard any part until you are sure there are no repairs available. Refer to the instructions in Repair before a discarded part is used again or oversize parts are installed.
Parts which should be discarded can be held although no repair is available. The repair of a discarded part could be shown to be necessary at a later date.
All parts must be examined to make sure that all the repairs have been completed satisfactorily.
The practices and processes referred to in the procedure by the TASK numbers are in the SPM.
References
Refer to the SPM for data on these items.
Definitions of Damage, SPM TASK 70-02-02-350-501
Inspection of Parts, SPM TASK 70-20-01-200-501
Some data on these items is contained in this TASK. For more data on these items refer to the SPM.
Method of Testing for Crack Indications
Chemical Processes
Surface Protection
Preliminary Requirements
Pre-Conditions
NONESupport Equipment
NONEConsumables, Materials and Expendables
NONESpares
NONESafety Requirements
NONEProcedure
Clean the part. Refer to TASK 72-32-22-100-000 (CLEANING-000).
Do the crack test on the part that is given below. Use the applicable penetrant inspection procedure.
PART IDENT
TASK/SUBTASK
No. 3 bearing seal support assembly
SPM TASK TASK 70-23-01-230-501
(Dip or Spray)
SUBTASK 72-32-22-230-052-001 Examine the No. 3 Bearing Seal Support Assembly (01-040) for Cracks
Clean the part. Refer to TASK 72-32-22-100-000 (CLEANING-000).
Do the crack test on the part that is given below. Use the applicable penetrant inspection procedure.
PART IDENT
TASK/SUBTASK
No. 3 bearing seal support assembly
SPM TASK TASK 70-23-02-230-501
(Dip or Spray)
SUBTASK 72-32-22-230-052-002 Examine the No. 3 Bearing Seal Support Assembly (01-040) for Cracks
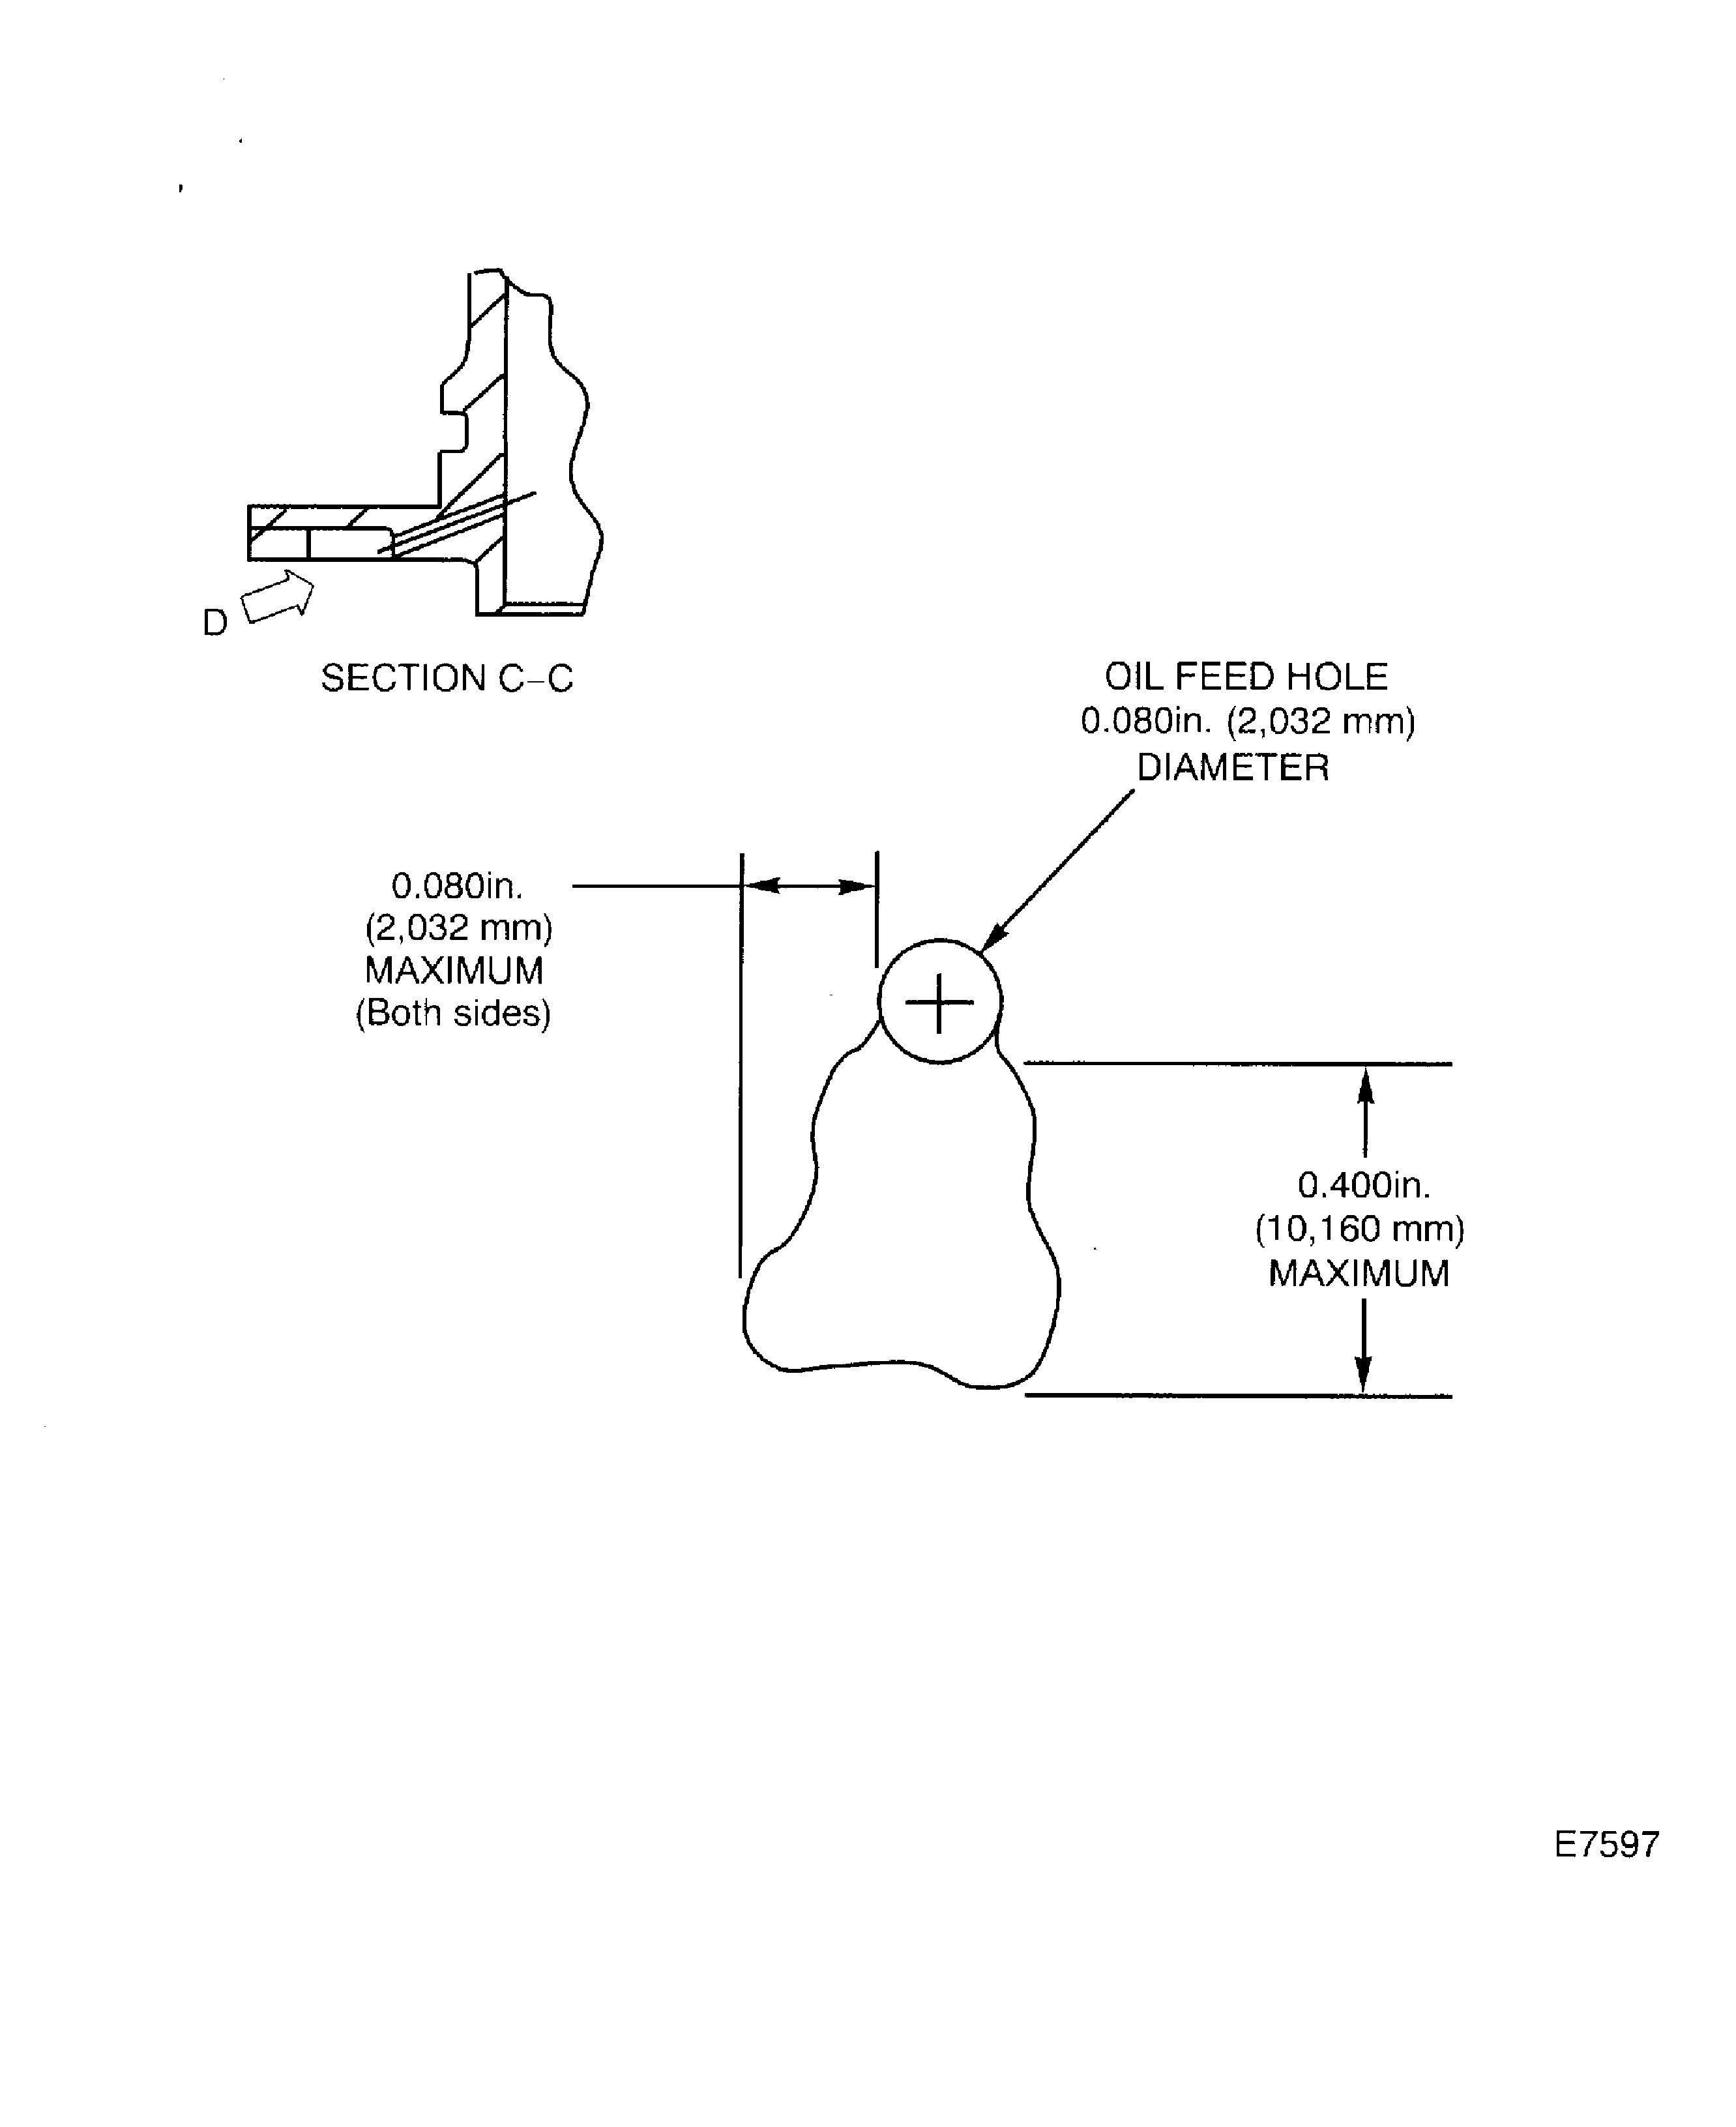
Wear (surface damage) up to 0.240 in. (6.096 mm) axially, 0.400 in. (10.160 mm) circumferentially and 0.020 in. (0.508 mm) in depth. One location is permitted. Damage must be a maximum of 0.080 in. (2.032 mm) axially from the oil feed hole. Refer to Figure
Repair, VRS3004 TASK 72-32-22-300-004 (REPAIR-004)
Wear, cracks and voids other than Step
Examine the seal support assembly at location 5 for wear, cracks and voids on the inner diameter nickel plate.
SUBTASK 72-32-22-220-070 Examine the No. 3 Bearing Seal Support Assembly (01-040) for Wear, Cracks and Voids on the Inner Diameter Nickel Plate
Repair, VRS3342 TASK 72-32-22-300-016 (REPAIR-016)
Damage
Repair, VRS3342 TASK 72-32-22-300-016 (REPAIR-016)
Other than Step
Installation depth
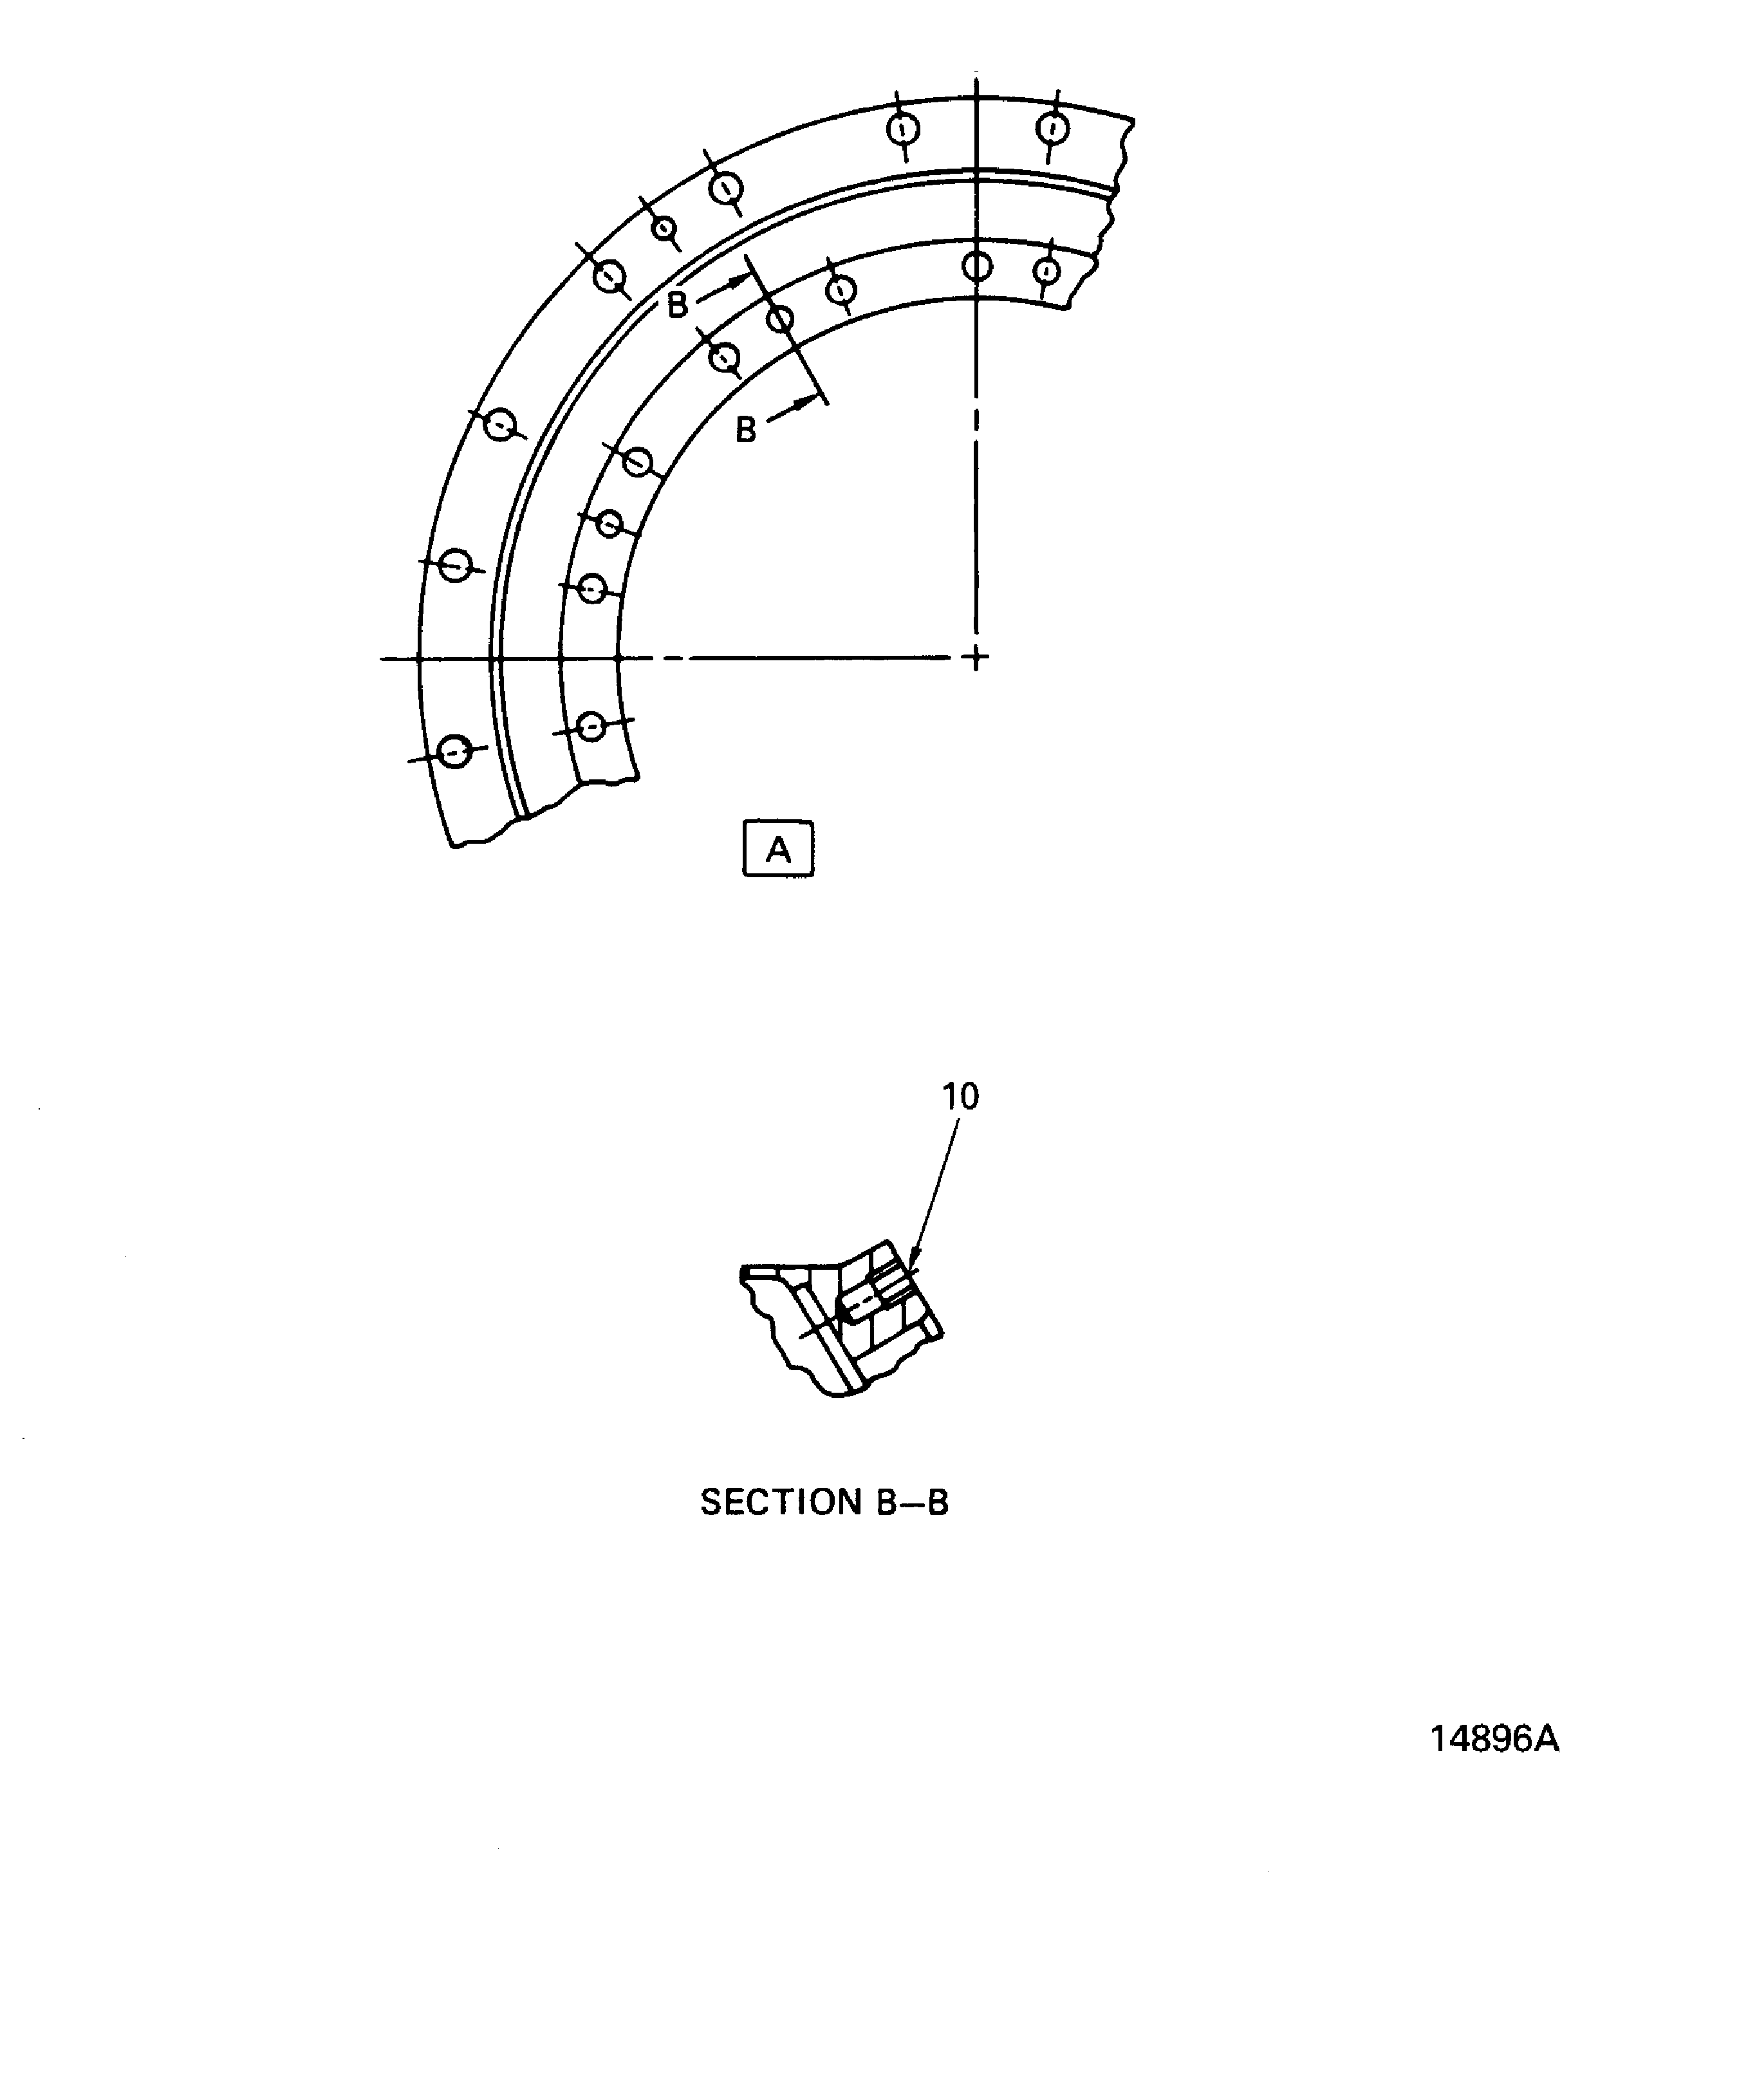
Examine the seal support assembly at location 10 for damage and installation depth of the inserts (nine locations).
SUBTASK 72-32-22-220-071 Examine the No. 3 Bearing Seal Support Assembly (01-040) for Damage and Installation Depth of the Inserts
Other than Step
Examine the seal support assembly inner diameter for wear at location 2400.
SUBTASK 72-32-22-220-072 Examine the No. 3 Bearing Seal Support Assembly (01-040) for Wear on the Inner Diameter of the Rear Flange Holes
Other than Step
Thickness.
Examine the seal support assembly at location 9 for the thickness of the front flange.
SUBTASK 72-32-22-220-073 Examine the No. 3 Bearing Seal Support Assembly (01-040) for the Thickness of the Front Flange
Other than Step
Examine the seal support assembly outer front flange rear diameter at location 2405.
Other than Step
Examine the seal support assembly rear flange inner diameter at location 2408.
Repair, VRS3004 TASK 72-32-22-300-004 (REPAIR-004)
Other than Step
Examine the seal support assembly at location 6 for the front inner diameter and the true position.
Other than Step
Examine the seal support assembly outer front flange front diameter at location 2406.
Other than Step
Examine the seal support assembly outer front flange rear diameter at location 2404.
SUBTASK 72-32-22-220-074 Examine the No. 3 Bearing Seal Support Assembly (01-040) for the Diameters and the True Position
NOTE
If the measured diameter in a free condition is not satisfactory, a held condition is permitted. All dimensions apply when Surface J is flat by 0.001 in. (0.025 mm) and Diameter K maintains a clearance envelope of 11.345 in. (288.163 mm) in a free or held condition. Hold the spacer only on Surfaces J, G and Diameter K.Other than Step
Parallelism.
Examine the seal support assembly at location 4 for the parallelism of the rear flange front face.
SUBTASK 72-32-22-220-075 Examine the No. 3 Bearing Seal Support Assembly (01-040) for the Parallelism of the Rear Flange Front Face
Figure: No. 3 bearing seal support assembly inspection locations
Sheet 1

Figure: No. 3 bearing seal support assembly inspection locations
Sheet 2

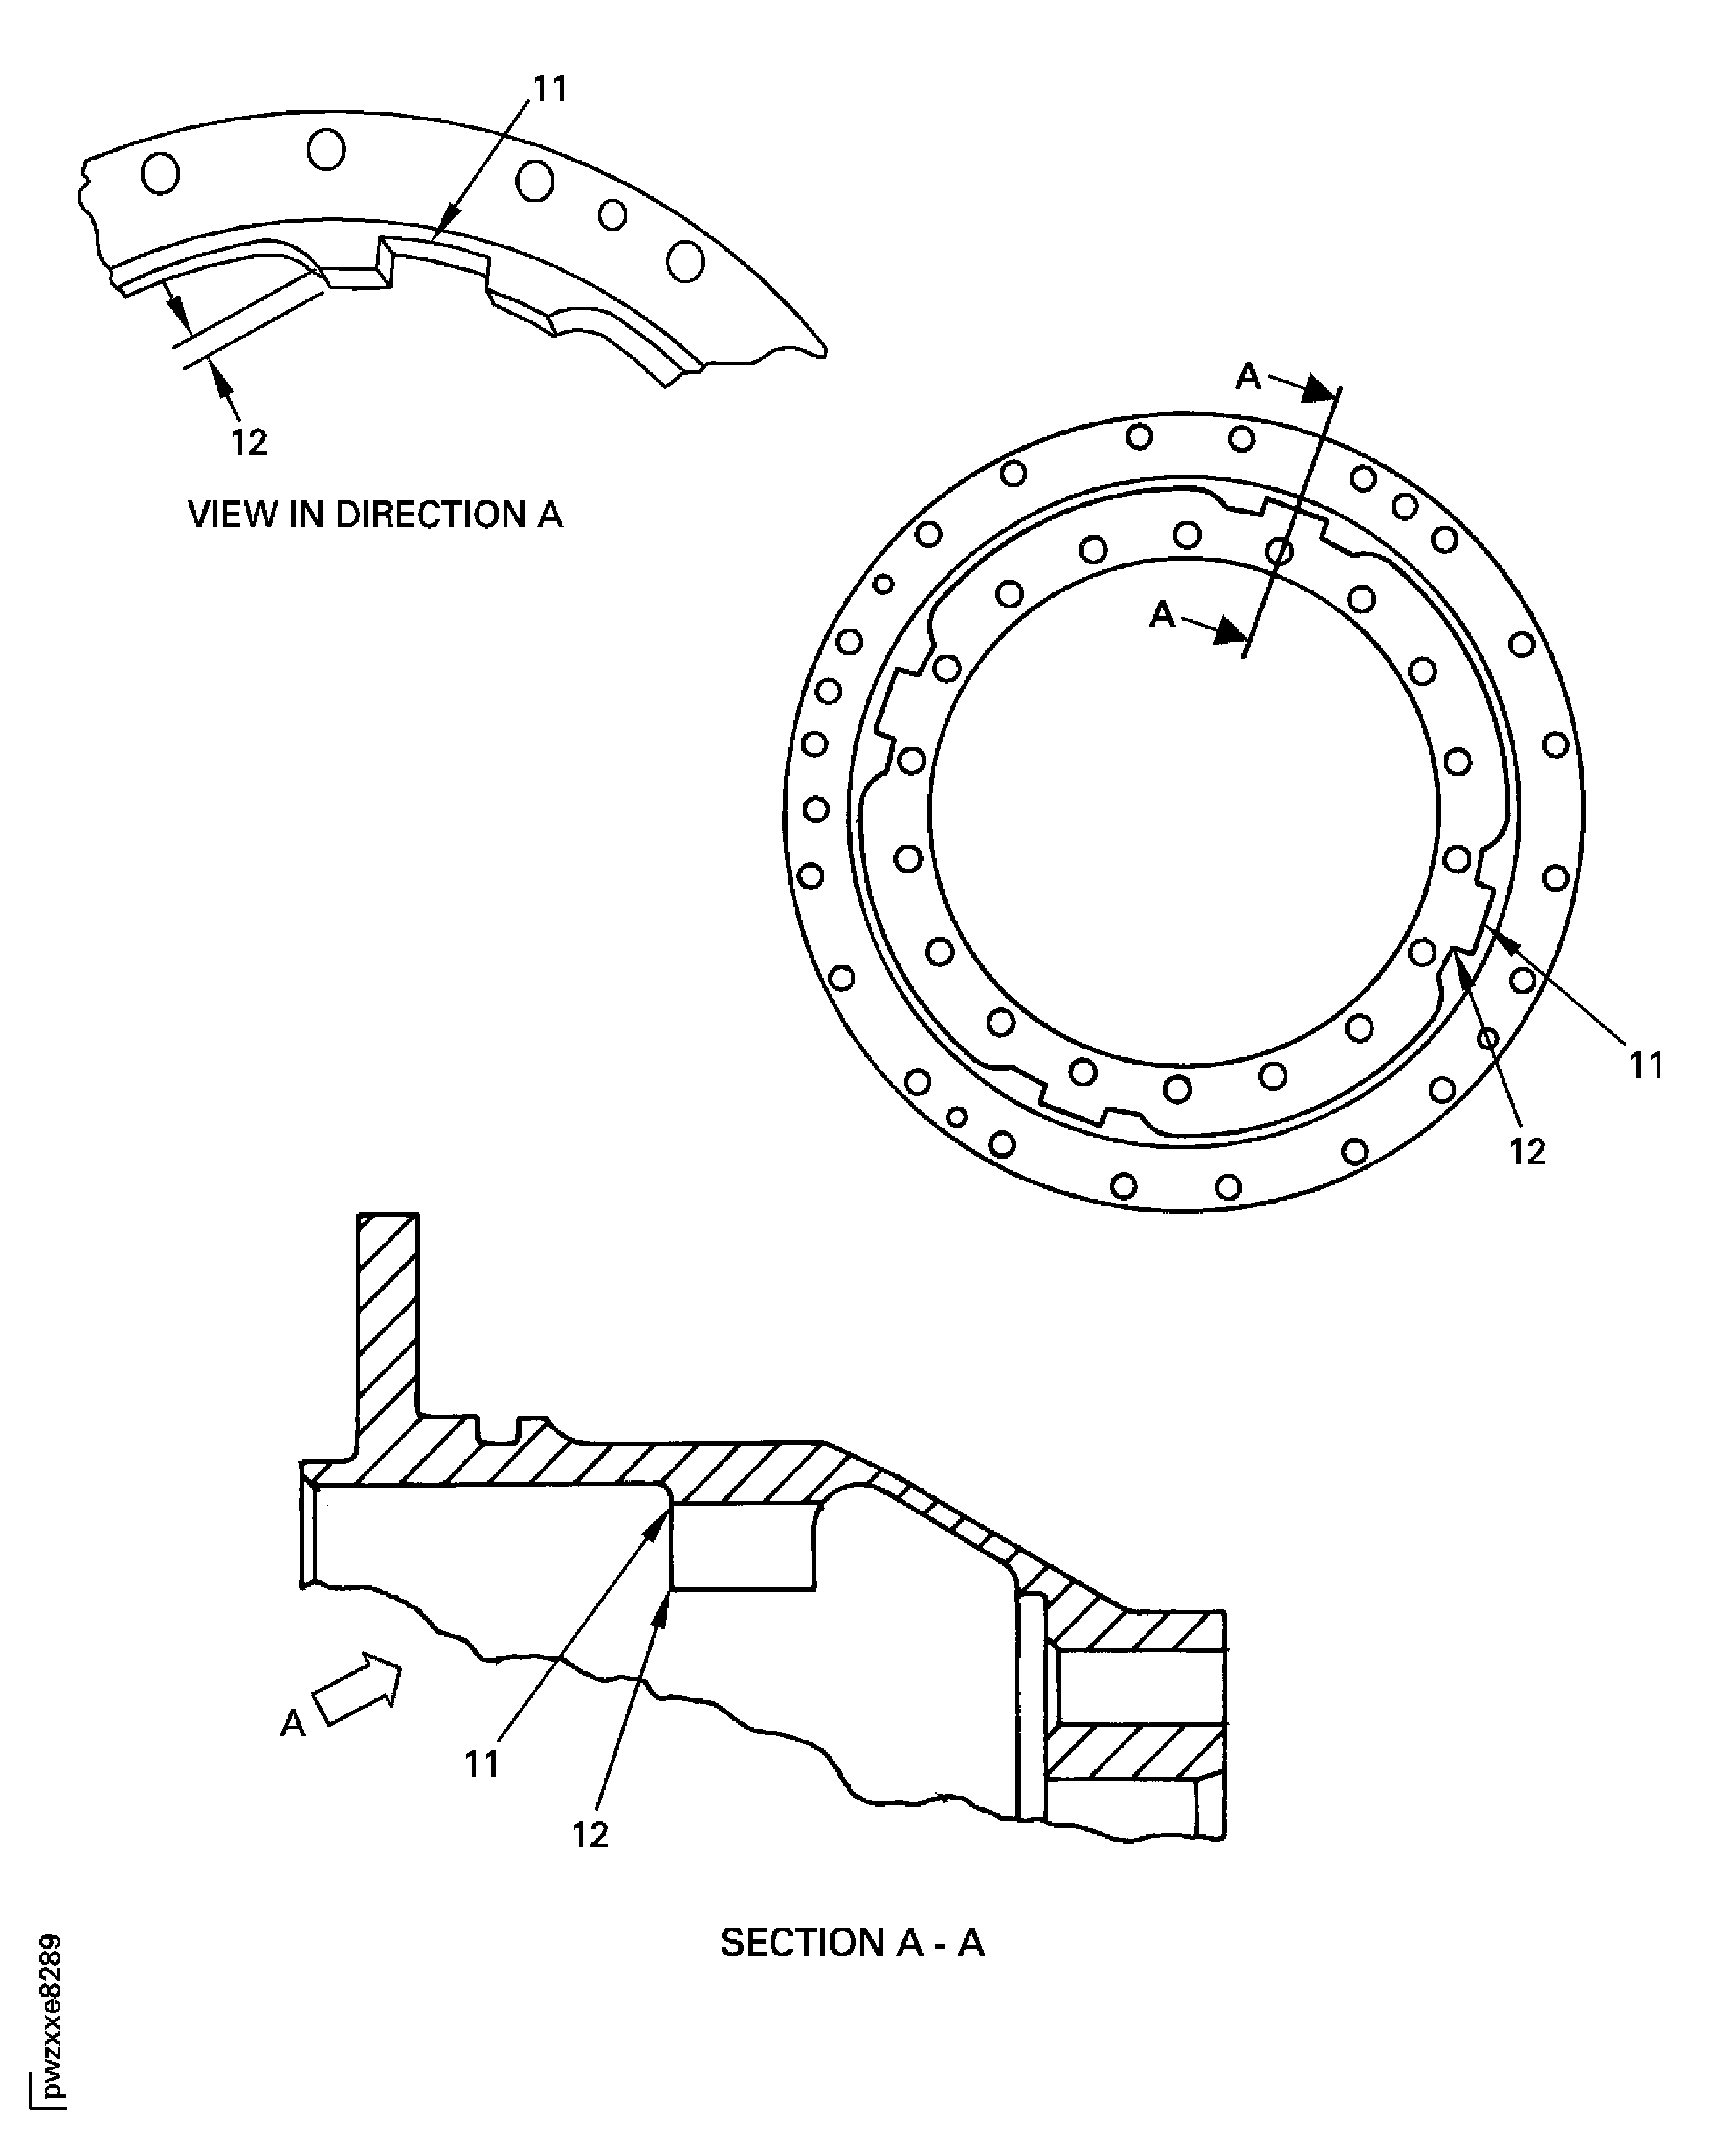
Figure: No. 3 bearing seal support assembly inspection locations
Sheet 3

Figure: No. 3 bearing seal support assembly inspection locations
Sheet 4

