Export Control
EAR Export Classification: Not subject to the EAR per 15 C.F.R. Chapter 1, Part 734.3(b)(3), except for the following Service Bulletins which are currently published as EAR Export Classification 9E991: SBE70-0992, SBE72-0483, SBE72-0580, SBE72-0588, SBE72-0640, SBE73-0209, SBE80-0024 and SBE80-0025.Copyright
© IAE International Aero Engines AG (2001, 2014 - 2021) The information contained in this document is the property of © IAE International Aero Engines AG and may not be copied or used for any purpose other than that for which it is supplied without the express written authority of © IAE International Aero Engines AG. (This does not preclude use by engine and aircraft operators for normal instructional, maintenance or overhaul purposes.).Applicability
All
Common Information
TASK 72-32-41-200-001-B00 No. 1 Bearing Support Assembly - Examine, Inspection-001
General
This TASK gives the procedure for the inspection of the No. 1 bearing support assembly. For other No. 1 bearing support parts, refer to TASK 72-32-41-200-000 (INSPECTION/CHECK-000)
Fig/Item numbers in parentheses in the procedure agree with those used in the IPC.
The policy that is necessary for crack check is given in the SPM TASK 70-20-01-200-501.
All the parts must be visually examined for damage, corrosion and wear. Any defects that are not identified in the procedure must be referred to IAE.
Do not discard any part until you are sure there are no repairs available. Refer to the instructions in Repair before a discarded part is used again or oversize parts are installed.
Parts which should be discarded can be held although no repair is available. The repair of a discarded part could be shown to be necessary at a later date.
All the parts must be examined to make sure that all the repairs have been completed satisfactorily.
The procedure for crack test is given in Step. Do the test before the part is visually examined.
The practices and processes referred to in the procedure by the TASK number are in the SPM.
References
Refer to SPM for data on these items.
Definitions of damage, SPM TASK 70-02-02-350-501
Inspection of parts, SPM TASK 70-20-00-200-501
Some data on these items are contained in this TASK. For more data on these items refer to SPM.
Method of Testing for Crack Indications
Chemical Processes
Surface Protection
Preliminary Requirements
Pre-Conditions
NONESupport Equipment
| Name | Manufacturer | Part Number / Identification | Quantity | Remark |
|---|---|---|---|---|
| Fluorescent Penetrant Inspection Equipment | LOCAL | Fluorescent penetrant inspection equipment | Medium Sensitivity, water washable (Refer to SPM TASK 70-23-02-230-501) |
Consumables, Materials and Expendables
NONESpares
NONESafety Requirements
NONEProcedure
Clean the parts. Refer to TASK 72-32-41-100-000 (CLEANING-000).
SUBTASK 72-32-41-240-053 Examine the No. 1 Bearing Support Assembly (01-240) for Cracks
Refer to Figure.
Repair, VRS1242 TASK 72-32-41-300-007 (REPAIR-007)
More than in Step
Nicked.
Repair, VRS1242 TASK 72-32-41-300-007 (REPAIR-007)
More than in Step
Dented.
Repair, VRS1242 TASK 72-32-41-300-007 (REPAIR-007)
More than in Step
Scratched.
Repair, VRS1242 TASK 72-32-41-300-007 (REPAIR-007)
More than in Step
Galled.
Examine all the surface.
SUBTASK 72-32-41-220-057 Examine the No. 1 Bearing Support Assembly (01-240) Surface
Refer to Figure.
Repair, VRS1243 TASK 72-32-41-300-008 (REPAIR-008)
Thread damage
Repair, VRS1243 TASK 72-32-41-300-008 (REPAIR-008)
Loose
Repair, VRS1243 TASK 72-32-41-300-008 (REPAIR-008)
Missing
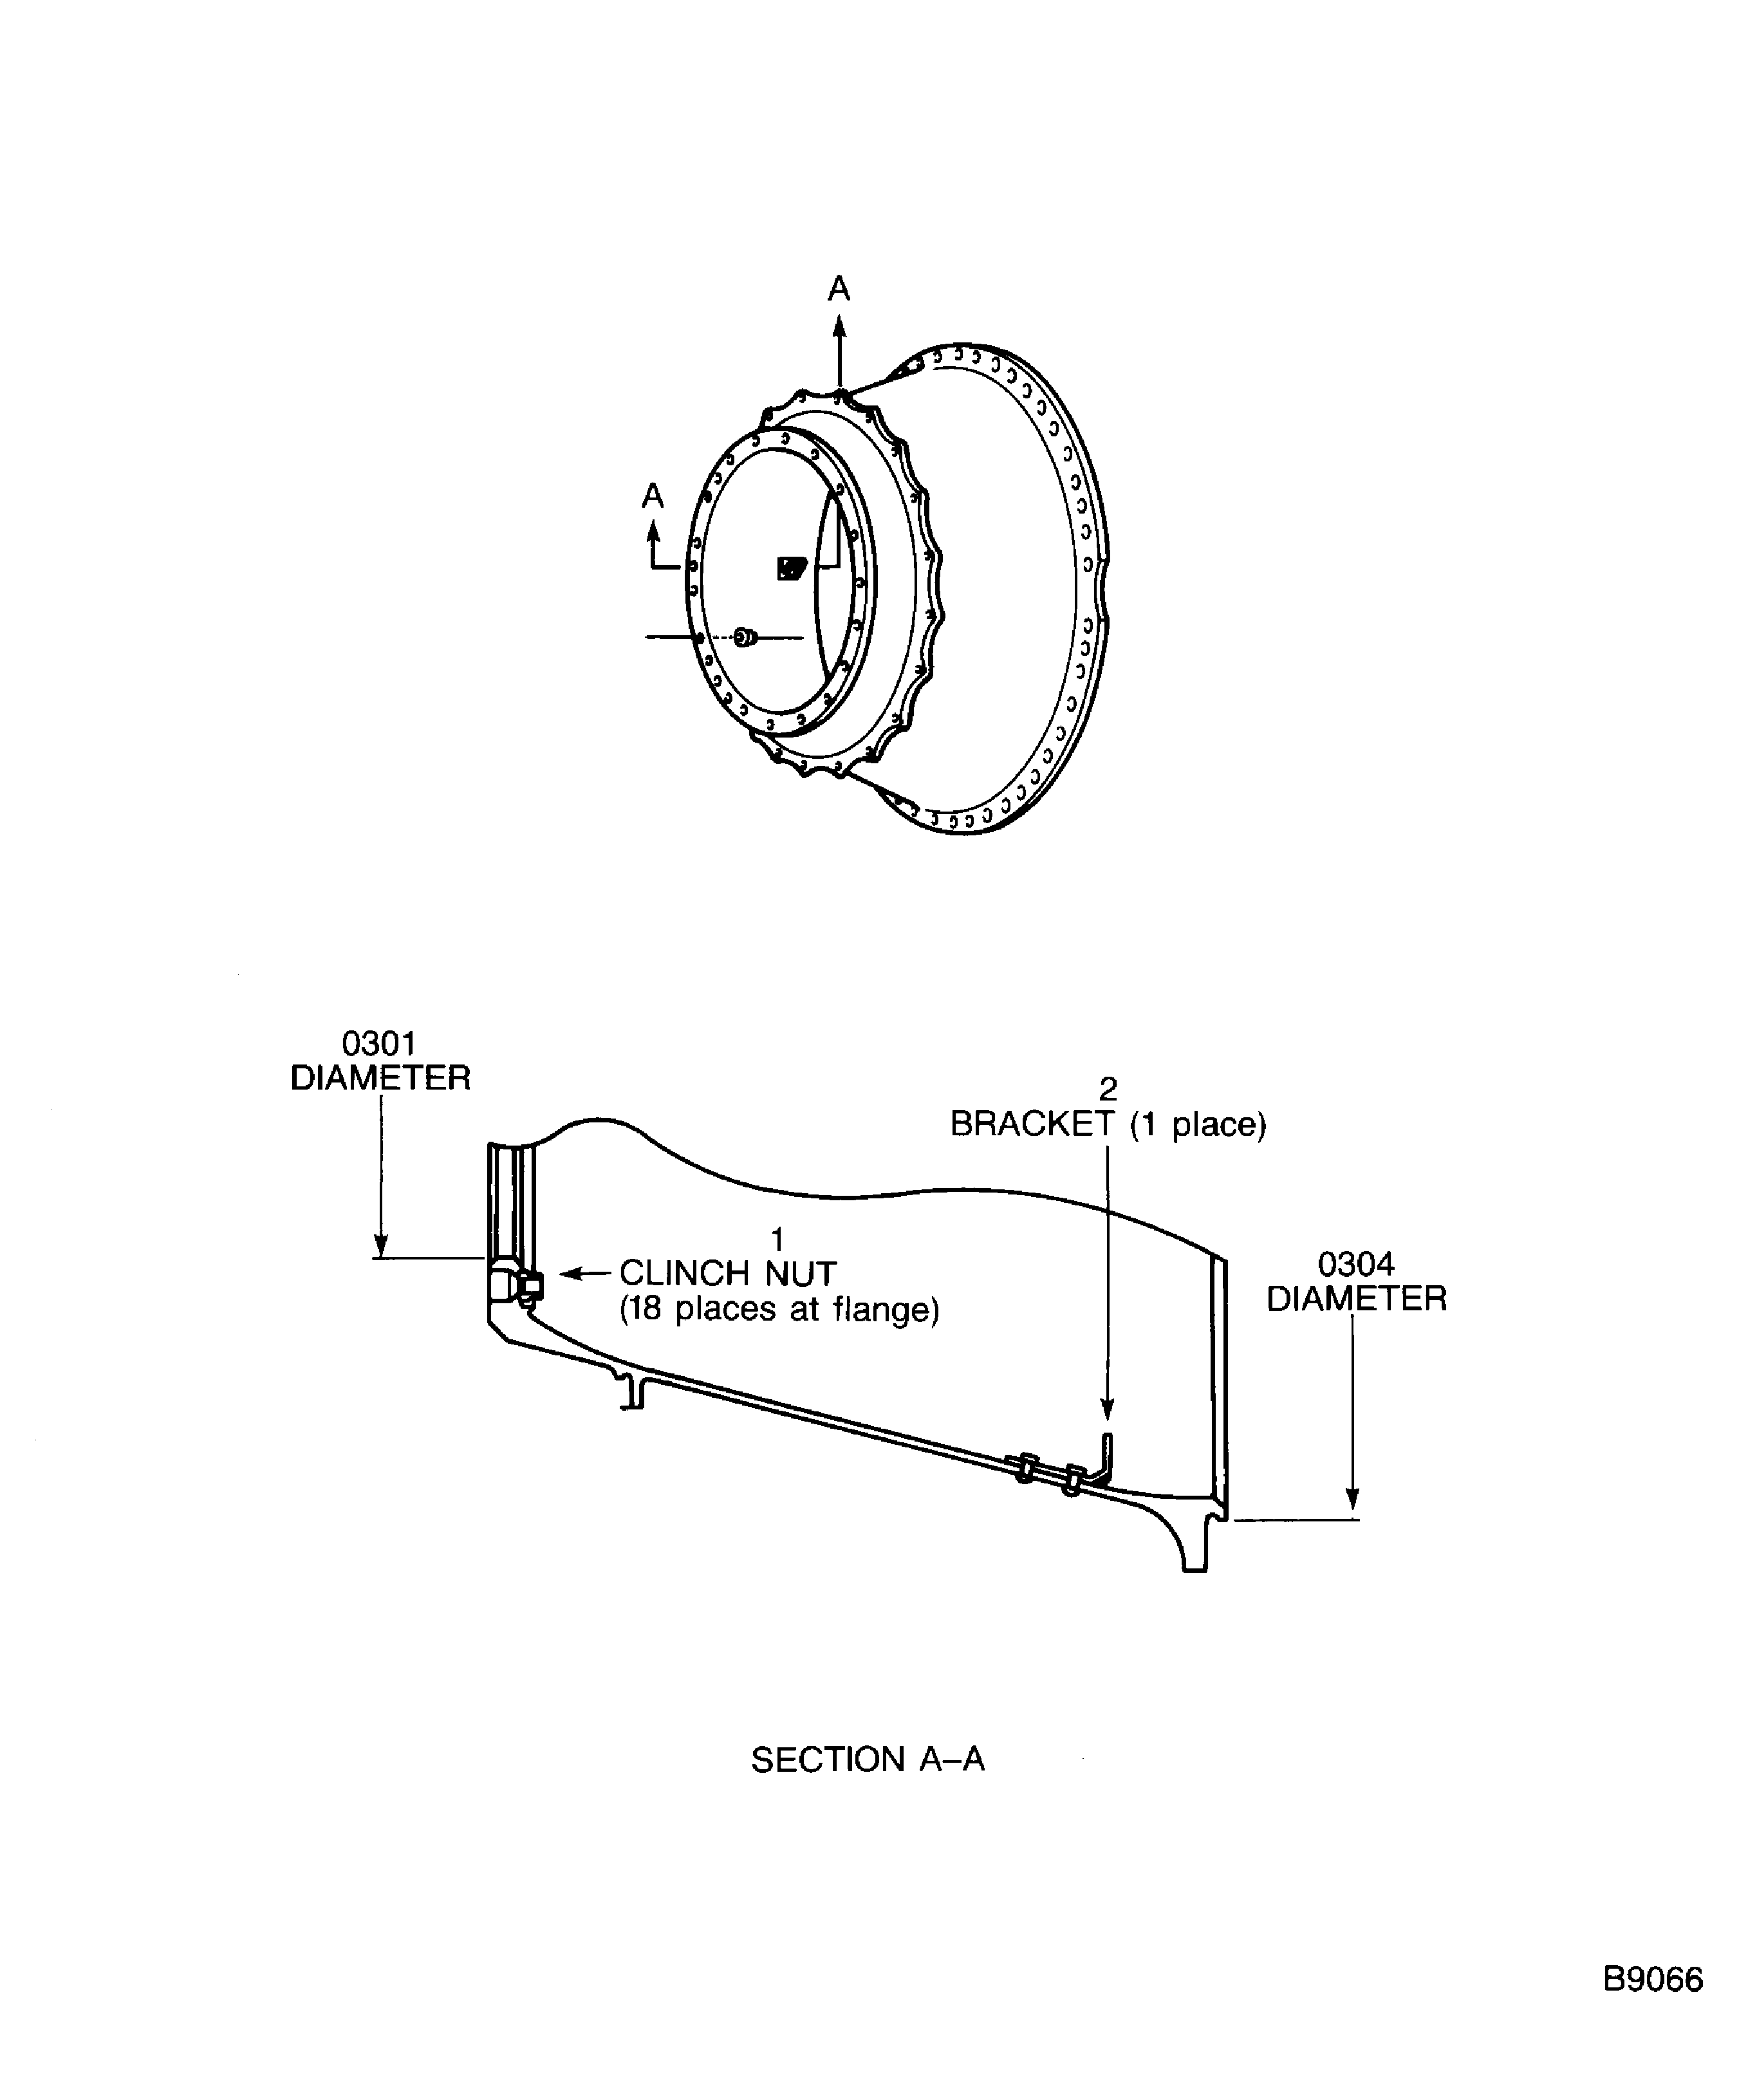
Examine the clinch nuts at location 1.
SUBTASK 72-32-41-220-058 Examine the No. 1 Bearing Support Assembly (01-240) Clinch Nuts
Refer to Figure.
Repair, VRS1244 TASK 72-32-41-300-009 (REPAIR-009).
Broken.
Repair, VRS1244 TASK 72-32-41-300-009 (REPAIR-009).
Distorted.
Repair, VRS1244 TASK 72-32-41-300-009 (REPAIR-009).
Cracked.
Repair, VRS1244 TASK 72-32-41-300-009 (REPAIR-009).
Loosened rivet.
Examine the bracket at locations 2 and 7.
SUBTASK 72-32-41-220-059 Examine the No. 1 Bearing Support Assembly (01-240) Bracket
Refer to Figure.
Repair, VRS1245 TASK 72-32-41-300-010 (REPAIR-010).
If the average diameter is between 12.7946 in. and 12.8146 in. (324.985 mm and 325.493 mm).
Dimensionally examine the average diameter.
SUBTASK 72-32-41-220-060 Examine the No. 1 Bearing Support Assembly (01-240) at Location 0301
Refer to Figure.
Repair, VRS1246 TASK 72-32-41-300-011 (REPAIR-011).
If the average diameter is between 21.482 in. and 21.502 in. (545.64 mm and 546.15 mm).
Dimensionally examine the average diameter.
SUBTASK 72-32-41-220-061 Examine the No. 1 Bearing Support Assembly (01-240) at Location 0304
Figure: Inspection of the No. 1 bearing support assembly
Inspection of the No. 1 bearing support assembly

