Export Control
EAR Export Classification: Not subject to the EAR per 15 C.F.R. Chapter 1, Part 734.3(b)(3), except for the following Service Bulletins which are currently published as EAR Export Classification 9E991: SBE70-0992, SBE72-0483, SBE72-0580, SBE72-0588, SBE72-0640, SBE73-0209, SBE80-0024 and SBE80-0025.Copyright
© IAE International Aero Engines AG (2001, 2014 - 2021) The information contained in this document is the property of © IAE International Aero Engines AG and may not be copied or used for any purpose other than that for which it is supplied without the express written authority of © IAE International Aero Engines AG. (This does not preclude use by engine and aircraft operators for normal instructional, maintenance or overhaul purposes.).Applicability
All
Common Information
TASK 72-38-25-200-002 Bifurcation Panel Remaining Parts - Examine The Bifurcation Panel Remaining Parts, Inspection-002
Effectivity
FIG/ITEM | PART NO. | |
01-270 | 6A8165 | |
01-280 | UP10842 | |
01-290 | LK62478 | |
01-290 | 6A9099 | |
Various | Nut | TASK 70-21-03-100-501 |
Various | Bolt | TASK 70-21-03-100-501 |
Various | Washer | TASK 70-21-03-100-501 |
General
This TASK gives the procedure for the inspection of the bifurcation panel remaining parts. For the other bifurcation panel parts refer to TASK 72-38-25-200-000.
Fig/item numbers in parentheses in the procedure agree with those given in the IPC. Only the primary Fig/item numbers are used. For the service bulletin alpha variants refer to the IPC.
The policy that is necessary for inspection is given in the SPM TASK 70-20-01-200-501.
All the parts must be cleaned before they are examined. Refer to the TASK 72-38-25-100-000.
All the parts must be visually examined for damage, corrosion and wear. Any defects that are not identified in the procedure must be referred to IAE.
Do not discard a part until you are sure there are no repairs available. Refer to the instructions in Repair before a discarded part is used again or oversize parts are installed.
Parts which must be discarded can be held although no repair is available. The repair of a discarded part could be shown to be necessary at a subsequent date.
All parts must be examined to make sure that all the repairs are completed satisfactorily.
The practices and processes referred to in the procedure by the TASK/SUBTASK numbers are in the SPM.
References
Refer to the SPM for data on these items:
Definitions of Damage, SPM TASK 70-02-02-350-501,
Inspection of Parts, SPM TASK 70-20-01-200-501.
Some data on these items is contained in this TASK. For more data on these items refer to the SPM:
Method of Testing for Crack Indications,
Chemical processes,
Surface protection.
Preliminary Requirements
Pre-Conditions
NONESupport Equipment
NONEConsumables, Materials and Expendables
NONESpares
NONESafety Requirements
NONEProcedure
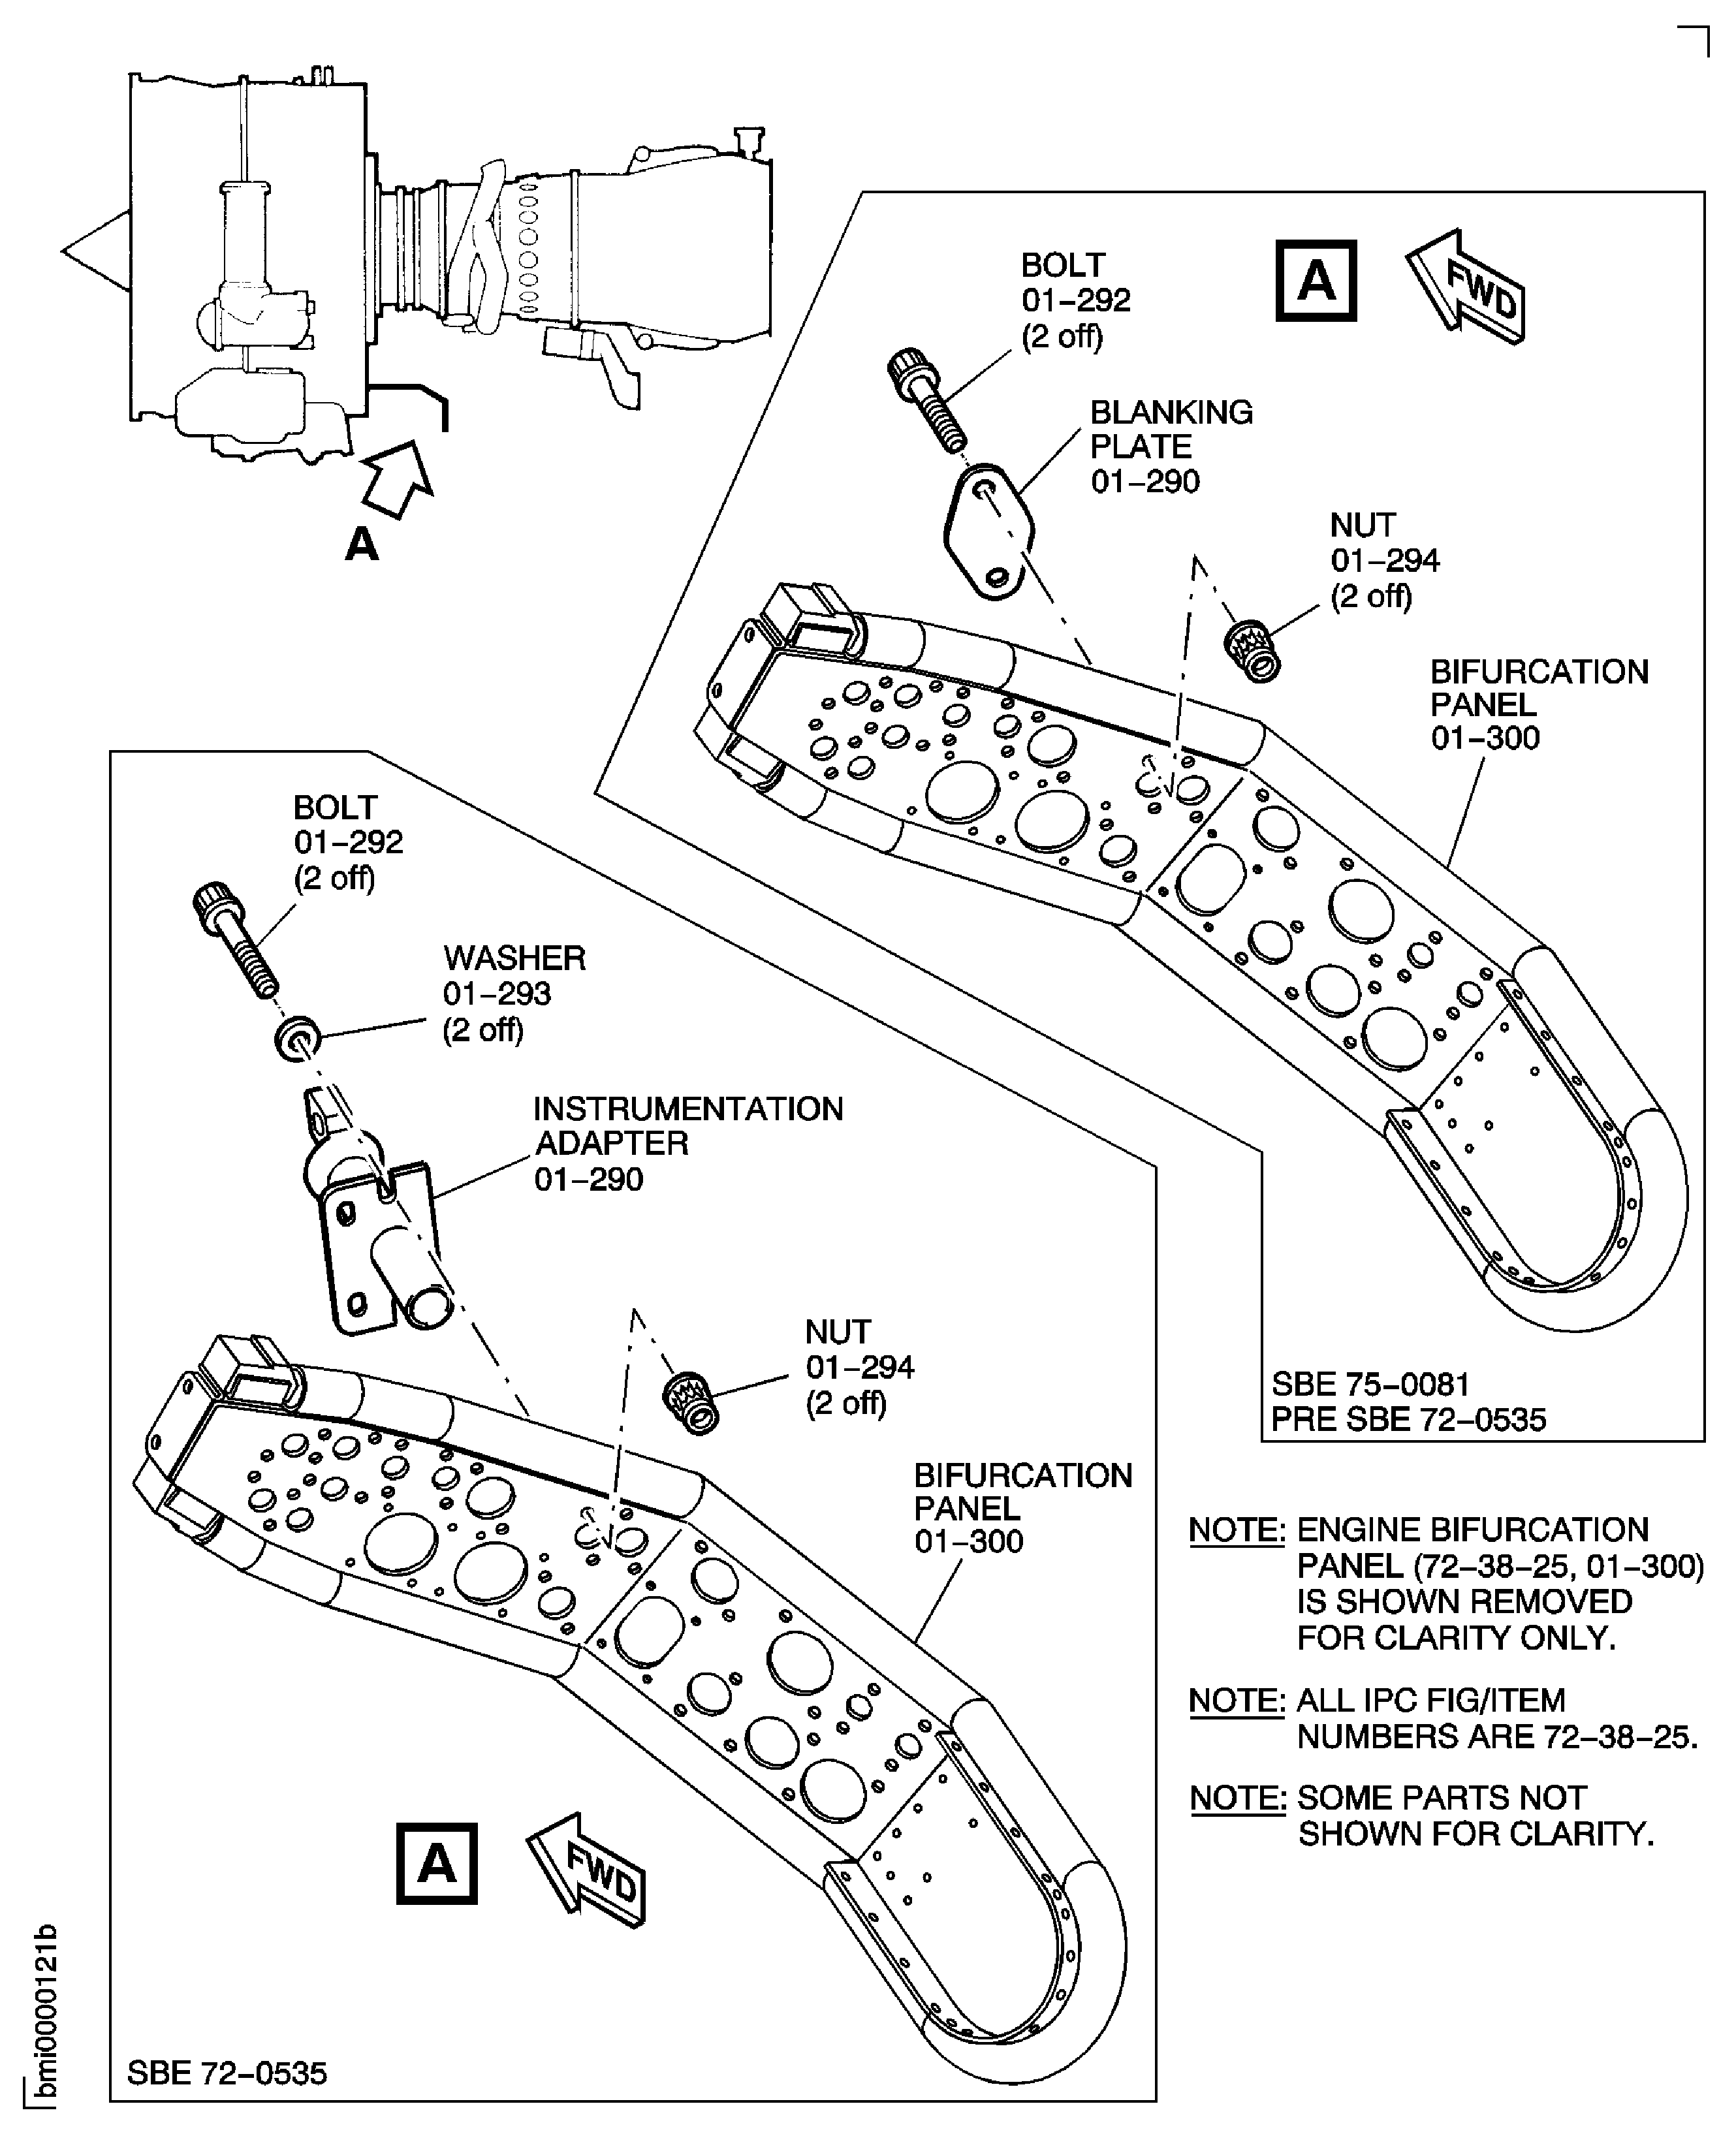
Refer to Figure.
SUBTASK 72-38-25-220-068 Examine the Instrumentation Adapter (01-290) for Cracks (SBE 72-0535)
Refer to Figure.
SUBTASK 72-38-25-220-069 Examine the Instrumentation Adapter (01-290) (SBE 72-0535)
Refer to the SPM TASK 70-42-01-400-501
Worn
Threads.
More than in Step
Nicked.
Surfaces.
In excess of Step
Burred.
Head.
SUBTASK 72-38-25-220-057 Examine the Bolts
Refer to the SPM TASK 70-42-01-400-501
Worn
Threads.
In excess of Step
Burred/nicked.
Surfaces.
SUBTASK 72-38-25-220-058 Examine the Self-Locking Nuts
Figure: Examine the Bifurcation Panel
Examine the Bifurcation Panel

