Export Control
EAR Export Classification: Not subject to the EAR per 15 C.F.R. Chapter 1, Part 734.3(b)(3), except for the following Service Bulletins which are currently published as EAR Export Classification 9E991: SBE70-0992, SBE72-0483, SBE72-0580, SBE72-0588, SBE72-0640, SBE73-0209, SBE80-0024 and SBE80-0025.Copyright
© IAE International Aero Engines AG (2001, 2014 - 2021) The information contained in this document is the property of © IAE International Aero Engines AG and may not be copied or used for any purpose other than that for which it is supplied without the express written authority of © IAE International Aero Engines AG. (This does not preclude use by engine and aircraft operators for normal instructional, maintenance or overhaul purposes.).Applicability
All
Common Information
TASK 72-43-20-300-018 No. 4 Bearing Seal Ring Holder - Rear Flange Inner Diameter (ID) Restoration Repair, Repair-018 (VRS3797)
General
Price and availability - refer to IAE
The practices and processes referred to in the procedure by the TASK numbers are in the SPM.
Preliminary Requirements
Pre-Conditions
NONESupport Equipment
| Name | Manufacturer | Part Number / Identification | Quantity | Remark |
|---|---|---|---|---|
| Workshop inspection equipment | LOCAL | Workshop inspection equipment | ||
| Magnifying glass, 4x | LOCAL | Magnifying glass, 4x | or greater |
Consumables, Materials and Expendables
NONESpares
NONESafety Requirements
NONEProcedure
Refer to the SPM TASK 70-32-06-320-501.
Machine the diameter to remove all of the damage and/or coating.
Machine the ID of the seal ring holder.
SUBTASK 72-43-20-320-065 Machine the Rear Flange ID of the No. 4 Bearing Seal Ring Holder Before Nickel Plate
Refer to the SPM TASK 70-11-03-300-503.
Clean the seal ring holder.
SUBTASK 72-43-20-110-089 Clean the No. 4 Bearing Seal Ring Holder
Refer to the SPM TASK 70-34-18-380-501.
Mask areas not to be coated.
Grit blast out of the area shown is not permitted unless otherwise specified.
Prepare the part for coat.
SUBTASK 72-43-20-350-074 Restore the Rear Flange ID of the No. 4 Bearing Seal Ring Holder by Coating
After coating is applied and part is cooled, remove mask or maskants. Remove tape residue by the SPM TASK 70-11-26-300-503.
Clean the ring holder.
SUBTASK 72-43-20-110-090 Clean the No. 4 Bearing Seal Ring Holder
If the measured diameter in a free condition is not satisfactory, a held condition is permitted.
NOTE
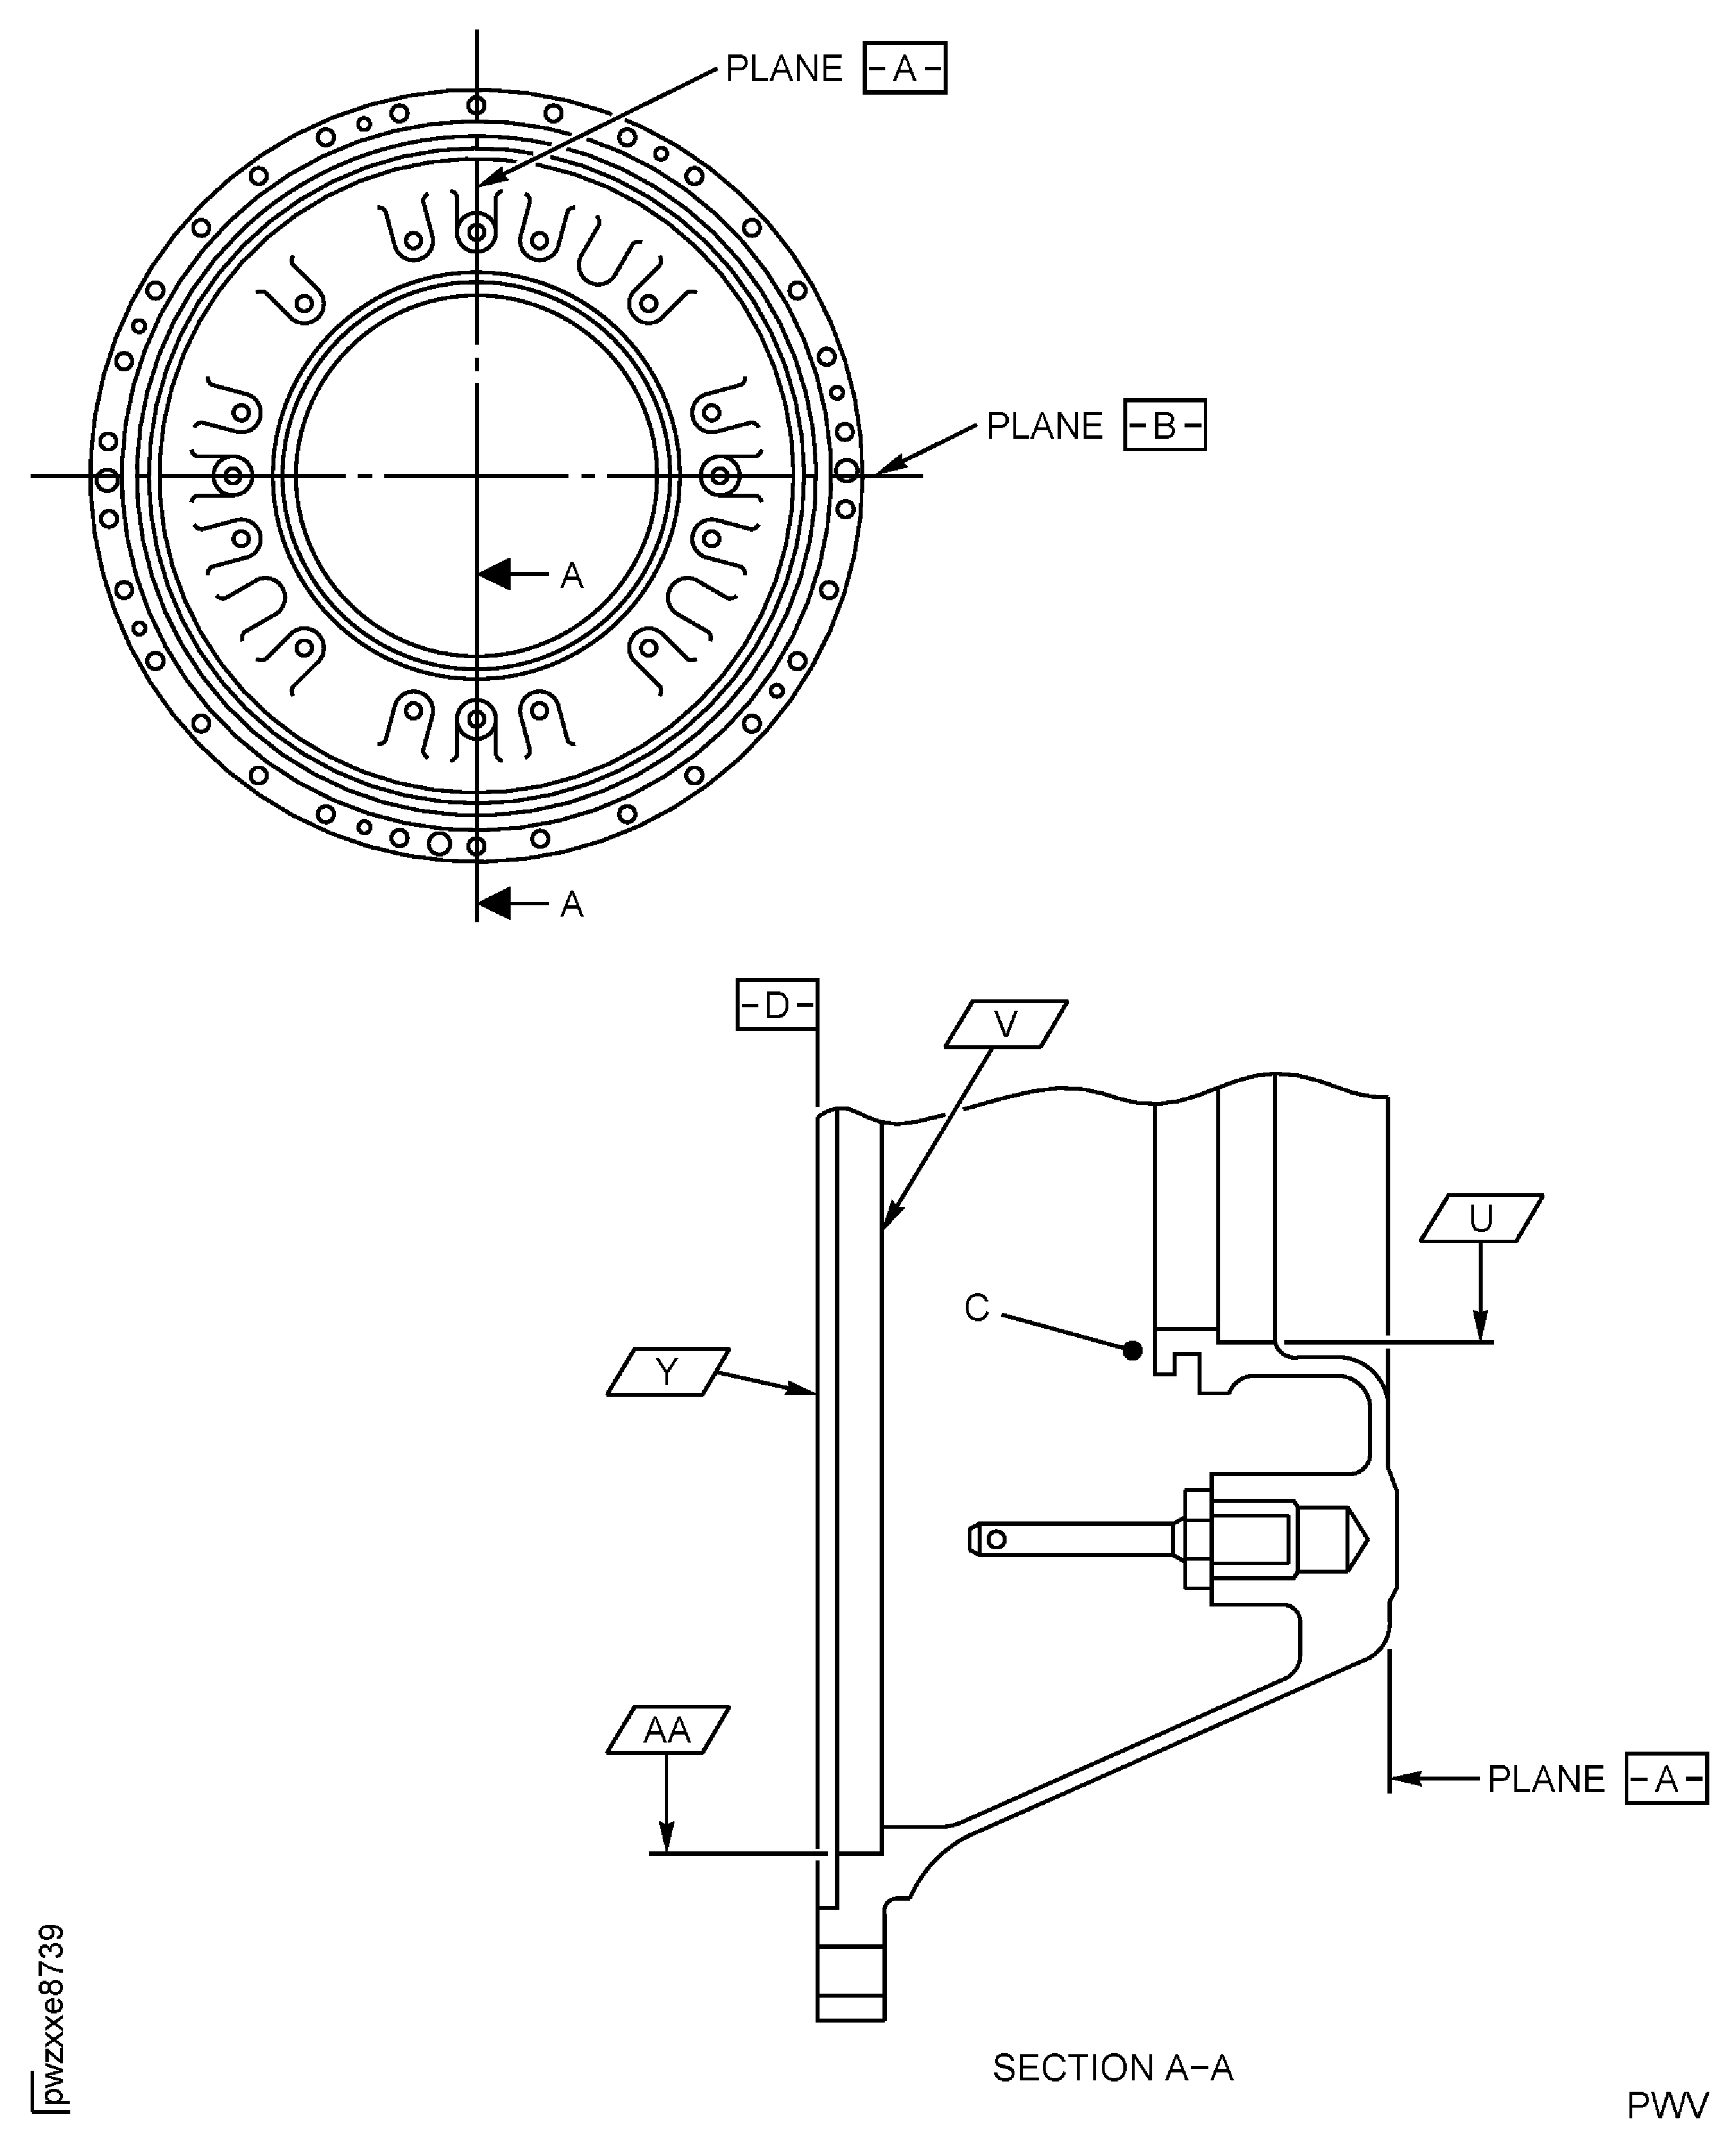
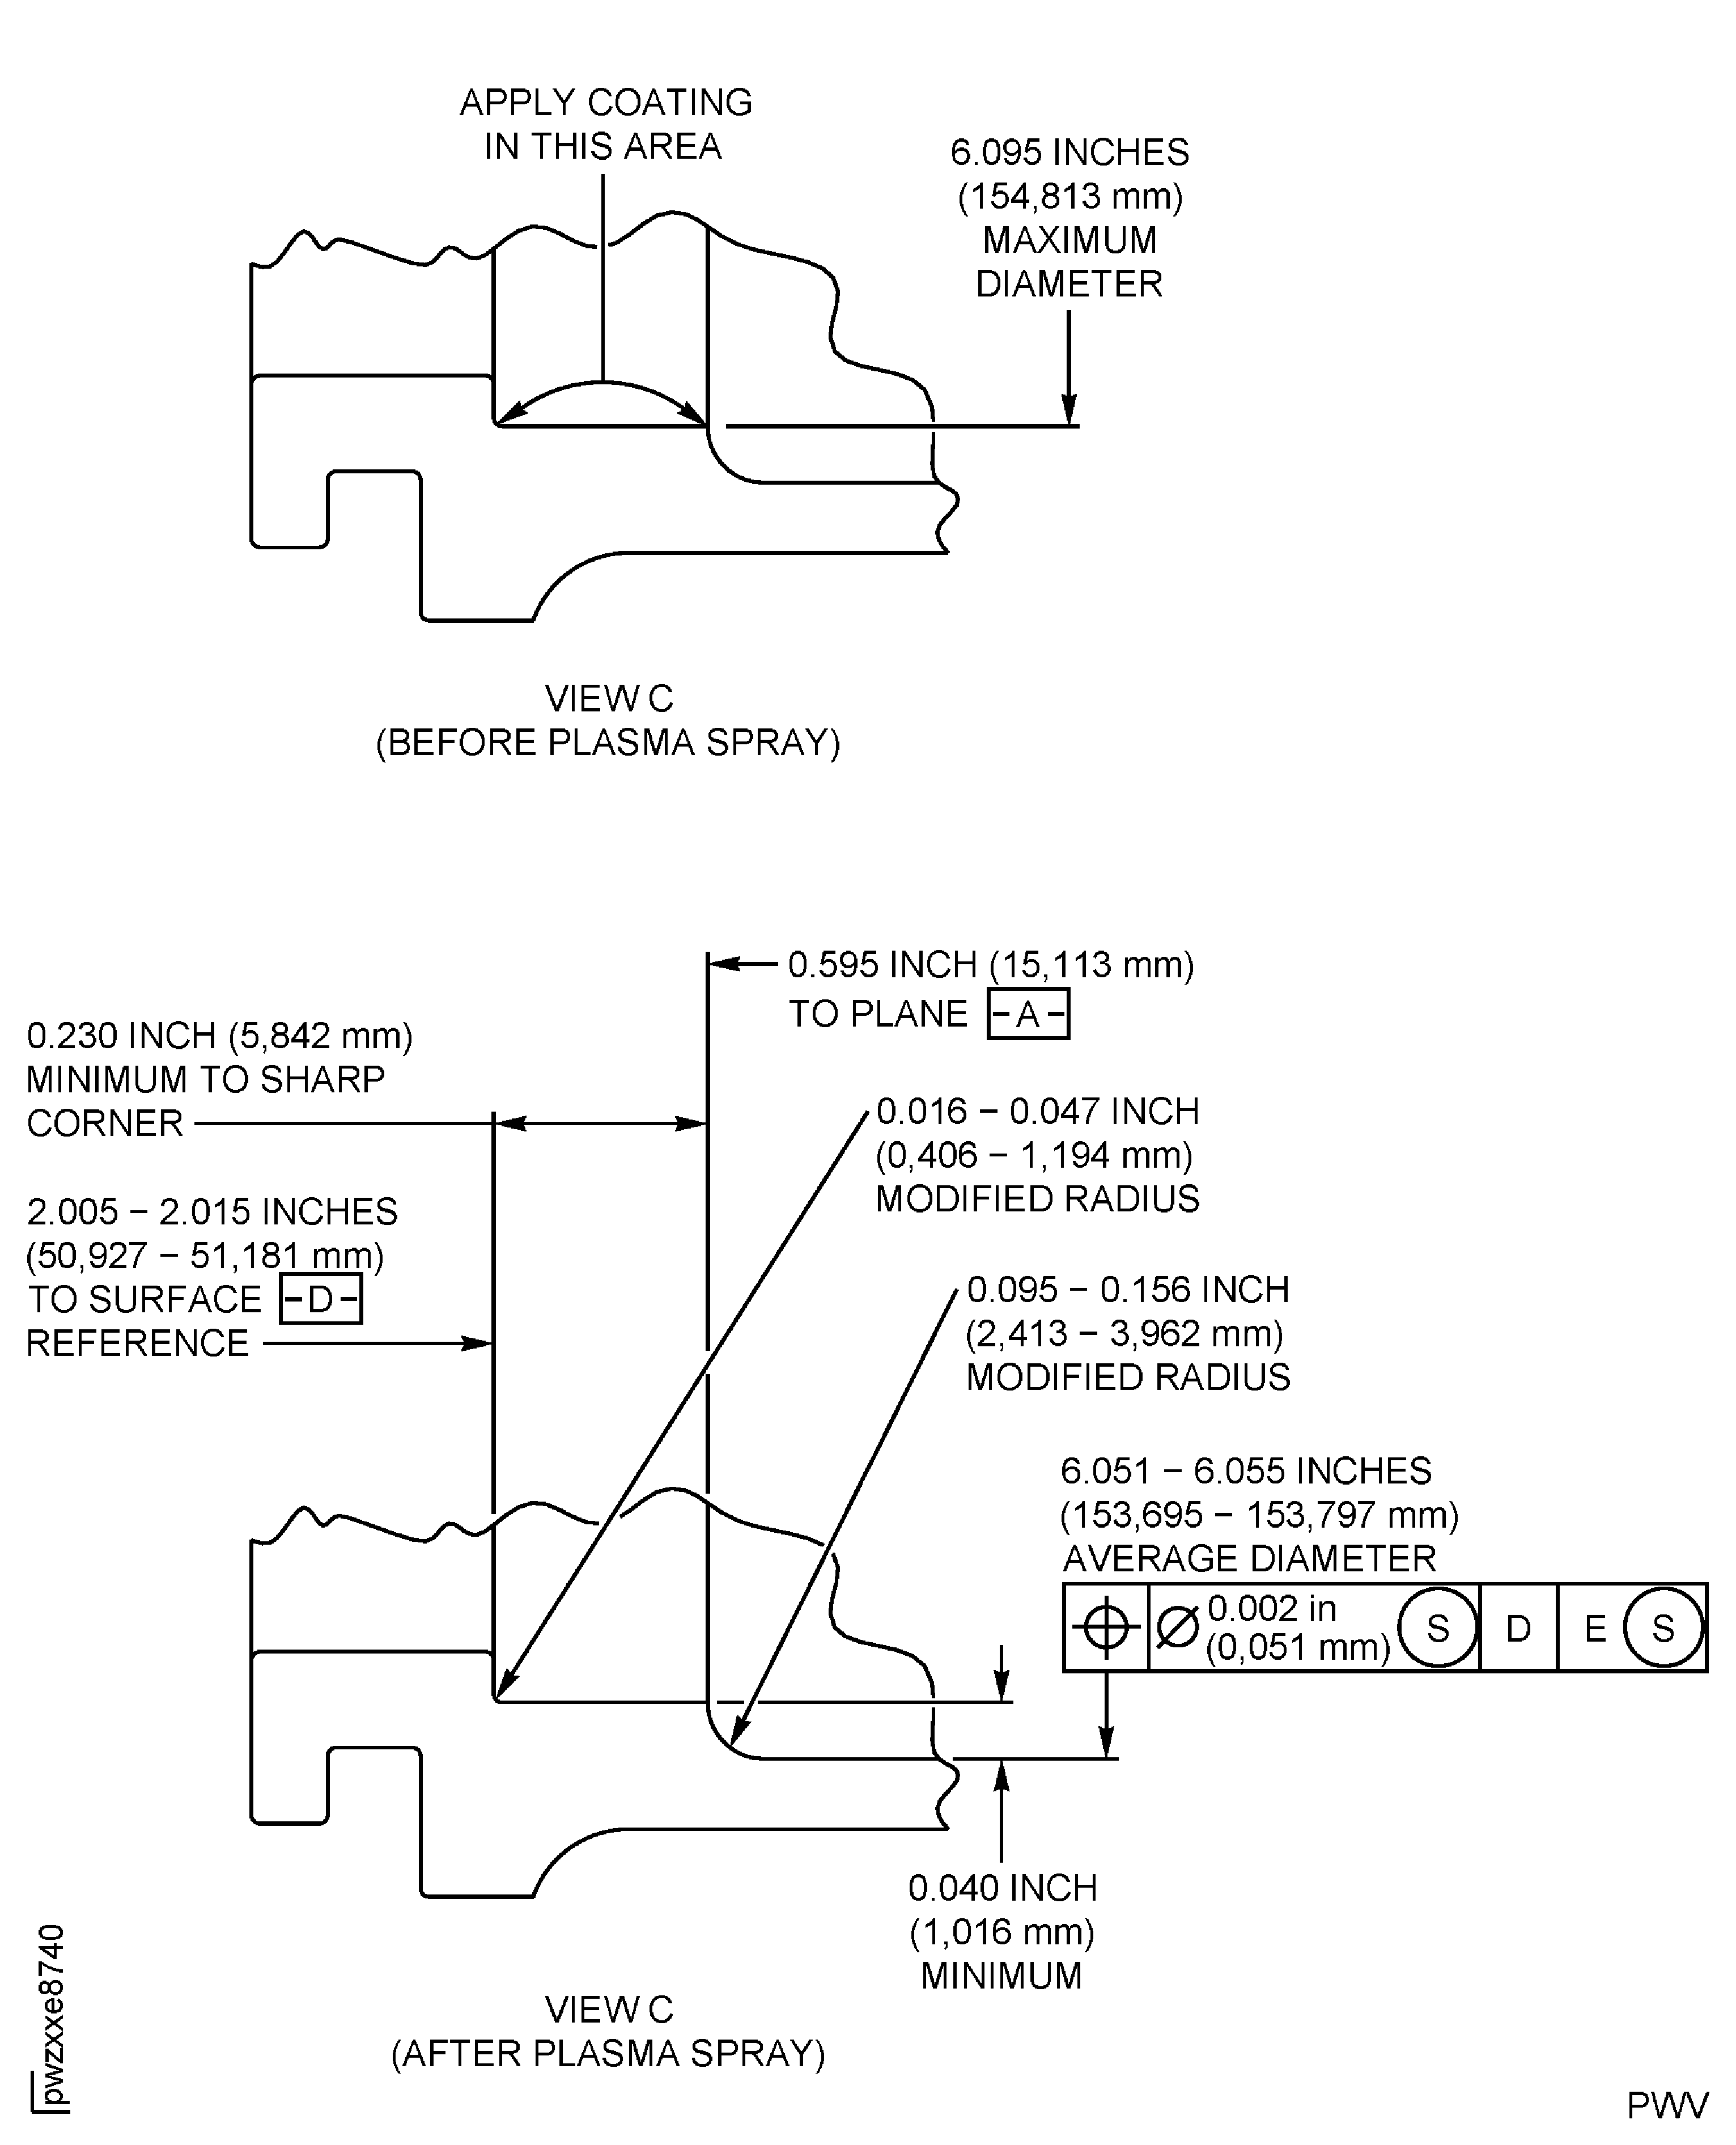
The thickness of the coating after finish machine must be 0.003 to 0.020 in. (0.07 to 0.51 mm) all around.All dimensions apply when surface Y is flat by 0.002 in. (0.05 mm) and Diameters AA and U maintain a clearance envelope of 10.887 in. and 6.050 in. (276.53 mm and 153.67 mm) respectively in a free or held condition. Hold the seal ring holder only on surfaces Y and V and Diameters AA and U.
Machine the ID of the ring holder after coating.
SUBTASK 72-43-20-320-066 Machine the Rear Flange ID of the No. 4 Bearing Seal Ring Holder
Refer to the SPM TASK 70-11-03-300-503.
Clean the seal ring holder.
SUBTASK 72-43-20-110-091 Clean the No. 4 Bearing Seal Ring Holder
Refer to TASK 72-42-33-200-000 (INSPECTION-001).
Use a 4X (or greater) magnifying glass to do a visual inspection of the coated area to examine for cracks and adhesion.
Examine the seal ring holder after coating and finish maching.
SUBTASK 72-43-20-220-100 Examine the Repair
Make a permanent mark by the procedure given in the SPM TASK 70-09-00-400-501.
Remove high material caused by marking the number.
Mark VRS3797 on the repaired No. 4 Bearing Seal Ring Holder adjacent to the part number.
SUBTASK 72-43-20-350-075 Identify the Repair
Figure: Repair Details and Dimensions
Sheet 1

Figure: Repair Details and Dimensions
Sheet 2

