Export Control
EAR Export Classification: Not subject to the EAR per 15 C.F.R. Chapter 1, Part 734.3(b)(3), except for the following Service Bulletins which are currently published as EAR Export Classification 9E991: SBE70-0992, SBE72-0483, SBE72-0580, SBE72-0588, SBE72-0640, SBE73-0209, SBE80-0024 and SBE80-0025.Copyright
© IAE International Aero Engines AG (2001, 2014 - 2021) The information contained in this document is the property of © IAE International Aero Engines AG and may not be copied or used for any purpose other than that for which it is supplied without the express written authority of © IAE International Aero Engines AG. (This does not preclude use by engine and aircraft operators for normal instructional, maintenance or overhaul purposes.).Applicability
All
Common Information
TASK 72-50-00-300-003 LPT Stage 6 Inner Air Seal - Blend Repair, Repair-003 (VRS4020)
General
Price and availability - none
The practices and processes and practices referred to in the procedure by the TASK numbers are in the SPM.
NOTE
Preliminary Requirements
Pre-Conditions
NONESupport Equipment
| Name | Manufacturer | Part Number / Identification | Quantity | Remark |
|---|---|---|---|---|
| Bore gage | LOCAL | Bore gage | ||
| Carbide tipped reamer | LOCAL | Carbide tipped reamer | ||
| Crack detection kit (fluorescent) | LOCAL | Crack detection kit (fluorescent) | ||
| Dial caliper | LOCAL | Dial caliper | ||
| External dial caliper | LOCAL | External dial caliper | ||
| Illuminated comparator magnifier | LOCAL | Illuminated comparator magnifier | ||
| Radius gage set | LOCAL | Radius gage set | ||
| Roughness microtester | LOCAL | Roughness microtester | ||
| Unltraviolet lamp | LOCAL | Ultraviolet lamp |
Consumables, Materials and Expendables
| Name | Manufacturer | Part Number / Identification | Quantity | Remark |
|---|---|---|---|---|
| CoMat 05-113 EMERY POLISHING PAPER | LOCAL | CoMat 05-113 |
Spares
NONESafety Requirements
NONEProcedure
Use fine stones and CoMat 05-113 EMERY POLISHING PAPER to make the blended surface as smooth as the initial surface.
Edges and corners are not permitted.
Polish the blended areas except holes and hole chamfers.
SUBTASK 72-50-00-350-053 General Instructions for the Blend Repair of the Stage 6 Turbine Inner Air Seal (01-240)
Keep material removal to the minimum to remove damage.
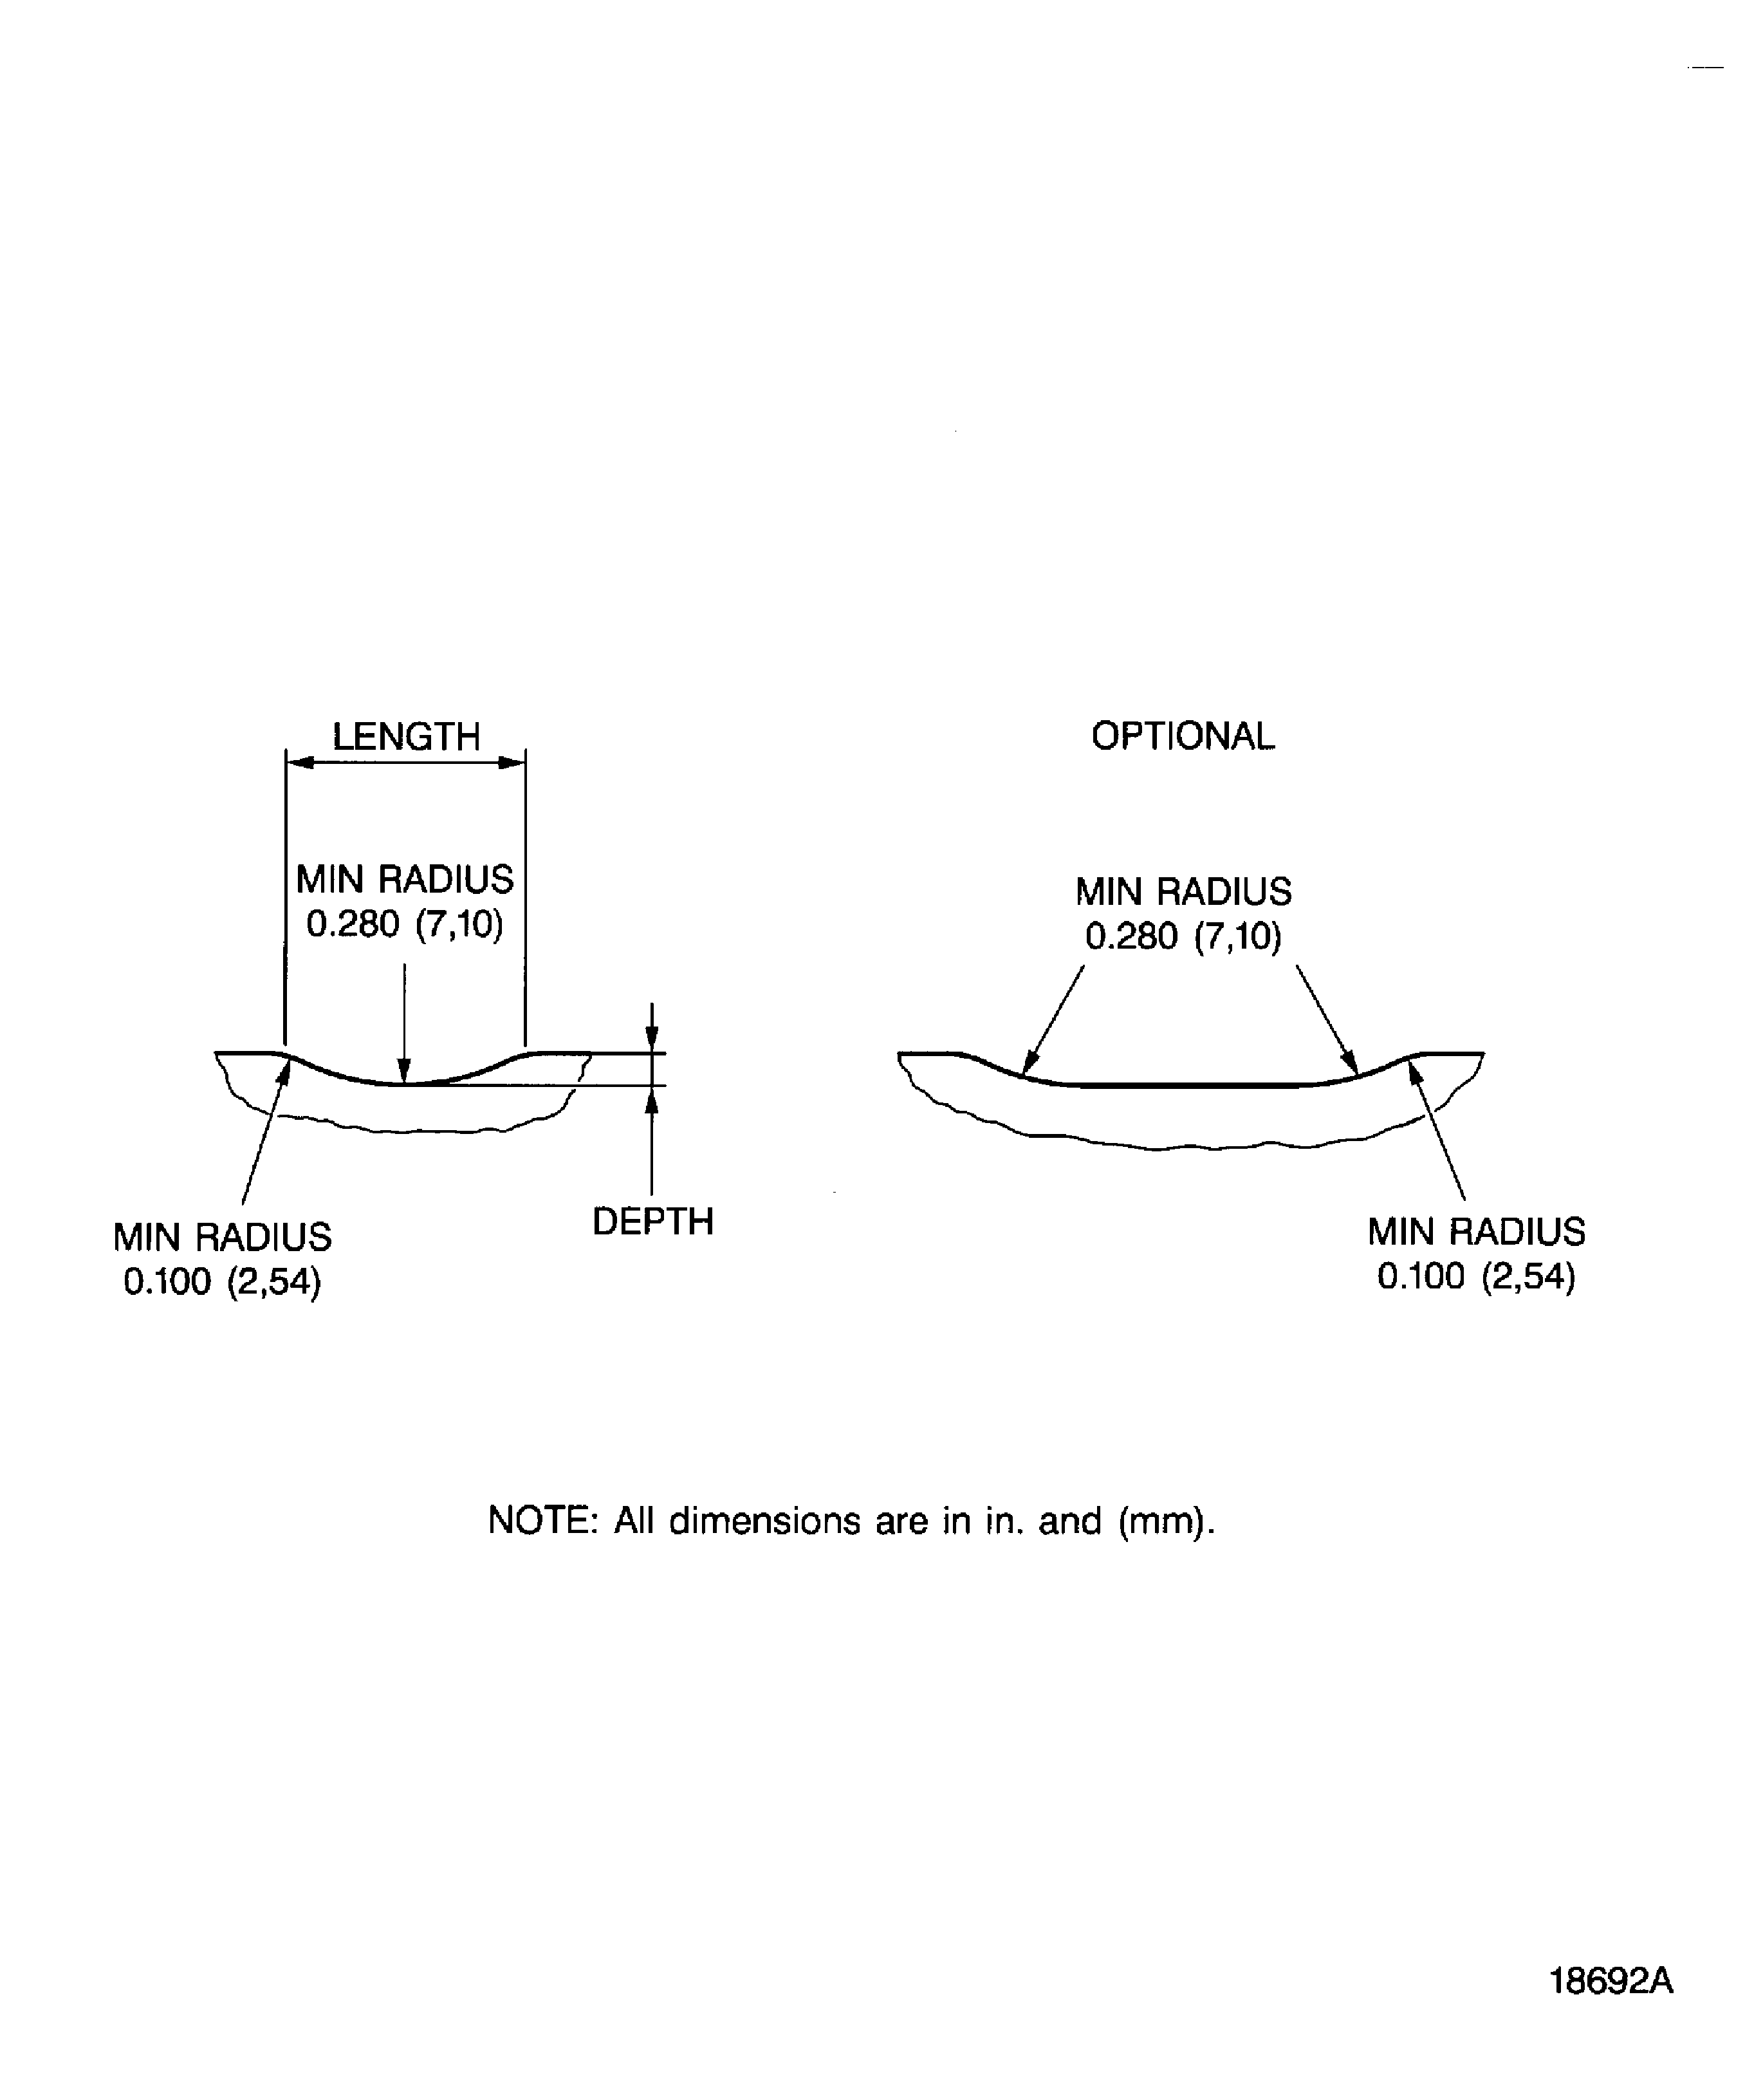
For local blending the length to depth ratio must be a minimum of 15:1 unless otherwise specified, refer to Figure.
Unless stated differently there is no limit for the number of blends. If there is a number of damage marks close together blend the whole area to the specified depth.
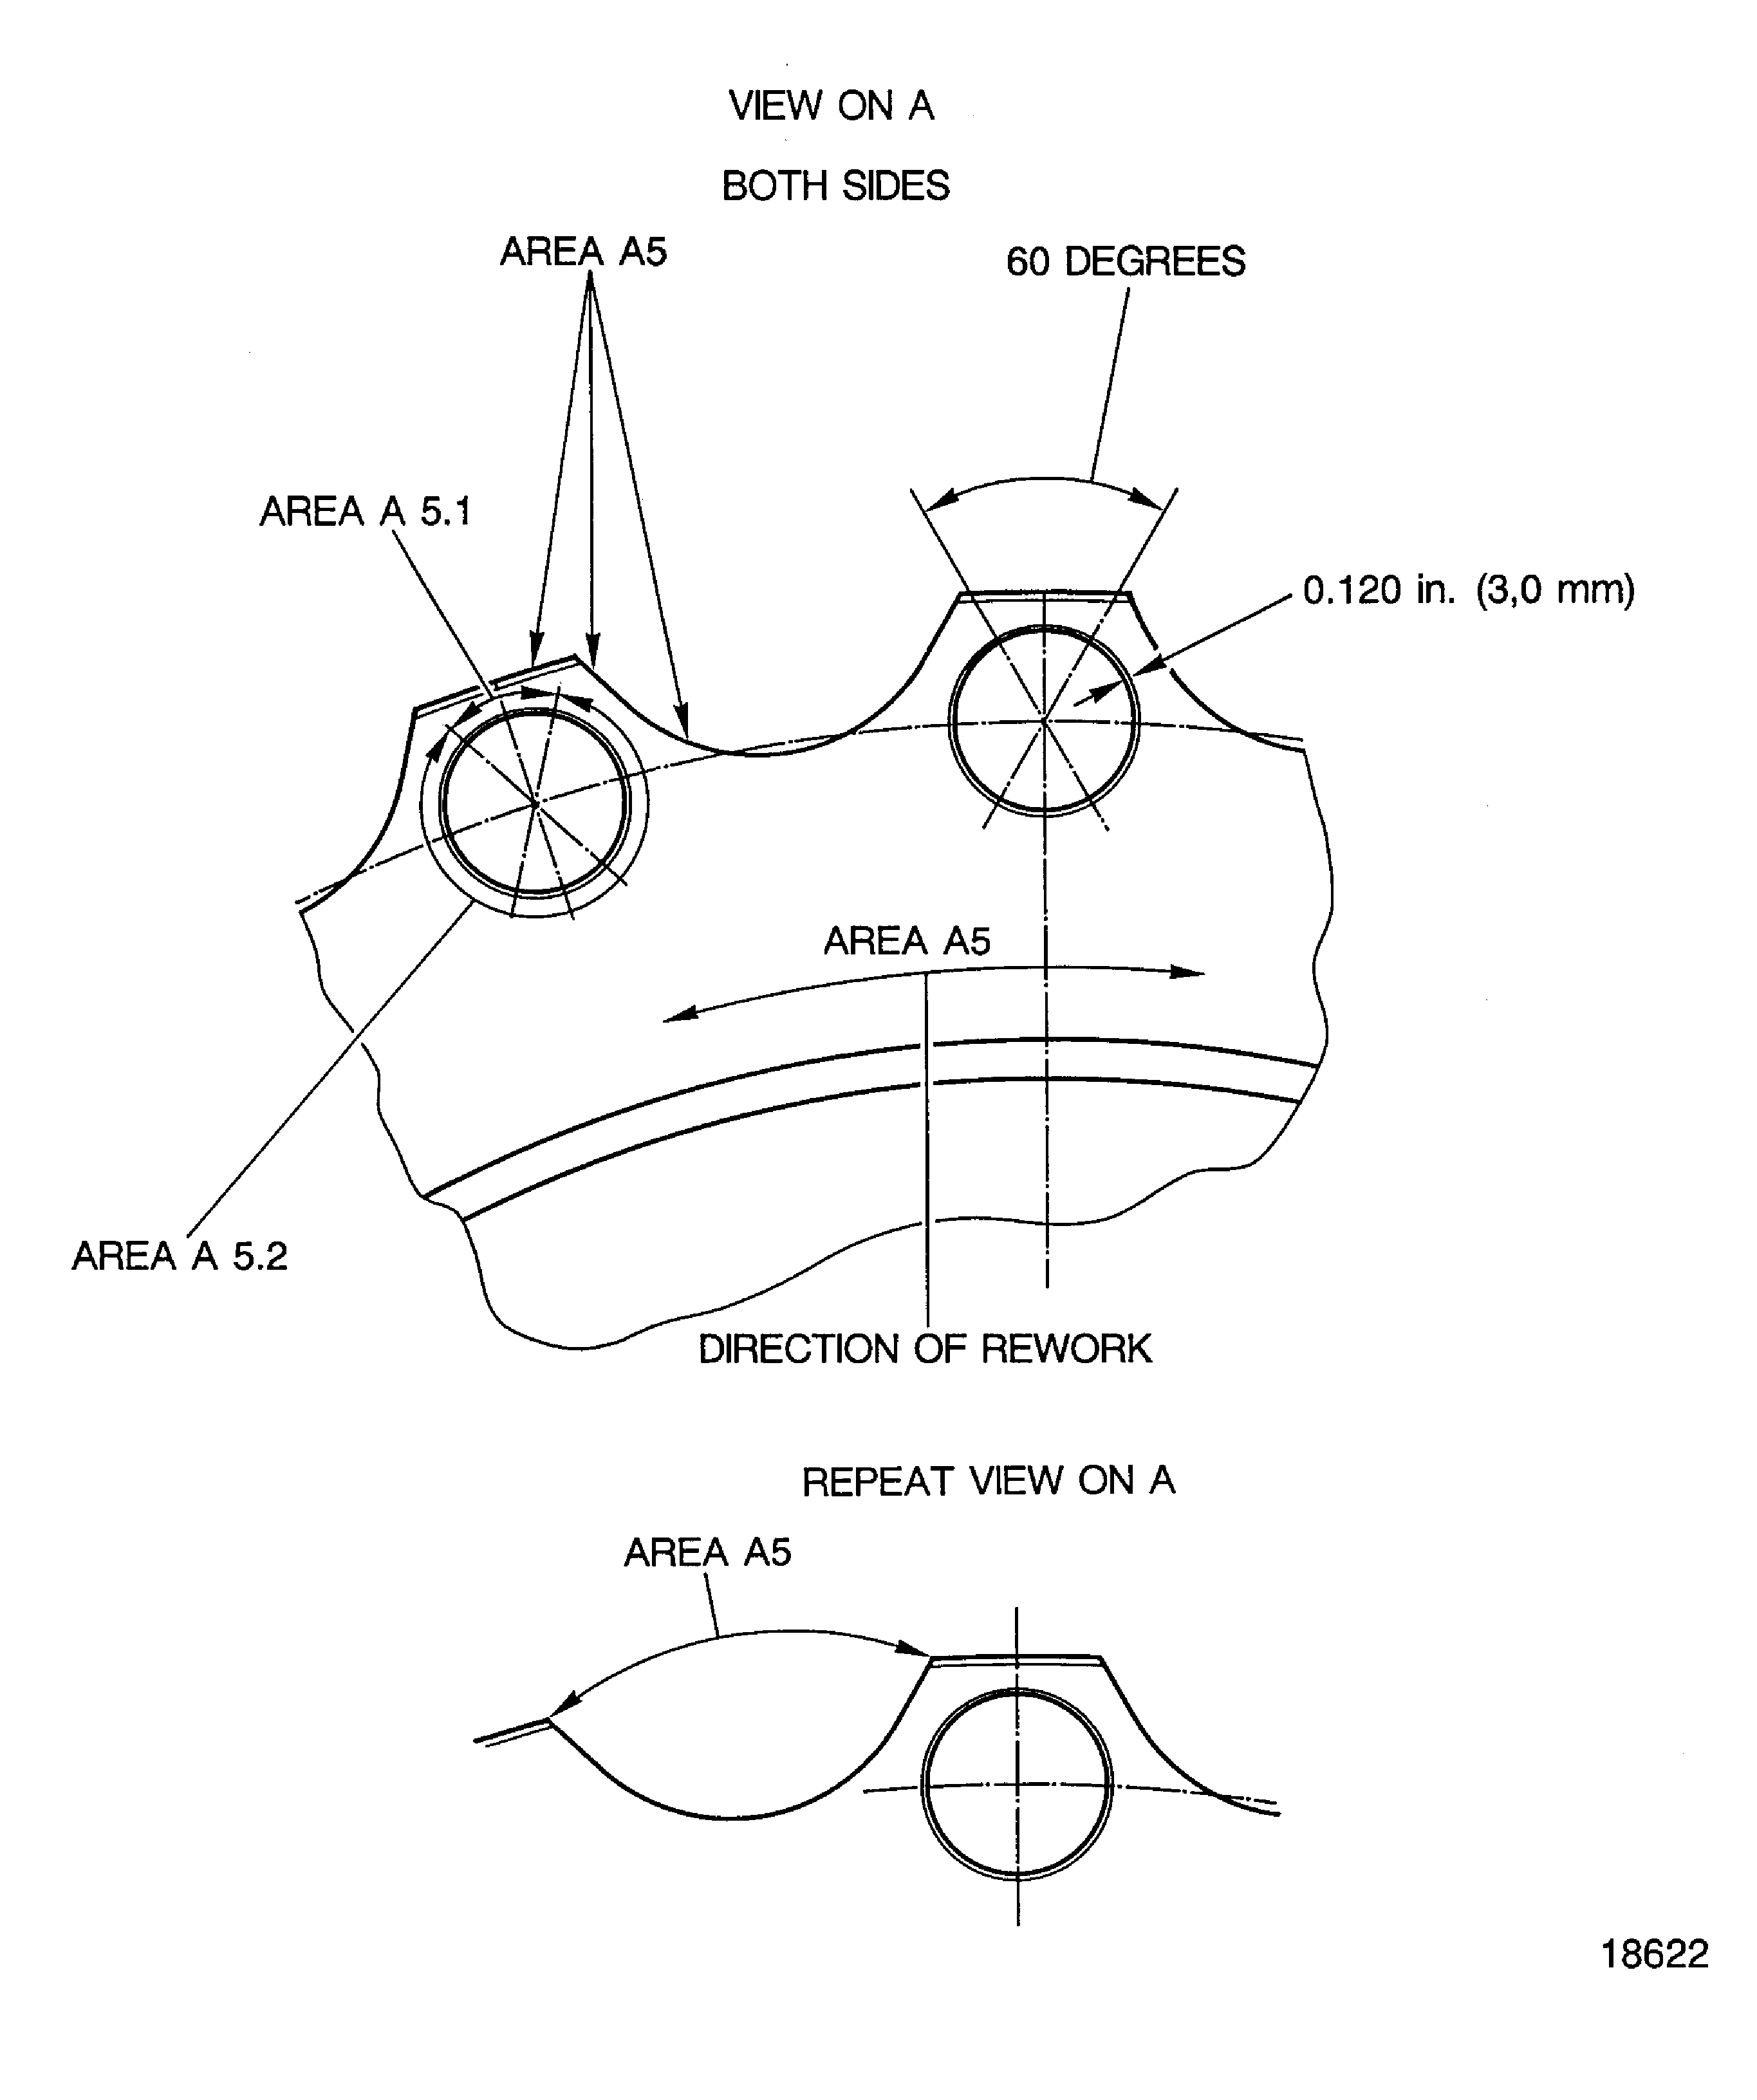
For direction of blend repair, where specified, refer to Figure.
For blend repair of the two knife edge seals refer to the VRS4018 TASK 72-50-00-300-003 (REPAIR-003).
Refer to Figure
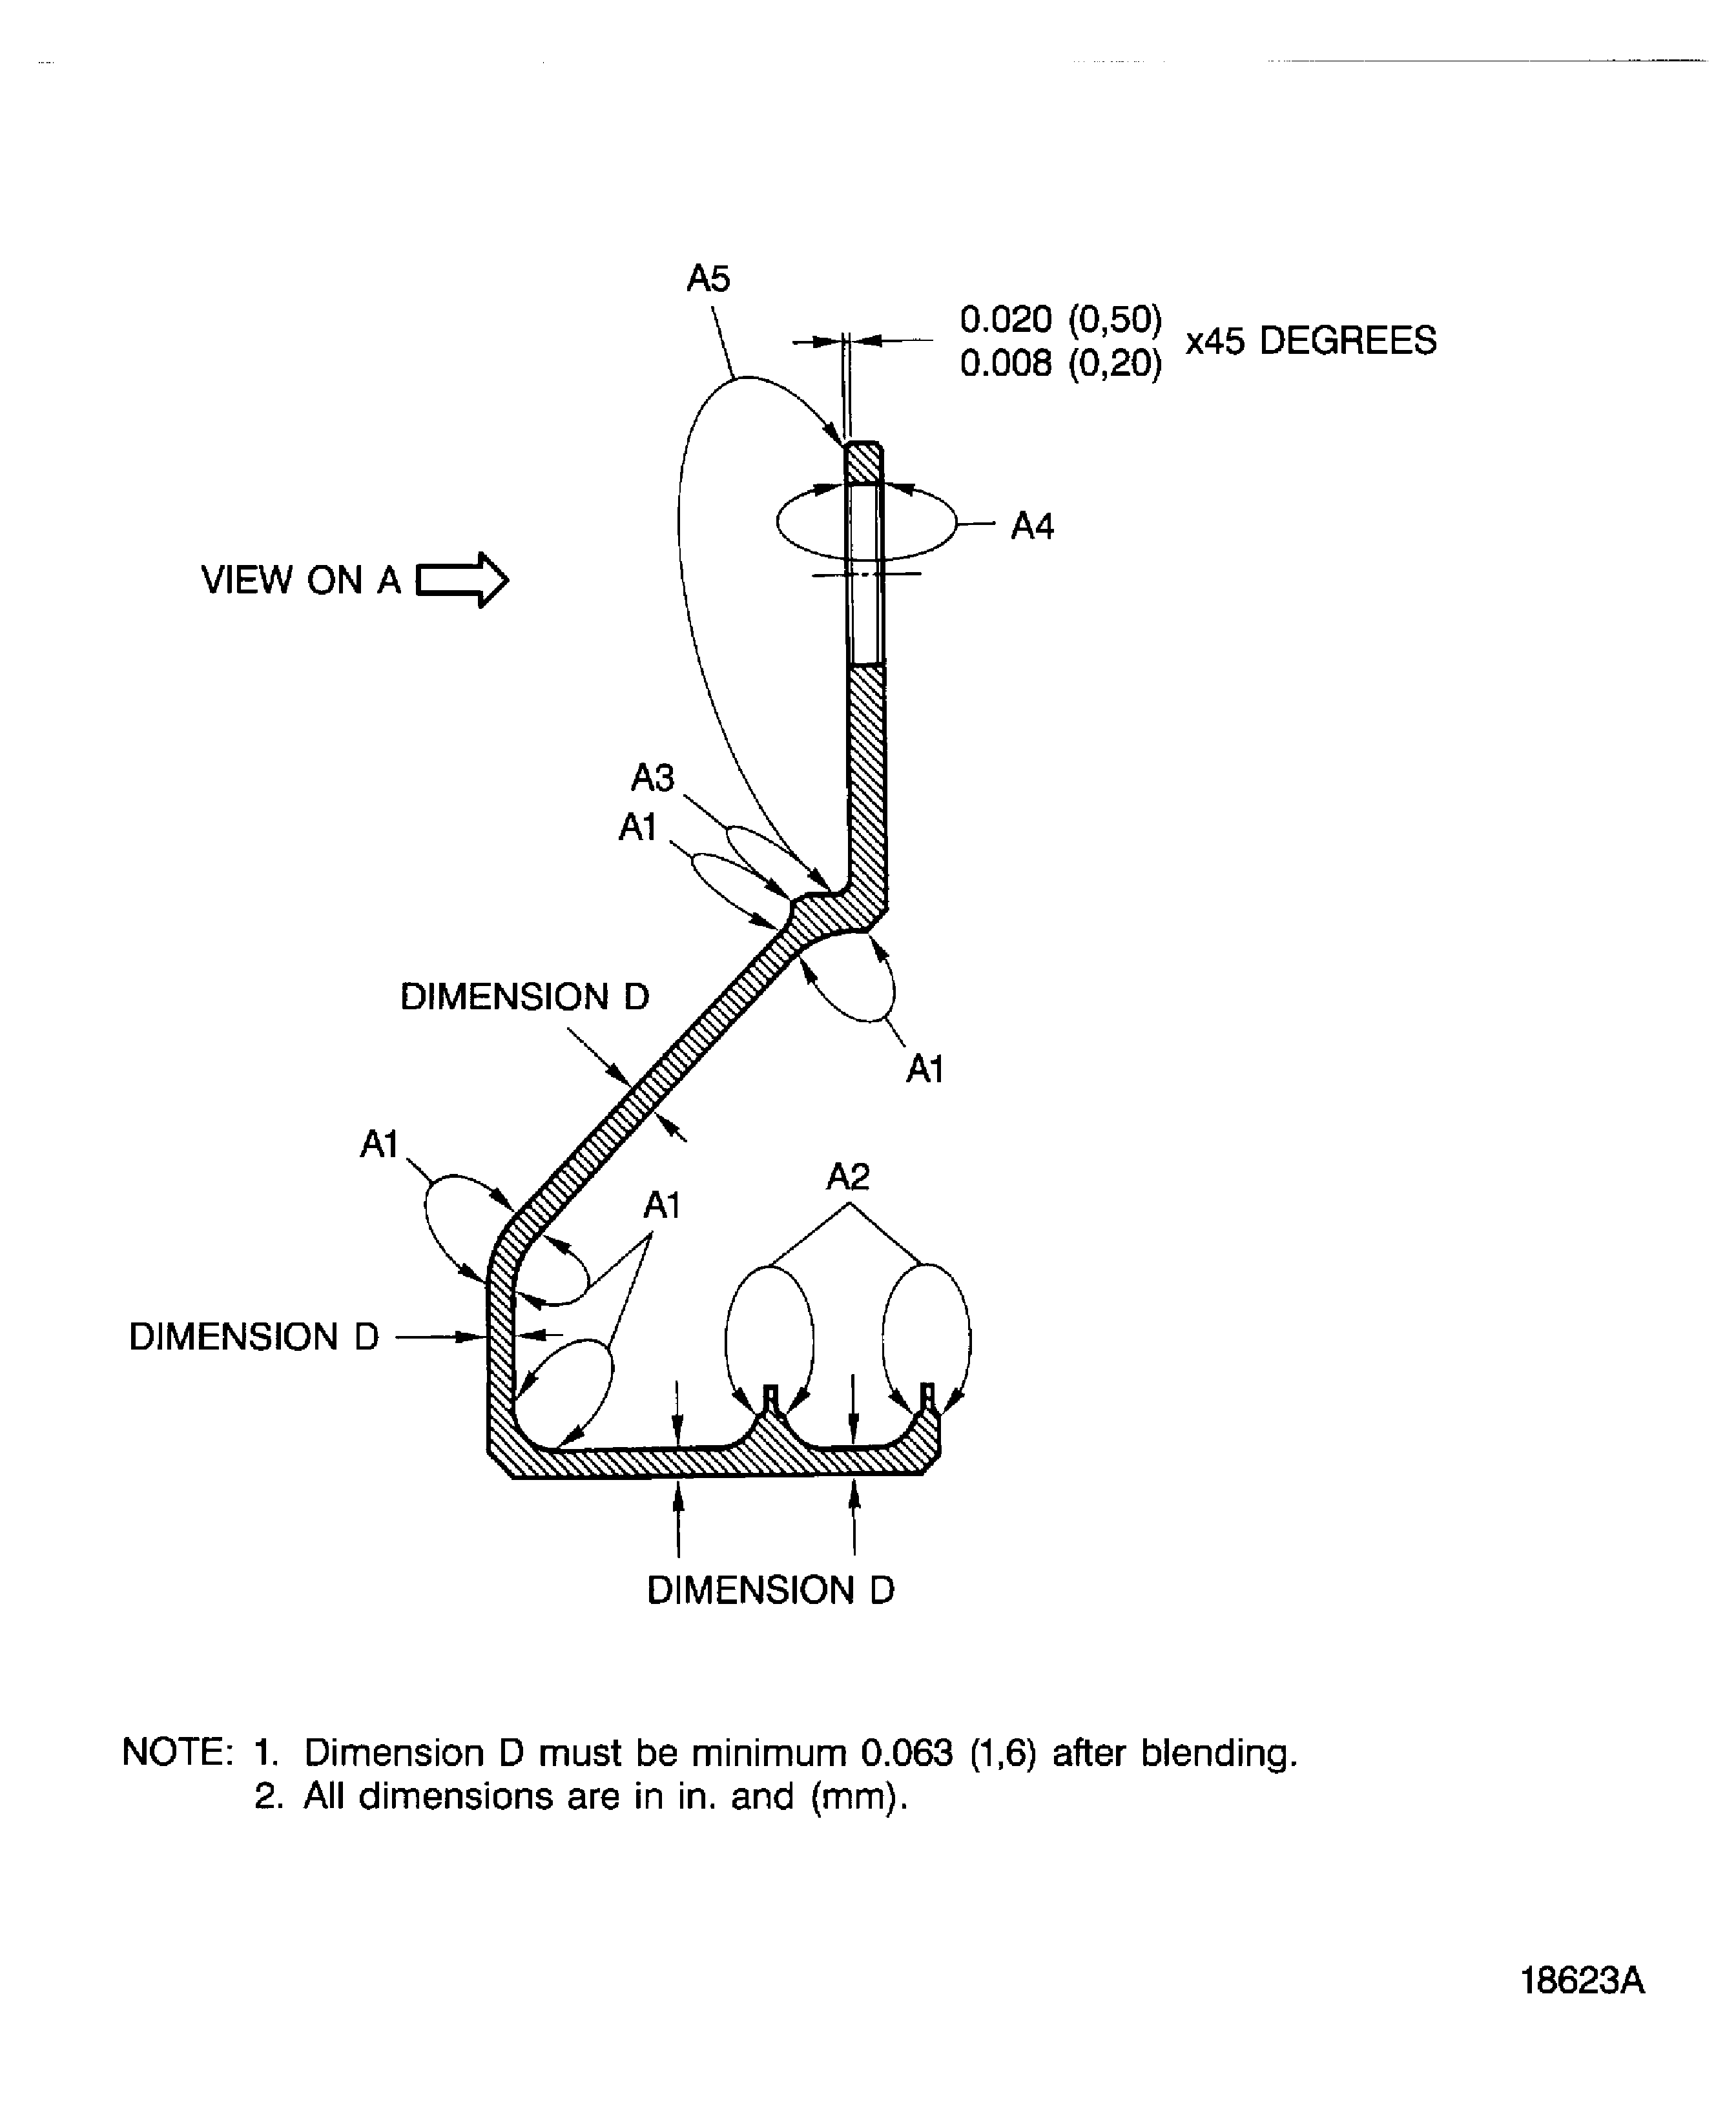
Maximum permitted depth of blend repair is 0.005in. (0.13 mm), maximum permitted length of blends for scratches and scores is 0.500in. (12.70 mm).
Minimum distance between blends 0.500in. (12.70 mm).
For damage outside the spacing limits maximum depth of blend repair is 0.003in. (0.08 mm), maximum blend area is 0.25sq in. (160.00 sq mm).
Blend repair in area A1.
Maximum permitted depth of local blends is 0.004in. (0.10 mm) except as follows in area A5.1 and A5.2 Figure.
Blend repair in area A5.
Maximum permitted depth of blend repair is 0.010in. (0.25 mm).
Length to depth blend ratio is 5:1 minimum.
Minimum distance between blends is 0.500in. (12.70 mm), Figure.
Blend repair in all other areas.
SUBTASK 72-50-00-350-054 Blend Repair the Stage 6 Turbine Inner Air Seal (01-240)
NOTE
Refer to: Figure
Examine the blended areas, refer to the SPM TASK 70-23-05-230-501.
No cracks are permitted.
Use crack detection kit (fluorescent) and ultraviolet lamp.
Do the test for cracks in area A4 and A5.
SUBTASK 72-50-00-230-053 Examine the Blend Repaired Areas A4 and A5 for cracks
Refer to: Figure
Refer to the SPM TASK 70-35-19-350-501.
Do the butterfly polishing in the blended Areas A4 and A5.
SUBTASK 72-50-00-380-051 Polish the Blended Areas A4 and A5
Refer to: Figure
Use fine hand held stones to make the blended surfaces as smooth as the initial surfaces.
Refer to the SPM TASK 70-35-19-350-501.
Do the polishing in all other blended areas.
SUBTASK 72-50-00-380-052 Polish All Other Blended Areas
Examine the blended areas, refer to the SPM TASK 70-23-05-230-501.
No cracks are permitted.
Use crack detection kit (fluorescent) and ultraviolet lamp.
Do the test for cracks.
SUBTASK 72-50-00-230-054 Do the Post Repair Inspection for Cracks
Refer to VRS4027, TASK 72-50-00-300-006 (REPAIR-006).
Rebalance the stage 6 inner air seal.
SUBTASK 72-50-00-350-055 Do the Post Repair
Figure: Blend repair of the stage 6 turbine inner air seal
Blend repair of the stage 6 turbine inner air seal

Figure: Blend repair of the stage 6 turbine inner air seal
Blend repair of the stage 6 turbine inner air seal

Figure: Local blending length to depth ratio
Local blending length to depth ratio

